Sync of Contacts with iOS, Android, Vision, SuperVision, Mac OS X, Thunderbird
Thanks to CardDAV address book client / server protocol, it is possible to enable access for PBX users to shared PBX phonebook from different devices, including iOS / Android, Vision / SuperVision, Mac OS X and Thunderbird Mail.
Updated: September 2022
Permalink: https://wildix.atlassian.net/wiki/x/ixvOAQ
Set up the CardDAV sync, to be able to access your Wildix PBX corporate phonebooks from any device:
iOS / Android CardDAV Sync
Read instructions:
In addition, you can download for free Wildix Collaboration Mobile App for iOS from iTunes and Android from Google Play Store, to be able to call via your Wildix PBX and access all the Wildix Unified Collaboration features from your personally owned iOS and Android devices.
Note: In case of Android 10 or above, the following 3rd party CardDAV sync tools can be used:
Vision / SuperVision CardDav Sync
SuperVision/ Vision pre 2022
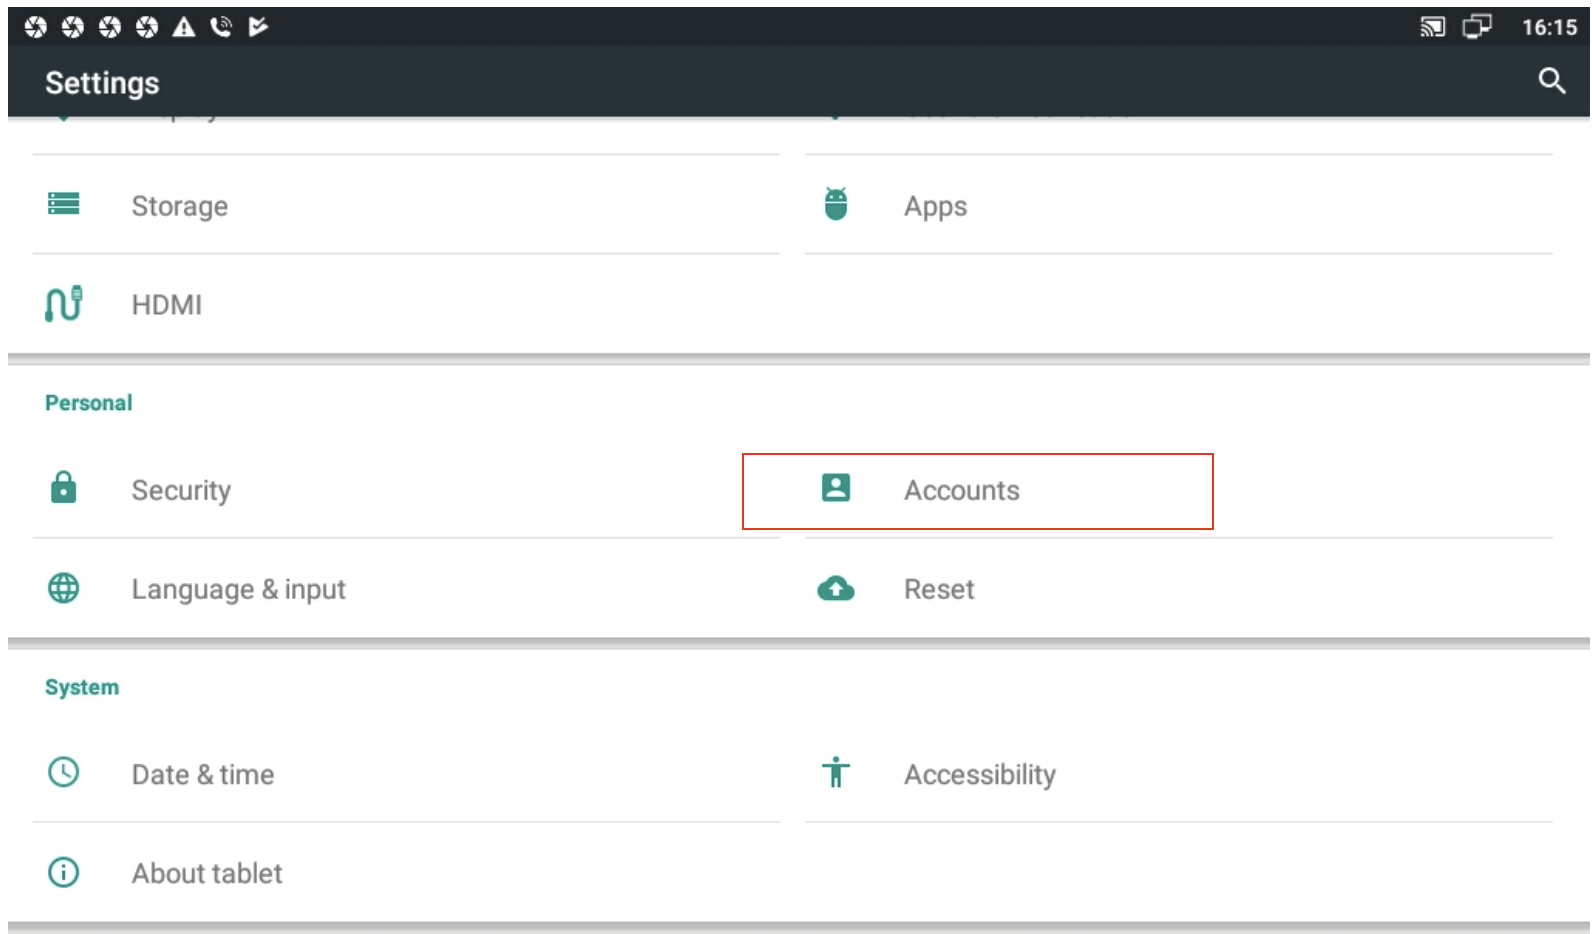
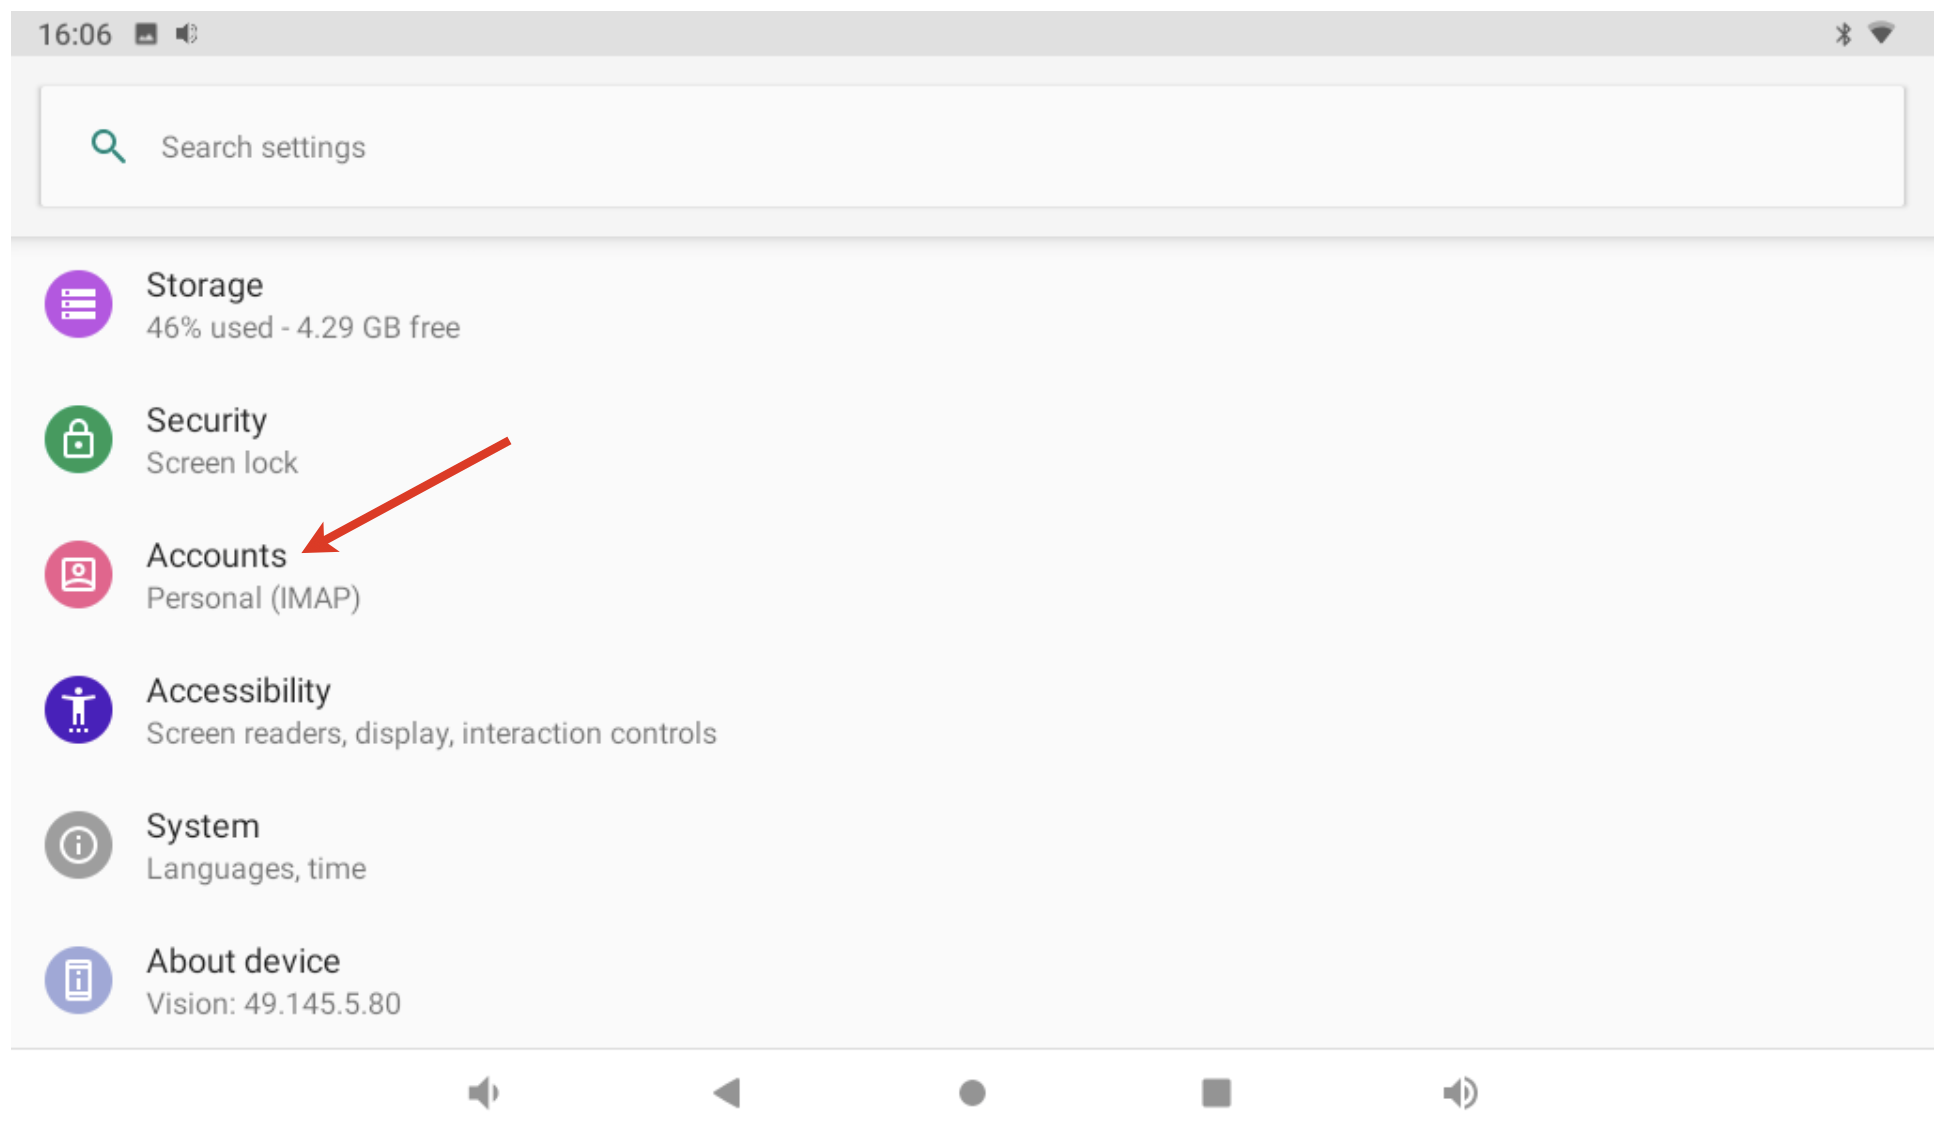
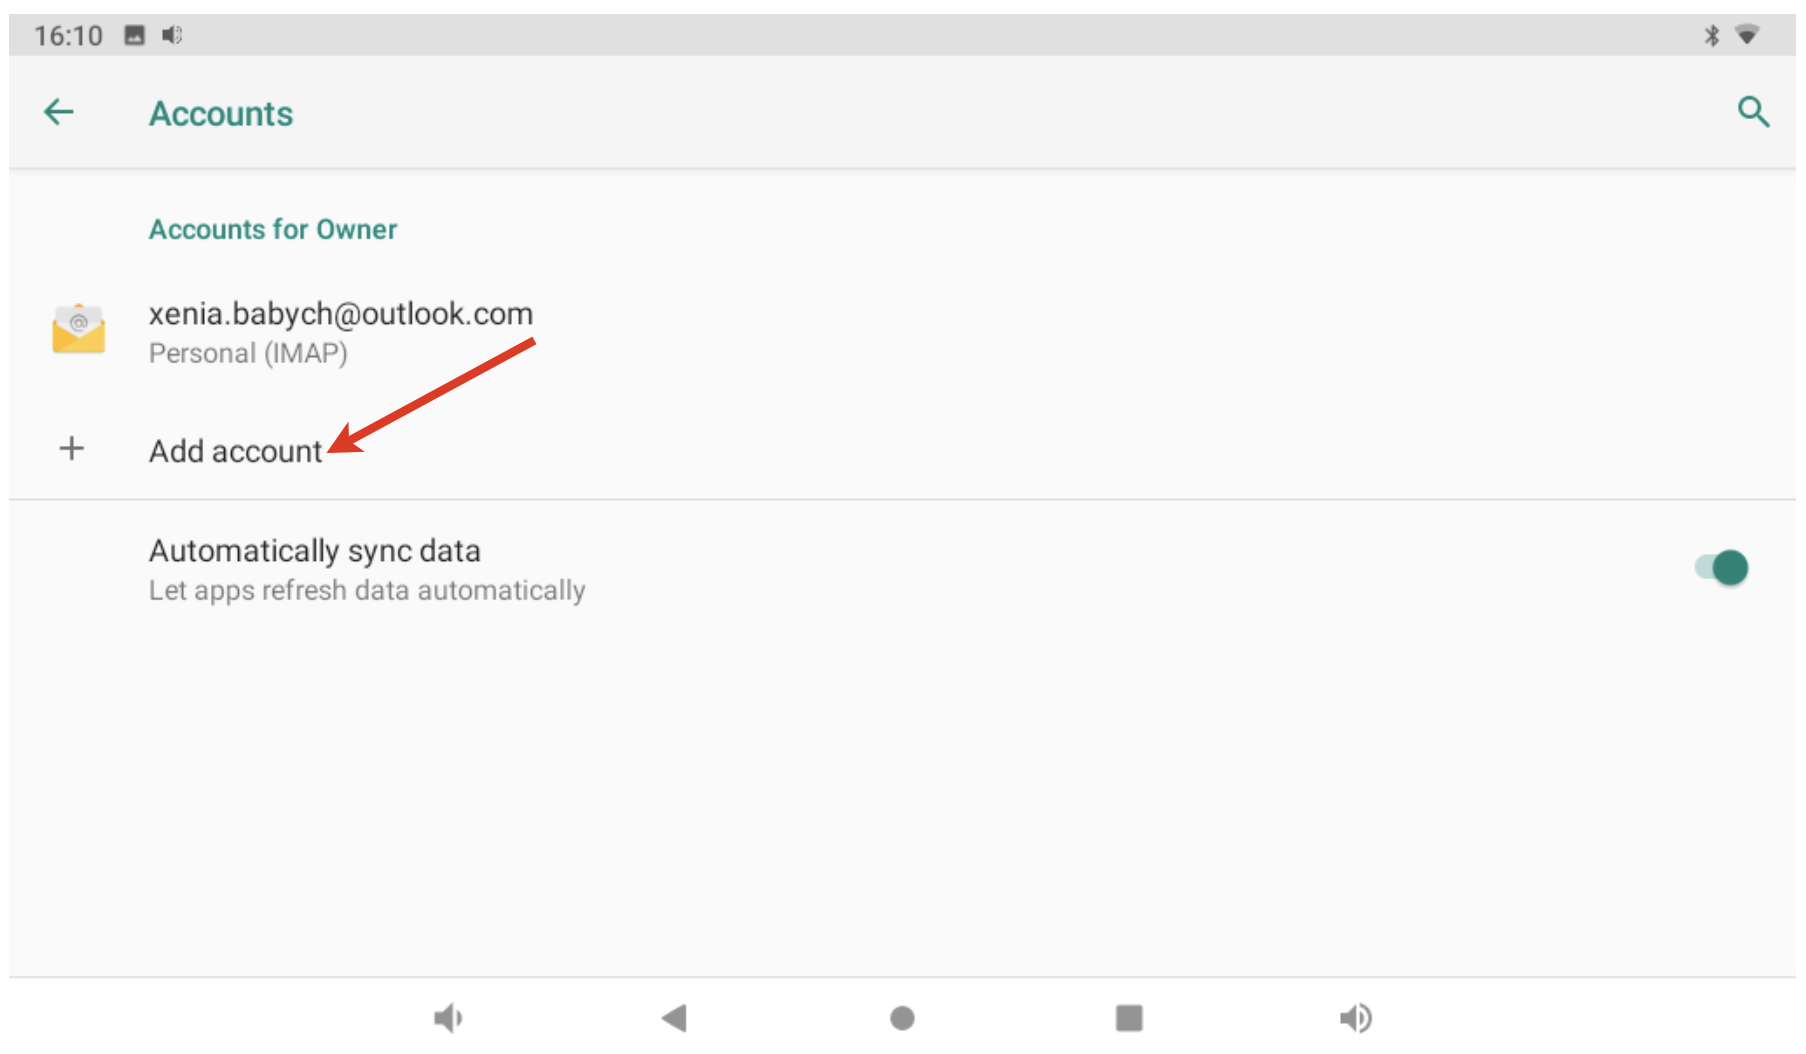
- Go to Phone Settings -> Personal -> Accounts:
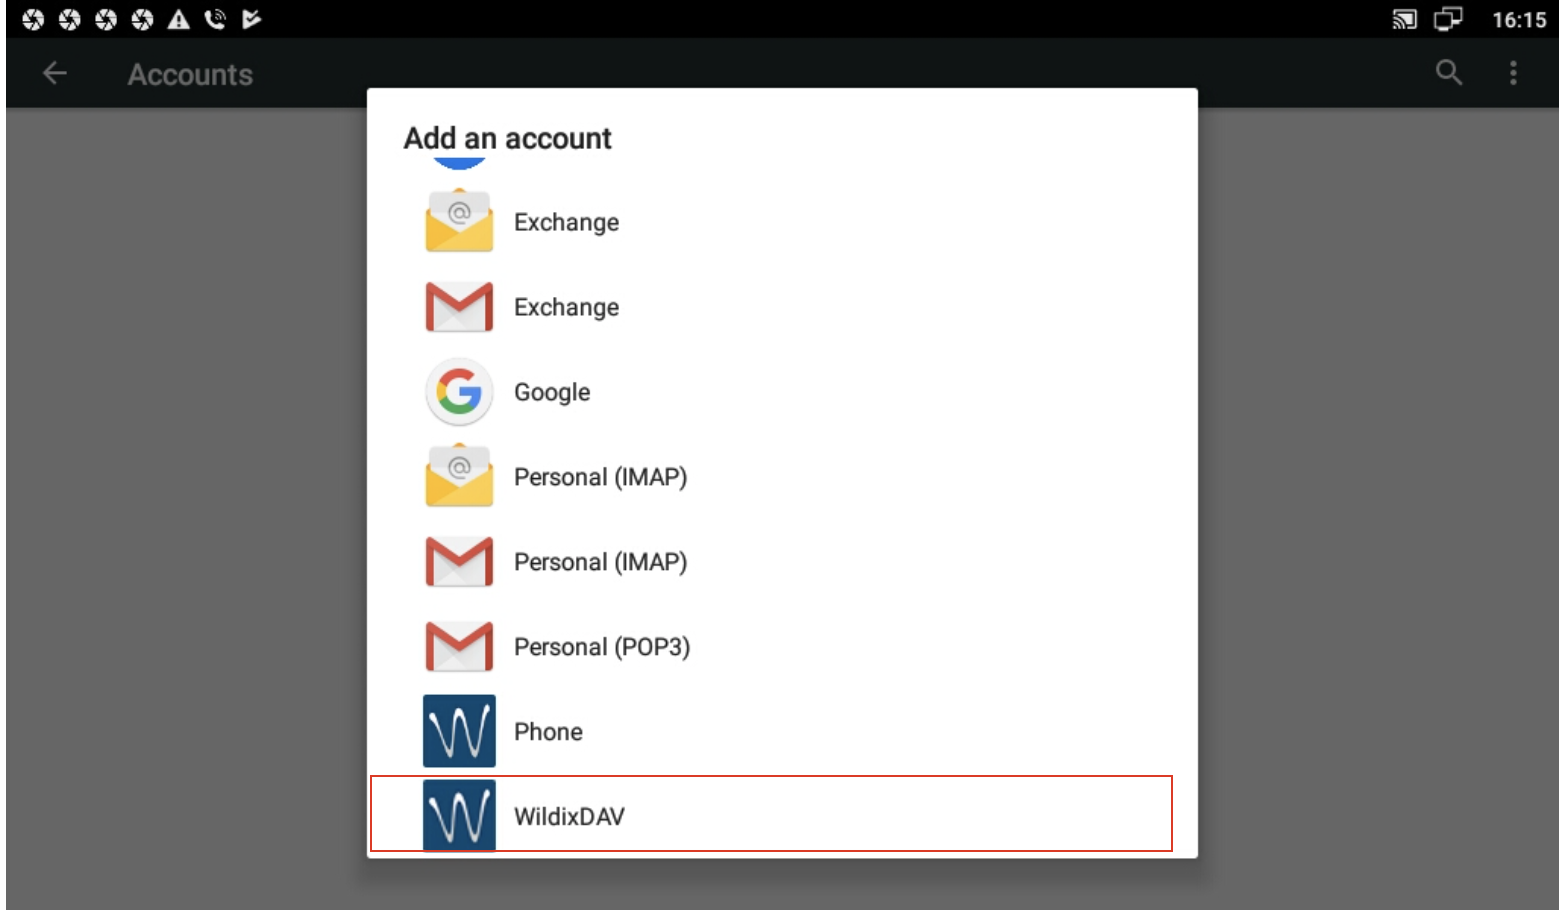
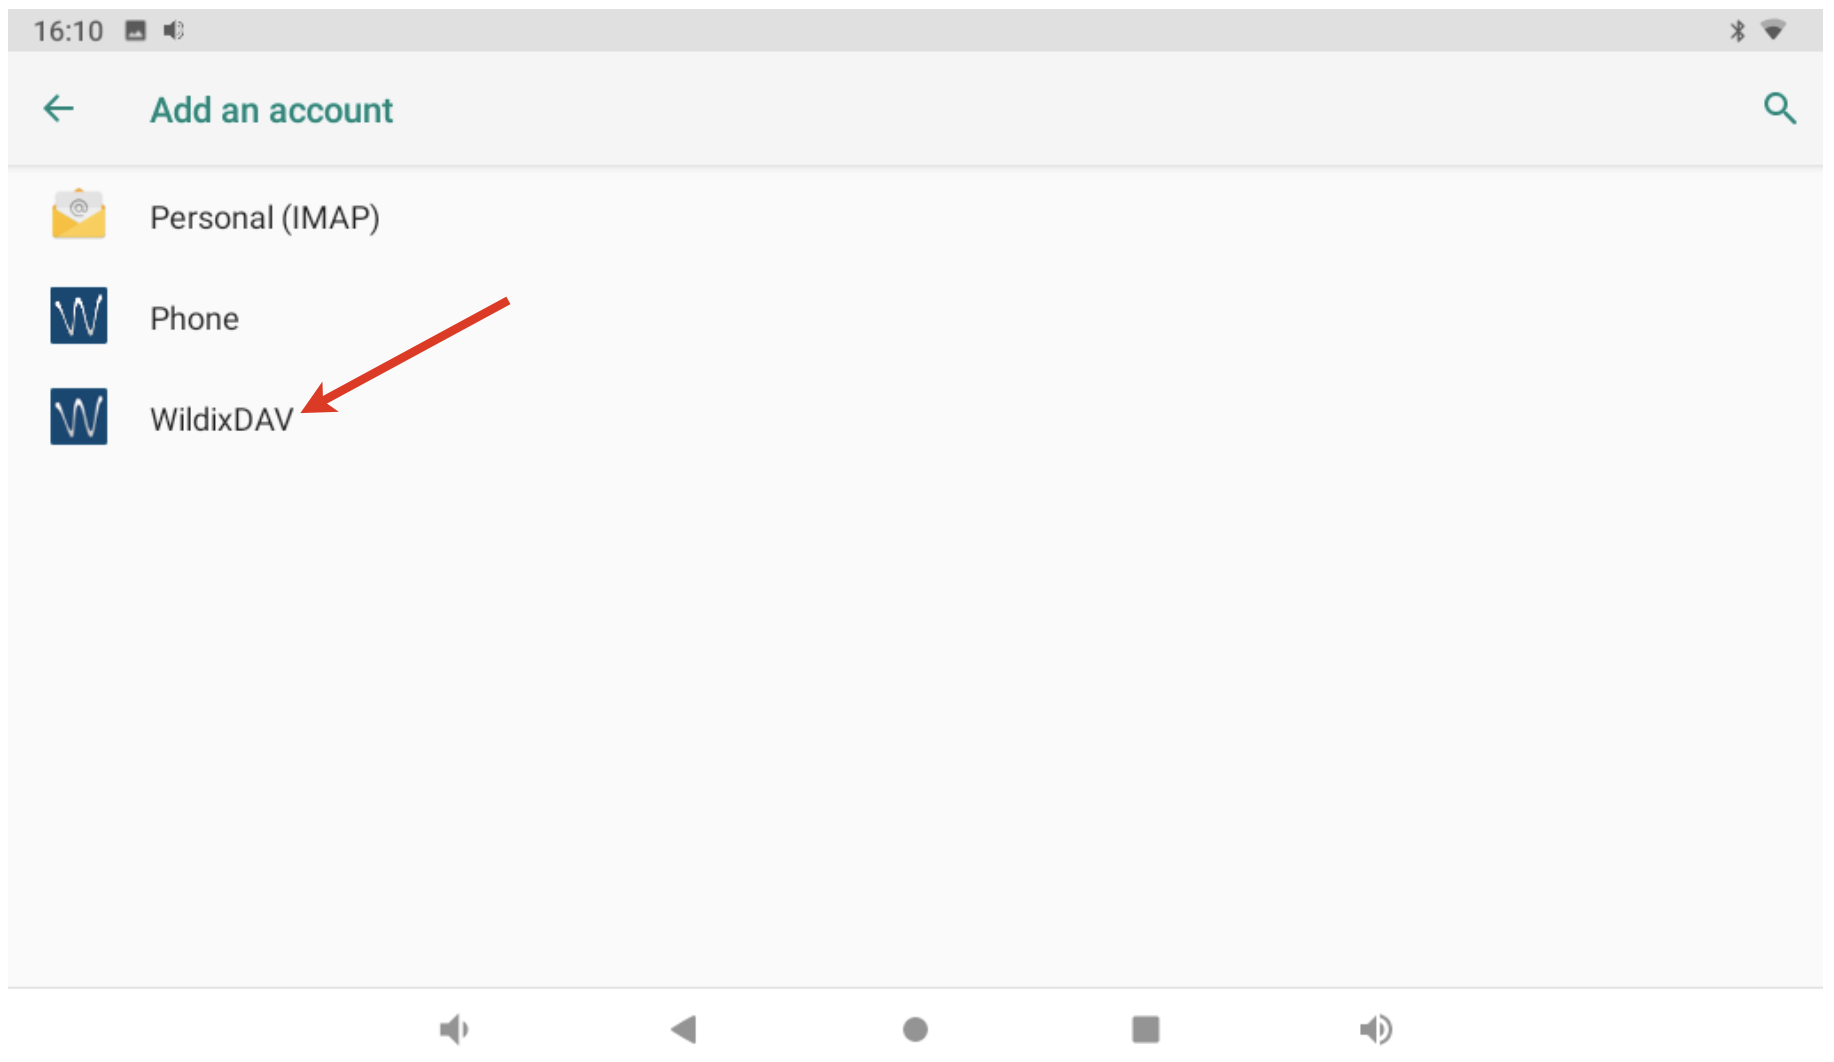
- Tap + Add Account and select WildixDAV:
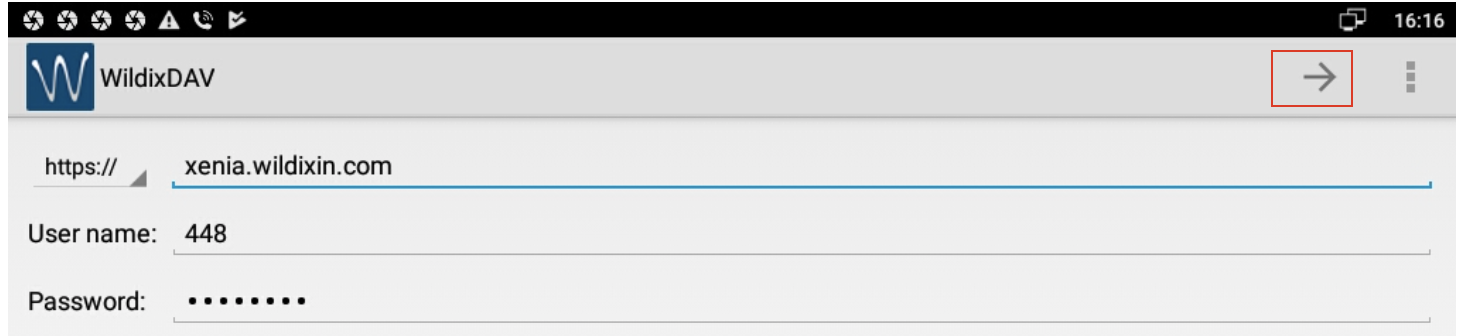
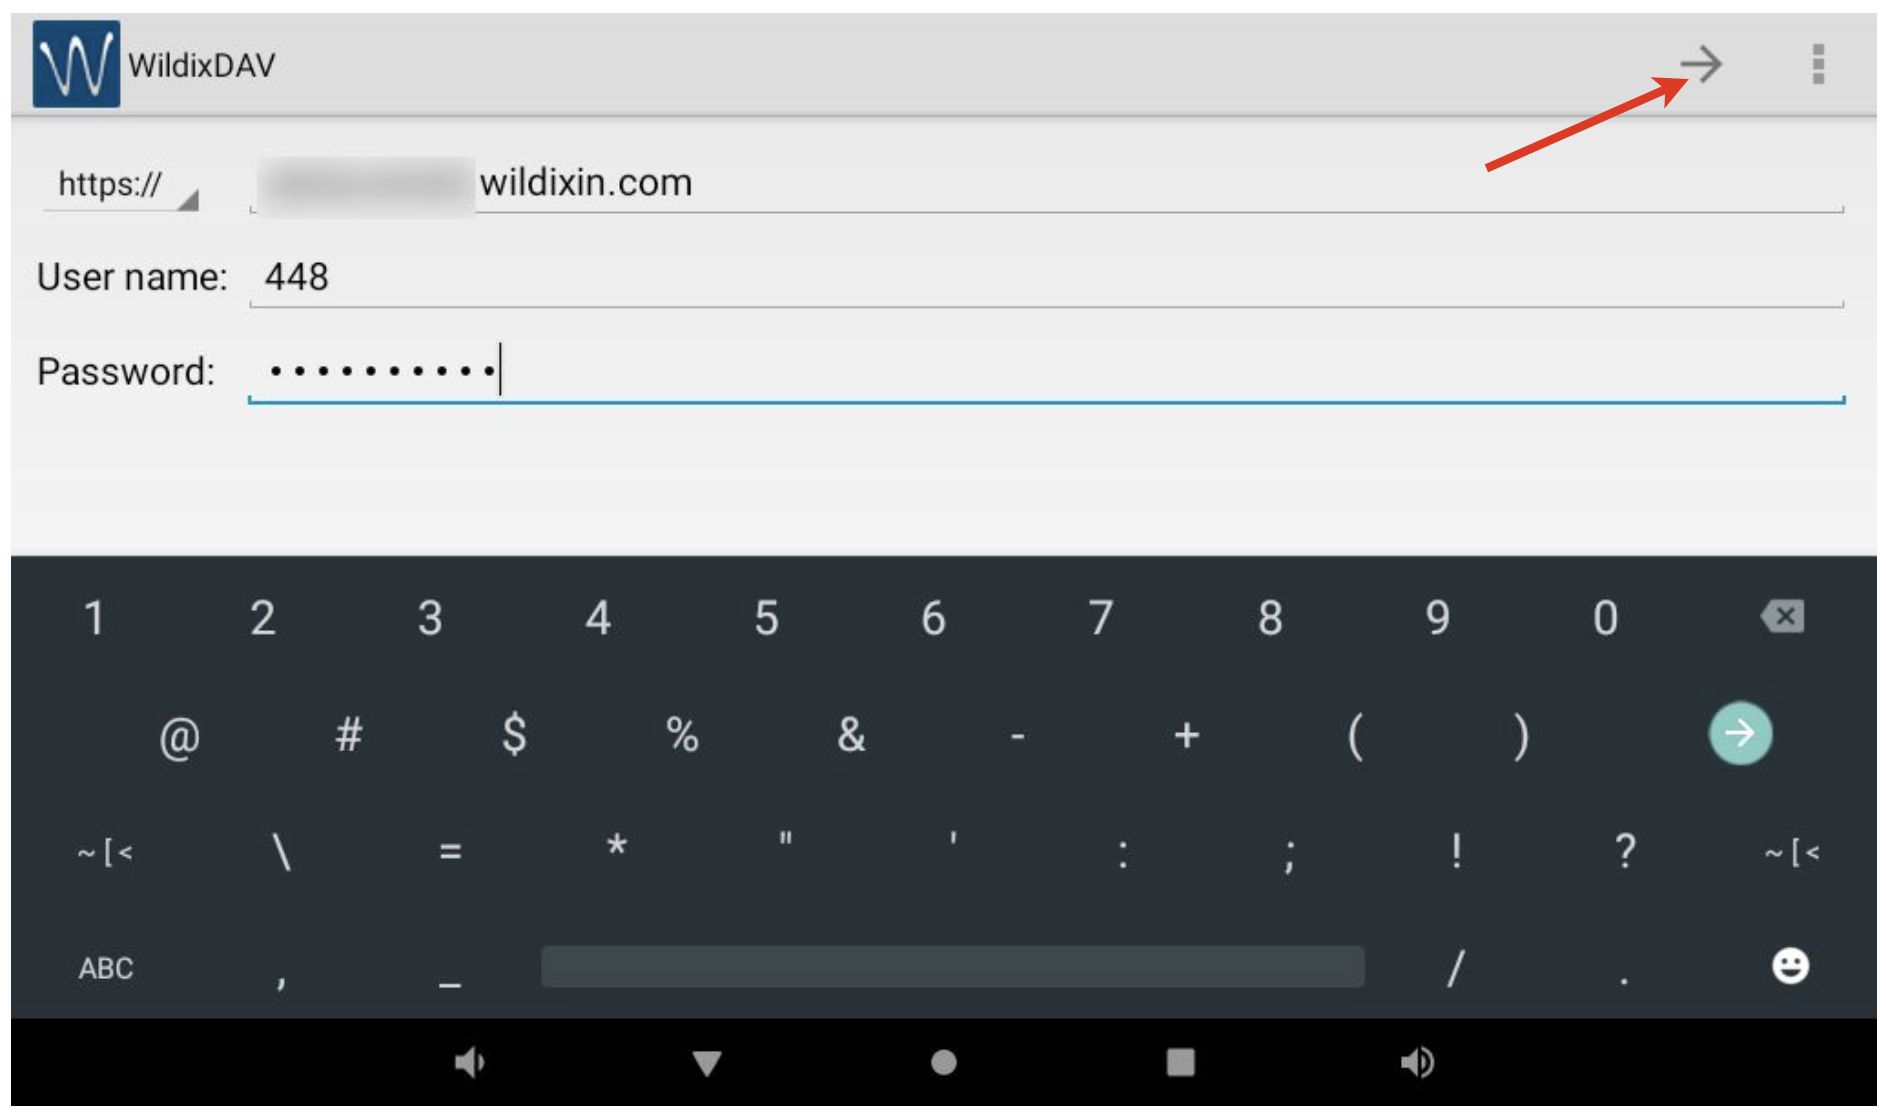
- Enter the Server name (PBX domain name or IP), User name and Password and tap Next:
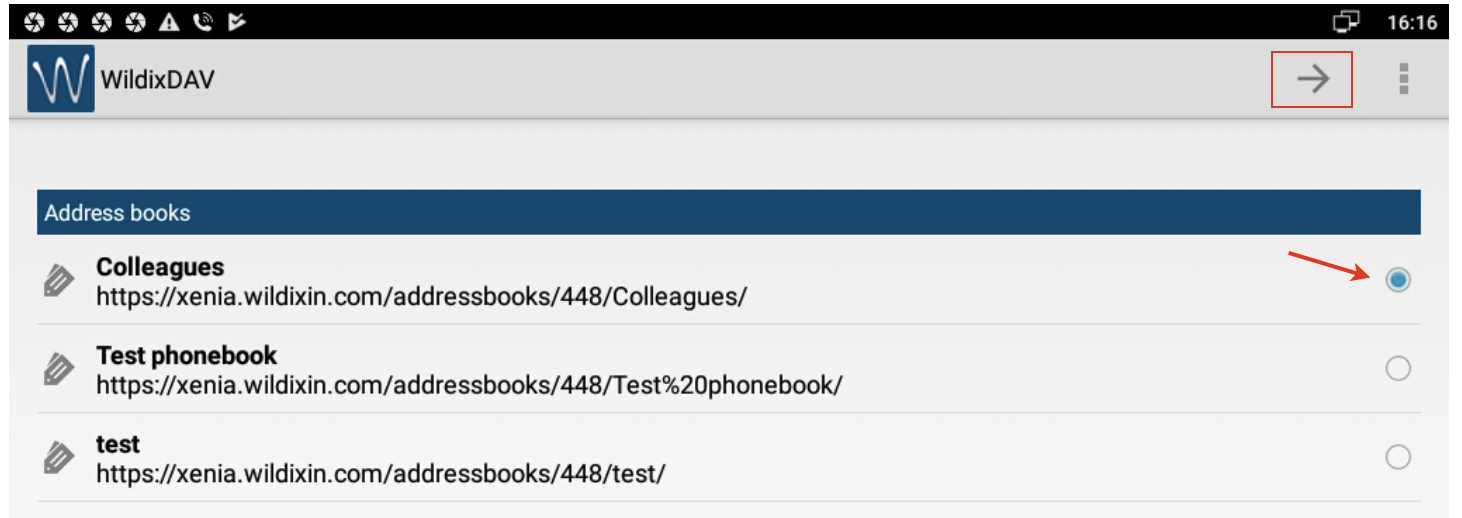
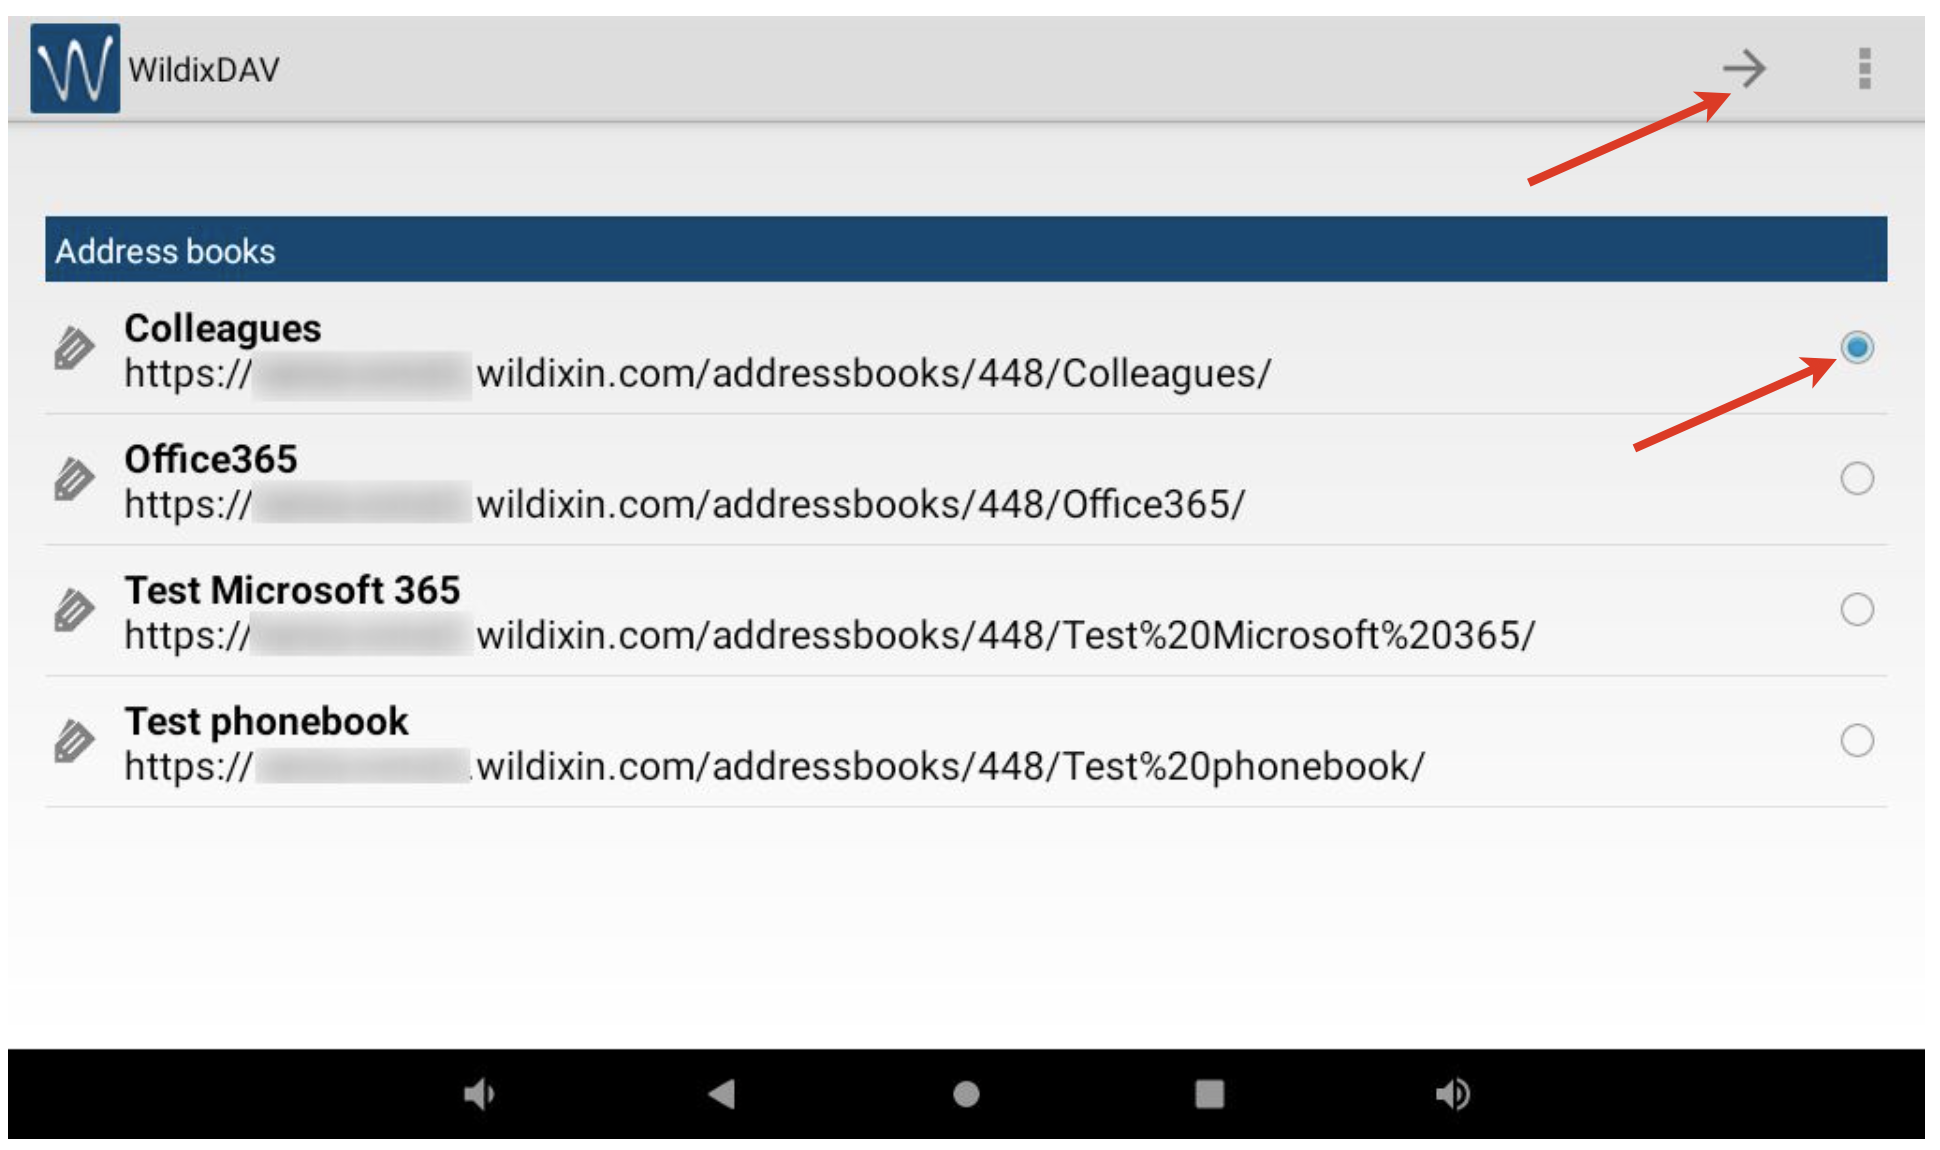
Tick off the phonebook that you wish to sync (it’s necessary to add phonebooks one by one, so repeat the steps again to add more phonebooks for sync) and tap Next:
Enter the local name for the phonebook and tap Tick to add it
- Sync starts automatically in background mode
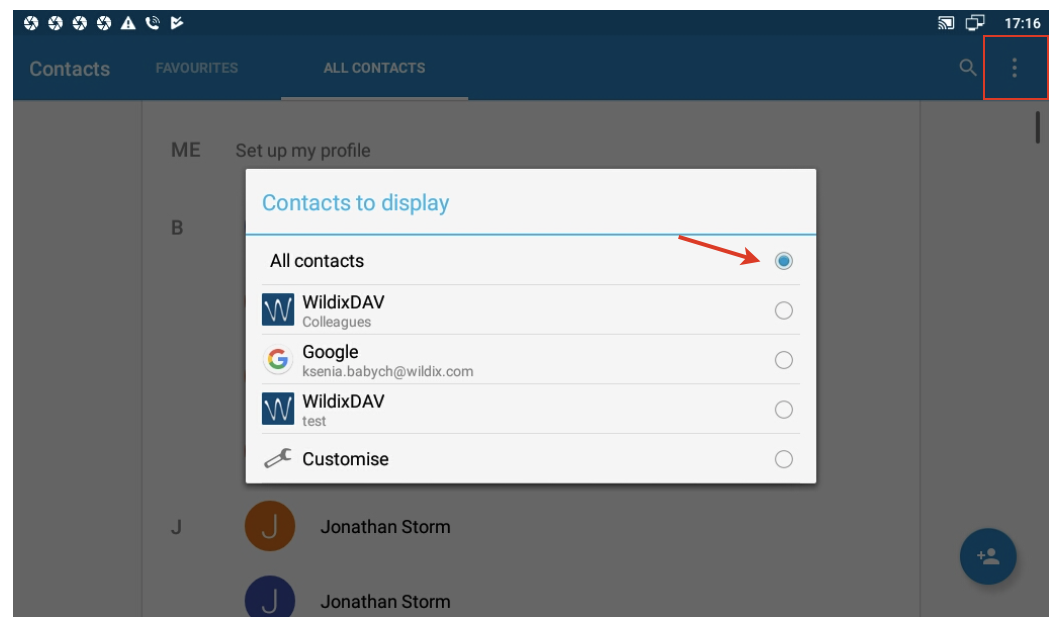
Now your PBX contacts appear in People (personal phonebooks). You can select the groups to be displayed:
- Go to People-> tap More options (three dots) button
- Select Contacts to display -> tick off contacts to be displayed
Vision
Vision User Guide: LINK
- Go to Phone Settings -> Accounts:
- Tap + Add account:
- Select WildixDAV:
- Enter the Server name (PBX domain name or IP), User name and Password and tap Next:
- Tick off the phonebook that you wish to sync (it’s necessary to add phonebooks one by one, so repeat the steps again to add more phonebooks for sync) and tap Next:
- Enter the local name for the phonebook and tap Tick to add it
- Sync starts automatically in background mode
Now your PBX contacts appear in Contacts (personal phonebooks). You can select the groups to be displayed:
- Go to Contacts-> tap More options (Hamburger icon) button
- Select Settings -> Contacts to display and tick off contacts to be displayed
MacOS Contacts CardDAV Sync
Note: Contacts are not subdivided into phonebooks.
- Go to System Preferences -> Internet Accounts & Accounts -> Add Other Account… -> Add a CardDAV account, “Manual”:
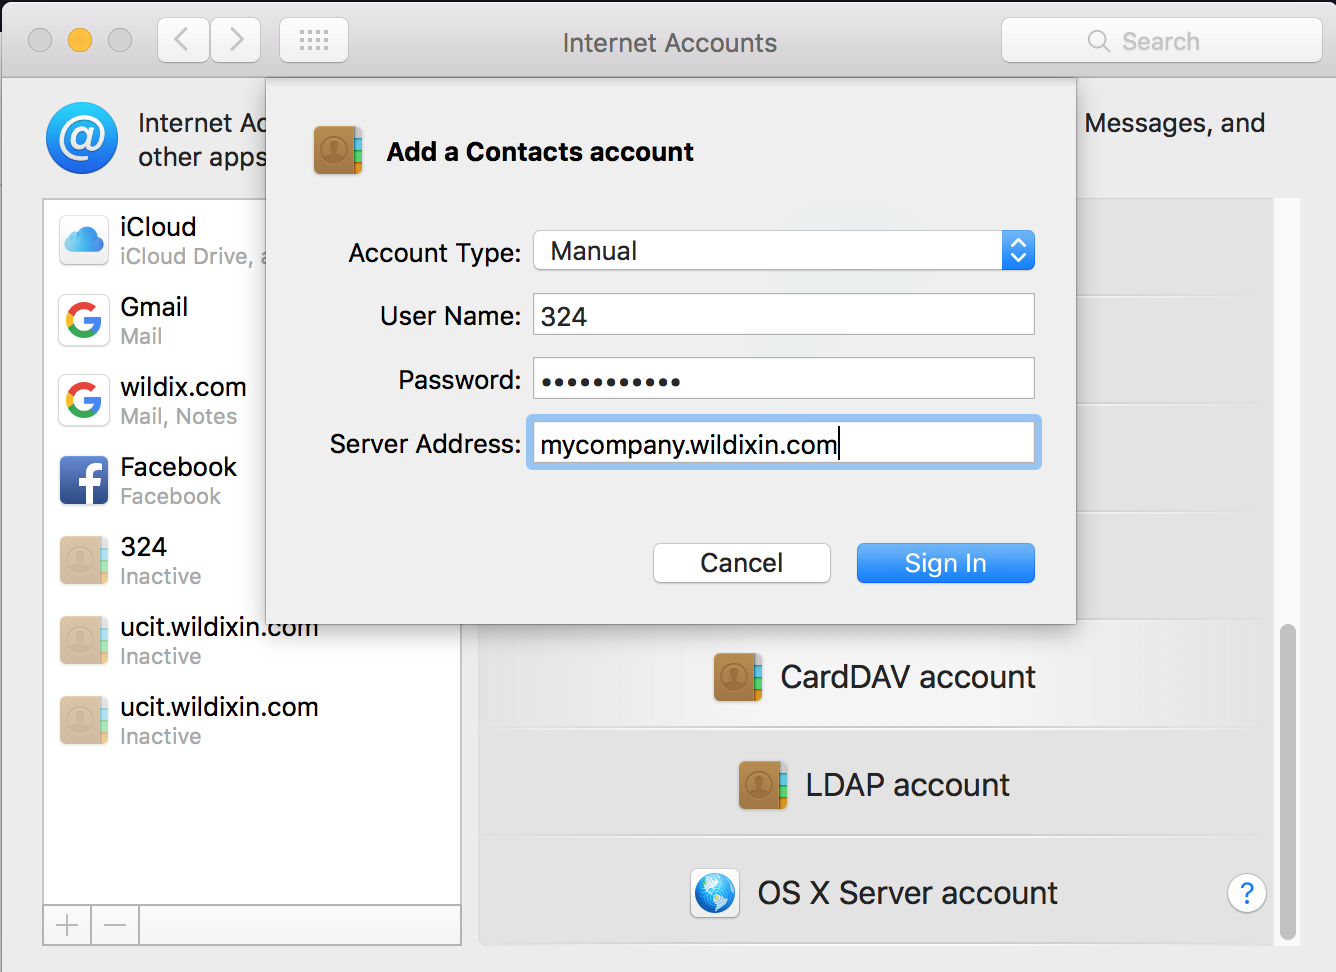
- Enter account information:
- User Name: your extension number
- Password: your password to access WMS / Collaboration
- Server Address: PBX address or domain name
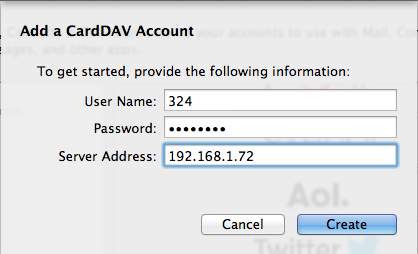
- Click Create and Continue
All the contacts from shared PBX phonebooks appear in your Mac OS Contacts
Thunderbird Contacts CardDAV Sync
1) Download and install the following addons:
- Provider for CalDAV & CardDAV
(Link for download: https://addons.thunderbird.net/en-US/thunderbird/addon/dav-4-tbsync/) - TbSync
(Link for download: https://addons.thunderbird.net/en-US/thunderbird/addon/tbsync/)
Install the plugins from Add-ons Manager folder.
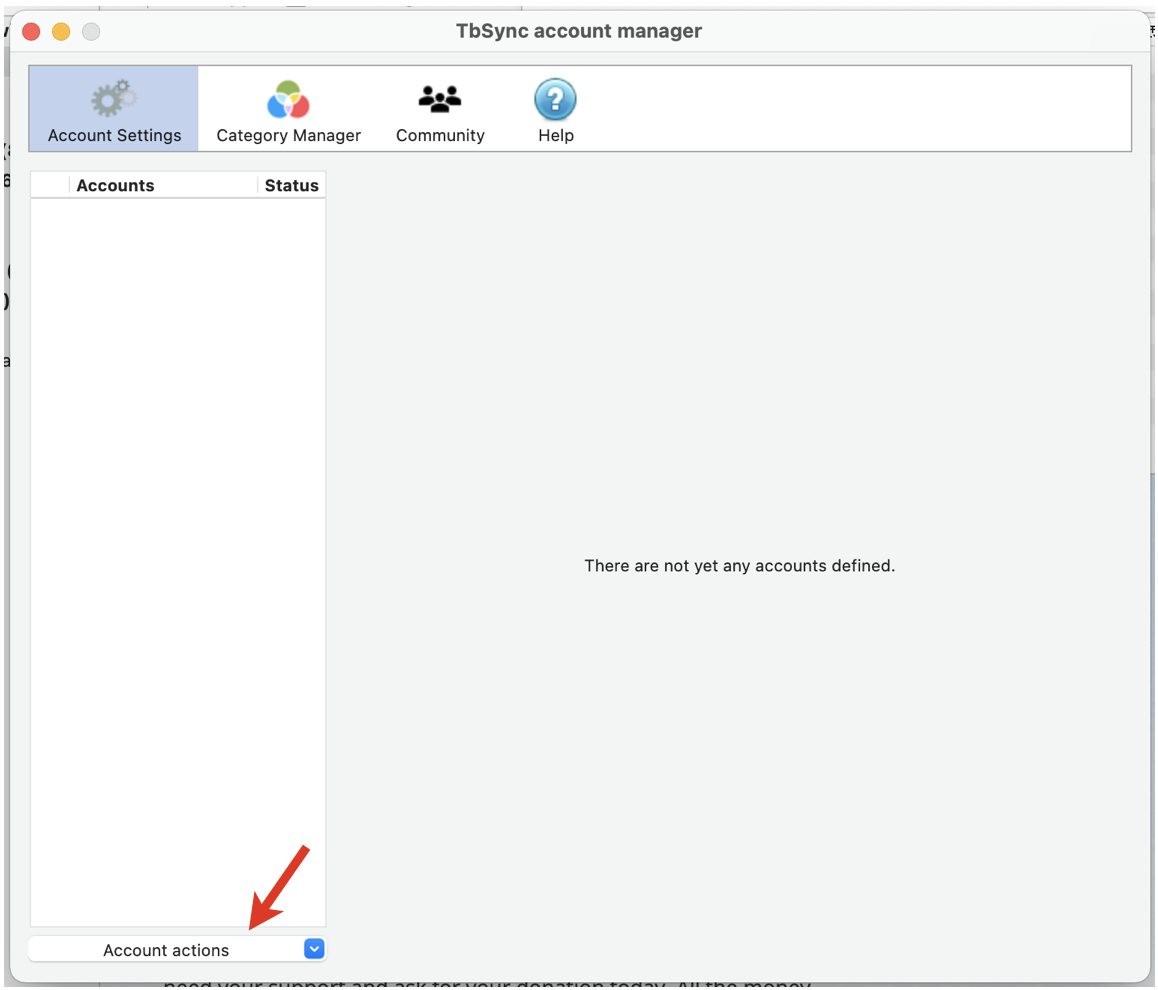
2.)Configure a new account in TbSync:
Click on Tools -> Synchronization Settings(TbSync) in your Thunderbird Toolbar
Note: If your Toolbar is invisible click ALT
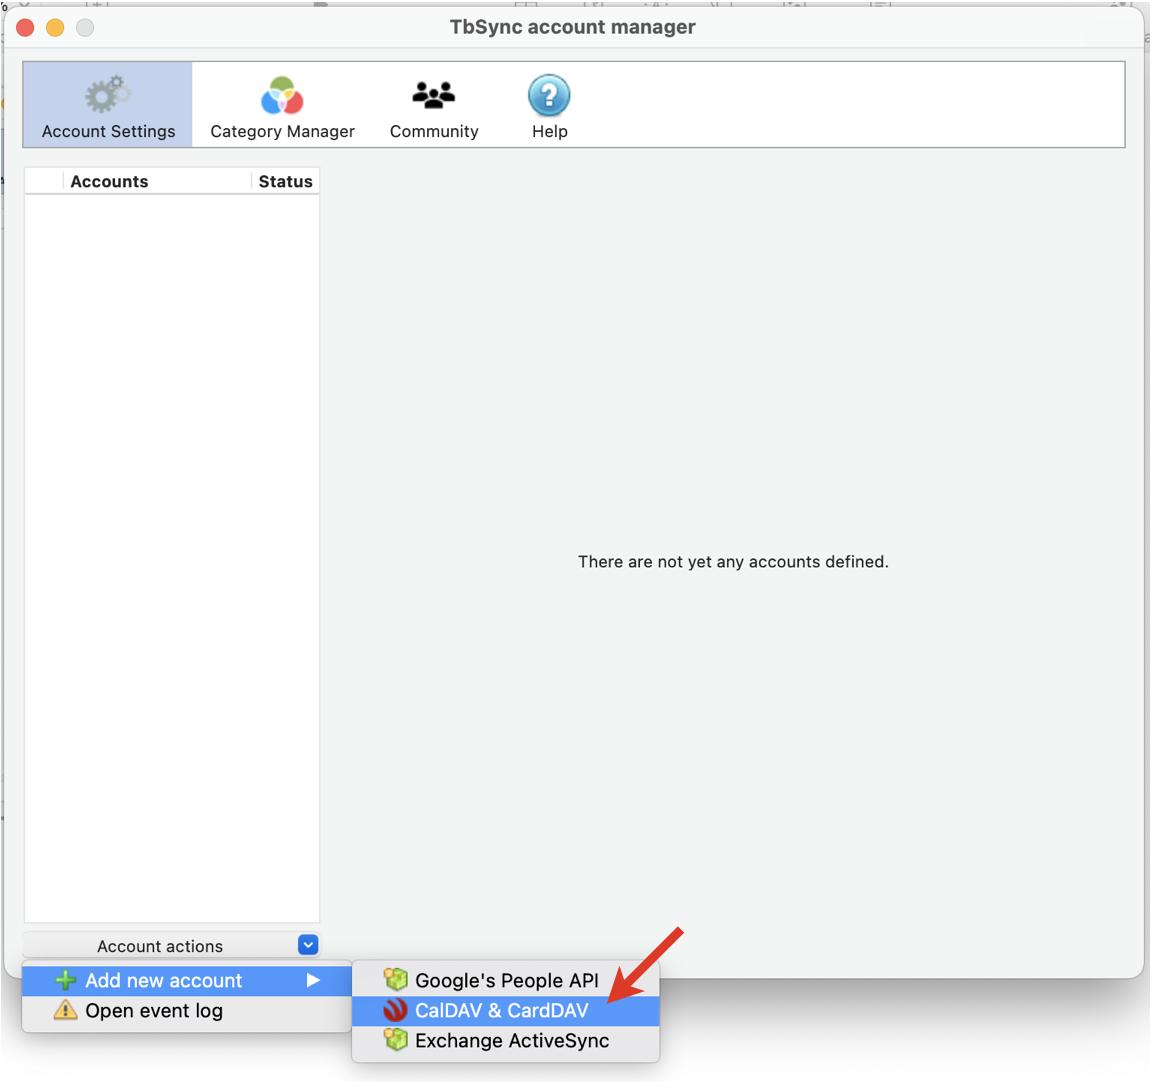
- In TbSync account manager, click Account actions button
- Choose Add new account option -> CalDAV & CardDAV
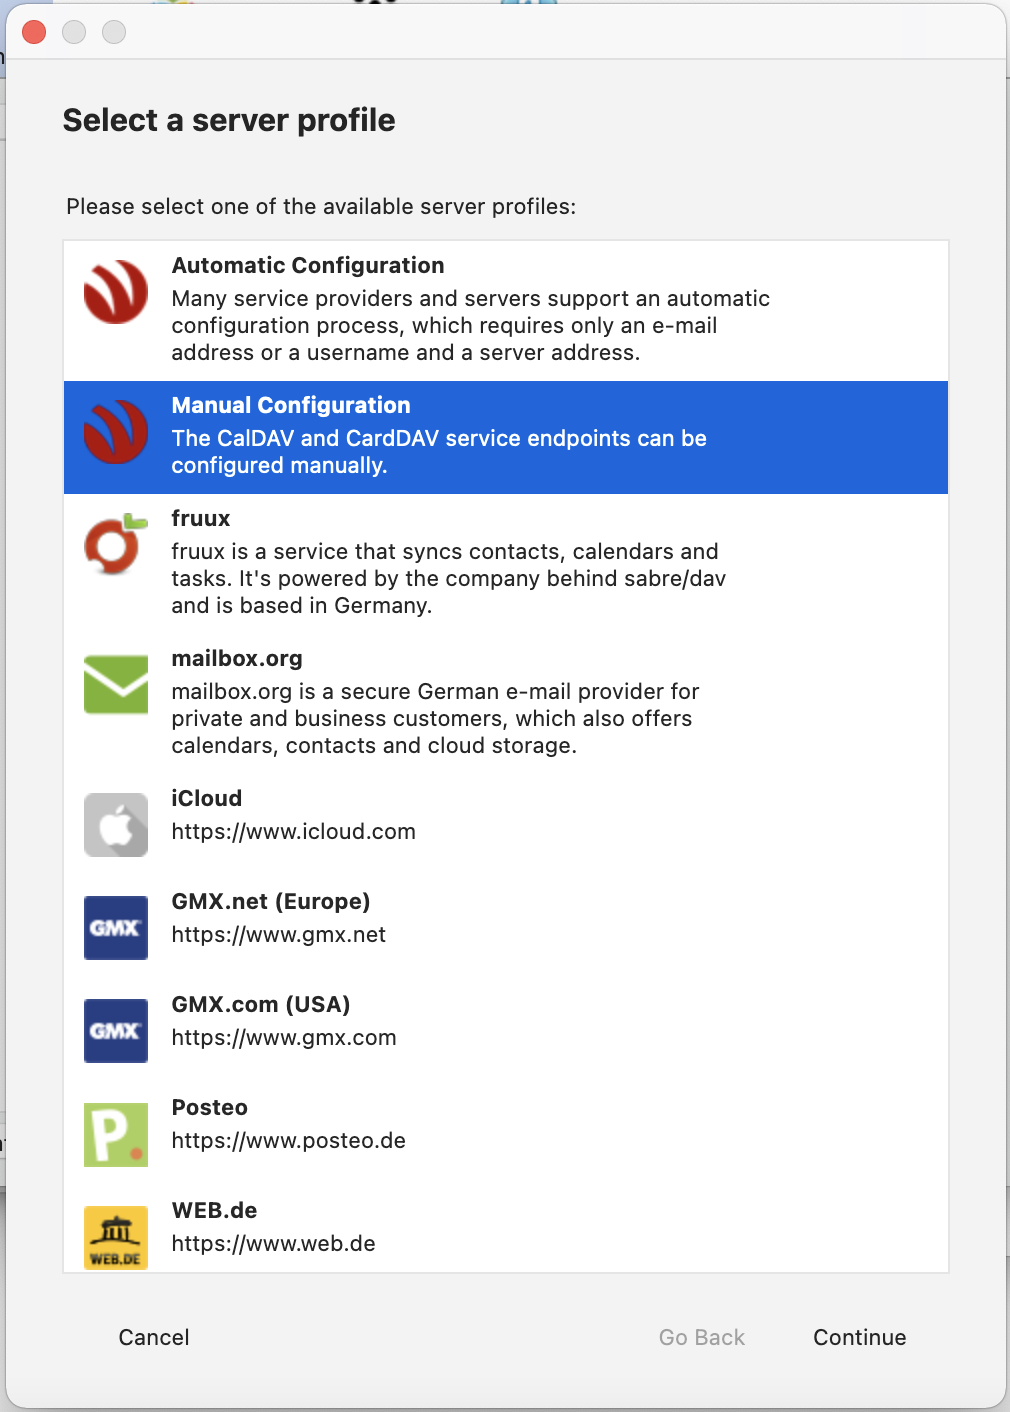
- When offered to select server profile, select Manual Configuration and click Continue:
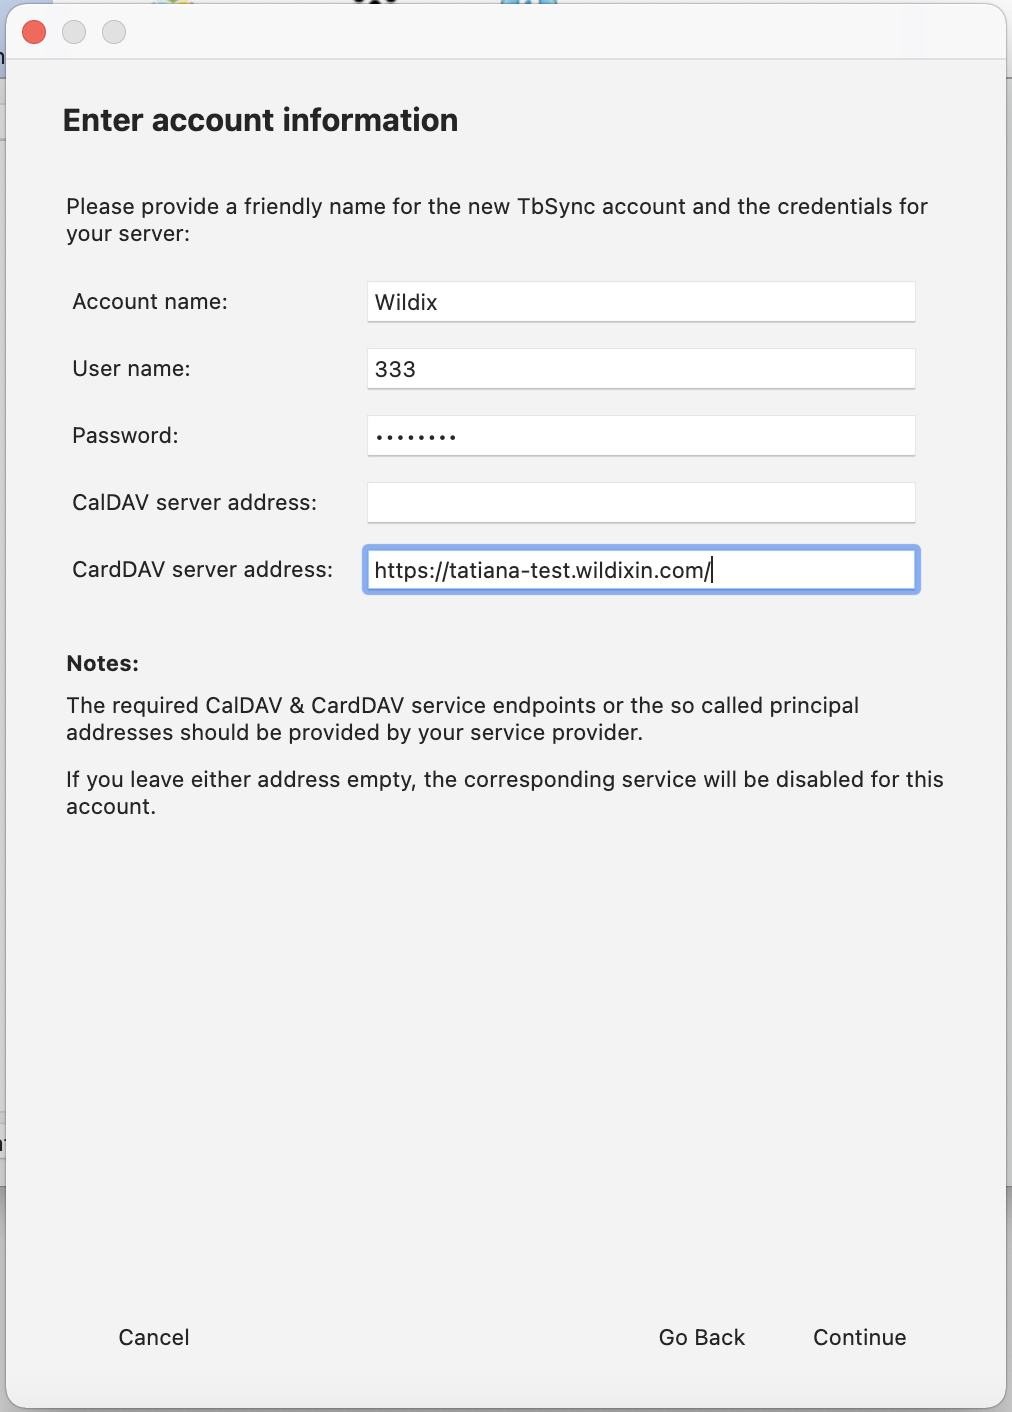
- Enter account information:
- Account name: choose an account name
- User name: insert your extension
- Password: type in your password
- CardDAV server address: insert your PBX address
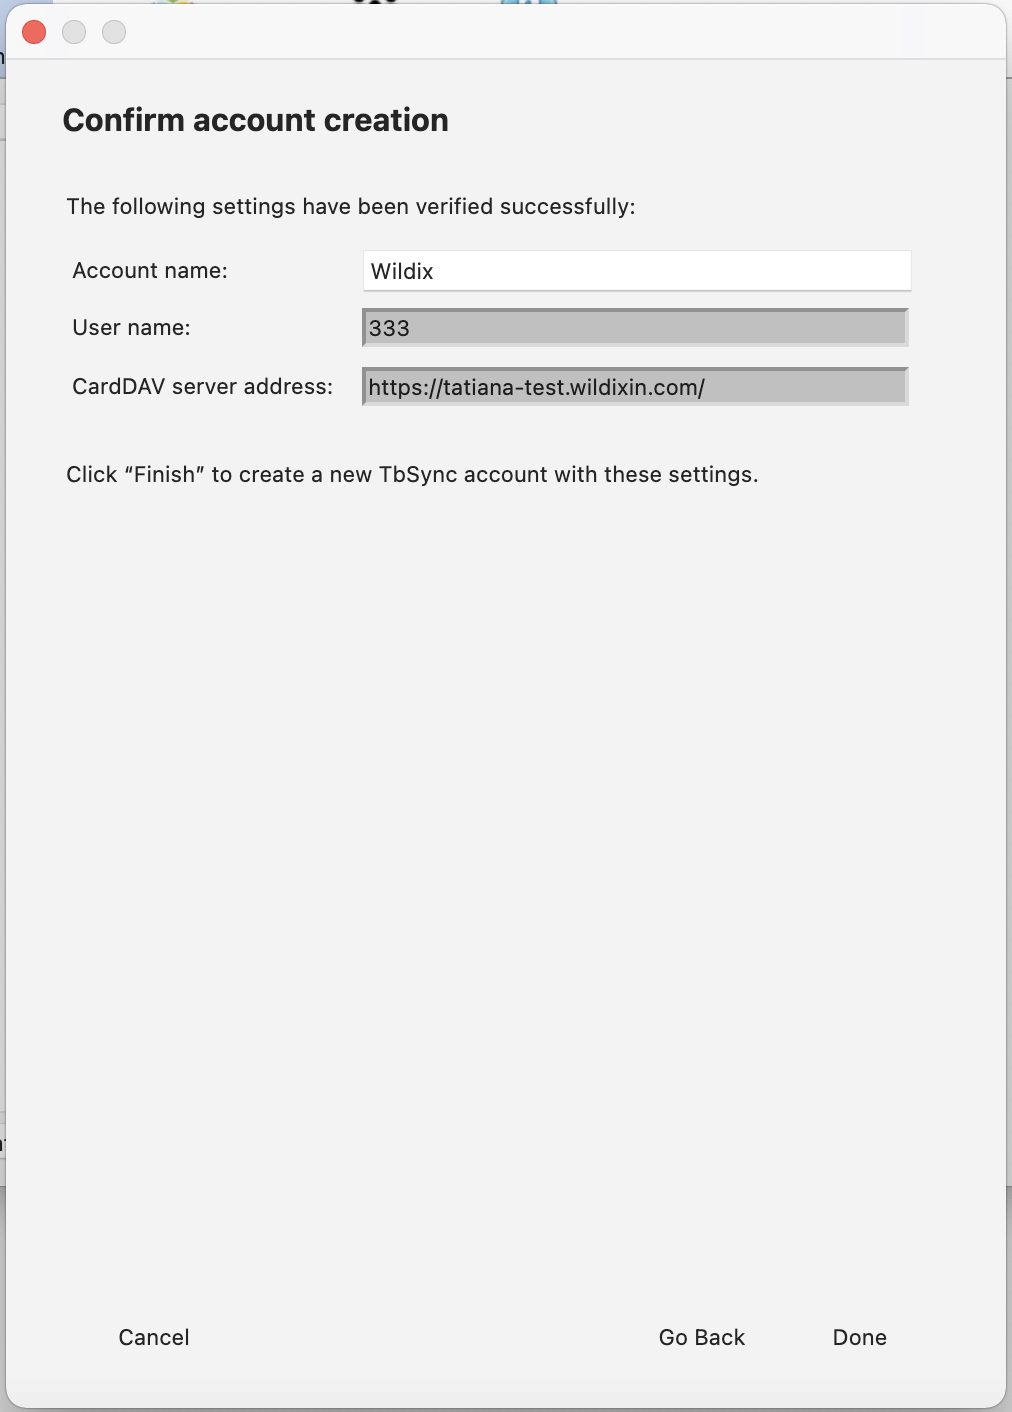
- When asked to confirm account creation, click Done:
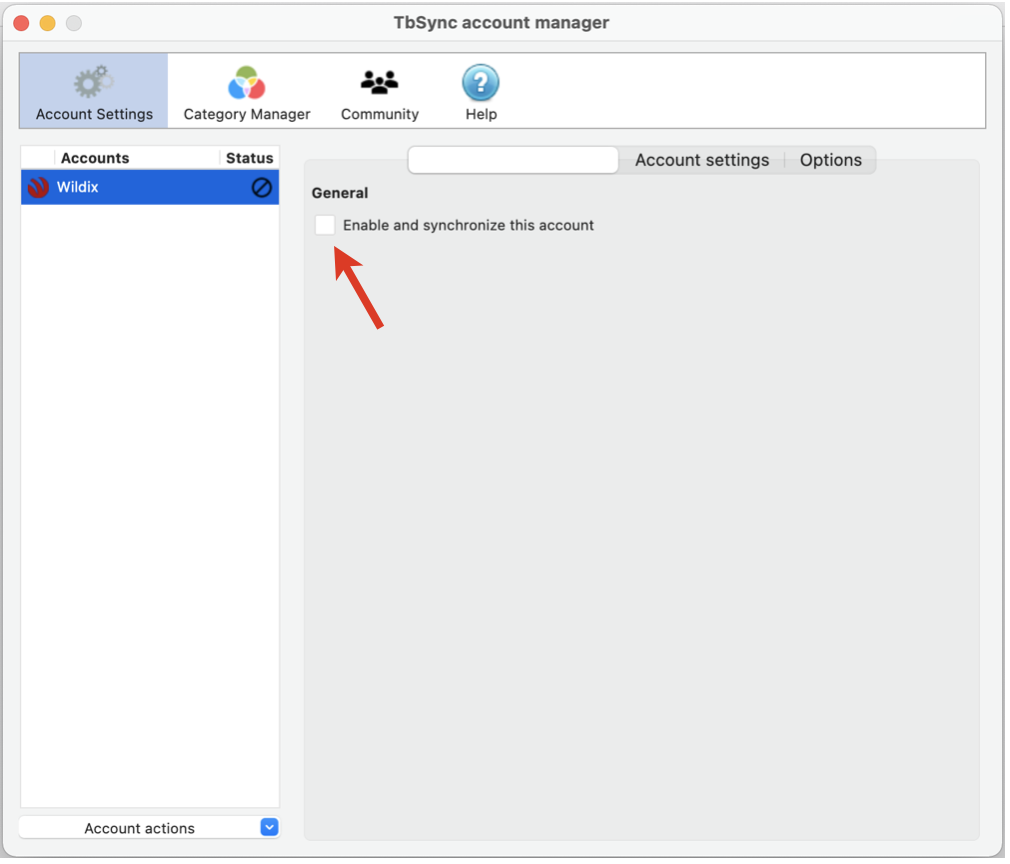
- On the TbSync menu, right-click on the newly created account and enable it:
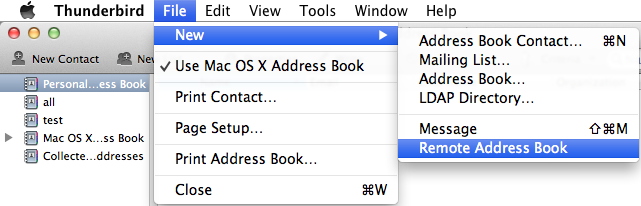
3) Set up remote address book:
- Open Thunderbird and go to Address Book -> File menu -> New -> Remote Address Book
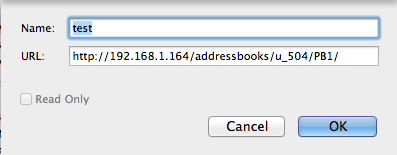
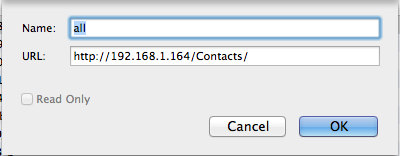
2. Enter the following data:
- Name: Phonebook name as you want it to appear in your Address Book
- URL: PBX IP address or domain name, followed by your user name and the phonebook name in the following format: http://PBX_IP/addressbooks/User_Name/Phonebook_Name/
To set up the sync with all the corporate phonebooks, enter: http://PBX_IP/Contacts/
Example: