Salesforce Classic Integration - User Guide - English
- Former user (Deleted)
- Tatiana Bieliakova
- Ksenia Babych
This guide will lead you through the process of Salesforce Classic integration usage, starting from a Softphone installation and activation, and ending with practical examples for call receiving.
Created: June 2019
Updated: April 2025
Permalink: https://wildix.atlassian.net/wiki/x/AArOAQ
Click-to-call
- Call History
- Search Bar for the contacts
- Auto-detect existing contact and redirect to his page
Requirements:
- WMS version: 5.01 or higher
- Wildix subscription plan:
- UC-Business or UC-Premium for Collaboration
- x-bees Standard or x-bees SuperBee for x-bees
- Salesforce license with access to the Classic Platform
- Activated Salesforce Payment Plan to set up Call Center, check the prices here
- Your Salesforce domain should be whitelisted on the PBX
Link to the application
The integration is available for the installation through the Salesforce AppExchange.

Call Сenter
Setup
Step - 1

- 1 - Click on your Profile name
- 2 - Go to the My Settings page
Step - 2
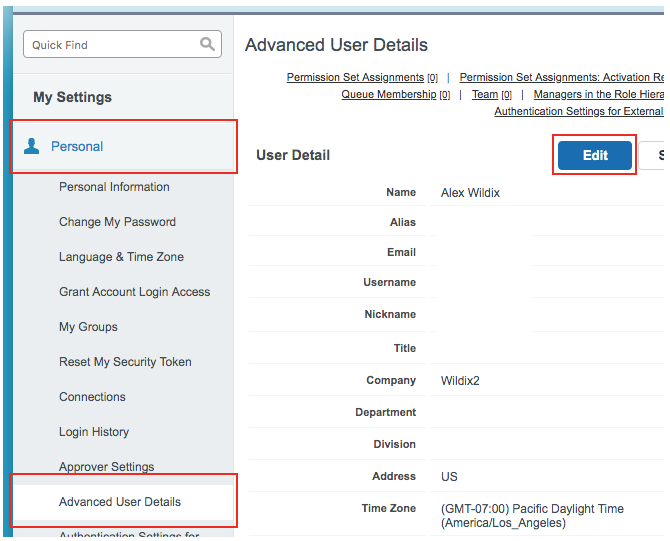
- Choose Advanced User Details subcategory
- Press the Edit button
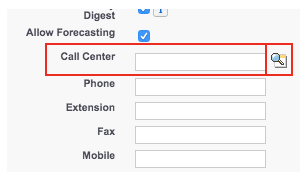
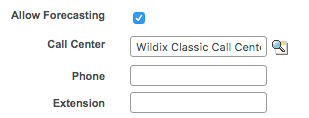
- Scroll down to the Call Center field and press the Magnifier button
Step - 3
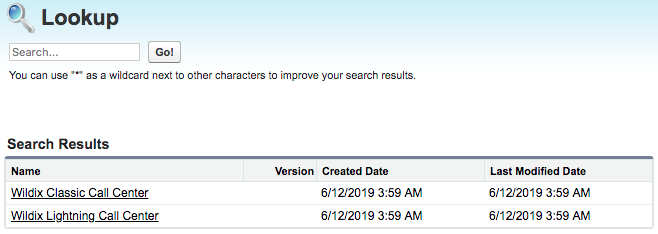
You see a popup with two options:
- Wildix Classic Call Center - will work only for Classic interface
- Wildix Lightning Call Center - will work only for Lightning version
Choose Wildix Classic Call Center and click Save.
Switch
In order to switch to Salesforce Lightning you also need to change Lighten Call Center.
Step - 1
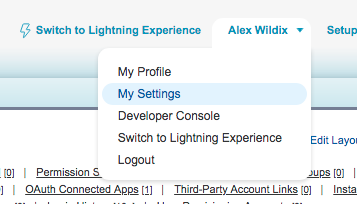
- 1 - Click on your profile
- 2 - Go to the Settings page
Step - 2
- Choose Advanced User Details subcategory
- Press the Edit button
- Scroll down to the Call Center field and press the Magnifier button
Step - 3
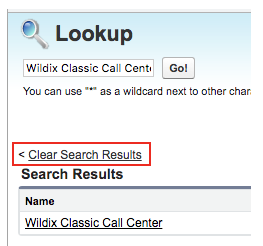
You see a popup with only one option. Click on Clear Search Results to get:
- Wildix Classic Call Center - will work only for Classic interface
- Wildix Lighten Call Center - will work only for Lightning version
Choose Lighten and click Save.
Enable Salesforce Telephony in WMS
To be able to log in to the integration and performs calls, make sure to install Salesforce Telephony in WMS:
- Go to PBX -> Integrations -> Cloud integrations
- Click on Salesforce Telephony:

- Click Install:

- The integration gets installed:
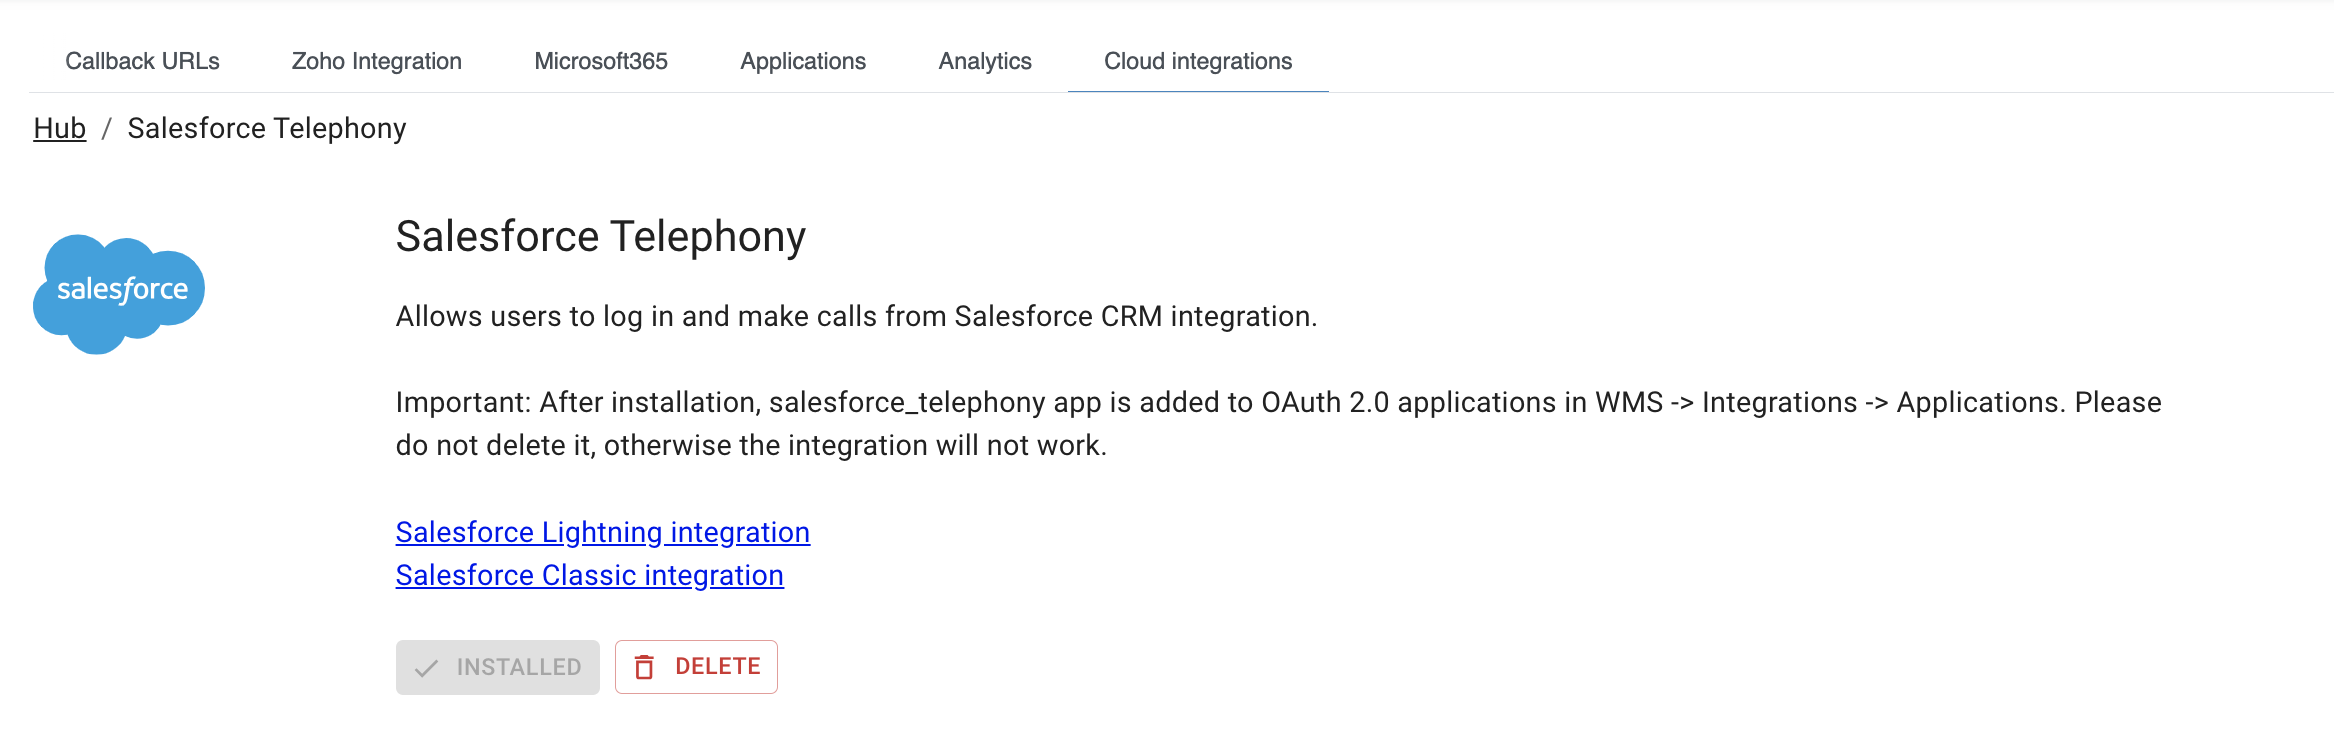
Note:
- When Salesforce Telephony is installed, the relevant salesforce_telephony app is added to OAuth 2.0 applications in WMS -> Integrations -> Applications. Please do not delete it, otherwise the integration will not work.
- In case of updating user name, extension, password, SIP password or email in WMS, user may need to relogin to Salesforce integration.
Application Usage
Keep Collaboration / x-bees open while working with the app.
Once you have ended the setup process you can access the application on the left side of the page from all tabs except Reports and Dashboards.

The application contains four tabs:
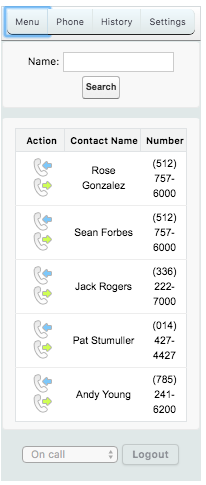
Menu
Main tab of the application
- Search bar for Contacts
- Search Results with contacts info and Click-to-call function
Phone
This tab is opening automatically if you have a call
- Shows caller info
- Suggest to add in the contact list
History
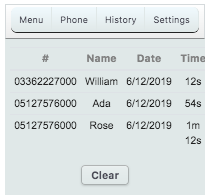
List of previous calls with:
- Phone number
- Name of contact
- Data of call
- Duration of a call
Dialer settings
Application has two checkboxes
- Enable auto-opening of found contacts
- Enable auto-opening of found contacts when receiving an incoming call
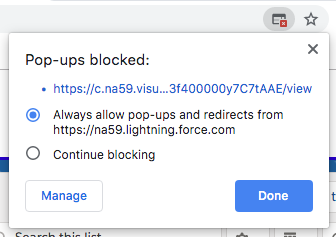
By default, Google Chrome does not allow pop-ups. Click on the error icon on the Address bar and change it.
Make a Call
Keep the Collaboration open while working with the application.
Currently there is no possibility to select a device from the list of all connected devices. The first device on the list has more priority. For example, if WP phone is the first, it has more priority over Collaboration. This means both devices would ring but the audio would be passed through a phone.
Making a Call by Click-to-Dial
- Locate the number that you want to dial in the Contact Page
- Click the
 button or the number. The number is automatically dialed in the softphone (Collaboration application)
- A number that has already been clicked cannot be clicked again for five seconds
- The button does not appear next to fax numbers
-
 icon displays if you have trouble with connection to Collaboration
Making a Call by Application
- Go to the Menu tab
- Search for the right contact
- By using the search bar
- By choosing from previous calls
- Call it by pressing
- Action icon
- Contact name
- Contact number
Answer a Call
Keep the Collaboration open while working with the application.
Currently there is no possibility to select a device from the list of all connected devices. The first device on the list has more priority. For example, if WP phone is the first, it has more priority over Collaboration. This means both devices would ring but the audio would be passed through a phone.
For accepting an incoming call you have to open Collaboration. A call dialog window is displayed when there is an incoming call:
To answer a call: click the green Handset icon
To decline a call: click the Hang up (red) icon
You can set up automatic call forwarding based on user status (available, DND, away) and call type (internal, external, whitelist, blacklist). See chapter: Call Features.