Provisioning of Wildix devices - Admin Guide
- Ksenia Babych
- Tatiana Bieliakova
- Elena Kornilova
The Guide describes and explains how to provision Wildix devices.
WMS Version: 6.0X/ 7.0X
Updated: May 2025
Permalink: https://wildix.atlassian.net/wiki/x/OxnOAQ
Introduction
There are several provisioning modes supported by WMS:
- Auto-provisioning (available only for Hardware and Virtual PBXs):
For devices connected to the local LAN or remote network via VPN.
For remote/ unreachable devices behind NAT/ firewall.
- Auto-configuration via auto.wildixin.com:
Automatically add Wildix devices during new installations.
Assign devices to PBX via Salesforce Partner Community (for devices, ordered via SFPC)
Assign devices to PBX via WMP (for devices that were ordered via WMP).
Read the chapter dedicated to Provisioning of Devices of WMS Online Guide for more information about provisioning, firmware upgrade, assigning phones, W-AIR network.
Note: It is possible to assign unprovisioned devices to users.
Available only for devices added via Remote Provisioning (Semi-automatic mode) or WMP. Refer to this chapter of WMS Start Guide for detailed information about assigning to users.
Note: Starting from WMS 6.03.20230630.3, the logic was updated to avoid HTTP protocol for device provisioning for improved security. With the update to WMS 6.03, devices are switched to HTTPS protocol by default, except for some old devices (e.g. some old FXS/FXO, W01GSM and old WP phones like WP400, WP500).
If required, HTTP protocol can be set by the "HTTPForceUse" custom provisioning parameter. Documentation: Provisioning Custom Settings
Auto-provisioning (Automatic mode) (Hardware, Virtual PBX)
Note: Auto-provisioning is supported on old generation Wildix Phones only. The new Wildix Phones 5 are not supported.
- Go to WMS -> Devices
- Click + Add for provisioning of devices
- Select Automatic mode and click Next
- Click Scan (you can also specify the IP range for the search):
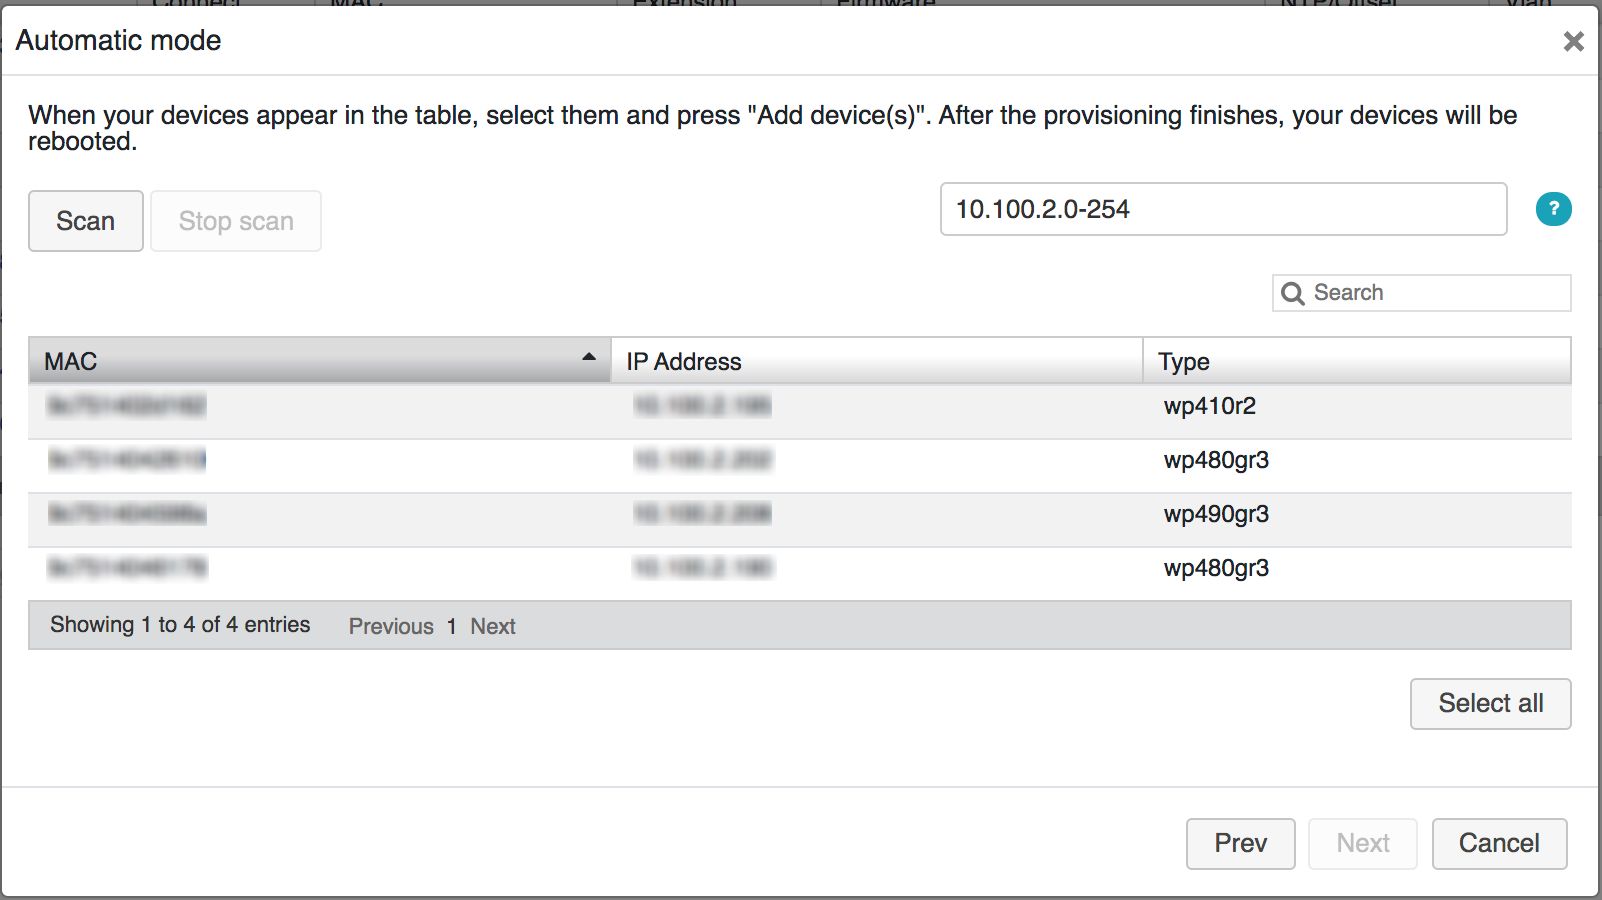
- Select your device(s) on the list and click Next
- Wait till the device is provisioned:
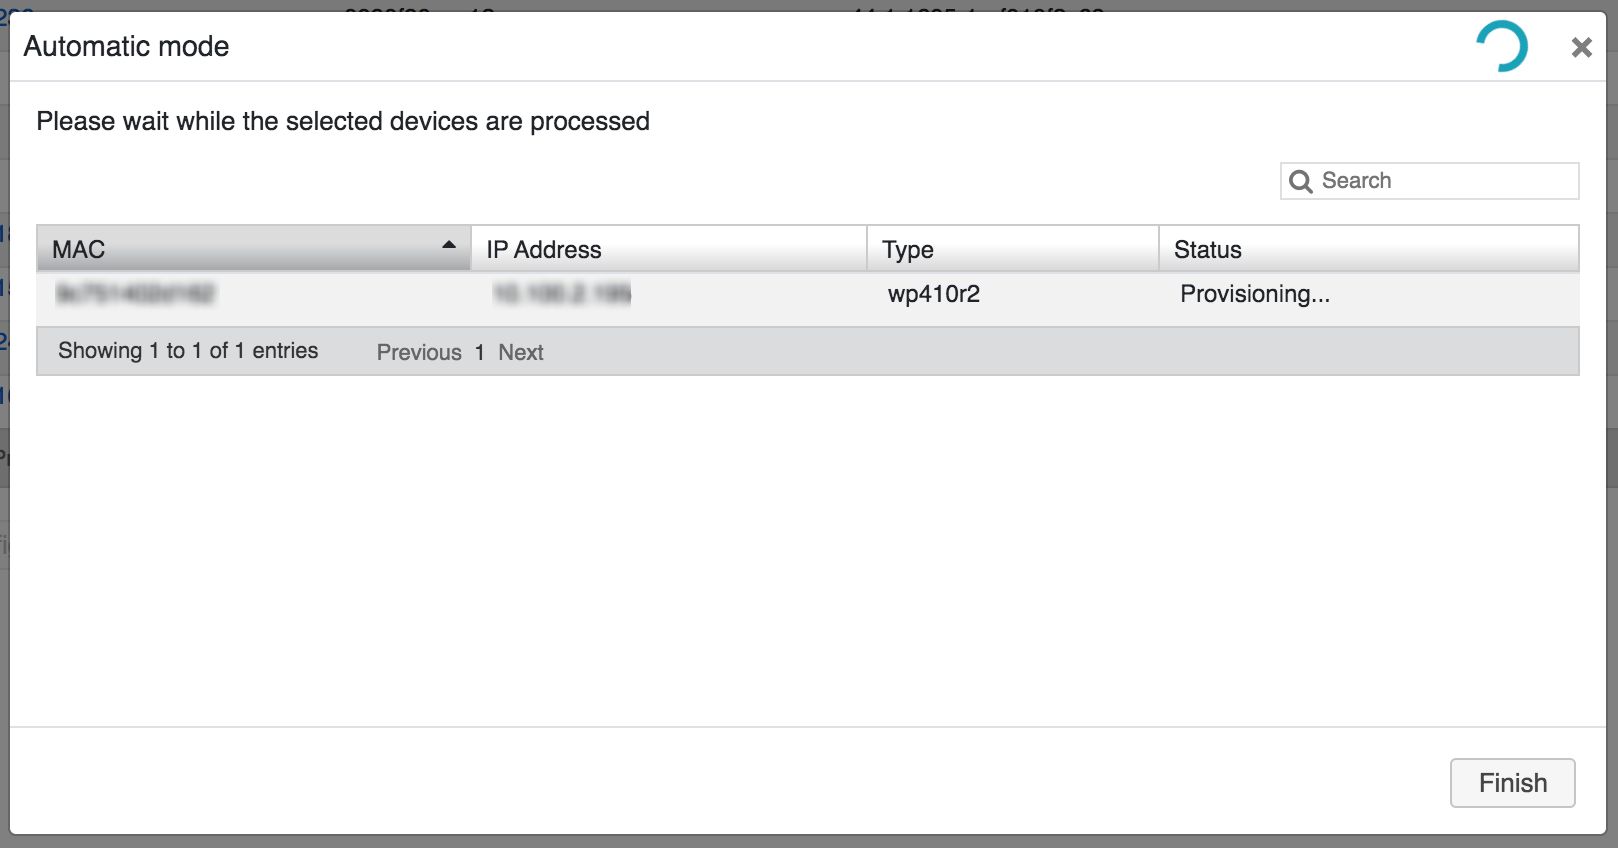
- Click Finish

- The provisioned device appears in the list of all available devices in WMS -> Devices:

Note: in case you can see the model, “login1” in the field “phone”, the firmware version and the password, it means that the device is provisioned.
Refer to the chapter How to assign Wildix phones to users of WMS online Guide for getting details about assigning procedure.
Remote provisioning (Semi-automatic mode)
Read this detailed online Guide for remote provisioning of each Wildix device.
Auto-configuration (auto.wildixin.com provisioning)
Auto-configuration allows you to automatically add and provision Wildix devices during new installations/ devices that had been reset.
Remarks:
- Auto-configuration works only in the local network (devices and PBX must be in the same network)
- This feature is available only for Hardware and Virtual PBX
- Wildix devices support this feature starting from the certain fw version, so in case your fw version is not up to date, for the first time it is necessary to add the device manually using a regular auto-provisioning procedure
Limitations:
- If internal DHCP server is used, it must return PBX address as Primary DNS Server address
- If external DNS server is used, you must add the correct DNS record (auto.wildixin.com must be resolved to the PBX IP)
- If external DHCP server is used, you must use PBX address as Primary DNS server
- For auto-configuration of W-AIR base stations (not SB), you must first manually create a W-AIR network via WMS interface
Note: For auto-configuration of W01GSM follow this procedure:
- Connect W01GSM to Wildix Switch
- Go to device’s web interface
- Enter credentials for the first time access: admin : admin
- Go to the menu System -> System Configuration
- Enter the following string into the field Primary Profile URL: http://auto.wildixin.com:80/?action=setaps&config=xml
- Click on Save
- Press Back on the prompt page
- Click on Provision
- Go to WMS -> Devices: the device has been provisioned
Provisioning via Salesforce Partner Community
See details in the document Assign Devices to Customer PBX via Salesforce Partner Community.
WMP provisioning
Thanks to this provisioning mode, Wildix Partner can assign devices (W-AIR bases, media gateways, phones) to the customer’s (or to the lead’s) or reseller's customer PBX via the Portal.
Note: The option is supported for devices, that were previously ordered via WMP.
Video tutorial:
Prerequisite: you must have available devices (WP, W-AIR bases, media gateways) which you had previously ordered and had them shipped to you.
Go to WMP -> Customers tab
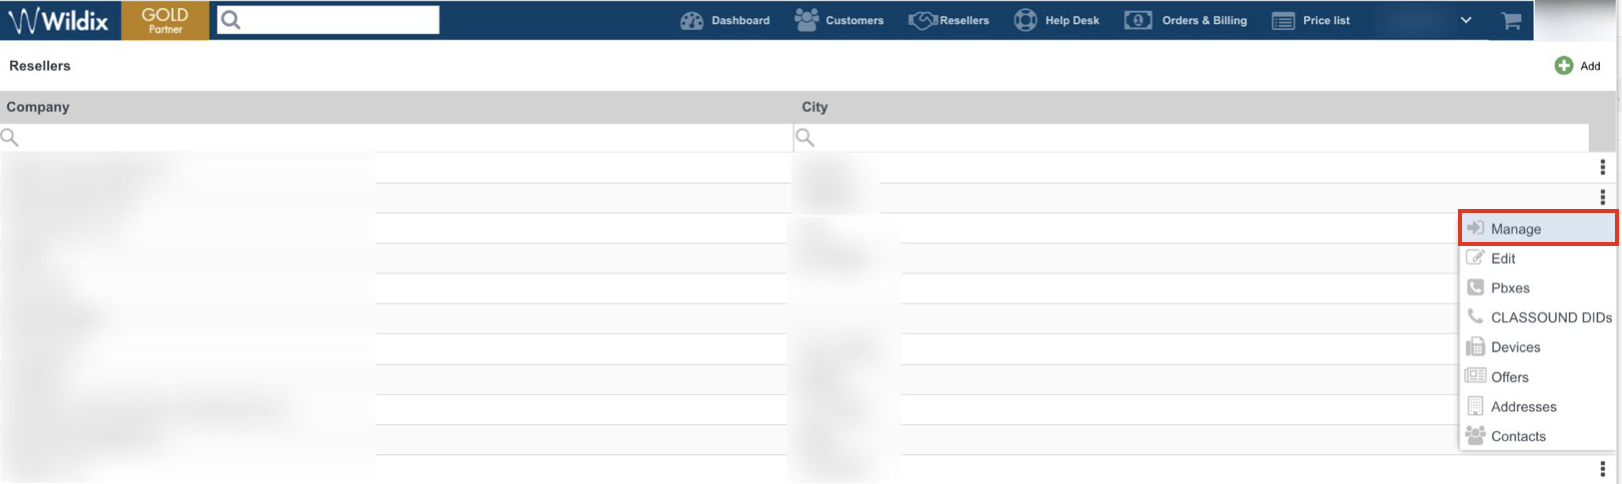
Note: In case of assigning devices to Reseller's customer PBX, you first need to go to WMP -> the Resellers tab -> choose necessary reseller and click Manage:
Then, go to the Customers tab of the Reseller and proceed with the steps described below.
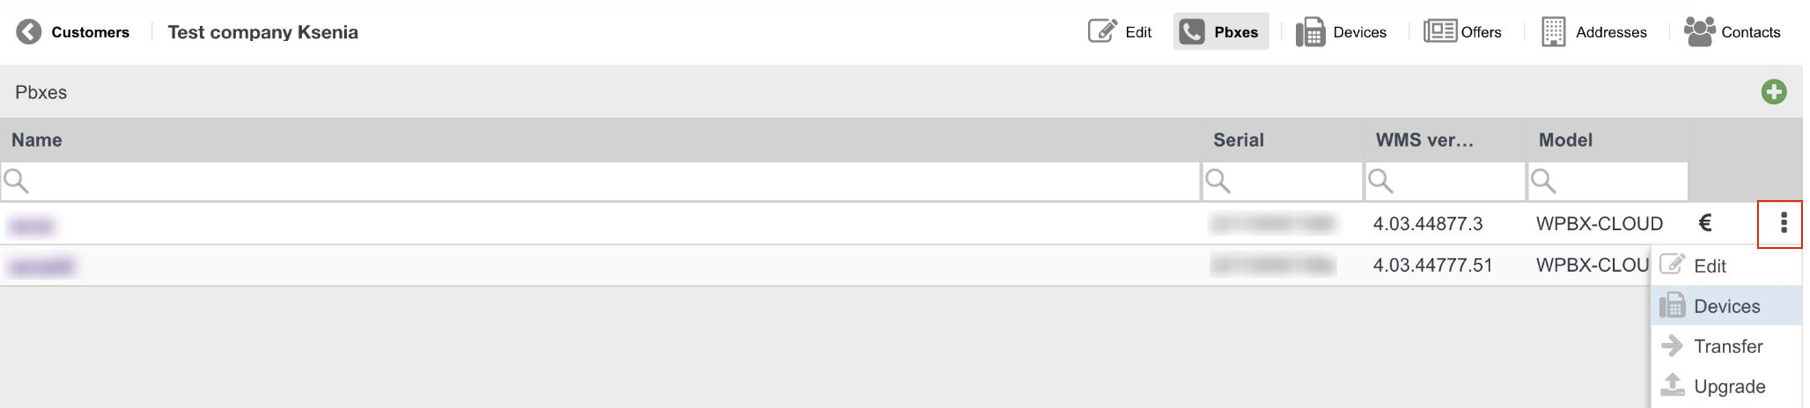
Select the customer, then the particular PBX and click Options button (three dots)
Click Add CAPEX:

If you have previously ordered devices via HWaaS option, they appear under this tab. More details in WMP Dashboards.
- All your available devices are listed; select only those devices that you want to assign to this PBX and click Add:
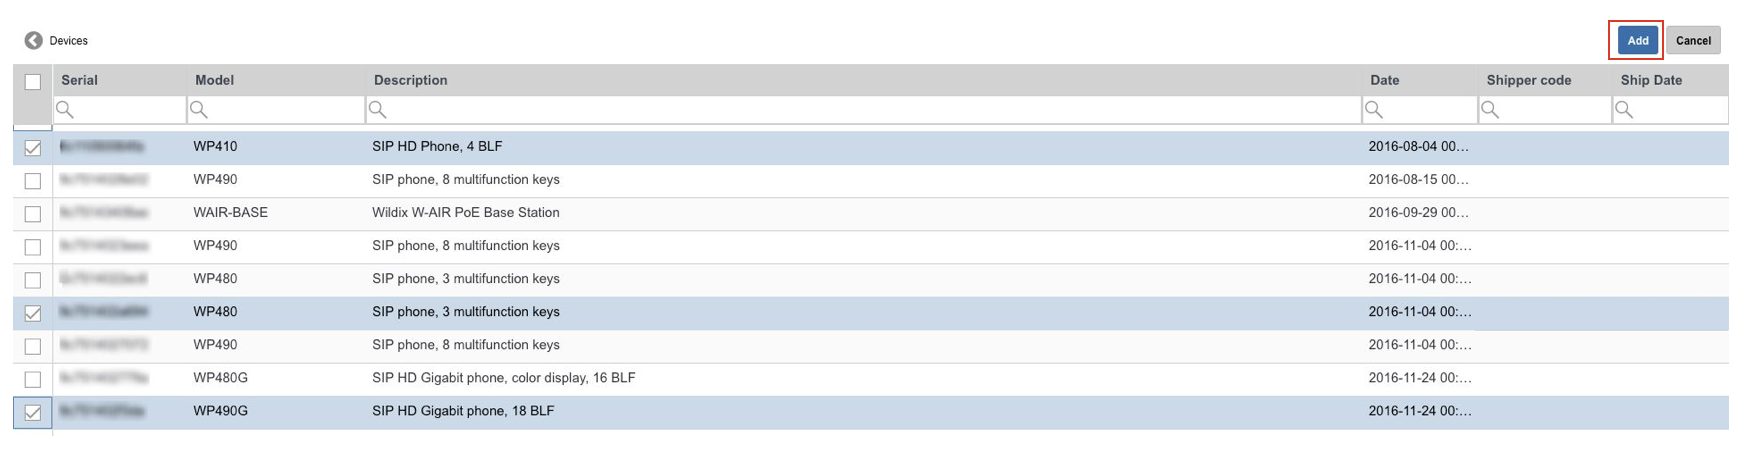
- Go to WMS -> Devices: provisioned devices appear on the list:
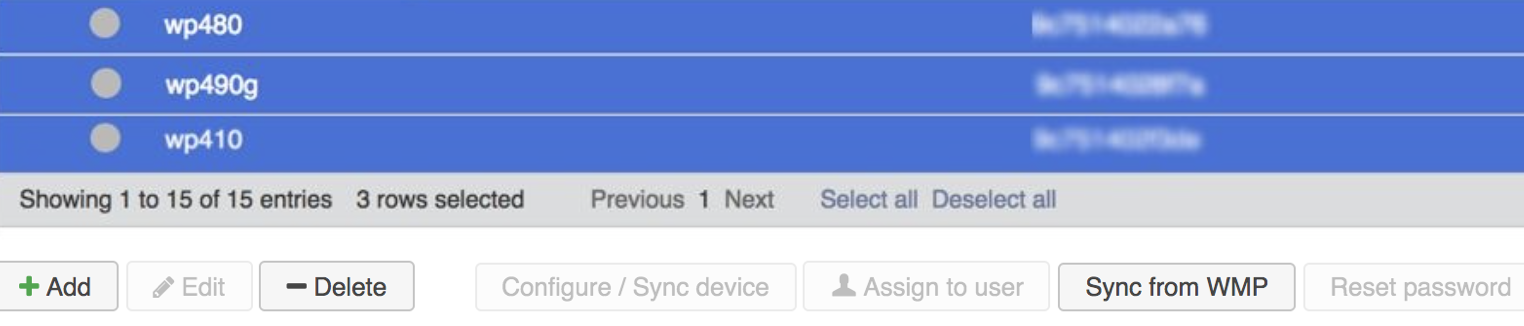
Note: There is no need to click Sync from WMP button as devices appear on the list right after they were added via WMP. At this step, only devices' Model and Mac address are available. When these devices are connected to the network, they will receive IP Address, devices' correct model, Firmware and Password will be indicated.
Sync from WMP can be used in order to add removed devices back to PBX with Per User licensing from WMP.
Direct access to devices
After you have provisioned devices, you can access them directly from WMS -> Devices.
Limitations:
- Feature is available only for Hardware and Virtual PBXs
- Devices must be in the same network as the PBX
To connect to the devices:
- Click on the green triangle icon "Connect" to allow the connection to this device:

- Click on the link “Open” to connect to the device:

Click on the red square icon “Disconnect” to close the access to the device: