WMS Settings Menu - Admin Guide
WMS Settings Menu Guide provides the basic information on the Settings options and explains how to set up various parameters.
Updated: June 2025
Permalink: https://wildix.atlassian.net/wiki/x/mBfOAQ
PBX
WMS network
Set up the connection between Server and Client PBXs.
Information on ports:
- Enable the port 443 TCP (or another custom secure port) and 1194 UDP on the side of the Server PBX
- Access to WMS network nodes between PBXs: incoming 1194 UDP
Note: Starting from 19 April 2022, only one PBX with active licenses is allowed per customer and this PBX automatically becomes main (Server) PBX. Other PBXs of the same customer are added to the same WMS Network as Client PBX and inherit the licenses from the Server PBX.
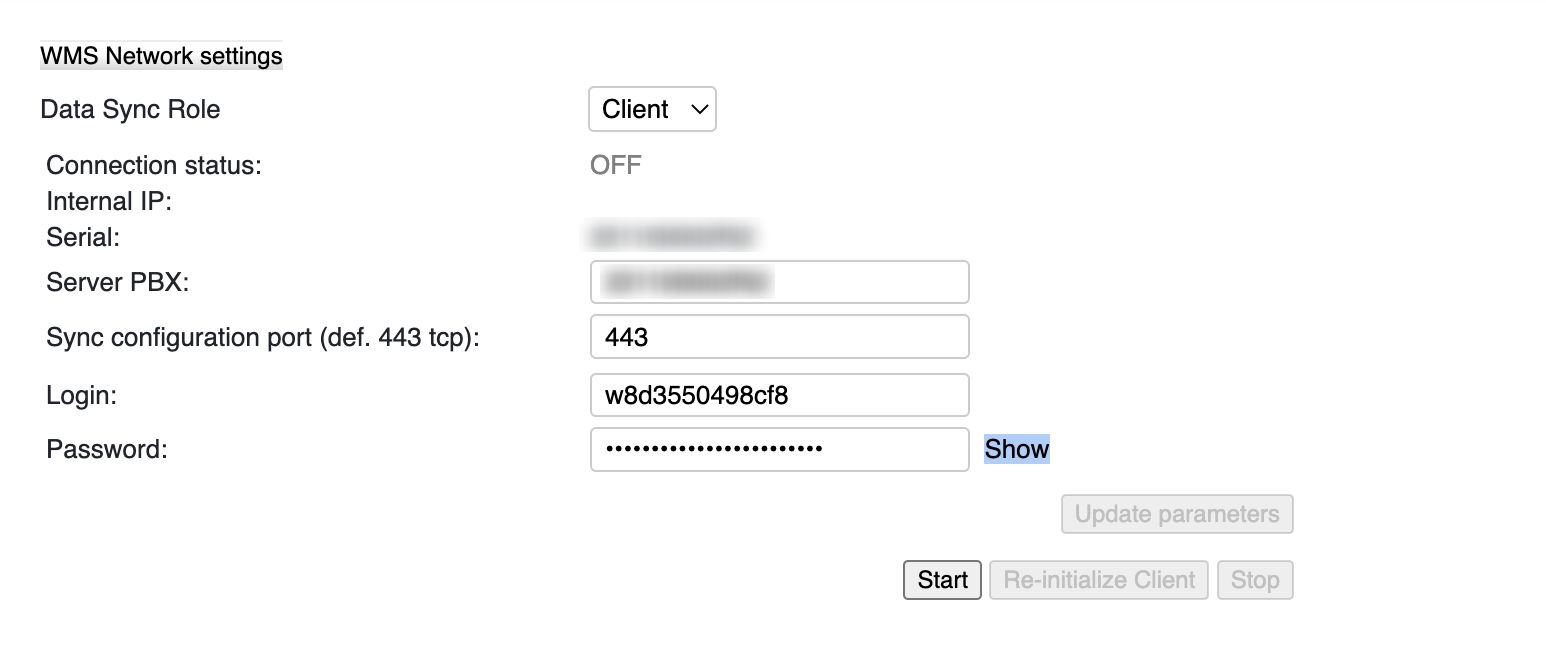
To set up WMS Network:
- Data sync Role: Server/ Client
- Server PBX IP (Client PBX): enter WAN IP address or *.wildixin.com domain name of Server PBX
- Sync configuration port: (443 TCP by default) communication port for sync of configuration
- Login: user name (must be the same on Server and Client)
- Password: password (must be the same on Server and Client)
Click Start button to activate sync between the PBXs (first start the sync on Server, then on Clients).
Click Stop button to deactivate the configuration sync for this PBX.
Click Generate credentials to generate login and password.
Note: It is only possible to automatically generate credentials, without manual editing.
Admin has to regenerate Server PBX credentials using Generate credentials option. After completing, update credentials also for all Client PBXs in WMS Network. If credentials are not updated, WMS Network will stop working.
Click Re-initialize Client button to restart the connection (only on Clients).
Click Update parameters button to update the parameters after they have been changed.
Server configuration example:

Client configuration example:
All the PBXs belonging to the same WMS Network can have only one admin user, which is the admin user of the Server PBX.
Enabling WMS Network on a PBX that was previously in use:
In case you enable WMS Network on a Client PBX that had been previously in use, users and groups will be deleted from the PBX. To make sure you keep the existing users, follow these steps:
- Export the CSV file of users of the Client
- Enable WMS Network on the Client
- Import CSV file to the Server
- Access the Client, select the newly exported users and move them from the Server to the Client
WMS network Server replacement procedure:
Proceed as follows:
- Move all users from Client (future Server)
- Disable WMS network on this Client
- Delete this Client from PBXs page on Server
- Make a backup on Server
- Apply this backup on Client
Language & region
Specify the PBX language and region settings:
- Language: select the default PBX language (do not confuse with the WMS interface language that can be set up in WMS -> Users -> select a user/ users and click Edit). All the system sounds will be pronounced in the selected language. Before selecting the language, make sure that the corresponding sound package is installed
Default Tone Zone: select your country / region
Country Code: select your country code for the correct routing of incoming and outgoing calls
Time zone: select your time zone for the sync with the external NTP server (NTP server section)
Sounds packages: select the sound packages to be installed
Each user can select a preferred language in Collaboration Settings -> Personal. This language is applied for Collaboration web interface, WP4X0 interface. All the System sounds (audio prompts) are also played in the language selected by the user, but only if the corresponding Sound package is installed. Otherwise, System sounds are played in the default Language of the PBX.
Call and chat history
On the CDS tab, you can see statistics of CDS space usage in WMS and configure data rotation settings.
The tab displays the total number of space used and a bar graph visualises the space distribution between backups, recordings, voicemail and free space.

Note:
- The CDS tab is available for root admin only, starting from WMS 6.06.20240425.1. Read more about CDS in this document: Company Data Storage Flow.
When the amount of used storage reaches 95%, an email is sent.
Hovering the mouse over a section on the bar graph, the number of used space is displayed for the relevant section.
In the table below you can find information about oldest file of different types and size of files, as well as data retention period. In the Data retention period column you can configure how long the data should be stored for different fily types:

Note:
- By default, 12 months are set.
- In case there is no CDS license, the maximum rotation period that can be set is 12 months.
Above the Data retention section you can find expected number of months the data might be stored in CDS taking into account the current rotation policy and data usage:

Note:
Expected data retention time is displayed at least one day after any data has been added to Company Data Storage.
The data is updated every day. To make a rough calculation of time the data will be stored, first the average MB usage is calculated. The average MB usage for X days is calculated by the following formula:
((Y-S)+((X-1)*A))/X
Where:
- Y = number of MB added
- S = number of MB removed
- A = average MB gain for the previous day
- X = number of days
Example:
Day 1:
10 MB added, 2 MB removed
Average gain is 8 MB/ day.
Day 2:
200 MB added (Y), 20 MB removed (S). Previous average gain is 8 MB (A).
((200-20)+((1*8))/2= 94 MB/day
Day 3:
50 MB added, 5 MB removed, previous average gain is 94 MB /day.
((50-5)+(2*94))/3 = 77.7 MB / day
Basing on the average MB gain per day, the rough calculation of expected number of months to store the data is performed.
The minimum expected retention time that can be displayed is 1 month. E.g. if there are 10 days or 20 days left – in both cases “less than 1 month" will be displayed in the “Expected retention time”.
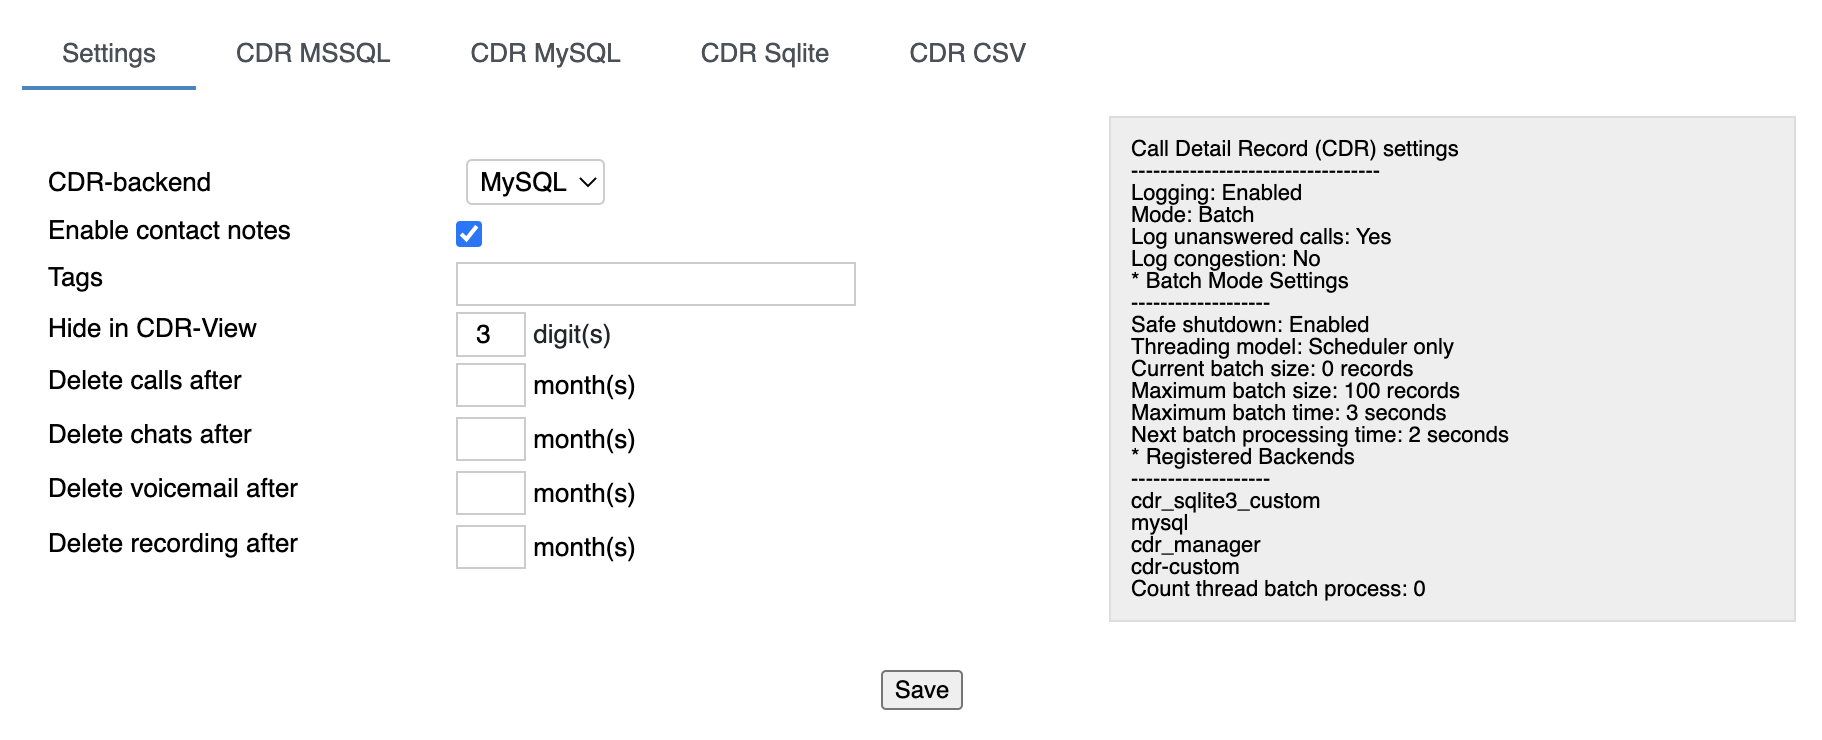
On the Settings tab, you can set up and select the backend used for storing chat history and call history (CDR). The following CDR storage modes are supported:
External server Microsoft SQL: MySQL or MSSQL. The server must be previously installed and must be reachable by the PBX
Internal database: CDR Sqlite. In this case CDR is stored on the PBX (on the backend specified for CDR storage). This backend is recommended for PBXs with 40 users and less
CSV file (Hardware / Virtual PBX): file can be saved to a storage device (USB or network share)

Other Settings:
- Enable contact notes: enables the Notes feature of Wildix Collaboration
- Tags: this field allows you to add tags; later on these tags can be selected via Dialplan application "Set" (see Dialplan applications User Guide) and set via Collaboration (see Collaboration User Guide)
You can add multiple tags separated by comma. Maximum character length in the "Tags" field is 255 characters.
- This change is applied to new PBXs automatically
On existing PBXs it's possible to change CDR table manually using the following command:
ALTER TABLE cdr
MODIFY lastdata varchar(255);
- Hide in CDR-View: allows hiding last X digits in CDR-View from phone numbers consisting of more than 7 digits. Must be used together with ACL “Can/cannot see full number in CDR-View” (see ACL rules and Call classes management Guide)
Delete calls / chats / voicemail / recording after: these options allow auto-deleting old calls, chats, voicemails and recordings after a specified number of months
Notes:
- Starting from WMS 6.07.20240906.1, the option Delete recording after is not displayed if Company Data Storage is activated.
- By default, the system clears data older than 12 months, if other values are not specified. Clearing of old data is run at 4 am every day.
- Deleting chat history in WMS Network.
In case WMS Network is enabled, chat history from CDR-backend will be deleted using the minimum value. For example, "Delete chats after 2 month" is set on Server PBX and "Delete chats after 1 month" is specified on Client PBX -> chats will be deleted after 1 month (the value of Client PBX is applied).
Limitation: in case of applying backup, empty icons for Call recordings and Voicemails that had been deleted, are still present in CDR-View (also on History page for call recordings).
Step 1. Enable connection to the database
Go to tabs CDR MSSQL / CDR MySQL / CDR Sqlite - you must enable connection to at least one database (however all the modes - CDR MSSQL, CDR MySQL, CDR Sqlite and CDR CSV - can be enabled at the same time).
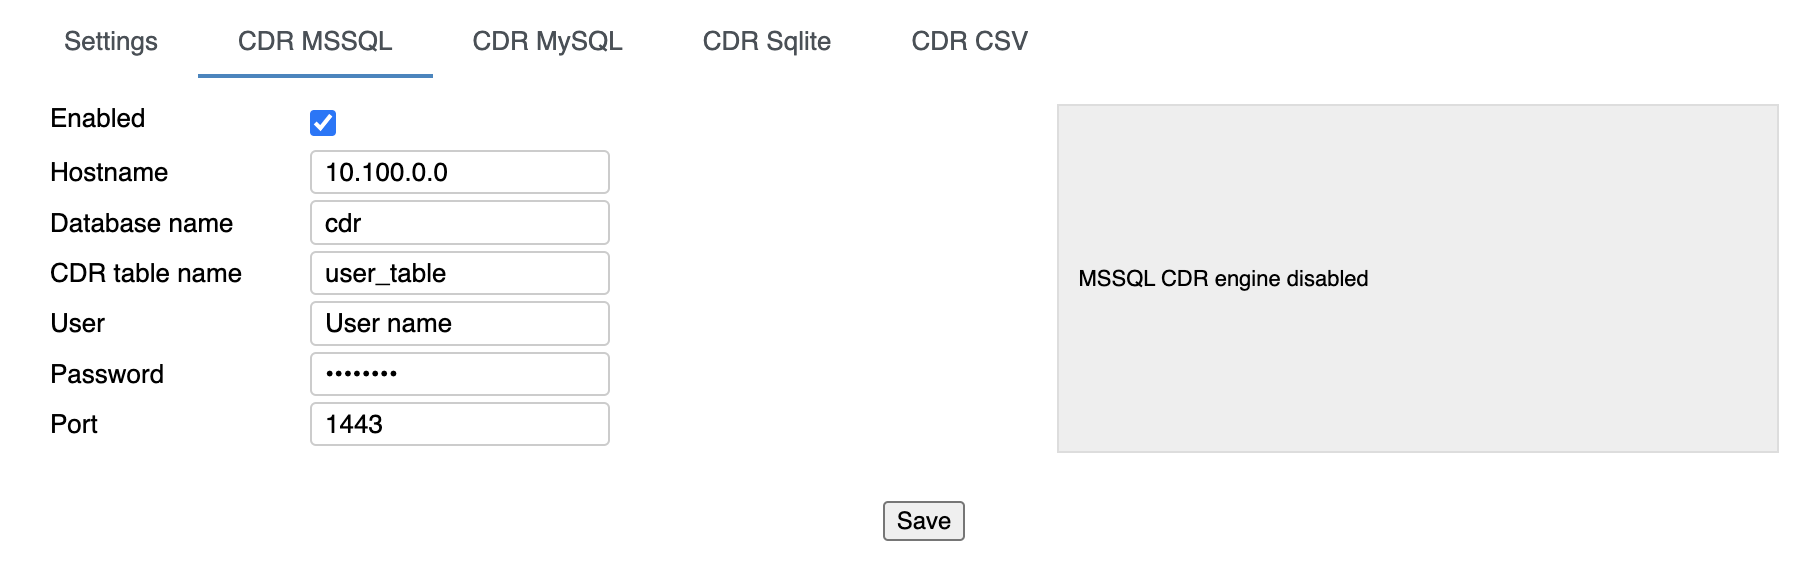
Example of MSSQL/MySQL configuration:
- Enabled: check the box to enable connection to the backend
- Hostname: the name or the IP address of the remote server
- Database name: the existing database where the CDR must be saved
- CDR table name: the name of the table that the PBX creates on the remote database
- User: the user to access to the server
- Password: the password to access to the server
- Port: specify the port used for connection
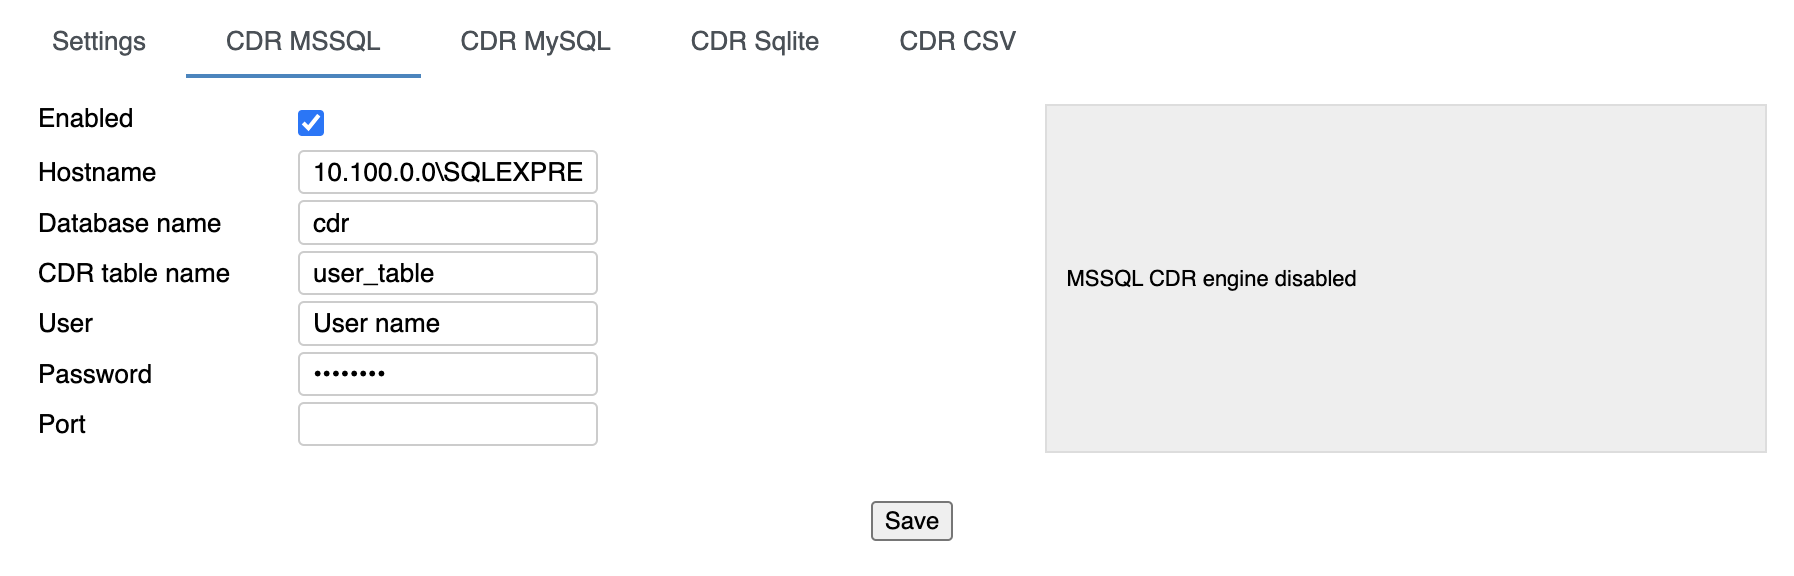
Note: It is also possible to enable connection to MSSQL instance.
Requirement: SQL Server browser must be running on MSSQL host. Please check the Microsoft documentation for detailed information on SQL browser.
To enable the connection, check the box "Enabled" and fill in the following data:
- Hostname: specify MSSQL instance in the form of ip_adress_of_SQL_server\instance_name. For example, 10.100.0.0\SQLEXPRESS
- Database name: the name of database where the CDR will be stored
- CDR table name: enter the name of the table created by the PBX on MSSQL Server
- User and Password: enter the credentials to access to SQL Server
- Port: there is no need to specify the port when connecting to MSSQL instance. By default MSSQL itself listens on TCP port number 1433, but for instances the TCP port is dynamically configured
Step 2. Select the backend for CDR storage (Hardware, Virtual PBX)
- Go to the tab Settings to select the backend that will be used for displaying CDR statistic. You can choose only one backend
- Click Save to save the configuration
For each backend there is a log shown in the right part of the screen, with the actual status and eventual problems and errors:
SIP-RTP
General PBX parameters and parameters for the voice transport:
- Auto discover external IP address (Hardware, Virtual PBX): if enabled, uses DynDNS url specified below to discover the external IP
- DynDNS website url (Hardware, Virtual PBX): url of the service to discover the external IP
- External IP address (Hardware, Virtual PBX): external IP address manually set up
- External secure port (Hardware, Virtual PBX): (default 443): option to use a different port for TLS connections
Use only https (Hardware, Virtual PBX): If enabled, all http connections are redirected to the port 443 or the alternative https port (if configured)
Note: the parameter is enabled for Cloud PBXs by default.
- Random music on hold: if enabled, music on hold to be played back is selected randomly by the system
Default music on hold: select default music on hold
Note: Music on hold is selected using different Dialplan applications; in case this option is enabled, files present in the selected Music on hold directory of the Sounds menu, will be played in a random order.
- RTP start port / RTP end port (Hardware, Virtual PBX): set up the port range out of which the RTP ports are dynamically taken, normally 10 000 : 15 000
- Outgoing registration timeout (seconds): set up timeout for SIP registrations on the PBX, for stable connections it’s better to augment this value to reduce the network traffic
- Jitter buffer (min / average / max delay): set up the jitter buffer delay values
RTP / T.38 ToS / DSCP and SIP ToS / DSCP: optimal values are set up by default for these parameters and should be changed only if necessary
More information: How to set DSCP QoS for Wildix devices and Web Phone.
Important: after having changed DSCP value, to apply the changes in WMS network, it is necessary to restart WMS network in WMS Settings -> PBX -> WMS Network.
Auto add new devices in local networks (for 2 hours) (Hardware, Virtual PBX): when enabled, devices are added and provisioned automatically in local networks. After 2 hours the option is automatically disabled
- Custom Direct RTP Subnets: the networks that are considered local by the PBX and on which the wideband codec usage is forced
TLS Certificate (*.crt)(Hardware, Virtual PBX): upload a TLS certificate file
Generate certificate for SIP-RTP page on LINUX system:
- openssl genrsa -des3 -out server.key 2048
- openssl rsa -in server.key -out server.key
- openssl req -sha256 -new -key server.key -out server.csr -subj “/C=IT/ST=TN/L=My City/O=My Company/CN=examplecompany.com” (use your country instead of IT (Italy) and your region instead of TN (Trento))
- openssl x509 -req -sha256 -days 3650 -in server.csr -signkey server.key -out server.crt
Output: server.crt server.csr server.key
Upload server.crt and server.key to WMS Settings -> PBX -> SIP-RTP page.
This certificate serves for all types of connections, including SIP-TLS, HTTPs-TLS, XMPP-TLS.
LIMITATION: certificate should not be protected by password.
- TLS Private Key (*.key) (Hardware, Virtual PBX): upload a TLS private key file
Note: Wideband codec is forced for all devices (g711 always has higher priority compared to g729).
If you want to enforce g729, this can be done via Dialplan configuration (Set application -> Codecs -> choose the preferred option).
With wideband codecs, the following priorities apply:
- opus
- alaw
- ulav
- g729
Hotel integration
Enable integration with Oracle / Fidelio PMS and other hotel management systems that support FIAS protocol.
Refer to the Hotel Integration Guide for detailed information.
Integrations
Cloud integrations
Note: In case of WMS version lower than 6.05.20240119.1, the tab is named Calendars.
Enable integration with:
- Google Calendar: refer to the guide How to set up and use Google Calendar integration for more information
- Microsoft Teams Presence: for detailed information, check the guide teams4Wildix - integration of Microsoft Teams with Wildix PBX - Documentation
Webhook: refer to the document How to set up Webhook integration for more information
- HubSpot integration (x-bees and Collaboration 7): refer to HubSpot Integration – Admin Guide for more details
- Salesforce integration (x-bees): refer to Salesforce Integration with x-bees – Admin Guide for more details
- Client integrations (x-bees, Collaboration 7): for detailed information, check the document How to set up Client integrations
Zoho Integration
Enable integration with Zoho CRM. Refer to Zoho CRM integration with Wildix PBX for detailed information.
Microsoft 365
Enable integration with Microsoft 365 including calendars and phonebooks sync. Consult Microsoft 365 Integration Guide for detailed instructions.
Applications
- Server to Server
The option is available only for a super admin user!
S2S authentication via token for Wildix PBX API significantly increases security and protects your PBX from potential attackers.
Documentation and instruction on how to generate the token and how to sign it with a secret key, is available on your PBX: https://<pbx_host>/api/v1/doc/#tag/Authentication/bearer
- OAuth 2.0
The option is available only for a super admin user!
C2S (client to server) authorization provides the safe use of APIs for integrations without session cookies and without using basic authentication.
Documentation is available on your PBX: https://<pbx_host>/api/v1/doc/#section/Authentication/oauth2
- Simple Token
The option is available only for a super admin user.
To ensure the best security, it is recommended to use Server to Server or OAuth 2.0 authentication, if possible.
Simple Token authorization is a simplified method of Wildix PBX API integration via access key (token).
Documentation is available on your PBX: https://<pbx_host>/api/v1/doc/#section/Authentication/Token
Token expiration
Starting from WMS versions 6.10.20250609.6 and 7.02.20250609.3 when creating any token (S2S, OAuth2 and Simple Tokens), you have to define its expiration period (e.g. 30 days, 90 days):

Starting from WMS versions 6.10.20250620.2 and 7.02.20250620.2, admin gets email notifications:
- each time a new token is created

- 7 days before a token expires
- when a token has expired
Analytics
Enable x-caracal ACD Stats. Refer to x-caracal Guide for detailed information.
Callback URLs
Callback URLs allow opening Zoho CRM or other CRM systems upon receiving or placing a call and pass parameters (static parameters or supported variables).
Refer to How to set up web application integration via Popup URL for detailed information.
Verify certificate (optional)
You can enable the validity verification of the CRM server. Enter your credentials for basic authentication.
Limitations:
- Digest authorization is not supported
- Host certificate verification is not supported. Only certificate's validity is verified (means the certificate is issued by the certification authority and not self-signed)
- Redirects are not supported (for example, from http to https)
Features
Manage such PBX Features as:
Cloud Analytics (available from WMS 6.03.20230630.3): enables events sending/ data gathering for Cloud Analytics (CDR-View 2.0) in Collaboration, Collaboration 7 and x-bees. Starting from WMS v. 6.06.20240530.1, it is activated by default on all types of PBXs. Also, enabled Cloud Analytics is required for Webhook integration (for more information, check the document How to set up Webhook integration).
Note:
- If sending of the events was enabled and then disabled, the old data is still stored in the data base. For the old data be removed, a ticket to customer care has to be opened.
- On versions prior to WMS v. 6.06.20240530.1, Cloud Analytics is enabled by default if a PBX or whole WMS Network are running in the Cloud. In case of a standalone Virtual/ Hardware PBX, or if there is a mix of Cloud and Virtual/ Hardware PBXs in a WMS Network, Cloud Analytics should be enabled manually by admin.
Important: If you need to disable Cloud Analytics on a PBX with x-bees or Collaboration 7 licenses, please contact Wildix Technical Support, as the Cloud Analytics setting may affect presence sync in x-bees/ Collaboration 7.
On a PBX with Collaboration licenses Cloud Analytics can be turned off without additional configuration from the Technical Support side.
Collaboration call control (available from WMS 6.03.20230630.3): enables Call control mode for Collaboration. By default, only 1 active Collaboration session is permitted. However, there is an option to allow the second Collaboration tab – in Call Control mode. This can be used, for example, for media devices when connecting via remote desktop. The option is particularly practical for teams4Wildix integration. Once the feature is activated, an additional option appears on the Collaboration login window – Call Control only.
Use case: User can set "Call control only" mode to be automatically enabled by adding a parameter in the URI (useful when it is needed to share the link among all employees or bookmark the page)
How-to: add ?sip=no to PBX domain name -> https://pbxname.wildixin.com/collaboration/?sip=no
- (available from WMS 6.04.20231020.2): enables location-based MFA on the PBX, which uses users' location (determined by the IP address) to confirm their identity. If the IP address appears to be from an unfamiliar location, users need to confirm the IP address via email. Starting from WMS 7.01, location-based multi-factor authentication for Collaboration is enabled by default. Read more in the documentation: Security Policy at Wildix
- Allow Collaboration (available from WMS 7.01.20250512.1): allows / forbids access to Collaboration on PBXs with WMS 7 version. When the checkbox is disabled and user tries to log into Collaboration, there is a notification that Collaboration access is disabled and user is suggested to use Collaboration 7 instead.

Security
CORS
Configure domain whitelist to protect PBX from cross-site request forgery (CSRF) attacks.
Refer to Domain Whitelist (Allow Origin) Configuration Instruction for detailed information.
Important: Trusted domains must be added to a domain whitelist! Please note that any Web API / PBX API integration will stop working if the domain is not added.
Trusted IP list
Note: The support starts from WMS 6.02.20230306.1.
Enter the IP addresses you want to add to the trusted list. Any trusted IP addresses for reaching the PBX should be indicated here.
Note:
- Allowed values are: valid IP addresses (subnets are not allowed)
- Maximum number of IP addresses that can be added: 32

TLS
Enable Allow TLS 1.0, TLS 1.1 option. To ensure better security, Wildix has implemented TLS 1.2, enforcing it by default for newly created systems and right after PBX reset.
However, there is a number of deprecated devices that don’t support TLS 1.2, for example, WP600AXX, WP R1/R2, W04FXOR2, W04FXSR2, and W01/02 FXS R1. Documentation: List of Wildix devices EOL that do not support TLS 1.2.
The option Allow TLS 1.0, TLS 1.1 ensures support and backward compatibility of such deprecated devices. It is enabled by default after the upgrade.
Important: If you disable the option Allow TLS 1.0, TLS 1.1, the devices that don’t support TLS 1.2 stop working.
Note: For more information on why it is important to switch to TLS 1.2, check out our article TLS 1.2 and You: Why You NEED to Upgrade Your Security.
Active Directory Single SignOn via Kerberos (Negotiate)
You can set automatic Single Sign-On via Active Directory.
Refer to Active Directory Single Sign-On for detailed description.
Active Directory Single SignOn via SAML 2.0
Note: The support starts from WMS 6.07.20240906.1.
It is possible to configure support of Active Directory Single Sign-On via SAML 2.0 protocol.
Check out the document How to configure support of Active Directory SSO via SAML 2.0 protocol for instructions.
System
Network (Hardware, Virtual PBX)
Set up the network parameters based on the selected network scenario: you can keep the data and voice networks separated or shared.
On Virtual systems, Network parameters are available in read only mode.
Shared data and voice networks scenario
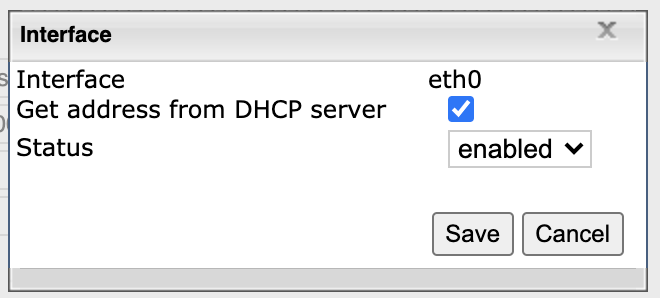
In this scenario the single connected port is WAN eth0, the IP address is received from the DHCP server.
- WAN eth0 (dhcp) interface gets the IP address from DHCP server, LAN eth1 interface is inactive:
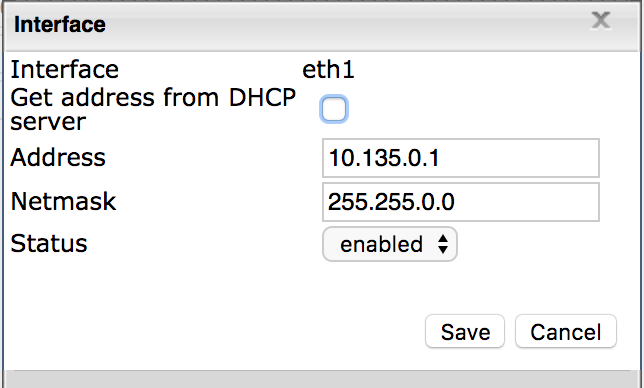
Separated data and voice networks scenario
In this scenario the PBX itself functions as a DHCP server. WAN eth0 port is configured as DHCP client, LAN eth1 port must be set up with the static IP and DHCP server enabled. The default address of the eth1 port is 10.135.0.1.
- WAN eth0 interface gets the address from DHCP server: LAN eth1 interface – static:
Read more about network scenarios: Choosing a network scenario (Hardware PBX).
After you have changed the network settings, click Apply network settings to apply the new parameters.
WMS Network interface
- DMZ wtun0 (static) interface is used for connection to WMS Network. The interface cannot be edited unlike enth0 and enth1 interfaces

Options:
- Click + Virtual to add a virtual interface to be able to assign more than one IP to a physical interface
- Click + Vlan to add an interface with VLAN settings
- Click Enable routing eth0 to enable devices connected to other interfaces to use the data connectivity of the PBX (WAN port)
- Click Enable traffic shaper eth0-eth2 to create a bridge between the two interfaces and give a higher priority to the data traffic coming from eth0; more information in Choosing a network scenario (Hardware PBX)
- Click - to delete the selected virtual interface
- Click Edit to edit the settings of a selected interface (IP, subnet, status)
Routing and gateways
If the PBX’s WAN interface is connected to the network with the active DHCP server, the entry is automatically created in this table, containing the gateway assigned by DHCP server.
- Click +Add to add a new interface
- Click Edit to edit the settings of a selected interface
- Click -Delete to delete a selected interface
Hosts
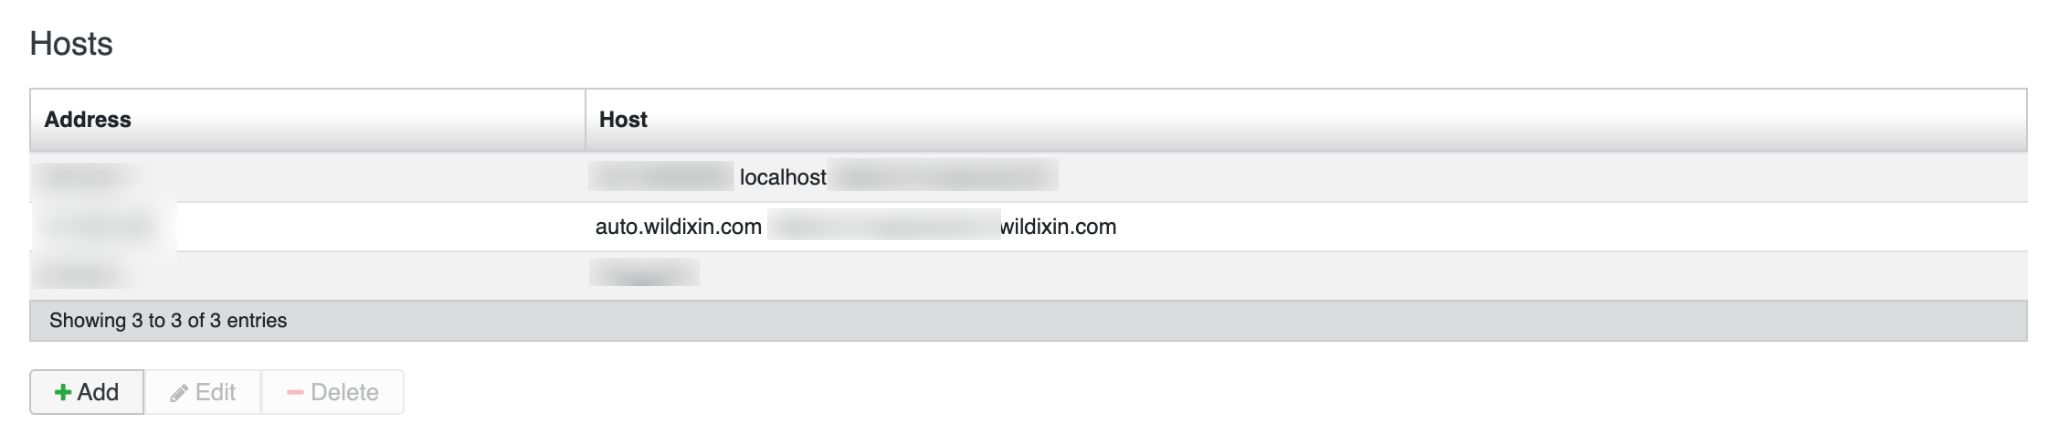
- Click +Add to add a new host. Enter its address and hostname
- Click Edit to edit parameters of a selected host
- Click -Delete to delete a selected host
You can also modify the DNS server and System name. System name is used as the PBX alias name – *.wildixin.com domain name.
Each PBX with Public IP can be accessed by either its serial number or by the value set up in System name:
[PBX_serial_number].wildixin.com
[PBX_system_name].wildixin.com
If you modify the DNS server, click Apply DNS service to apply the new parameters.
HTTP proxy client (Hardware, Virtual PBX)
Allows you to enter the data for connection to a proxy server.
Parameters:
- Enable HTTP proxy for Support VPN: this option allows you to activate remote support and connection to Wildix server in case HTTP proxy is used
- Proxy host: IP address of the proxy server
- Port: listening port of the proxy server
- Proxy authentication method: authentication method used by server (None, Basic, NTLM)
- Login: user name (if required by authentication method)
- Password: password (if required by authentication method)
LDAP server
Set up connection to LDAP server. This feature allows you to use a PBX as an LDAP server for users sync.
Parameters:
- Enable external connections to LDAP: enables access for external connections to the PBX
- Allowed host(s): security parameter allowing access only to the subnets entered here (e.g.: 192.168.0.0/24, 10.0.0.0/8); when using Overlay solution, enter here the IP of the Overlay Core
- Password: allows you to set up a password for connection to the server
DHCP server (Hardware, Virtual PBX)
If the chosen network scenario uses the service of the DHCP server of the PBX, make sure that the options of the service are enabled with the correct settings.
DHCP server is integrated for auto provisioning of supported devices. It’s possible to enable the server for the initial configuration of the devices and successively disable it, otherwise, enable the parameter Deny unknown clients.
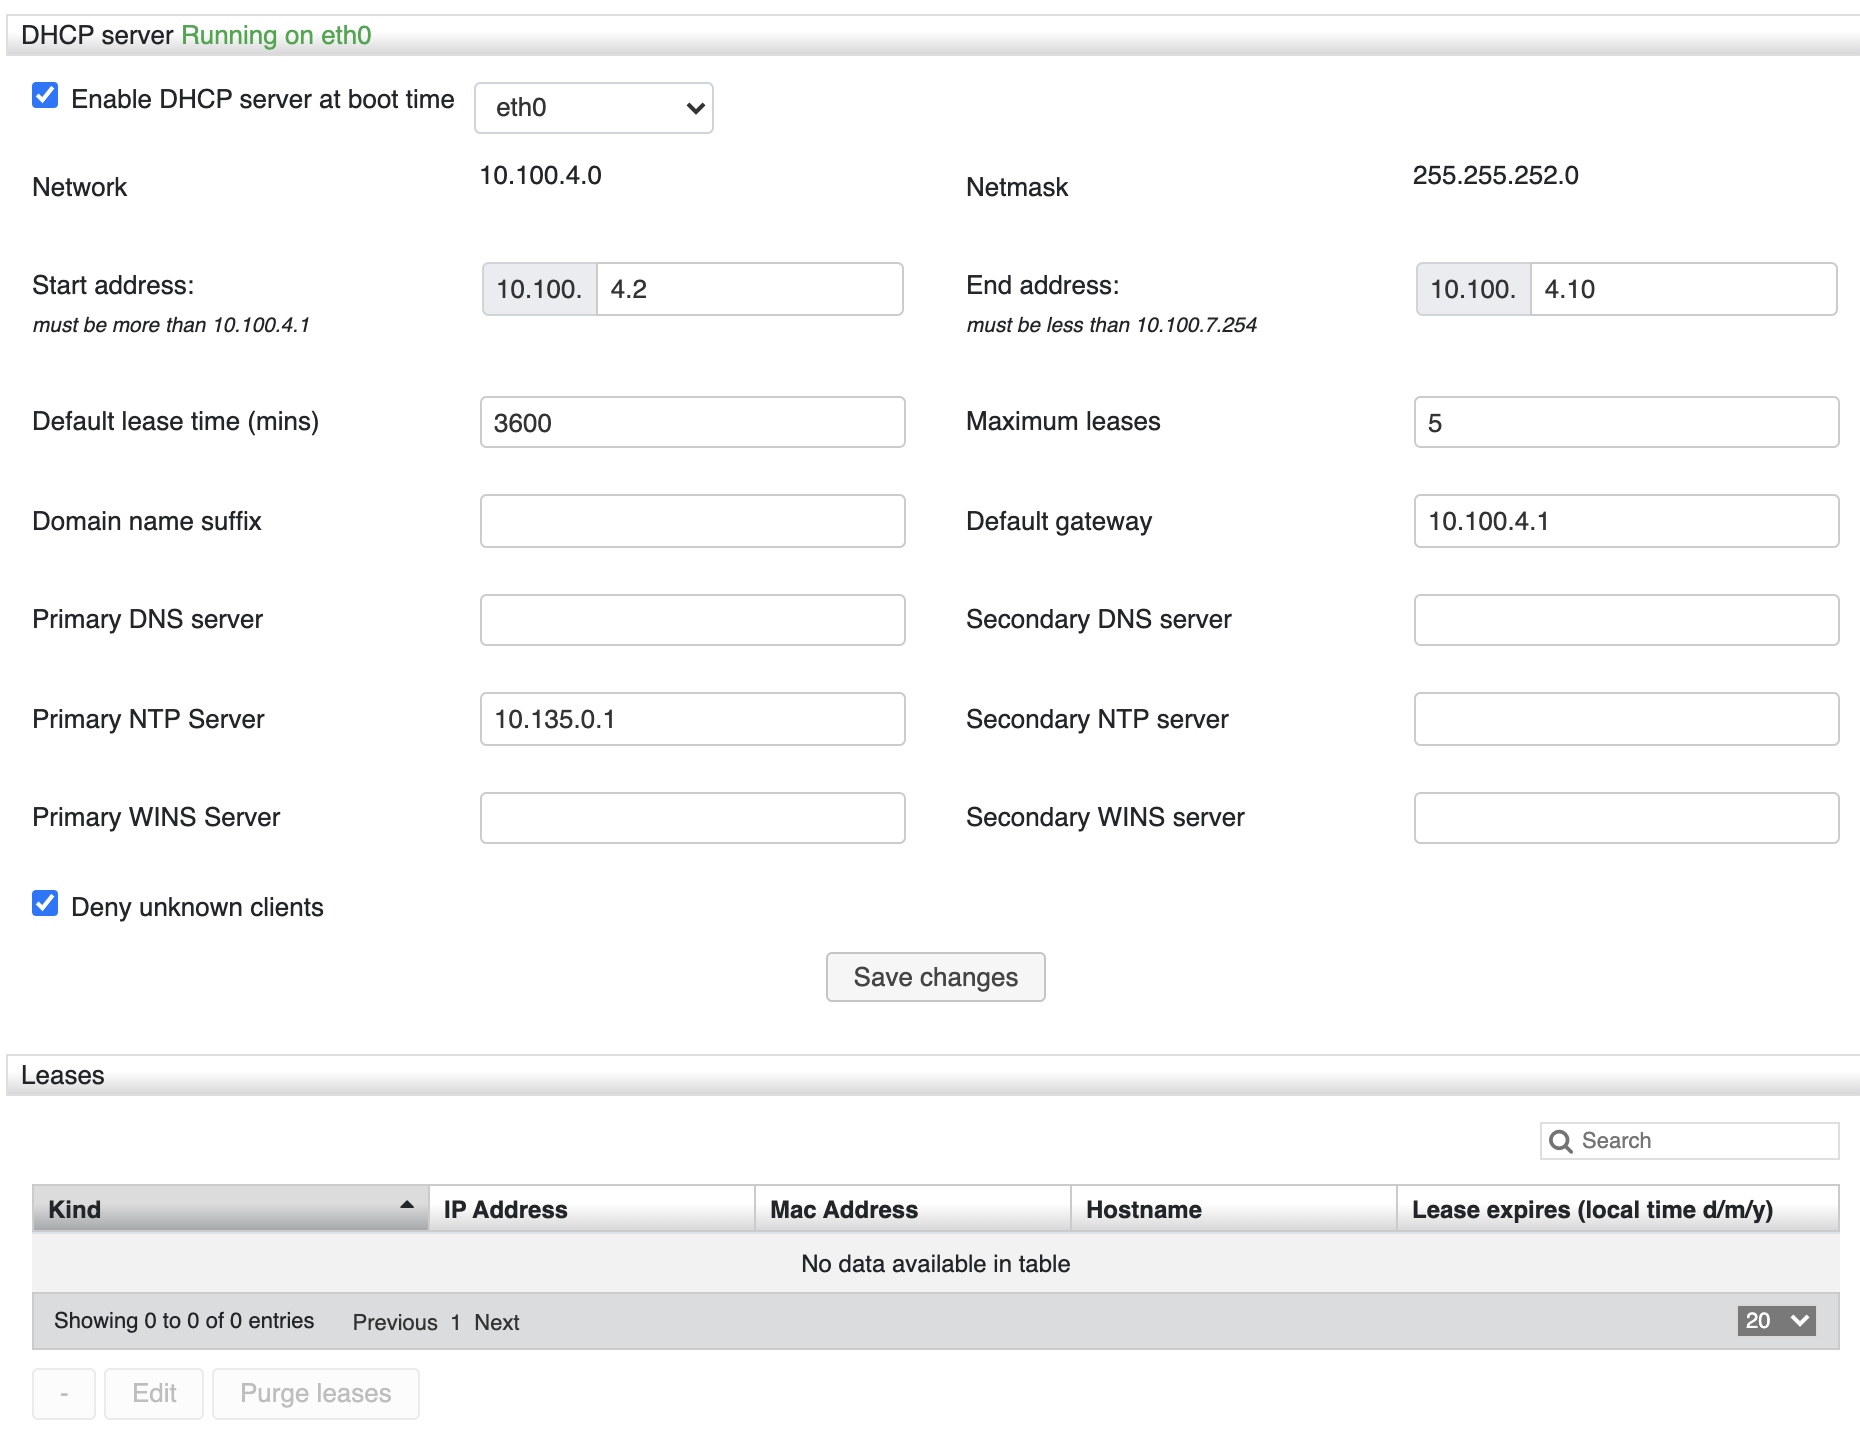
On WMS 3.88 click + button to expand DHCP server parameters:
- Enable DHCP server at boot time: enables internal DHCP server and allows you to select the interface on which the server is enabled (normally eth1)
- Start/ End address: range of IP addresses that can be assigned to hosts
- Default lease time (mins): minimum time period for lease duration
- Maximum leases: maximum number of leases that can be assigned
- Domain name suffix: if the hosts are inserted in the network which is managed by the domain controller
- Default gateway: IP address of the router or of the PBX (in case of LAN interface)
- Primary / Secondary DNS server: addresses of DNS servers
- Primary /Secondary NTP Server: addresses of NTP servers
- Primary / Secondary WINS Server: addresses of WINS servers
- Deny unknown clients: if enabled, IP addresses are not automatically assigned to unknown hosts
After you make some changes, click Save changes button.
DHCP option 176.
If you set DHCP option 176 for WP4XO phones, make sure that "VLAN id" data type is set as "string" on DHCP server and LLDP option (accessible on WP480G/490G, WorkForce, WelcomeConsole) on the phone's web interface in Network -> Advanced settings is enabled.
Note that on Linux like systems, DHCP option 176 values should be double-quoted. In case Dnsmasq is restarted, values are set to "string" data type.
Example in /etc/dnsmasq.d/dhcp.conf:
Options
dhcp-option=176, "L2Q=1,L2QVLAN=100"
Leases table
All the IP addresses which DHCP server has assigned to devices, appear in this table.
- To delete a lease, click - button
- To set up this IP address as static, click Edit button
- To release the previously assigned addresses, click Purge leases button
SMTP client
Enable the PBX to send notifications of the new voicemails, missed calls, chat requests, call recordings, faxes, etc.
Wildix Cloud PBXs offer default server for sending email notifications. Just enable Default settings option and click Save to be able to use the default server.
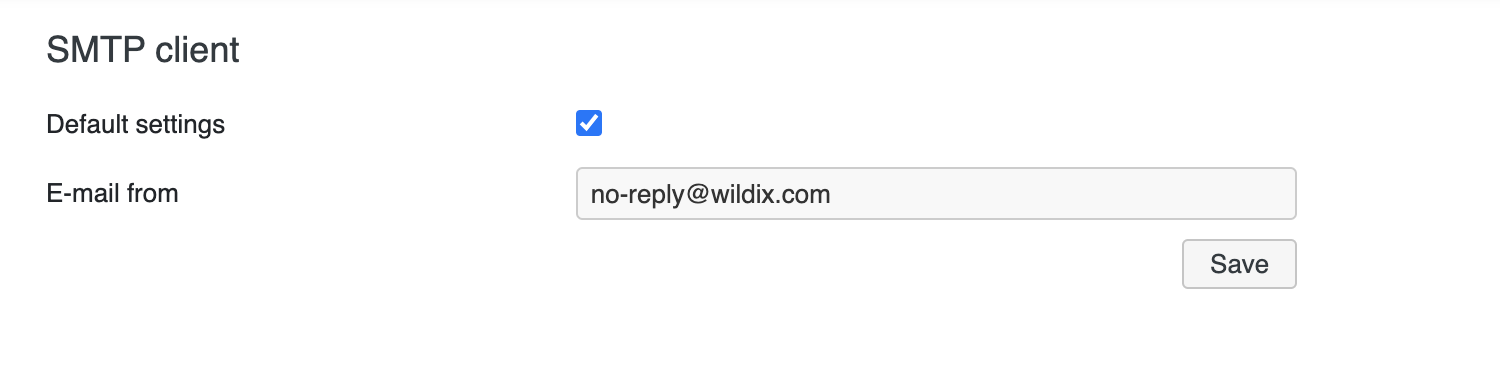
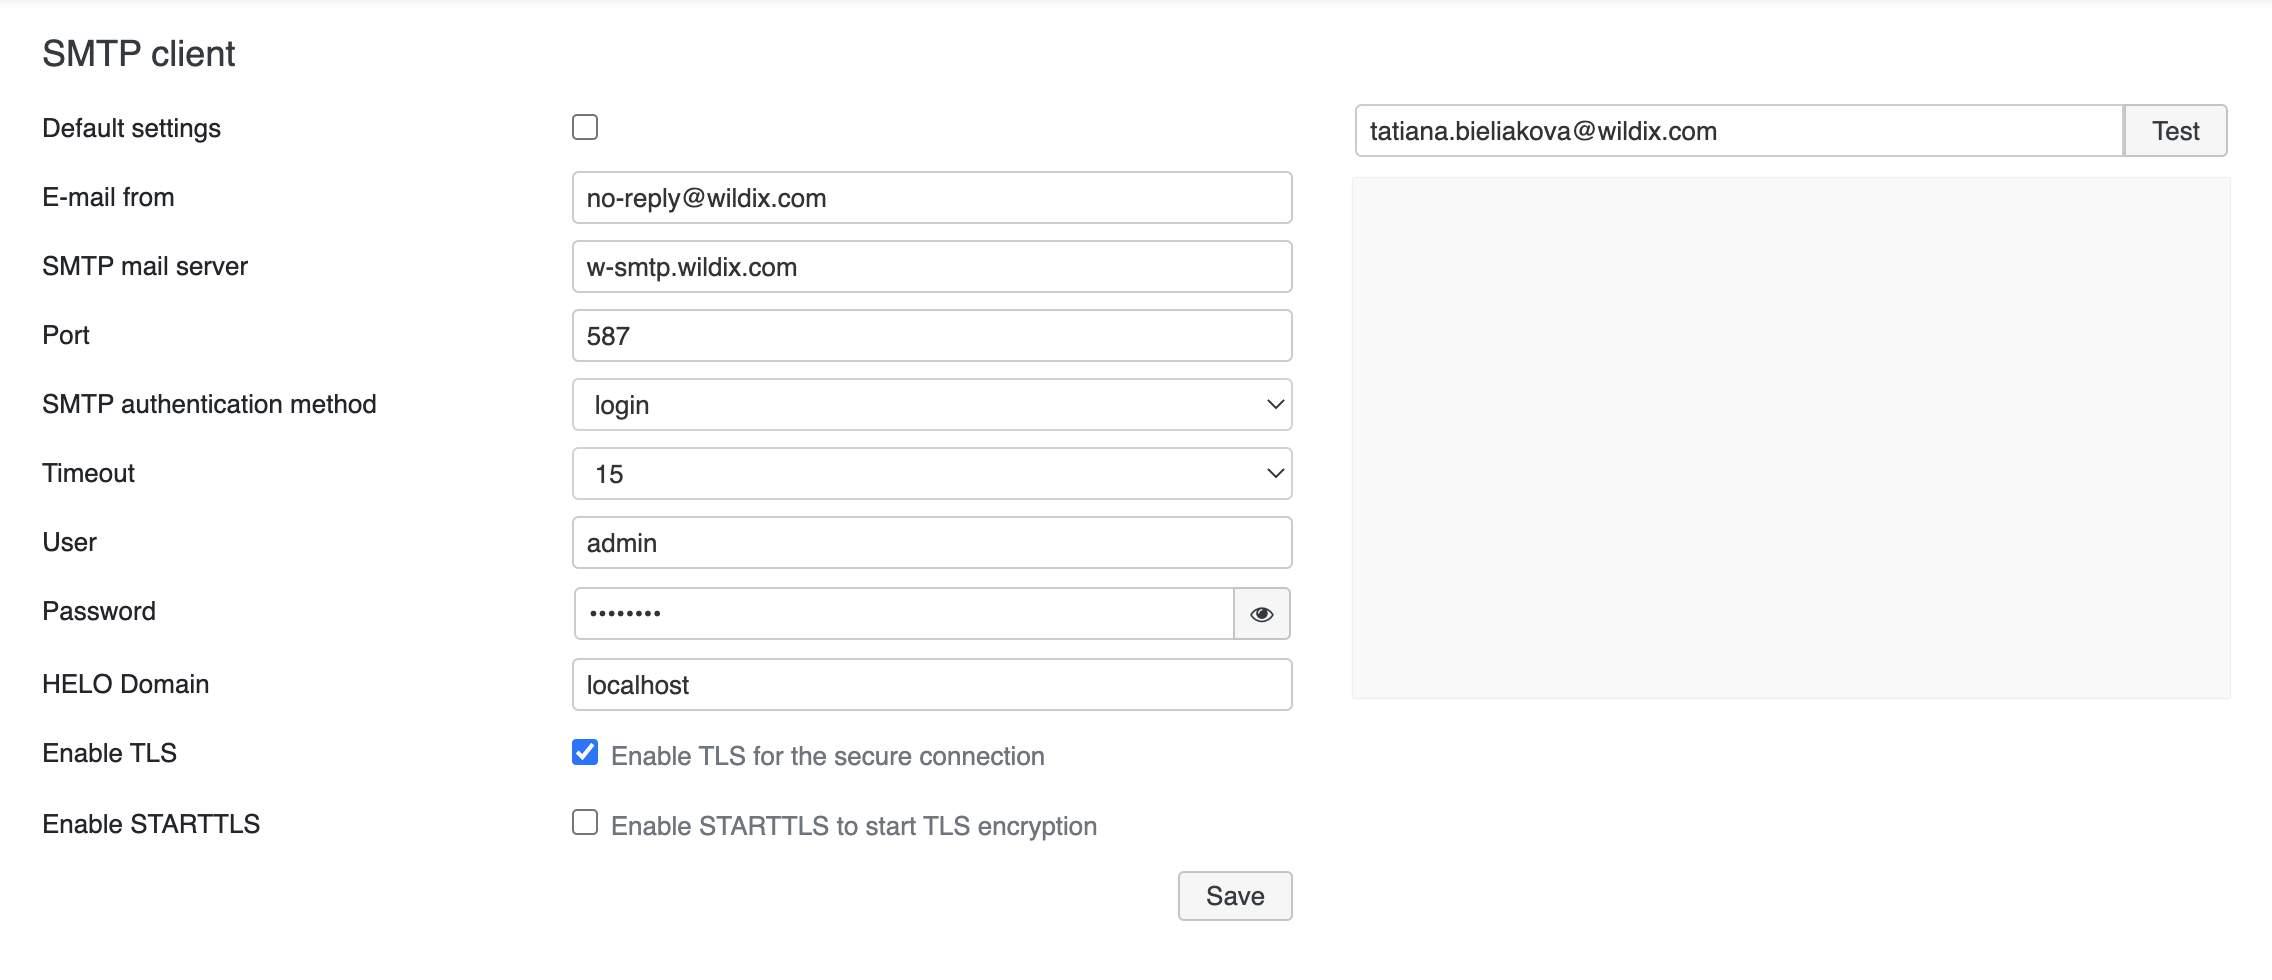
To activate SMTP client on Hardware and Virtual PBXs, enter the following parameters:
- Email from: address to be used by PBX to send emails
- SMTP mail server: server’s postal address used by the company
- Port: listening port of the SMTP server
- SMTP authentication method: choose the authentication method for the SMTP server
- Timeout: select the timeout for the SMTP server to send notifications
- User: user name to access the server
- Password: password to access the server
- HELO domain: domain defined for sending emails. Default value is “localhost”, change it in case anti-spam filters of the SMTP server block sending the message
- Enable TLS: TLS protocol enabled for the security of the connection to the server
- Enable STARTTLS: STARTTLS option enabled if provided by SMTP
After you have entered all the parameters, proceed as follows:
Click Save
To make sure that the entered parameters are correct, enter the email address into the field located in the upper right section and click Test
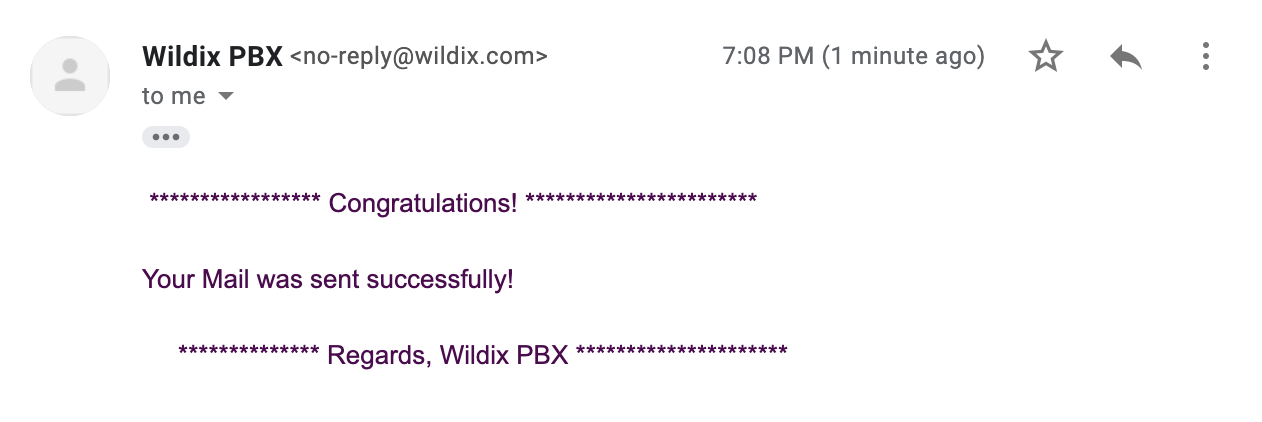
The logs are displayed in the field below and you receive the following email:
Note: in case you are having problems setting up SMTP client with Google account, proceed as below:
- Enable 2-Step Verification in your Google account settings (account settings of the user to access the server):
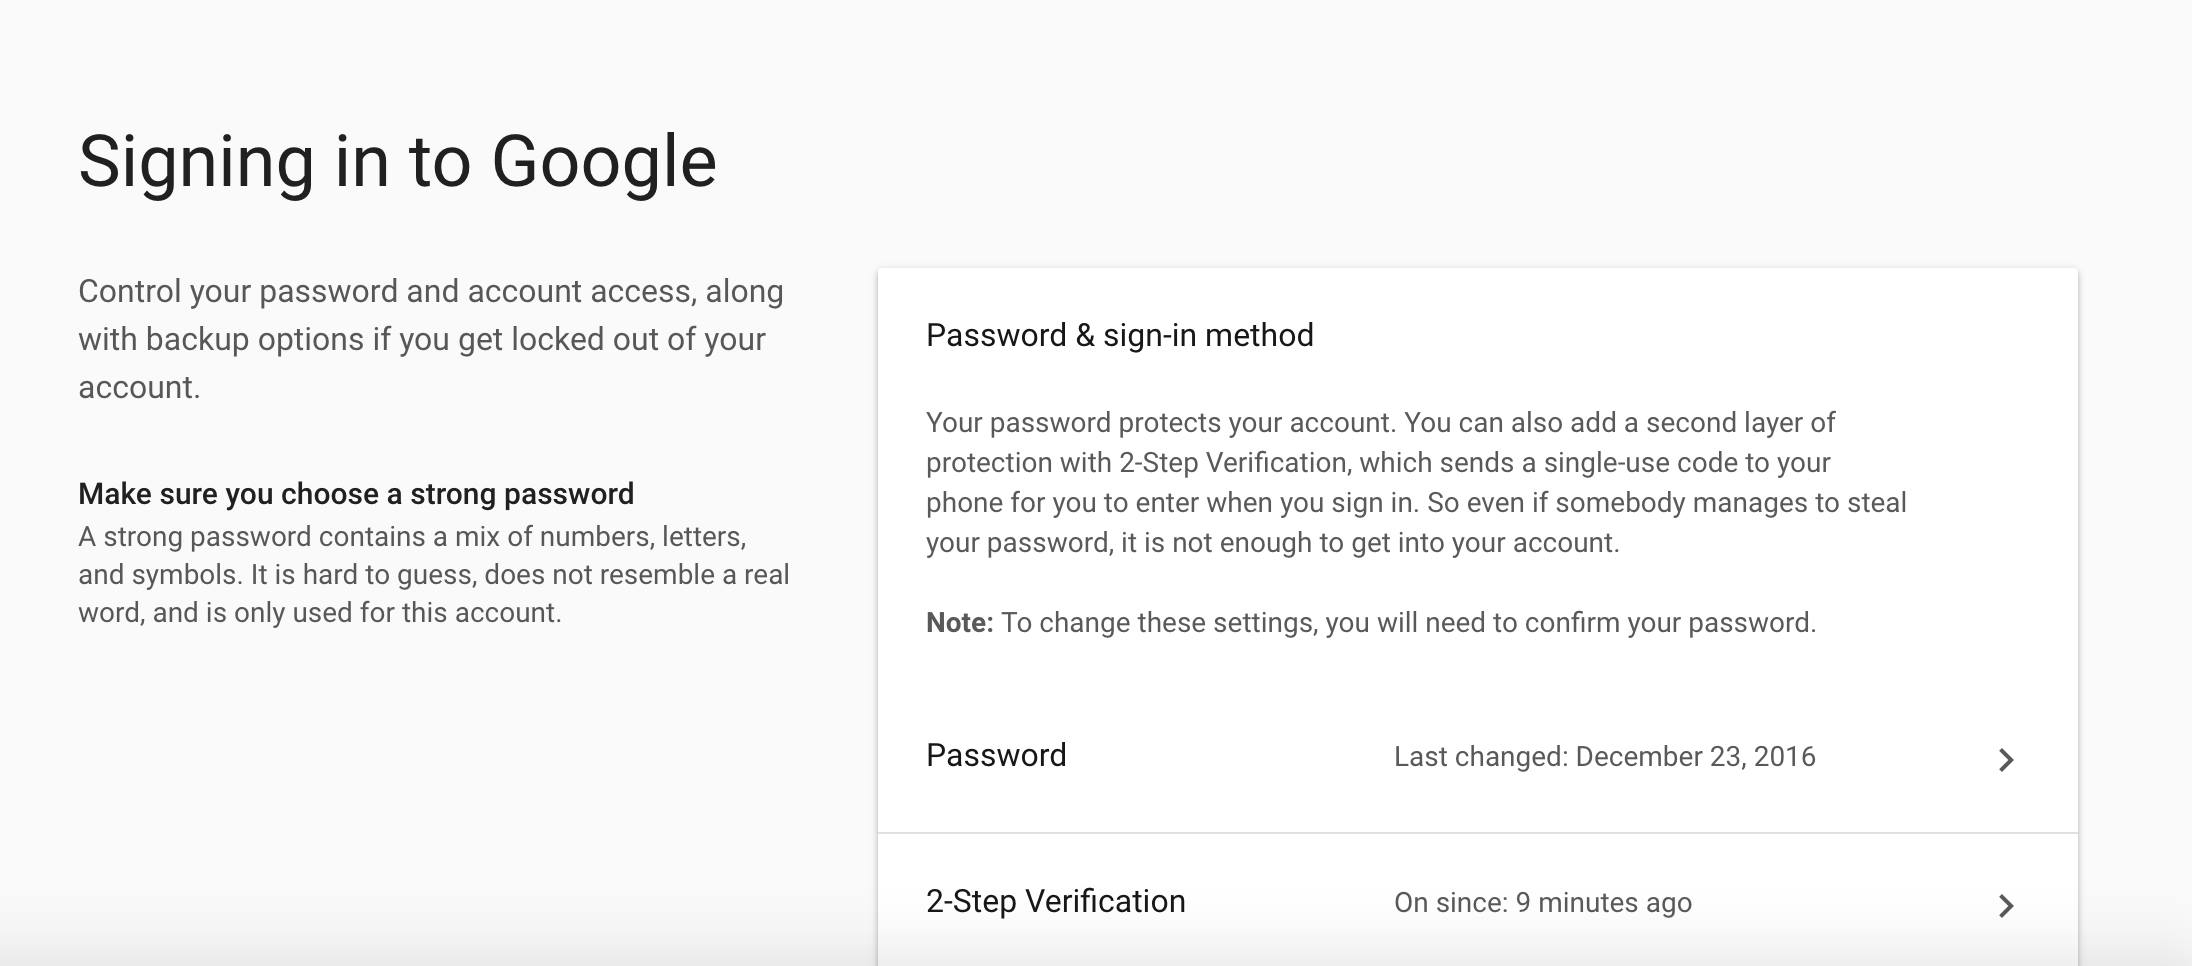
- Add Apps password (appears only after you set up 2-Step Verification)
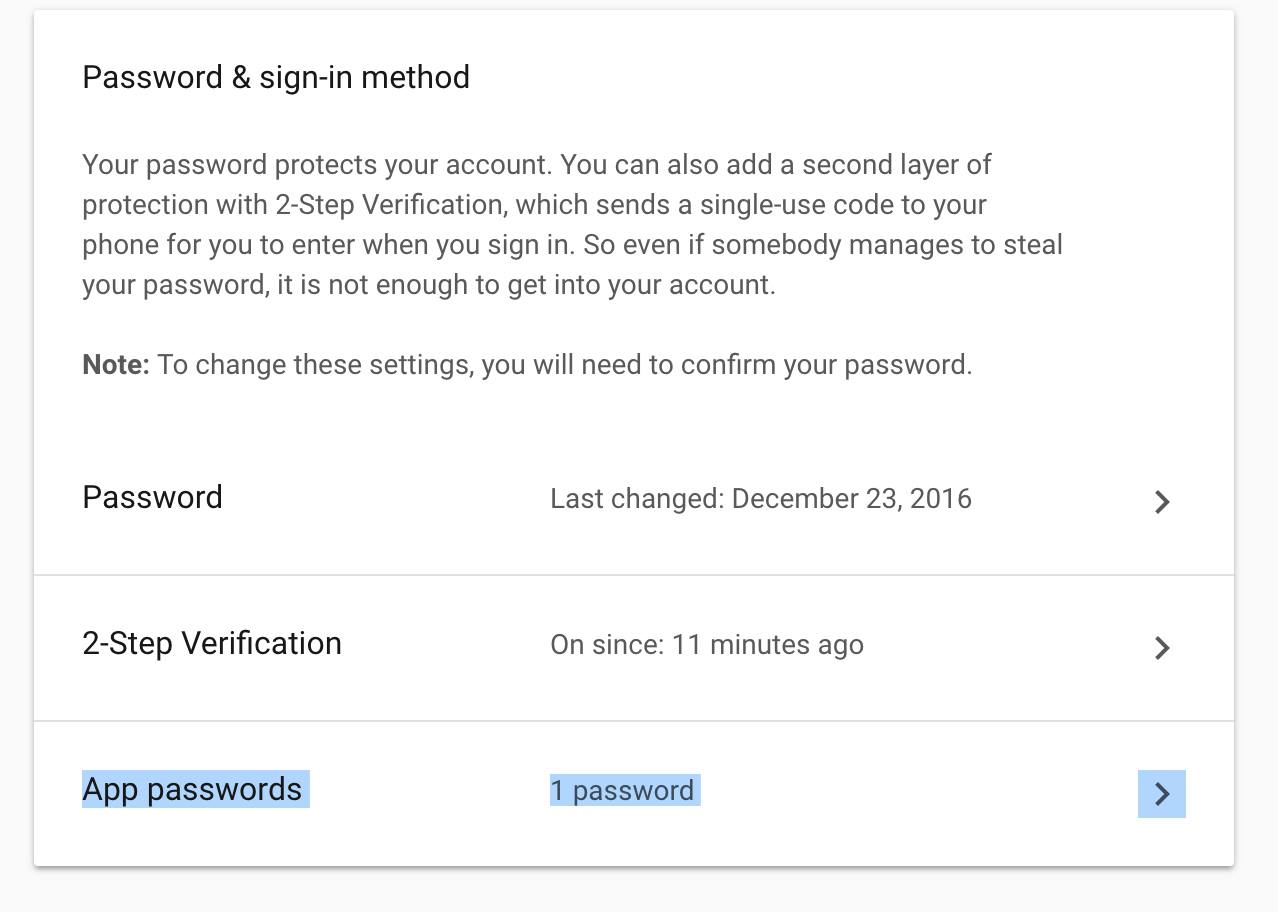
- Use this apps password for authentication in SMTP client. Insert it in the Password field
FAX/SMS server
Allows you to enable Mail2Fax and Mail2SMS services and specify the general parameters for FAX/SMS management.
For SMS sending, a GSM Media Gateway is required. For SMS Sending without it, use the option "Curl SMS send".
General parameters:
- Send a copy of sent and received faxes and sent SMS to this e-mail: this option allows you to enter an email address to which all the incoming and outgoing faxes are saved
- Standard SMS header: allows you to enter the header for SMS messages sent by PBX
- Remote PBX (for SMS sending): allows you to select the PBX in WMS Network to send SMS messages
- Fax delivery notification: allows you to enable fax delivery confirmation notification
Curl SMS send enabled: enable this option for SMS sending via HTTP request without registering GSM media gateway
Note: Curl SMS has a higher priority compared to GSM gateway. If the parameter is unavailable or incorrectly configured (incorrect login, password or wrong API request), then the message will be sent via GSM gateway.
Curl SMS send: the feature allows sending SMS via CURL request using third-party service or another PBX with a configured GSM trunk (using SMS API).
Note: Starting from WMS 6.02.20230306.1, in case SMS sent via CURL contains the following characters, they are replaced with a space: ' (single quote), “ (double quotes), \ (backslash), / (slash).
To send SMS via third-party service, use the list of of curl command examples and possible variables (click ? button to see the list). For example, curl –request POST \ --url https://www.maitaly.it/maws20/default.asmx/SendSimple? \ d "user=user_name&psw=user_pass&num=(TO_NUMBER)&body={MESSAGE}&idserivce=4&from={FROM_NUMBER}"
To send SMS via another PBX with a configured GSM trunk, you can use the following request: curl -k -X POST -u user:password --url "https://<PBX_IP_Address>/api/v1/originate/sms" --data-urlencode "number={TO_NUMBER}" --data-urlencode "message={MESSAGE}", where <PBX_IP_Address> is IP address of PBX with a configured GSM trunk

Click Save to apply the settings.
The PBX checks the mailbox, once new emails corresponding to the parameters of Mail2Fax service are found, the PBX sends them to the destination fax number(s) present in the email.
To create a new Fax/ SMS server profile:
- Click + to add a new Fax/ SMS server profile
- Enter the following parameters:
- Name: enter the name (identifier)
- Protocol: select the protocol of communication with your email server (POP3 or IMAP)
Auth type: select the preferred authorization type, Basic or OAuth2 (the support of OAuth2 for Fax/SMS Server starts from WMS 6.01.20221019.4). Depending on the chosen type, fill out the following fields:
a) In case of Basic Auth type:- Server: settings of your email server to access incoming messages
User: email address of user to access to the server
Note: don't use here an email of a user who must send faxes via Fax2Mail service.
- Password: password to access to email address of user specified in the field above
- Use SSL: enables secure connection to the server (required by some email servers)
SSL Certificate check: allows to disable SSL certificate check, e.g. in cases when the mail server uses a self-signed certificate. The parameter is enabled by default.
Note: The support starts from WMS 6.03.20230630.3.
- Auth provider: choose auth provider (Google or Office 365) -> click Login and perform the login
- Dialplan procedure: select the Dialplan procedure to manage faxes sent by users
- Protection password: security password for MAIL2FAX service
- Default LOCALSTATION: sender’s fax machine ID, appears at the top of each page of outgoing fax, if not specified the default value “Fax Server” is used
- Default LOCALHEADER: fax header to identify the sender, appears at the top of each page of outgoing fax, if not specified the default value “Wildix PBX” is used
- Keep e-mails and faxes on server: enables storing of messages on the server
Click Save to apply the changes
Select the profile from the list and click Test fetching mails to make a test and check if the entered parameters are correct.
You can delete a selected profile by clicking - or make changes by clicking Edit.
For more information about Fax/ SMS Server, read FAX/ SMS Server Quick Admin Guide.
SNMP server (Hardware, Virtual PBX)
Start the SNMP server integrated into the PBX to allow remote monitoring of system resources.
Parameters:
- SNMP Server: enables the access to the SNMP server
- Community: enter the server identifier
- Port: external port of access
- Trusted IP: enter the list of the clients that can connect to the server
Storages (Hardware, Virtual PBX)
Configure a backend to store all the data of the PBX (Voicemail, call records, faxes, CDR, backups, etc).
For an on-premise PBX, the USB drive inserted into the PBX serves as a backend for storing all the data. It is recommended to store the Backups on another USB drive or on a Windows share, to be able to restore the system in case of the primary USB drive’s failure.
Storage device
This table displays all the storage devices mounted at the system startup with the relative table of the partitions and the usage of the specified partition.
- Click Initialize to start the partition and formatting procedure of the storage device
- Click + to add the partition for each service
- Click - to remove a selected partition
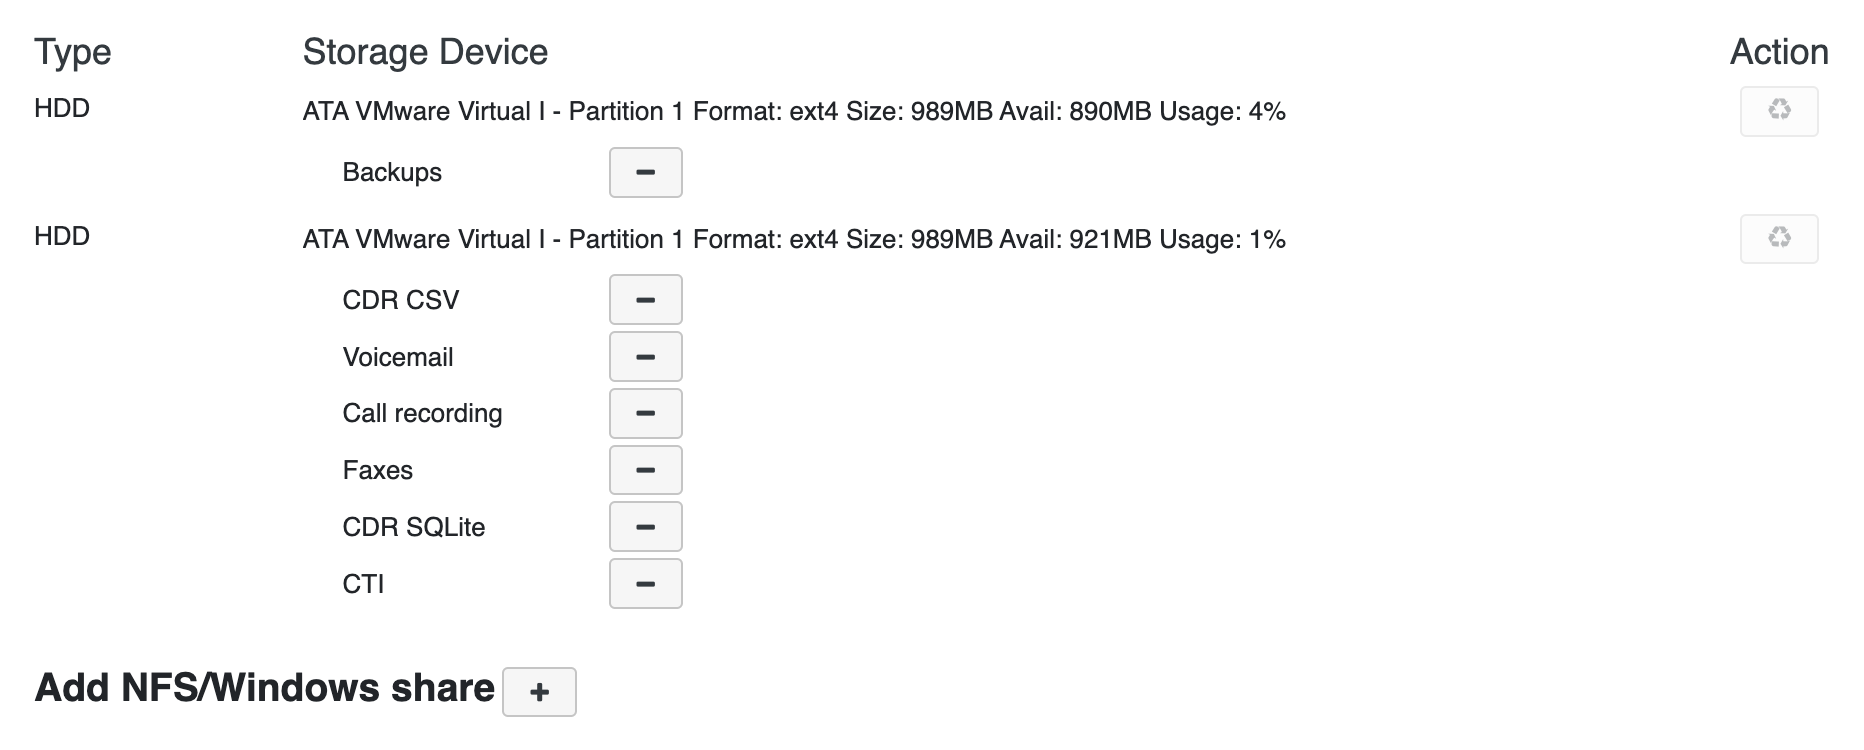
Add NFS/Windows share
Click + to add a new NFS/ Windows share.
Parameters:
- Type: select NFS/ Windows share
For NFS:- Host: IP address or host name of the server
- Path: name of the NFS share created at the host
- Service: select the service to be saved to the NFS share (Call recording/ Voicemail/ Call generation/ Backups/ Faxes/ CDR CSV)
- Host: IP address or host name of the server
- Path: name of the Windows share created at the host
- Domain: domain name of the host machine
- User name: user name to access to the resource
- Password: password to access to the resource
- SMB version: select the Server Message Block version
- Service: select the service to be saved to the Windows share (Call recording/ Voicemail/ Call generation/ Backups/ Faxes/ CDR CSV)
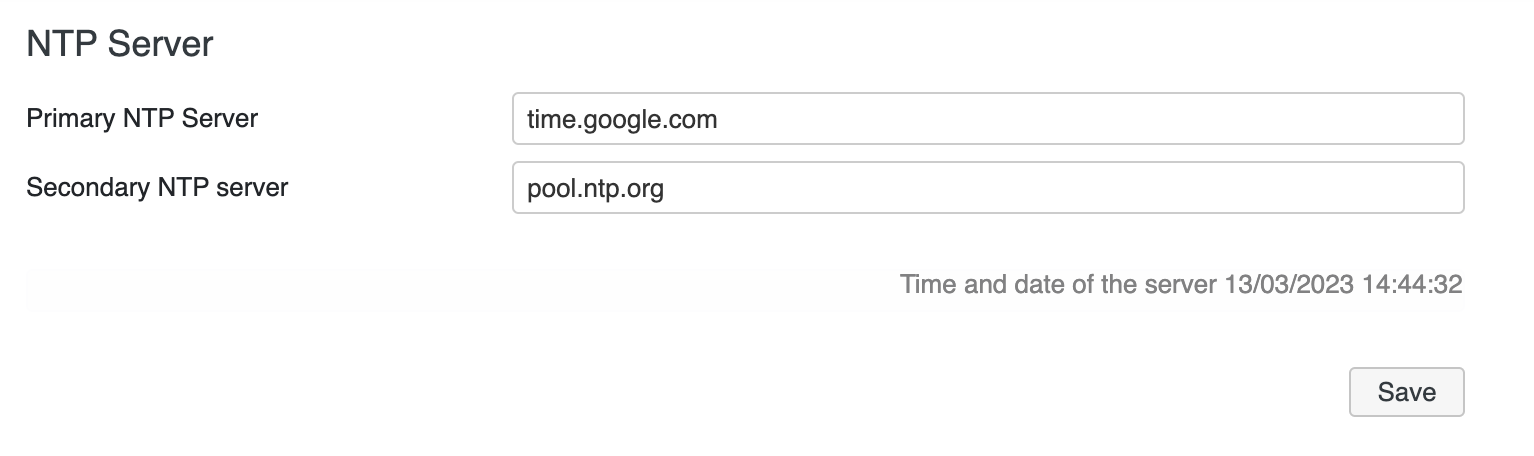
NTP server
Synchronize the PBX with an external NTP server.
Parameters:
- Primary NTP server: enter the primary server address. For example, time1.google.com
- Secondary NTP server: enter the secondary server address. For example, time2.google.com
Remote syslog
Enable remote syslog for log processing in addition to local syslog.
Refer to the online documentation Remote Syslog Guide for details.
Tools and utilities
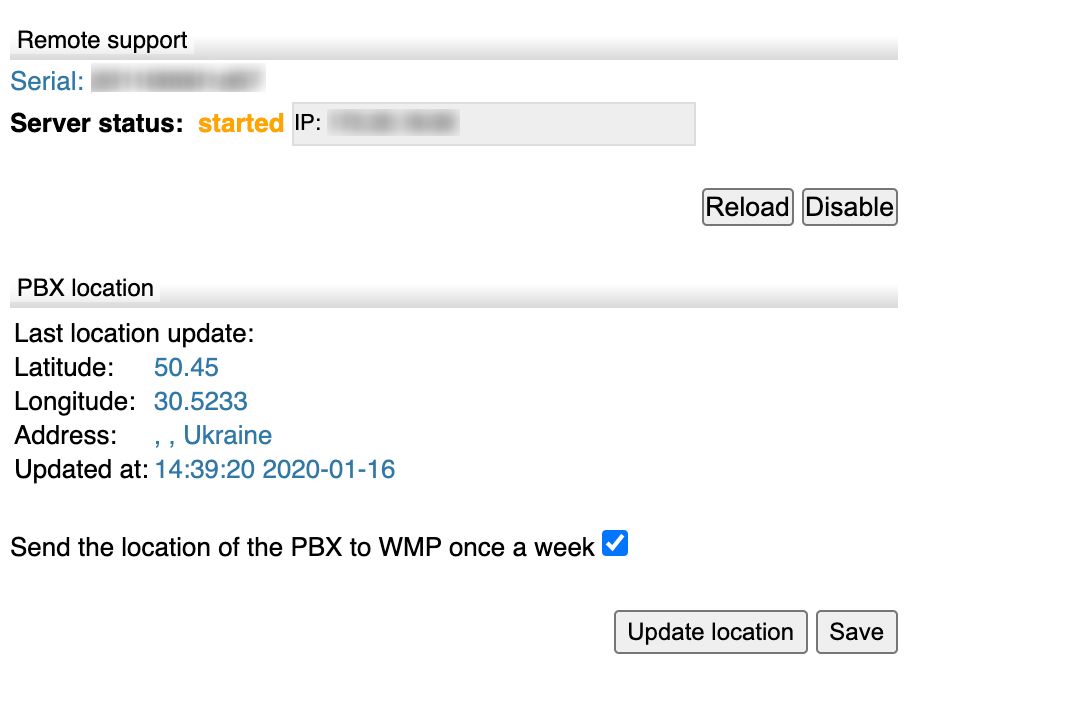
Remote support
Important: Remote support for Cloud PBXs is removed starting from WMS 4.0X.
Displays the information about the Wildix server, which is used for remote support and the PBX sync with the Wildix Management Portal.
Check information on ports to open for Remote Support: Ports used by Wildix services.
In the lower part of the screen you can set up the PBX to send the geographic position of the PBX to the Wildix server (geolocation tools are provided by Google) (Hardware, Virtual PBX).
The following IP ranges are used by Remote Support server (make sure they don’t collide with your internal network ranges):
172.16.0.0/16
172.20.0.0/16
172.25.0.0/16
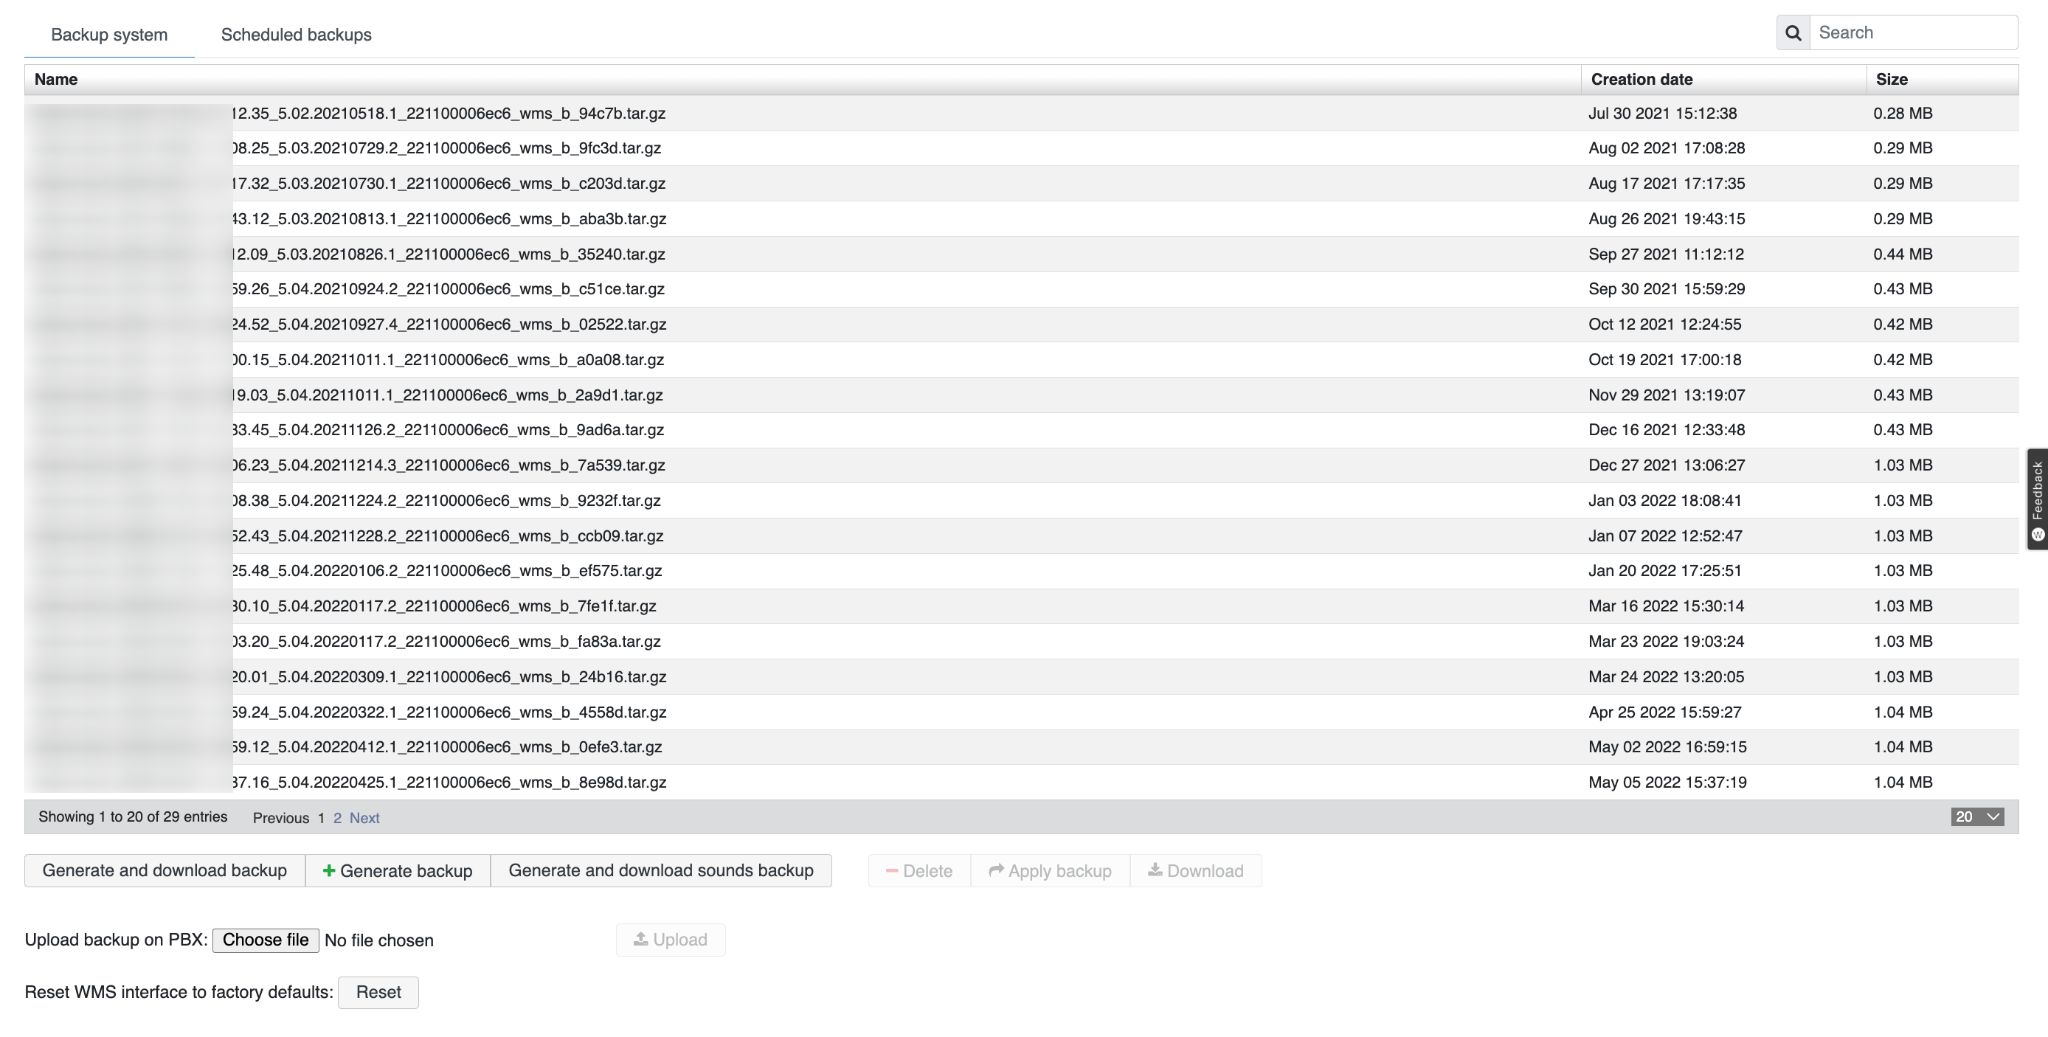
Backup system
Create and download the system backup and set up a scheduled system backup.
You can create the copies of PBX configuration on the Windows share or on the USB storage device (defined in System -> Storages (Hardware, Virtual PBX), otherwise the backup can be created and downloaded directly on your PC.
Starting from WMS 6.05, files are moved from local storage to Company Data Storage (CDS). For more information, read Company Data Storage Flow.
To perform the backup procedure:
- Generate a backup file by clicking Generate backup
- In case you have the generated file and you need to upload it: click Choose file, select the file and click Upload to upload it. The file will be available to in list of available backup files
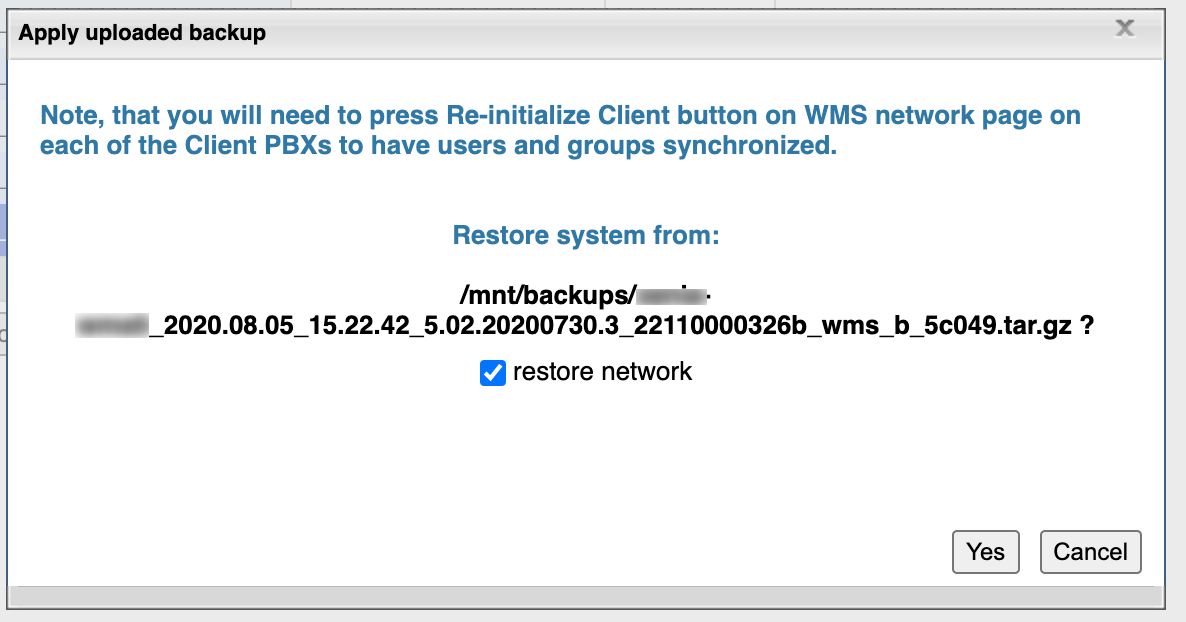
- Select the preferred file from the list and click Apply backup
- Confirm the backup by clicking Yes:
Note: in case you have set up WMS Network, you will need to click Re-initialize Client button on WMS Network page on each of the Client PBXs to have users and groups synchronized.
Note: "restore network" option allows you to restore network parameters saved in Settings -> System -> Network and the parameters saved in Settings -> System -> HTTP Proxy client. In case you don't need to restore these parameters, uncheck the box (the network parameters will be restored by default).
- After the backup is completed, you'll need to reboot your PBX. Click Reboot button to start the process:
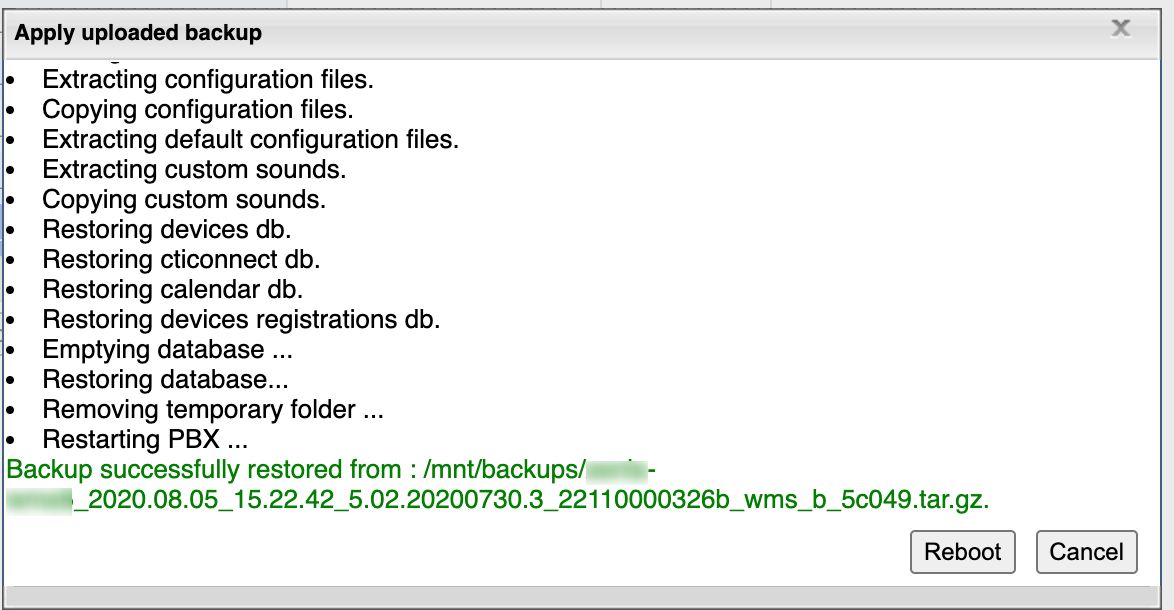
- After the reboot is completed, you will be forwarded to the login window
- Log in to proceed with the system
Other options:
- Click Generate and download backup to generate a copy of the backup file and saves it to your PC. The downloaded file can be used for performing the backups on other PBXs)
- Click Generate and download sounds backup to generate a backup copy of all the sounds saved on the PBX. The backup of the configuration does not contain all the sounds that can be saved after the first modifications to a separate file
- Click -Delete to delete a selected backup file
- Click Download to download a selected backup file to your PC
- Click Reset o reset to the default parameters
Limitation: In case of applying backups from another PBX, it is necessary to go to WMS -> System -> Storages and add back storages (for Virtual / HW PBX).
Scheduled backups
You can set up a scheduled backup to email which will be performed daily/ weekly/ monthly.

Enable the option for the scheduled backup:
- Backup to share (Hardware, Virtual PBX):
- Perform: enable the system to perform the backup every day/ week/ month
- Mail:
- Email: enter an email address to get backup reports
- Perform: enable the system to perform the backup every day/ week/ month. The backup is performed during the night
Click Save to save the changes.
Click Perform backup now
Upgrade
Check if there is a new version available and perform the upgrade.
Check the ports to open for Upgrade: Ports used by Wildix services.
Downgrade is not supported!
- Enter the name of the repository (rel60/ rel50) into the field “Upgrade repository” and click Save
Available repositories for upgrade:
- Stable versions rel60: it is recommended to upgrade customers PBXs from this source; changelogs: WMS Stable rel60
- Beta versions: rel60beta/ rel70beta: available for Wildix Partners for tests in the lab before this version becomes stable: WMS 6.0X Beta / WMS 7.0X Beta
- Wait till the system checks whether there is a new version available in the selected repository
- In case there is a new version available, click Perform upgrade button:

Note: To be able to upgrade to the next major WMS version, e.g. from WMS 5 to WMS 6, WMS Network has to be configured correctly, matching the licences ordered in Salesforce Partner Community.
- As a rule, the Upgrade procedure takes several minutes (however it depends on your Internet connection and the number and volume of packages that must be downloaded. During the procedure, you can review the upgrade log:

- As soon as the upgrade is completed, click Reboot button. You can download the upgrade log by clicking Download full log button:
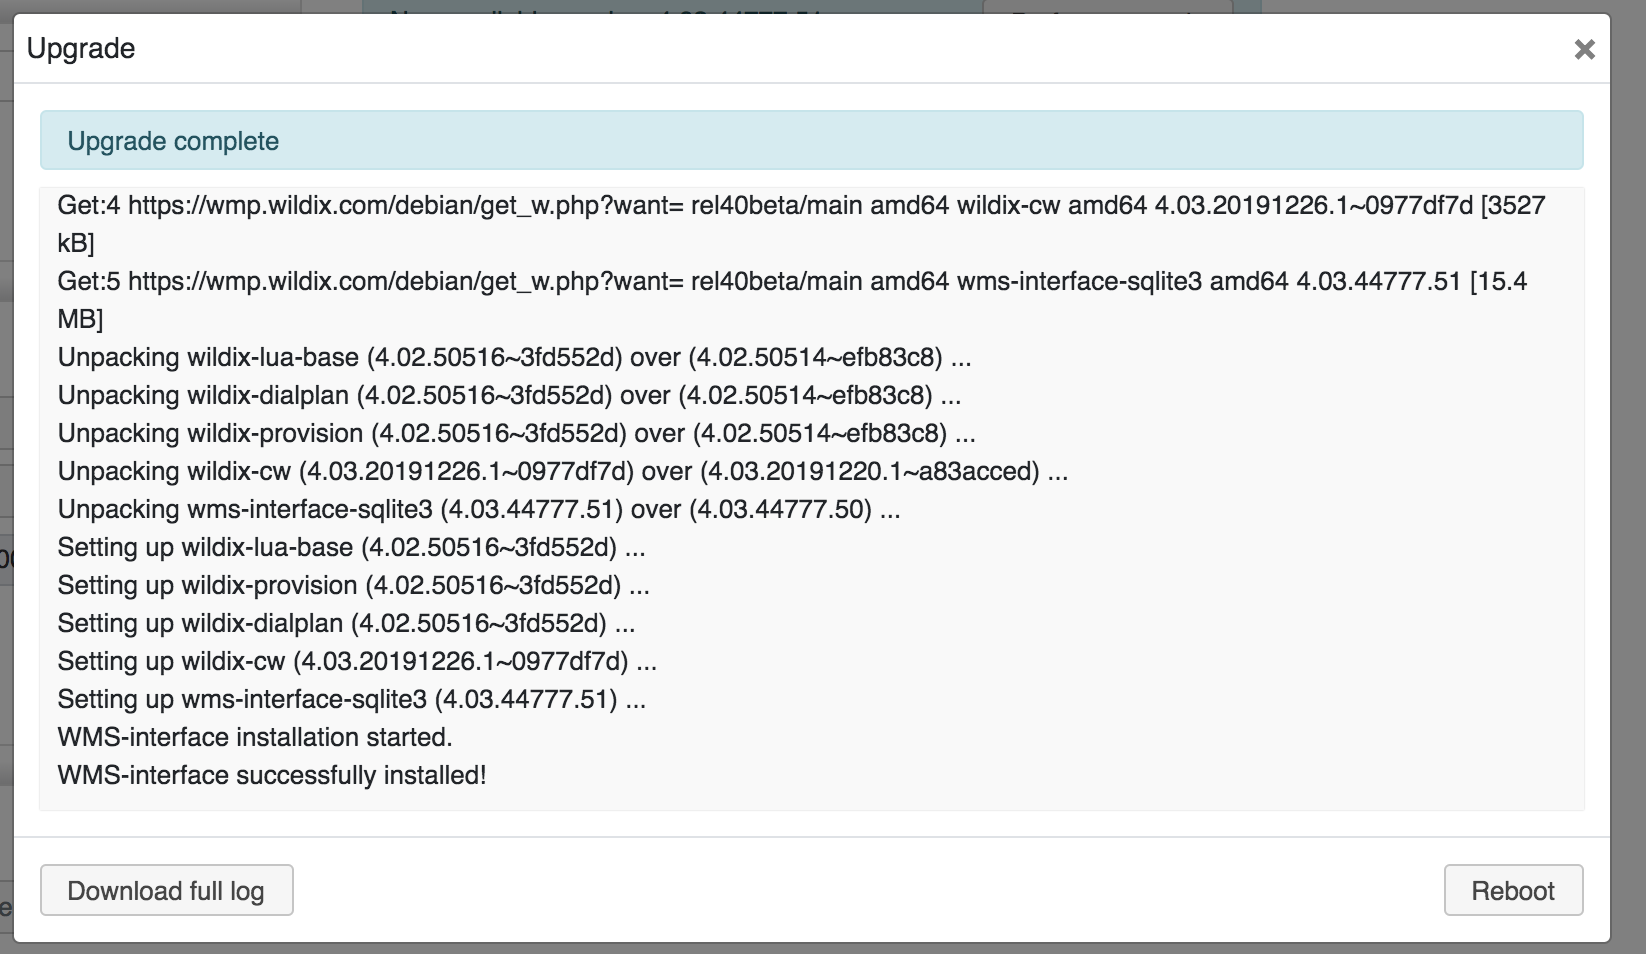
- After the reboot is completed, you will be forwarded to the login window
- Log in to proceed with the system
You can check the current WMS version in the upper right part of the screen.
How to perform the upgrade in case the version contains no WMS interface package? In case the page shows that there is no new WMS version is available, but it was announced by Wildix that there is a new version available, it means that you can install additional packages ("additional packages" = Callweaver package, firmwares, sound files, etc) from the repository. Click Upgrade additional packages.
Automatic upgrade
Weekly automatic upgrade for the Stable repository is enabled by default. You can disable it, but it is re-enabled again after each new upgrade.
You can enable automatic upgrade to be performed at the specified time.
Parameters:
- Upgrade repository: enter the name of the repository
- Email: enter the email address to which the upgrade result (only in case the upgrade was performed) will be sent
- Perform: enable the system to check each day / week / month if there is a new version available, and if yes, perform the upgrade automatically. Auto-upgrade is performed during the night
Note: Starting from 6.01.20220708.5, there is one Upgrade repository field on the Upgrade page in WMS -> Settings -> Tools and utilities. Automatic upgrades are performed from the repository that was manually entered in the field.

Custom firmware server
Deploy a local upgrade server for Vision/ SuperVision and PRI/ BRI media gateways and indicate the server URL to update firmware in cases when devices cannot get it from firmwares.wildix.com server (for example, connection to the server is blocked from the device; PBX doesn't have access to the server). Please contact Wildix Support for details.
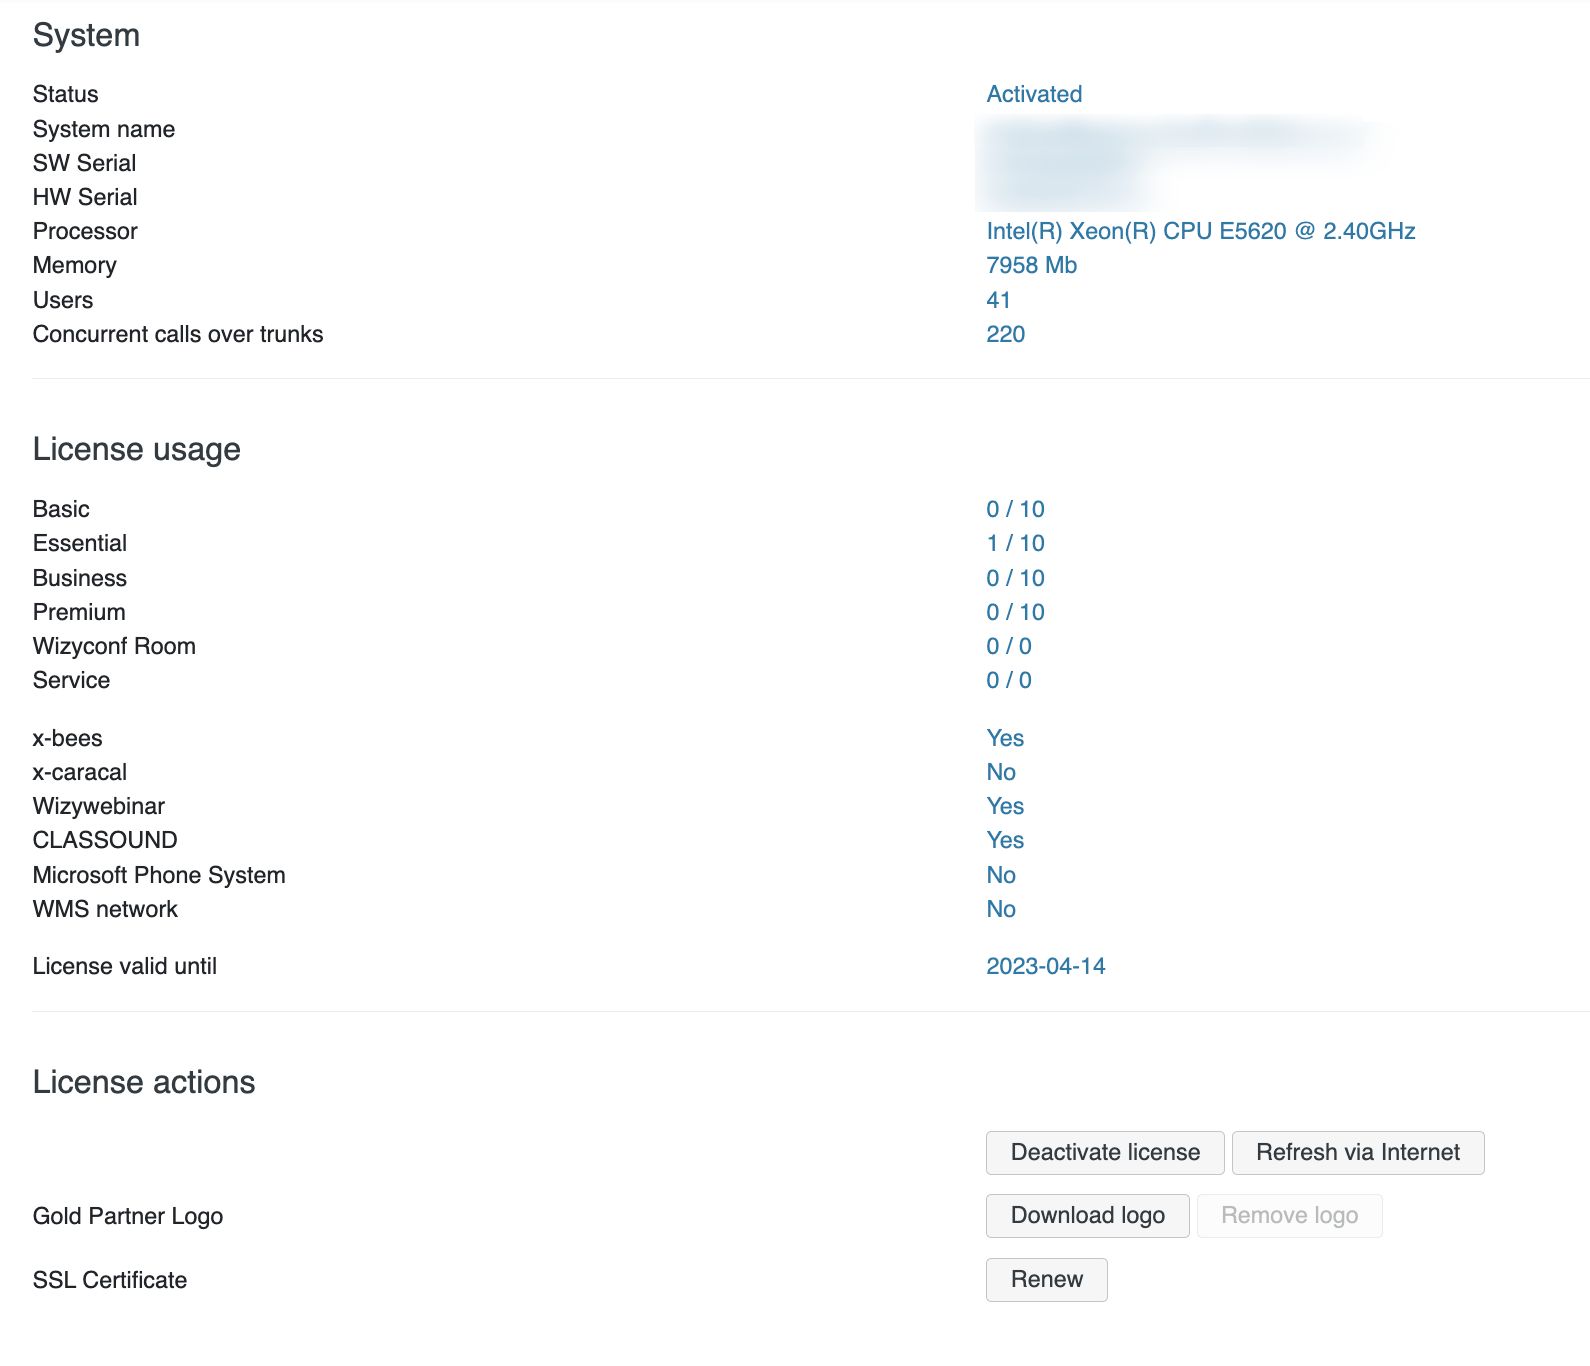
Activation / Licences
Activate PBX and Wildix licenses.
Read the guide PBX Licensing and Activation for the information about PBX activation and activation of other licenses.
To deactivate the PBX Activation license, click Deactivate license.
If you need to replace an old PBX by reusing PBX Activation license on a new PBX, do not deactivate license, but follow the procedure described in PBX Licensing and Activation guide.
Gold Partners have the option to display their company logo in WMS / Collaboration interface. The logo can be uploaded in WMP -> PBX per user -> click under user name -> select Company Settings. Requirements: file format: JPG, GIF, PNG; image size: 140px x 60px; file size: < 1MB
Note: Alternatively, logo can be uploaded by a request to Customer Success Specialist.
Click Download logo to make the logo appear in the upper right part of WMS / Collaboration interface / Remove logo to remove the logo from WMS / Collaboration interface.
Click Renew to update SSL Certificate.
Generate trace
Generate a *.pcap trace which allows you to debug and analyze problems with VoIP traffic.
There are several ways to generate a trace:
- Tick off IP Address and leave the input field empty
This option allows you to capture all the traffic passing through the PBX interfaces.
- Tick off IP Address and enter the host address
This option allows you to capture all the traffic passing to or from a specified host.
- Tick off Custom tcpdump and specify the interfaces, the ports and the hosts in the input field
Example:
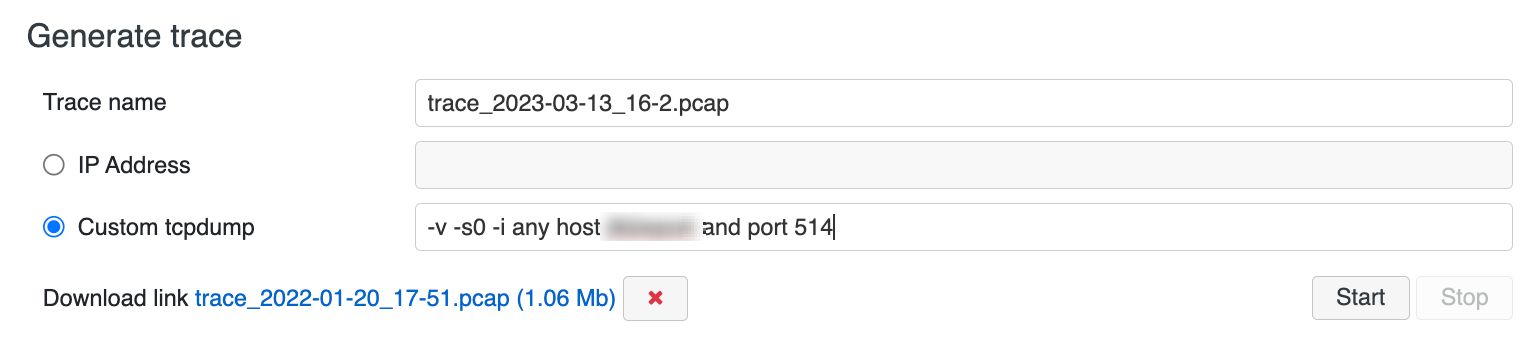
After you have selected the way to generate a trace, enter the Trace name and click Start.
When finished, click Stop. You can start a trace and continue navigating other menus of the WMS.
It is possible to stop traces via Dialplan. Consult this Articles for details.
Open the trace with Wireshark program.
Please find more information on using *.pcap trace generation feature in this Guide on debugging and troubleshooting VoIP problems.