teams4Wildix - integration of Microsoft Teams with Wildix PBX - Documentation
This Guide leads you through the process of teams4Wildix integration usage, starting from the Integration installation and activation, and ending with practical examples for call placing.
The Integration is free for those customers who have already activated CLASSOUND.
Microsoft Teams Integration webpage: https://www.wildix.com/microsoft-teams/.
For any technical assistance, contact Wildix Support (Support Hours - from 9am till 6pm EST / CET):
USA: +16144841546
UK: +443300563663
Italy: +3904611715112
D/A/CH countries: +498920006065
France and francophone countries: +33176747983
- Spain: +34932202994
Created: October 2021
Updated: March 2024
Permalink: https://wildix.atlassian.net/wiki/x/wBjOAQ


teams4Wildix Video Tutorial
Introduction
Wildix offers 2 modes of Integration usage.
Mode 1. Collaboration Plugin: it provides access to all advanced features by Wildix (check the attached Datasheet for the highlights )
- Mode 2. MS Phone System: besides the advantages of Mode 1, it allows MS Teams users to place and receive calls using Teams Dialpad (Calls tab of the MS Teams interface)
Requirements
General requirements:
- WMS version: 5.03.20210623.1 or higher
- Activated CLASSOUND
- Wildix UC-ESSENTIAL / UC-BUSINESS / UC-PREMIUM license for each user
Additional requirements for MS Phone System:
- Monthly subscription fee. The fee is purchased for the entire PBX on WMP
- Microsoft 365 (Office 365) Business license (starting from Business Basic) or Microsoft 365 (Office 365) E5 or Microsoft 365 (Office 365) E3 + Teams Phone for each user
Add Wildix Collaboration app
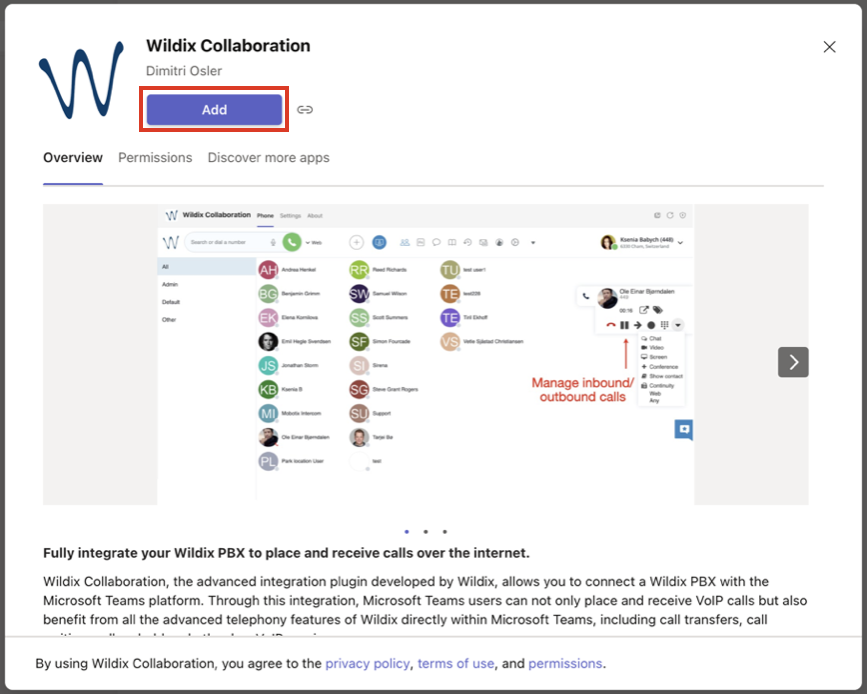
Go to Apps tab located on the bottom-left menu of Microsoft Teams
- Enter Wildix Collaboration in the search field (1) and click on the Wildix Collaboration app which is displayed in search results (2):
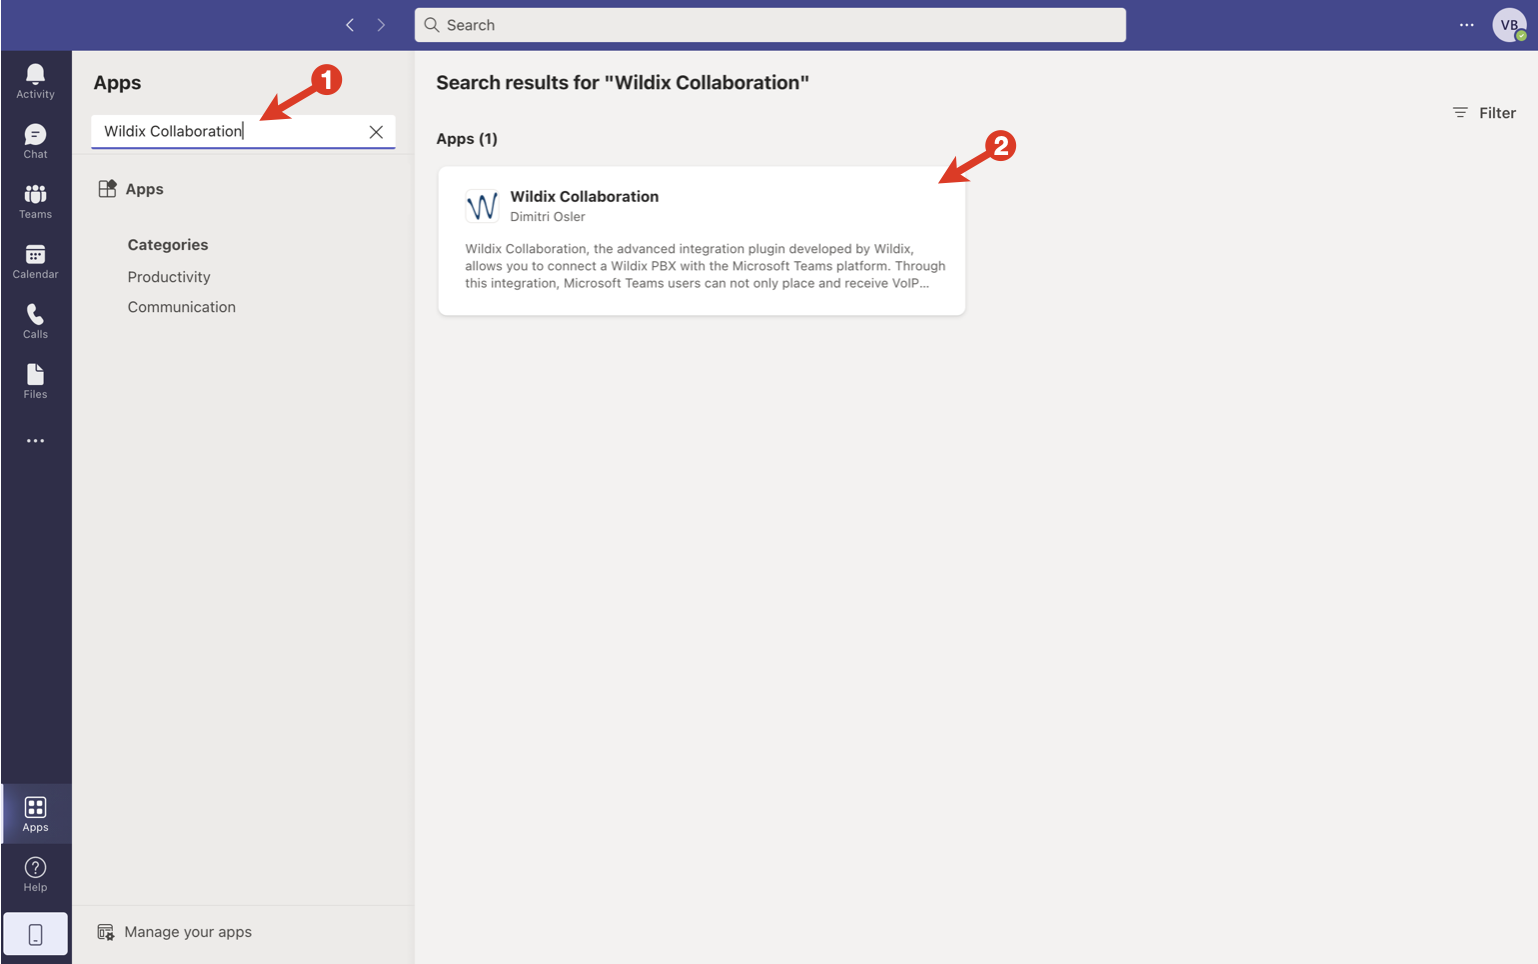
- Click Add:
Application Usage
Login to Wildix Collaboration inside MS Teams
The first time users open the Wildix tab, they are invited to enter the PBX domain name:
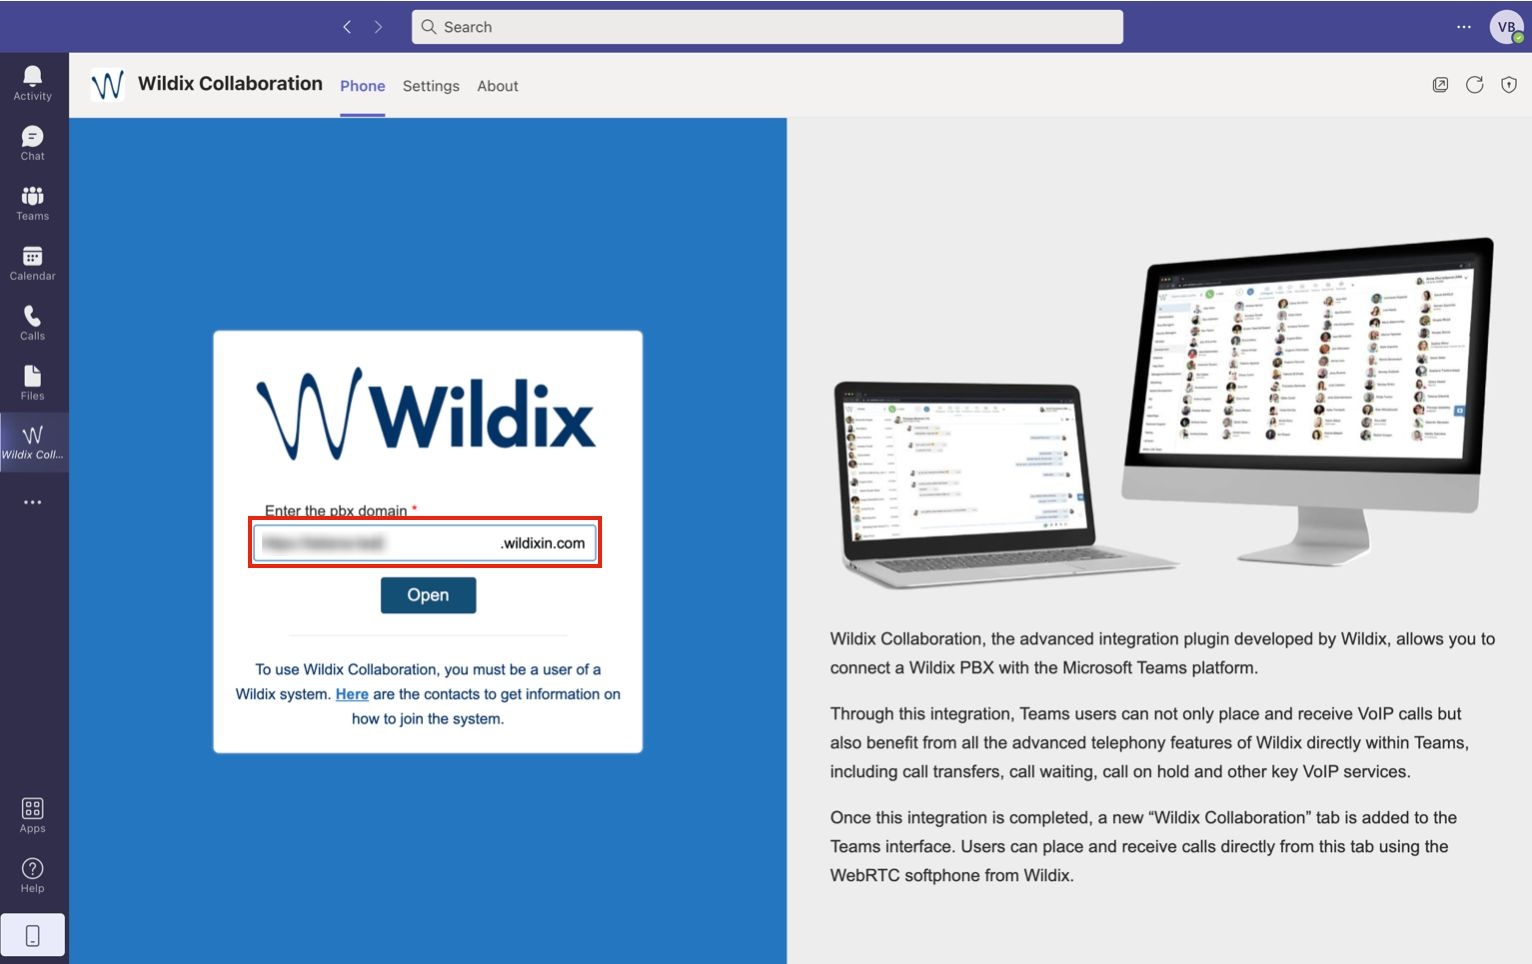
Enter the PBX domain name into the input field and click Open.
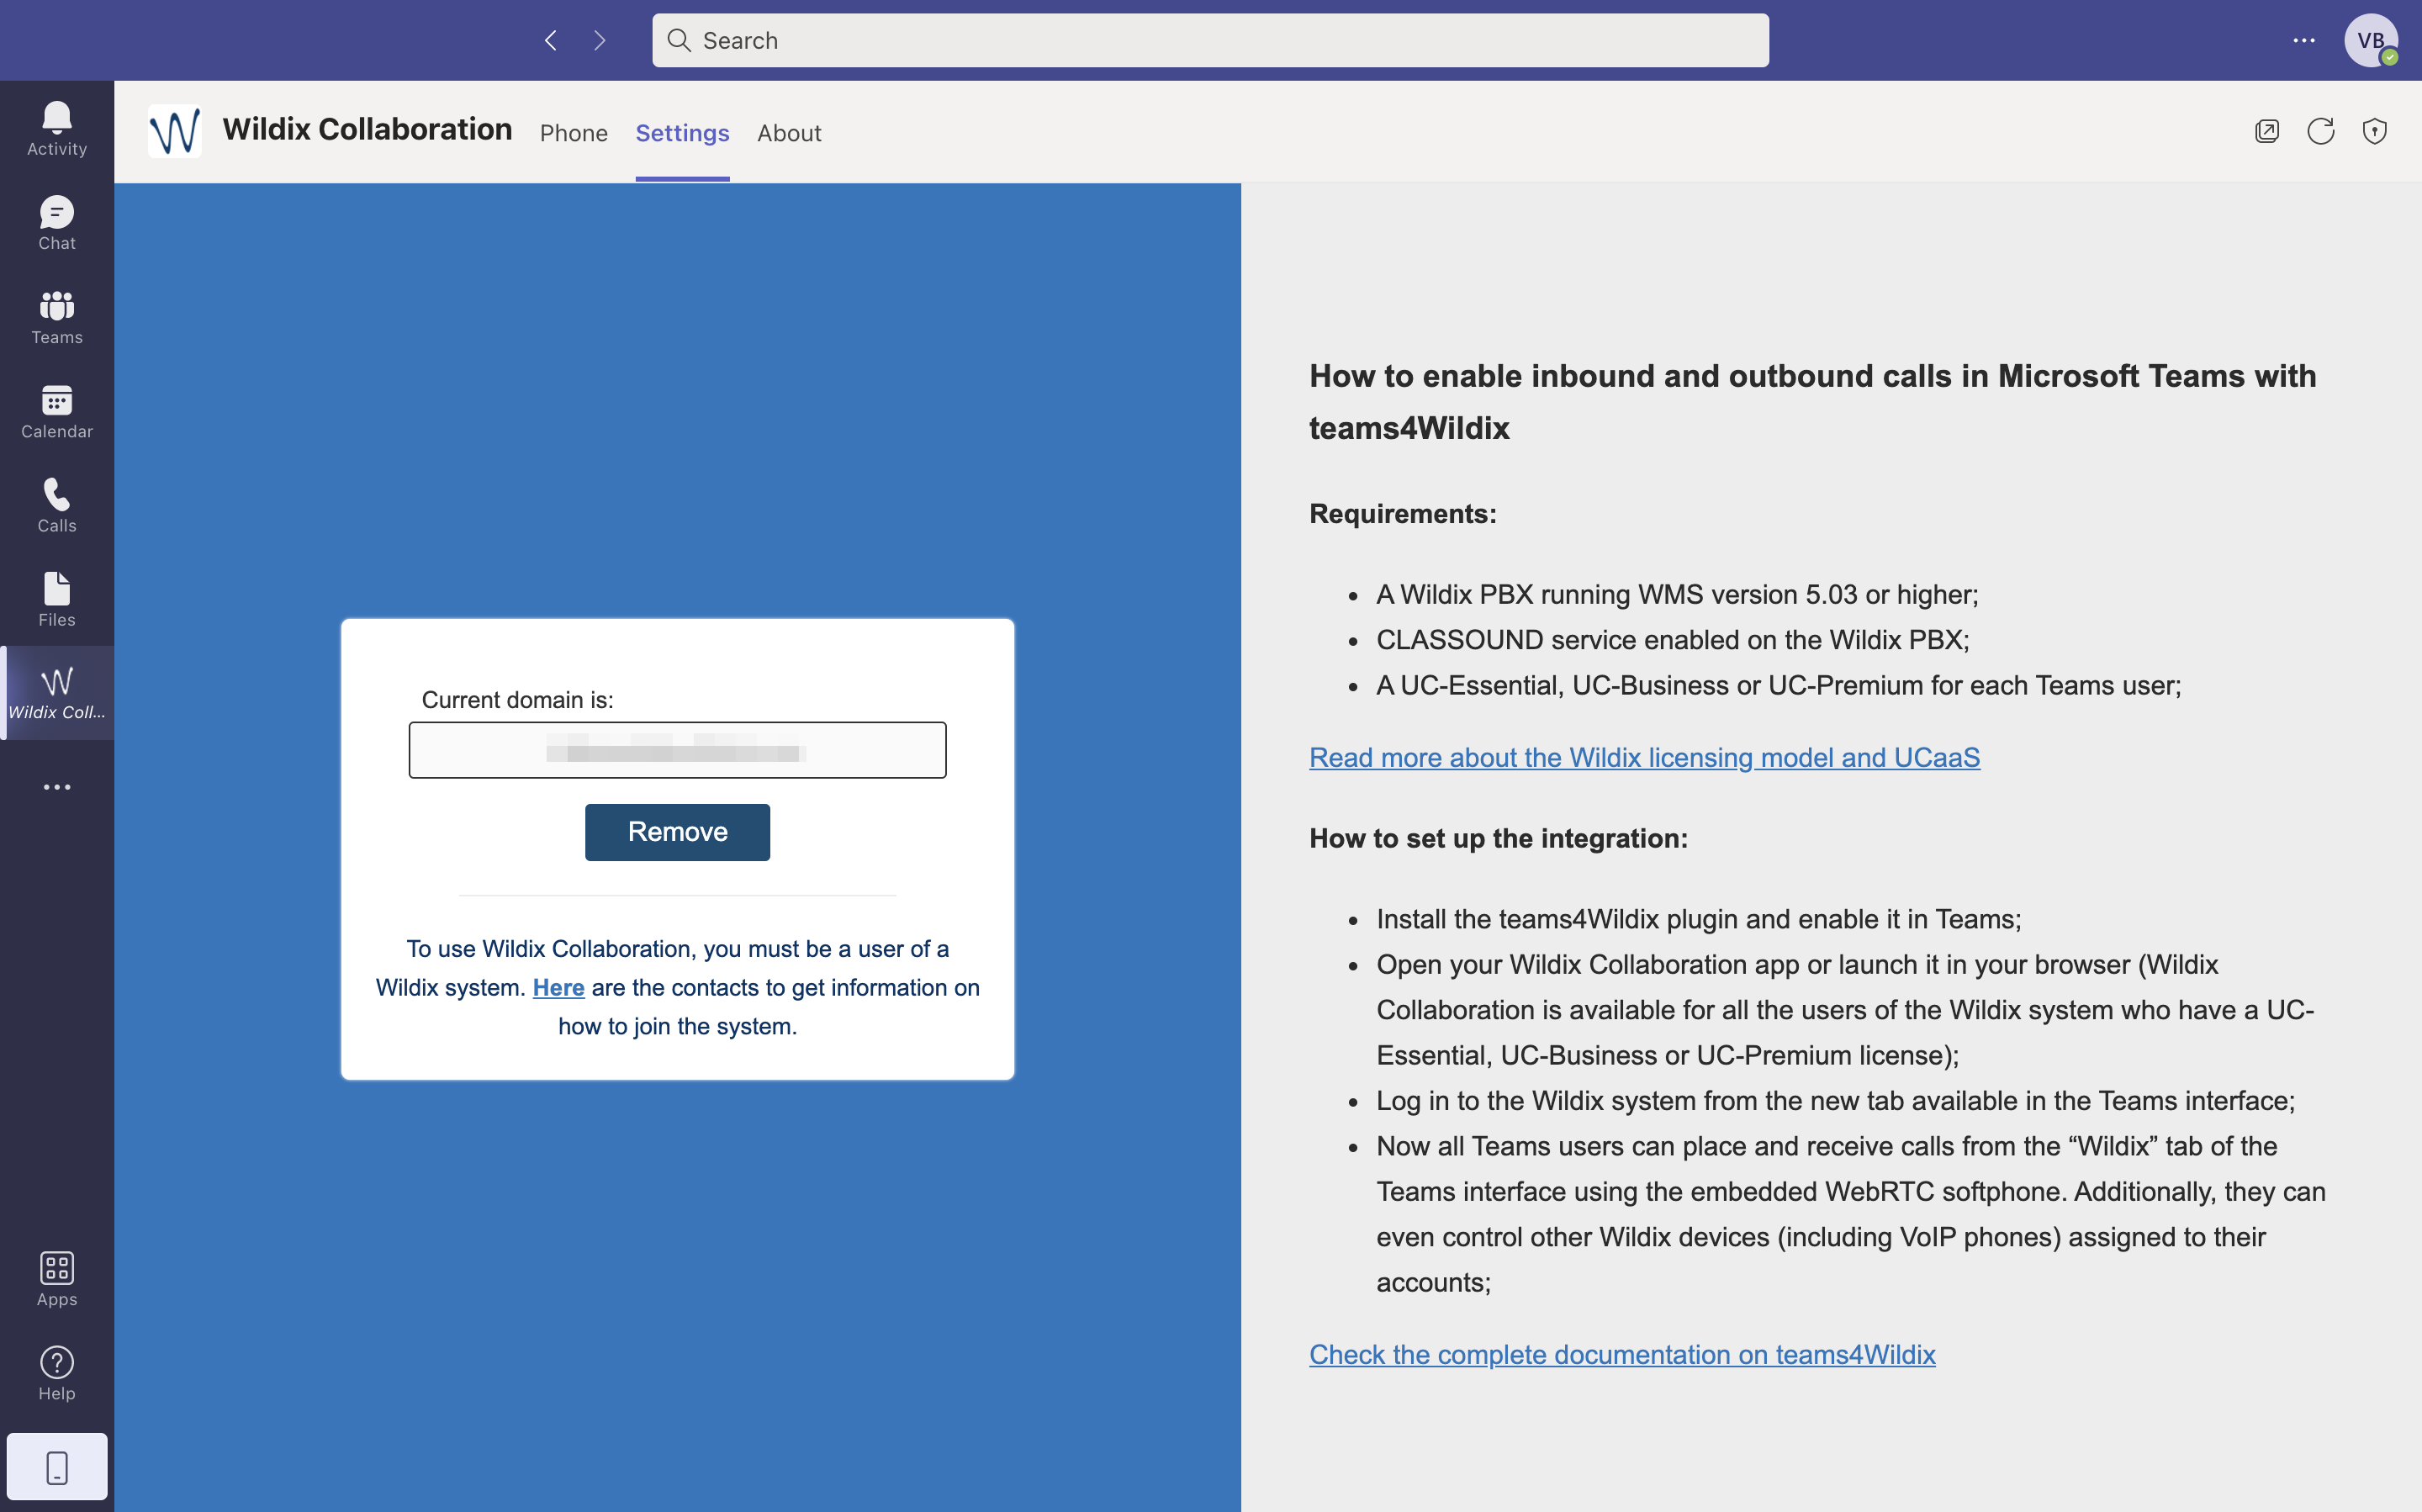
Users can change the PBX any time by opening the Wildix tab inside MS Teams and accessing the tab Settings. To change the PBX, first click to Remove the previous PBX and then enter the new PBX domain into the input field and click Save.
Once users have added the PBX, they need to log in to Wildix Collaboration (Phone tab of the Wildix app inside MS Teams):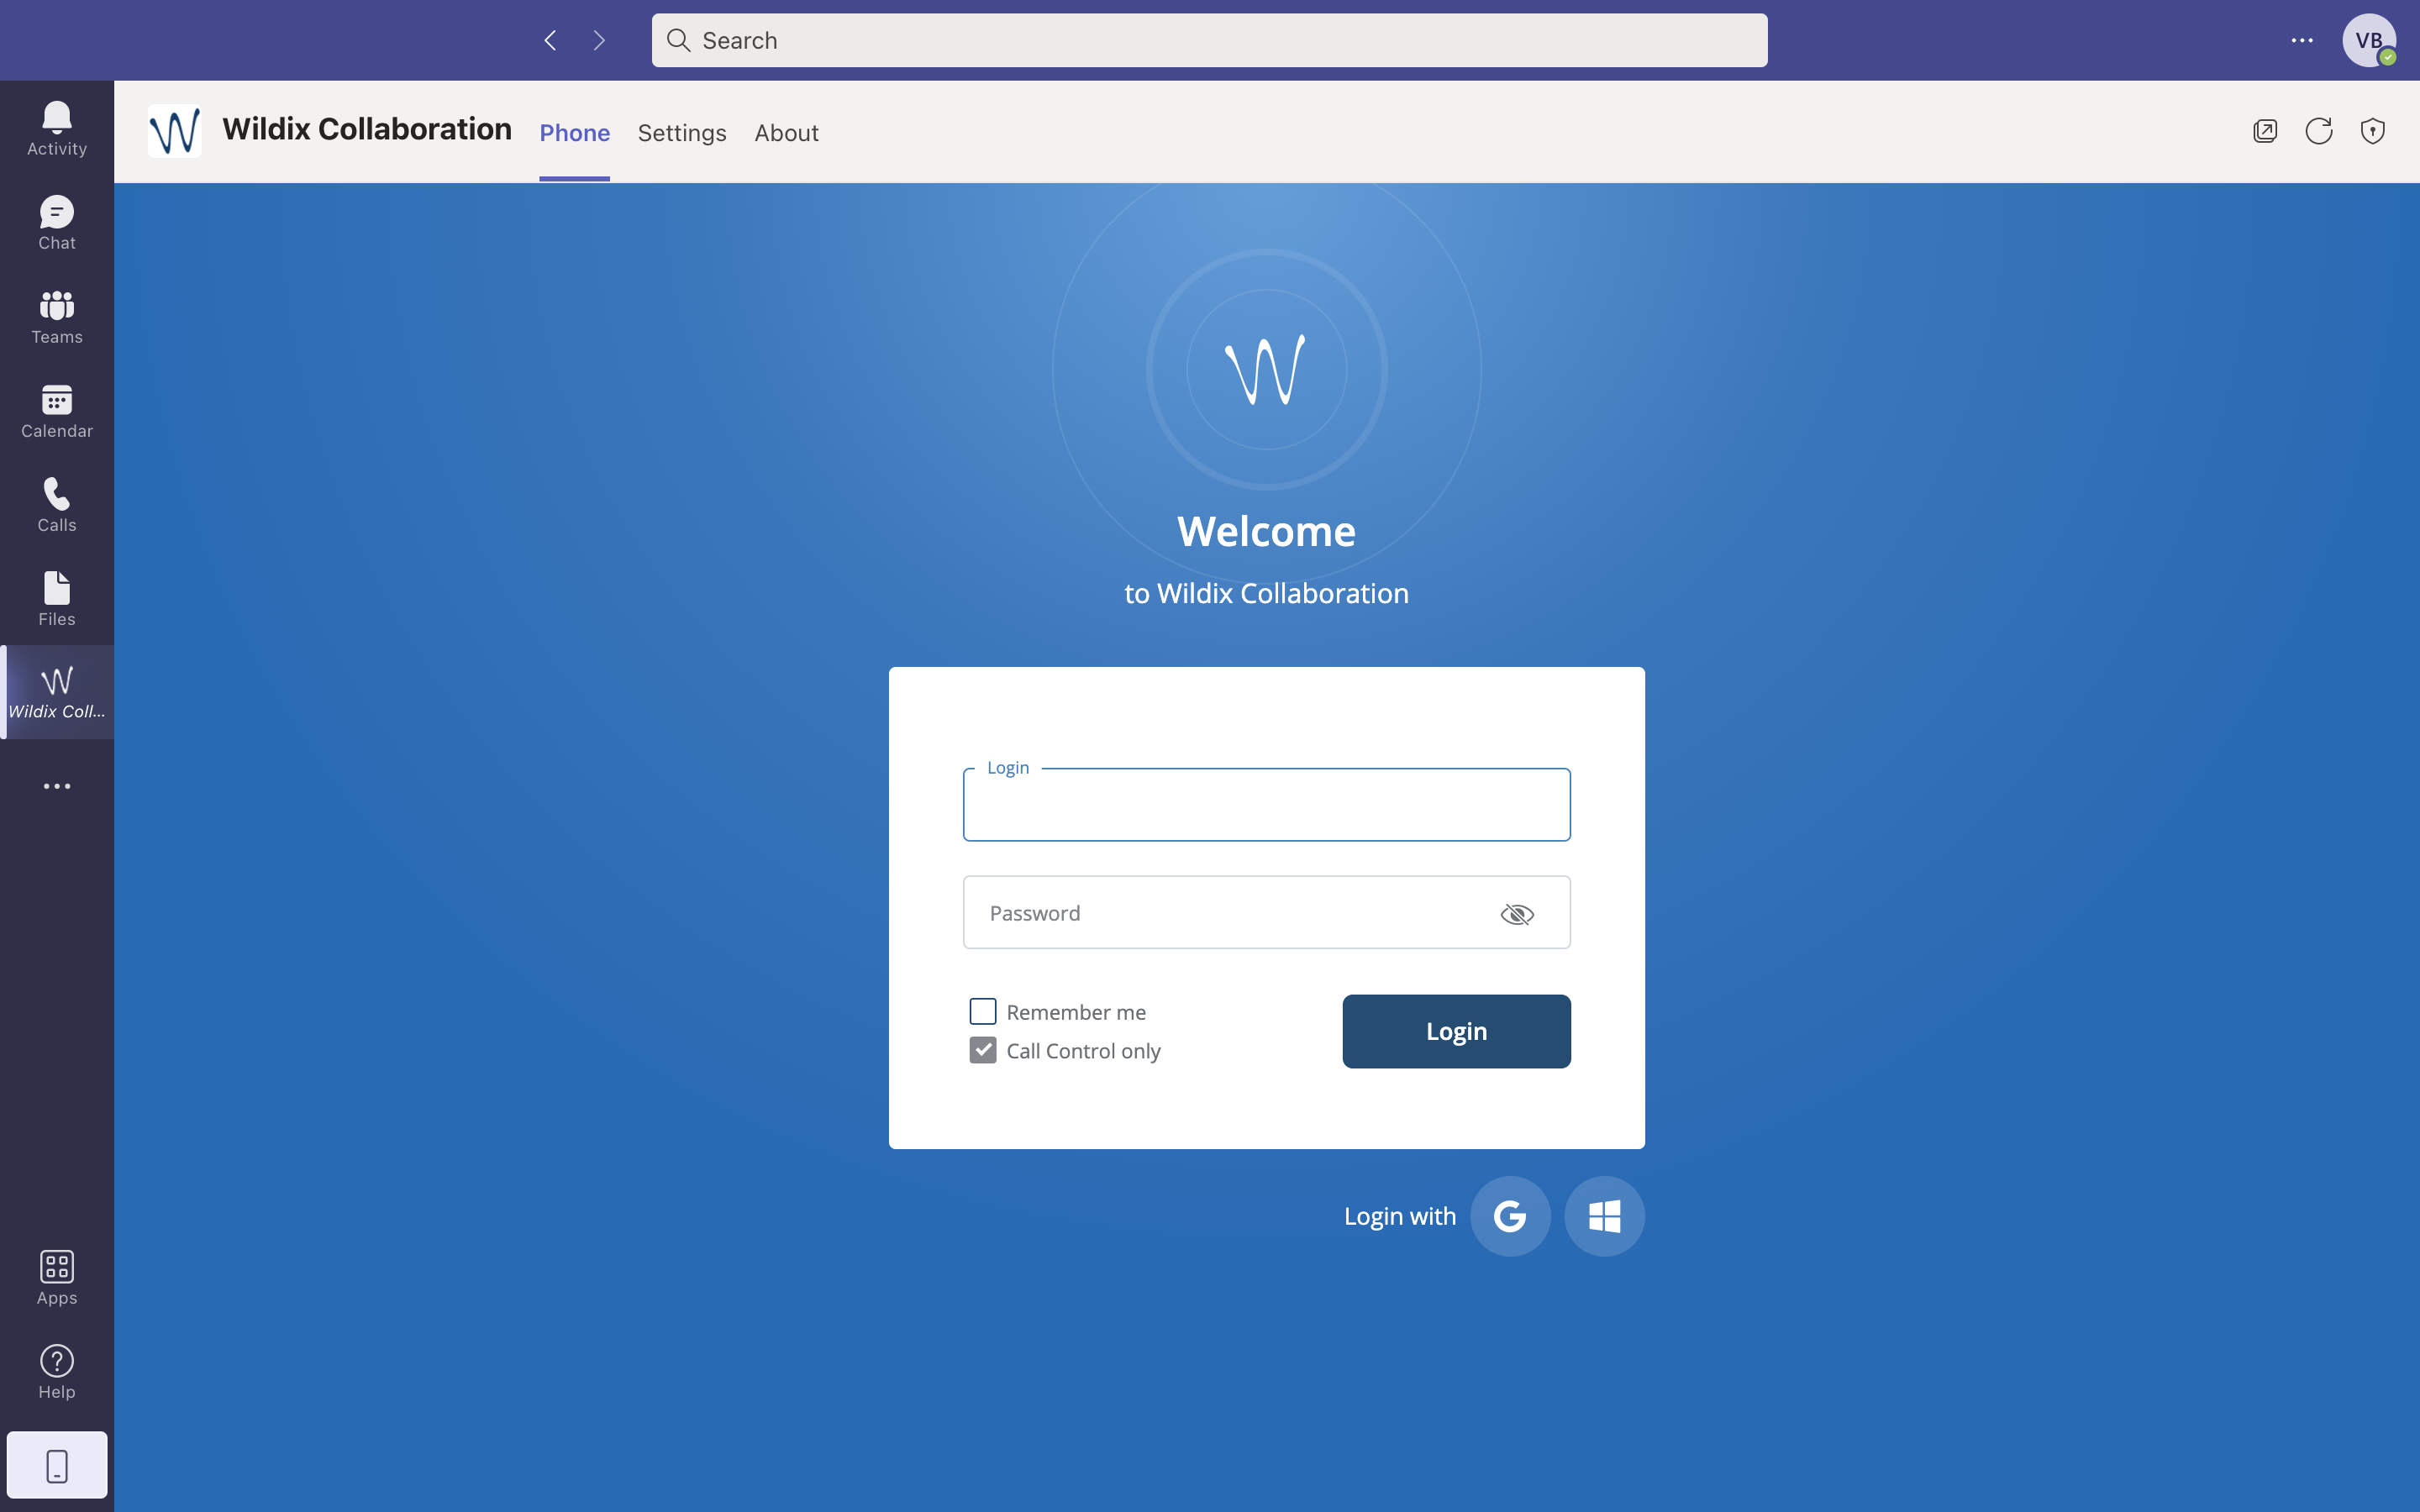
As a rule, users would use the option "Login with Office 365 Sign-On": click on the Microsoft icon in the lower right-hand part of the screen.
Using Collaboration Web Phone to control calls from MS Teams
To be able to control calls from MS Teams, users need a SIP device registered to their account. This can be a Wildix SIP phone for example, or a Wildix Collaboration Web Phone (place and receive calls directly from the browser).
To use Collaboration as a SIP device, there is a specific option Call Control only activated on PBX. This option allows users to control another Wildix Collaboration running in the browser or as a native app.
The behavior of Call Control only option depends on WMS version:
- Prior to the version 5.03.20210709.3, PBX admin should globally enable this option on PBX so that it becomes available on the Collaboration login screen for users. Once enabled, user should check off the option Call Control only when logging in to Collaboration inside MS Teams (see the previous screenshot - option Call Control only must be checked). Consult the Documentation to check how to enable the option
- Starting from the version 5.03.20210709.3, Collaboration in MS Teams is loaded with the option Call control only checked off automatically
- Starting from the version 5.04.20211026.2, Call Control only is activated by default, without the need to enable it globally, even if it isn’t displayed on Collaboration login screen inside MS Teams
Users who want to use Collaboration Web Phone to control calls from MS Teams need to have a second Collaboration running in the browser or as a native app.
Control calls from MS Teams
In the first mode of teams4Wildix integration, users need to use the Wildix tab to manage calls, not the MS Teams dialpad (not the MS Teams Calls tab).
For information regarding how to manage calls from the MS Teams dialpad, please consult the document MS Phone System, which explains in detail how to set up and use the second mode of teams4wildix integration.
To start placing and receiving calls from MS Teams, users need to first select the active SIP device in the device selection list located next to the green Call button. This device can be a Wildix SIP phone, such as WelcomeConsole, Vision, SuperVision, Start, WorkForce, a W-AIR DECT headset or handset, iOS or Android Collaboration app, or it can be Web (which stands for Collaboration Web Phone - second Collaboration running in the browser or as a native app).
Select the active device in the list of active devices in Wildix Collaboration: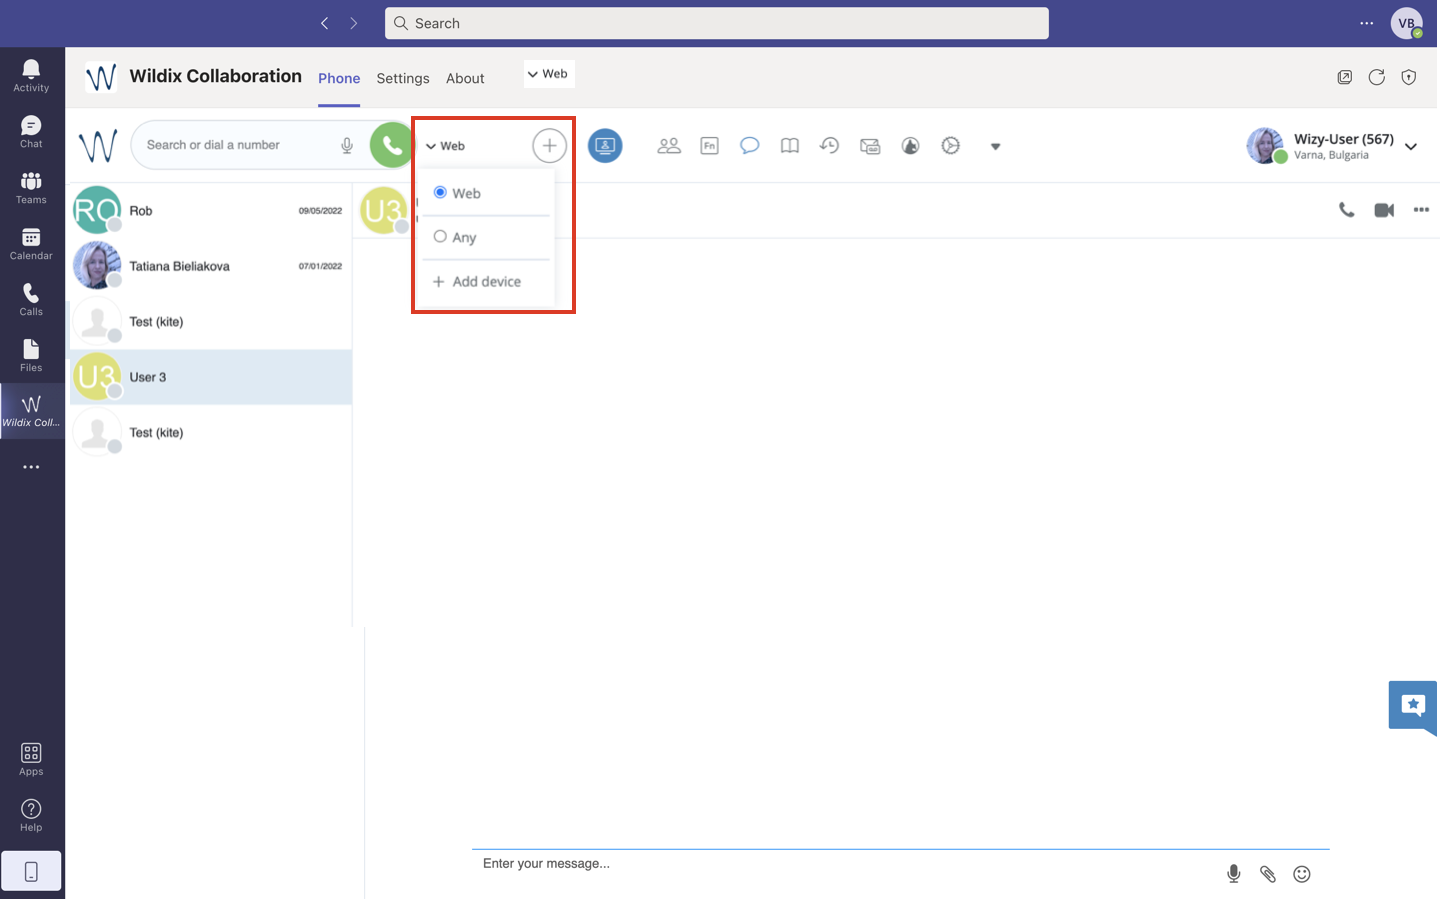
Other communication options
In addition to the ability to manage calls, users can benefit from all other features offered by Wildix Collaboration, such as:
- send and receive faxes and SMS
- check Voicemails
- set up call forwarding rules
- and other, for more information, consult Collaboration User Guide.
Note: Since MS Teams interface offers its own chat option, users are not supposed to use chat inside Wildix Collaboration to avoid confusion between the two systems. Starting from WMS v 5.03.20210709.3, it is possible to disable chats in Collaboration.
Microsoft Teams Presence Sync
The feature allows users to sync presence status between Microsoft Teams and Wildix Collaboration or x-bees, which ensures consistency of user status in both platforms. The presence sync is performed in a two-way manner, meaning that when you update your presence status in Microsoft Teams, the changes are reflected in Collaboration or x-bees, and vice versa.
Requirements
- Microsoft 365 account with Global Administrator or Privileged Role Administrator rights
- PBX updated to WMS v. 6.05.20231229.4 or higher in order to enable 2-way presence sync
- Cloud Analytics activated in WMS -> PBX -> Features. Additionally, you need to manually activate sending of presence events for Collaboration (for x-bees, it is activated by default), consult the doc Custom config parameters List for detailed instructions
- Collaboration needs to be open for correct display of user presence in Mode 1 of the integration. For Mode 2, this is not required
Important:
- If you have previously activated Microsoft Teams Presence, you need to reactivate it to support 2-way presence sync
- Microsoft Teams presence sync won't work if you have any calendar integrations (e.g. Google Calendar) enabled on the PBX
How to activate
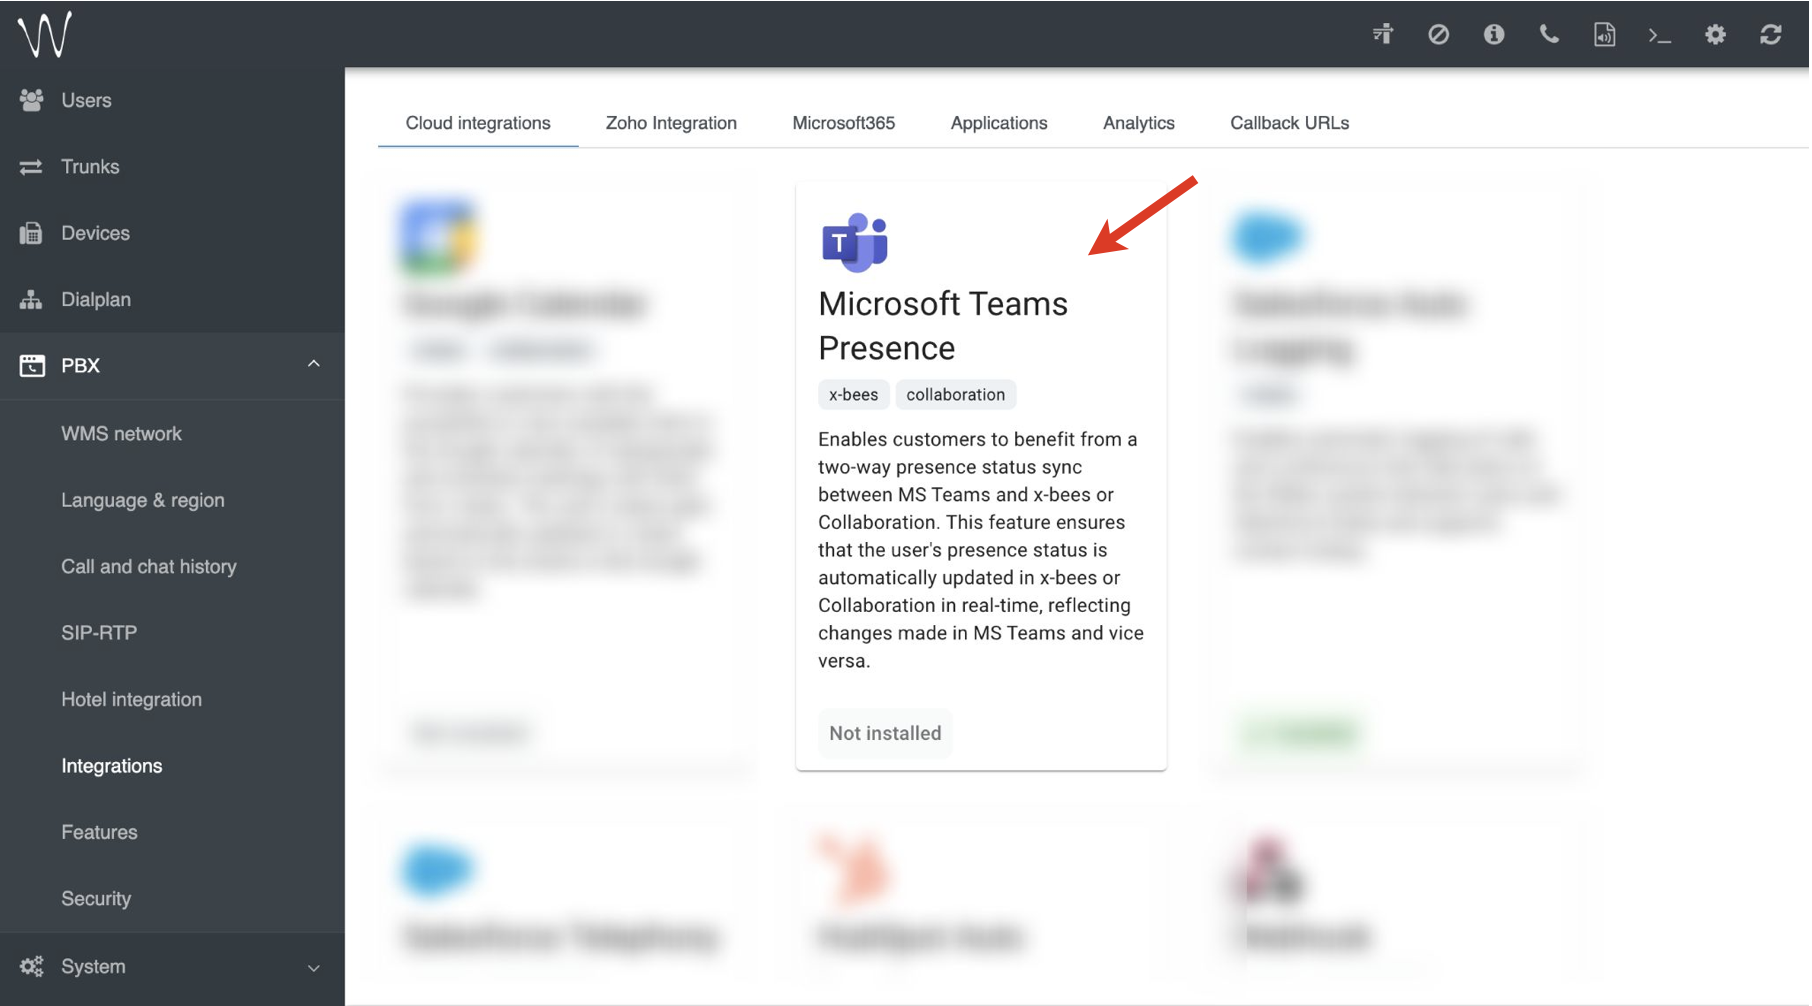
- Go to WMS -> PBX -> Integrations
Proceed to the Cloud integrations tab
Note: In case of WMS version lower than 6.05.20240119.1, the tab is named Calendars.
- Click Microsoft Teams Presence
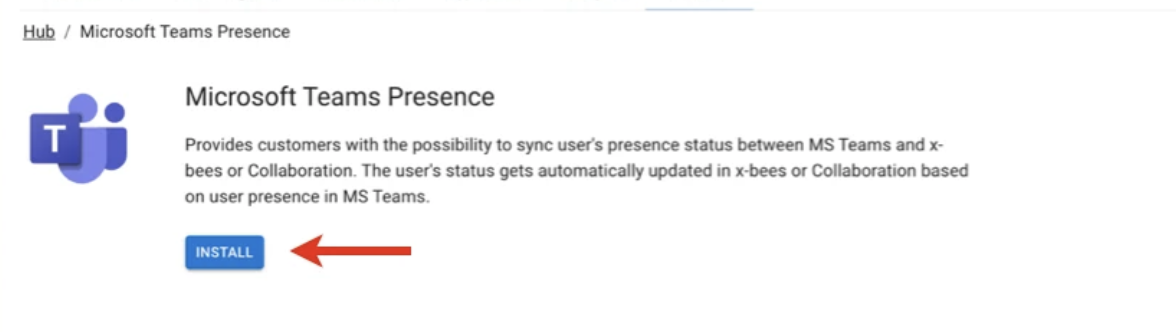
- Click Install
- Log in to your Microsoft account and accept the requested permissions
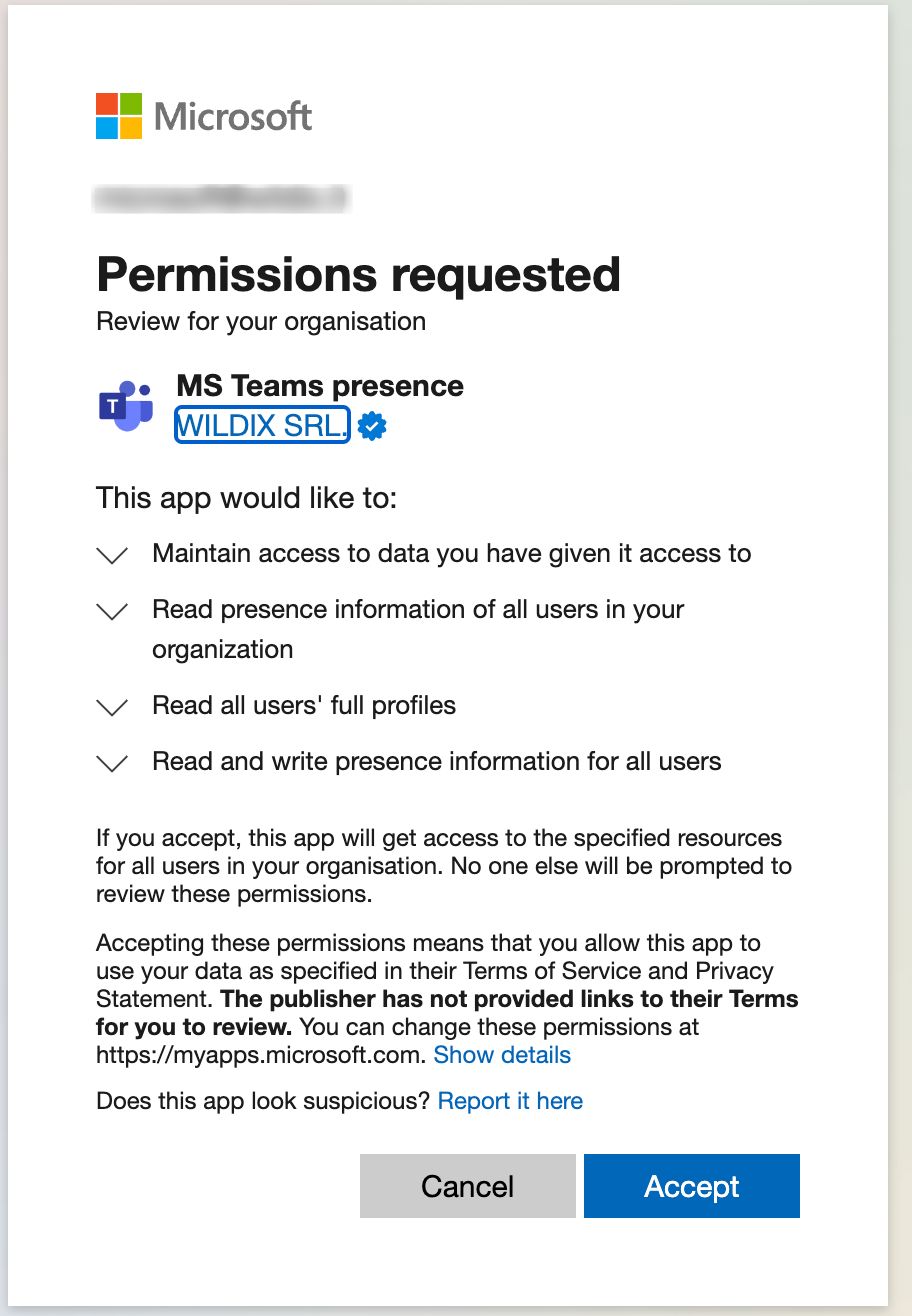
Note: In case the Microsoft account is already used for authentication to other third-party services or apps, there may be errors installing Microsoft Presence Sync.
Status mapping
The below table displays MS Teams statuses and the corresponding status on the PBX after the status sync. Please note that when changing your status in MS Teams, the sync with Collaboration or x-bees occurs within approximately 10 seconds. If you change your status in Collaboration/ x-bees, the sync with Teams may take up to 1 minute to reflect accurately in both platforms.
| Status in MS Teams | Status on the PBX |
|---|---|
| Available | Available |
| Do not disturb | Do not disturb + status message from MS Teams |
| Away | Away + status message from MS Teams |
Busy / In a call / In a meeting / Presenting / In a conference call | Do not disturb + status message from MS Teams |
Out of Office | Do not disturb + status message from MS Teams |
| Inactive / Off Work / Offline | Away + status message from MS Teams |
Be right back (Status unknown/ Blocked) | no changes |
Microsoft Phone System (second mode)
For information regarding how to set up and use the second mode of the teams4Wildix integration, called Microsoft Phone System which enables users to place and receive calls not only from Collaboration, but also from the Teams dialpad, consult the following Guides:
- Instruction for Wildix Partners: teams4Wildix - Instructions for Wildix Partner on MS Phone System Setup
- Instructions fro End Customers: teams4Wildix - Instructions for End Customers on MS Phone System Setup
teams4Wildix FAQ
Q1. Can teams4Wildix be integrated without CLASSOUND?
- No, CLASSOUND is required to have the Integration working.
Q2. Can another SIP trunk be used instead of CLASSOUND?
- Yes.
Q3. Can I as a partner install the Integration for end customers?
- In both Modes, an end customer admin is engaged. For Mode 1, an admin installs the integration for all company members. For Mode 2, MS admin account is needed for the initial setup on teams4Wildix portal, since Office 365 tenant checks the required licenses.
Q4. Can I control Teams Dialpad from Collaboration, for example, put a call on hold
- No, you cannot. Teams doesn’t allow controlling its Dialpad.
Q5. Can Teams contacts be dialed from Collaboration?
- Currently, no. Export of Microsoft phonebooks will be implemented later.
The user guide of the pre 2021 Microsoft Teams integration can be found here: https://drive.google.com/drive/u/0/folders/1aUGV-v9EMhMCCs0LlydOpoYkUSrHoSyK.