x-bees Admin Guide
- Ksenia Babych
- Tatiana Bieliakova
This Guide explains x-bees requirements and licensing and describes how to activate HubSpot, Salesforce, Google and Microsoft 365 integrations.
Other x-bees documentation: x-bees documentation.
Created: February 2022
Updated: December 2024
Permalink: https://wildix.atlassian.net/wiki/x/bgvOAQ
Requirements
- WMS version 6.01.20220621.2 and higher
Use the repository rel60 or rel60beta to install this version.
- The PBX must be on the x-bees licensing model in Salesforce Partner Community
Currently, there is no procedure for switching a PBX from the UC-licensing model to the x-bees-licensing, so it can be only done by the Wildix team. To check the requirements for switching, refer to the Customer Care documentation.
NOTE: access to Collaboration is also available for PBXs on the x-bees licensing plan!
- Make sure that these external servers are open on your router/ firewall:
- https://app.x-bees.com/
- https://api.x-bees.com/
- https://login.x-bees.com/
- https://chat.wildix-chat.com/
- https://conference.wildix.com/
- https://auth.wildix.com/
- https://fs.wildix.com/
- https://avatars.wildix.com/
- https://cognito-idp.eu-central-1.amazonaws.com/
- https://wda.wildix.com/
- https://wda-ws.wildix.com/
- https://wim.wildix.com/
- Make sure Cloud Analytics is enabled in WMS -> PBX -> Features (it is activated by default if a PBX or whole WMS Network are running in the Cloud). It is required for correct work of user presence sync and CDR-View 2.0 in x-bees Analytics. For more details, see documentation WMS Settings Menu - Admin Guide (see the Features section).
Supported browser
- Chrome
Mobile apps
- Android 9 or higher
- iOS 13.3 or higher
Chrome extension
- Download extension here: https://chrome.google.com/webstore/detail/x-bees/olejekejjhgimnlliplaiodgmbpcflhi
x-bees certification
To be able to use x-bees internally or to offer it to customers, it is mandatory to complete x-bees Partner Program at e-Learning platform https://e-learning.wildix.com/pages/32/certification-programs.
After you get x-bees certification, you can order PBXs with x-bees licensing in Salesforce Partner Community.
Licensing
Monthly/ Yearly licenses (3-year and 5-year commitment available):

| Features | Guest (external users) | x-bees-Device (for unattended phones, W-AIR handset users etc) | x-bees-Basic (for back office staff who do not deal with customers) | x-bees-Standard (for sales people, customer support) | x-bees-SuperBee (for supervisors, managers) |
|---|---|---|---|---|---|
| Access to x-bees web and mobile | ✅ | ➖ | ✅ | ✅ | ✅ |
| Max number of concurrent calls | ➖ | 2 calls | 4 calls | 8 calls | 8 calls |
| Max number of assigned devices | ➖ | 1 device | 10 devices | 10 devices | 10 devices |
| Free minutes for outbound calls* | ➖ | 100 min | 1000 min | 3000 min | 3000 min |
| Free SMS* | ➖ | ➖ | 50 messages | 200 messages | 200 messages |
| Colleagues search | ➖ | ➖ | ✅ | ✅ | ✅ |
| Colleagues view | ➖ | ➖ | ✅ | ✅ | ✅ |
| Favorites setup | ➖ | ➖ | ✅ | ✅ | ✅ |
| Inbound services (Contact center) | ➖ | ➖ | ✅ | ✅ | ✅ |
| Ability to create conversations | ➖ | ➖ | ✅ | ✅ | ✅ |
| Ability to write chats | ✅ | ➖ | ✅ | ✅ | ✅ |
| Video conferences participation | ✅ | ➖ | ✅ | ✅ | ✅ |
| Video conferences scheduling | ➖ | ➖ | ✅ | ✅ | ✅ |
| Ability to add guests to conversations | ✅ | ➖ | ➖ | ✅ | ✅ |
Personal contact-me links (chat and scheduler) | ➖ | ➖ | ➖ | ✅ | ✅ |
| Email signatures configuration | ➖ | ➖ | ➖ | ✅ | ✅ |
| ➖ | ➖ | ➖ | ✅ | ✅ | |
| Transcription of calls and conferences | ➖ | ➖ | ➖ | ✅ | ✅ |
| CRM integrations (Salesforce, HubSpot etc) | ➖ | ➖ | ➖ | ✅ | ✅ |
| Phonebook integration: search, add, edit contacts | ➖ | ➖ | ✅ | ✅ | ✅ |
| WhatsApp integration | ➖ | ➖ | ➖ | ✅ | ✅ |
| Gong.io BI integration logging of events | ➖ | ➖ | ➖ | ✅ | ✅ |
| Website widget agent | ➖ | ➖ | ➖ | ✅ | ✅ |
| AI Assistant | ➖ | ➖ | ➖ | ✅ | ✅ |
| Sales Intelligence | ➖ | ➖ | ➖ | ➖ | ✅ |
| Website widgets configuration | ➖ | ➖ | ➖ | ➖ | ✅ |
| Live dashboard and Analytics | ➖ | ➖ | ➖ | ➖ | ✅ |
Starting from WMS 6.04.20230920.1, the relevant licenses can be assigned to users via WMS -> Users -> Edit user -> License type field. See more in PBX Licensing and Activation - Admin guide (section "Assign correct license type to each user").
* Free minutes to Call Termination Area 1 and free SMS are available with the CLASSOUND service. Details on how to activate the service: CLASSOUND Activation Request.
Note that 2-way SMS are available in certain countries, check the list in How to send and receive SMS/ MMS via CLASSOUND.
Access for users and guests
Mobile apps
Notes:
- x-bees mobile apps can be downloaded both by PBX users and guests
- x-bees mobile apps are available for users who are assigned an x-bees-Basic license or higher
- Guests have to be previously invited to a channel by a PBX user in order to be able to engage with them in conversations
Follow the steps below:
- Download the x-bees app from Apple store or Google Play Market
- Log in using your Microsoft 365 or Google SSO, or via email
In case of login via email, a verification code will be sent to your email address, you will need to enter it to log in
- For PBX users only: follow the steps below to connect to your Wildix PBX
- Click on your user picture to open Settings
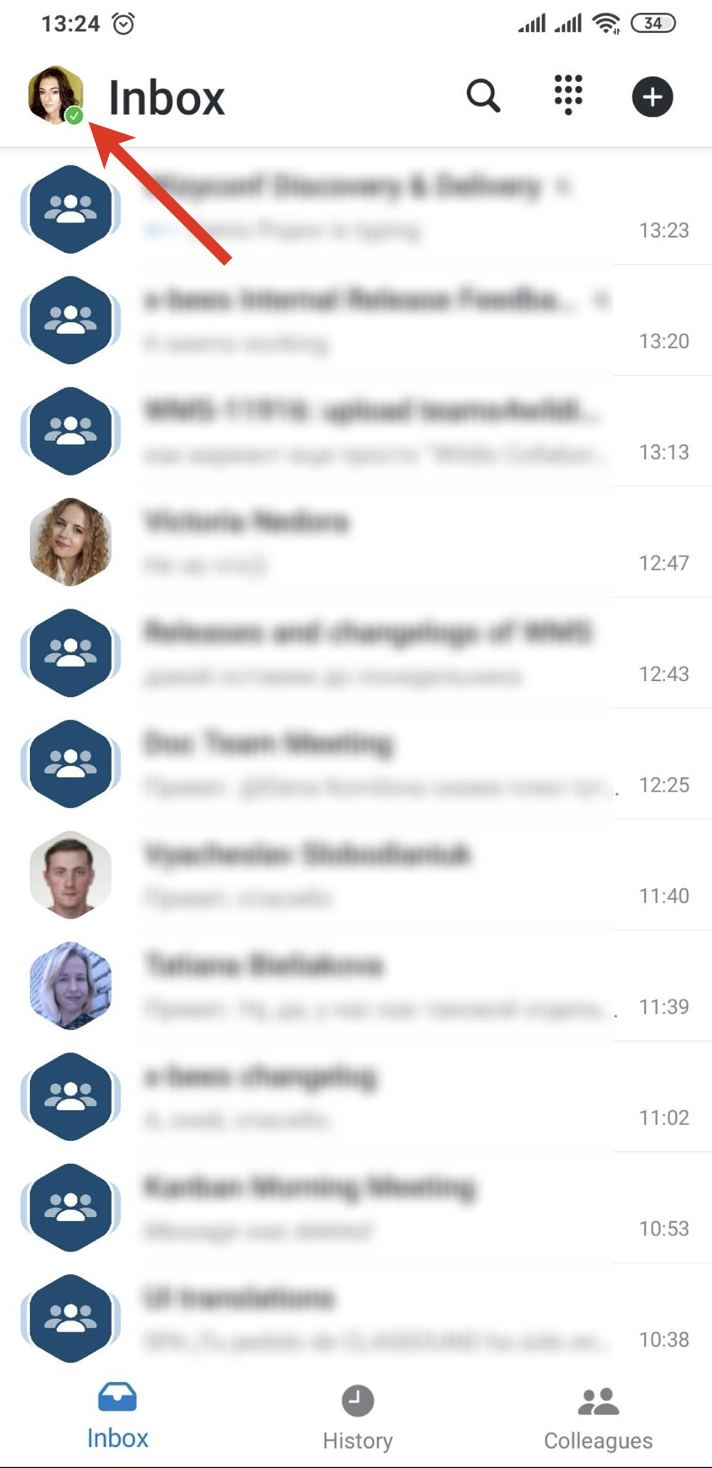
- Under Settings, click Connect to Wildix PBX
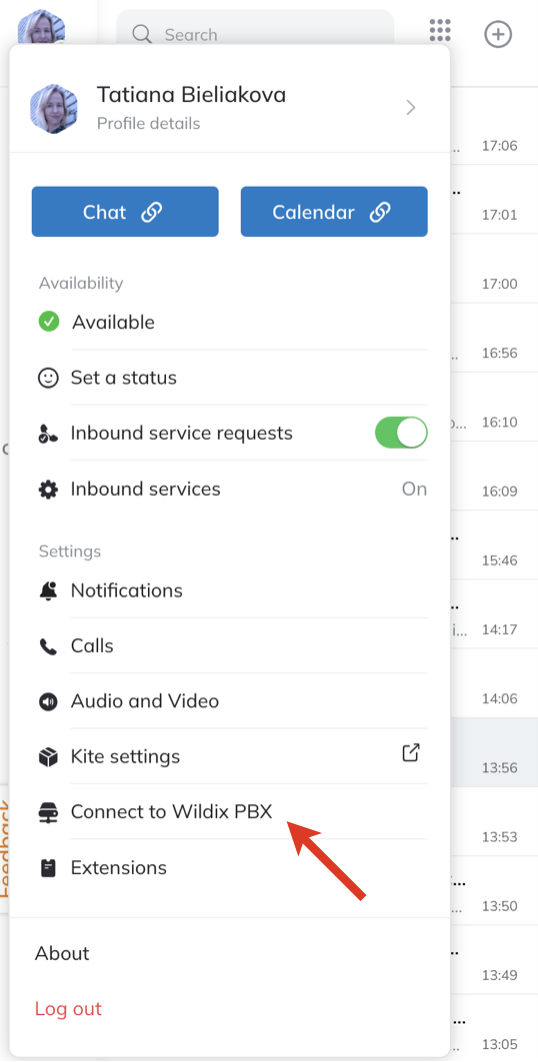
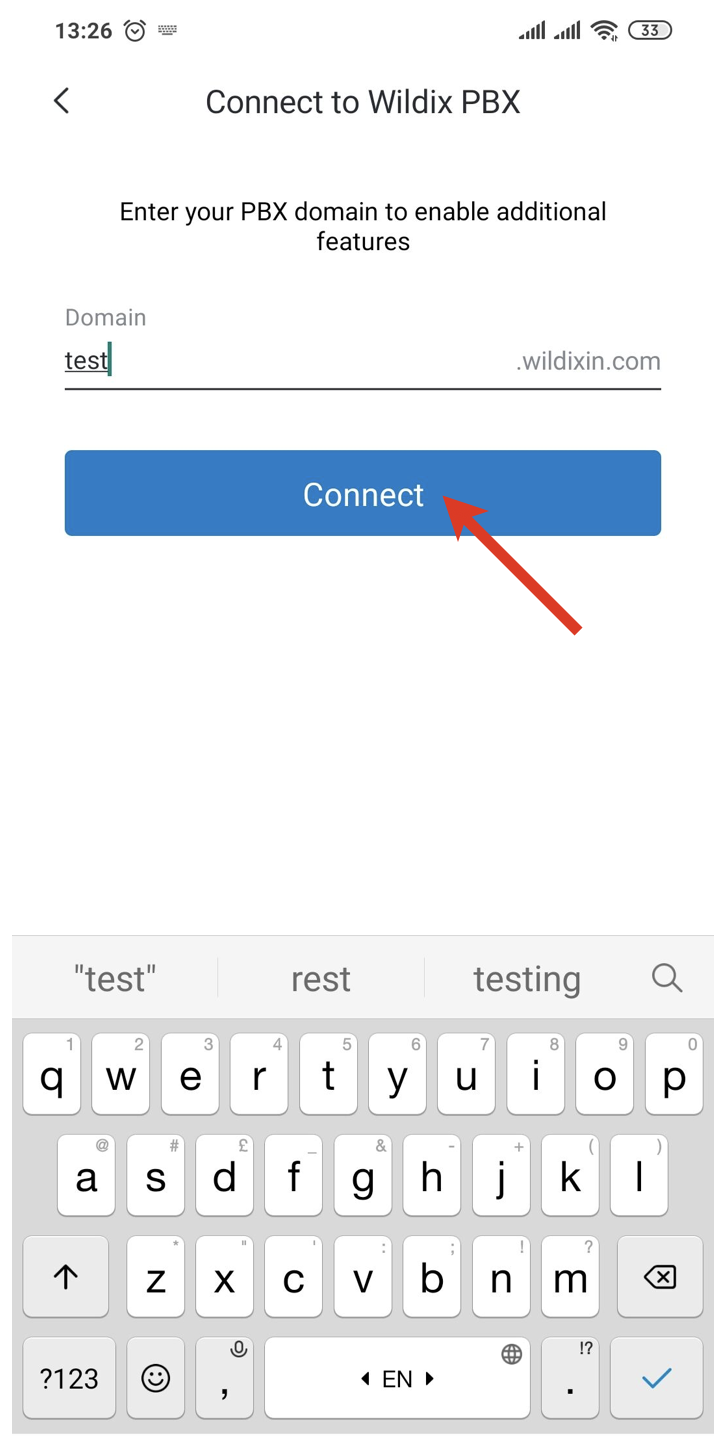
- Enter the domain name of your PBX into the input field and click Connect
- Click on your user picture to open Settings
Note: Guests who are not Wildix PBX users need to be invited to an x-bees channel by a PBX user to be able to engage with them in conversations.
Web access
From WMS:
- Go to WMS -> Users, select users and click Invite to x-bees
- Users receive an invitation via email with the link to join x-bees
Via the link:
Alternatively, PBX users can join x-bees following the steps below:
- Open the link: https://app.x-bees.com/
- Log in via Google or Microsoft 365 SSO, or by email
In case of login via email, a verification code will be sent to your email address, you will need to enter it to log in
Note:
- In case user email was changed via WMS, user preserves access to x-bees conversations.
After email is changed, user gets logged out from x-bees and has to log in with the new email -> go to Settings -> connect to PBX -> log in again. In case of using an invitation link, connection to the PBX is performed automatically and conversations are available immediately, without relogin.
- In case user email changes after the user was moved to another PBX, access to conversations is not preserved.
- In case user email was changed via WMS, user preserves access to x-bees conversations.
- Connect to the PBX:
- Click on your user picture in the upper left-hand part of the screen to open Settings
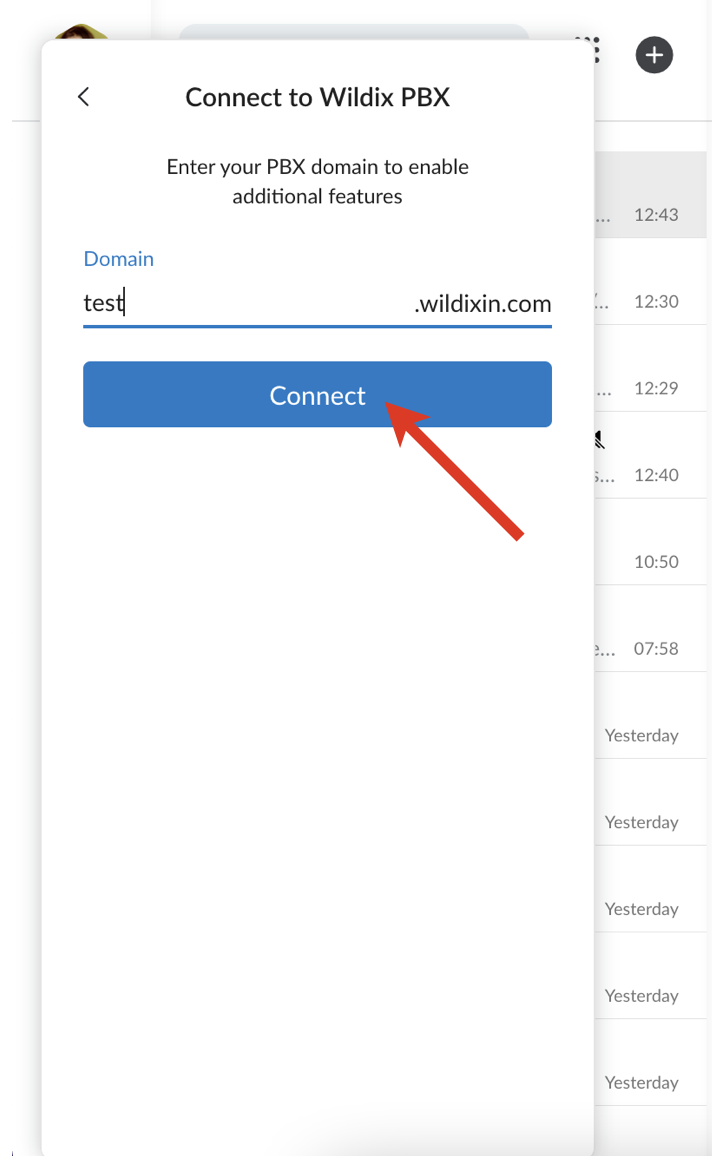
- Under Settings, click Connect to Wildix PBX
- Enter your Wildix PBX domain into the input field and click Connect
Direct link to contact an x-bees user
Note: A customizable widget or contact-me button can be added to your website or embedded to your email signature, to enable customers to contact single agents or groups by clicking on a link.
Documentation: x-bees website widget configuration.
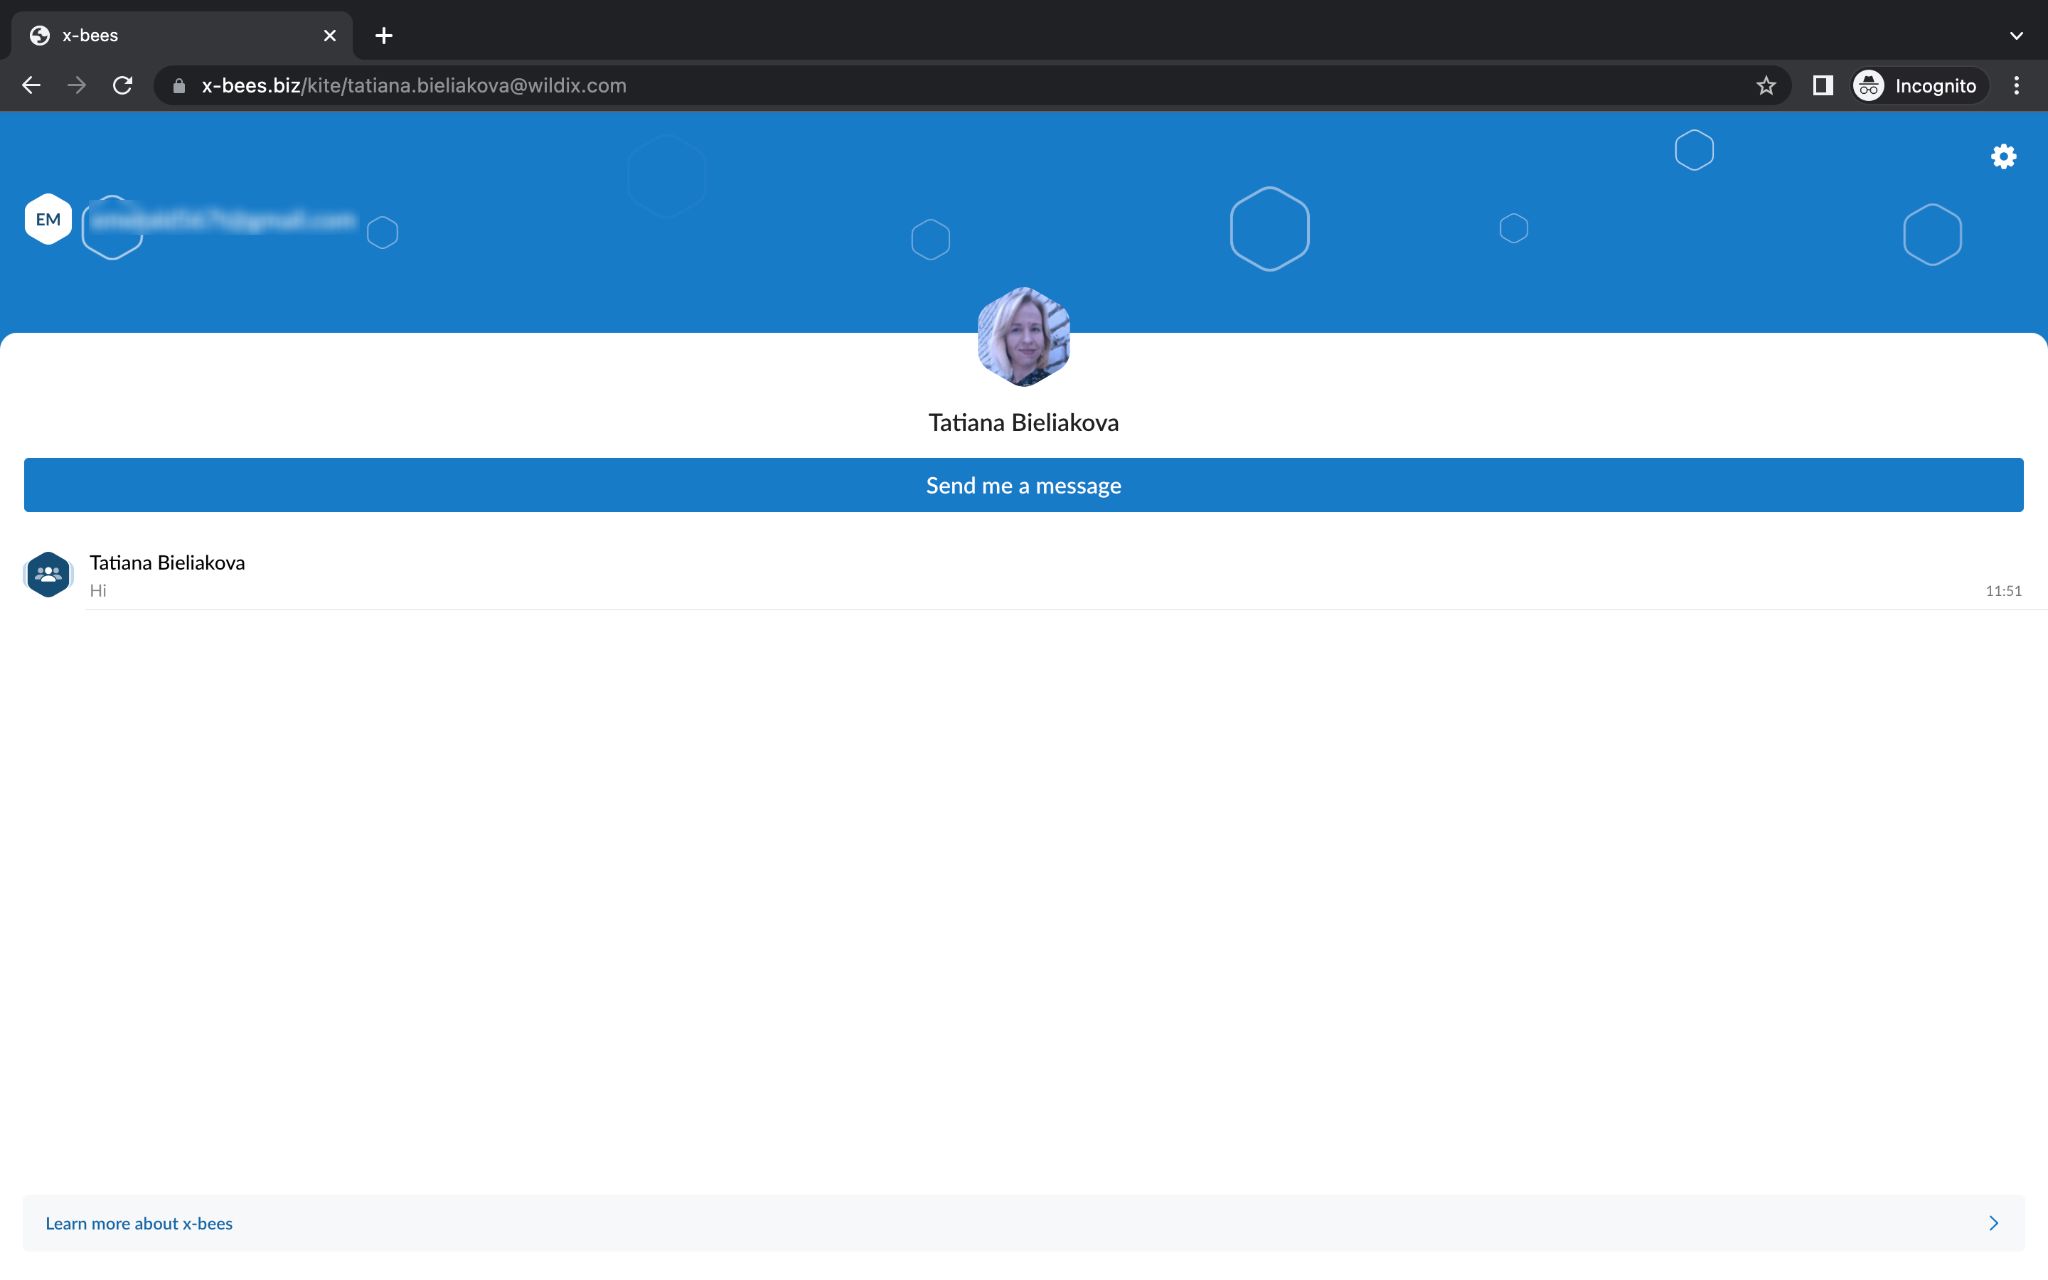
Currently, you can create contact-me links and add them to your website or anywhere on the web, in the following format: https://app.x-bees.com/kite/name.surname@yourdomain.com, where name.surname@yourdomain.com is your email address.
Here's an example of what happens if an external (non-authorized) user clicks on a link:
- User clicks Send me a message
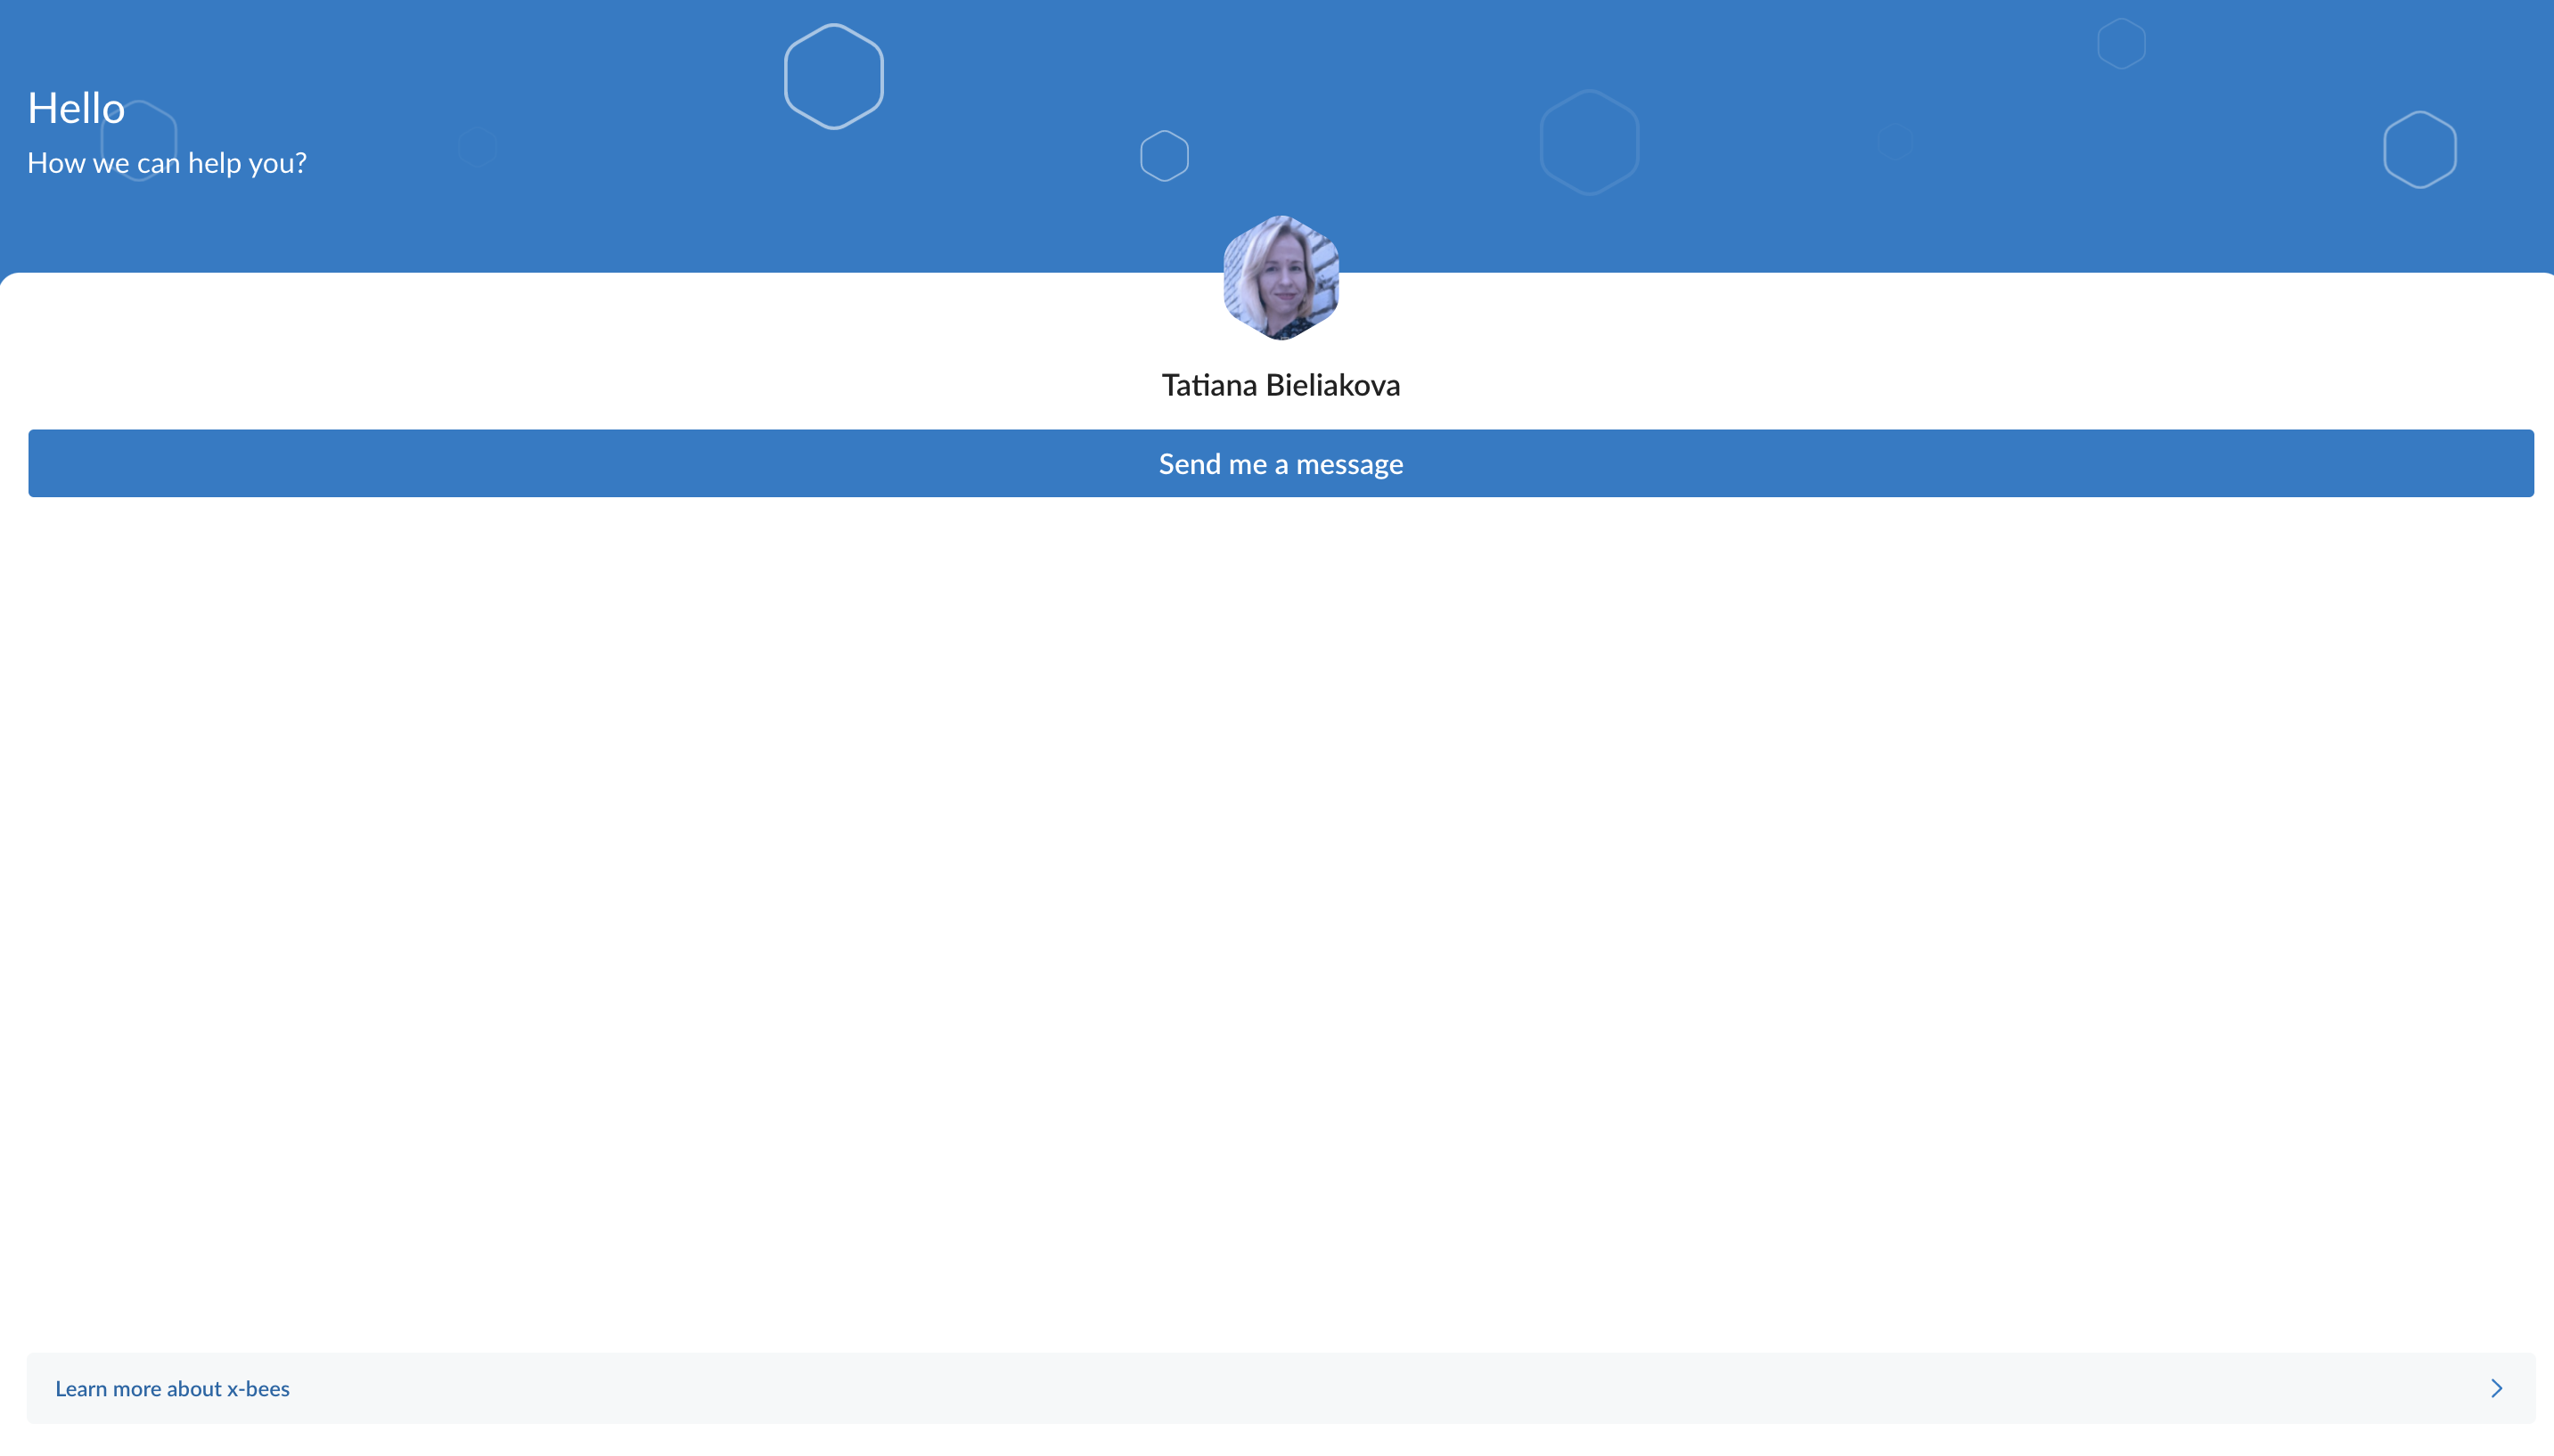
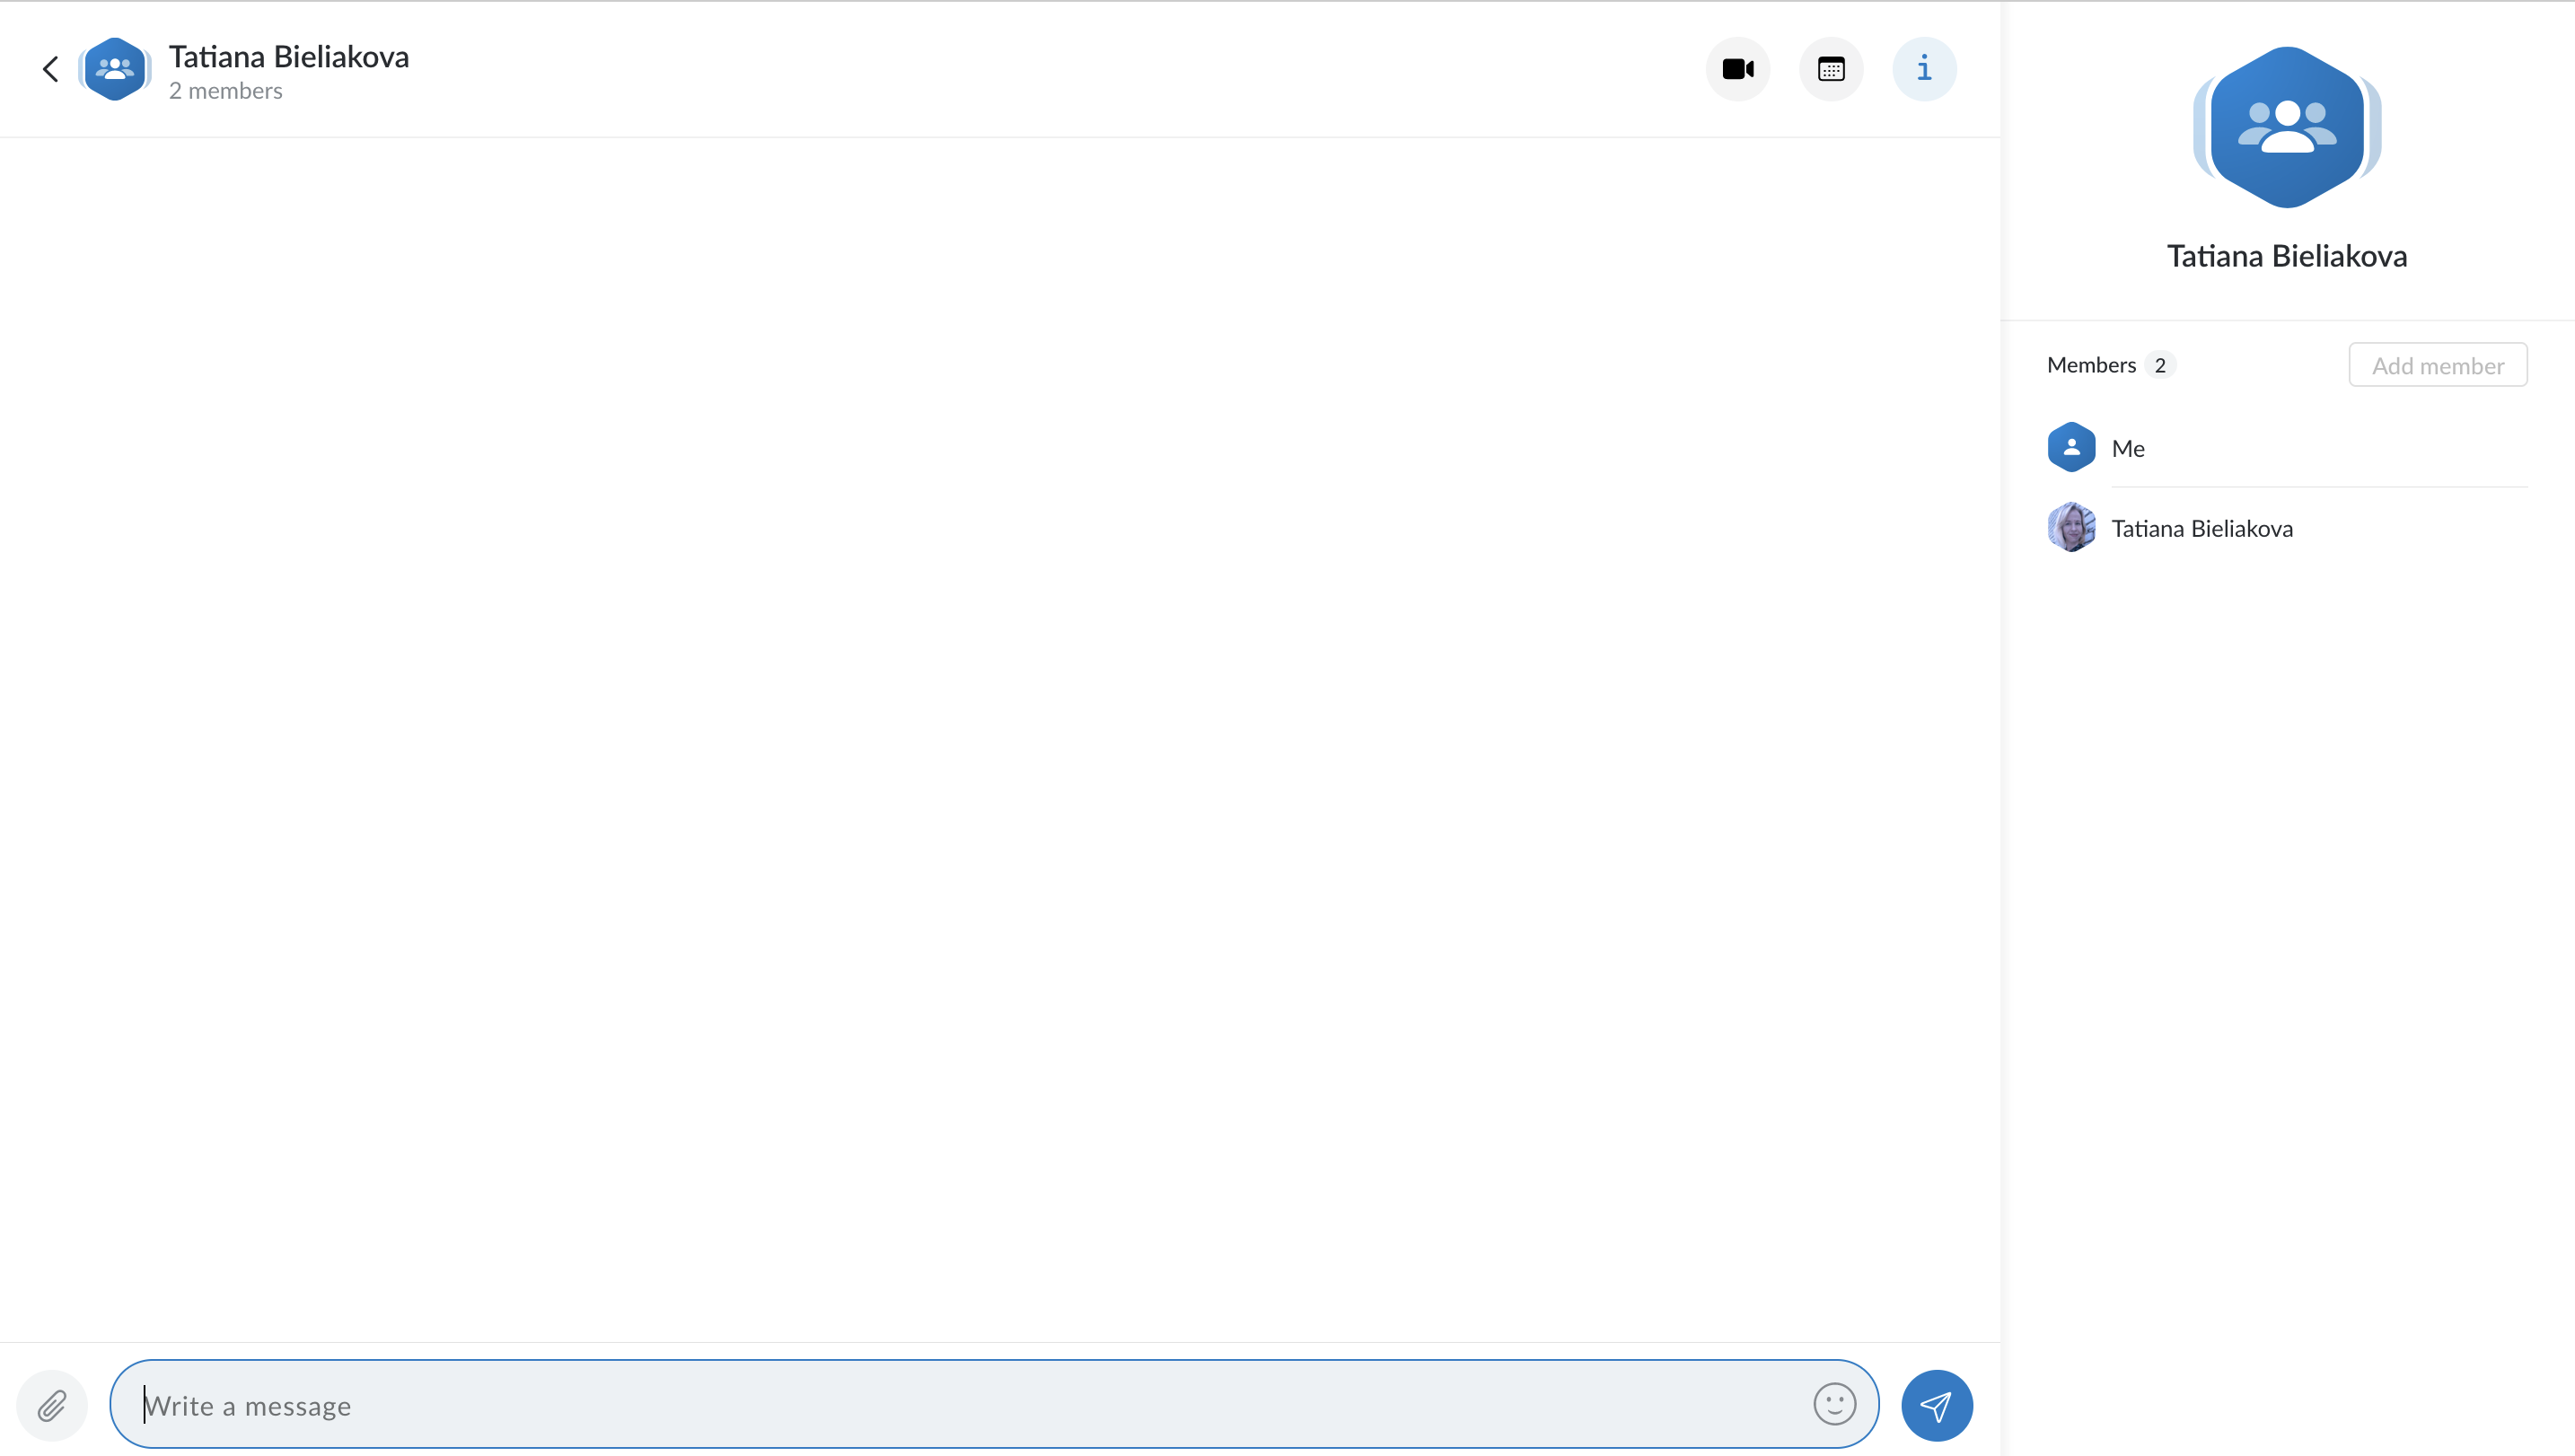
- x-bees interface opens and user starts typing a message
- Authentication popup opens, requesting user to log in using Google/ Microsoft 365 SSO or email
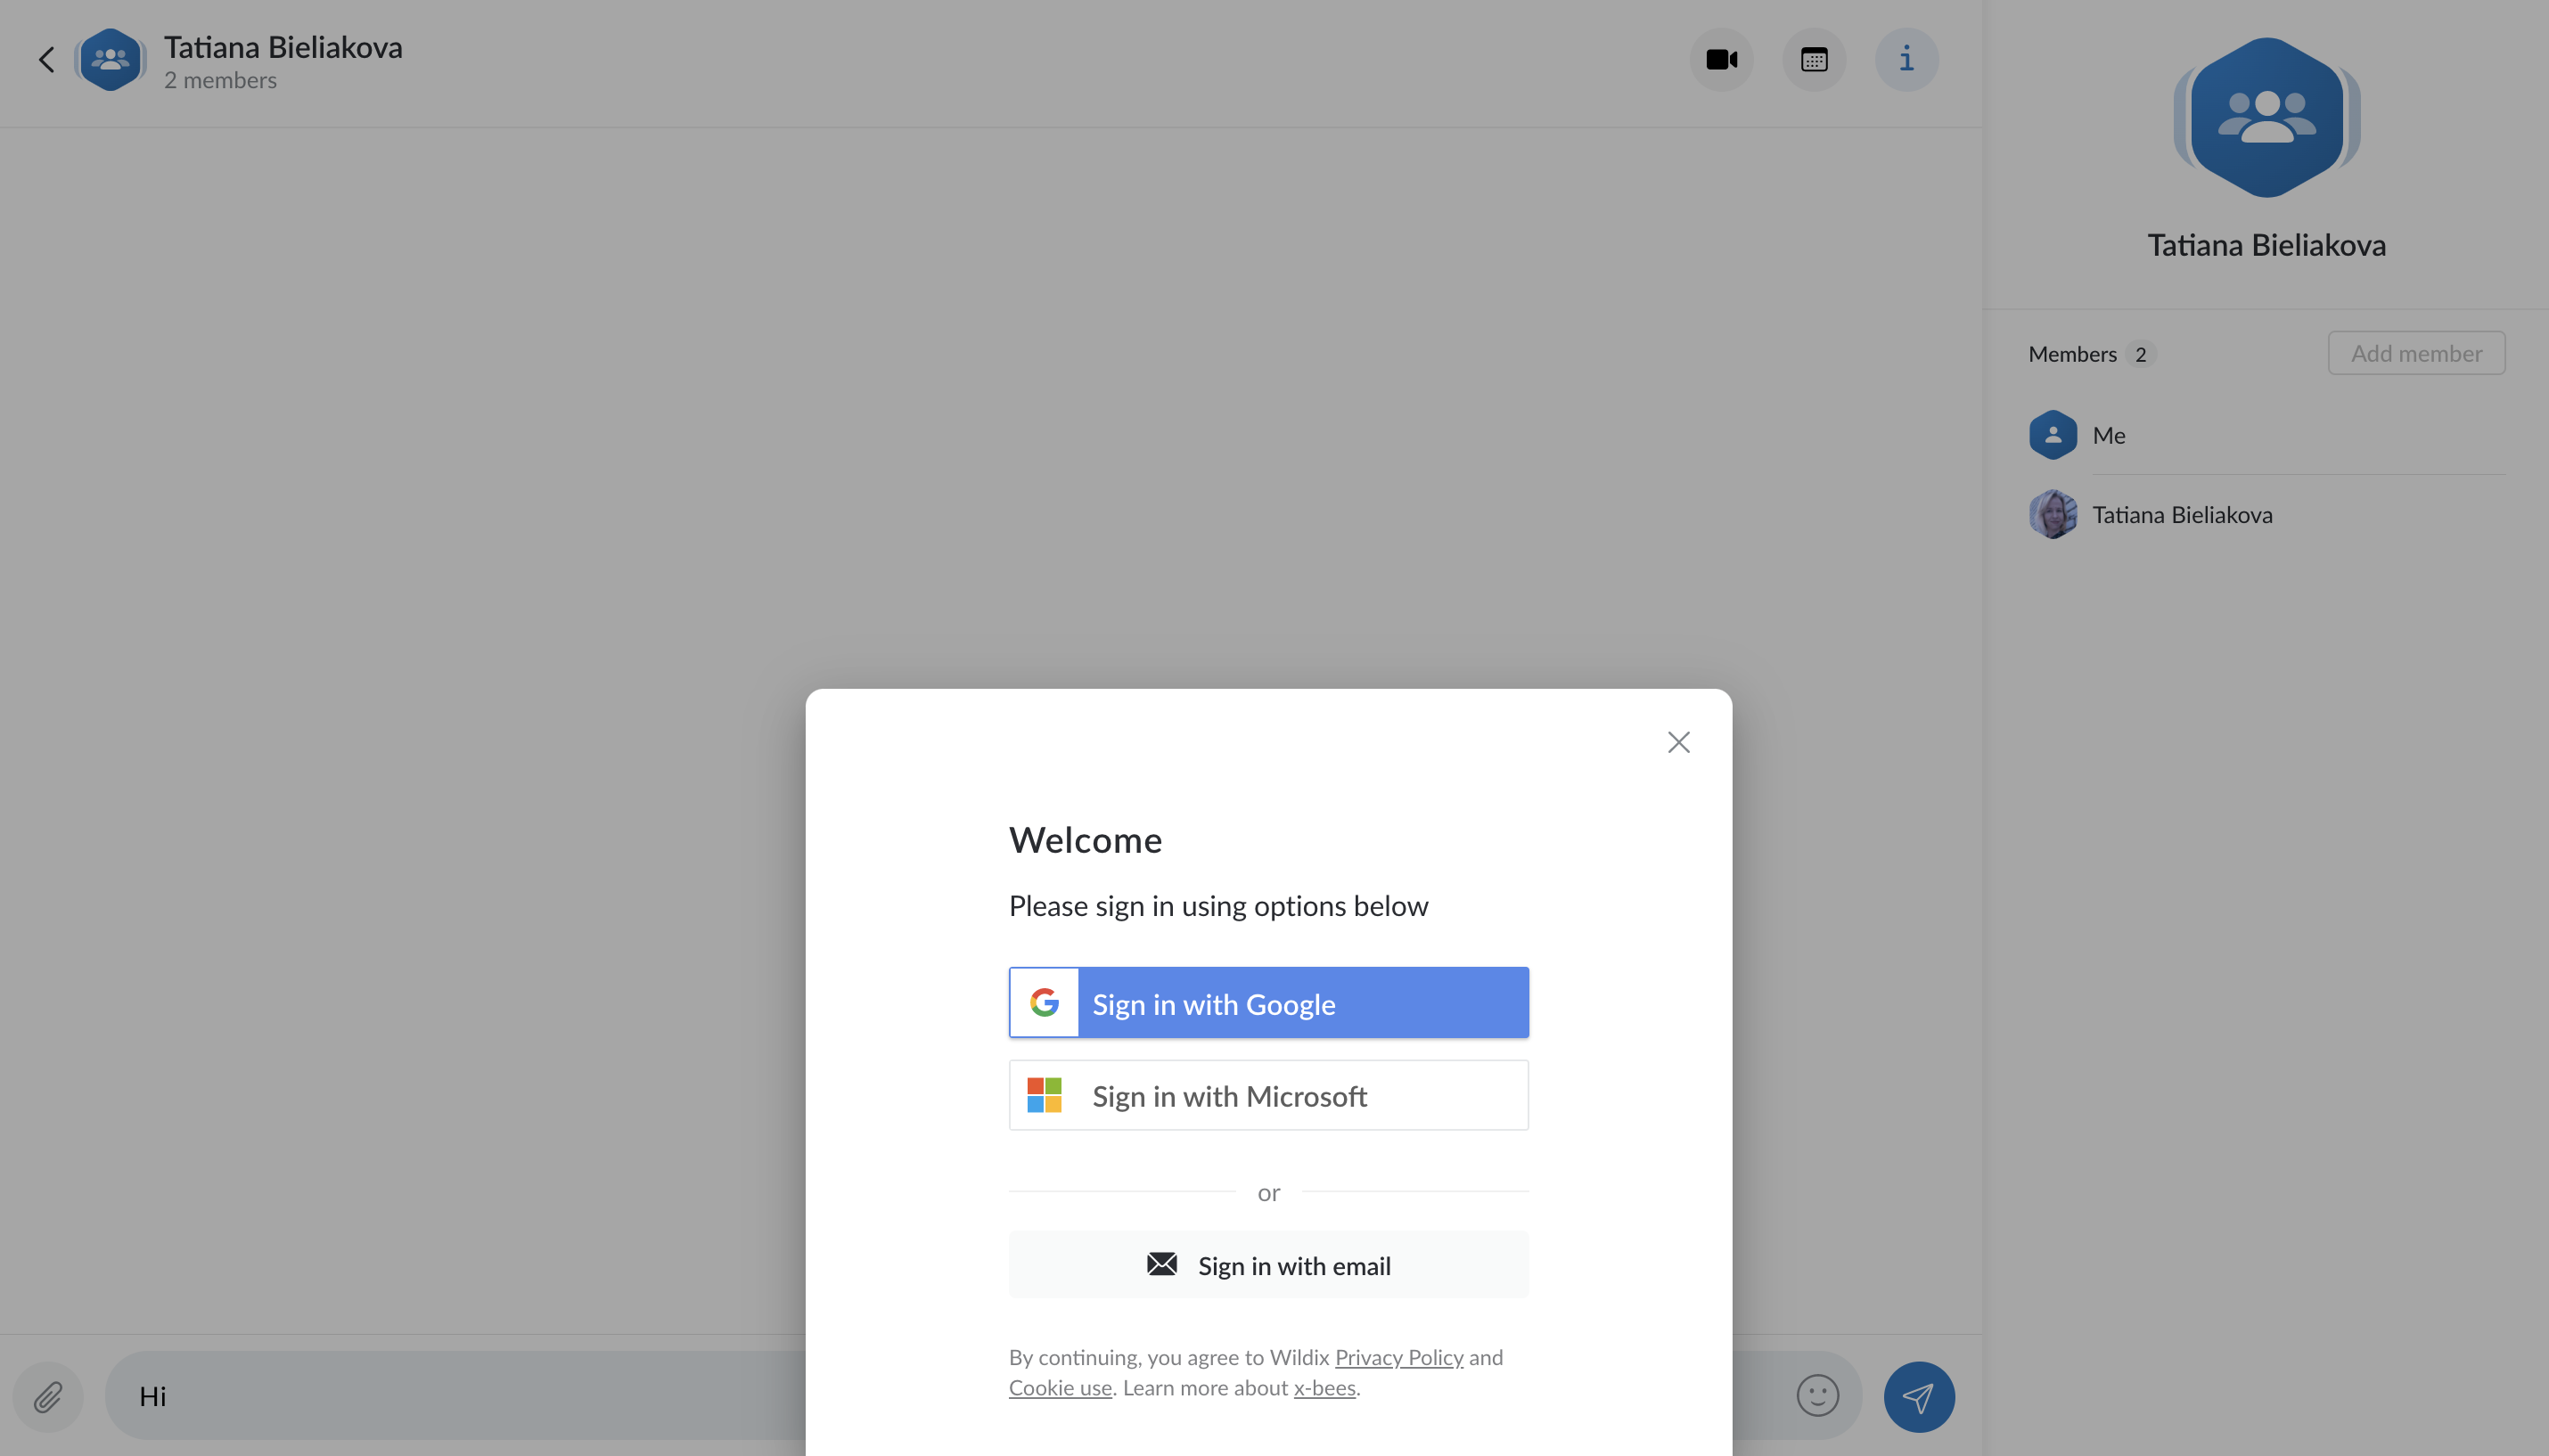
- In case user chooses to log in via email, a code is sent to their email and they need to type it
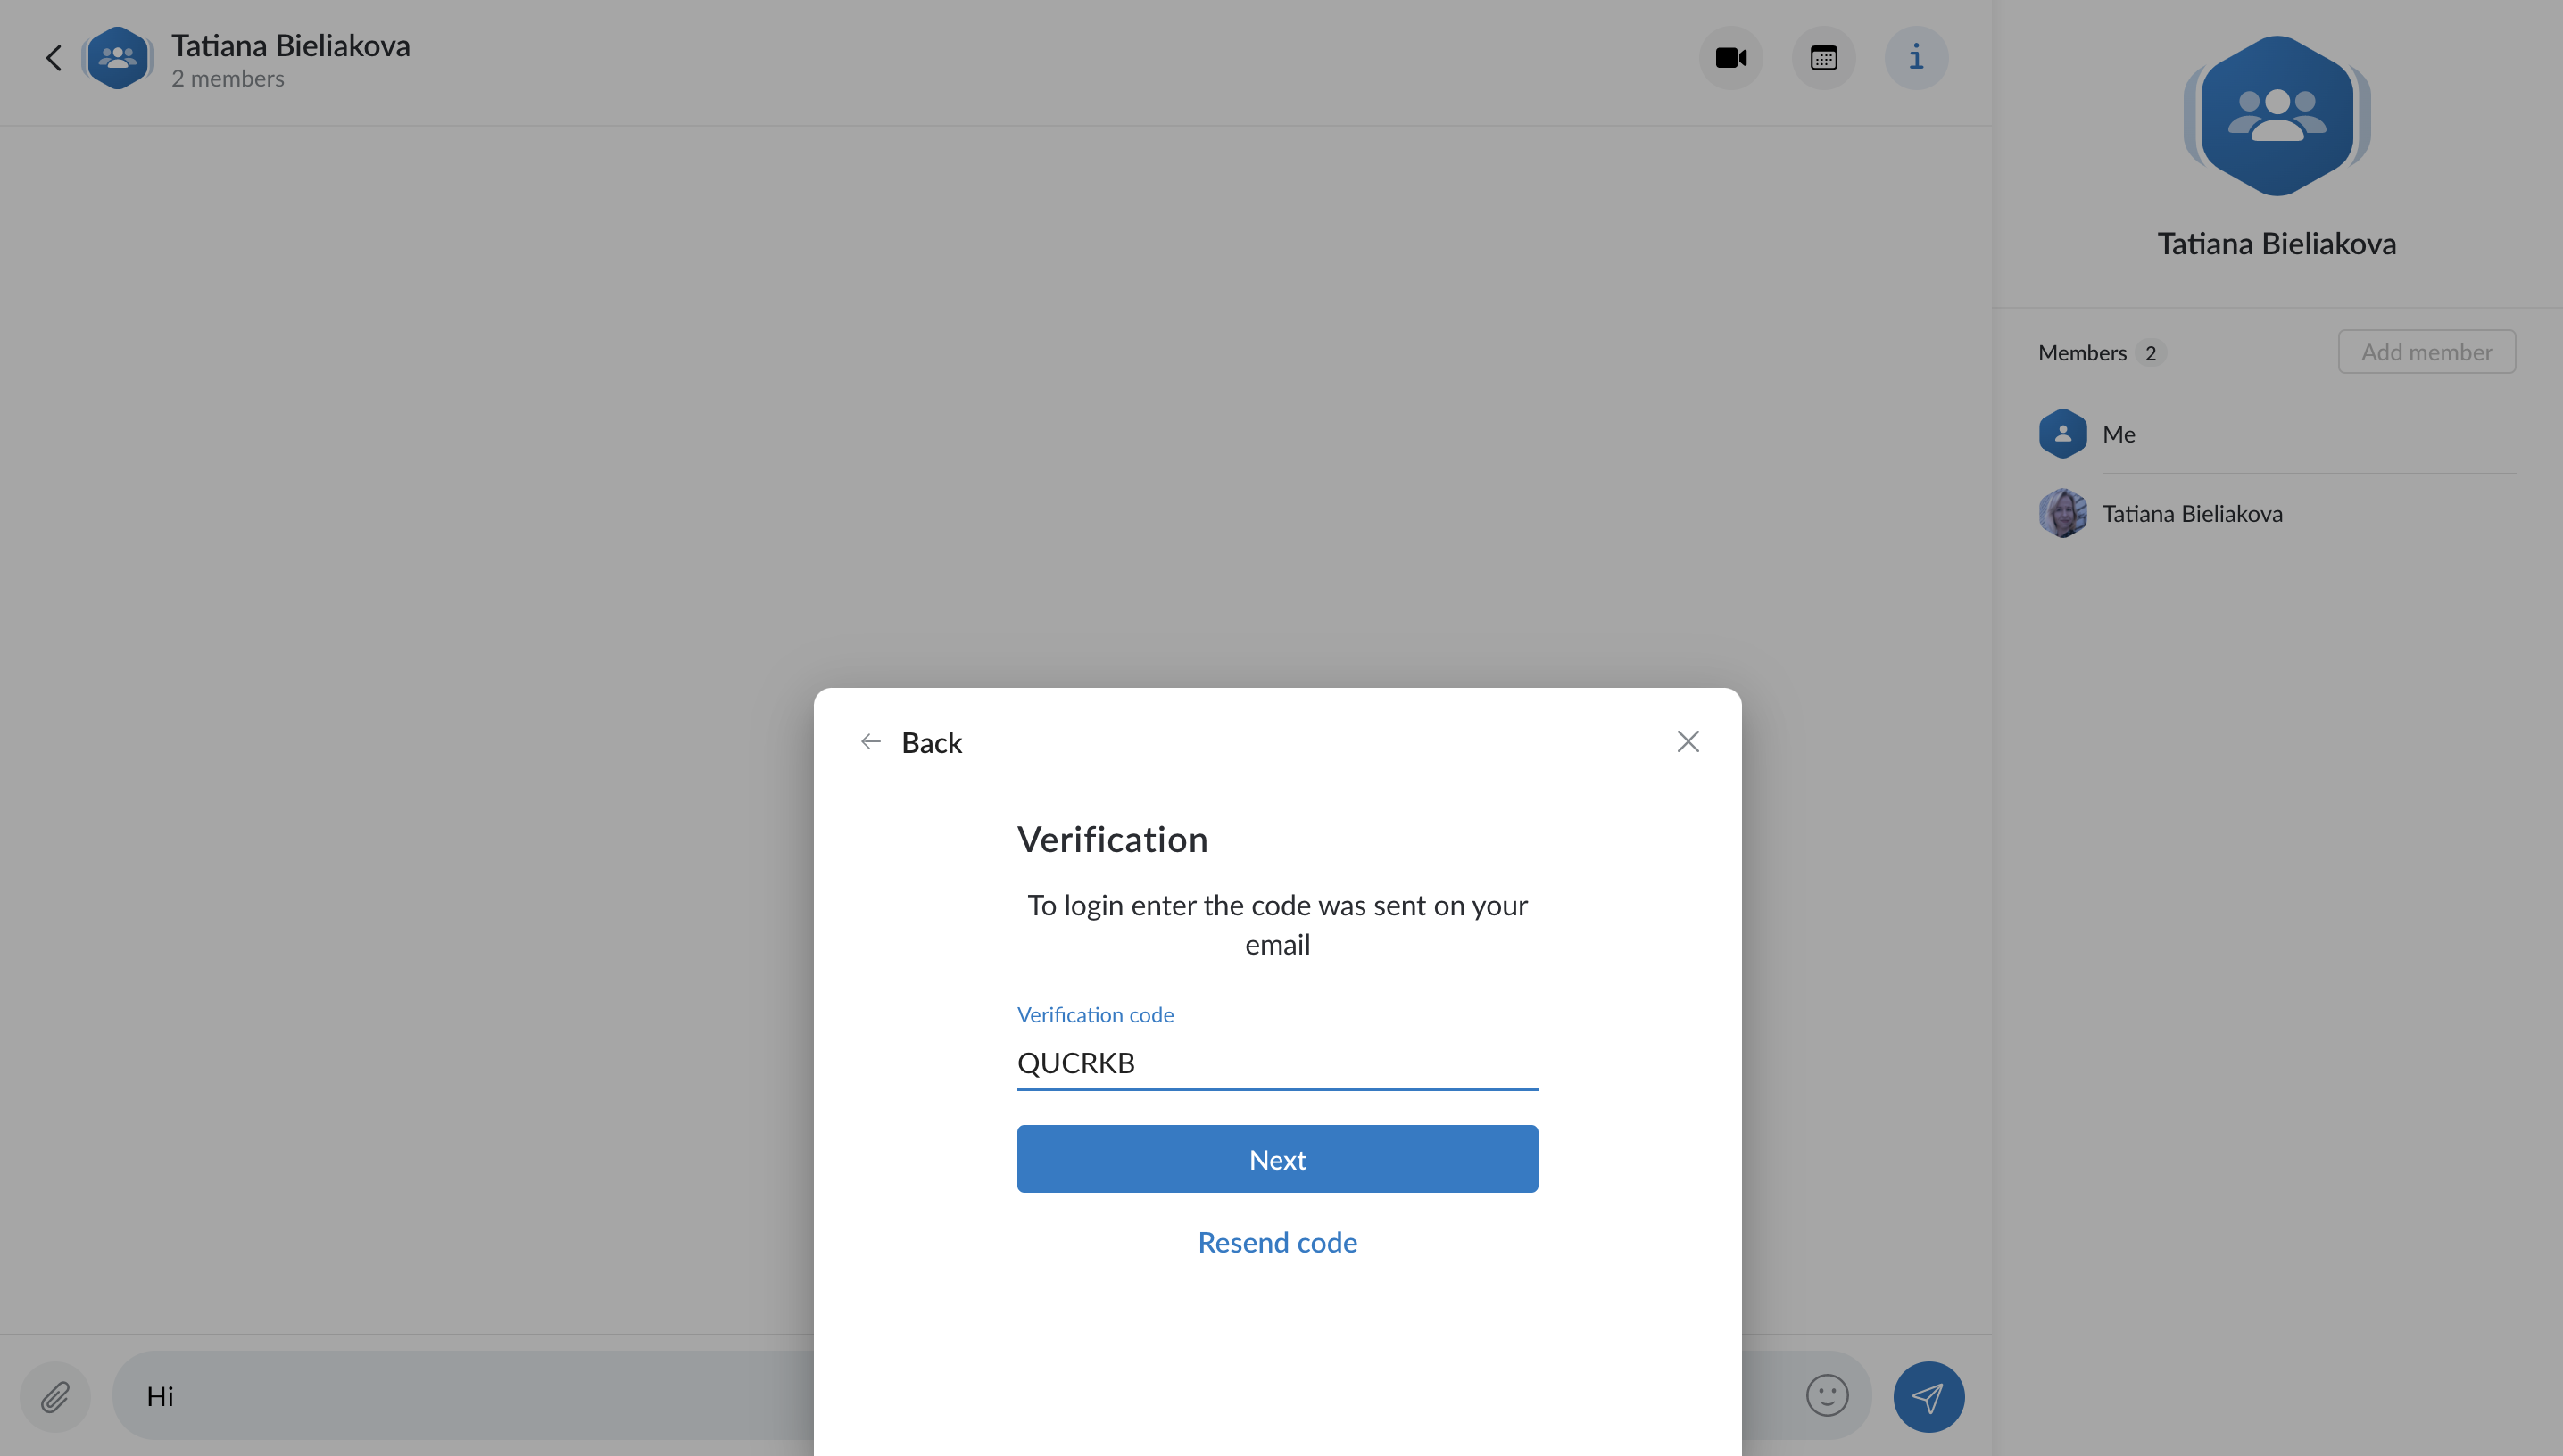
- Now they can continue the conversation with the PBX user
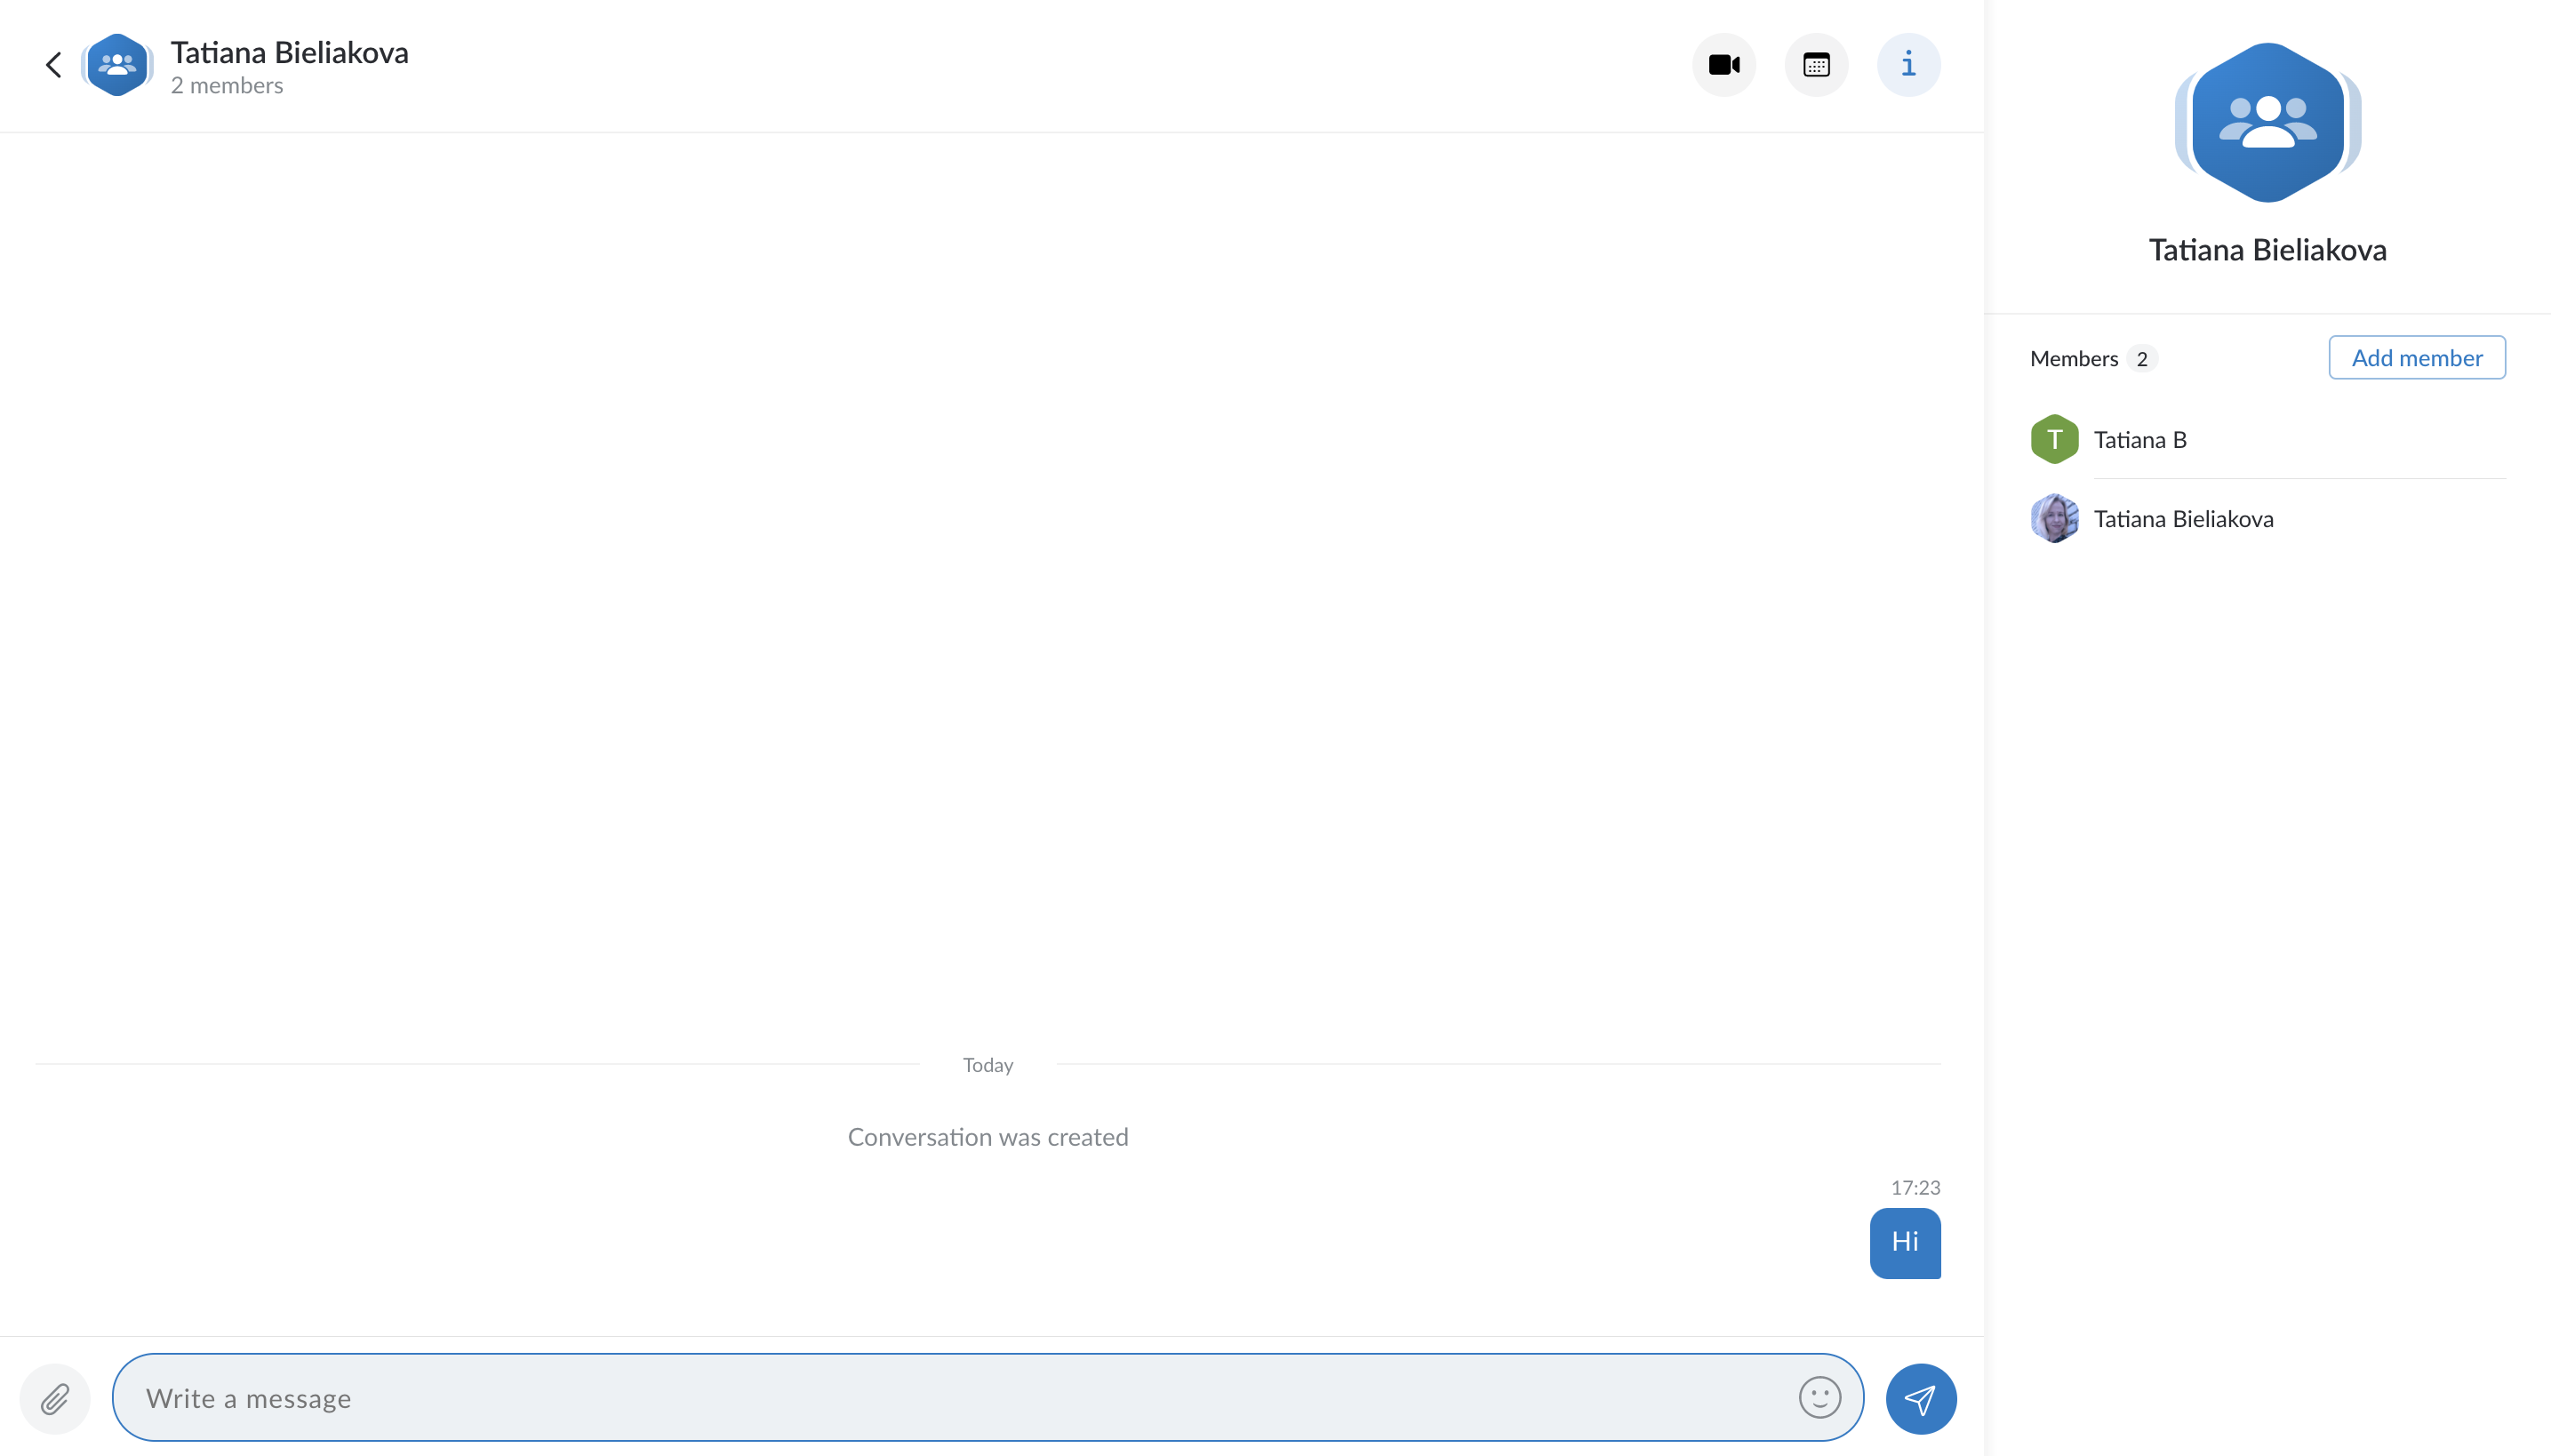
External user can invite other members to the conversation by clicking the Add member button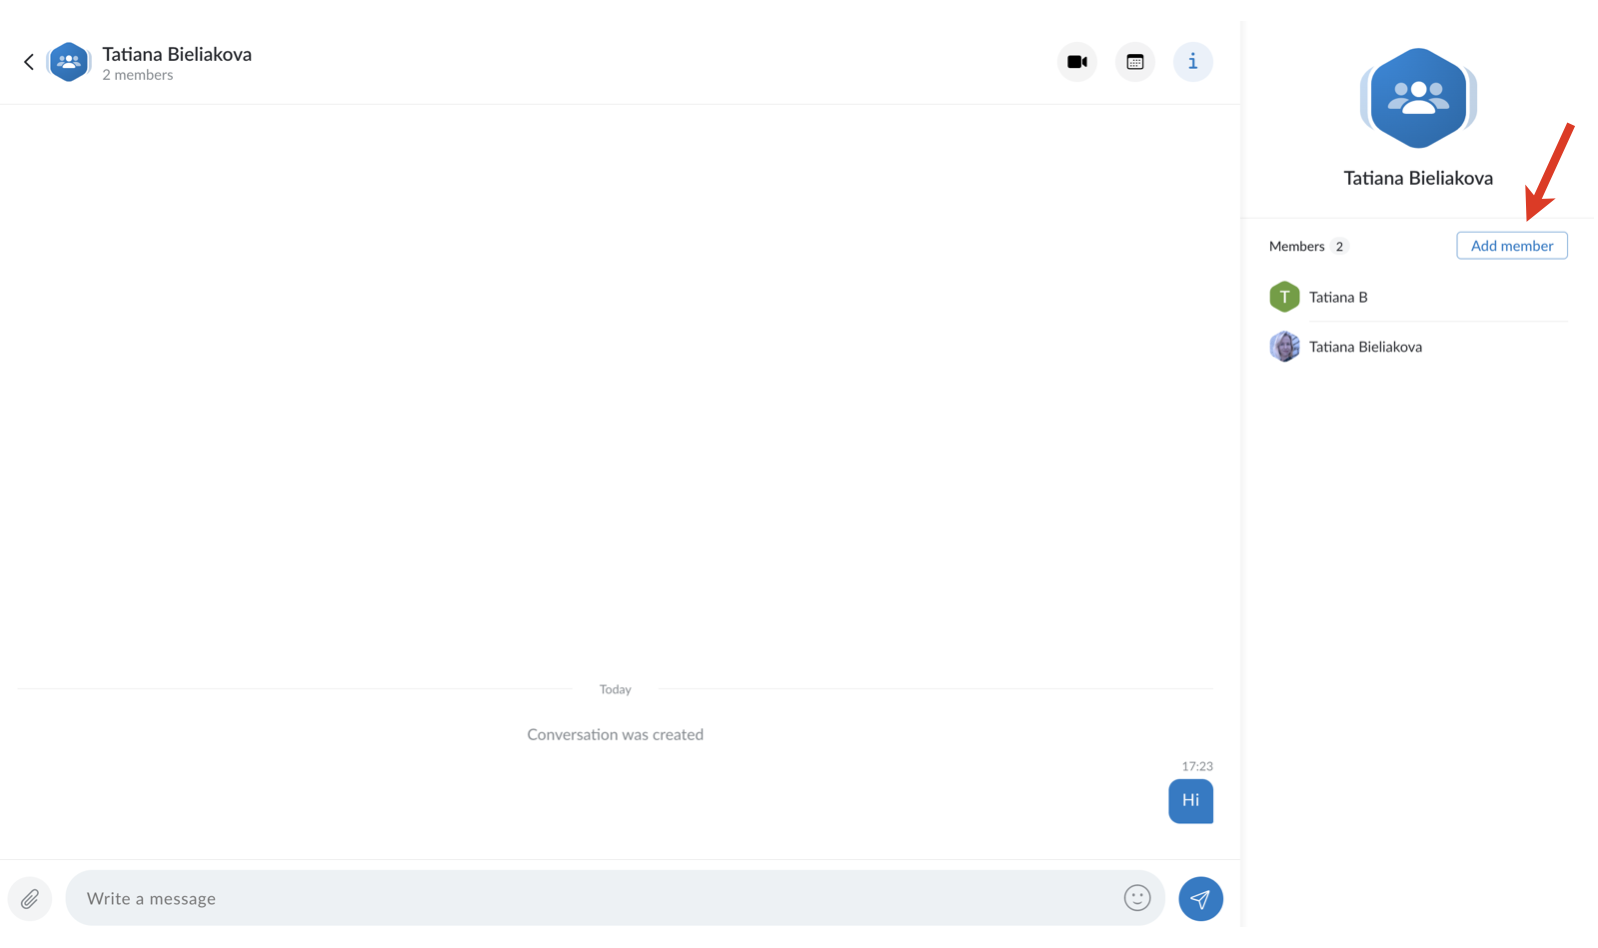
- By clicking on the Back arrow next to the conversation icon from the top left-hand side of the screen, user can view all the previous conversations in which they were involved
Access WMS via x-bees
Admin users can access PBX, where you can set up integrations, manage users, etc. via x-bees Settings -> Manage PBX button:

For other users, this option is not displayed.
Integrations
Salesforce Integration
Salesforce integration enables automatic logging of calls and conferences that take place on the Wildix system between users and Salesforce leads. From x-bees, users can create new Salesforce leads, find existing leads, view all the previous interactions with them, create tasks, log activities and start a new conversation or schedule a call with them.
Also, Salesforce integration with x-bees allows to manage Salesforce Opportunities, track stages, view and edit summary, view and edit notes and tasks.
For managing calls and contacts directly from Salesforce account, refer to a separate integration: Salesforce Lightning Integration User Guide (compatible only with Lightning).
Requirements
- x-bees-Standard license or higher
- Admin access to Salesforce Classic or Lightning account
- Salesforce license with API access. API access is included in the following Salesforce editions:
- Enterprise Edition
- Unlimited Edition
- Developer Edition
- Performance Edition
API access is not included in the following versions:
- Professional Edition: API access can be purchased from Salesforce
- Essential Edition
Information: https://help.salesforce.com/s/articleView?id=000326486&type=1.
Installation
Installation consists of two parts:
- Install Salesforce Auto Logging integration: it ensures automatic logging of calls and conferences that take place in x-bees between users and Salesforce leads; also, the integration ensures contact lookup for calls.
- Enable Salesforce in x-bees Client integrations: this allows to view Salesforce lead data on the Info frame in x-bees, see Salesforce contacts in Live Search and Dialpad search, create tasks and new Salesforce leads, and manage Salesforce Opportunities via x-bees.
- Update Salesforce Settings
I. To enable Salesforce Auto Logging:
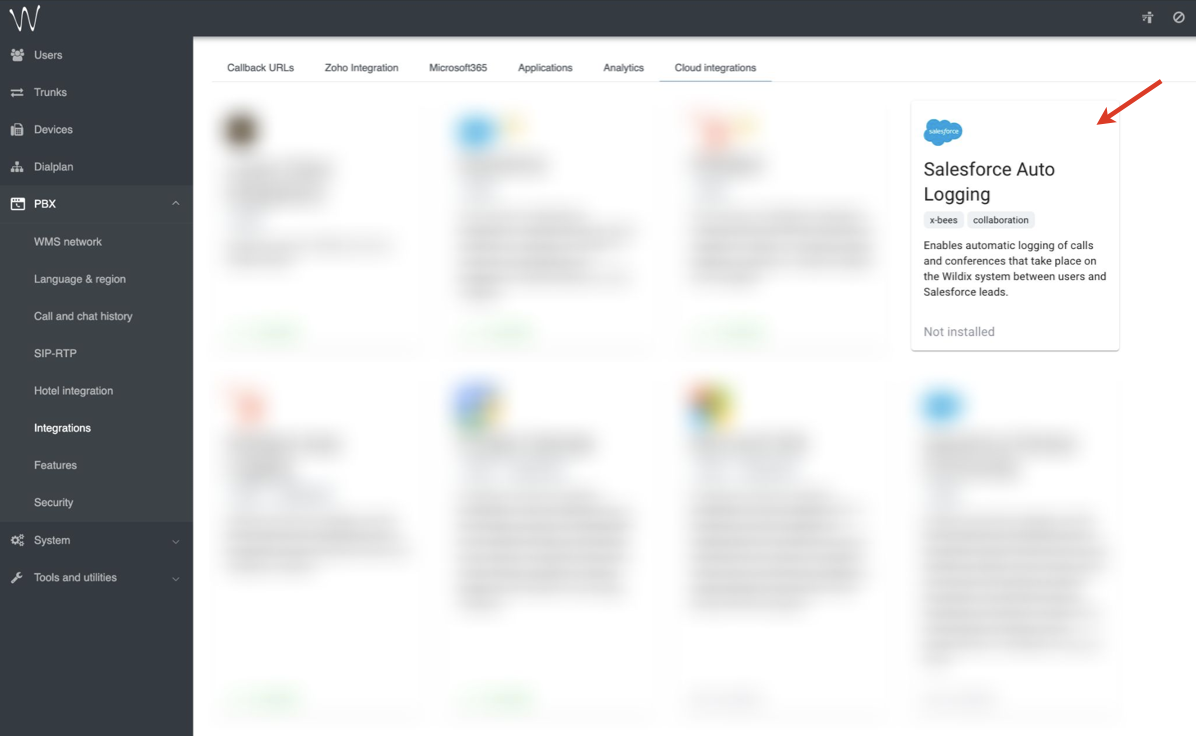
Go to WMS Settings -> PBX -> Integrations -> Cloud integrations
Note: In case of WMS version lower that WMS 6.05.20231110.2, the tab is named x-bees (not Cloud integrations). Your PBX should be on the x-bees licensing, otherwise, the x-bees tab is greyed out.
- Wildix Integration Hub opens
- Click on Salesforce Auto Logging:
- Select an environment (live/ sandbox) and click Install:
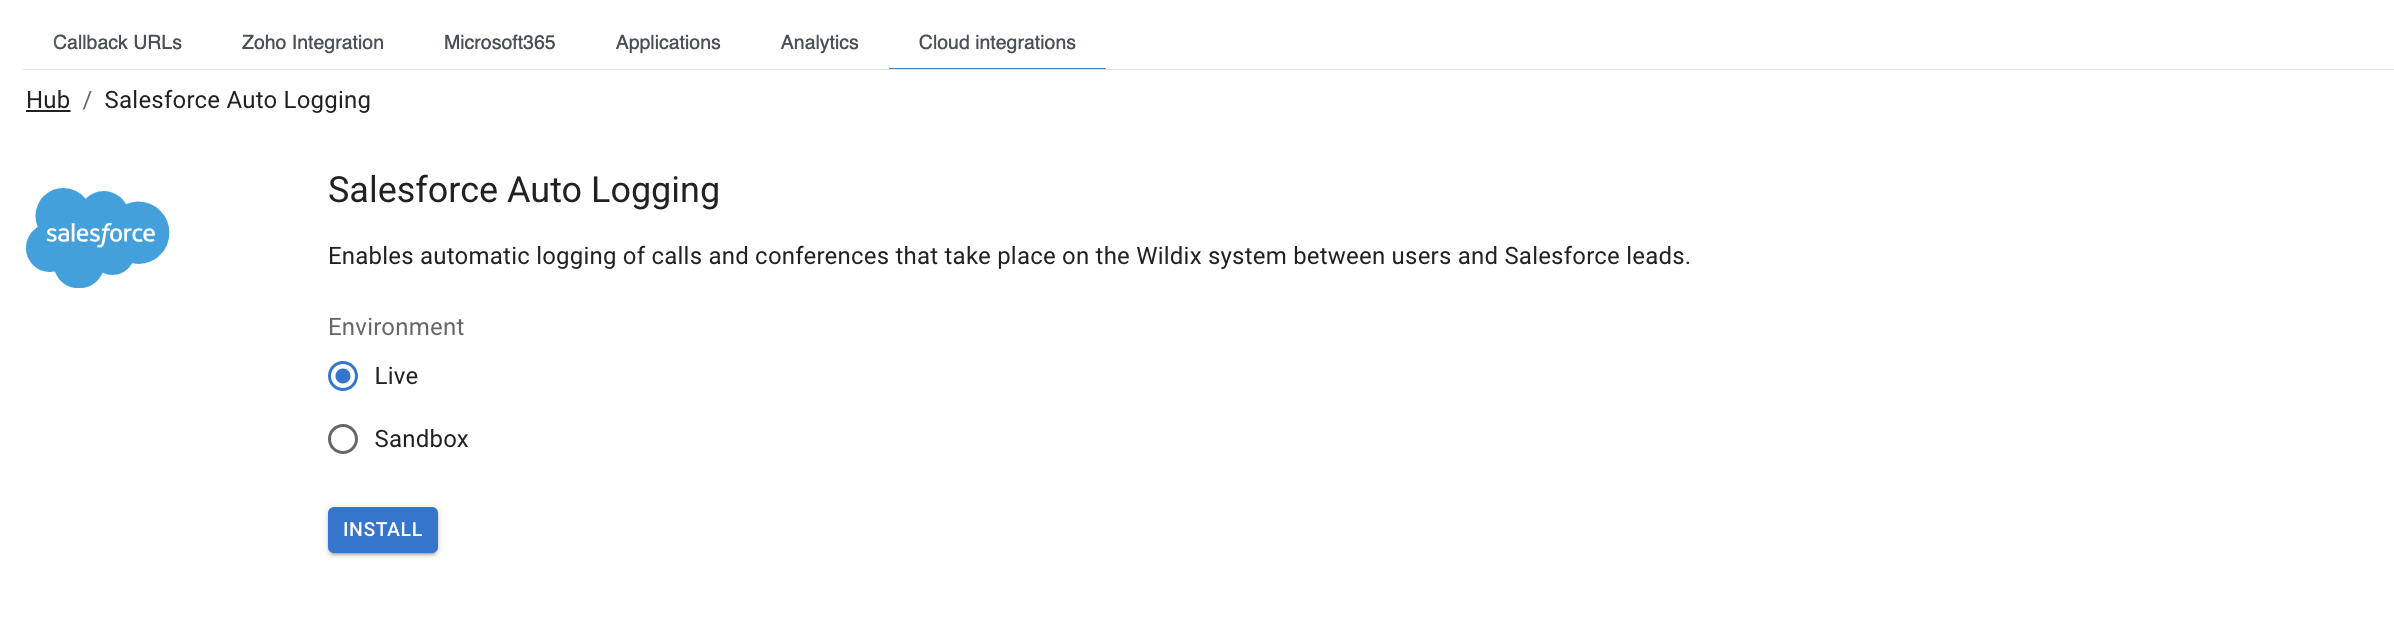
- Log in to your account. Salesforce Auto Logging integration gets activated:

II. To enable Salesforce in x-bees Client integrations:
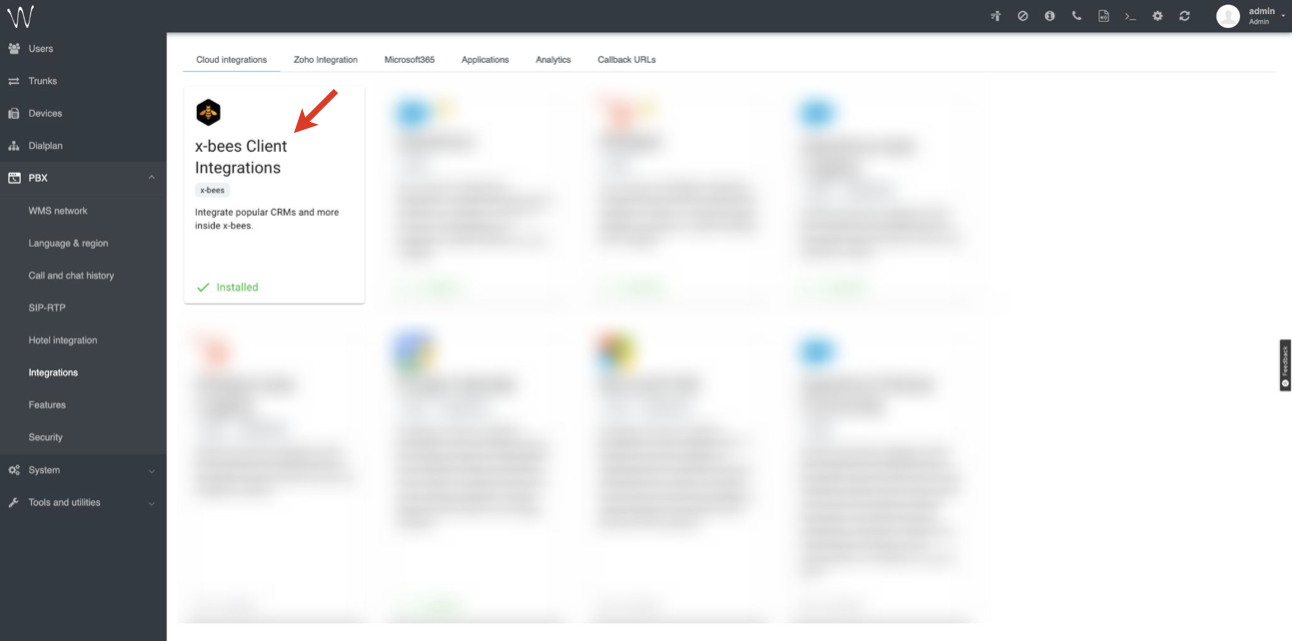
1. In WMS Settings -> PBX -> Integrations -> Cloud integrations, click on x-bees Client Integrations:
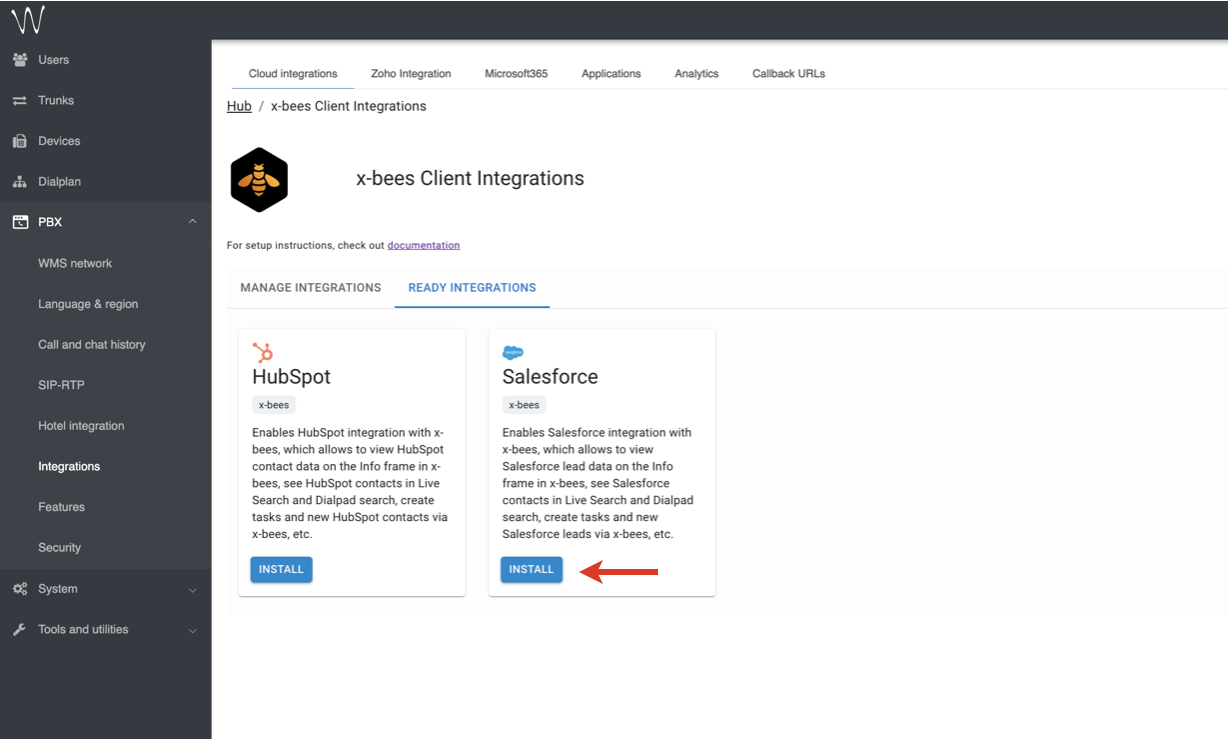
2. Proceed to the Ready Integrations tab and under Salesforce, click Install:
3. The integration gets installed:
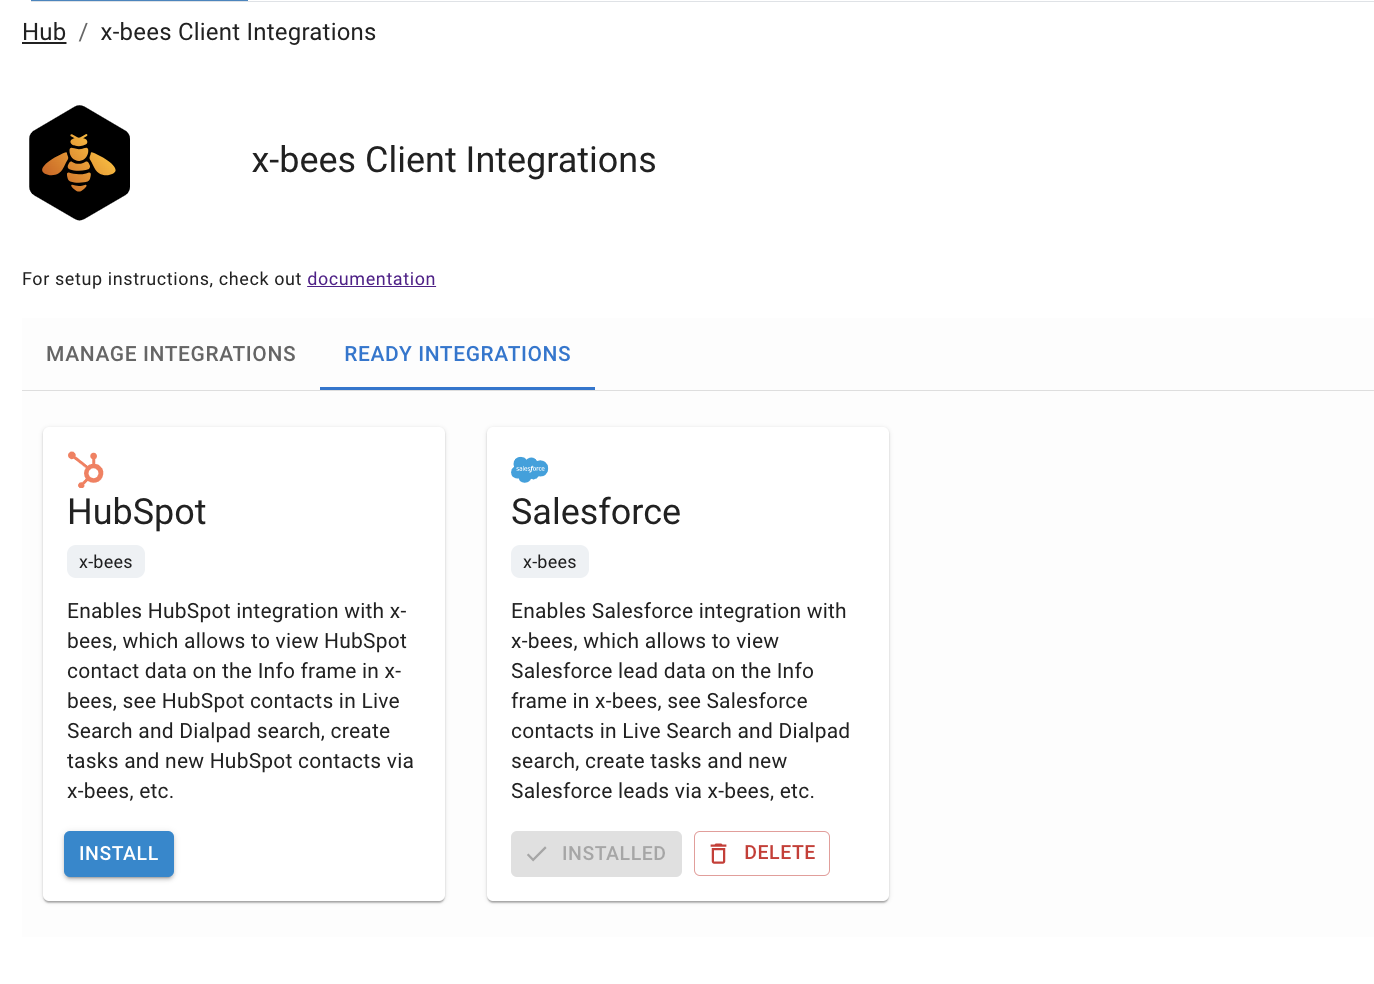
4. Once it is installed, the integration appears on the Manage Integrations tab:
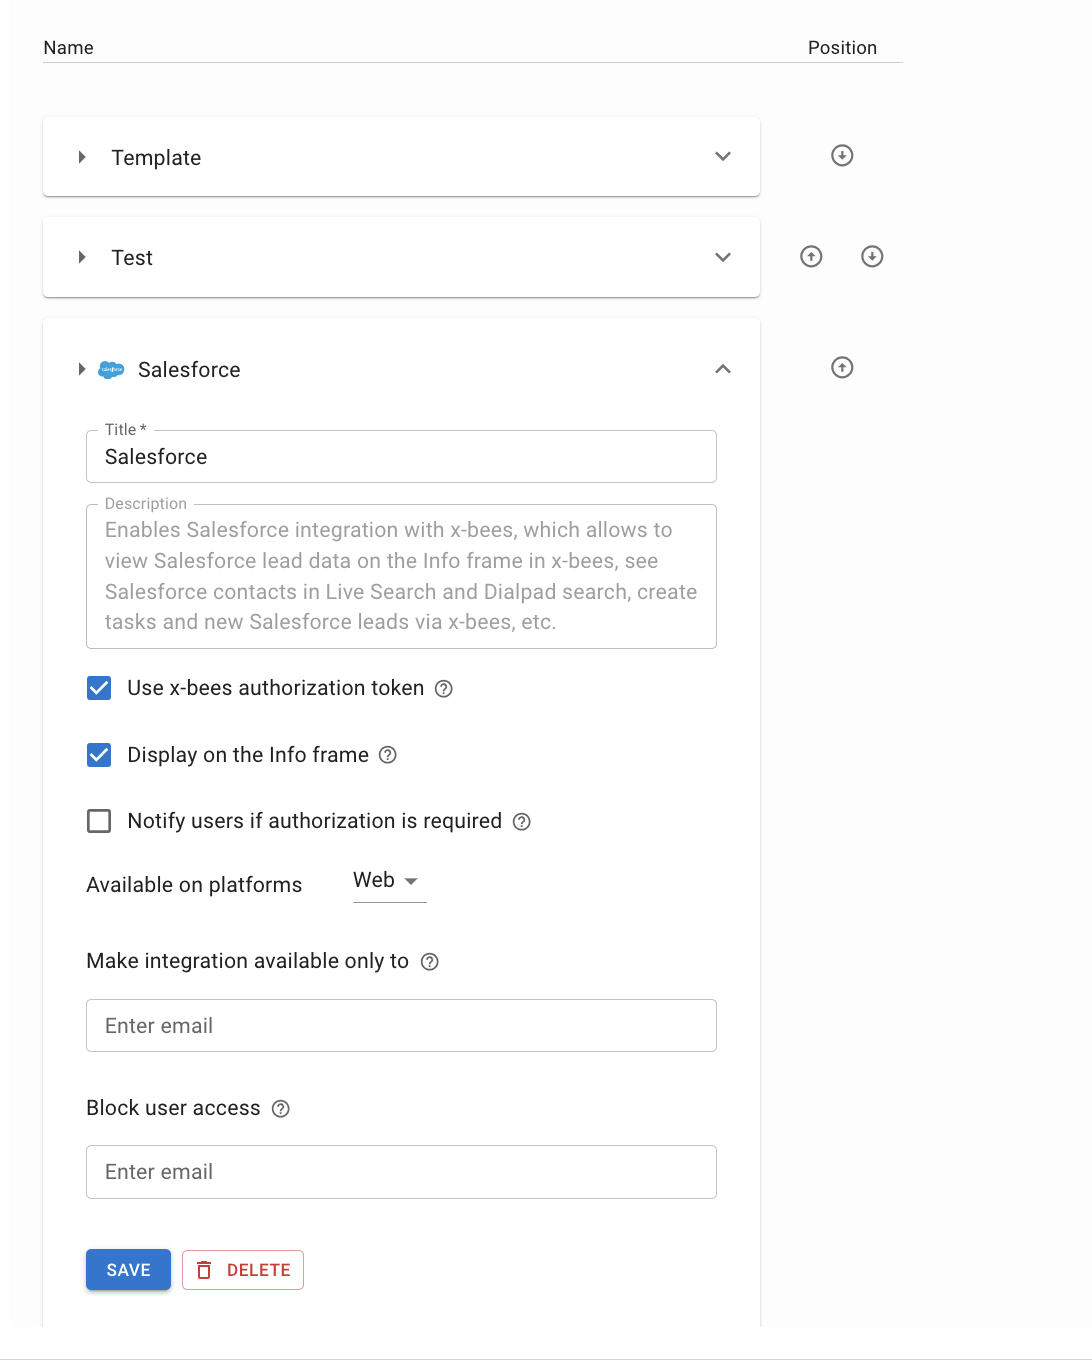
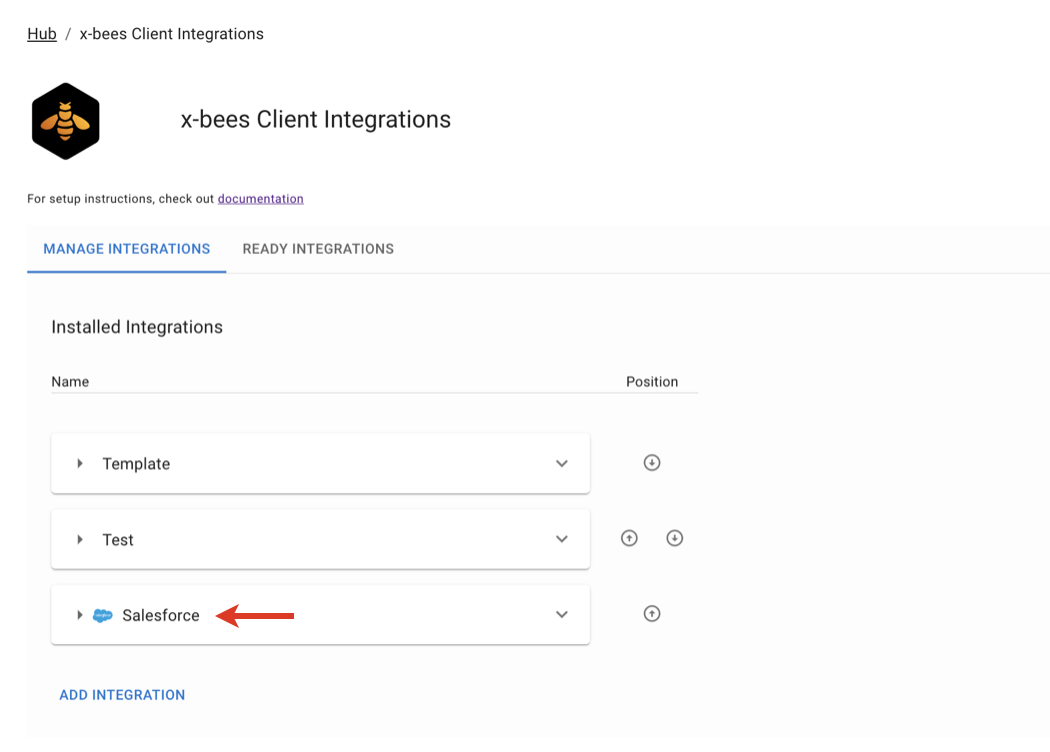 If you click on the Salesforce integration, you can edit its settings if required (e.g. make available only to some users, block access to certain users, etc.). For more information about the settings and how to manage them, check out the guide How to set up x-bees Client integrations.
III. Update Salesforce settings
In Salesforce, you need to configure CORS settings, profile permissions as well as authorize the Salesforce Admin to perform Author and Owner changes.
Important: Without the changes in Salesforce settings the integration features (e.g. automatic logging) may not work.
a) CORS settings
The domain https://integrations.x-bees.com must be added to the Salesforce account CORS Allowlist for the integration to work. For more details and instruction, check this link.

It is also required to enable CORS for the supported OAuth endpoints in CORS -> Cross-Origin Resource Sharing (CORS) Policy Settings. For more details, check this link.

b) Configure Profile permissions
Also, you need to make the following changes in Salesforce settings for the integration to work:
- Go to Salesforce Setup -> User Management Settings and enable Enhanced Profile User Interface:

- Proceed to Setup -> Users -> Profiles:
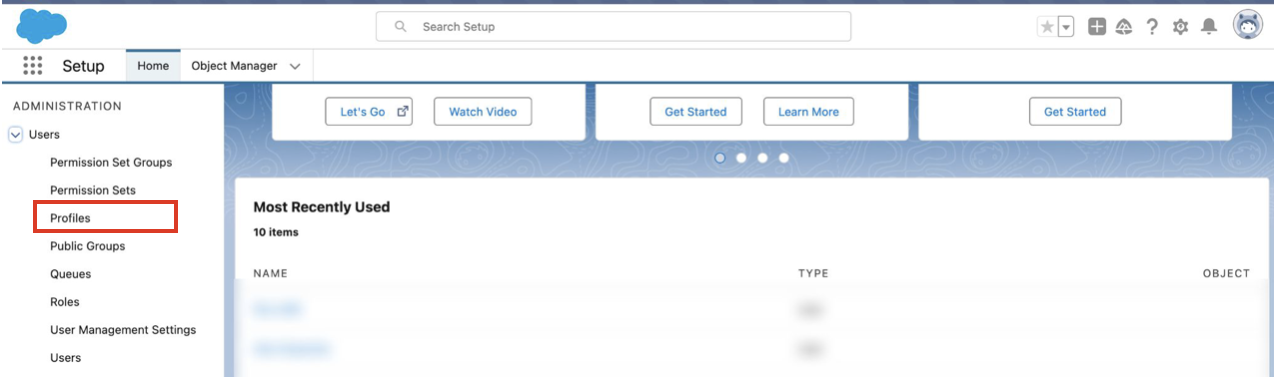
- Select the profile you need and click on it
- Proceed to Object Settings:
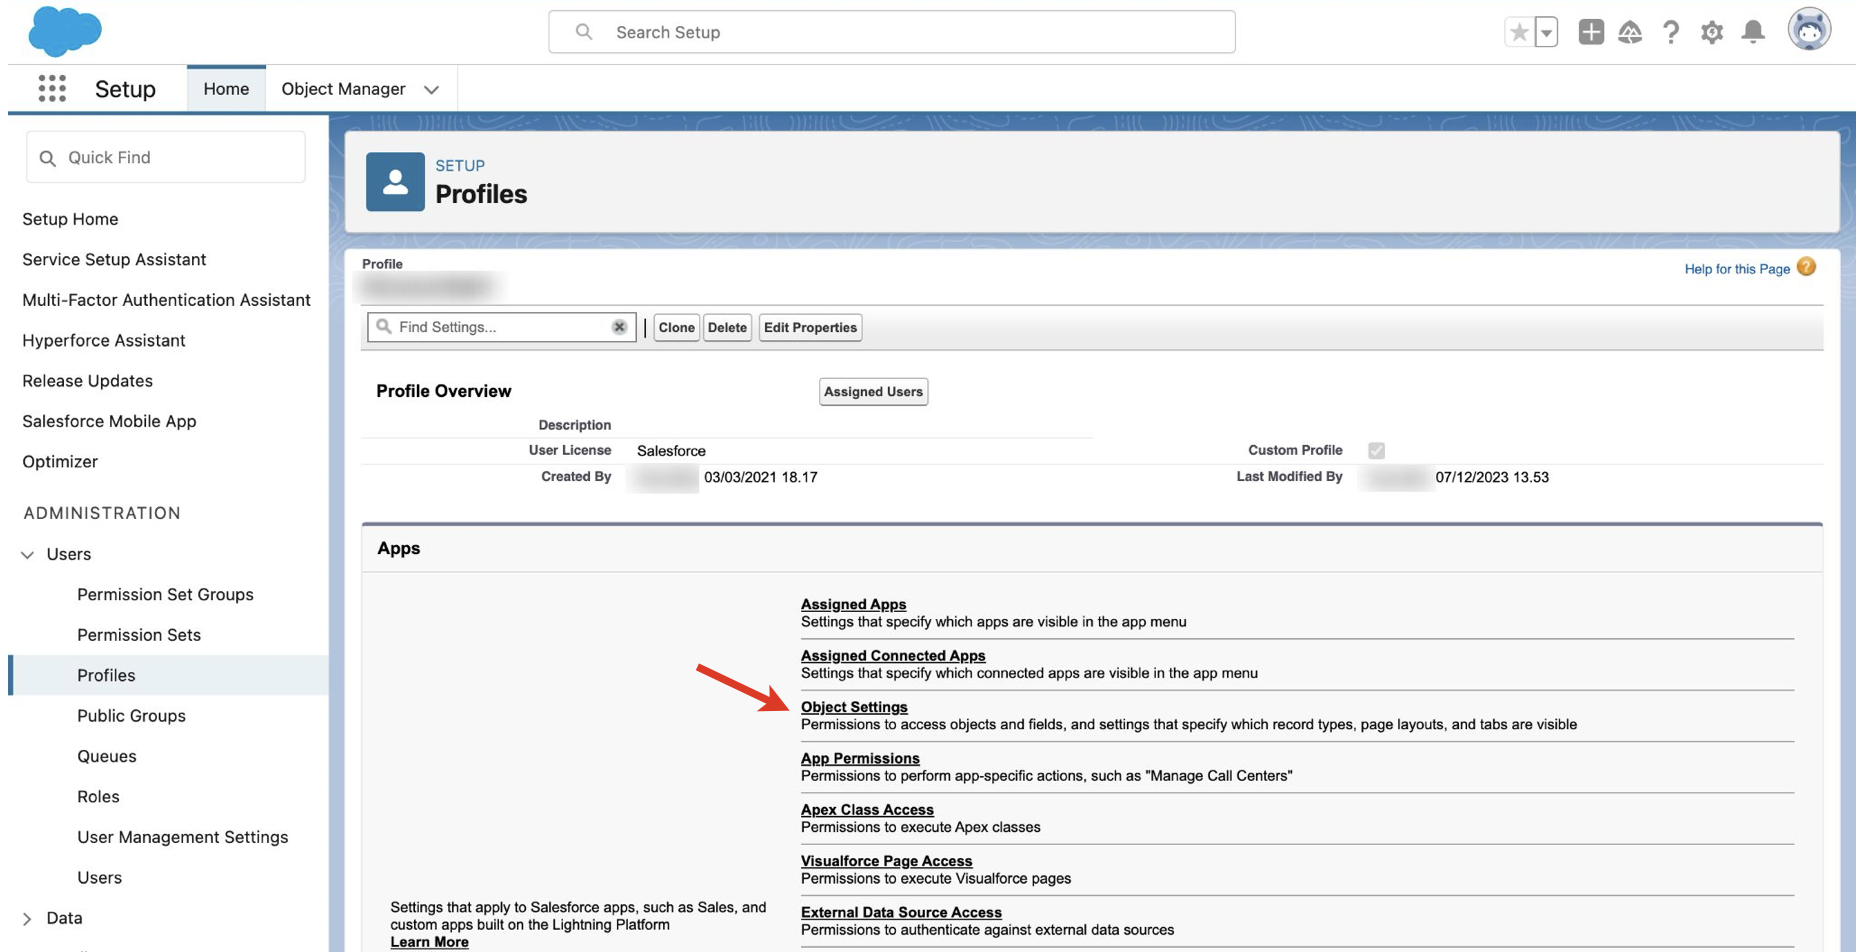
- In Object Settings list, find the following objects:
- Leads
- Contacts
- Accounts
- Click on the above mentioned objects one by one -> on the Object page and provide the following permissions
Leads: Name, Email, Phone, OwnerId, MobilePhone, Company
Contacts: Name, Email, Phone, OwnerId, MobilePhone
Account: Name, Phone, OwnerId
To provide the necessary permissions, click Edit and in the Field Permissions list make sure the relevant checkboxes (both Read Access and Edit Access) are ticked off:
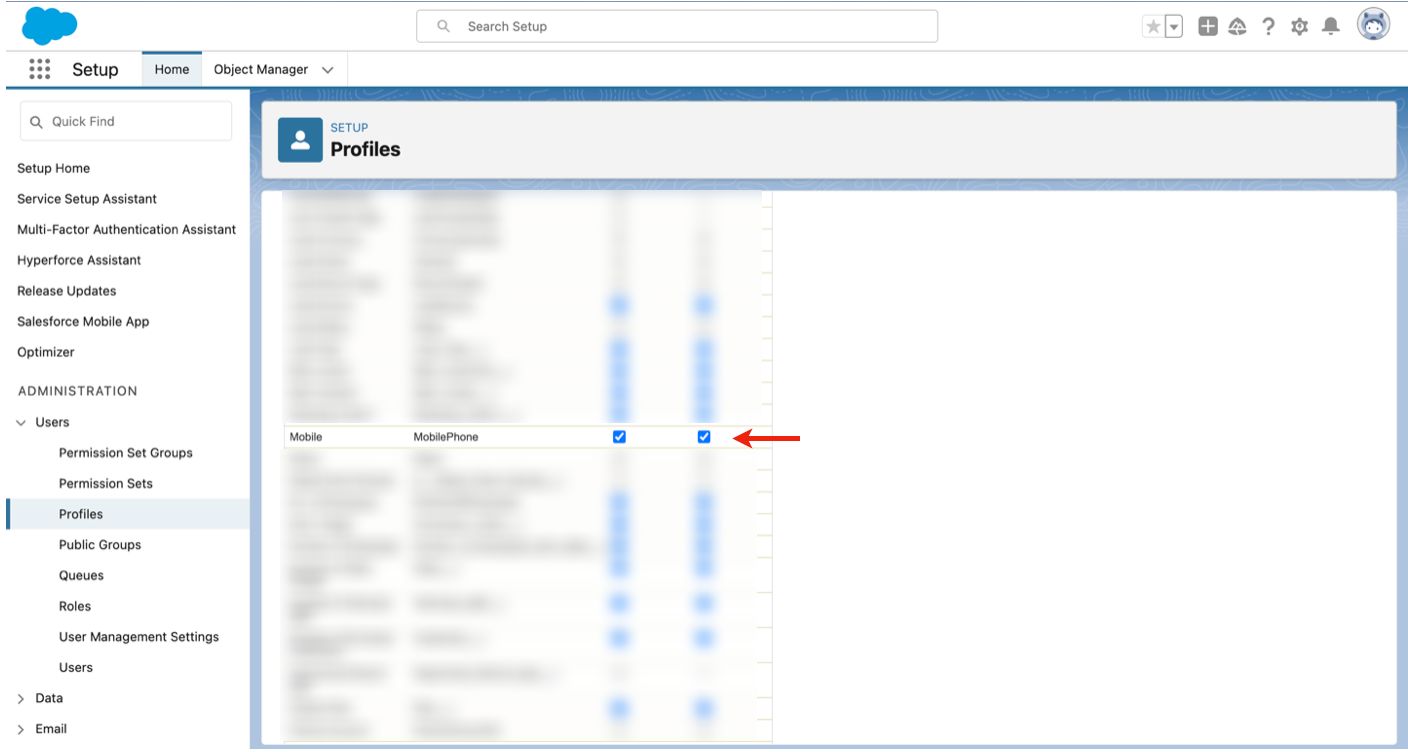
7. Save the settings.
c) Authorize the SF Admin to perform Author and Owner changes
Below you can find the instruction on how to authorize the SF admin to perform Author and Owner changes. Follow this instruction to make sure that logging activities can be performed and leads are created with the correct Author and Owner in SF.
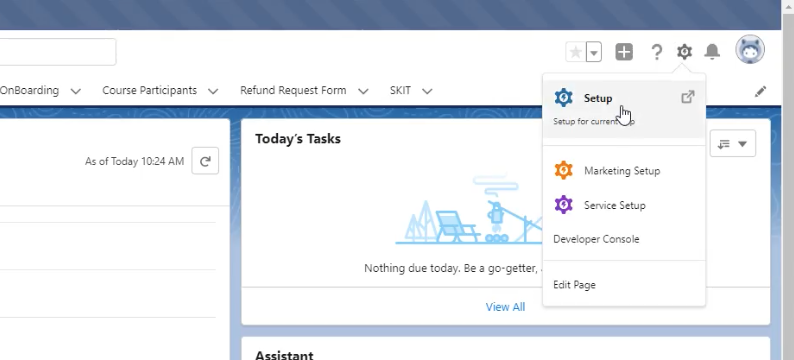
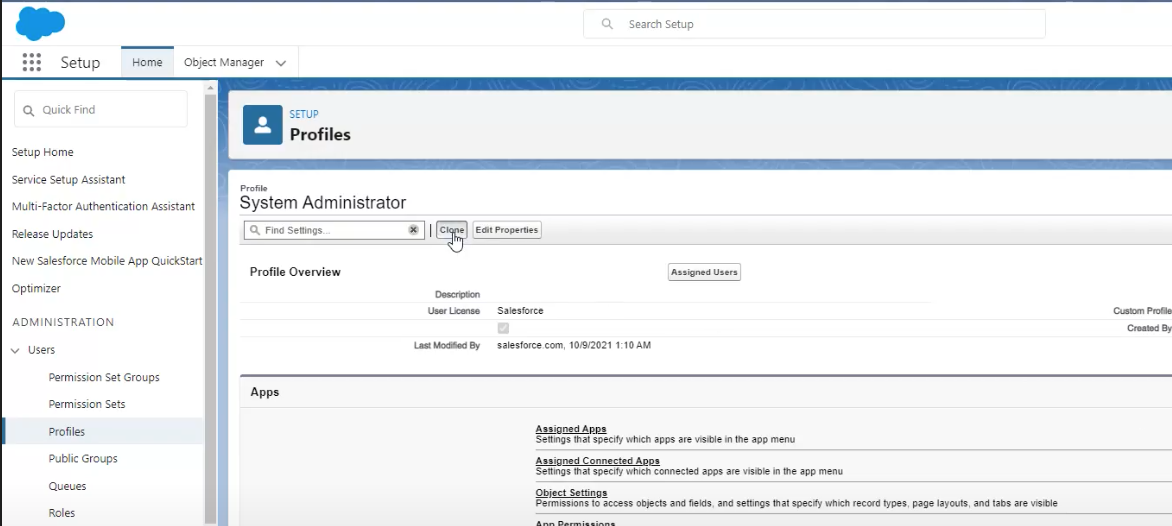
- Click Settings from SF (the Gear icon in the upper right-hand part of the screen) -> click Setup
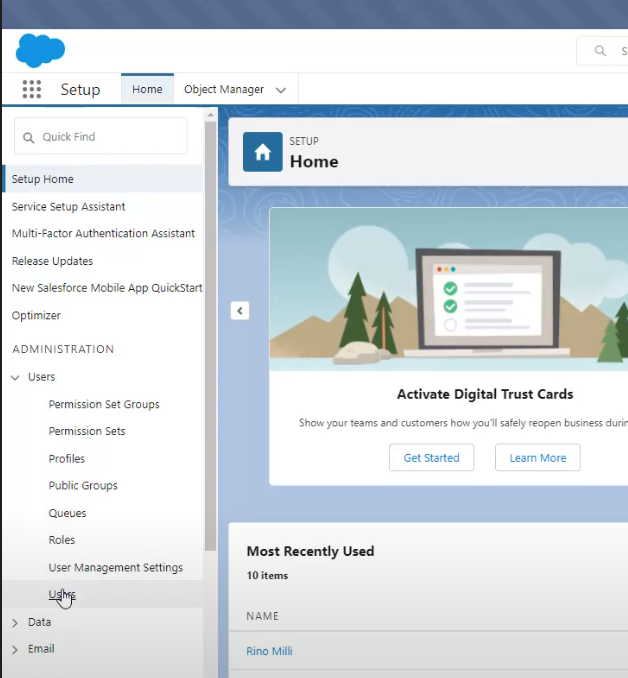
- Setup Home screen opens. From the left panel, under ADMINISTRATION, Users -> click Users
- Find the System Administrator profile and click to open it
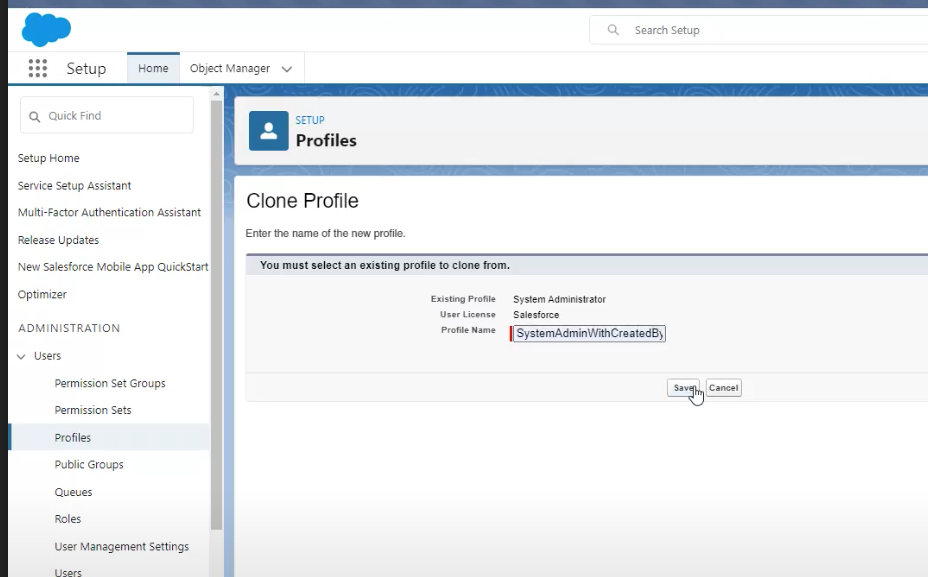
- Click Clone. Clone Profile screen opens
- Add the following Profile Name: SystemAdminWithCreatedBy and click Save
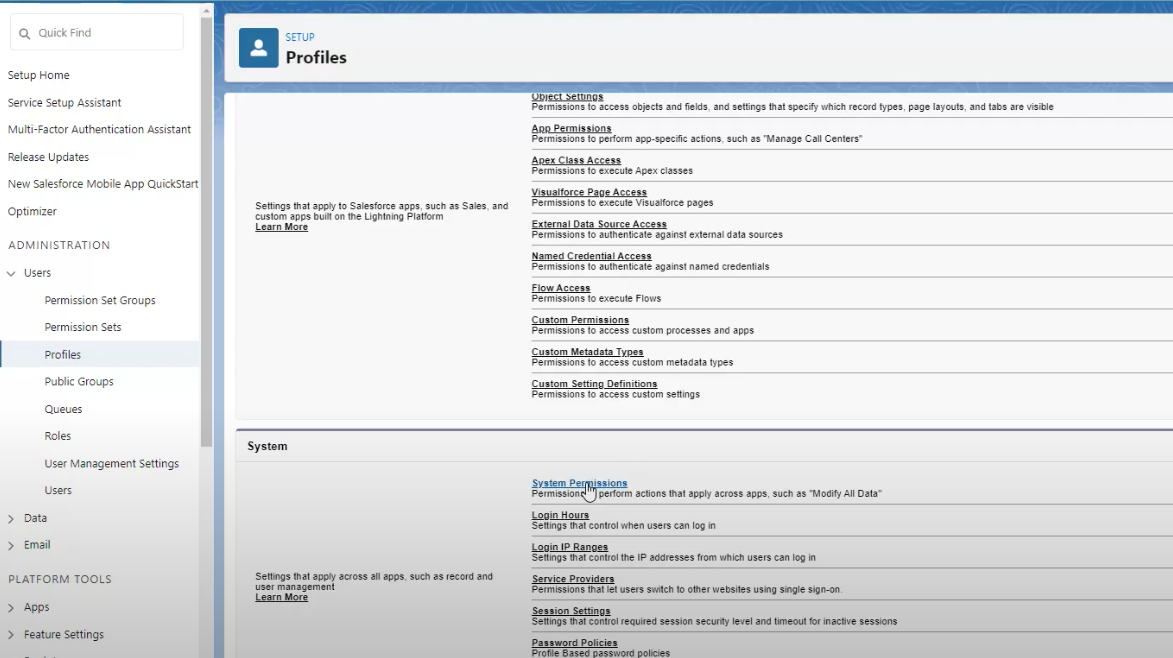
- The newly created Profile SystemAdinWithCreatedBy opens. Scroll down to System and click on System Permissions
- Click Edit
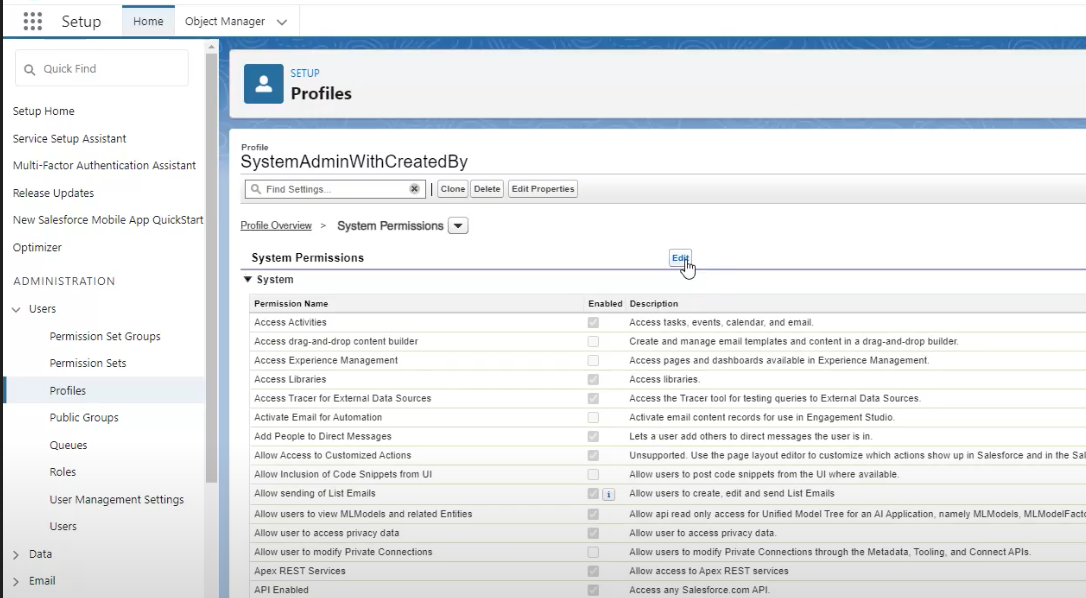
- Scroll down to Set Audit Fields upon Record Creation (Set audit fields, such as Created By and Last Modified By, when you create a record (API only).) and put the tick
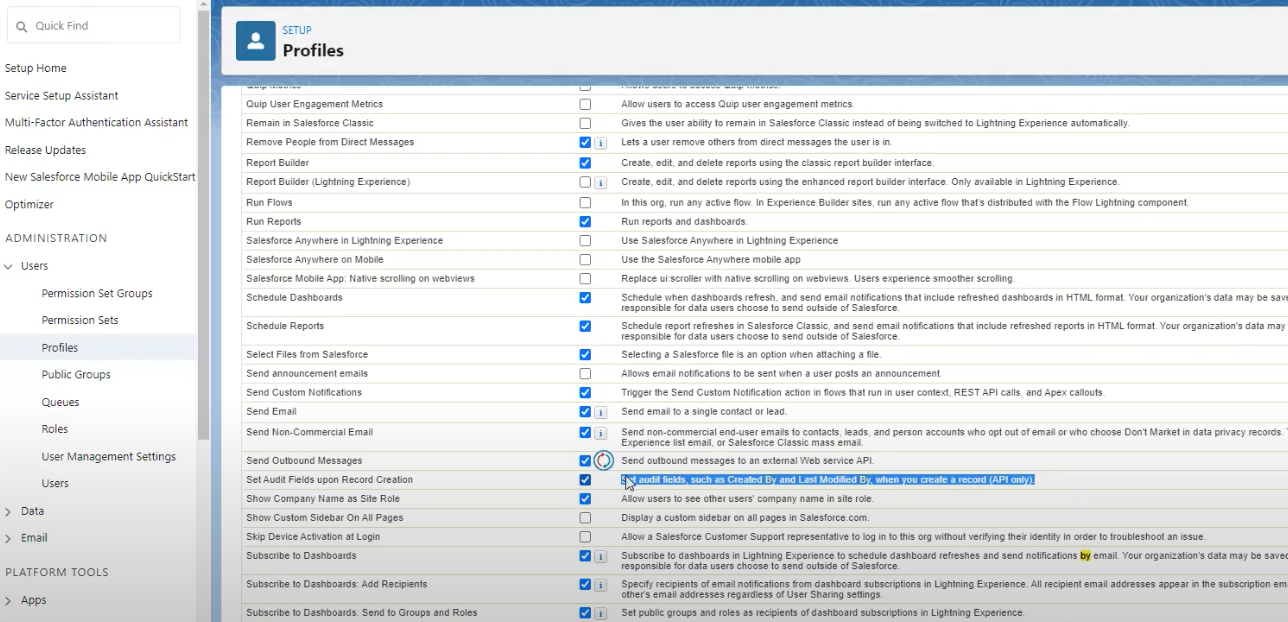
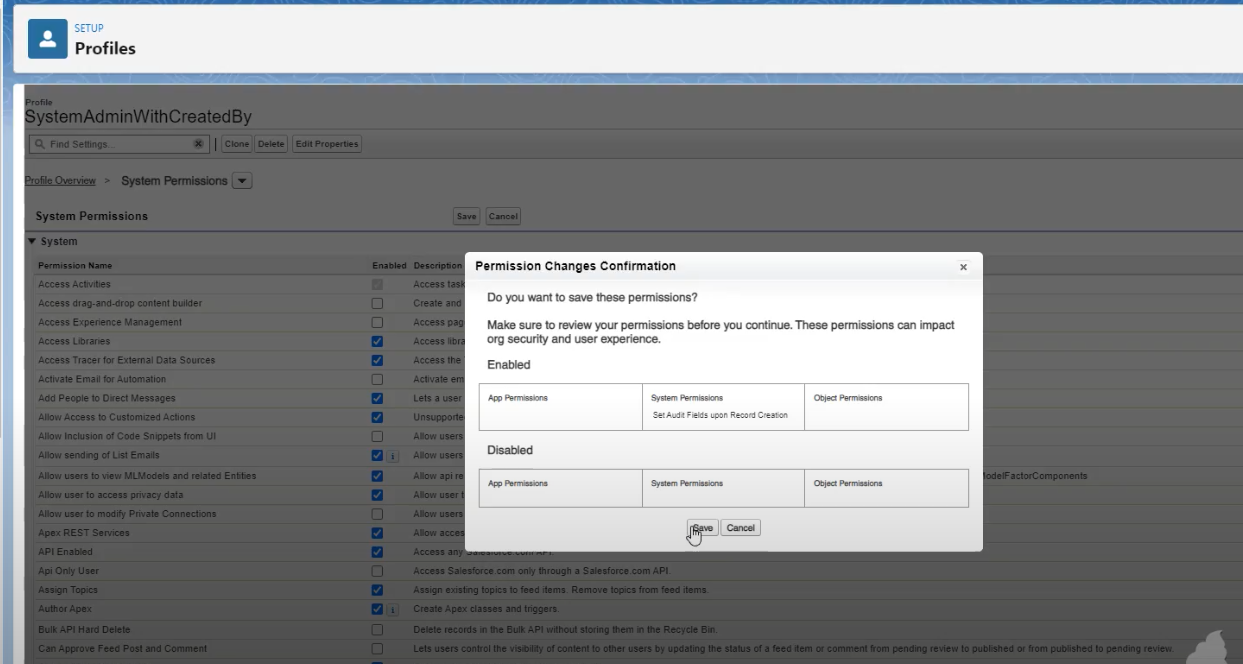
- Scroll up and click Save. Permission Changes Configuration window opens. Click Save again
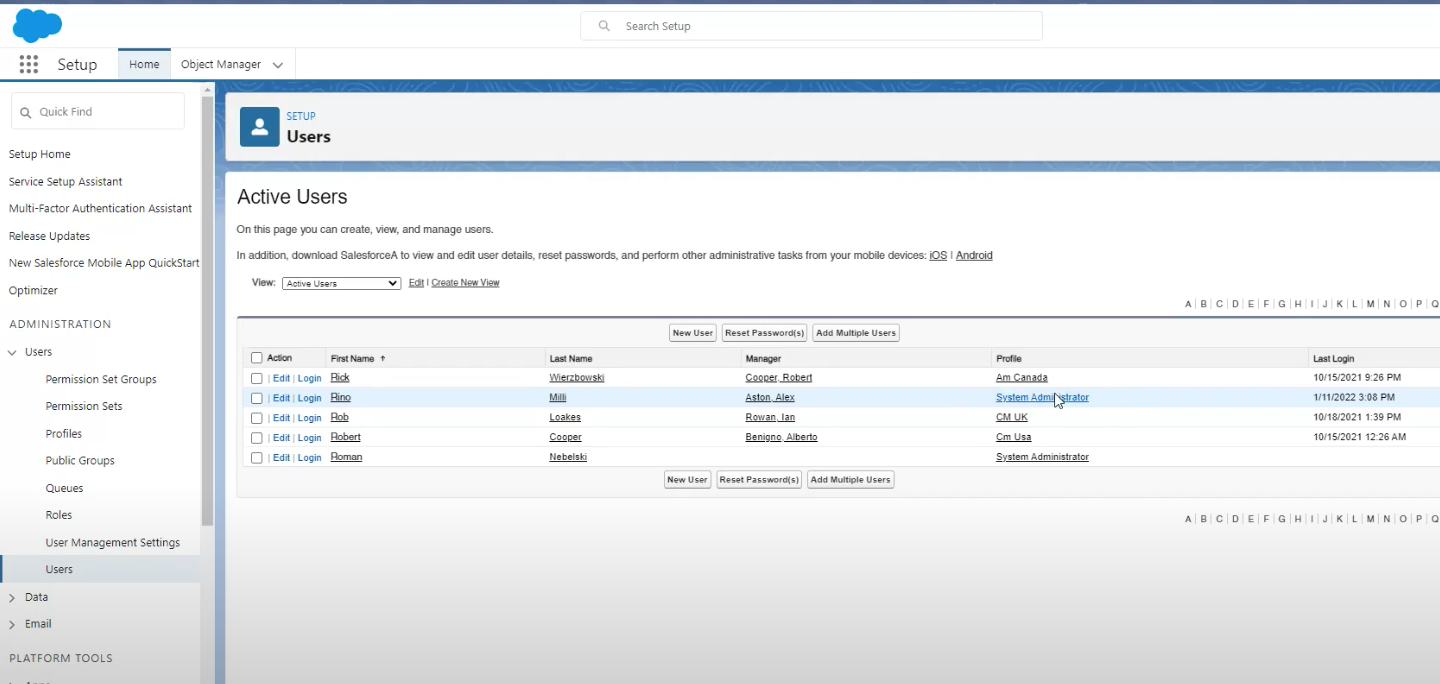
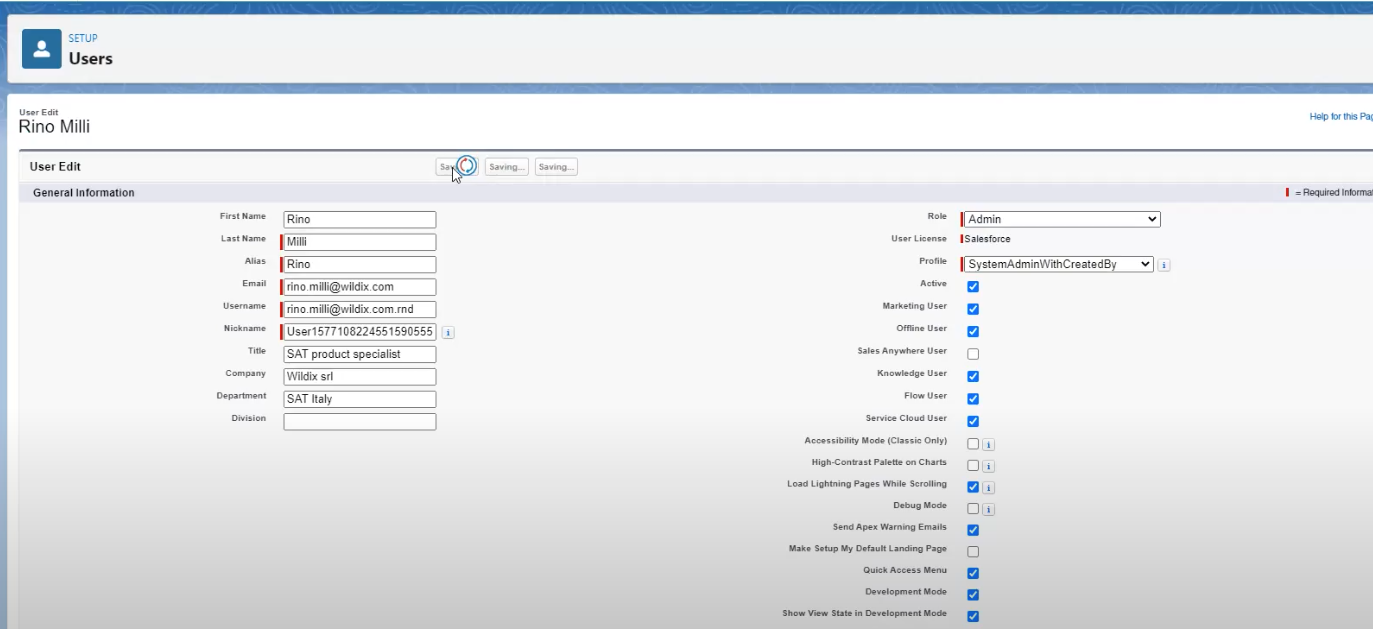
- On the left panel, under ADMINISTRATION click Users. Find your System Administrator and click Edit next to the entry
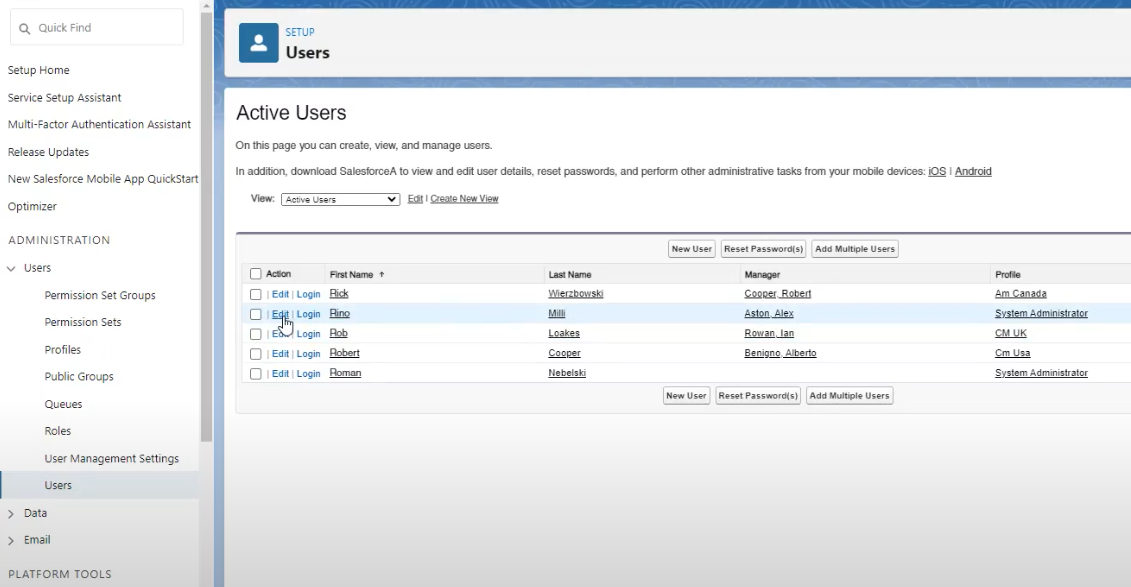
- Setup Users screen opens. Change the Profile from System Administrator to the newly created Profile SystemAdminwithCreatedBy and click Save
Video available.
Once the integrations are installed, from x-bees, it is possible to create new SF leads and manually log activities to SF:
- The user who performs an action on a Salesforce record from x-bees is assigned as the author of this activity in Salesforce
- If the user who performs an action is not present in Salesforce, then the activity is automatically assigned to the account's Admin
Salesforce Partner Community Integration
Salesforce Partner Community integration with x-bees enables logging of calls between users and Salesforce leads. From x-bees, users can create new leads, search for leads, view previous interactions with them, create tasks, log activities, start a new conversation or schedule a call with the lead, as well as manage opportunities.
Requirements
- x-bees-Standard license or higher
- Access to Wildix Salesforce Partner Community account
Installation
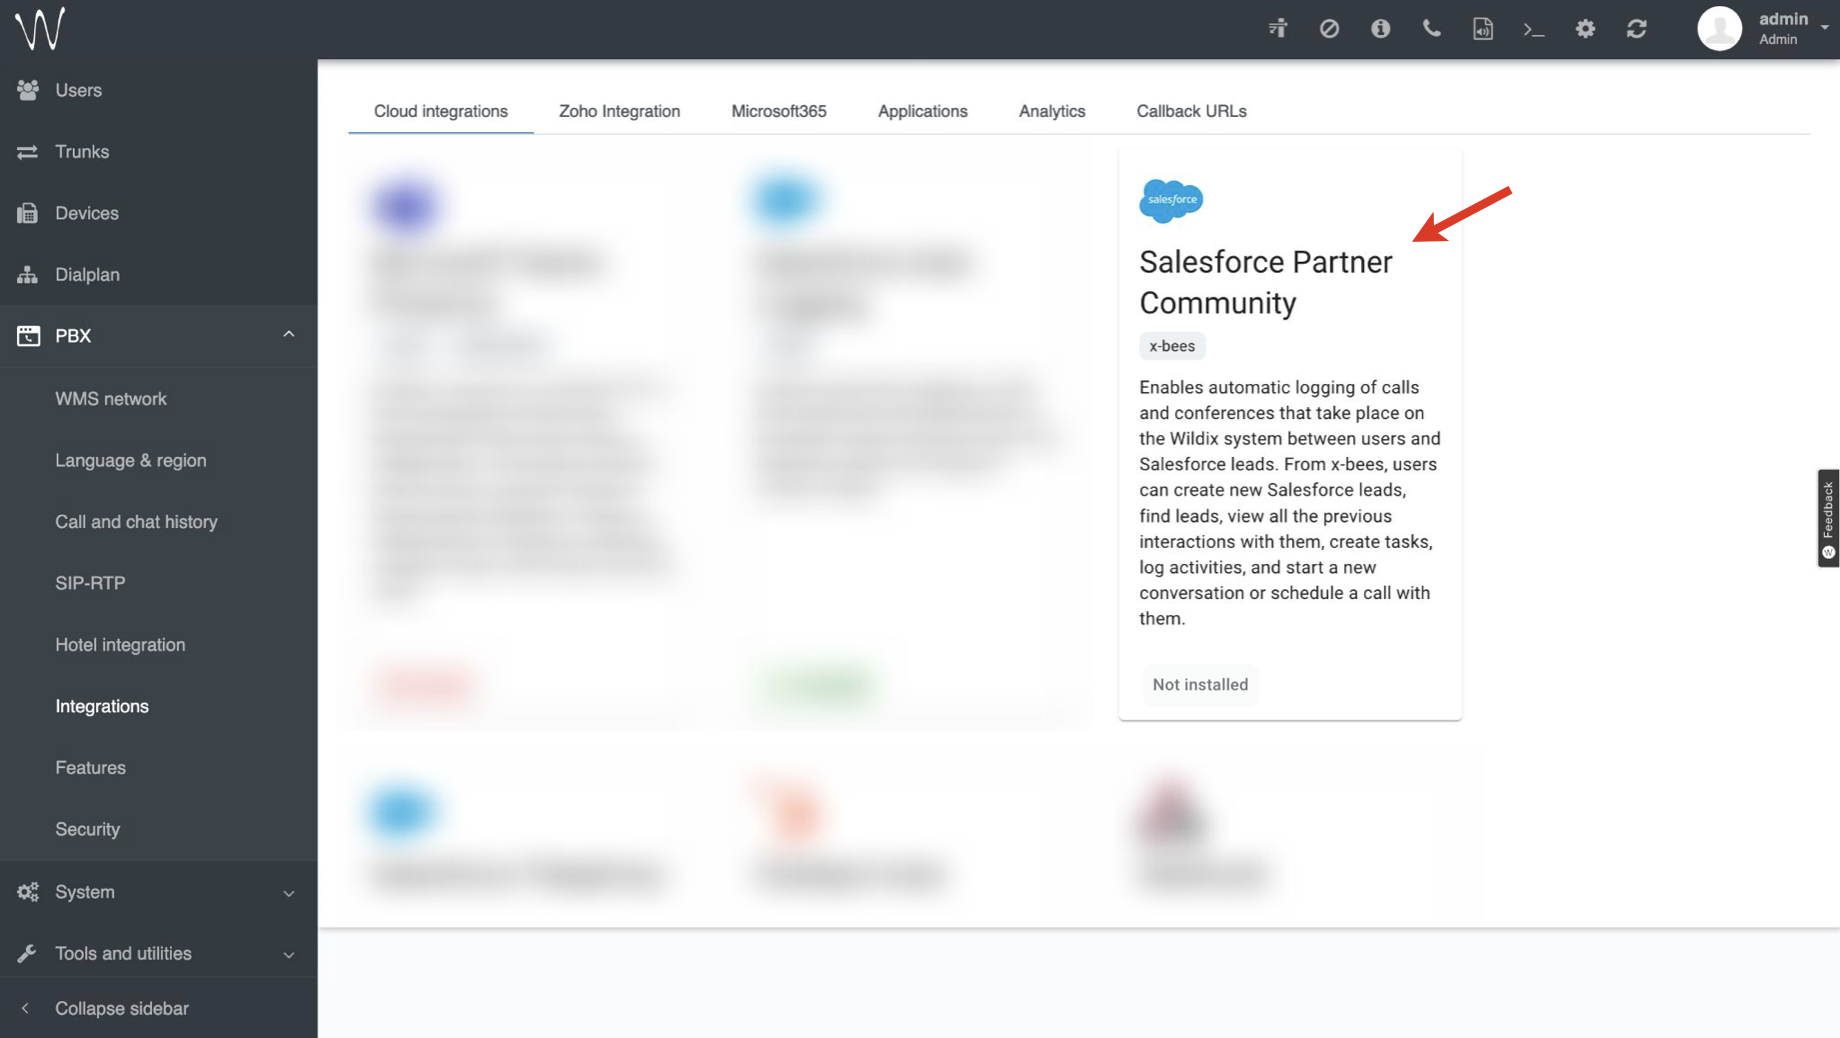
Go to WMS Settings -> PBX -> Integrations -> Cloud integrations
Note:
- In case of WMS version lower that WMS 6.05.20231110.2, the tab is named x-bees. Your PBX should be on the x-bees licensing, otherwise, the x-bees tab is greyed out.
- It is possible to install either Salesforce integration or Salesforce Partner Community integration with x-bees. Usage of both integrations at the same time is not supported.
- Your PBX should be on the x-bees licensing, otherwise, the tab is unavailable and greyed out
- Navigate to Salesforce Partner Community and click on it:
- Click Install to proceed with the activation:
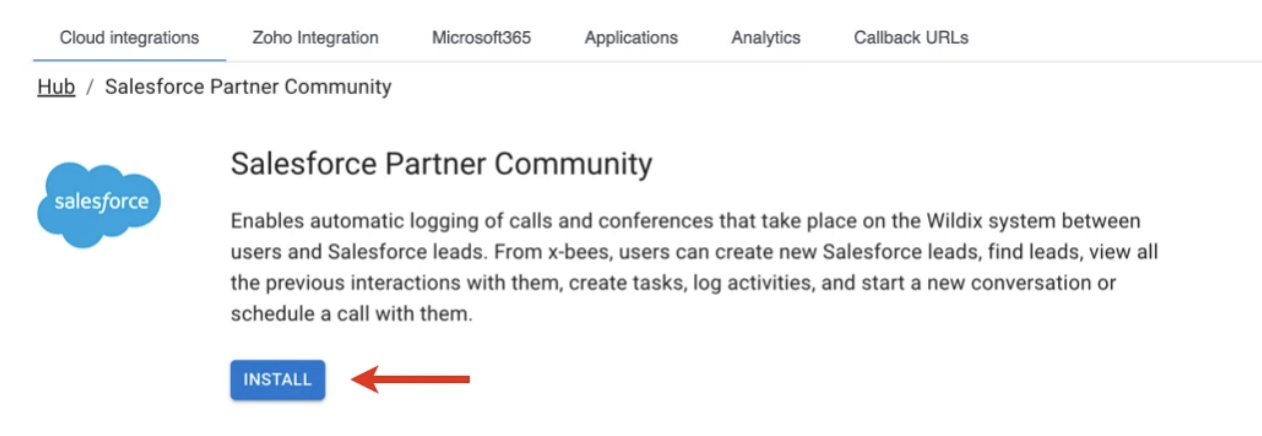
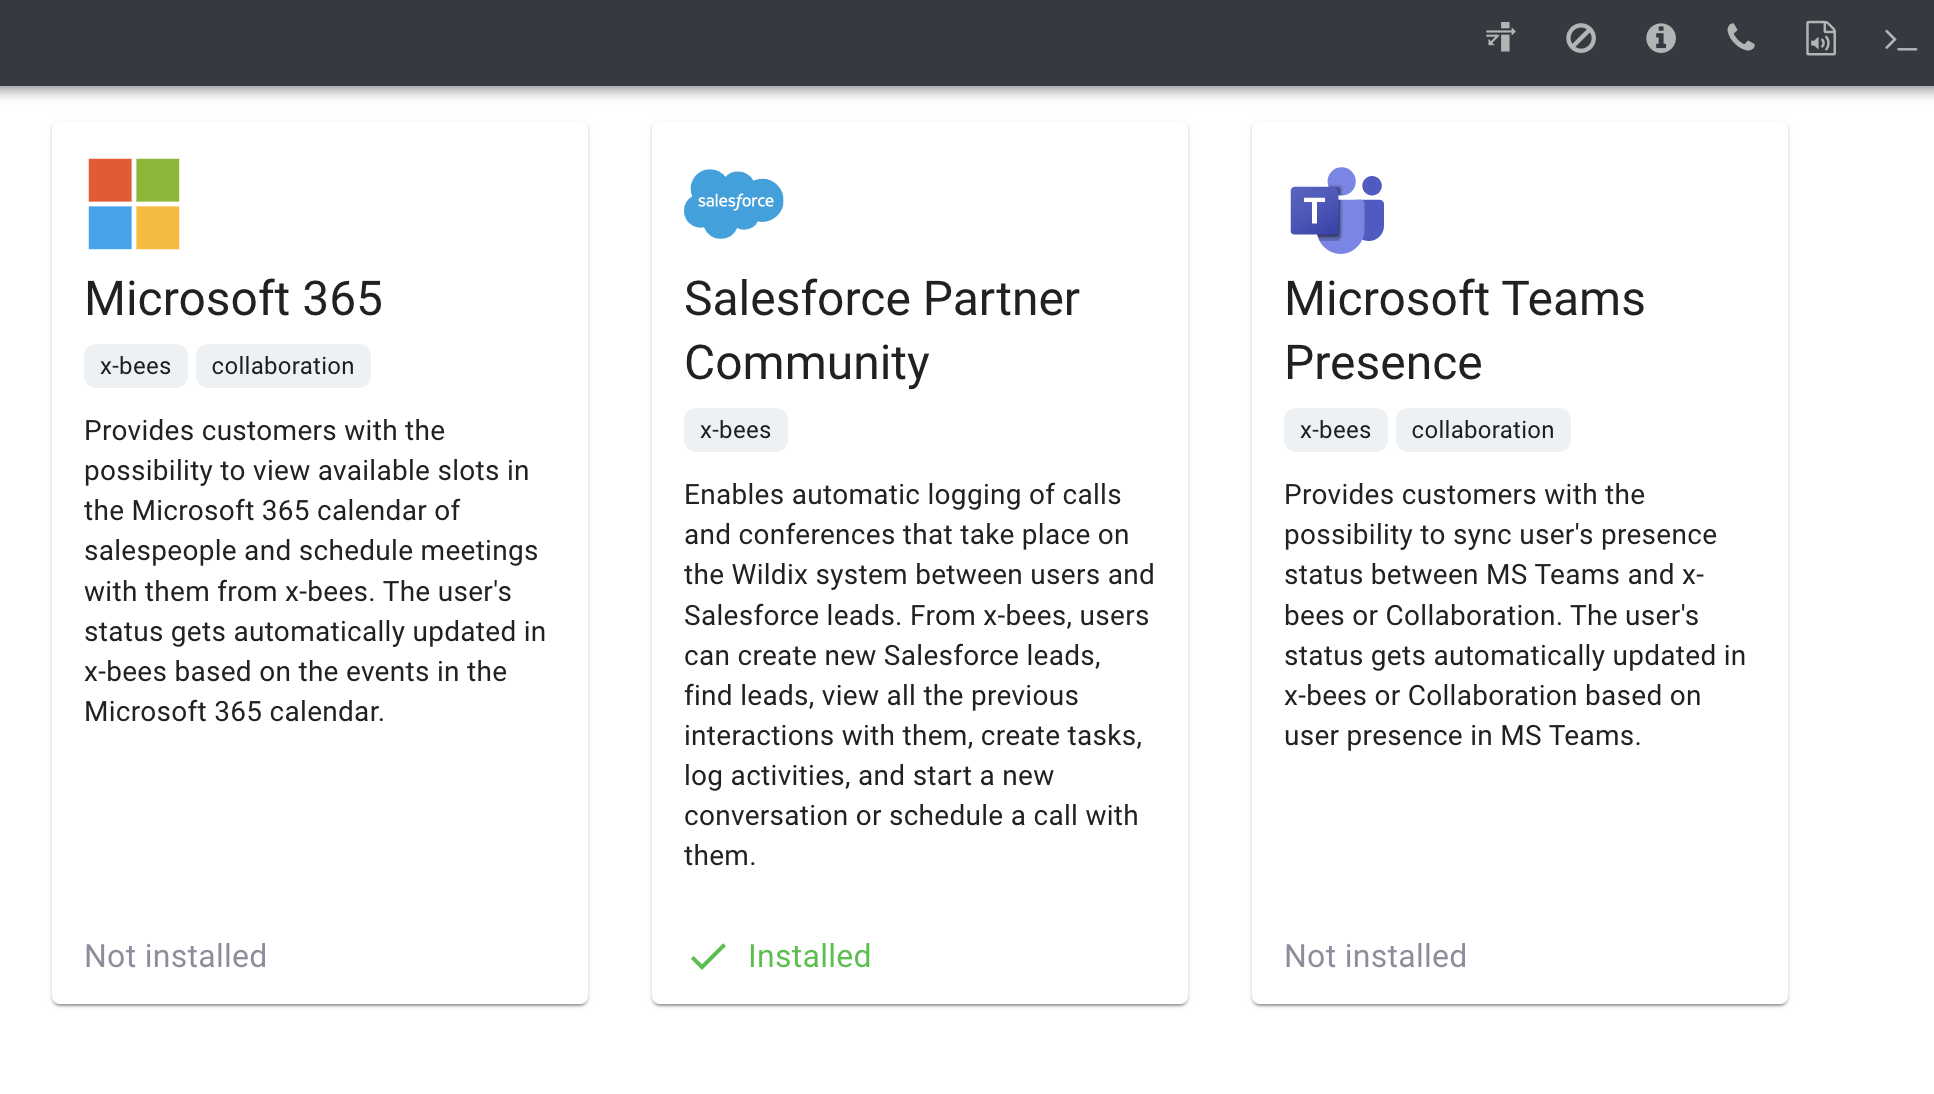
- The integration gets installed:
HubSpot Integration
HubSpot integration enables automatic logging of calls and conferences that take place on the Wildix system between users and HubSpot contacts. From x-bees, users can create new HubSpot contacts, find existing contacts, view all the previous interactions with them, create tasks, log activities, and start a new conversation or schedule a call with them.
For managing calls directly from HubSpot account, refer to a separate integration: HubSpot Integration User Guide.
Requirements
- x-bees-Standard license or higher
- Admin access to HubSpot account
Installation
Installation consists of two parts:
- Install HubSpot Auto Logging integration: it ensures automatic logging of calls and conferences that take place in x-bees between users and HubSpot contacts; also, the integration ensures contact lookup for calls.
- Enable HubSpot in x-bees Client integrations: this allows to view HubSpot contact data on the Info frame in x-bees, see HubSpot contacts in Live Search and Dialpad search, create tasks and new HubSpot contacts via x-bees.
I. To enable HubSpot Auto Logging:
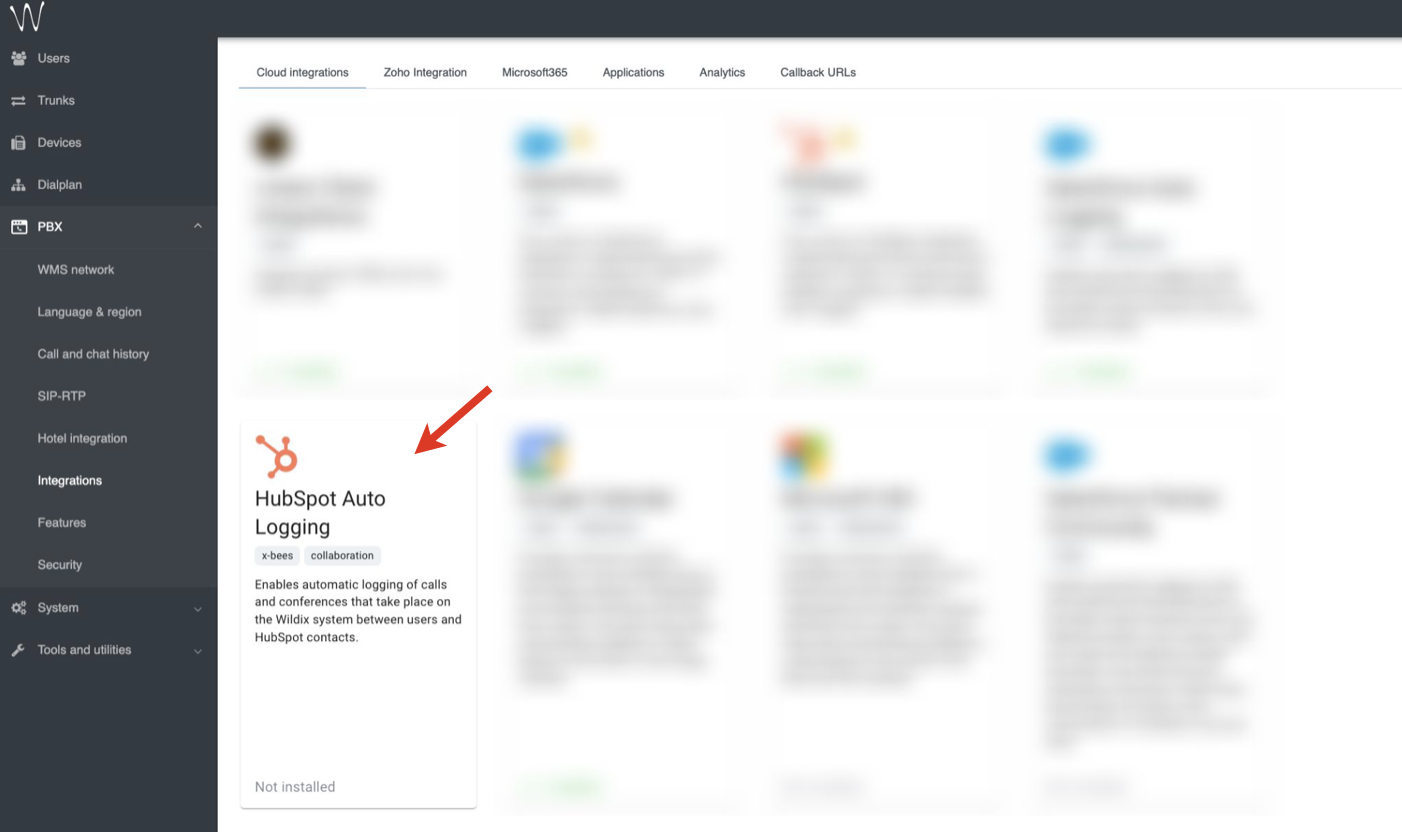
Go to WMS Settings -> PBX -> Integrations -> Cloud integrations
Note: In case of WMS version lower that WMS 6.05.20231110.2, the tab is named x-bees (not Cloud integrations). Your PBX should be on the x-bees licensing, otherwise, the x-bees tab is greyed out.
- Wildix Integration Hub opens
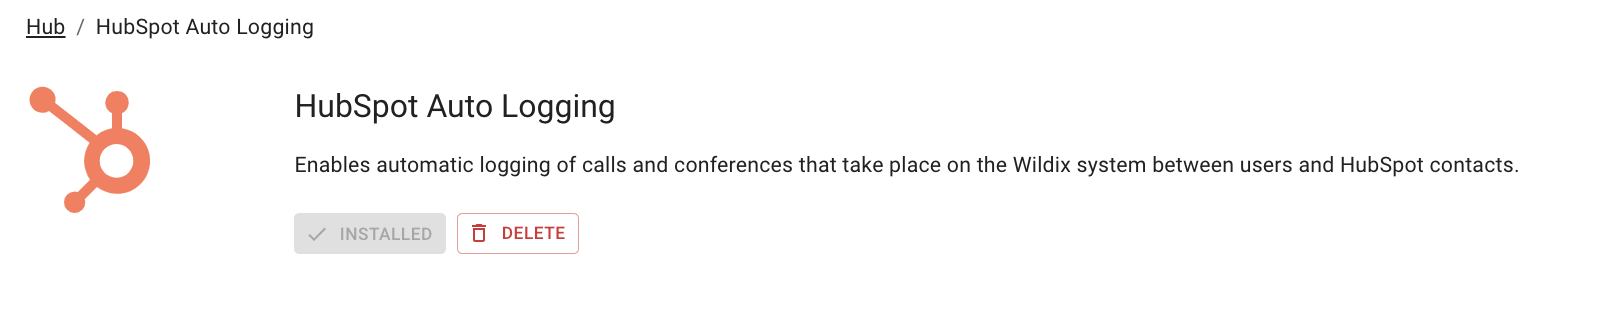
- Click on HubSpot Auto Logging
- Click Install to proceed with the activation:

- Log in to HubSpot and click Choose account:
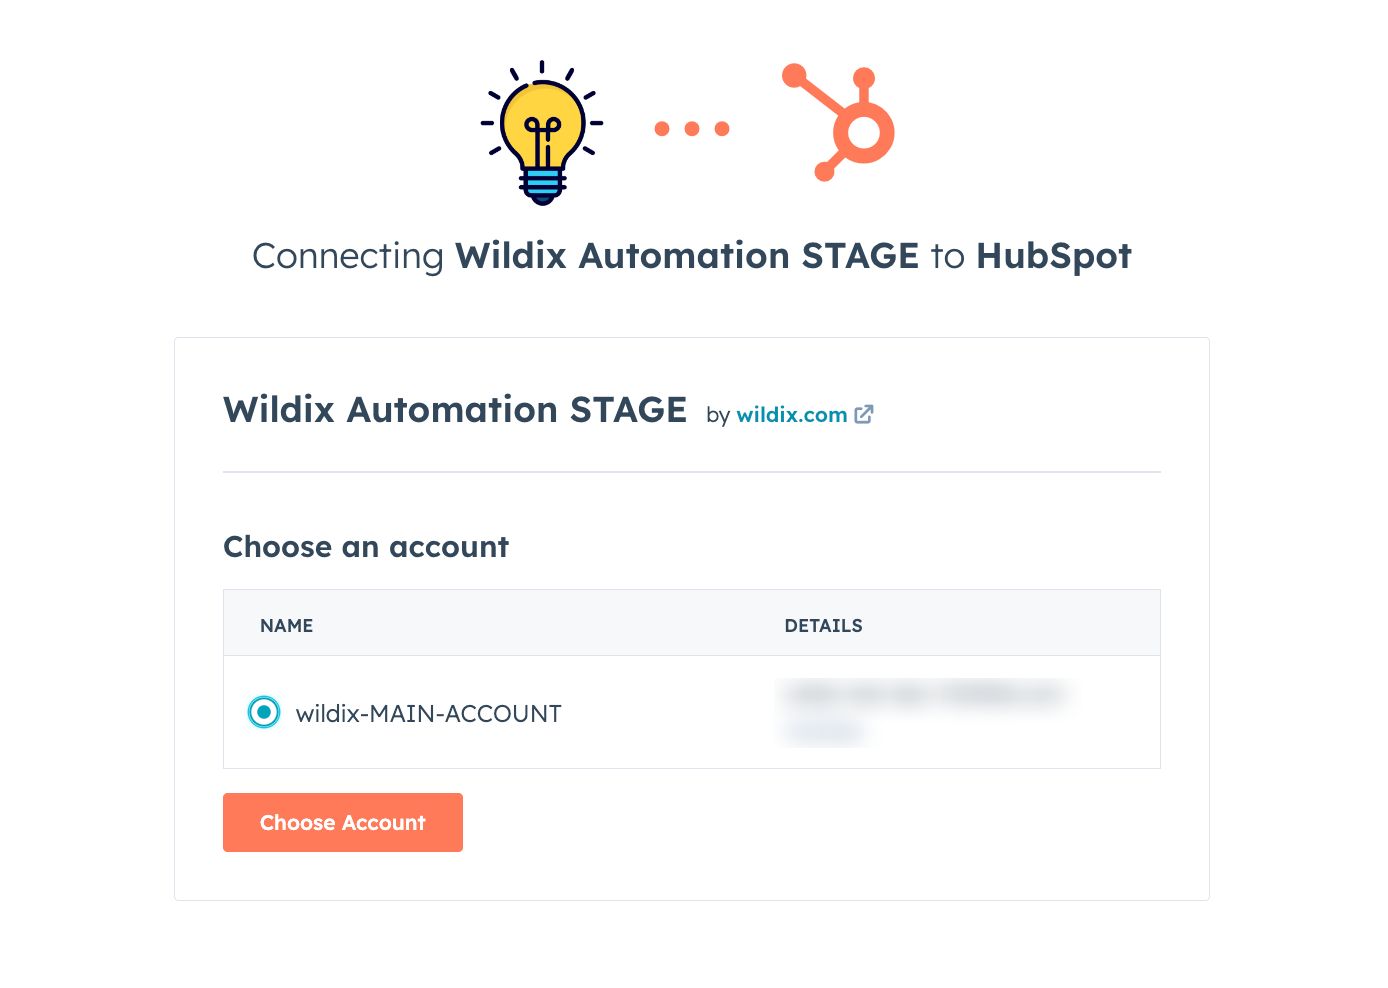
- HubSpot integration gets activated:
II. To enable HubSpot in x-bees Client integrations:
1. On WMS Settings -> PBX -> Integrations -> Cloud integrations, click on x-bees Client Integrations:
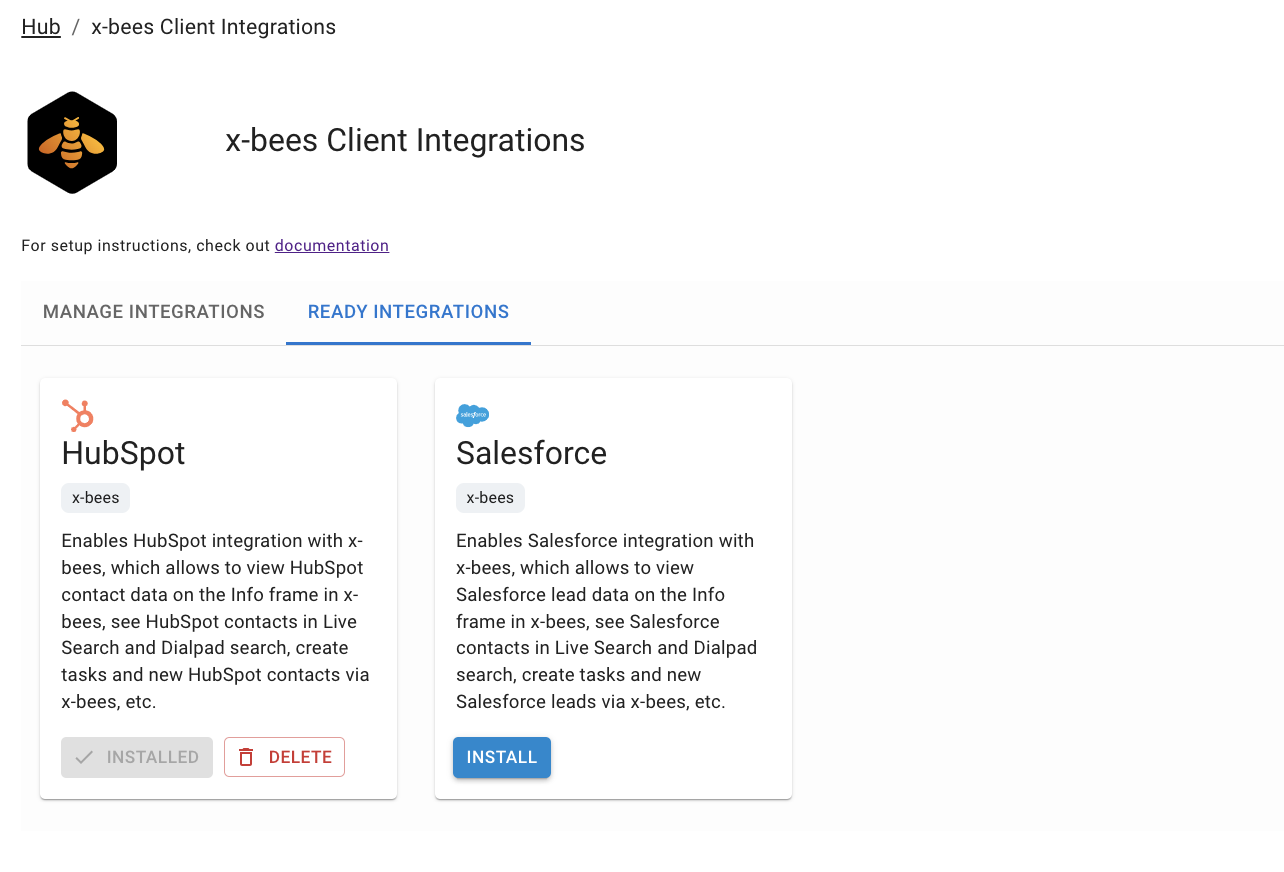
2. Proceed to the Ready Integrations tab and under HubSpot, click Install:

3. The integration gets installed:
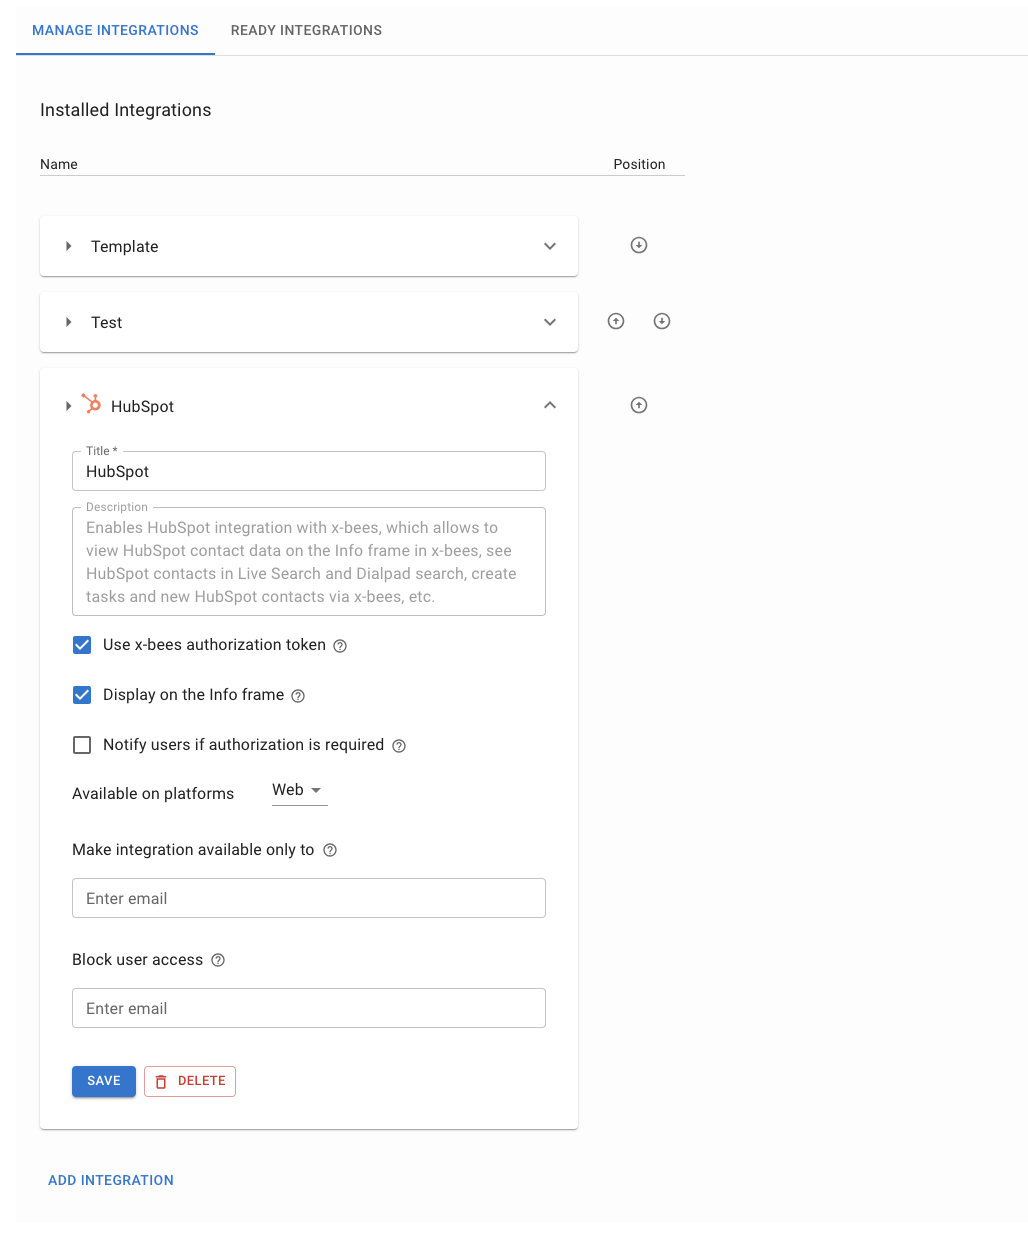
 4. Once it is installed, the integration appears on the Manage Integrations tab:
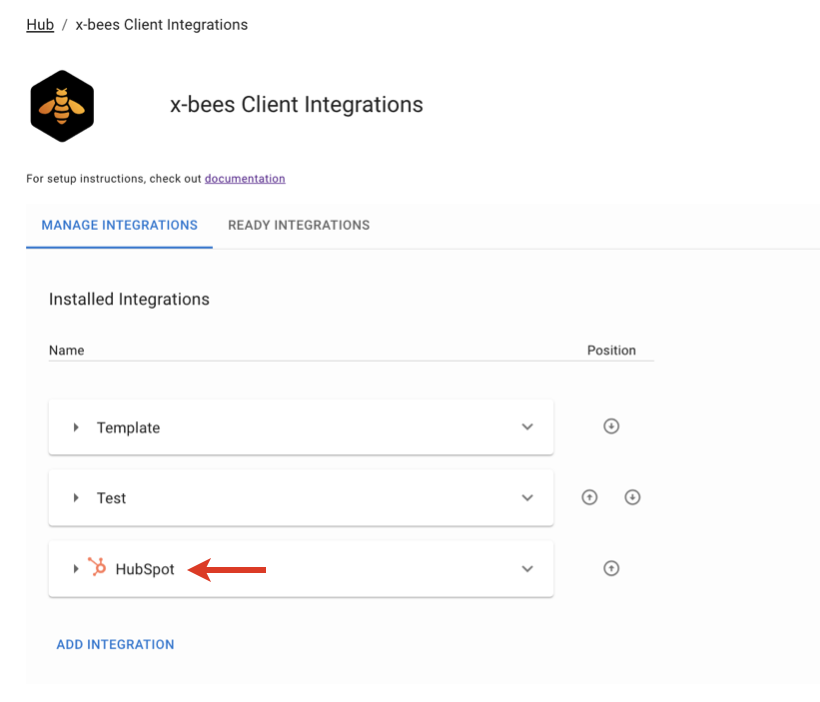
If you click on the HubSpot integration, you can edit its settings if required (e.g. make available only to some users, block access to certain users, etc.). For more information about the settings and how to manage them, check out the guide How to set up x-bees Client integrations.
Usage
HubSpot integration offers the following features:
- x-bees calls and conferences are automatically logged to HubSpot
- HubSpot contacts are visible in Live Search, Dialpad search (if phone number is available), and when creating a conversation
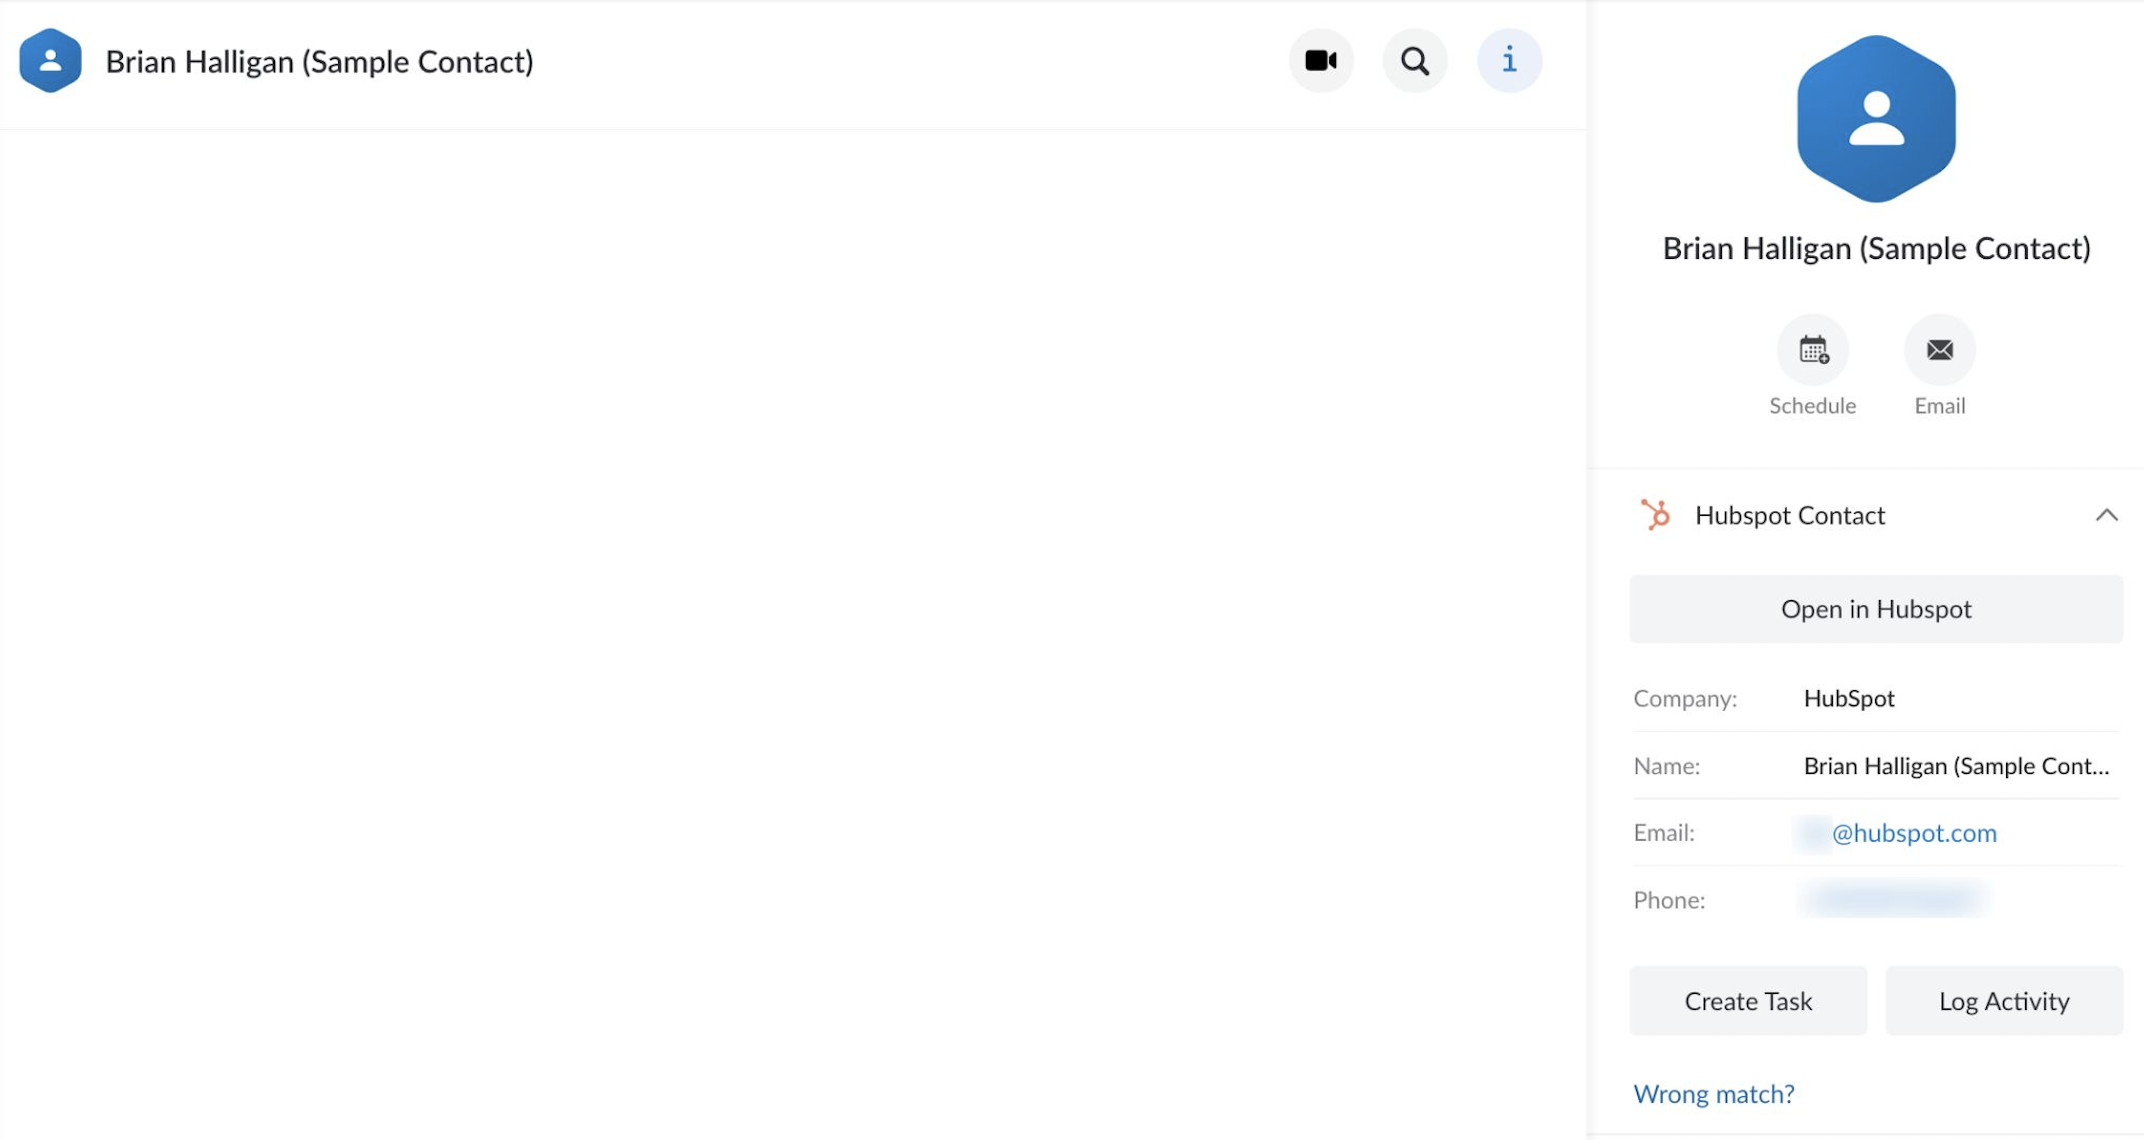
- Information about HubSpot contact is available on the Info tab in x-bees. There, you can perform the following actions:
- open contact in HubSpot
- change the match if the match is wrong
- log activity (Call/ Email/ Meeting)
- create tasks
- see the list of all tasks and activities
- monitor activity history
- Also, you can create new HubSpot contact via x-bees
Microsoft 365 Integration
Microsoft 365 integration allows customers to see Microsoft 365 contacts in Live and Dialpad search, as well as view and open the latest emails with the contact via the Info frame in x-bees on web or in x-bees mobile app.
Requirements:
- Licensing: x-bees-Standard license for each user who needs to use the integration
- Users should have a valid license allowing them to use Outlook and mailbox
- Admin access to PBX
- Support on mobile starts from x-bees app v. 1.96.1.296265 on iOS / v. 1.96.1.296265 on Android
To activate the integration, take the following steps:
Go to WMS Settings -> PBX -> Integrations -> Cloud integrations
Note: In case of WMS version lower that WMS 6.05.20231110.2, the tab is named x-bees. Your PBX should be on the x-bees licensing, otherwise, the x-bees tab is greyed out.
- Click on x-bees Client integrations
- Proceed to the Ready Integrations tab and under Microsoft 365, click Install:
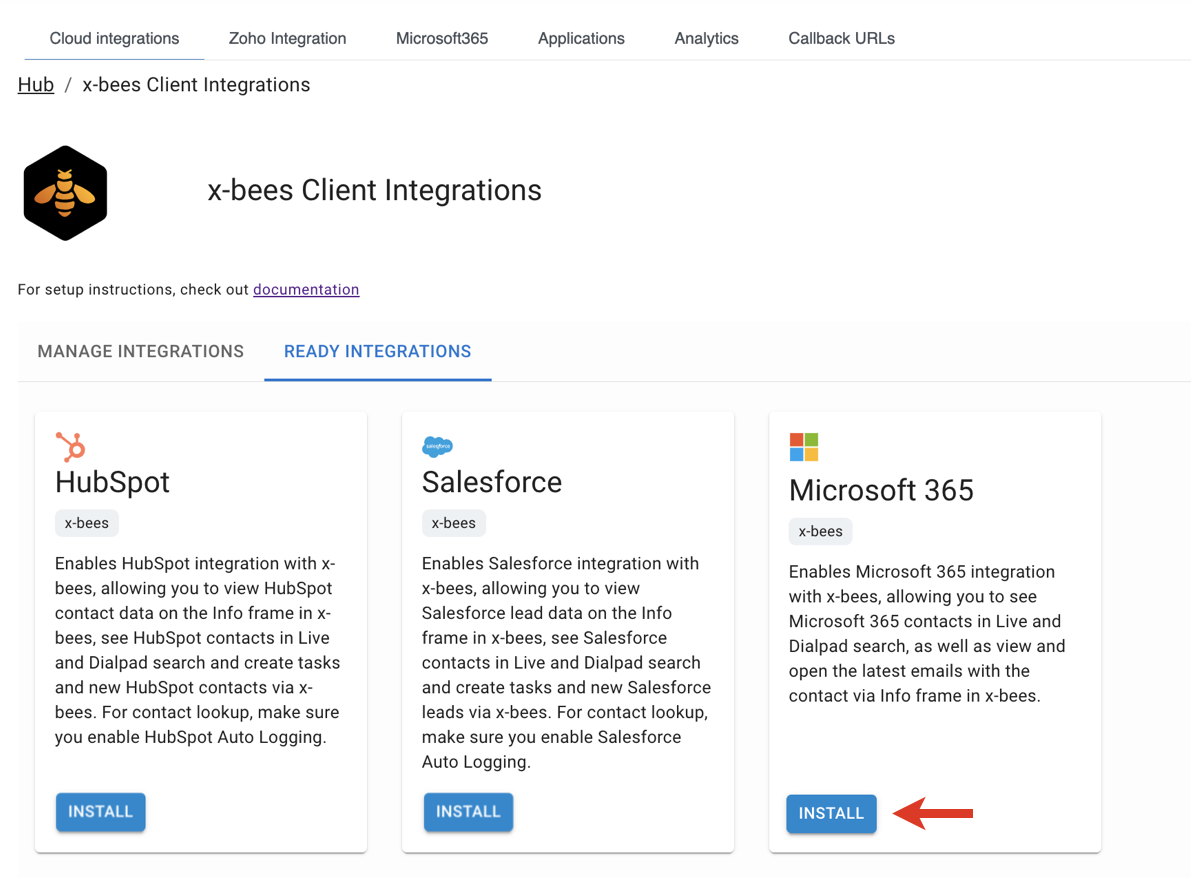
- The integration gets installed:

After the installation users need to activate the integration in x-bees (documentation: Microsoft 365 Integration with x-bees).
Microsoft 365 Calendar Integration
Microsoft 365 integration provides customers with the possibility to view available slots in the Microsoft 365 calendar of salespeople and schedule meetings with them from x-bees. The user's status gets automatically updated in x-bees based on the events in the Microsoft 365 calendar.
Requirements:
- Licensing: x-bees-Standard for access to Kite settings to set up calendars
- Users should have a valid license allowing them to use Outlook and mailbox
- Admin access to PBX, Microsoft organizational account with enabled Global administrator role (Azure AD)
Notes
- Sync of users from Azure AD is performed basing on the Primary email address: user’s primary email in Azure AD and in WMS should match. User’s primary email address can be changed by an administrator
- New custom calendars are added once a day at night when fully synced or as soon as they are updated (e.g. renamed)
- In order for avatars and icons to be displayed in emails about calendar events in Outlook, the user must confirm that they trust the no-reply@x-bees.com address (this can be done directly through the notification from Outlook, displayed in the header of the mail).
- On the Kite Settings -> Calendar Settings page, working hours correspond to the settings from Outlook. A lunch break from 1 pm to 2 pm is available. Time zone value is also synced, but time zone name may differ.
Limitation
- Calendars added via Outlook -> Settings -> Add personal calendars / Add from directory are not synced
To activate the integration, take the following steps:
Go to WMS Settings -> PBX -> Integrations -> Cloud integrations
Note: In case of WMS version lower that WMS 6.05.20231110.2, the tab is named x-bees. Your PBX should be on the x-bees licensing, otherwise, the x-bees tab is greyed out.
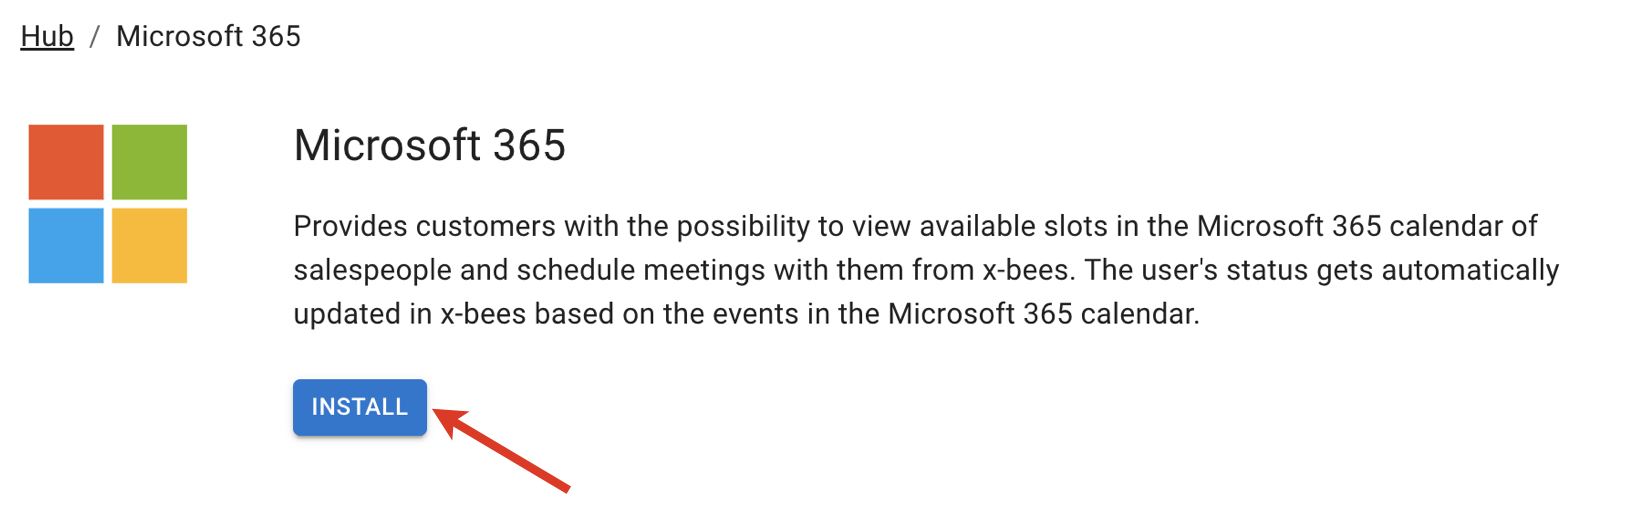
- Click on Microsoft 365
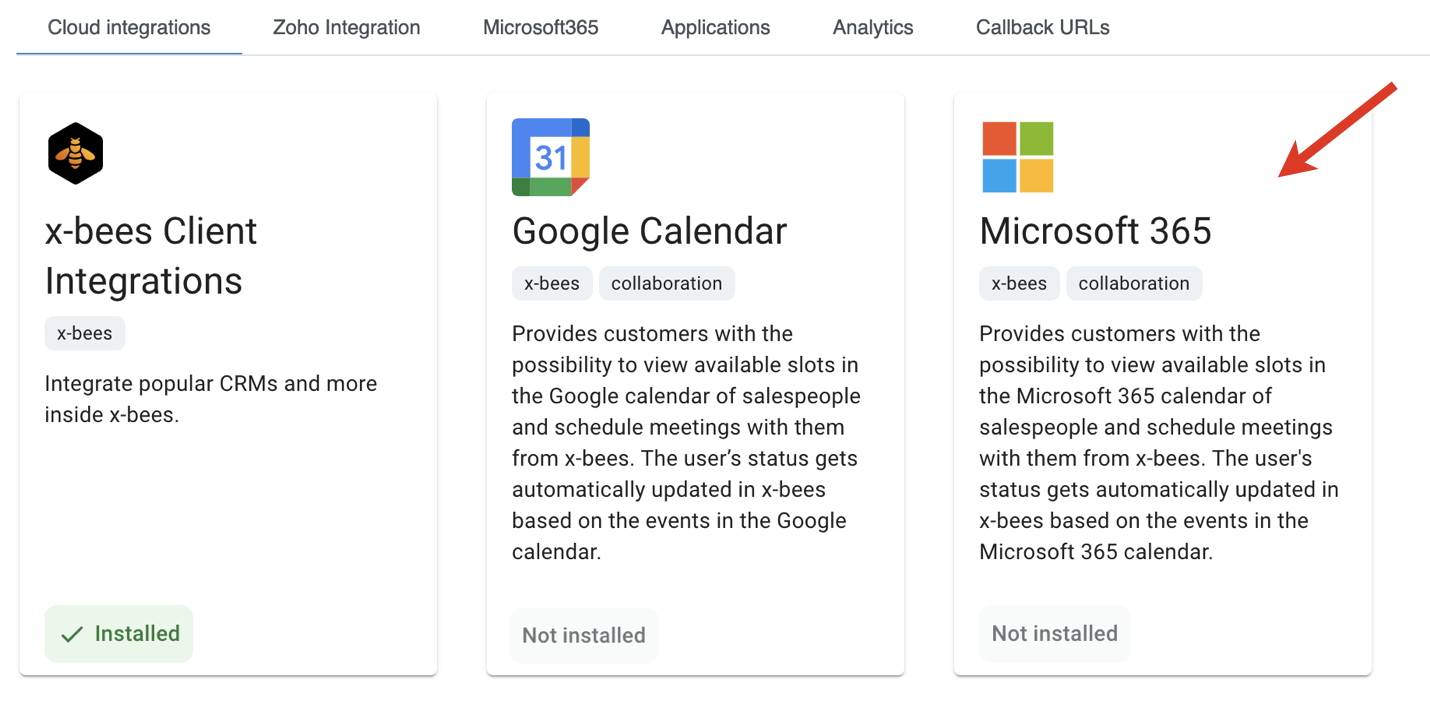
- Click Install
- Log in to your account if required and grant permissions by clicking Accept
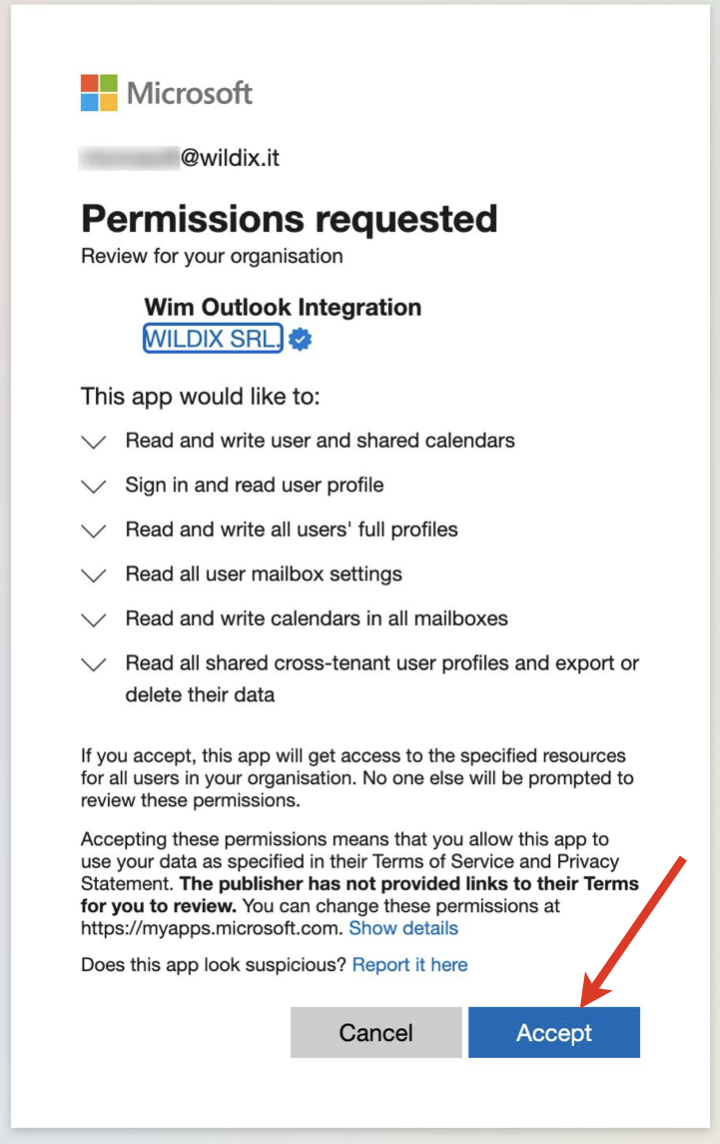
- The integration is activated

- You can manage the display of the status message for Microsoft 365 public events in user presence status. Just disable/ enable the option Display status message for public events:
 By default, the option is enabled. When disabled, calendar event status messages are not displayed in user presence.
Google Calendar Integration
Google Calendar integration provides customers with the possibility to view available slots in the Google calendar of salespeople and schedule meetings with them from x-bees. The user’s status gets automatically updated in x-bees based on the events in the Google calendar.
Requirements
- Licensing: x-bees-Standard for access to Kite settings to set up calendars
- Admin access to PBX, Google Suite Admin Console and Google Workspace
To activate the integration, take the following steps:
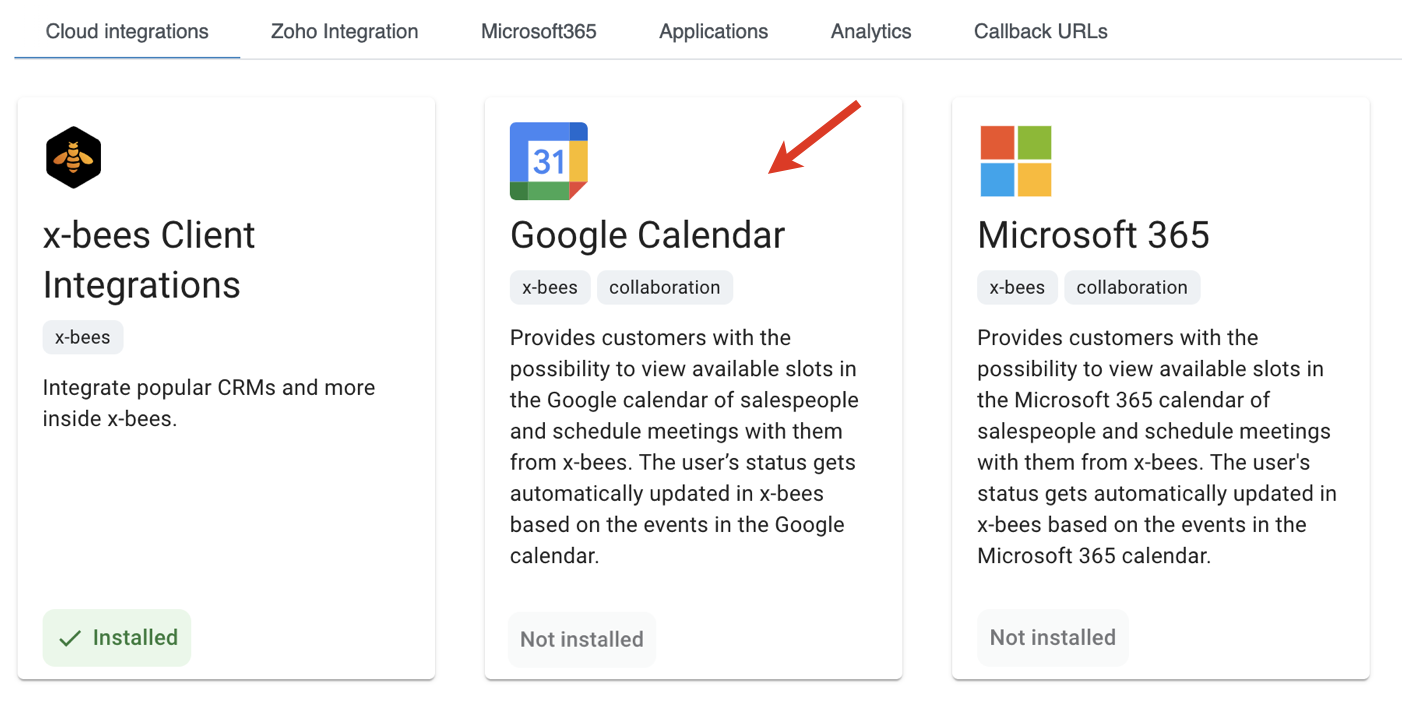
Go to WMS Settings -> PBX -> Integrations -> Cloud integrations
Note: In case of WMS version lower that WMS 6.05.20231110.2, the tab is named x-bees. Your PBX should be on the x-bees licensing, otherwise, the x-bees tab is greyed out.
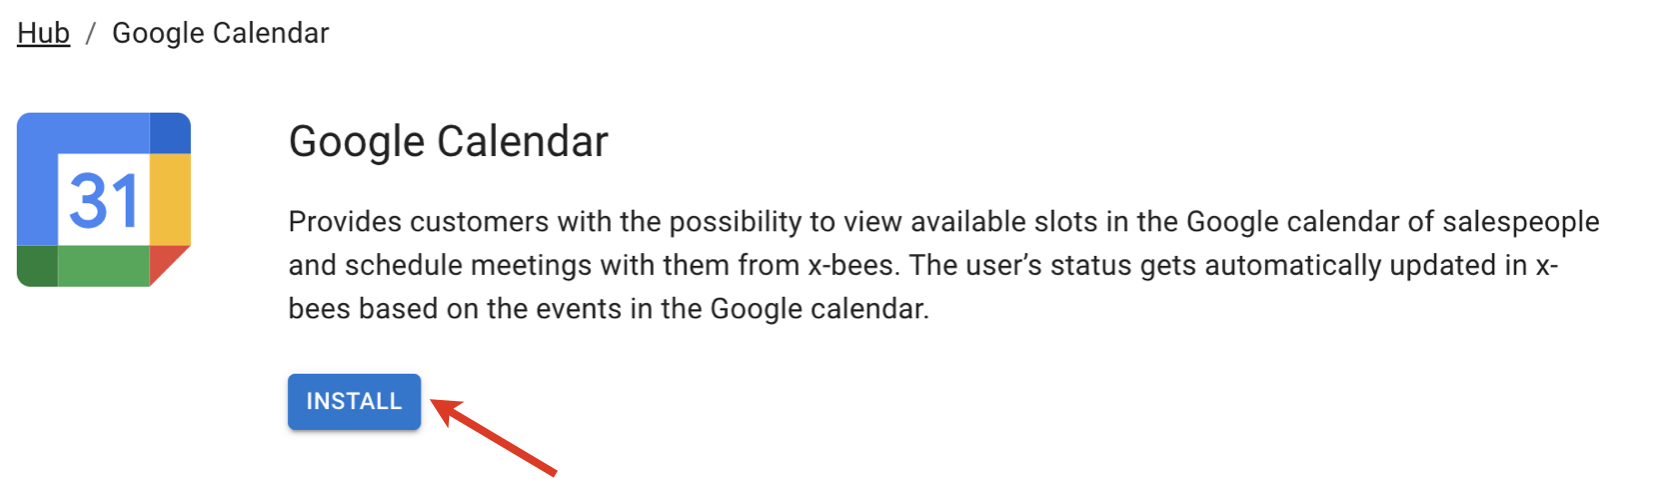
- Click on Google Calendar
- Click Install
- Proceed with 2 activation steps
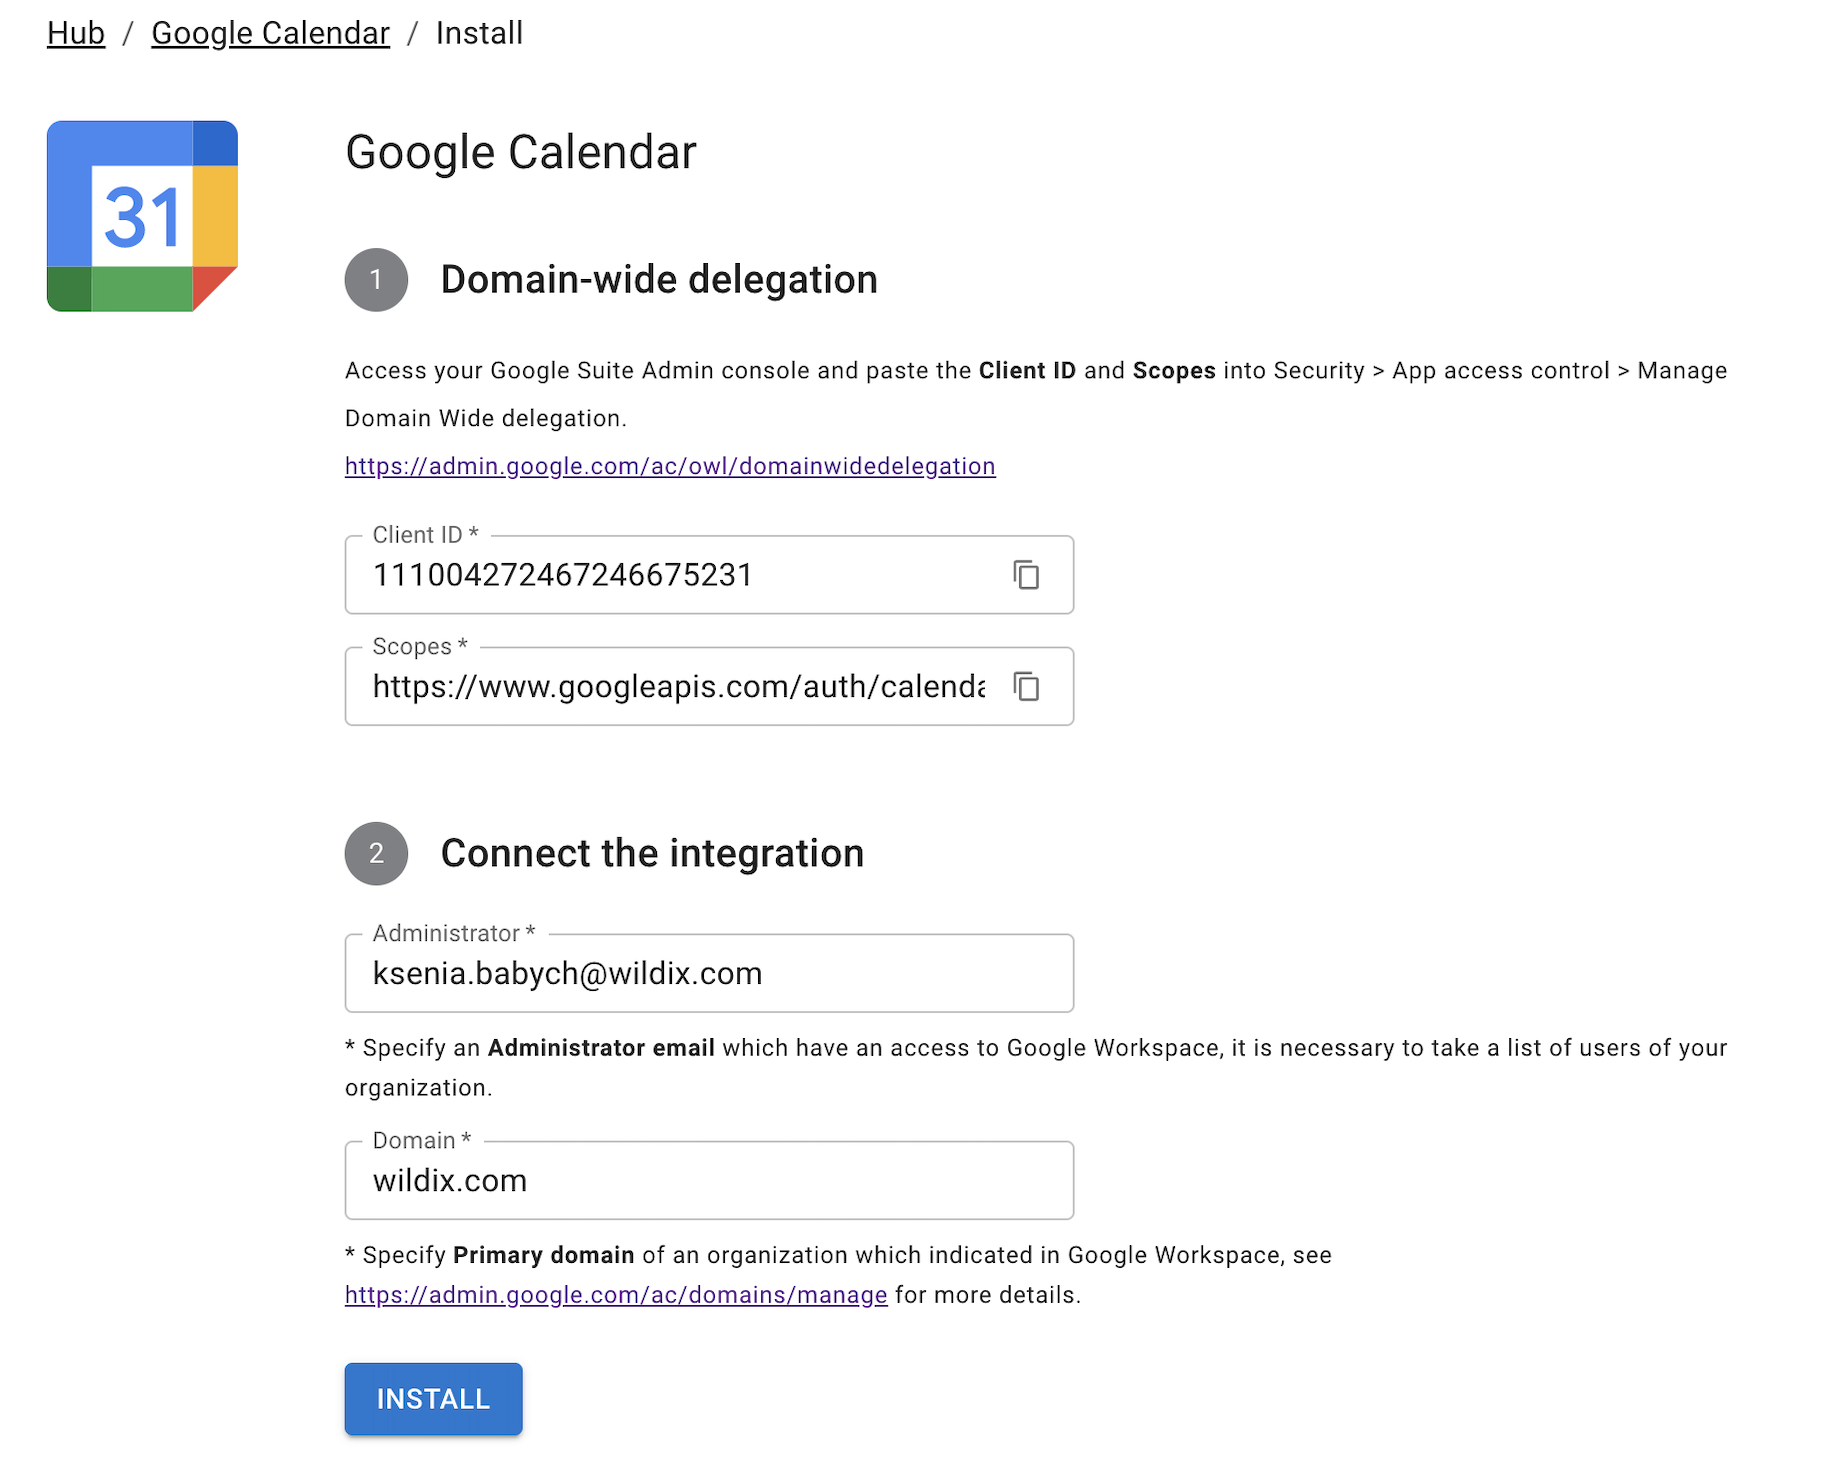
- On the 1st step, perform Domain-wide delegation:
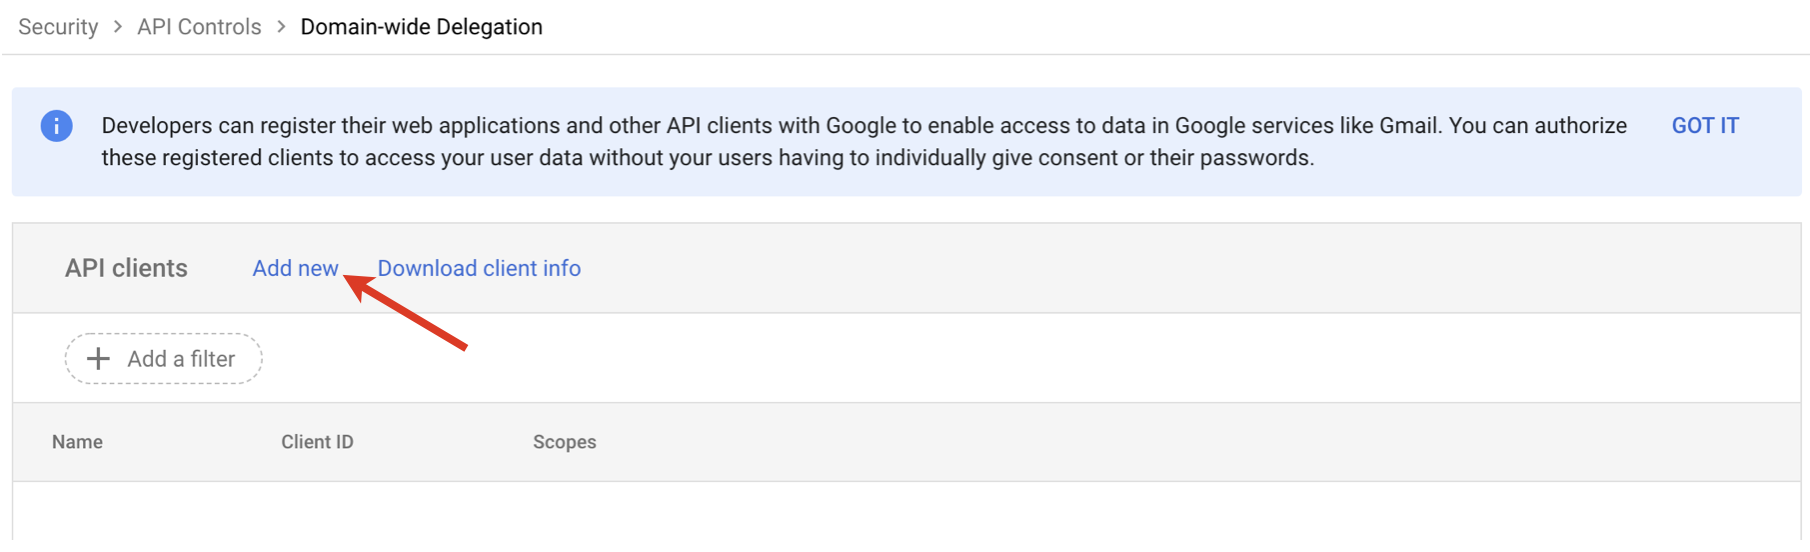
- go to https://admin.google.com/ac/owl/domainwidedelegation
- click Add new
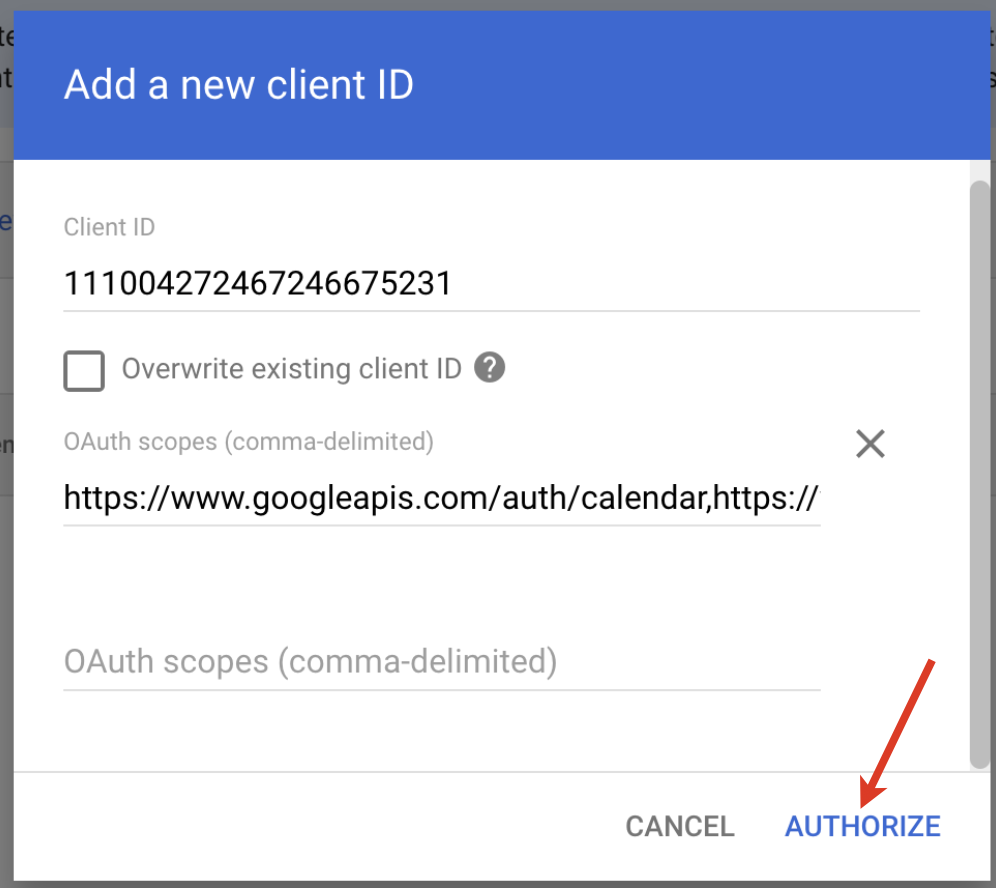
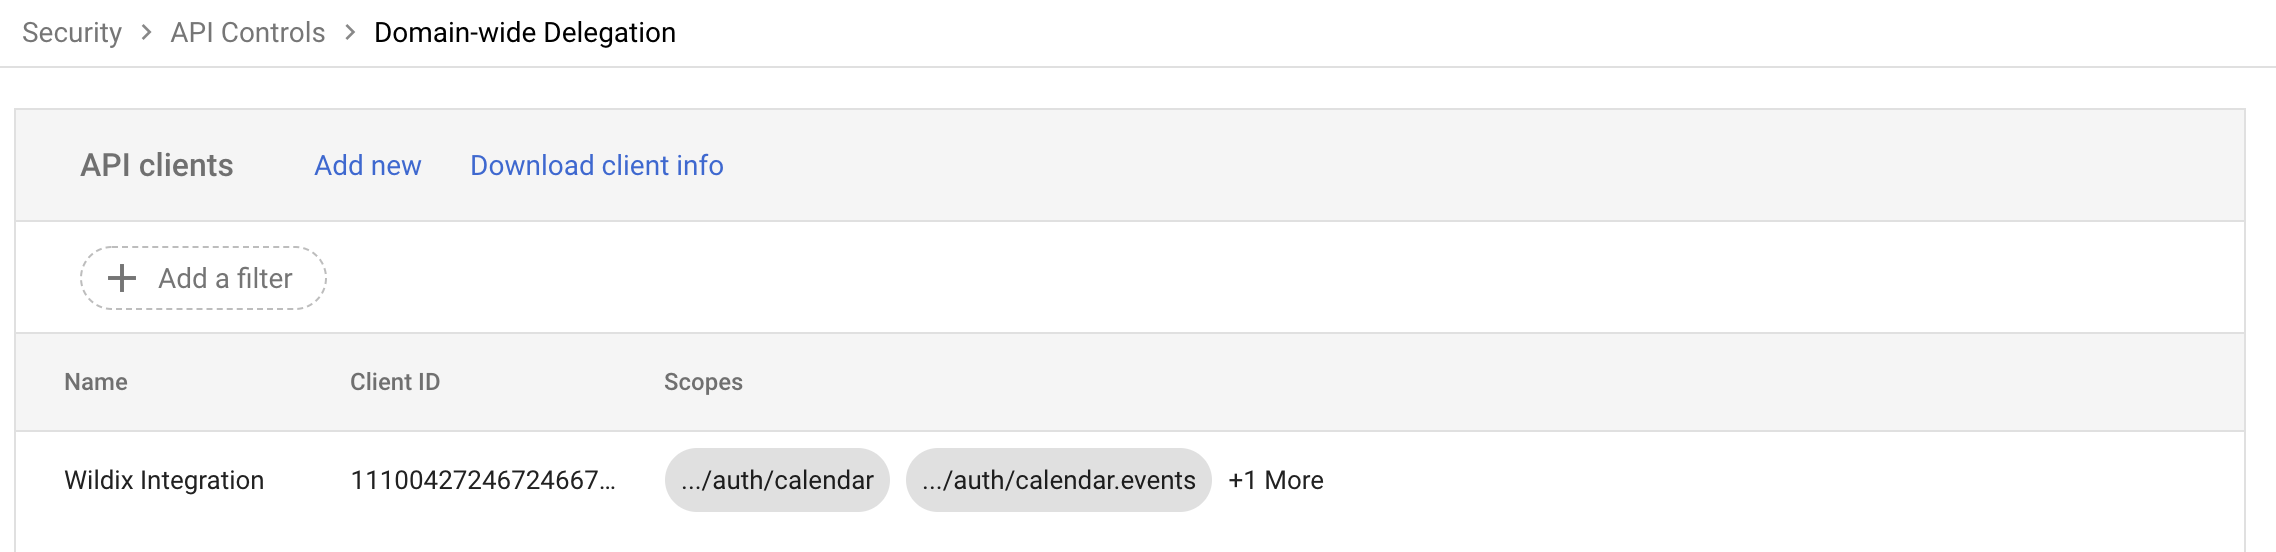
- insert Client ID and Scopes copied on Google Calendar page and click AUTHORIZE
- the delegation is performed and you can move to the 2nd step
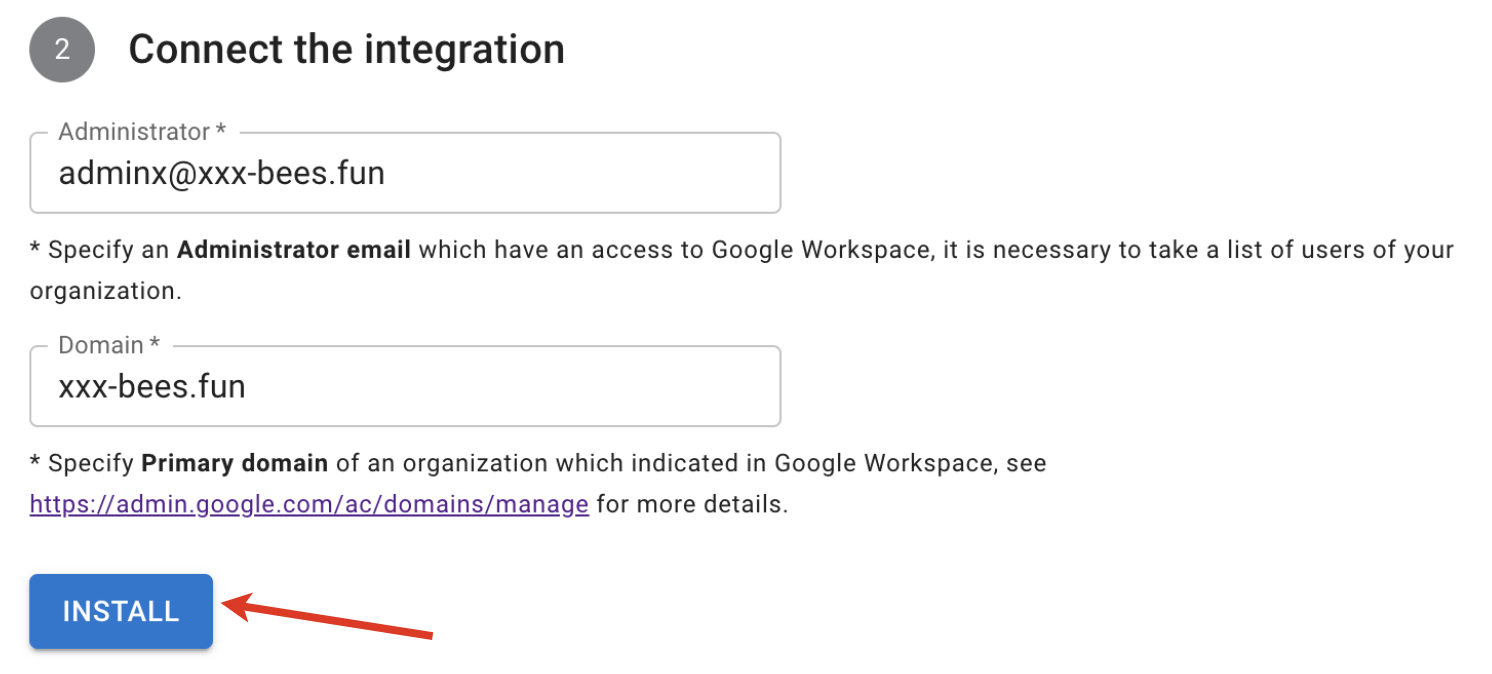
- On the 2nd step, insert Administrator email which has access to Google Workspace and organization's Primary domain indicated in Google Workspace
- Click Install to complete the activation
- The integration is activated

- You can manage the display of the status message for Google Calendar public events in user presence status. Just disable/ enable the option Display status message for public events:

By default, the option is enabled. When disabled, calendar event status messages are not displayed in user presence.
Google Workspace Integration
Google Workspace Integration supports the following features:
- Contacts search
- Possibility to view the current and upcoming event on the Info frame
- Possibility to create and edit contacts via x-bees
To activate the integration, follow the steps below:
Go to WMS Settings -> PBX -> Integrations -> Cloud integrations
- Click on x-bees Client integrations
- Proceed to the Ready Integrations tab and under Google Workspace, click Install:

- The integration gets installed:

After the installation users need to activate the integration in x-bees (documentation: Google Workspace Integration with x-bees).
Phonebook Integration
Phonebook integration is available starting from x-bees Web 1.32.1.543668 and WMS 6.03.20230630.3 or higher. The integration is enabled by default, in case of x-bees Basic licence or higher.
In case the contact is found in phonebooks, you can find it in the relevant Phonebook section on the Info frame:
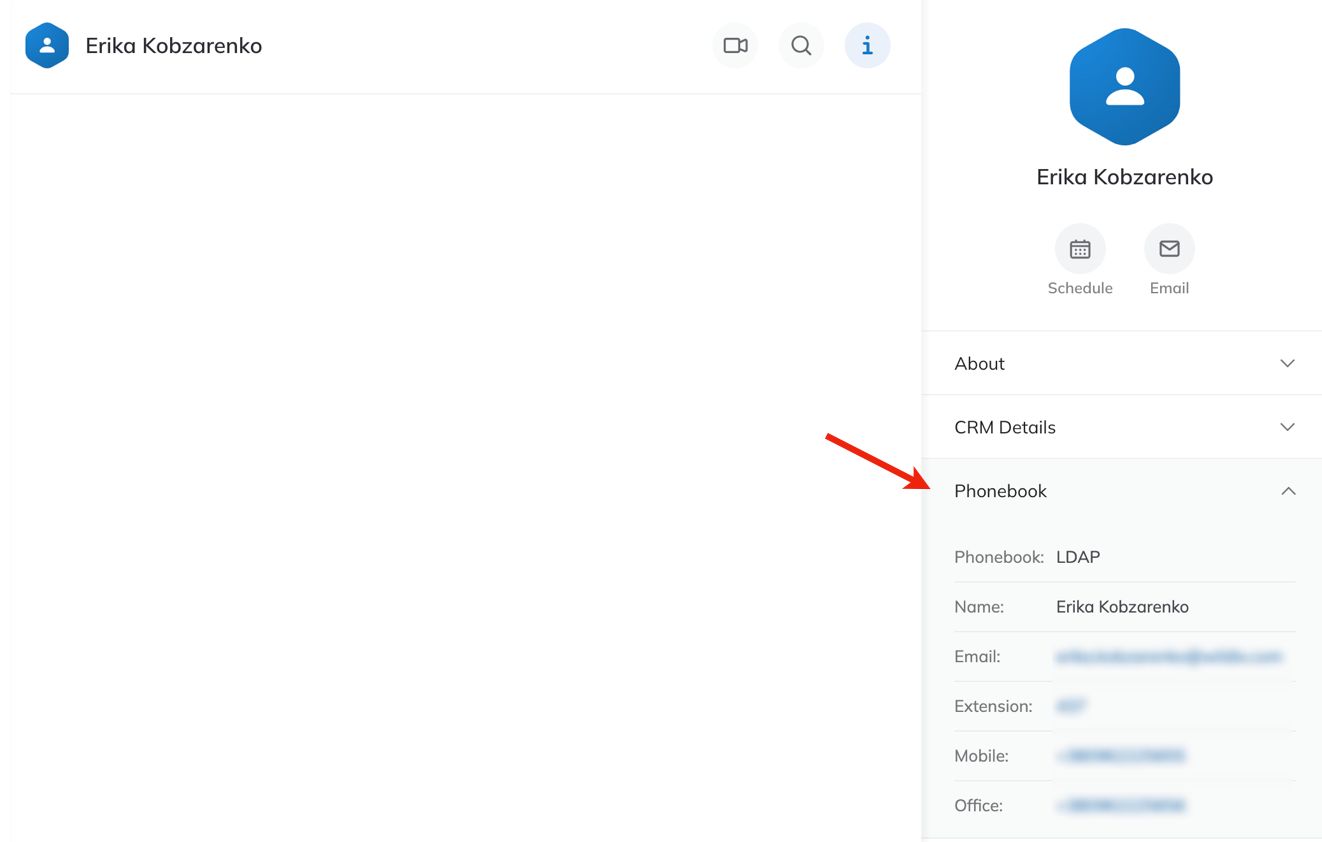
Phonebook section includes such fields as Name, email, mobile, address, etc., and lets to edit a contact or create a new one. In case of adding/ editing a phonebook contact via x-bees, the changes are synced with the Phonebook.
Webhook Integration
Also, there is possibility to set up Webhook integration with third-party web applications and services, which allows to send events related to calls.
For setup instructions and configuration example, check out the document How to set up Webhook integration.
iFrame Integration
iFrame integration allows to configure integration with third-party applications and services and, if required, have the data displayed in the Info frame section in x-bees.
For setup instructions, check out the document How to set up x-bees Client integrations.
Other
Allow calls to 911 extension via x-bees
By default, a call to 911 is redirected to a native dialler, due to being an emergency number in some countries. If, say, you have a user with 911 extension on the PBX and need to allow users to make calls to 911 extension, follow the instructions in this guide Custom config parameters List.