How to access Wildix APIs using Postman OAuth 2.0
- Former user (Deleted)
- Tatiana Bieliakova
- Ksenia Babych
- Elena Kornilova
This guide explains how to access Wildix APIs using Postman (OAuth 2.0).
Created: February 2022
Updated: June 2023
Permalink: https://wildix.atlassian.net/wiki/x/3B-OAQ
Follow the below instructions to access Wildix APIs using Postman:
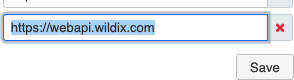
1.Navigate to Settings -> PBX -> Security and add: https://webapi.wildix.com
2. Go to Settings -> PBX -> Integrations, and select Applications. Here you will need to select OAuth 2.0 and proceed with adding the credentials you would like to use on Postman (this can be anything you like).
Click Add and enter the details you want to use. In our example below, we used the name "Wildix API":
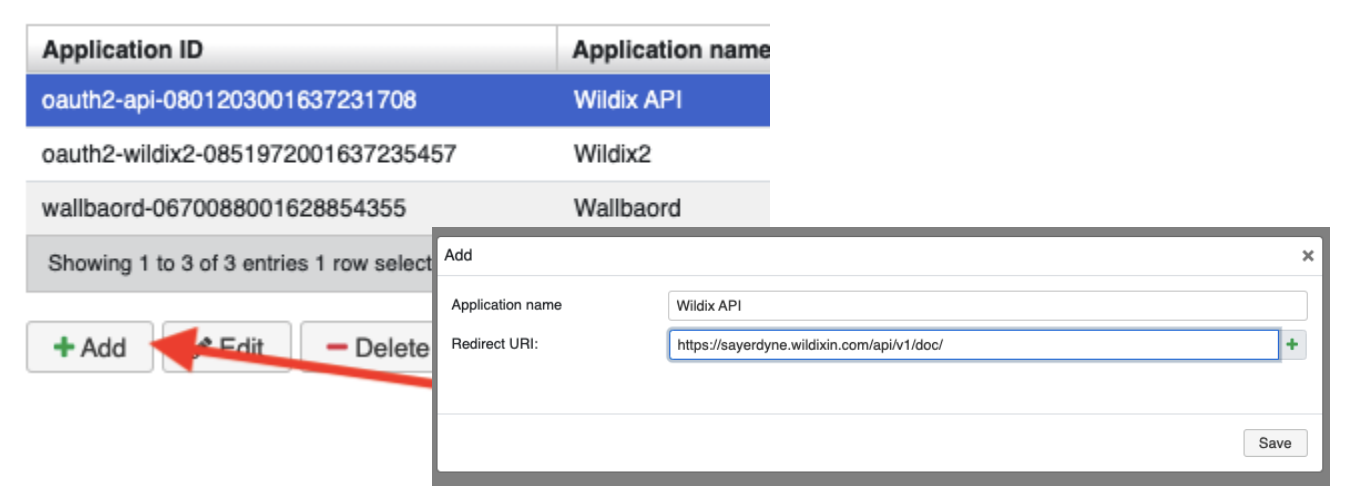
Note: When creating the OAuth 2.0, you will need to add the Redirect URI. This will be the PBX name followed by /api/v1/doc/:
Example: https://{PBX/NAME}.wildixin.com/api/v1/doc/
3. Once the above has been created, click Save and proceed to the next step.
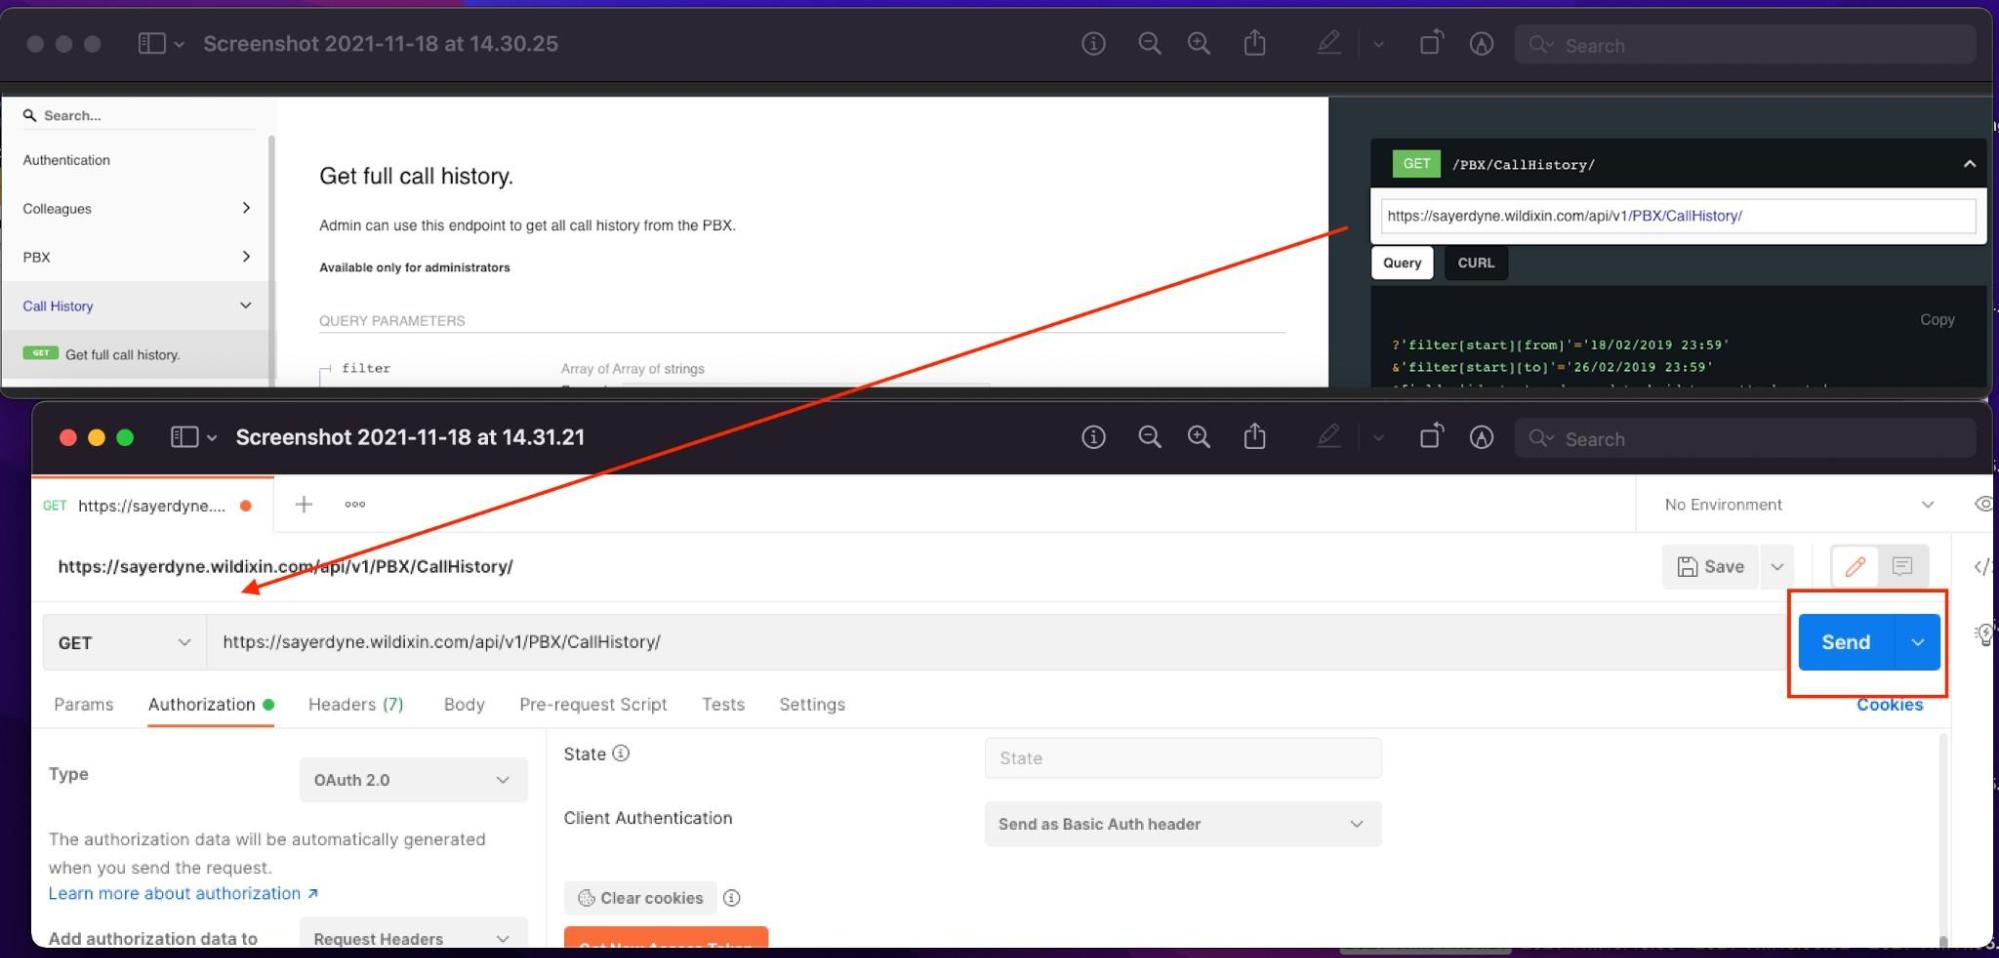
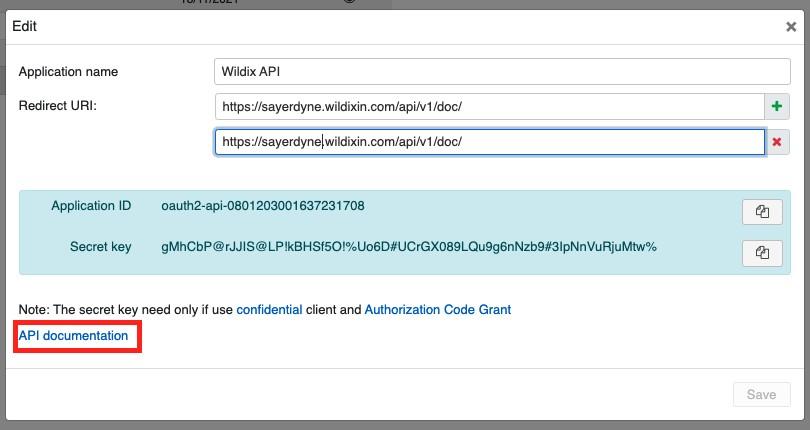
4. Next, you will see the list of the OAuth 2.0 APIs you have created. Double-click back onto the Application ID and navigate to API Documentation.
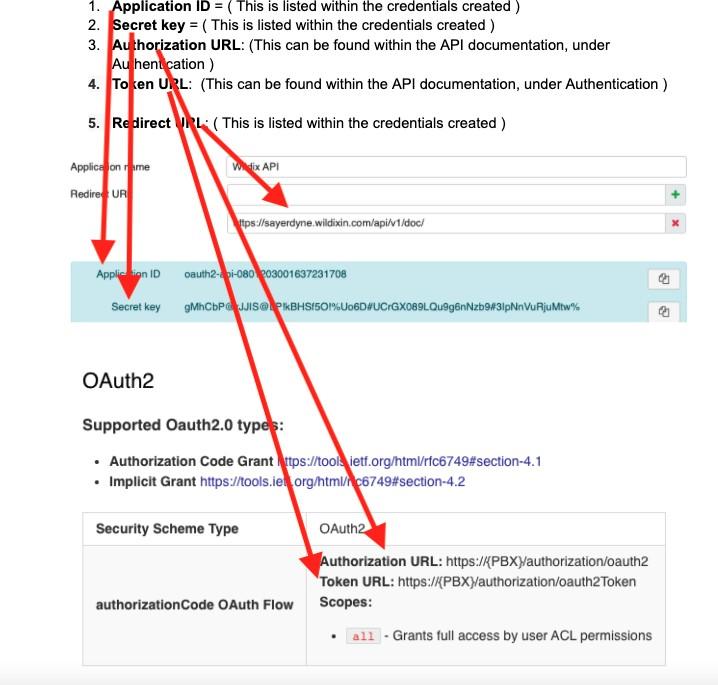
5. In order to successfully authenticate with Postman, you will need to gather the following details and make note of them:
- Application ID (listed within the credentials created)
- Secret key (listed within the credentials created)
- Authorization URL (can be found within API documentation, under Authentication)
- Token URL (can be found within the API documentation, under Authentication)
- Redirect URL (listed within the credentials created)
6. Once you have all necessary details noted from above, you can proceed to open “Postman”.
Note: If you need to download “Postman”, follow the below link and install it before proceeding with the next steps:
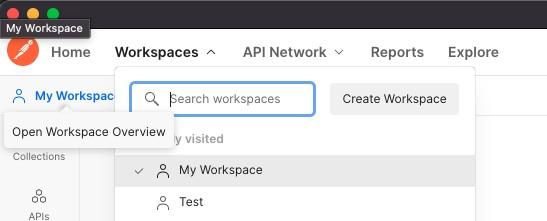
7. When logging into Postman for the first time, you will already have a default My Workspace tab where you can start the authentication process. Alternatively, you can create a new workspace that you want to work on.
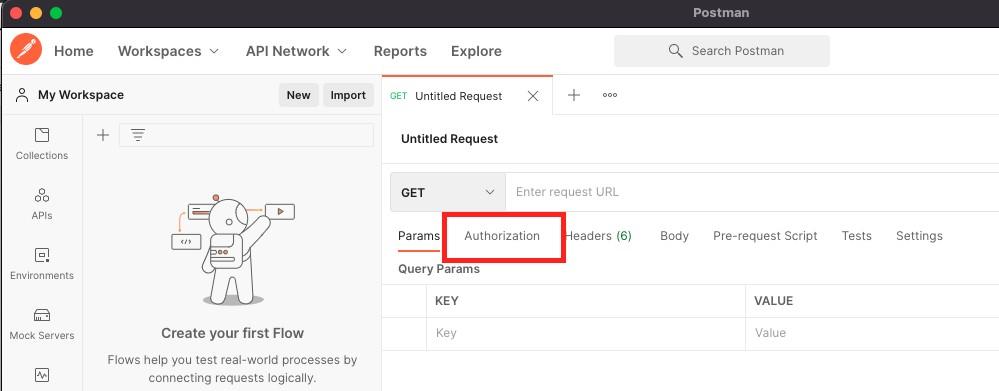
8. Now you need to use the credentials from step 5 of this instruction to start the authentication process. Once you have accessed your workspace, you are taken to a page where you can configure the Params, Authorization, Header, Body, etc. You will need to select Authorization as shown below:
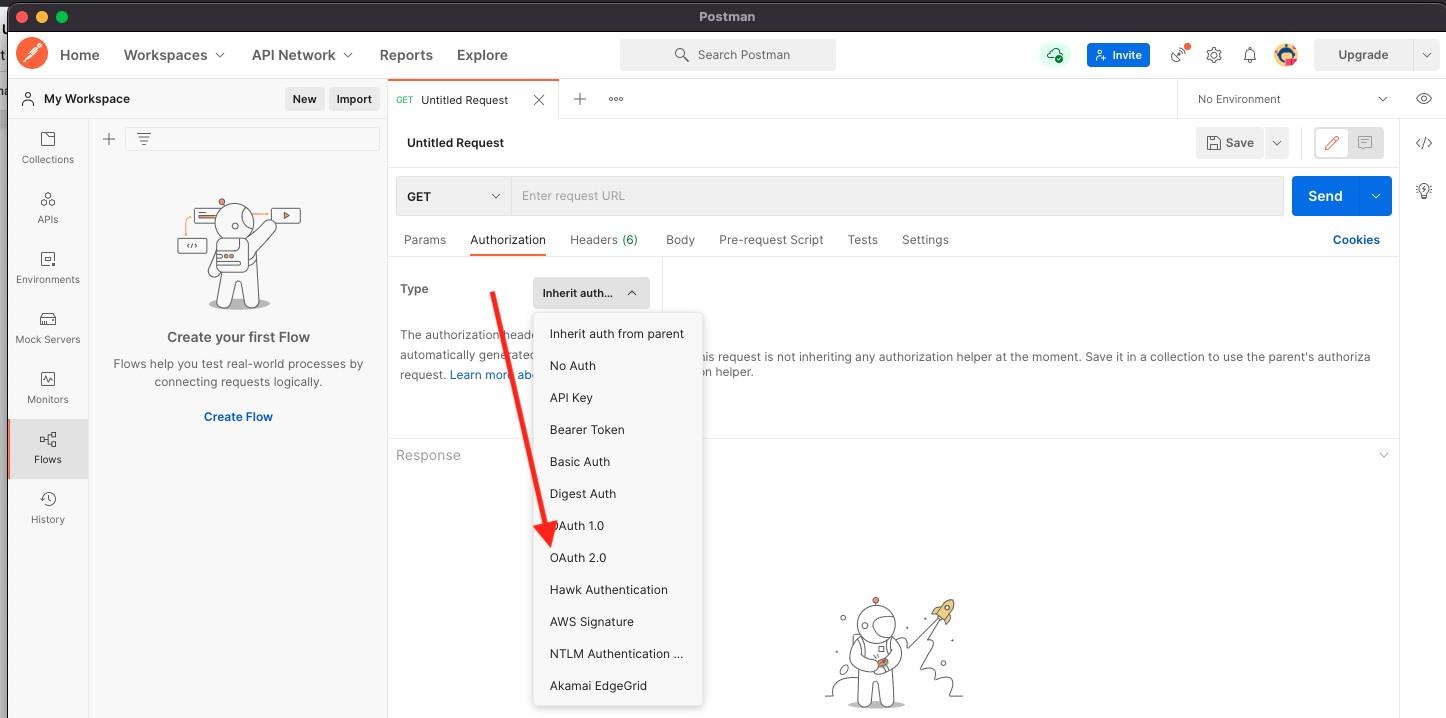
9. Under Authorization, press the drop-down that says Type and select OAuth 2.0:
10. It's here where the above credentials need to be entered, see the screenshot below:
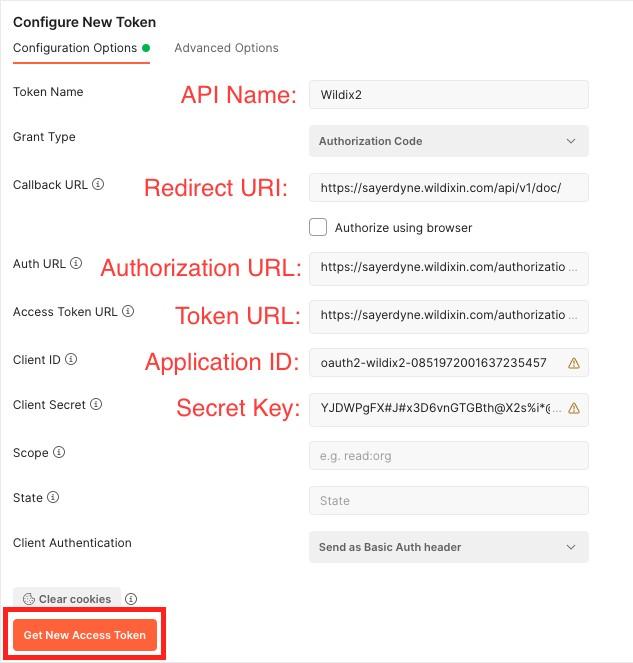
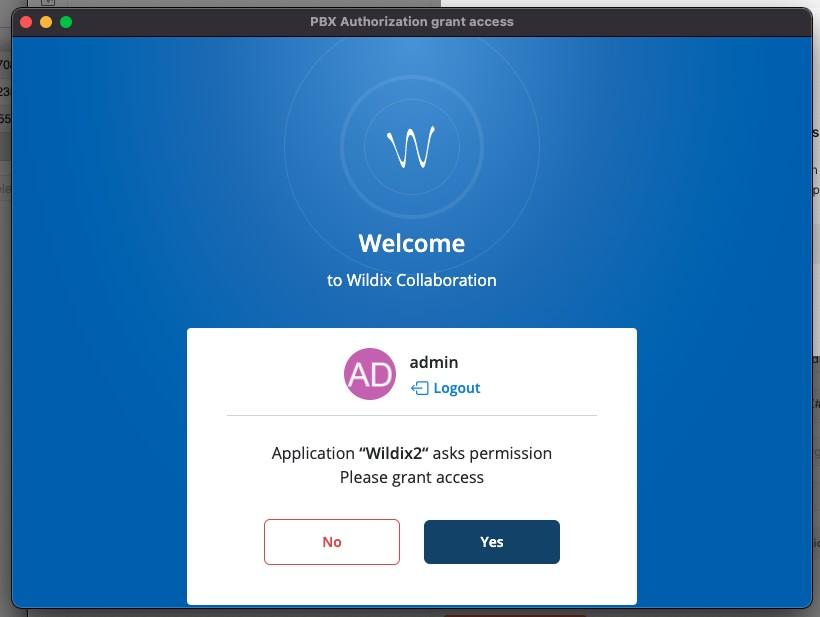
11. When entered, click Get New Access Token, this will redirect you to https://{PBX/NAME}.wildixin.com/api/v1/doc/ and request you to grant access to the APIs of the PBX:
Note: If you get an error message: “Error: Empty client ID” when you try to get a new token or refresh it, and the correct ID is present in the Client ID field, change “Client authentication” way from “Send as basic Auth Header” to “Send client credentials in body”. This should do the trick.
12. Once access is granted, you are now ready to query the Wildix APIs from Postman. You can use the GET, POST, DEL options in Postman to retrieve the data you need.