Outlook integration for Microsoft Windows
Outlook integration supports: Calendar Sync, Presence, User pictures, Click2call, IM, Call popup, Caller name lookup, live search in Outlook contacts, URL to create / edit contact during an incoming call.
Updated: February 2023
Permalink: https://wildix.atlassian.net/wiki/x/IBjOAQ
Features
- Calendar Sync
- Presence and user pictures
- Click2call and IM
- Call popup
- Caller name lookup and live search in Outlook contacts
- URL to create / edit a contact during an incoming call
- Creating Wildix Conference
Additionally:
- Outlook contacts Import: download the application for your Windows system type following one of the links below:
Requirements
- Wildix Collaboration
- Windows 10 (64-bit)
- MS Office 2016 or higher (note that Office on the web is not supported)
- User License: UC-BUSINESS per each user
For Calendar Sync:
- Min. Outlook version: 2016
Note: Starting from WMS 5.03, it is possible to sync calendars and update users statuses automatically, without Outlook. Consult the Guide Microsoft 365 Integration Guide for details.
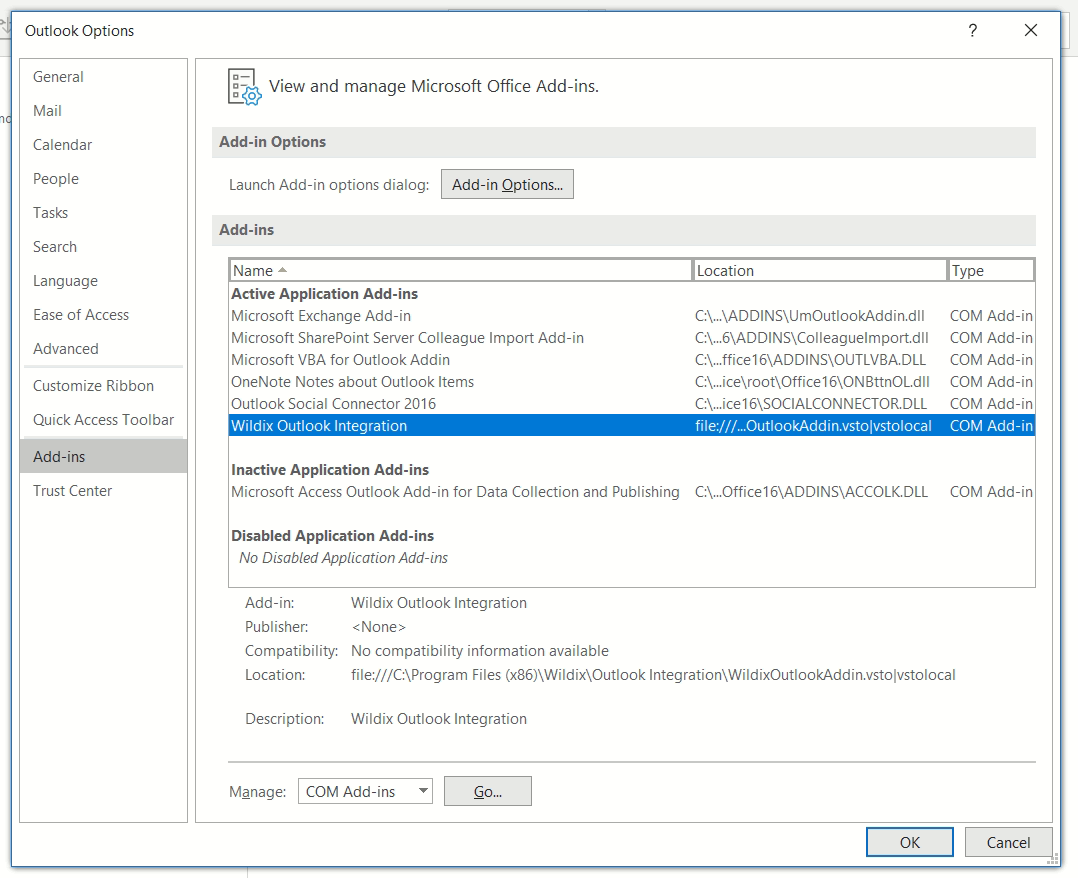
Make sure that Wildix Outlook Integration is active in Outlook Options -> Add-ins. To add Wildix to Add-Ins:
- Go to File -> Options:

- Go to Add-Ins and select Wildix Outlook Integration -> click Ok to save the changes:
For other features:
- Min. Outlook version: 2016
- Office Pro Plus 2016 or Office Standard 2016 + Skype for Business (make sure Skype is not running, since Microsoft accepts only one source for presence)
Current limitation: Android Collaboration App vs Outlook Calendar
- It is not recommended to enable option “User status when talking on mobile” on Android Collaboration App (Advanced Settings) in case of using Outlook Calendar Integration: after completing a mobile call, user status might not be able to go back to its previous state due to the Outlook Calendar sync, and might remain incorrect.
Installation
Install WIService
Outlook integration is part of the WIService starting from WIService v. 3.5.1. So, to enable Outlook integration, WIService should be installed:
- Go Collaboration Settings -> Extensions -> install Integration service:

For detailed instructions on how to install WIService, check this guide: What is WIService: Installation.
Activate Outlook Integration
Once WIService is installed, you need to activate Outlook integration in WIService settings:
Note: Starting from WIService v. 3.7.10 admin rights are required to activate Outlook Integration. When activated, Outlook Integration is enabled for all users of the Windows PC.
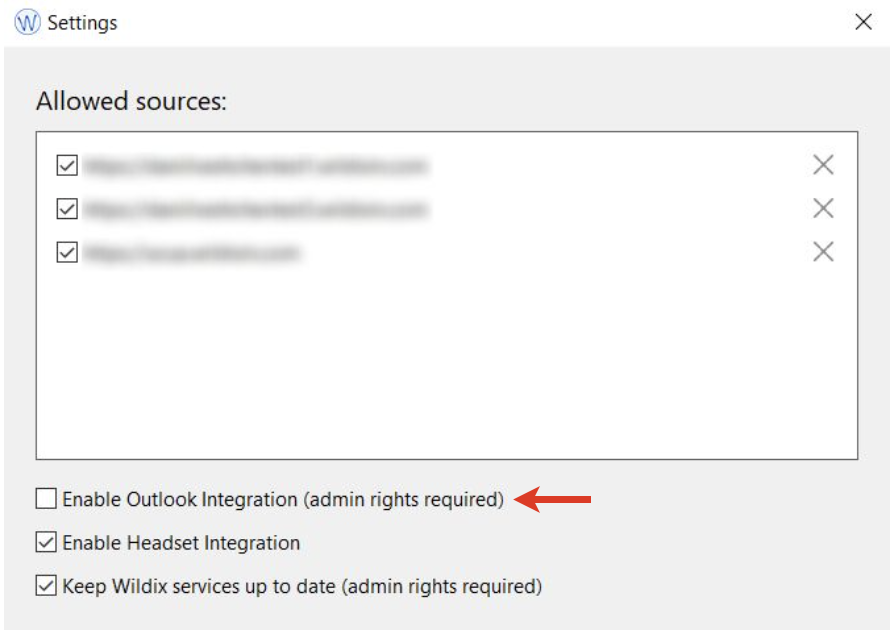
- Go to Quick Launch Toolbar -> right-click on Wildix Integration Service icon -> select Settings
- Activate the option Enable Outlook Integration (admin rights required):
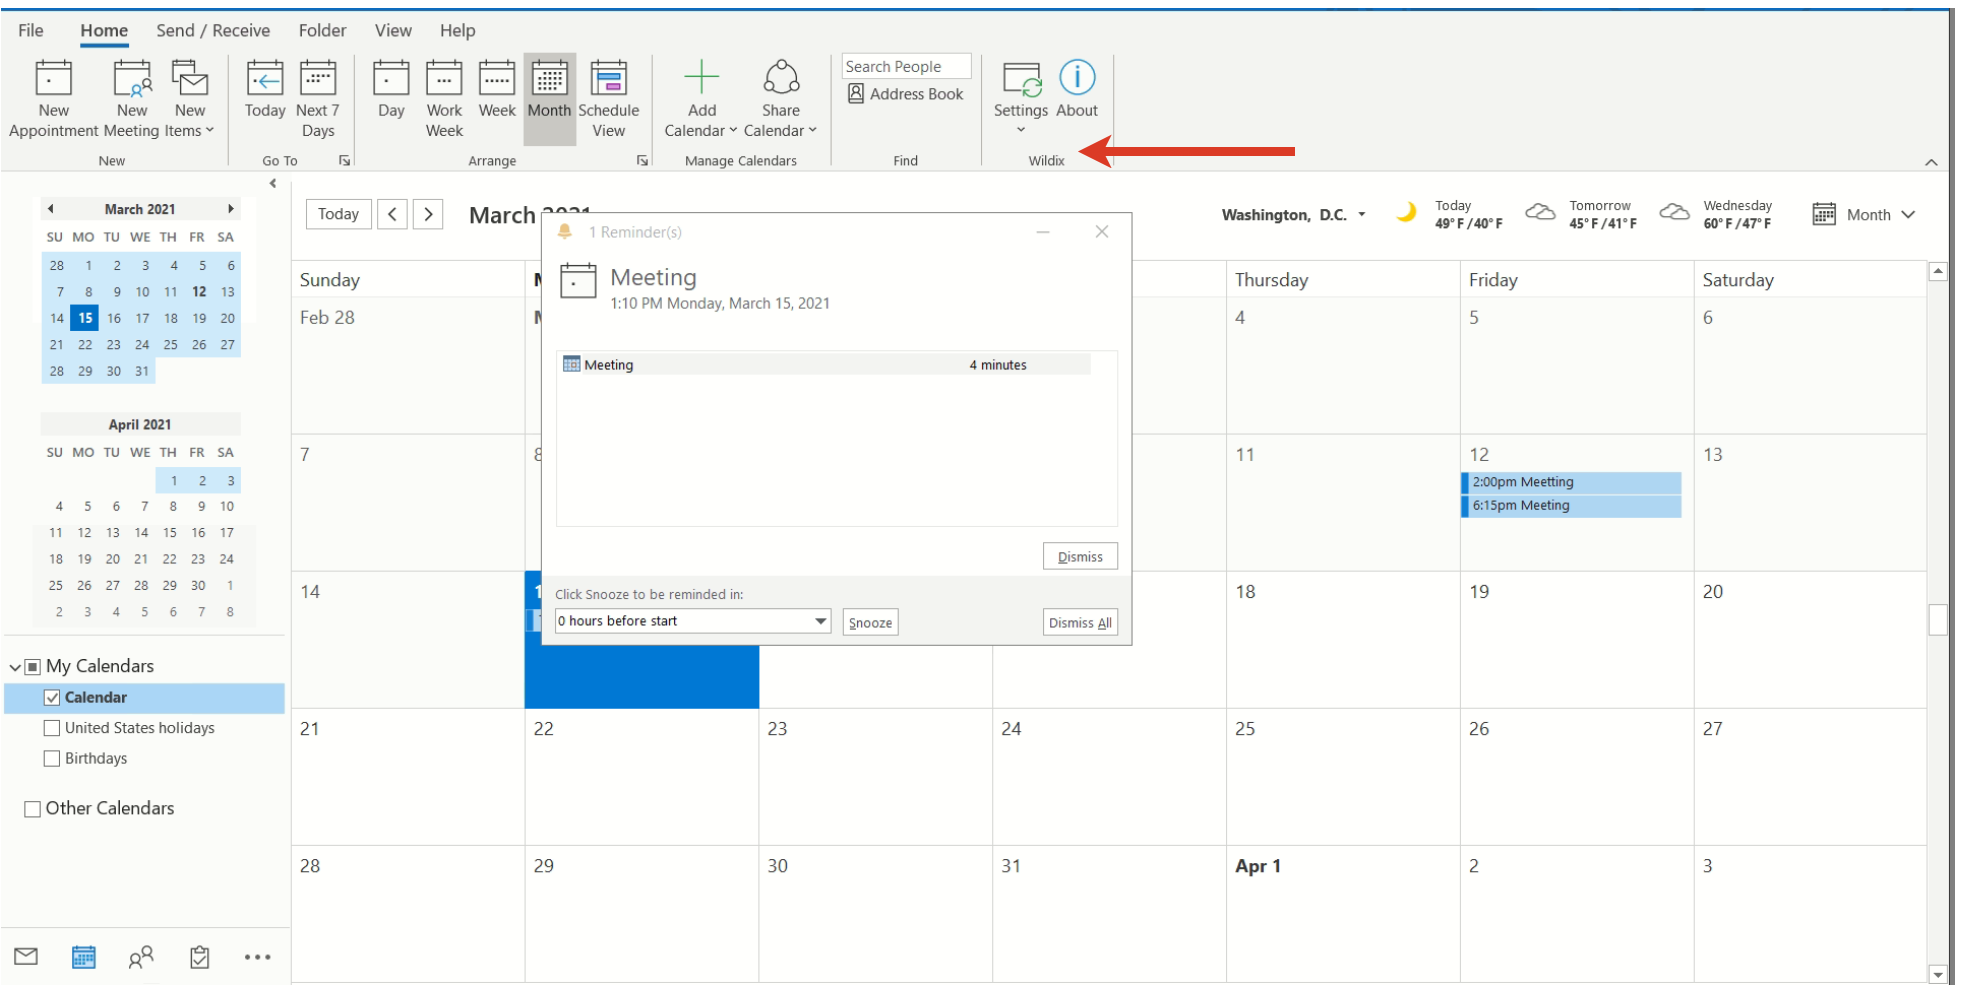
- After the activation, Wildix Outlook Integration is available in Outlook Calendar:
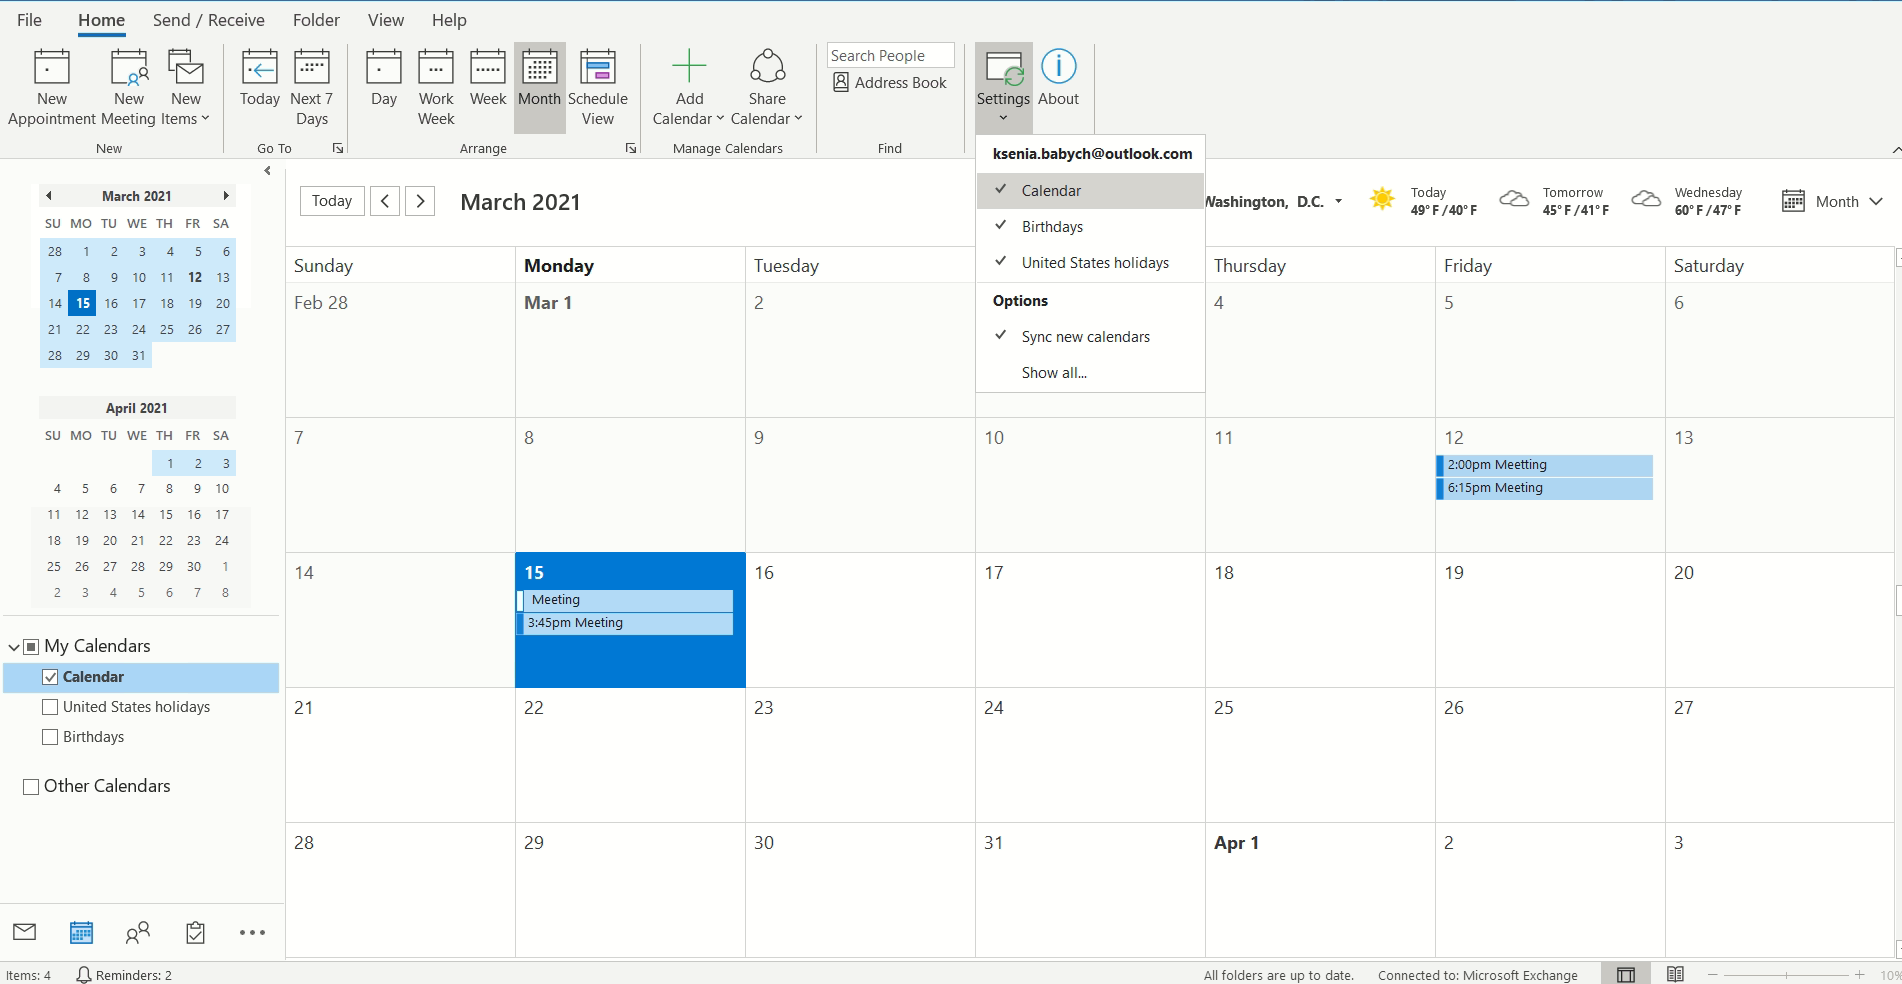
- click Settings to choose calendars to be synced with Collaboration
- click About to check the integration version and open logs if needed
Starting from WIService v. 3.16.1, Outlook integration installation folder is in the WIService folder on Windows.
Enable Outlook calendar sync
Go to Collaboration Settings -> Outlook (the tab appears after the integration is installed) and click the toggle switch Enable calendar sync: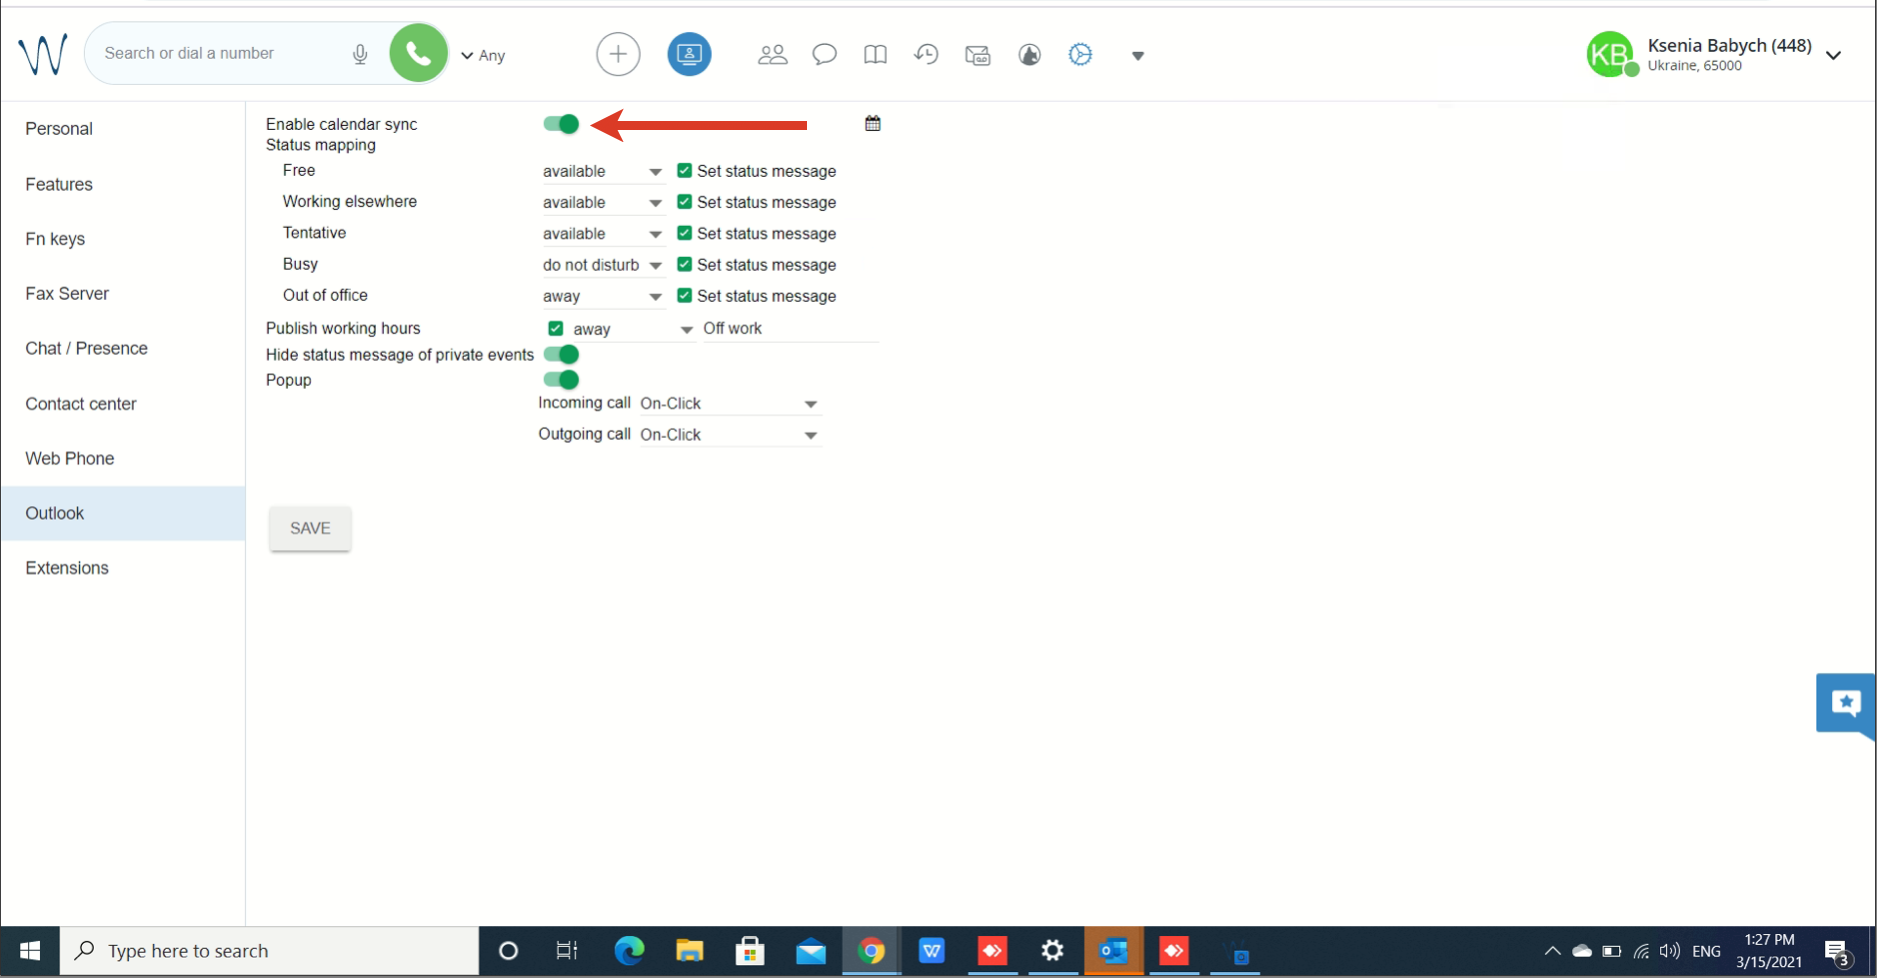
Note: The calendar sync can take up to 10 minutes after you enable it.
Important: Starting from WMS 5.04.20211228.2, in case Microsoft365 integration is enabled in WMS -> Settings -> PBX -> Integrations, Microsoft365 integration has higher priority, Collaboration syncs with Outlook Cloud, and the Outlook tab is replaced with Microsoft365 in Collaboration Settings.
Documentation: Microsoft 365 Integration Guide
The following features are supported:
- Sync of your presence status in Collaboration with Outlook calendar event status
- Sync of upcoming events from Outlook calendar
- Outlook calendar working hours sync with Collaboration
Click the Calendar icon to see the upcoming events from your Outlook calendar:
- Status mapping: allows you to set the corresponding Wildix Collaboration status for each Outlook calendar status; additionally you can enable / disable the status message
- Publish working hours: enables sync of working hours from Outlook calendar with Wildix Collaboration; additionally you can select the Wildix Collaboration status displayed when you are out of office and enter the status message
- Hide status message of private events: enable if you don’t want status message of private events to be displayed as your status message of Wildix Collaboration
- Popup: allows you to open Outlook upon receiving or placing a call:
- On-click (Incoming/ Outgoing call): click the link to open the app
- Ringing (Incoming call): the app opens upon receiving a call (when call is in “ringing” state)
- Call generation (Outgoing call): the app opens upon placing a call (when call is in “ringing” state)
- Answer (Incoming/ Outgoing call): the app opens right after a call is answered
Video tutorials
Wildix Outlook Integration:
Presence, Click2Call from Outlook:
Create Wildix Conference via Outlook
Note: The support starts from WMS 6 Beta v. 6.02.20230117.1 and WIService v. 3.12.
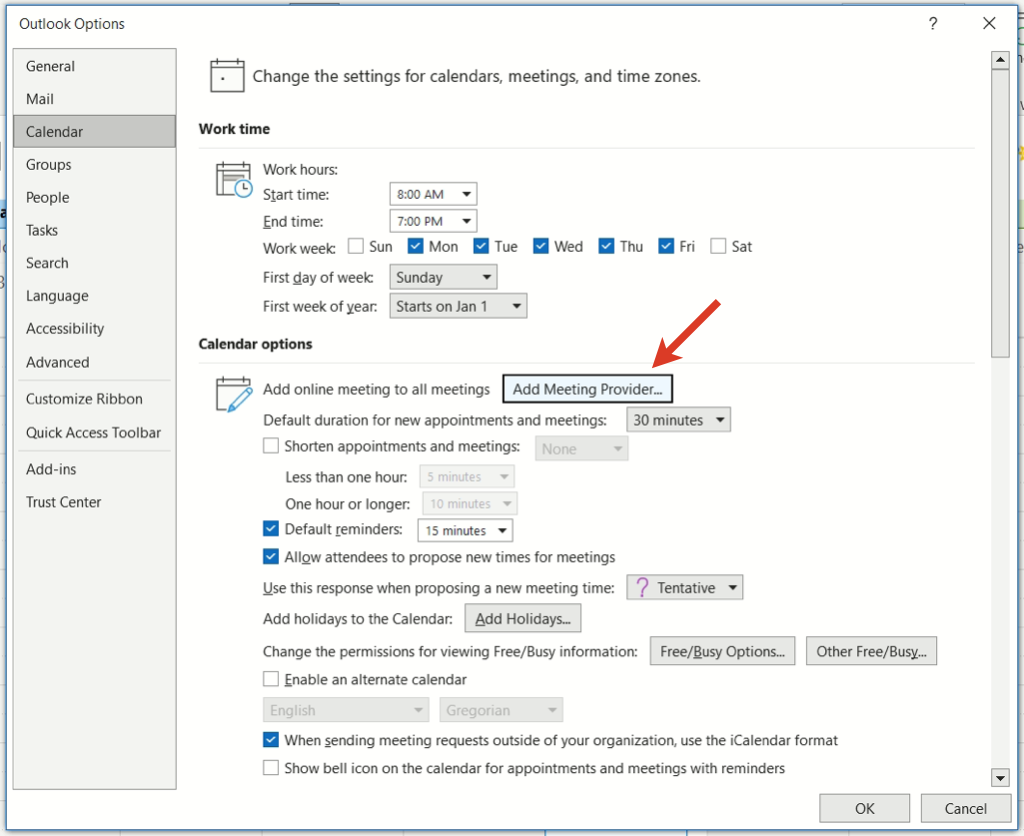
Current limitation: In case you have a MS Teams meeting add-in, it is recommended to disable the setting "Add online meeting to all meetings” in Files -> Options -> Calendar -> Add meeting provider:
1. Click on the button New Wildix Conference on the Calendar tab:

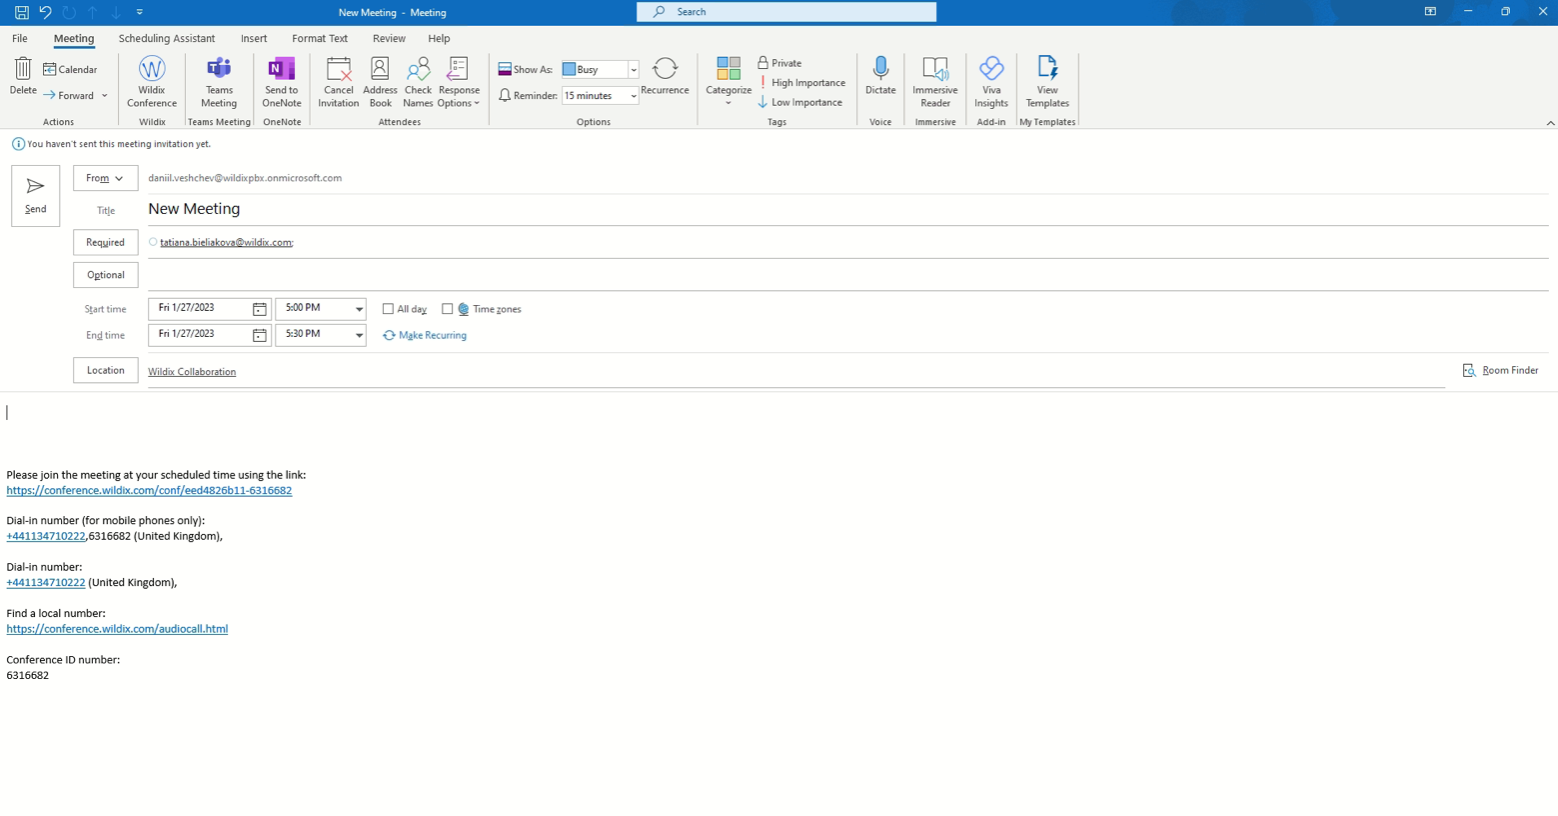
2. The screen of the new meeting shows up, which already includes link to the conference as well as dial-in numbers:
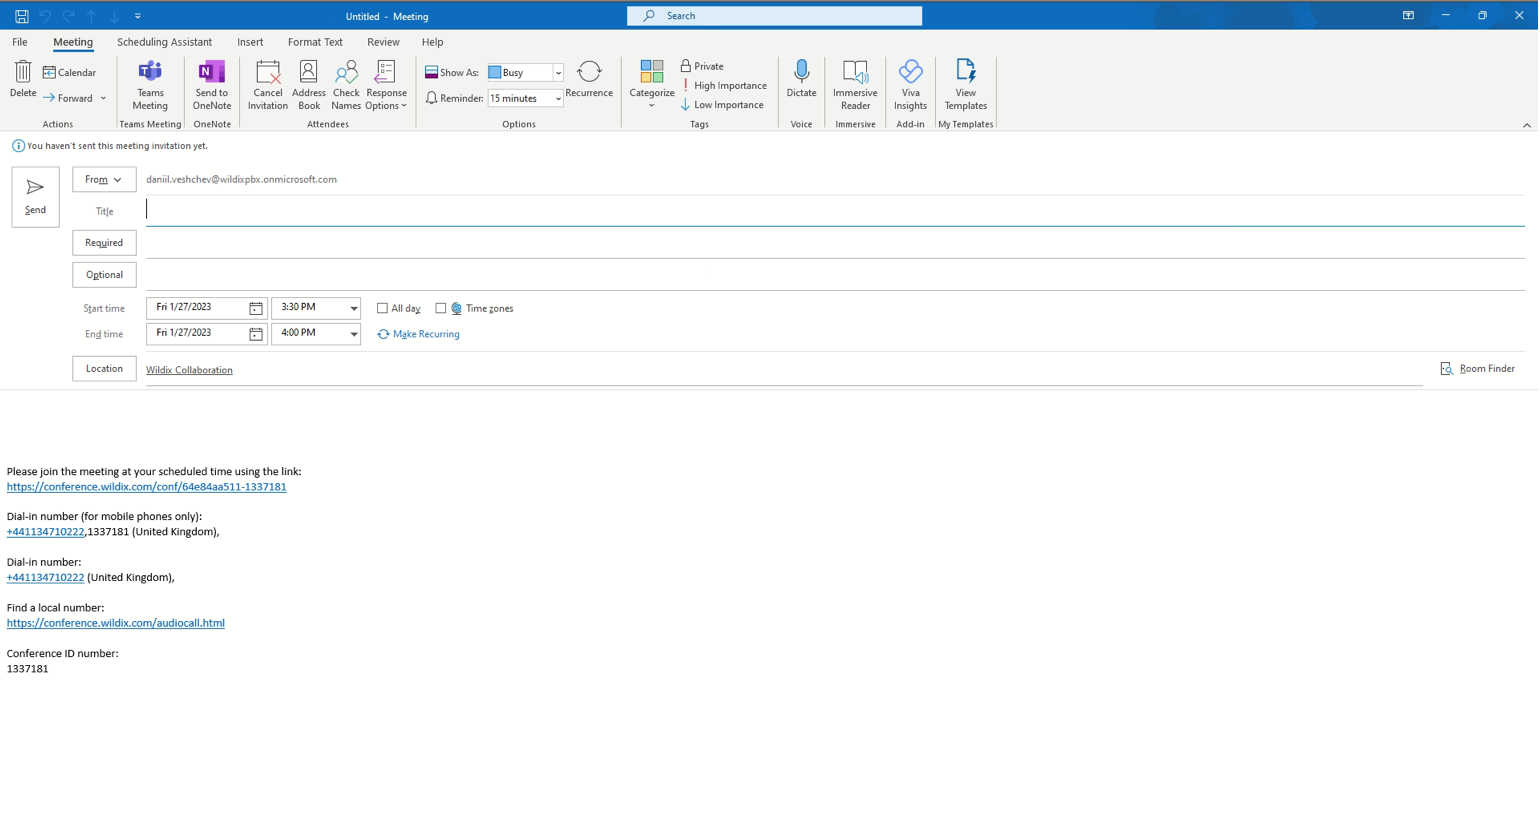 Enter details of the meeting:
- Title
- Meeting participants
- Start and end time
Location of the meeting is automatically set to Wildix Collaboration.
 3. The conference is created both in Outlook and in Collaboration:
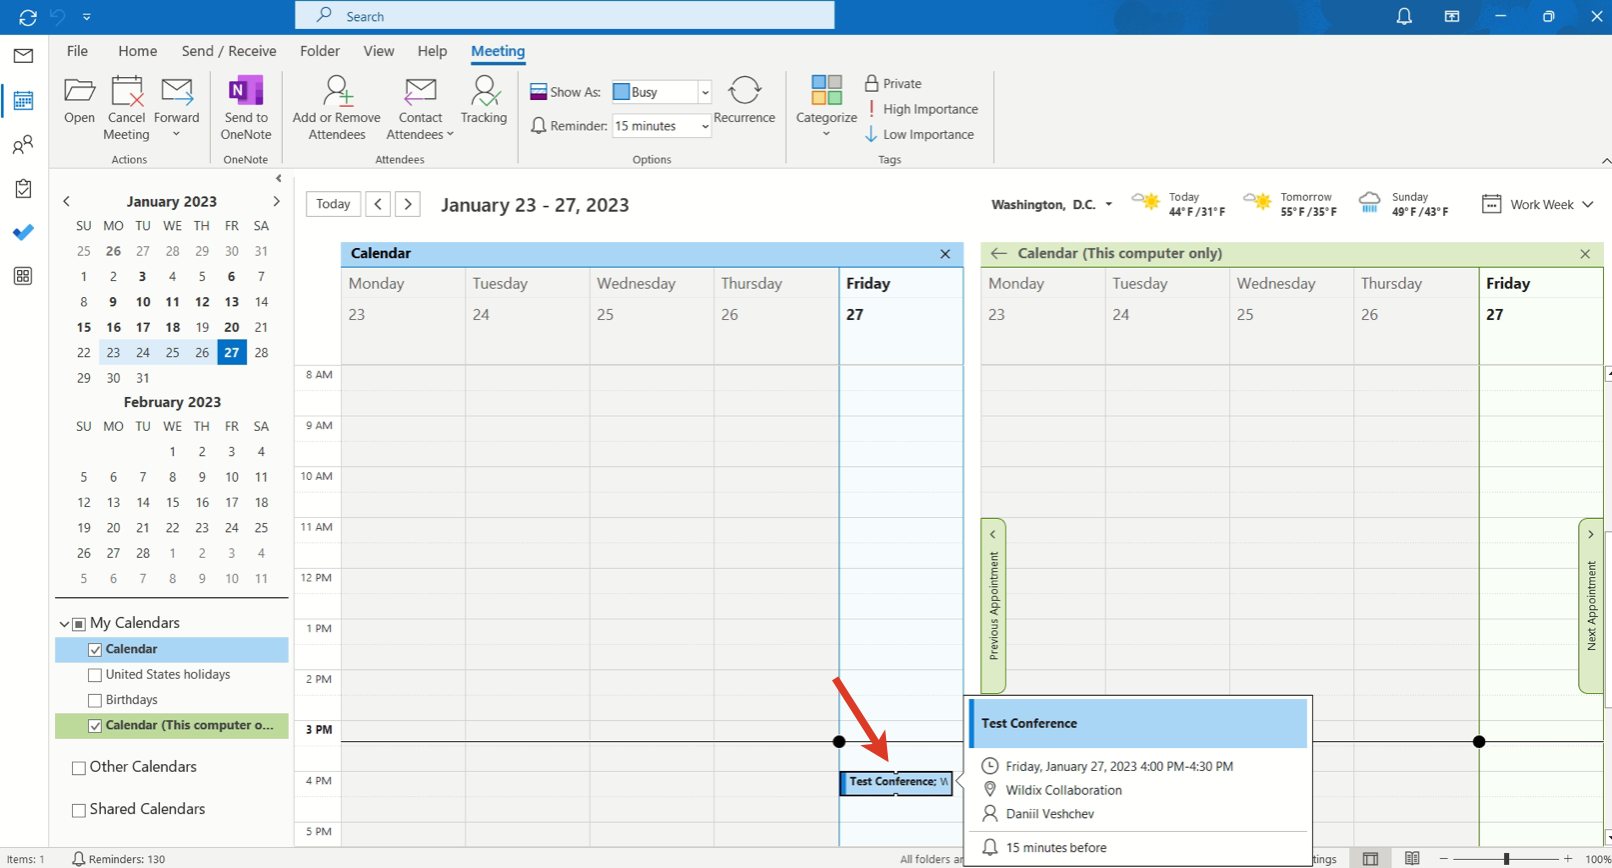
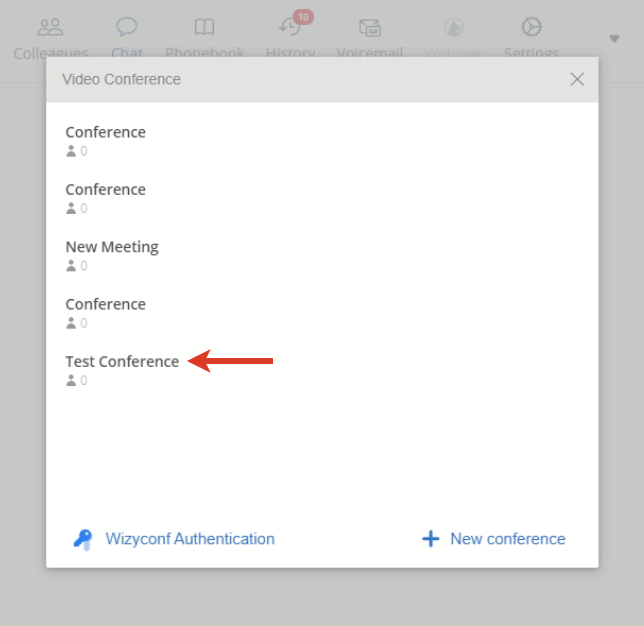
Note: In case of making any changes to the Conference either via Outlook or Collaboration - the changes are not synced.
E.g.: if you delete the Conference in Outlook, it remains in the list of Conferences in Collaboration.
The email invitation with the Conference details is sent to invited users:

Note: Meeting participants only get email invitations with the Conference details, but are not automatically added as participants of the Conference in Collaboration, even if the emails are the same as on the PBX.
When you create a new Meeting in Outlook (via New Appointment/ New Meeting buttons), you can also turn it into Wildix Conference - just click Wildix Conference button at the top:

Location gets automatically set to Wildix Collaboration and the conference link and dial-in numbers are added below:
Watch video tutorial: https://training.wildix.com/lessons/how-to-schedule-wildix-video-conferences-via-outlook-calendar/