WMP Dashboards
- Elena Kornilova
- Ksenia Babych
- Tatiana Bieliakova
This document describes Wildix Management Portal Dashboards.
Updated: December 2024
Permalink: https://wildix.atlassian.net/wiki/x/9ATOAQ
The dashboards are available in the Portal (home page):
- MRR: each Partner will be able to see their Monthly Recurring Revenue (OPEX)--including the actual MRR rate versus the committed MRR rate according to the blanket agreement
- Reports: each Partner will be able to see separate reports on LifeTime PBXs, Licences Overusage, CLASSOUND Orders, Serial/ DID finder, Licences Expirations Calendar
- Wildix Grand Prix: each Partner will be able to see their overall position in the global Wildix Grand Prix as well as rankings by country (see examples below)
- CLASSOUND: each Partner will be able to see statistic reports of incoming and outgoing CLASSOUND calls including DIDs, duration, costs etc (see examples below)
MRR Dashboard
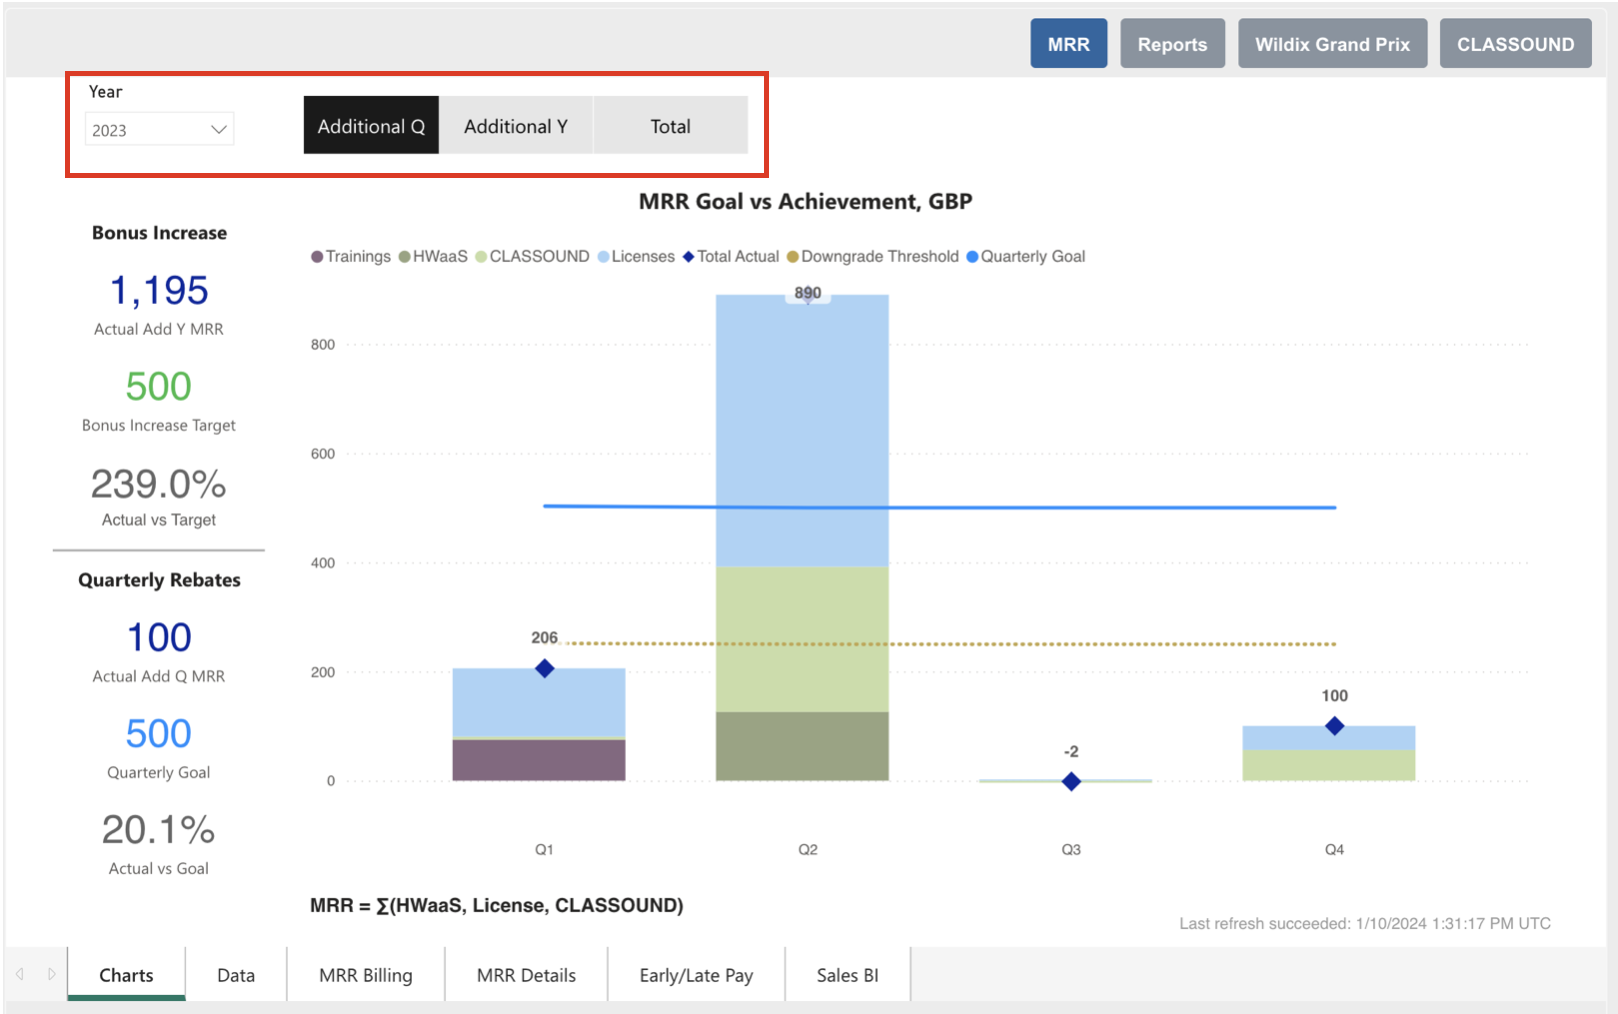
The dashboard displays Monthly Recurring Revenue (OPEX)--including the actual MRR rate versus the committed MRR rate according to the blanket agreement. On this tab, you can also see the news feed showing the last important Wildix updates.
The following showings are available:
- 1 - the MRR Goal for the current period (quarter/ year/ total)
- 2 - separate HWaaS, Licence and CLASSOUND rates
- 3 - Threshold goal

At the left-side panel, you can see two sections:
- Bonus Increase, which includes Actual yearly MRR, Bonus Increase Target, and percentage of Actual vs Target MRR.
- Quarterly Rebates, which include Actual quarterly MRR, Quarterly Goal, and percentage of Actual vs Goal MRR.

At the top, you can choose the Year and switch between the following options:
- Additional Q: additional quarterly MRR
- Additional Y: additional yearly MRR
- Total: total MRR
How-to:
View the detailed calculations: click on the Data tab to open the report
Here you can see the calculation of HWaaS, Licence, CLASSOUND services, as well as the Total and MRR Goal (the detailed interpretation of MRR Goal is present on MRR Billing tab).
On the Data tab, you can also choose year and switch between Additional quarterly, Additional yearly, and Total MRR.
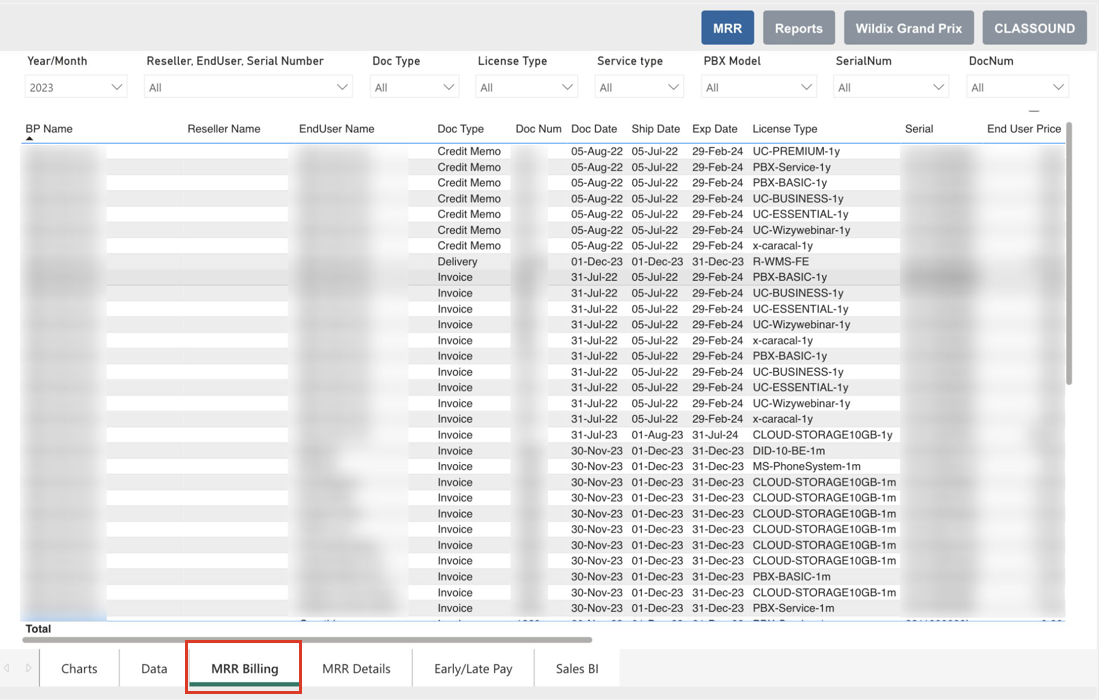
View the details for each licence and its contribution to your Actual MRR: click on the MRR Billing tab to open the report
Here you can see what exactly formed your Actual MRR, documents/licenses/ services for each Reseller/End customer, and the expiration dates. Additionally, you can filter the data by a particular Reseller/ End customer, document, or license type, as well as PBX. By default, the whole current year is selected in the "Year/Month" field in the top left corner. Thus, the breakdown for the last month's MRR is shown. If you are interested in the MRR of a specific month, you can select it in the "Year/Month" field.
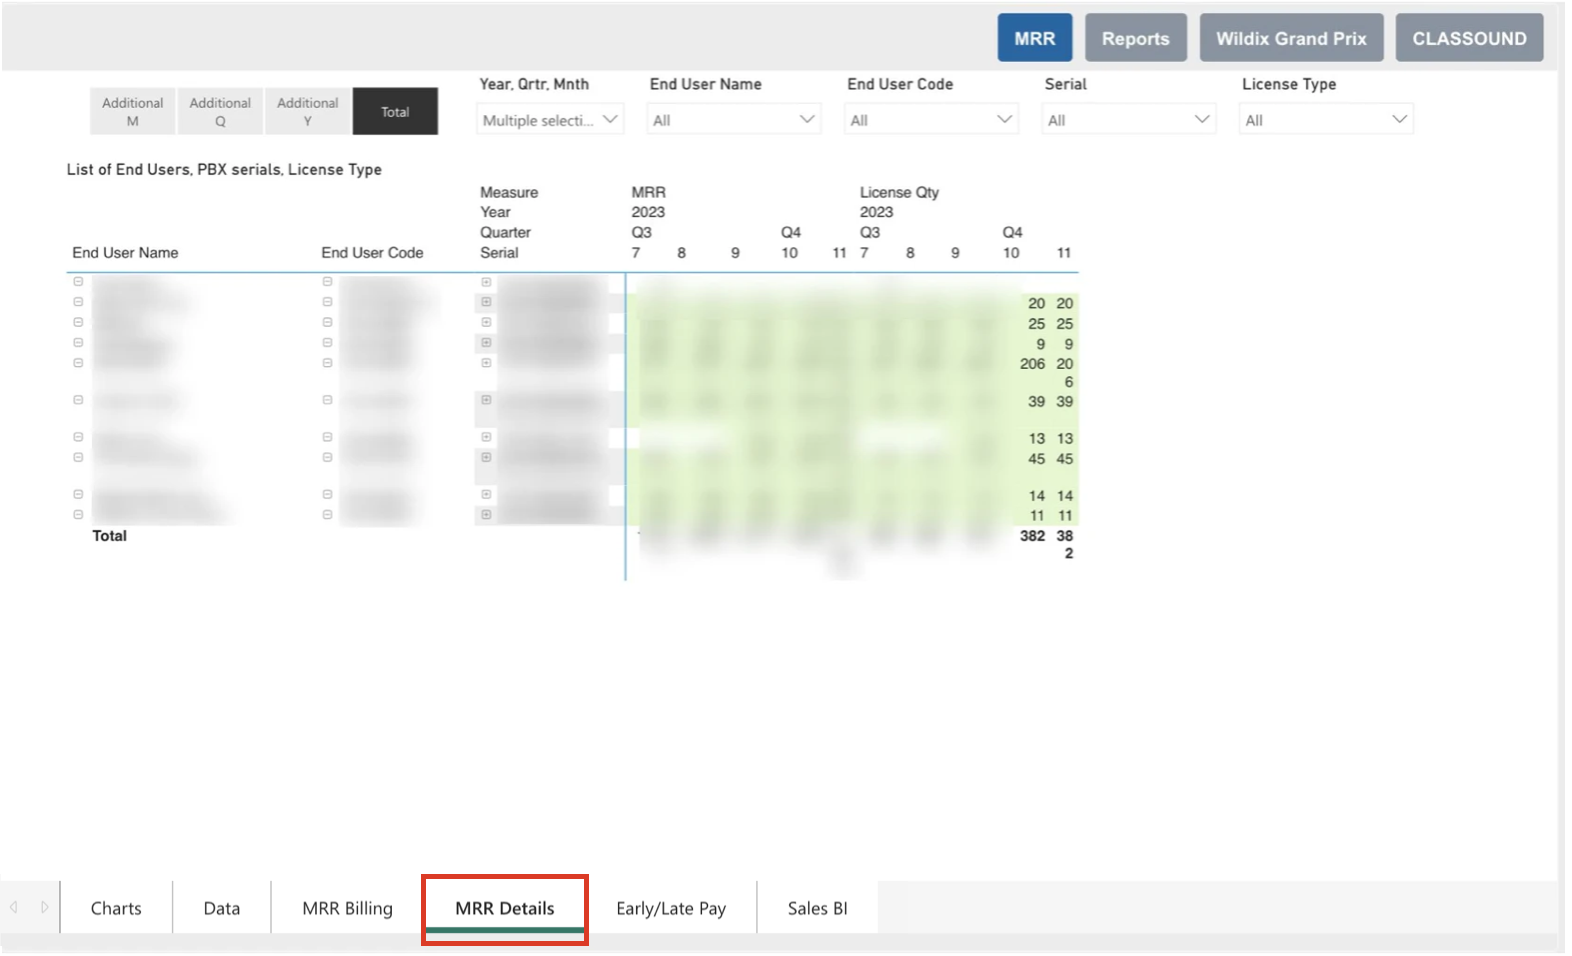
- View the details for End Users and their contribution to your MRR: click on the MRR Details tab to open the report
Here you can see your MRR by End Users by different periods, month, quarter, year, and total. Additionally, you can filter the data by a particular End User, End User code, serial or license type.
- View the amount of early payment rewards and charges for late payments of invoices: click on the Early/ Late Pay tab to open the report
Here you can see the billing status as well as the amount of reward for early payment and charges for late payment of invoices.
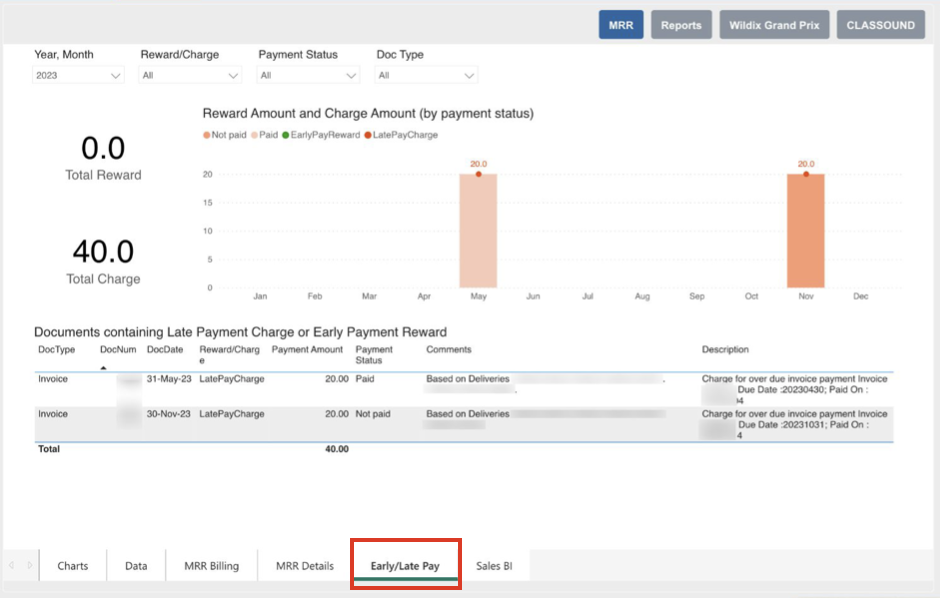
Early payments are encouraged and in case of paying an invoice a month before the due date, you get 1% off it, which is shown as a discount off the next invoice. The discount is calculated as a daily rate of 12% per annum, so every day counts. In case the invoice is overdue by three days or more, a blanket 12% annual interest on late payments is charged, calculated as a daily rate. If you want to enable early auto-payments, see instructions in the documentation How to process and pay bills directly via WMP.
View the MRR graphs by Reseller/ User/ Licences by Duration/ Group: click on the Sales BI tab to open the report
You can filter the data by a specific period, Reseller/ User or Serial Number and Type of Service.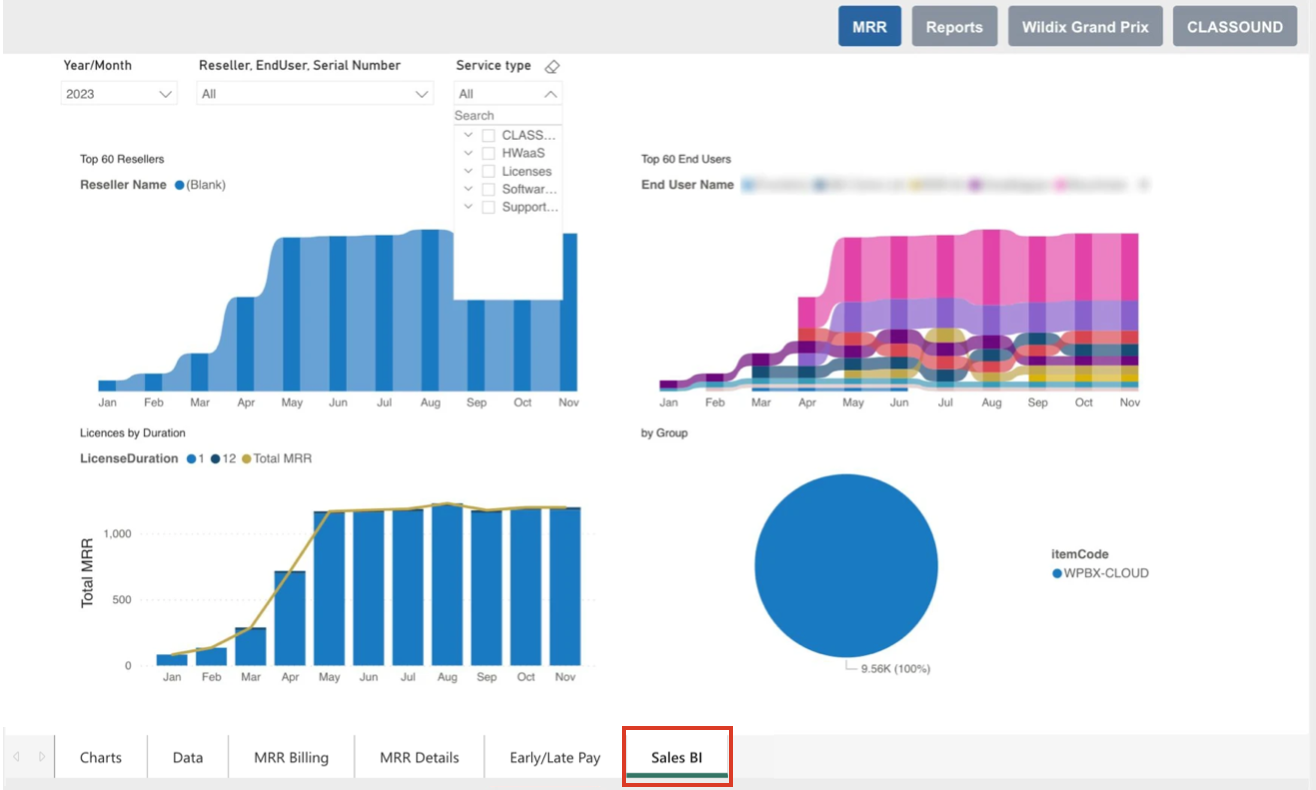
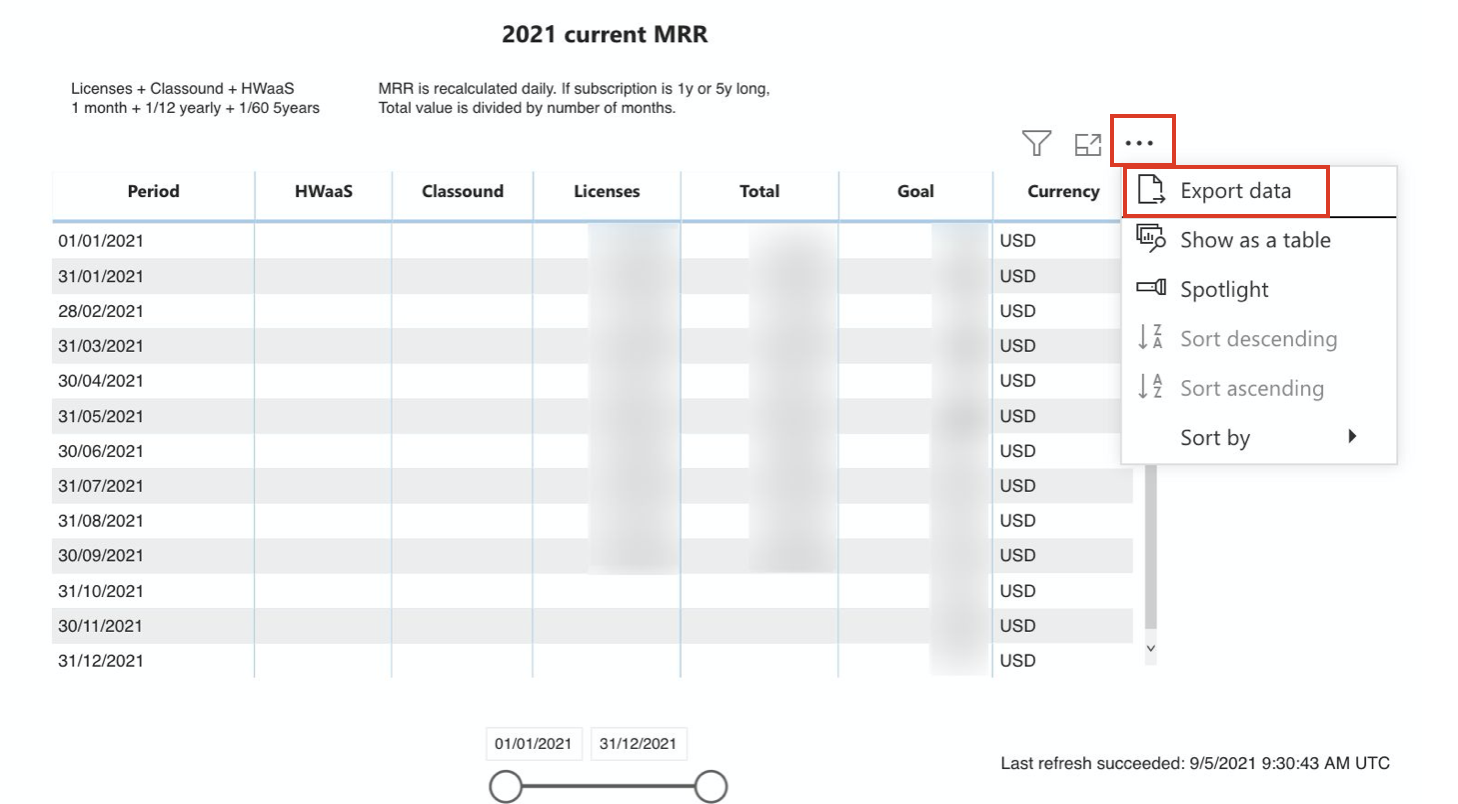
Export data
You can export all the mentioned above reports:
- Select a report you want to export
- Hover mouse over the report -> click on More options (three dots) -> Export data
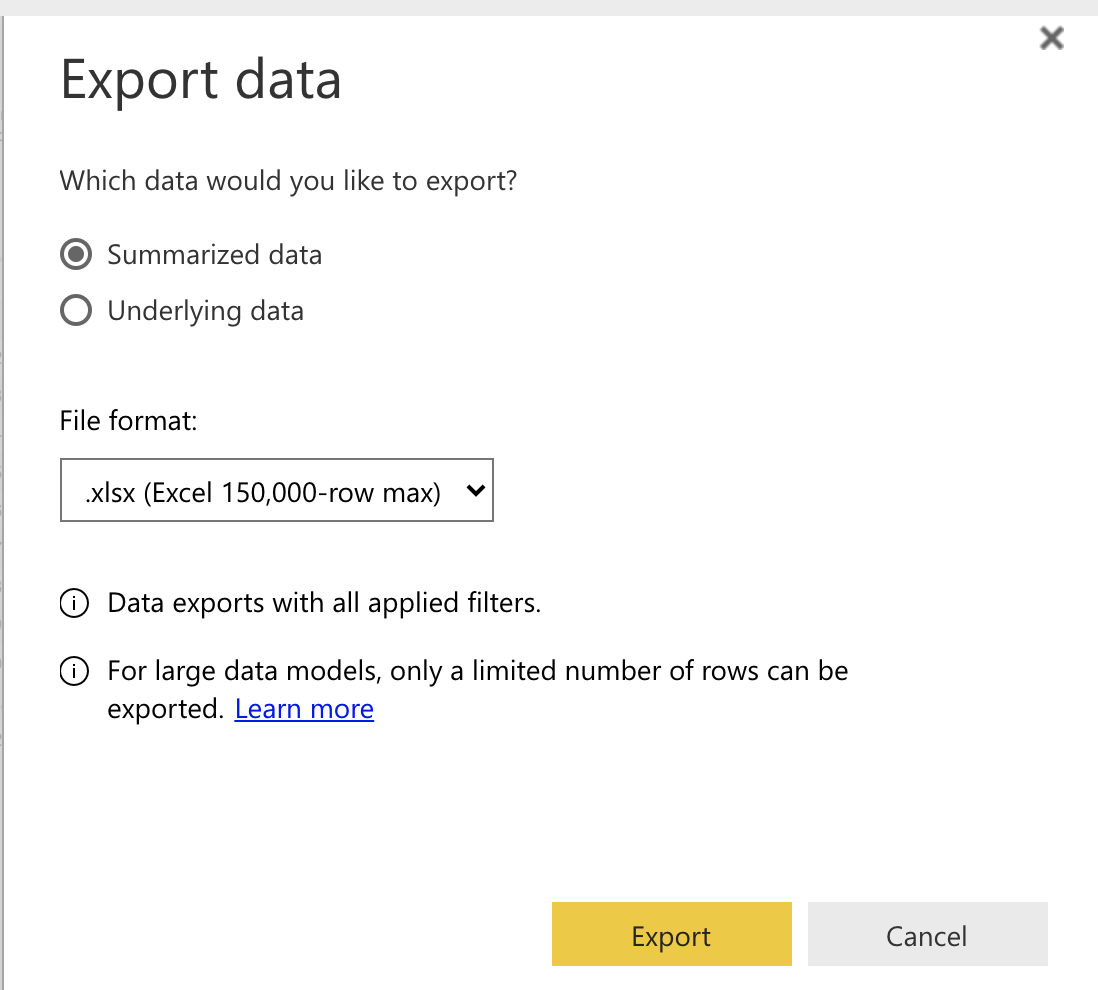
Select data, file format and click Export
Reports Dashboard
View LifeTime PBXs: click on the LifeTime PBXs tab to open the report
Here you can track the total amount of LifeTime PBXs for each Reseller/ End User and see the support fee.

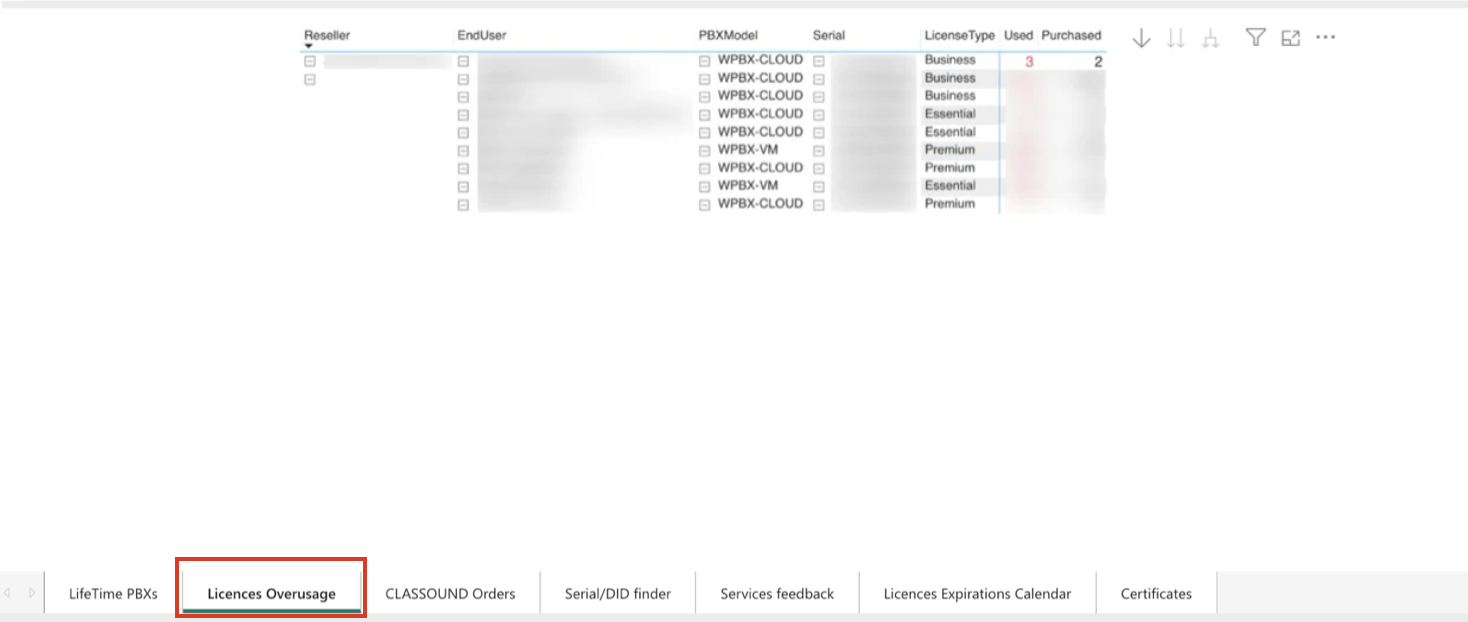
View the exact number of purchased and used licences: click on the Licences Overusage tab to open the report
Here you can see the exact number of purchased and overused licences for each Reseller/ End User/ a particular PBX.
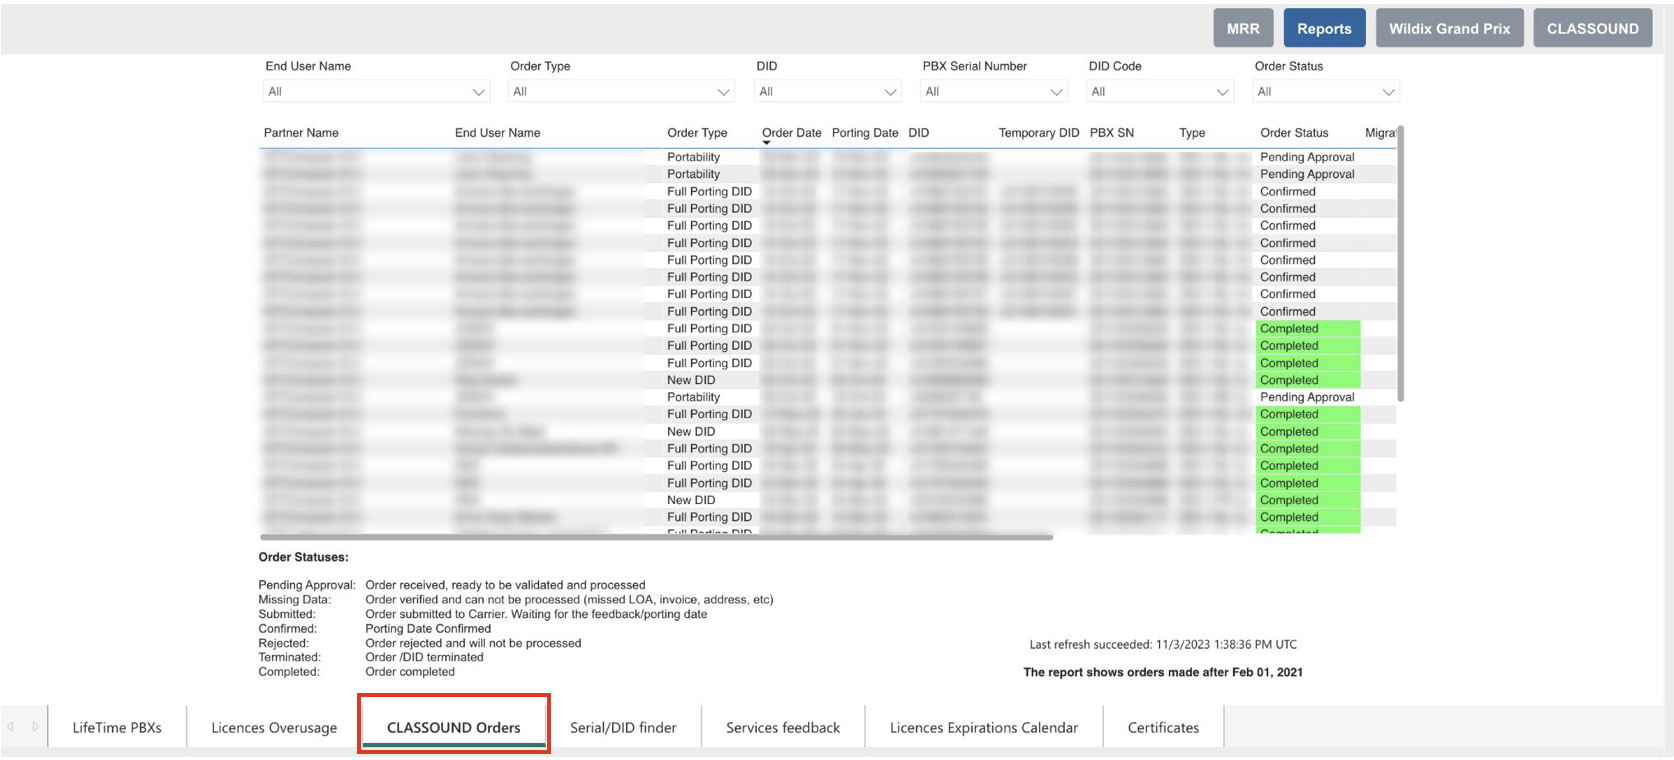
View status of CLASSOUND DIDs orders: click on the CLASSOUND Orders tab to open the report
You can check statuses of CLASSOUND orders made starting from February 01 2021, including Order/ Porting Date, DIDs and their types.
Starting from November 2022, CLASSOUND orders report includes the columns PBX SN and Temporary DID (Temporary DID is a part of CLASSOUND Instant Virtual Porting process, for more info refer to the document: CLASSOUND Instant Virtual Porting (IVP)).
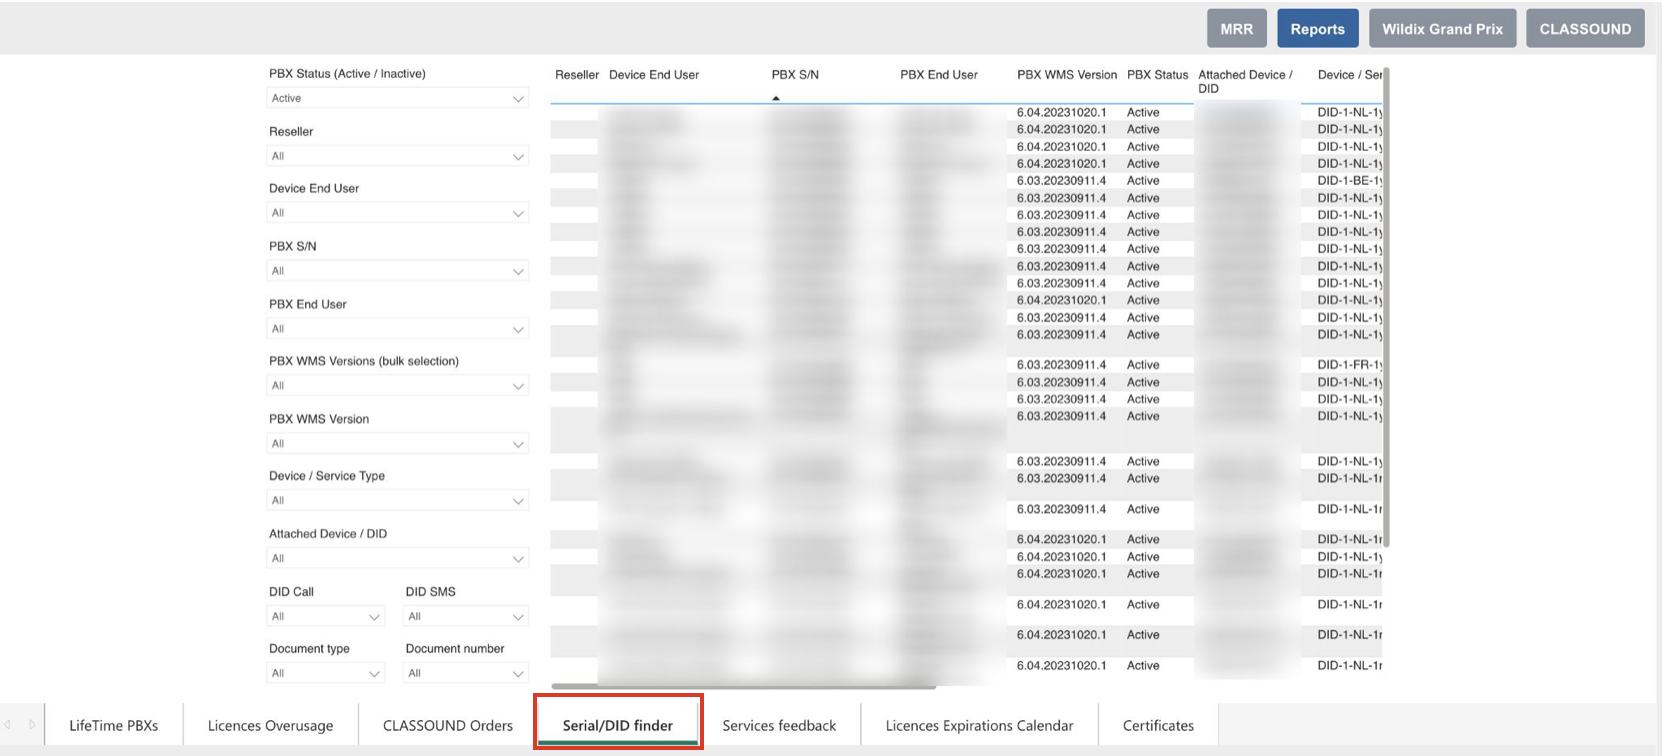
View device/ service/CLASSOUND DIDs by Reseller/ End User: click on the Serial/DID finder tab to open the report
Here you can find device/ service/ DIDs for each Reseller/ End-User/ a particular PBX. Also, you can check PBX statuses. By default, only Active PBXs are shown, but you can search terminated ones as well (just select another value). In addition, you can view the current PBX WMS version as well as the information for the particular DID.
- View expiration dates of 1 and 5-year licences: click on the Licences Expirations Calendar tab to open the report
Here you can see a timeline and a table with expiration dates of 1 and 5-year licences, which includes information about PBX DNS, expiry date and days left to expiry, subscription (in months), PBXs under “Commitment”, and quantity of PBXs by end-users.
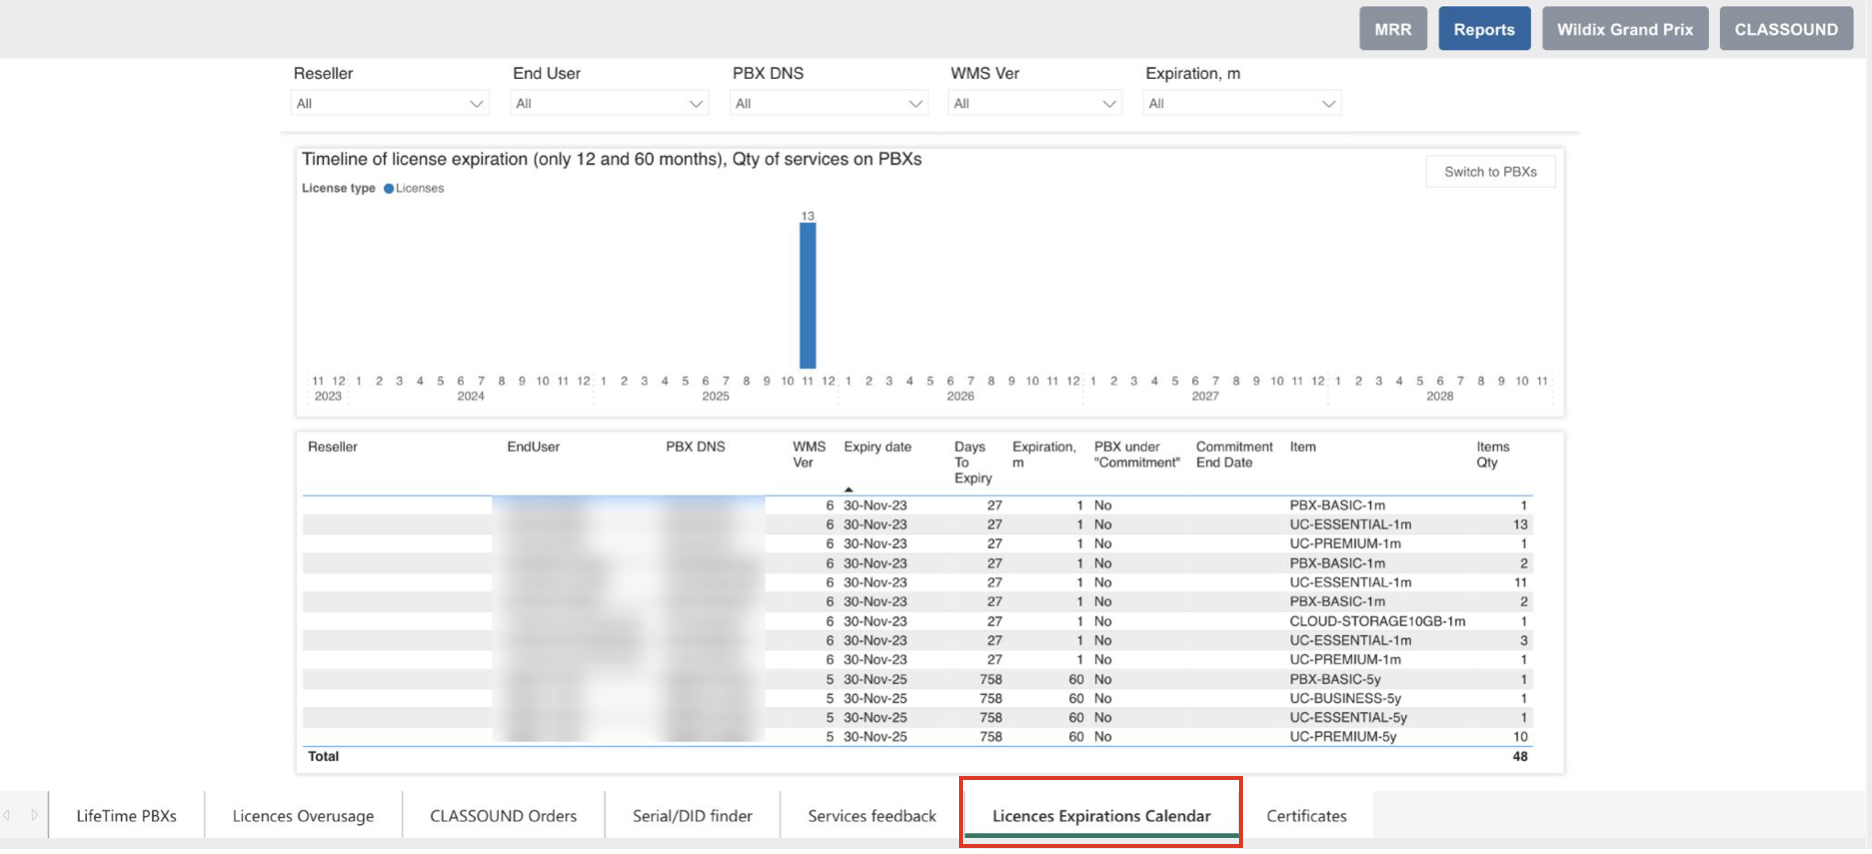
In the top right corner of the timeline, you can switch between the count of services or PBXs, using the Switch to Services and Switch to PBXs buttons correspondingly.

- View passed trainings and download training certificates: click on the Certificates tab
The tab allows you to view completed trainings, as well as download Wildix certificates.
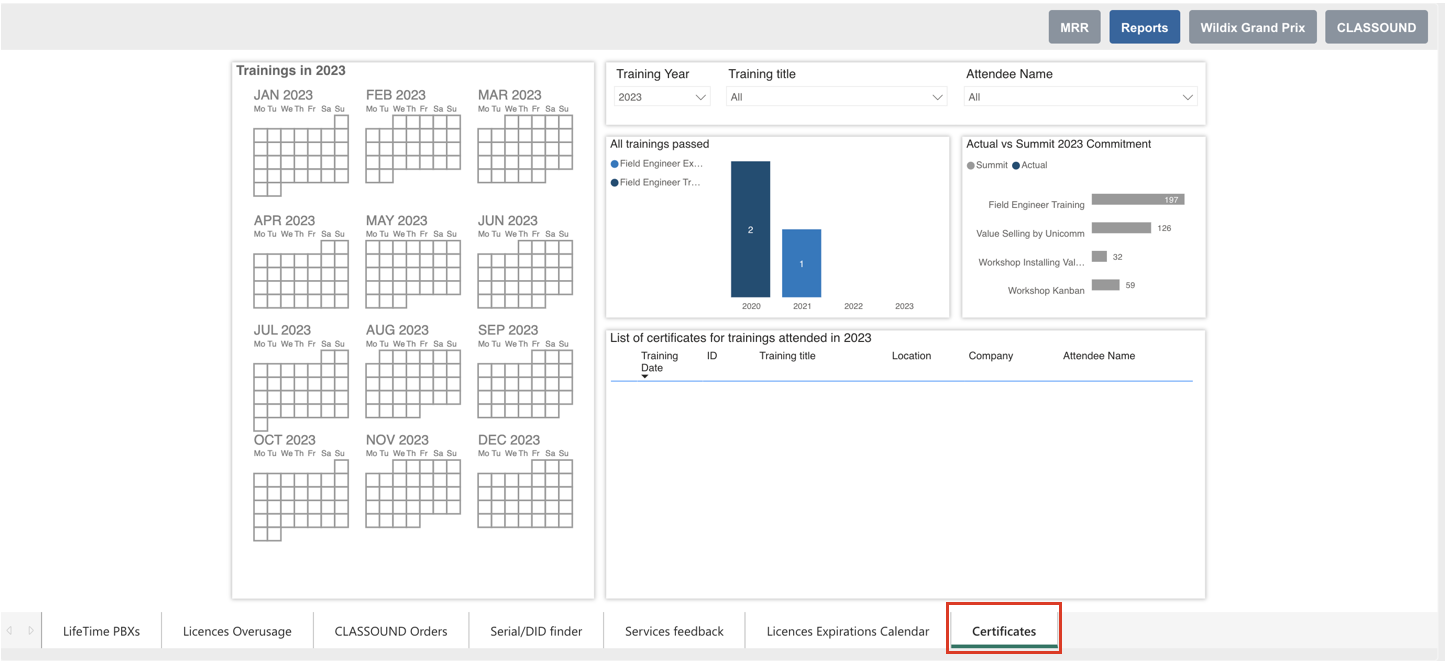
You can filter trainings by:
- Training year
- Training title
- Attendee name
Clicking on the blue items of the Calendar on the left, you get the list of trainings of that specific date.
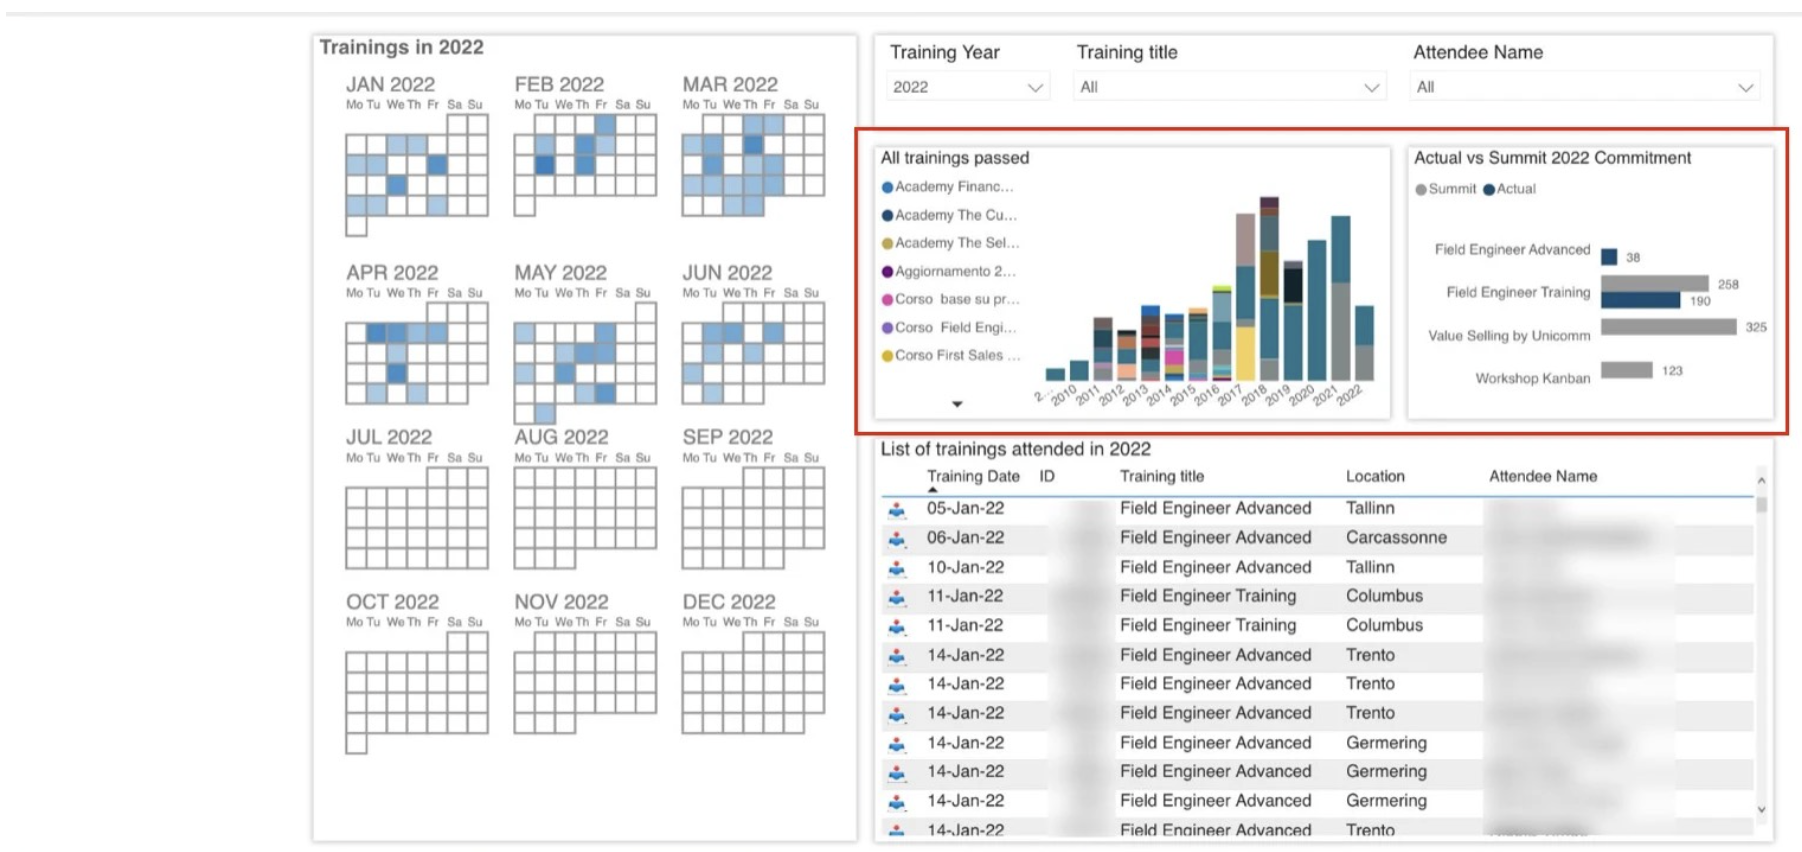
The section All trainings passed displays completed trainings in different years. There also is a section that shows Actual vs Summit Commitment training data.
To download a certificate, click on the download icon next to the relevant entry in the section List of trainings attended in the selected year:
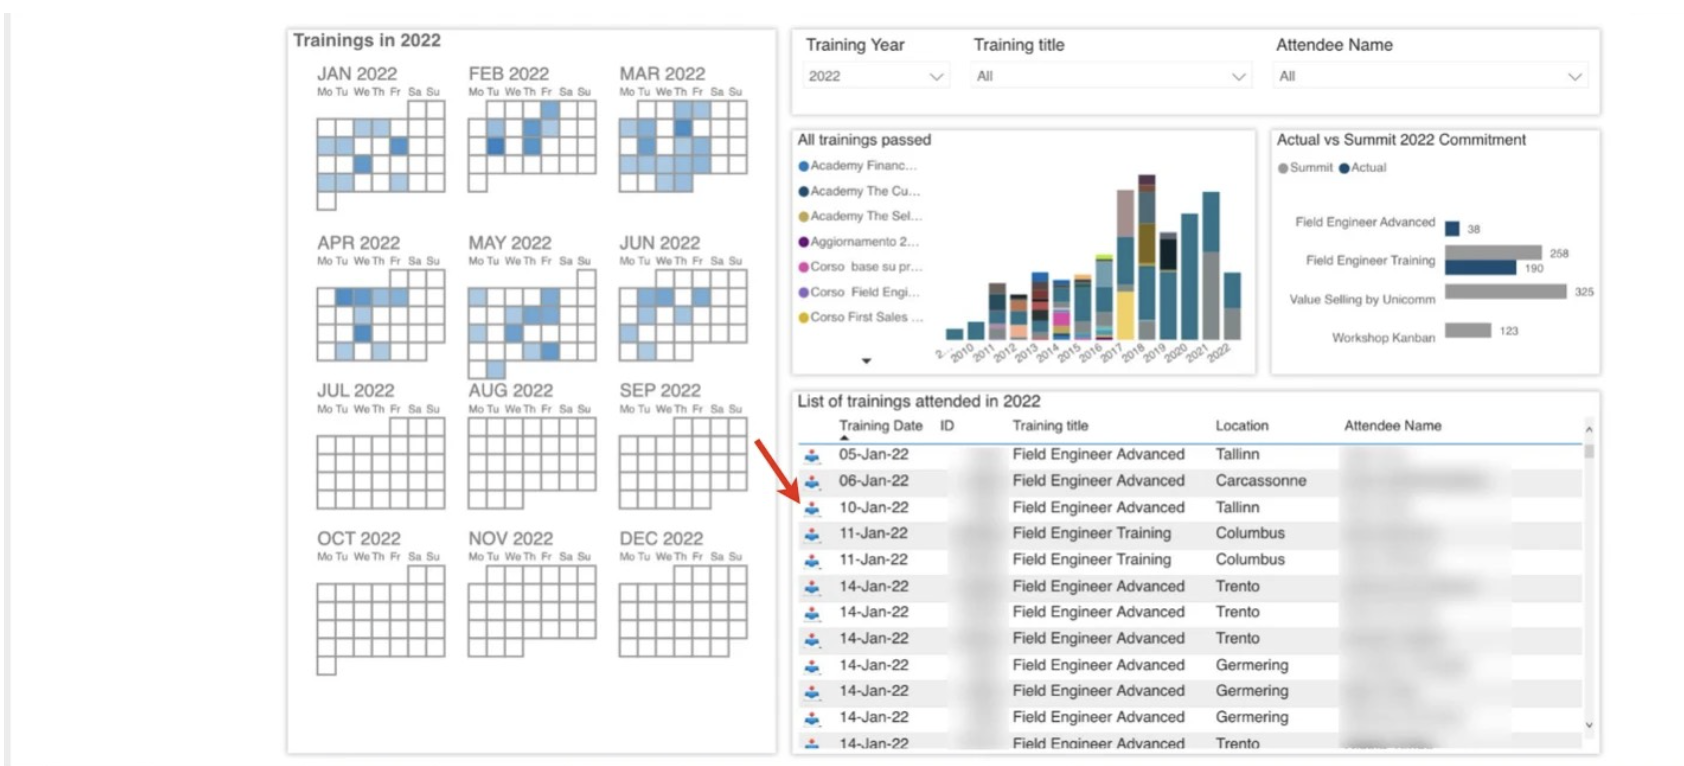
Training certificates are downloaded in pdf format.
Note: Only certificates for trainings, held by Wildix, are available for download.
Export data
You can export all the mentioned above reports:
- Select a report you want to export
- Hover mouse over the report -> click on More options (three dots) -> Export data
- Select data, file format and click Export


Wildix Grand Prix Dashboard
By default, the dashboard shows your the Winners of the Wildix Grand Prix and the top-ten Partners in the global Wildix Grand Prix for the current quarter.

How-to:
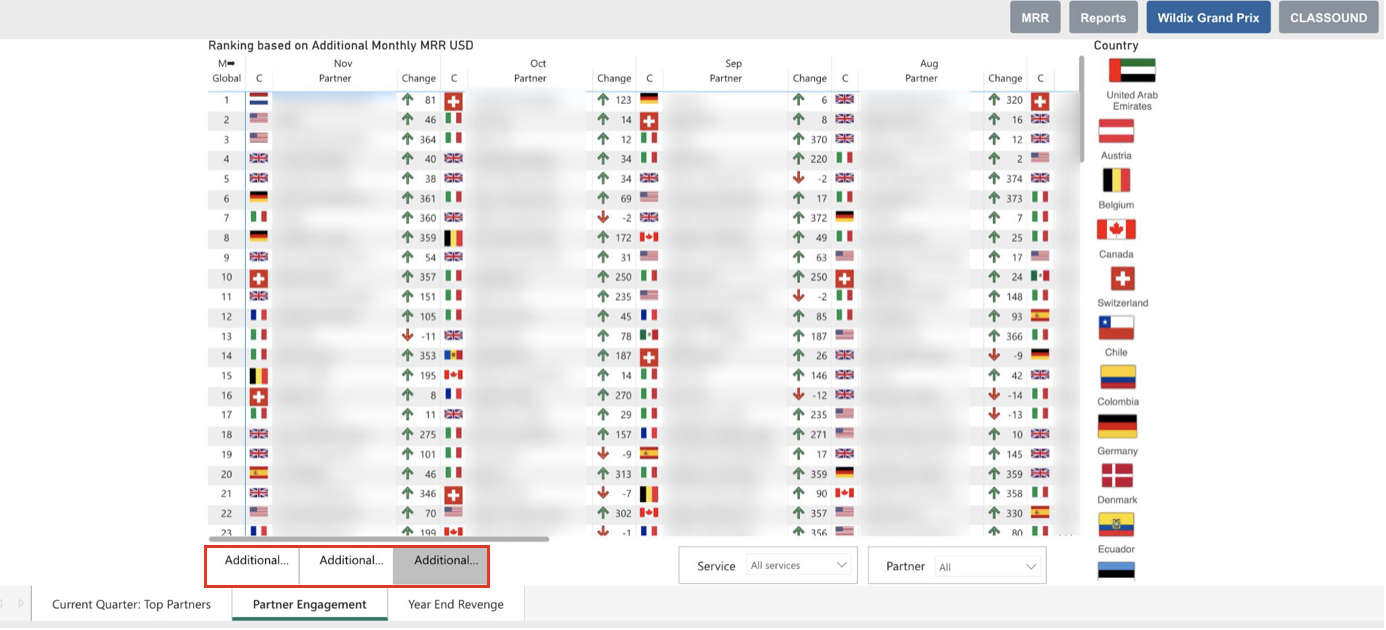
See your position in your own country's ranking
Click on the Partner Engagement tab to open the report. Select the flag of your country (click again to go back to the default view):

- See the information based on Yearly/ Quarterly/ Monthly MRR: click on the corresponding button on the bottom of the page to switch:
- View the information based on MRR type (CLASSOUND, HWaaS, Licence): click on Service on the bottom of the page to switch:

- View the information by Partners: click on the Partner button on the bottom of the page:

CLASSOUND Dashboard
The dashboard shows the detailed statistics of incoming and outgoing CLASSOUND calls and SMS. More information about the service:
How-to:
View statistics of calls: click on Calls statistic tab to open the report
The following showings are available:
- 1 - A graph, which displays Duration (min)/ Total cost/ End User price of outgoing calls which can be filtered by Country/ Reseller name/ User name/ Area zone/ DNS name / PBX number
- 2 - Overall Duration/ Total cost/ End User price of calls which can be displayed in a column/ matrix view (to switch, click on the button in the top right corner)
- 3 - Outgoing calls. Extra fees: grouped by User, PBX, extension or Country, including the total amount of calls, call duration, included minutes, cost
- 4 - Incoming calls. Extra fees: grouped by User, PBX, DID, including the total amount of calls/ call duration, included minutes, cost

Also, to display the necessary data, you can use filters at the top: choose year, month/ country/ Reseller name/ User name/ Area zone/ DNS name/ PBX number:
View the full list of calls: click on List of calls tab to open the report
The following showings are available:
- 1 - Outgoing calls: including User, PBX, DNS name, extension, connection date and time/ DID used for outgoing calls, called numbers and countries, the total amount of calls, call duration, whether in bundle, total cost and end user price
- 2 - Incoming calls: including User, PBX, date and time, DID used for incoming calls, calling numbers, the total amount of calls, call duration and cost

Also, you can use filters at the top (year, month/ in bundle/ User name/ to number/ DNS name/ etc.) to have only necessary data displayed.
- View statistics of SMS: click on Messages statistic tab to open the report
The following data is available:
- 1 - A graph, which displays the amount of Messages/ Partner price/ End User price of messages which can be filtered by Country/ Reseller name/ User name/ Area zone/ DNS name / PBX number
- 2 - Message type: grouped by outgoing and incoming two-way, WhatsApp, MMS and outgoing one-way SMS
- 3 - Outgoing SMS: grouped by User, PBX, extension or Country, including the number of Included SMS, SMS quantity, total cost, and currency
- 4 - Incoming SMS: grouped by User, PBX, DID, including the total SMS quantity

- View the full list of SMS: click on List of SMS tab to open the report
The following data is available:
- 1 - Outgoing SMS: grouped by User, including date and time sent, DID used for outgoing SMS, recipients' numbers and countries, cost, currency, and the total number of SMS
- 2 - Incoming SMS: grouped by User, including date and time sent, DID used for incoming SMS, number sent from, and the total number of SMS

Export data
You can export all the mentioned above reports:
- Select a report you want to export
- Hover mouse over the report -> click on More options (three dots) -> Export data

- Select the data and the file format, click Export

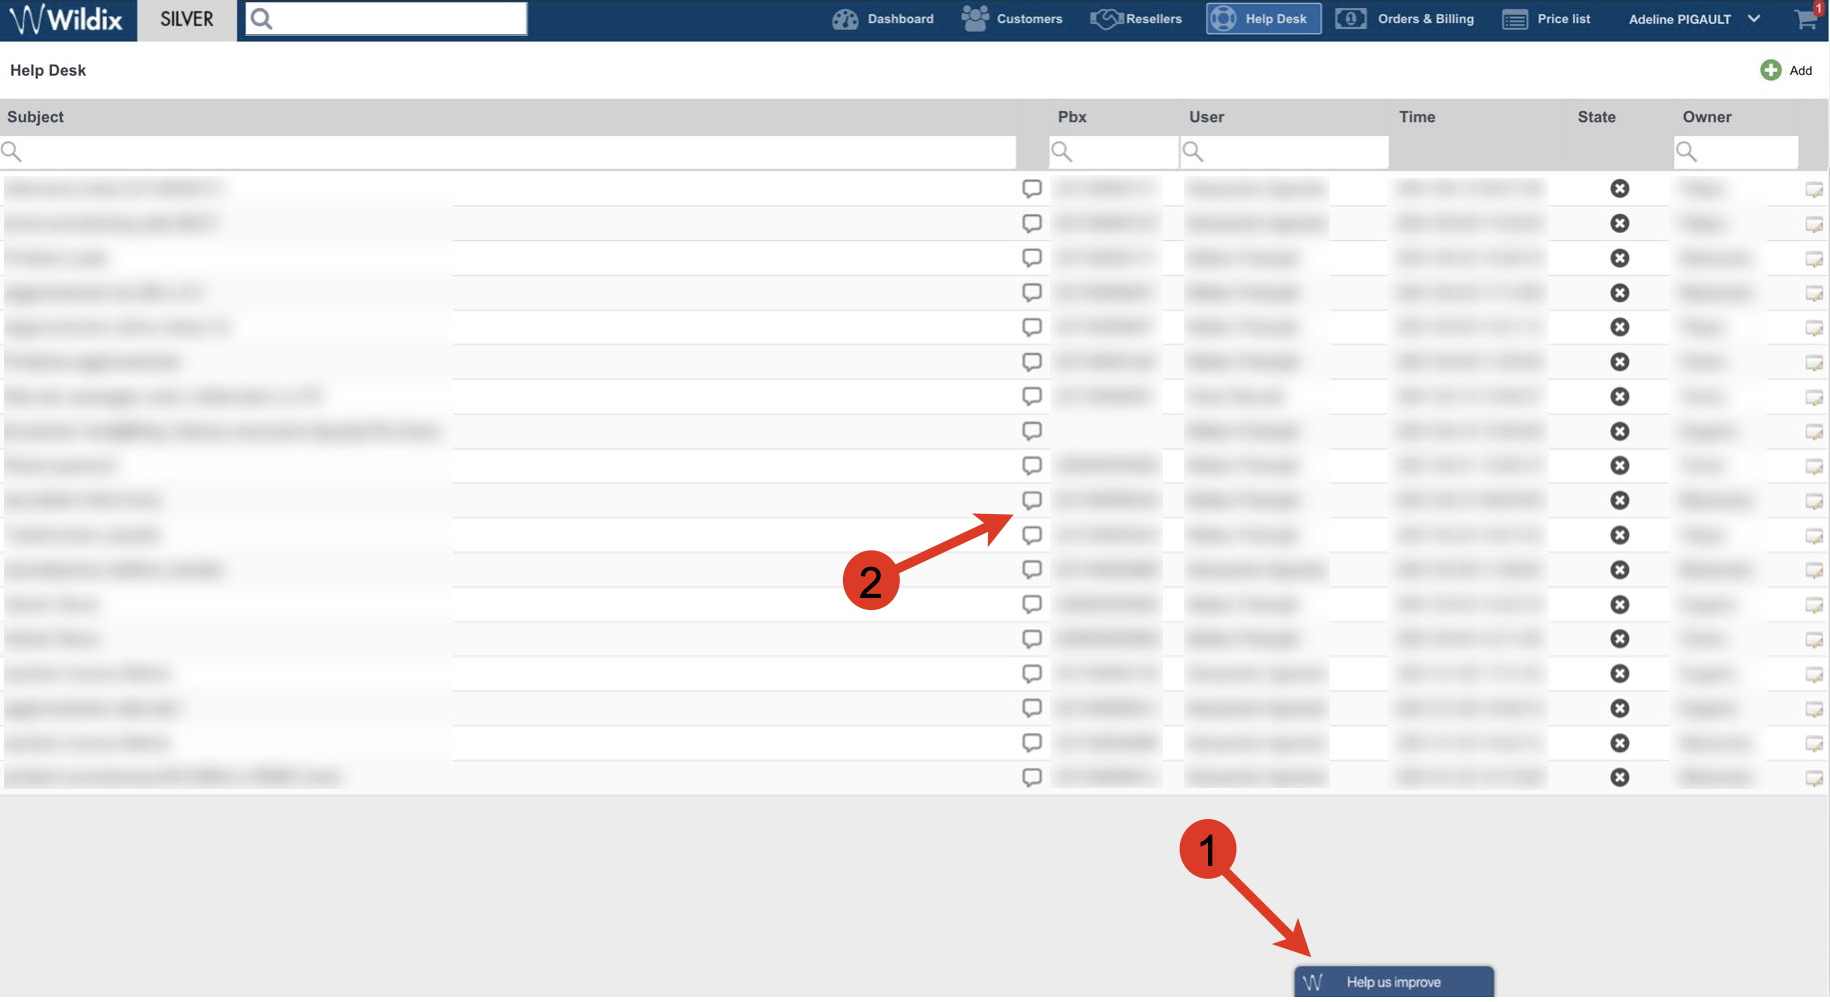
Sharing Feedback
There are two options of leaving feedback on the WMP:
- Click on Help us improve button to leave feedback about the website in general or about a specific part of the page. The button is always available, regardless of the WPM page you’re on.
- To share feedback regarding Tech Support and Customer Care service, go to the Help Desk tab, choose a ticket, click on the feedback icon (to the left of the Pbx column), and proceed with instructions on the dialog window that appears.