How to configure Departments tree
- Tatiana Bieliakova
- Ksenia Babych
This step-by-step guide leads you through the process of activation of the Departments tree feature and building a multilevel hierarchy of Departments.
Created: January 2022
Updated: October 2023
Permalink: https://wildix.atlassian.net/wiki/x/fh-OAQ
Introduction
Starting from WMS 5.04.20220309.1, there is a possibility to create a multilevel hierarchy of Departments, which are displayed in a tree view on the Colleagues tab in Collaboration. This can be useful for organisations with a large number of users.
Note: Creating multilevel hierarchy of Departments with a tree view is not supported in x-bees.
1. Fill out User Departments in WMS
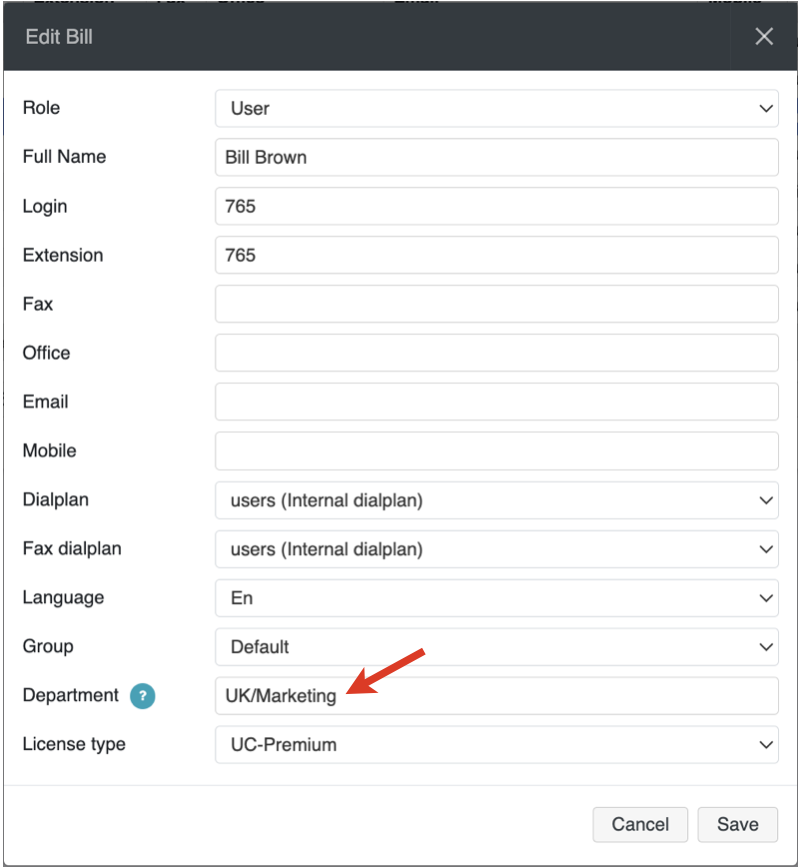
Information about Departments is taken from User info in WMS -> Users -> Edit -> Department field.
Note: Users with no Department indicated in WMS, are added to the Other section of the Departments tree on the Colleagues tab in Collaboration.
To build a multilevel hierarchy of Departments, when adding/ editing a user (or in case of users import via a CSV file), indicate the Department path using the separator “/”, "|", or "\". For example:
Department: UK/ Marketing
Notes:
- If user’s Department field in WMS is empty, Group name is automatically used as Department. This doesn’t apply to imported users, their Department fields remain empty.
- It may take up to 10 minutes for the changes to apply and get displayed in Collaboration.
- Users that have no Department data are added to the Other section on the Colleagues tab.
- If the Department name contains “/” it should be replaced with another character. If required, you can change the default separator: Change the default separator (optional)
- It is recommended to replace long names with shorter ones.
- By default, the Colleagues tab displays only users added to the roster. To have all users displayed, follow the instructions in point 3. Display all PBX users (optional) of this guide.
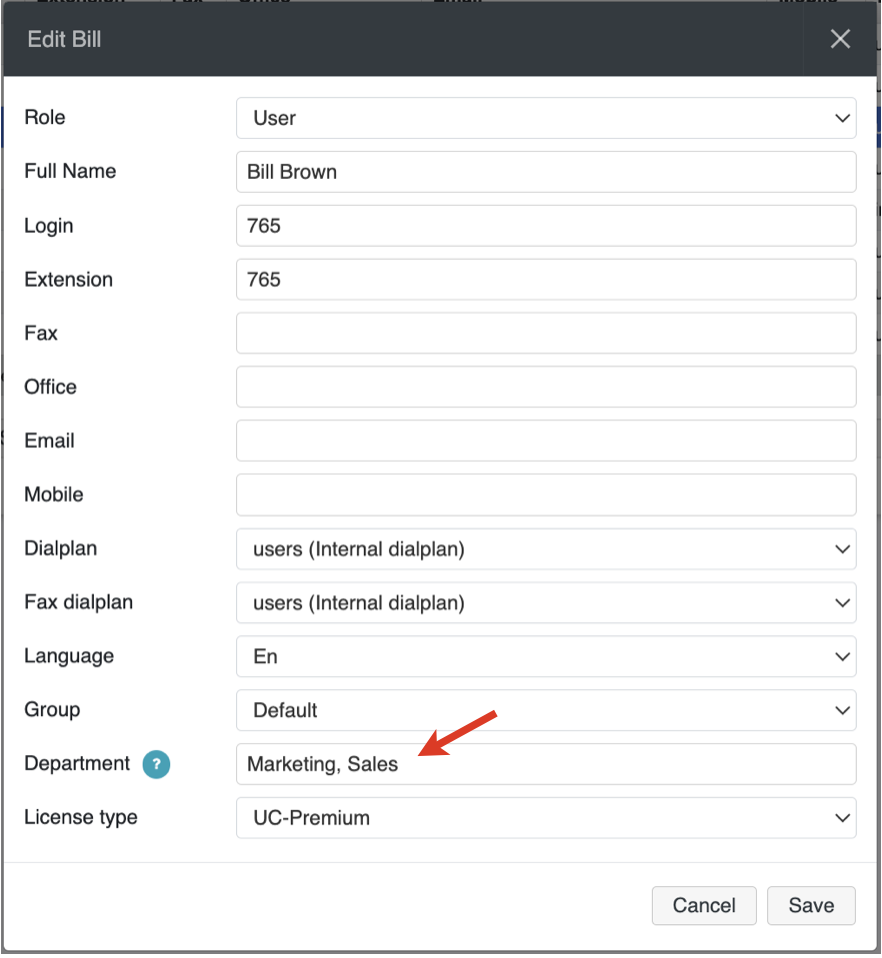
Starting from WMS 6.04.20231012.1, it is possible to add a user to multiple departments. For this, enter the necessary department names, separated by commas in the Department field:
2. Change the default separator for Departments tree (optional)
When indicating the Department path in WMS -> Users -> Edit User -> Department field, the default separator "/" should be used. For example:
Department: UK/ Marketing
To change the default separator to another character ("\" or "|"), edit the following parameter in the /rw2/etc/env.custom.ini:
DEPARTMENTS_TREE_SEPARATOR="\"
3. Display all PBX users (optional)
By default, only people added to the roster are shown on the Colleagues tab. To display all PBX users, add the following line to the /rw2/etc/env.custom.ini file:
COLLABORATION_SHOW_ALL_COLLEAGUES=true
Current limitation: The status of users that are not added to the roster is not displayed.
4. Navigate Departments tree in Collaboration
Current limitation: Applying changes in the Departments tree may take up to 10 minutes.
The Colleagues tab displays the Departments tree (or simply a list of Departments, if there is no multilevel Departments structure):
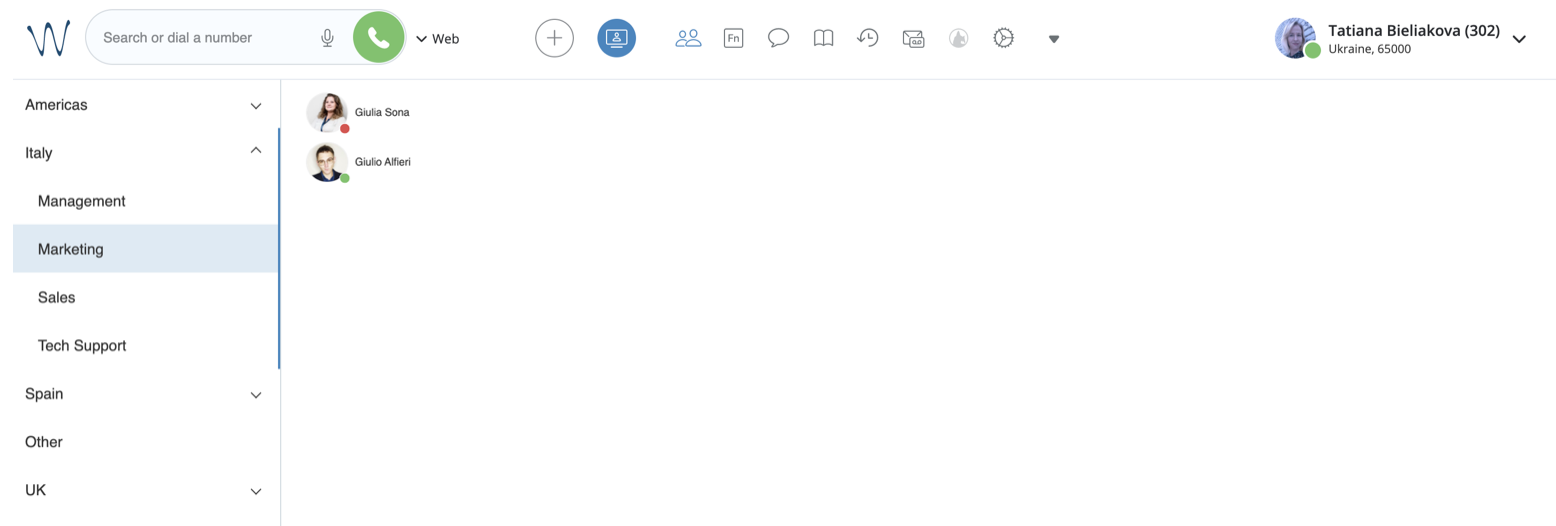 To navigate between different Department levels, just click on the arrow icon and choose the necessary Department.
For more info about Colleagues tab, check the guide Collaboration User Guide: Colleagues.
Notes:
- Users that don’t belong to any Department are added to the section Other.
- In case all PBX users are displayed on the Colleagues tab (if configured on the PBX side), the status of users not belonging to the roster is currently not available.