Wizyconf-Mic Installation Guide
- Elena Kornilova
- Tatiana Bieliakova
This guide explains how to install Wizyconf-Mic - table and ceiling installation
Created: September 2019
Permalink: https://wildix.atlassian.net/wiki/x/9BjOAQ
For more details about how to connect all the components of the Wizyconf to the Wizyconf-Core, consult the page Wizyconf Conference Room - Documentation.
Packing List
The following components of the Wizyconf box refer to the Wizyconf-Mic and Wizyconf-Array:
- 2 x microphone ball
- 1 x Wizyconf-Array box
- 2 x mount bracket
- 2 x ceiling mount cable protection
- 2 x Wizyconf-Mic box
- 1 x power supply with US, UK, EU plugs
- 2 x audio control cable
- 2 x rigid cable (50cm)
- 2 x rigid cable (20cm)
- 2 x soft cable (53cm)
- 2 x 4 screws for mounting
- 1 x package of 4 support legs for Wizyconf-Array
- 1 x package of 8 support legs for Wizyconf-Mics
Connection
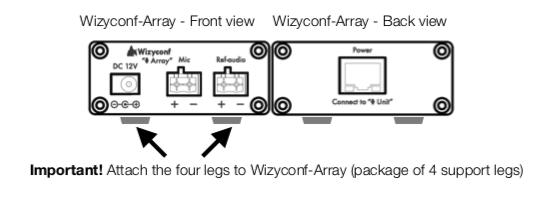
Wizyconf-Array Overview
Important: attach the four legs at the bottom of Wizyconf-Array (package of 4 support legs).
Wizyconf-Mic Overview
Important: for table installation attach four legs at the bottom of each Wizyconf-Mic (package of 8 support legs).

Wizyconf-Array: port definition
Port Name | Description |
DC 12V | Connect to the power supply. |
Mic | Microphone analog connection. Connect to Wizyconf-Core using audio control cable. |
Ref-audio | Reference audio analog connection. Connect to Wizyconf-Core using audio control cable. |
Connect to “ Mic” | Connect to Wizyconf-Mic 1. |
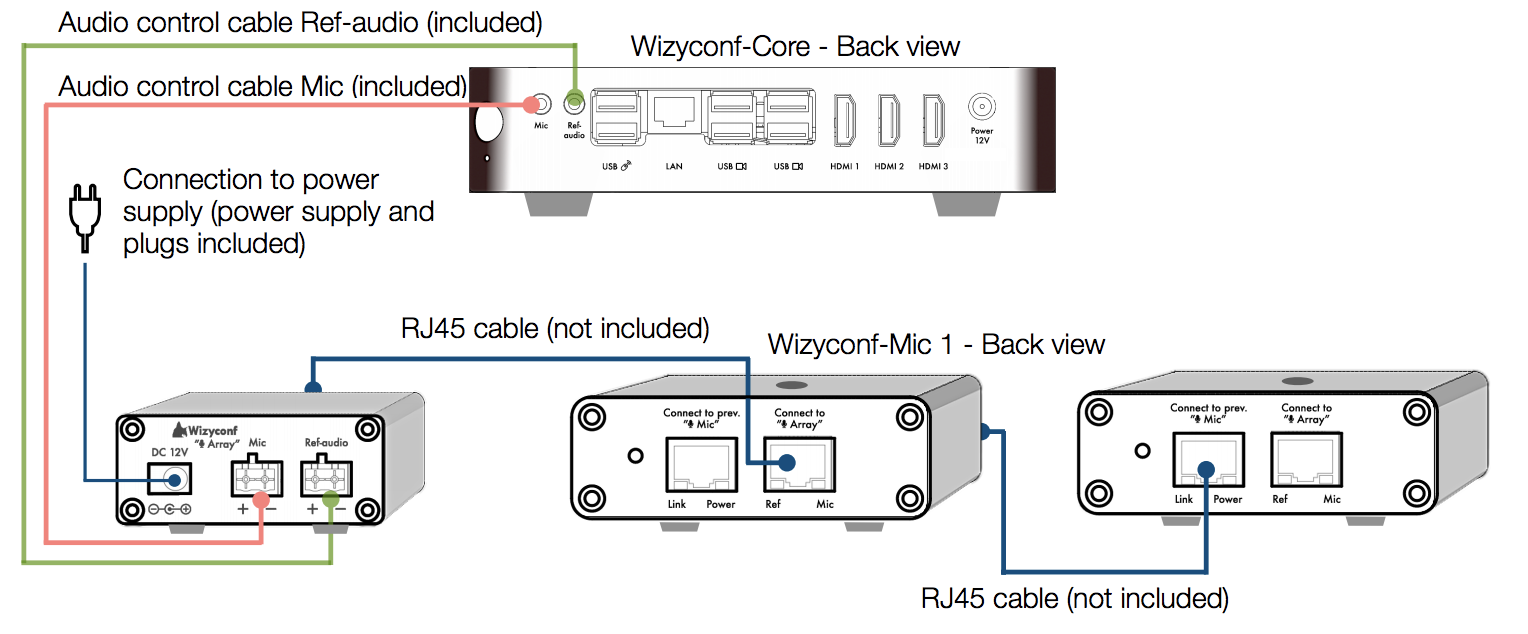
Wizyconf-Mic: port definition
Port Name | Description |
Status Indicator | Steady red: system starting. Steady green: clock synchronization (takes 10-30 seconds). Flashing green: clock synchronization finished; working status. |
Connect to “ Array” | Connect to the Wizyconf-Array. |
Connect to next “ Mic” | Wizyconf-Mic 1 only: connect to Wizyconf-Mic 2. |
Connect to prev. “ Mic” | Wizyconf-Mic 2 only: connect to Wizyconf-Mic 1. |
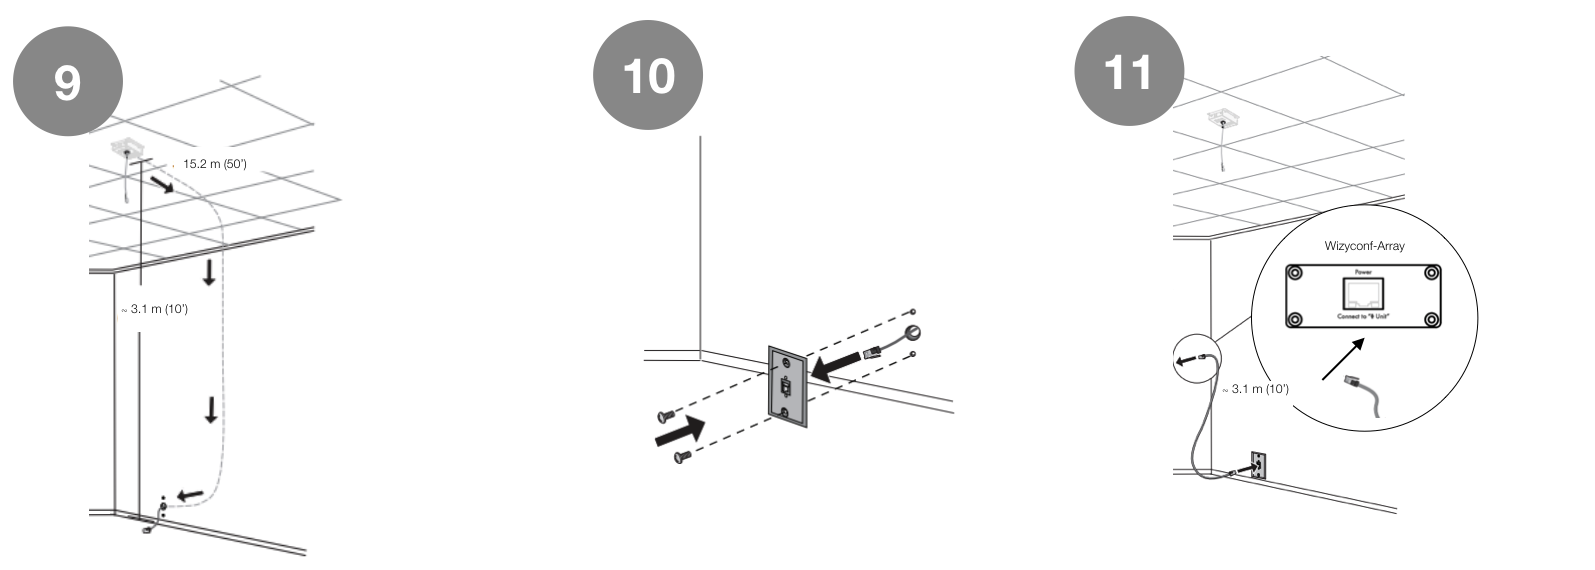
Wizyconf-Array and Wizyconf-Mic Connection Scheme
- Connect the Wizyconf-Array to the ports "Mic" and "Ref-audio" of the Wizyconf-Core using the Audio control cables (included)
- Connect the Wizyconf-Array to the power supply
- Connect the Wizyconf-Array to the first Wizyconf-Mic as shown on the scheme below, and the first Wizyconf-Mic to the second Wizyconf-Mic using RJ-45 cables (not included):
Wizyconf-Mic Installation
Desk Installation
For installation on a table:
- Make sure you have attached four support legs at the bottom of each Wizyconf-Mic
- Attach the rigid cables to the Wizyconf-Mics and the microphone balls
- You can bend the microphone cable so that the top of microphone ball is located closer to the people who speak
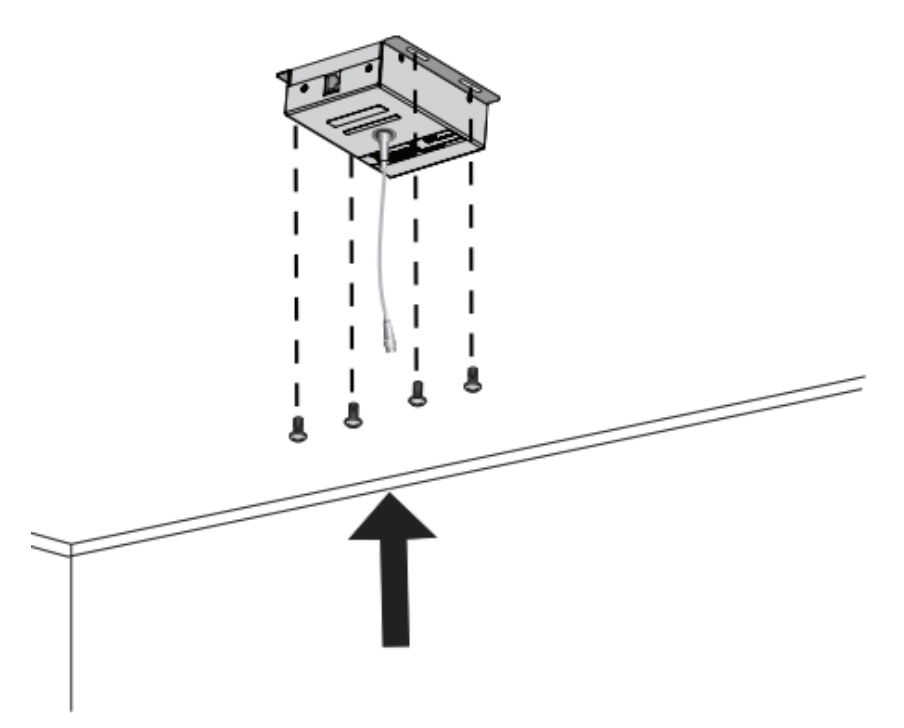
Ceiling Installation
For ceiling installation:
- Attach the soft cables to the Wizyconf-Mics and the microphone balls
- It is recommended to use the provided mount cable protection (to protect the cable when installing the microphone in the ceiling)
- Make sure the ceiling can support the weight of the Wizyconf-Mic (one unit = 0.3 kg)
- The length of one soft cable is 53cm. If your ceiling is higher than 3.05m, it is recommended to install the microphones on the table
Suspended ceilings
Follow the instructions:
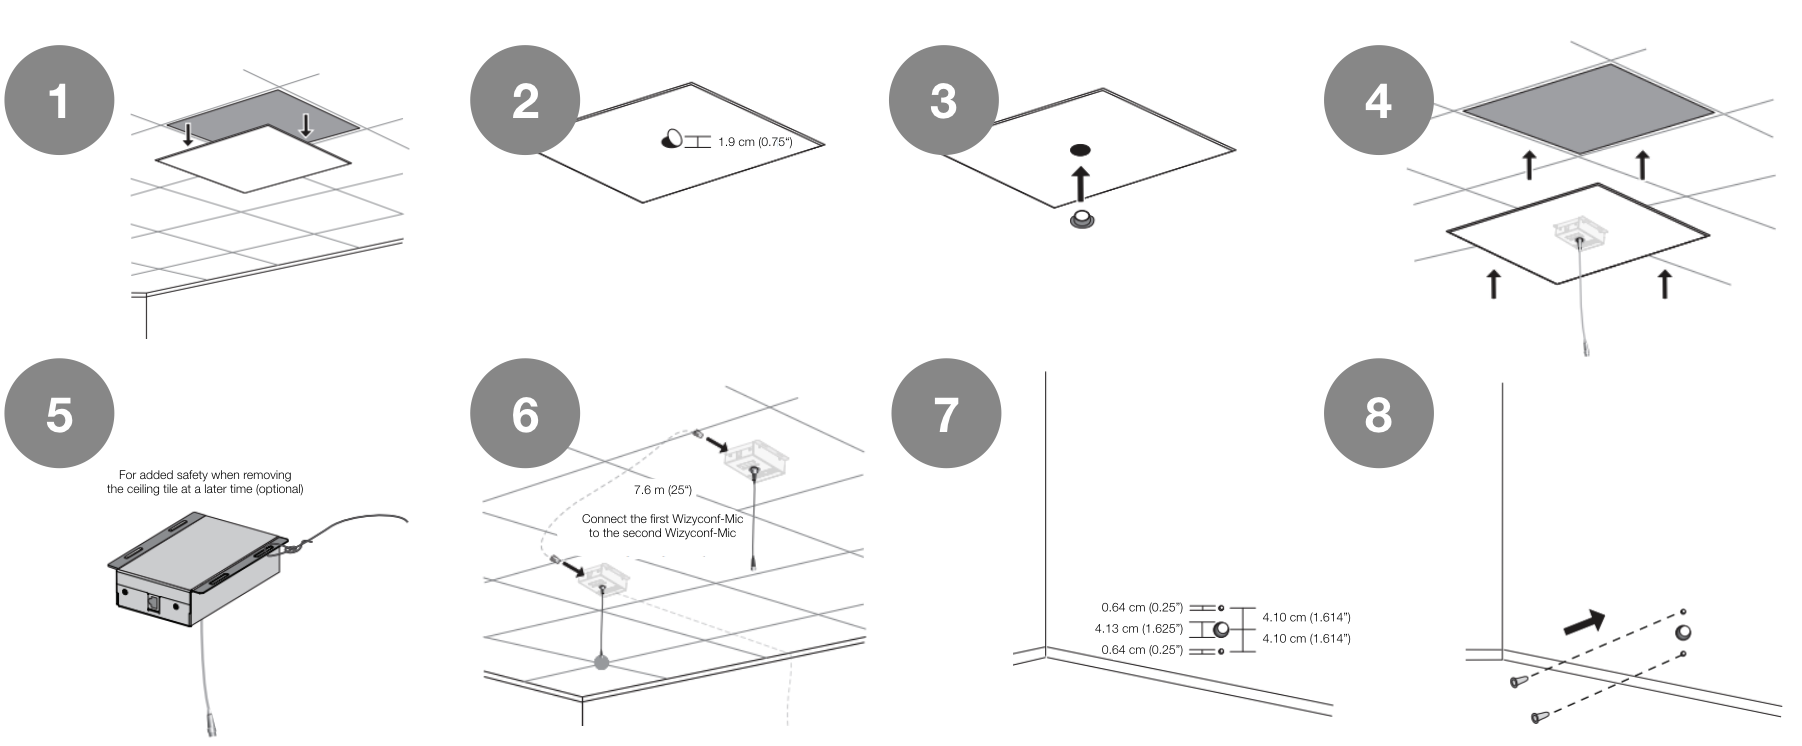
For ceilings that are not suspended:
Note: the recommended distance between the two microphones is from 5.5 m to 7.6 m (18''-25'').