How to set up virtual classrooms with Wizywebinar
- Ksenia Babych
This document is a complete guide explaining how you create and manage virtual classrooms with Wizywebinar.
Created: May 2023
Wizywebinar documentation: Wizywebinar User Guide.
Web page: https://www.wildix.com/wizywebinar-for-education/.
Permalink: https://wildix.atlassian.net/wiki/x/AYAgCw
Requirements and features
- Min. WMS version 5.02.20201207.3
- UC-Wizywebinar license + UC-Business (or UC-Premium) license for each user who needs access to Wizywebinar to create virtual classrooms
Limitations per 1 UC-Wizywebinar license:
- Number of people who can speak and enable video: 1
- Number of simultaneous virtual classroom sessions: 1
- Number of attendees: 100
- Number of recordings: 1
General Limitations:
- Max number of concurrent broadcasters/ speakers per classroom: 16
- Max number of attendees per classroom: 5000
Features:
- Breakout rooms. Facilitate discussion and activate learning by splitting your audience intro breakout rooms
- Content library. Share relevant PDFs, presentations and videos stored securely in the cloud from your online virtual classroom
- Email automation. Increase attendance and feedback by sending customized and automated invitation, reminder and follow-up emails
- Hand raising. Make virtual classroom management a breeze with this attention-grabbing tool
- Live broadcast. Reach a wider audience by streaming your sessions and events directly to YouTube or Facebook
- Live chat. Create a supportive online virtual classroom through conversations in both public and private chat
- Polls. Check comprehension by creating custom polls and discussing the results
- Q&A. Encourage critical thinking by moderating Q&A sessions through text and audio
- Recording. Stay on track with HD-quality video recordings students can watch and rewatch in their own time
- Screen sharing. Spice up your lesson plan by sharing your screen, window or tab in real-time without any buffering
- Secure access. Control access to the session by invitation, link or registration and with or without password protection
- Shared notes. Reinforce ideas and concepts by sharing your notes straight from our virtual training platform
- Statistics and reporting. Collect insights on your students and virtual classroom management through our post-session statistics
- Whiteboard mark-up. Highlight, draw and add text to the whiteboard and shared documents to draw attention to the important details
Terminology
- Speaker – a teacher, someone who runs a virtual classroom, broadcasts their audio and video and controls various aspects of the classroom. There can be more than one speaker. Speakers have a number of privileges over other participants, which include: the ability to speak, show video, start the recording, manage other participants, use group chat for speakers, and more
- Audience – students, mostly passive listeners of the classroom. By default, they don’t have permission to speak, unless allowed by speakers. If needed, they can interact using chat in Conversations, Questions and Answers, etc.
How to set up a virtual classroom
- Go to Collaboration -> Webinar

Click New Meeting button
Fill out mandatory fields: Topic, Start date and Duration and optional: Set Password and Friendly URL:

- Click Advanced options button to proceed with the creation (add students, enable breakout rooms etc)
- Go to Participants tab to add students. You can add them manually by inserting First (1) and Last (2) Name and Email (3) or import the full list via CSV file. Consult this chapter for details

- Go to Access tab to control the access permissions to a classroom. You can make a classroom private so only invited students can enter it and create breakout rooms to split students into different groups. Consult this chapter for details

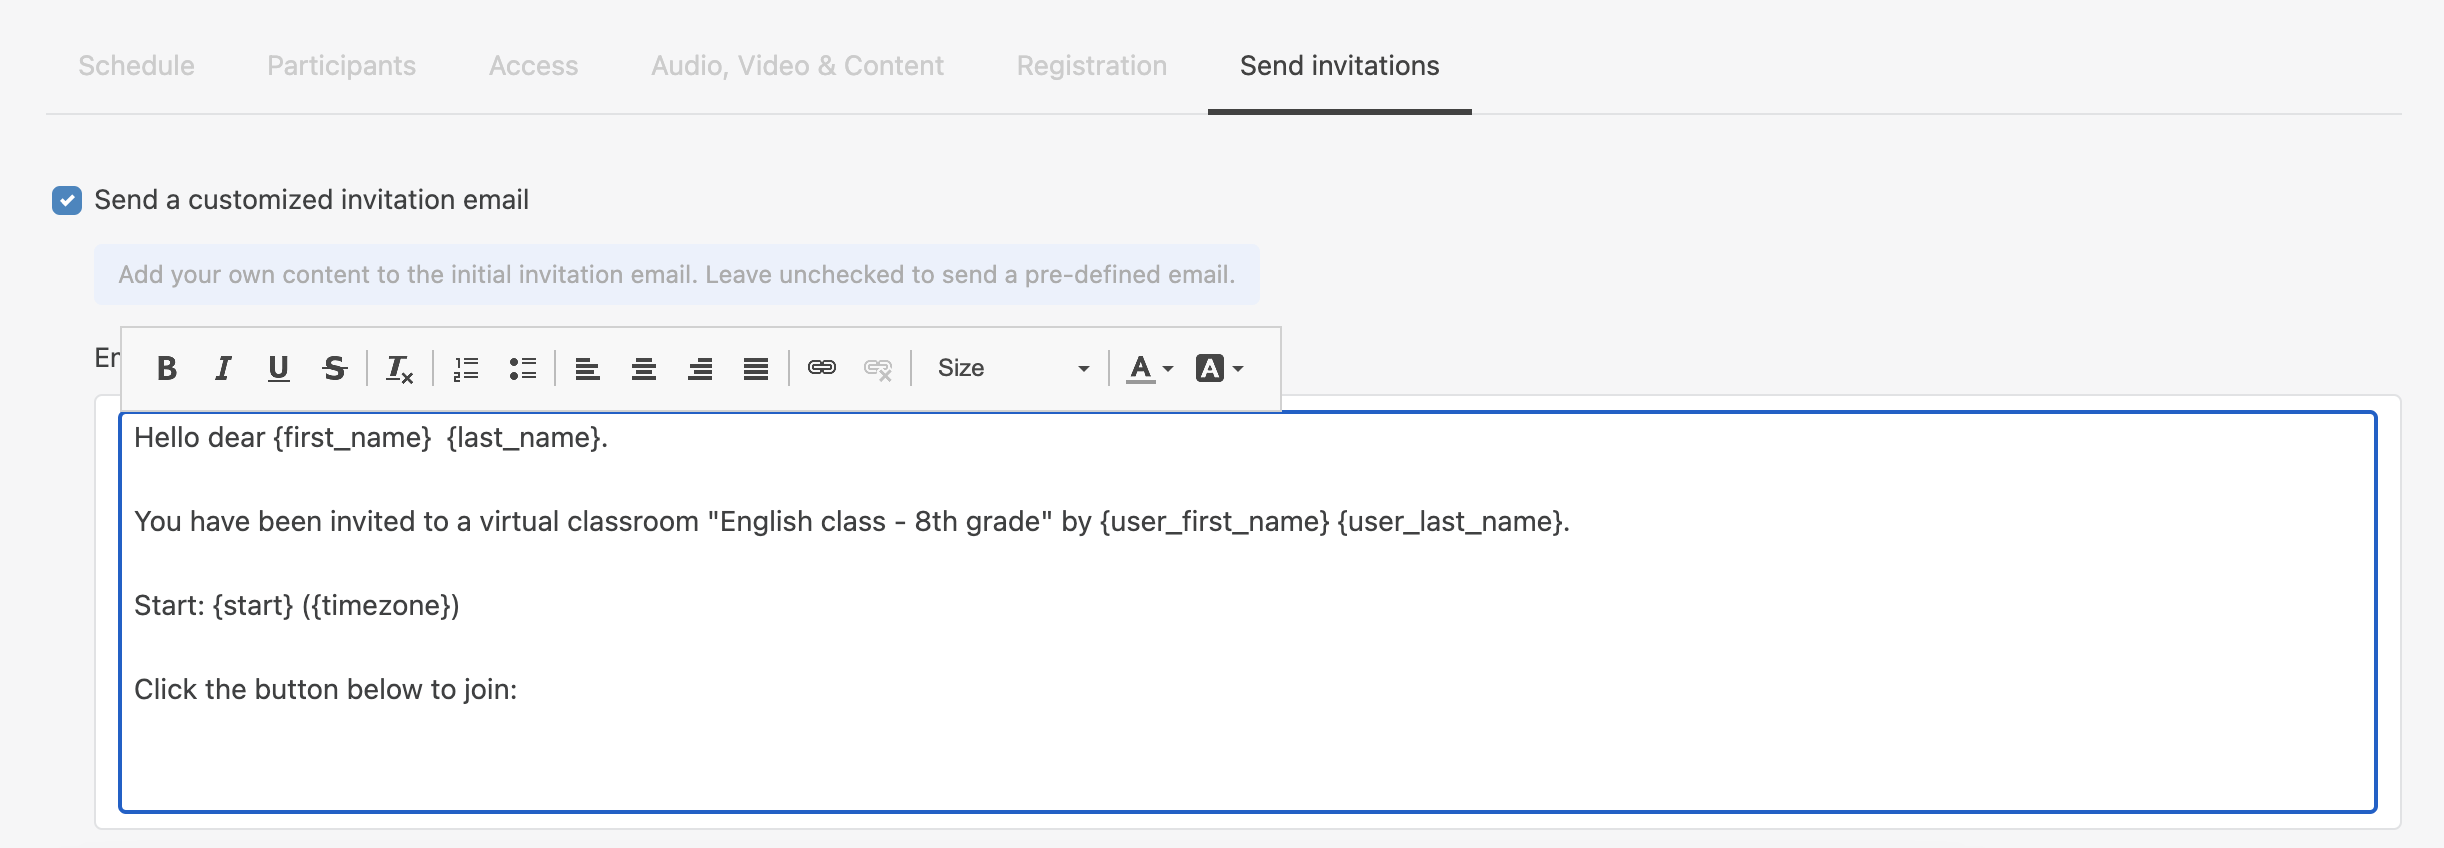
- Go to Send invitations tab to customize the email sent out to students. You can schedule emails to be sent before the start and after the end of a class and attach any files here
For other specific settings, consult Wizywebinar User Guide.
Edit or delete a virtual classroom
After setting up a classroom, you can edit or delete it in the Schedule menu. Click on Schedule from the left-hand panel.
To edit: hover the mouse cursor over it and click on Pencil icon (Edit Meeting)
To delete: hover the mouse cursor over it and click on x icon (Delete Meeting)

How to manage a virtual classroom
Preliminary settings
- Upon entering a classroom, click on Camera and Microphone icons on the left panel to enable them

- Go to Settings (Gear icon) and select Workspace: here you can enable private chats so students can send messages to each other or directly to you, questions & answers, shared notes (useful when there are two Speakers), synced layouts and other settings (consult Wizywebinar User Guide for details)
- You can enable the Synced layouts feature to take full control over how you’d like your students to view your content. Remember that they can only see the locked menus. For example, you can set up in such a way students can only access Conversations and Questions & Answers, but they can't access Participants and Content library. As a Speaker, you can still access other menus (for example, Participants, Conversations, Questions and Answers, Content Library) even if they are not pinned in Forced layouts. The detailed description can be found in this chapter
Manage students
As mentioned, there are two types of user roles:
- Speaker: someone who can broadcast their audio and video as well as control all aspects of the classroom. Note that the number of Speakers per 1 Wizywebinar license is limited to one Speaker
- Audience: someone who attends the classroom and is largely a passive viewer. They cannot share their content unless granted permission to do so by a Speaker
To manage students:
- Click on Participants button on the left panel

Here you have the following options:
Move to Speakers: give administrative permission to a student as well as the possibility to broadcast their audio and video
Give broadcast permission: give permission to broadcast audio and video
Give presentation permission: grant permission to the classroom's whiteboard and permission to start screen sharing
Rename user: edit name of a student
Ban participant: ban a student for a period of time by their IP
Remove participant: expel a student from the classroom
Content library
Content Library is where you manage materials and other media that you plan to share with your students. It supports lots of file types including all office document formats as well as MP4s and many image formats.
To access Content library, click on Graph icon on the left panel. By default, there is Shared Files folder. In this folder you can find all media that you shared with other speakers or which was shared with you:
- To upload a file, click Create new button and select the type from the drop-down list

- To share a file, you can double-click on it on hover the mouse cursor over it and click Eye icon next to the name of the file and click Show

In the Content Library, you can also start Polls, check this chapter for details.
Screen Share
To start screen share, click on Screen icon on the left panel.
You can choose among three options:
Browser Tab allows you to select only one tab from the ones you have open in your browser to share with your audience:
Application Window allows you to select a specific program and only share that selection with your audience
Your Entire Screen allows you to share everything that is showing on your desktop
Live chat
Conversations panel is where you can interact with your students and where they can interact with you and each other.
- Click on Message icon on the left panel to open the Conversations panel:

Both Speakers and Audience members can do a lot in Conversations – like react to messages with emojis or format text in different styles.
Speakers can also clear chat history and both Speakers and Audience can export chat history by clicking on the three dots in the upper part of the Conversations panel.
Breakout rooms
If breakout room option is enabled, when entering the virtual classroom, you can see Breakout Rooms icon.
- To start breakout rooms: click Start breakout

- You can broadcast a message to all Breakout Rooms to announce some important messages or the end of the group activity by clicking Broadcast message

- To return students back to the classroom, click Strop breakout
For breakout rooms management, check this chapter.
Questions and Answers
Questions & Answers are disabled by default, you need to activate the option in Workspace settings.
Basically, this functionality is preserved by students. To ask a question:
- Click on Question icon on the left panel
- Type your question in the field below and click Ask If you want to ask a question anonymously, tick off the option Ask anonymously

- You can answer by clicking on the question. Type your answer below and click Answer. You can answer privately or using Live answer option (allows you to show the message to everyone on the main screen and to answer it live)

Whiteboard
To open the in-meeting whiteboard:
- Click on Whiteboard button (Pencil icon) on the left panel.
- You have a set of whiteboard tools like text input, pen and highlighter, line and shape on the right-hand side of the Content Viewer window for drawing on a whiteboard

Recording
To start recording a session:
- Click on Recording button from the left panel. Red REC icon is displayed above the left panel of the screen when the recording is running

- When stopping a recording, click Stop recording button to confirm
Livestream
Through Livestream you can broadcast your virtual classroom to a larger audience via Facebook Live or YouTube if needed. To start live streaming:
- Click on Live streaming button (Broadcast icon) from the left panel

- Then you need to select YouTube or Facebook and enter the Live stream key into the input field
For detailed instructions on how to get the stream key, read the guide: How to Start Live Stream.
End a virtual classroom
To end a classroom:
- Click on Leave/ End session button (Exit icon) from the left panel
- You have three options here:
- Disconnect audience users - you close the classroom for students, but you are left
- Leave session - you leave the classroom, but students are left there
- End session - the classroom is closed for everyone including you

Statistics
In Collaboration -> Webinar tab:
- Click on the Schedule tab from the left panel and then hit History tab. In this menu you can view all the past sessions
- Hover the mouse cursor over a classroom and then click on Pencil icon

Click Advanced options
Open the Reports tab. Here you can see a short Summary Report and download it in CSV or Excel:

In the report, you can find information about attendees: whether they were invited, registered, or joined as guests, whether they attended or missed the classroom, as well as the details they provided when registering or joining the classroom.
Also, if Questions & Answers and/or Polls were used during the classroom, the relevant reports with QAs and Polls results are also available for download in CSV or Excel format. They include the following information: the questions, the answers, the date and time asked, users who asked and answered the question, public vote details if any, etc.
For other statistics, check this chapter.
Set up a hybrid classroom
With the help of Wizyconf Station, it is possible to set up a hybrid classroom by keeping both your remote and in-person students on task. Consult Wizyconf Conference Room - Documentation for details.