Submit a Case via Salesforce Partner Community
This Documentation describes how to submit a case via Salesforce Partner Community, monitor the case, and chat with Support Team.
Created: May 2023
Updated: July 2025
Other documentation:
- Salesforce Partner Community Guide
- How to convert CAPEX into HWaaS via Salesforce Partner Community
- How to transfer HWaaS devices to another Customer via Salesforce Partner Community
- How to assign CAPEX devices to a Customer via Salesforce Partner Community
Permalink: https://wildix.atlassian.net/wiki/x/AYDCCw
Introduction
Salesforce Partner Community provides a convenient way to submit a case to Customer care or Tech support team if you have any questions, issues, or feature requests, easily track the status and manage all the relevant communication in one single place.
Video Tutorial
Submit a Case
For Partners
Customer Care / Tech Support
- On the Home page, click Submit a Case button:

- Select type of your case and click Next
Here is the overview of case types you can choose from:
- Customer Care: Resolve billing issues, check invoices and ensure your account is up to date
- Tech Support: Report technical issues and get help with all aspects of the Wildix Blue ecosystem
- Customer Success: Escalate your issue to Customer Success Specialist team
- HWaaS Management: Request to cancel, replace or upgrade HWaaS devices
- RMA Capex: Request replacement of equipment
SMS Registration: register your numbers for SMS sending
Note: SMS Registration option is available for US only. See more details in the documentation Registering 10DLC numbers for SMS campaigns
For UK SMS Registration, Customer Care ticket should be opened.

- Choose Case Reason (e.g. Billing / HWaaS / Orders / CLASSOUND, etc.) and click Next:

- Choose Category (for some case reasons, the field is not required) and click Next:

- Where appropriate, select the Sub-category:

- Choose Account:

- In case the issue is urgent/ service is down, use the relevant checkbox:

- Choose device type (optional) and click Next:

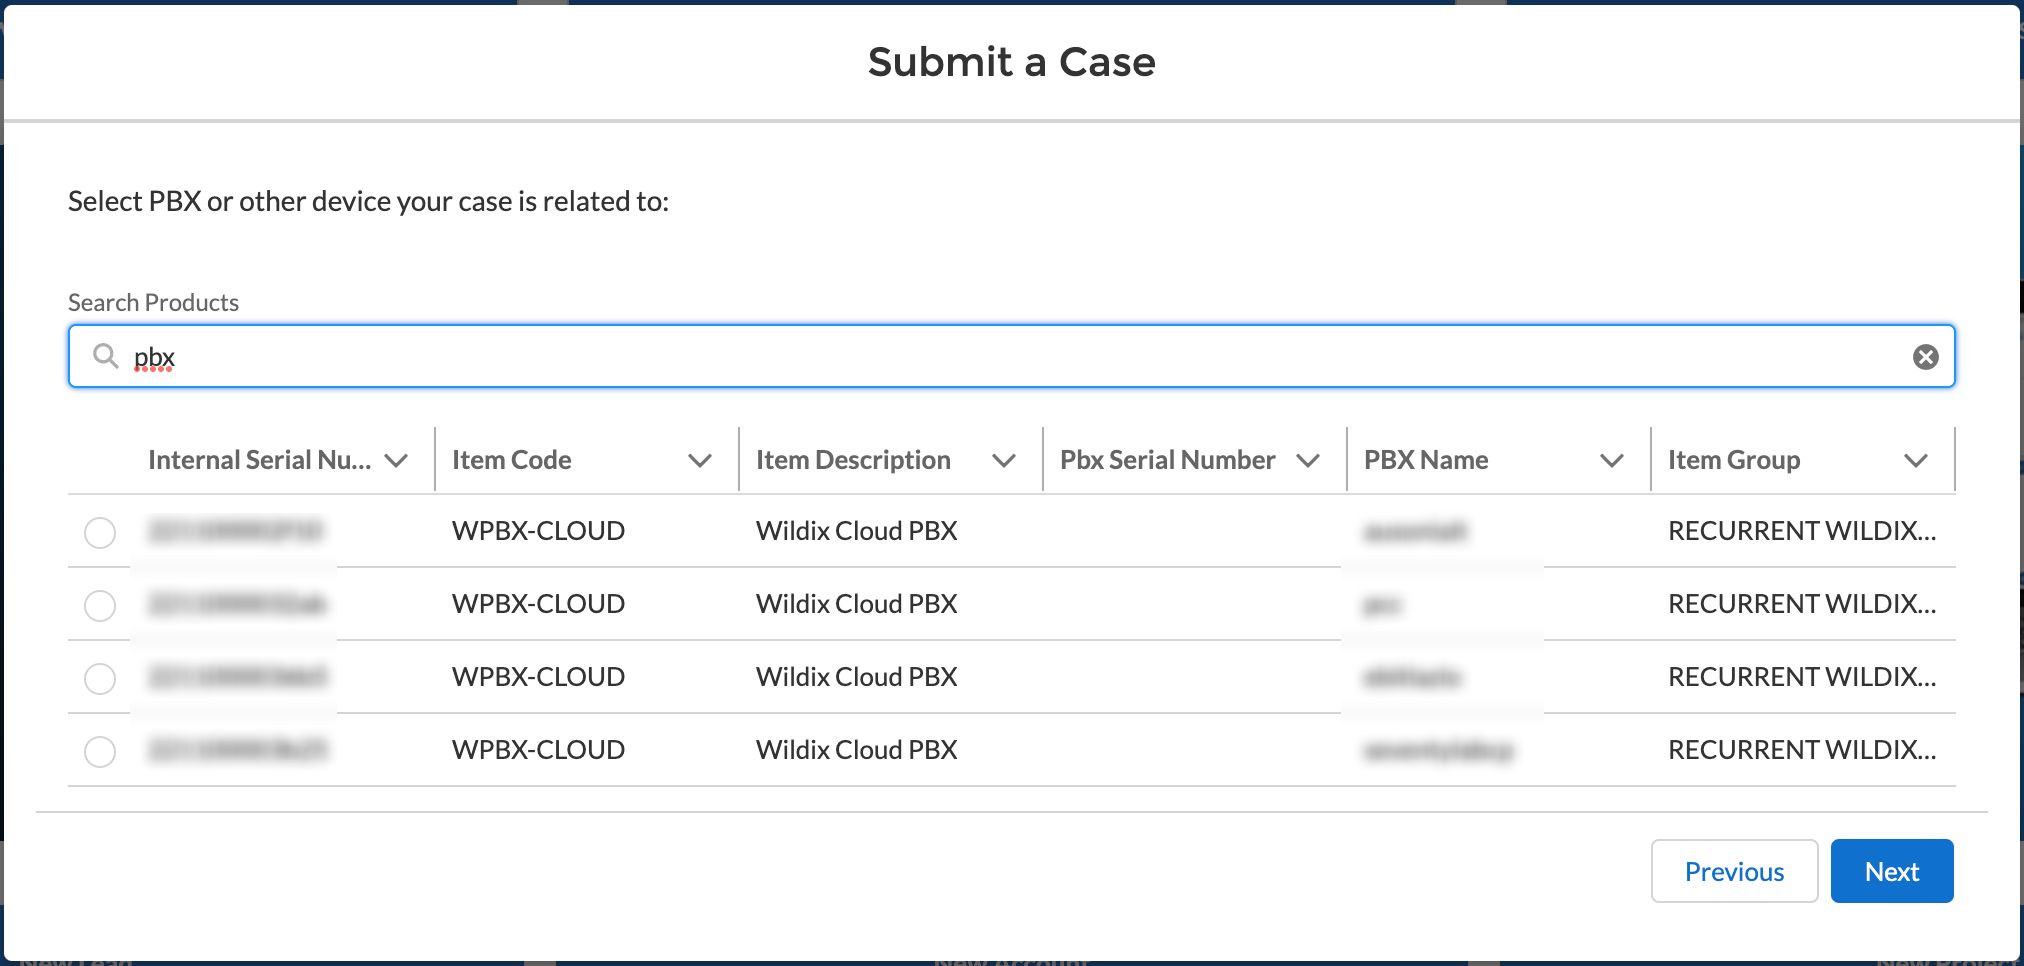
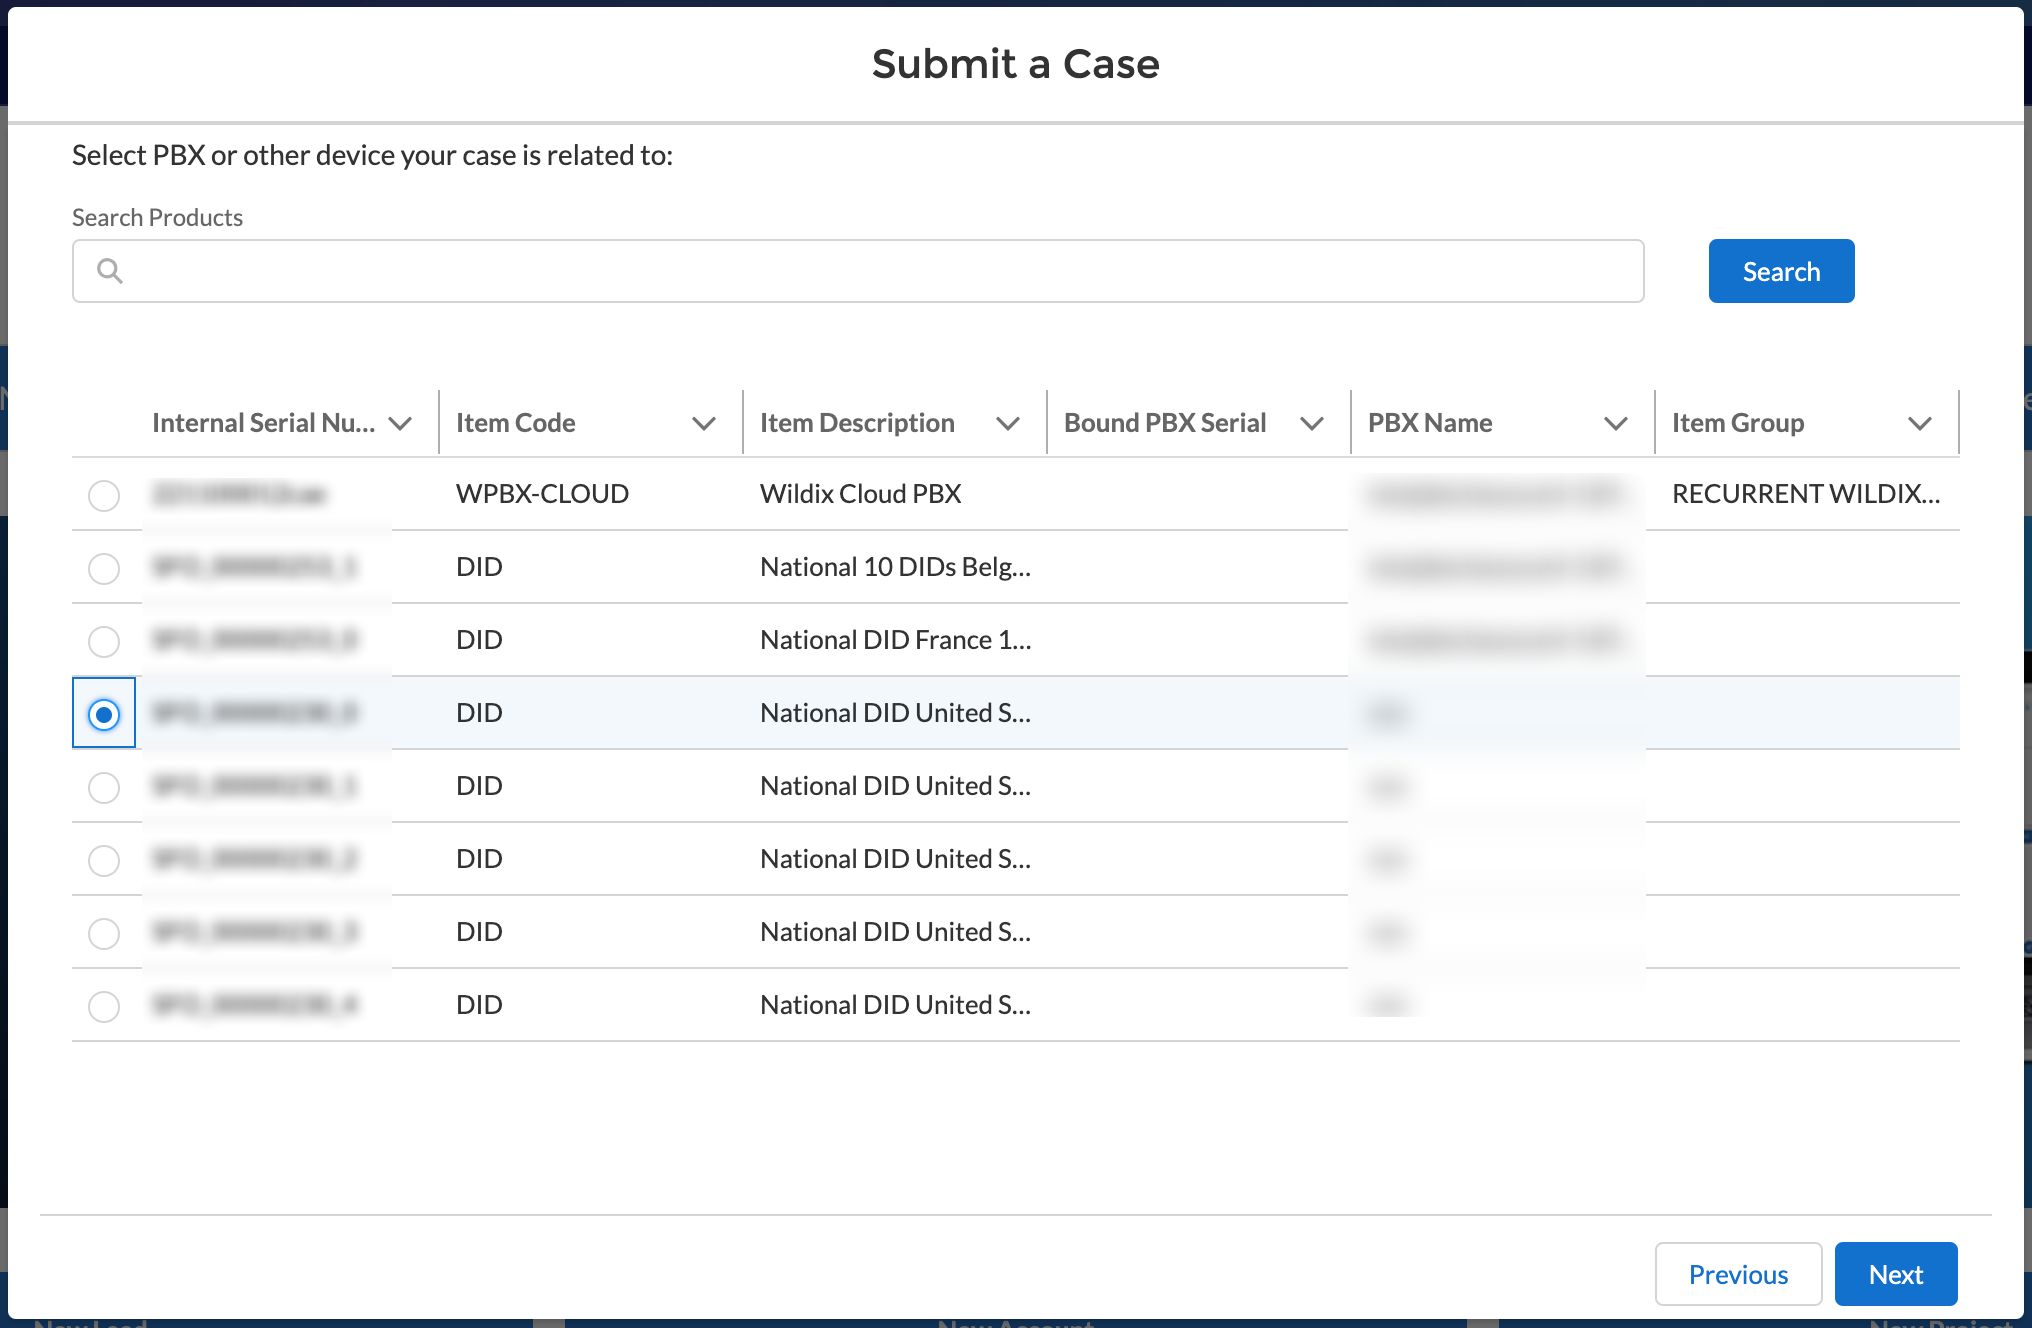
- Search for the necessary PBX or device, select it from the list and click Next:
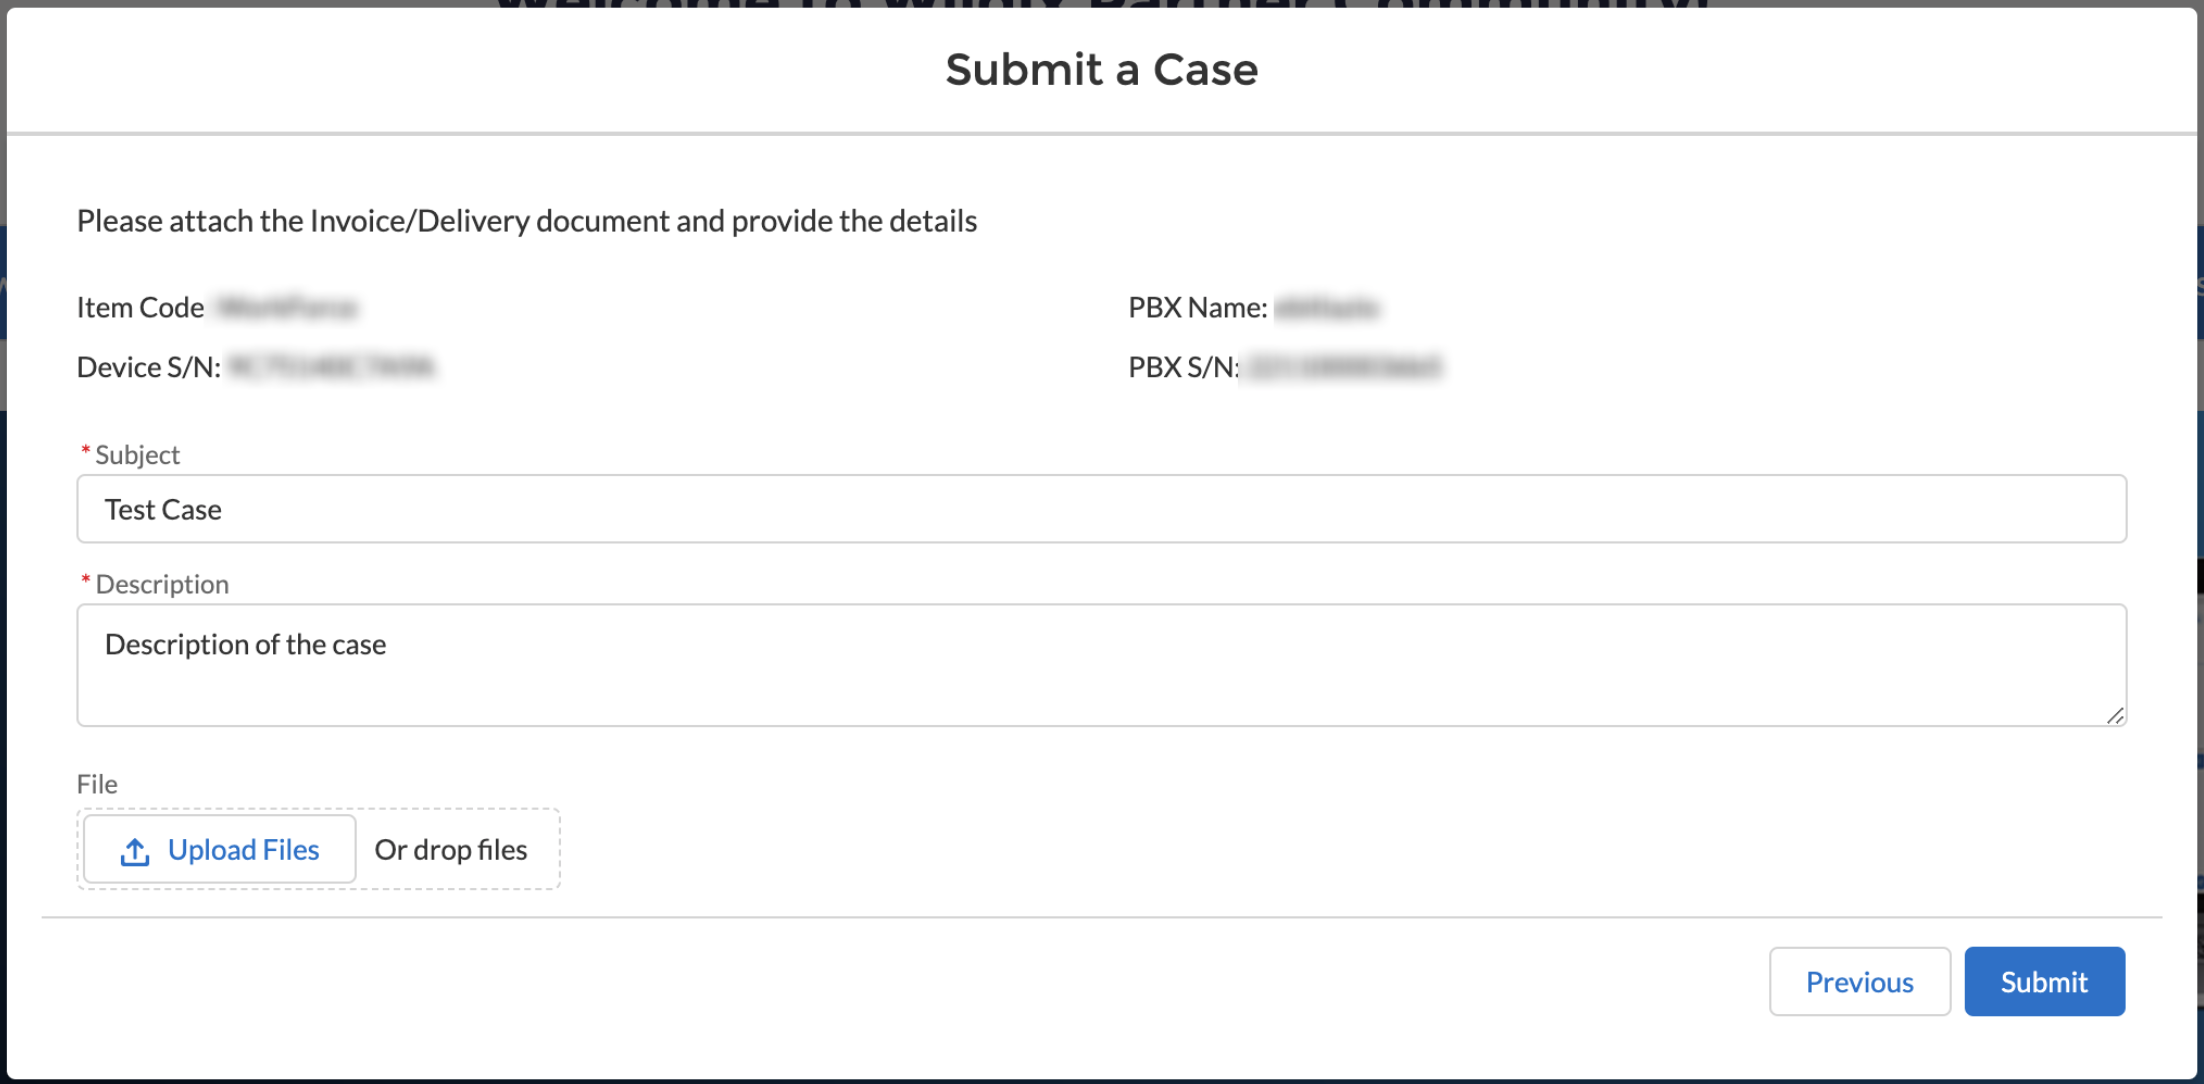
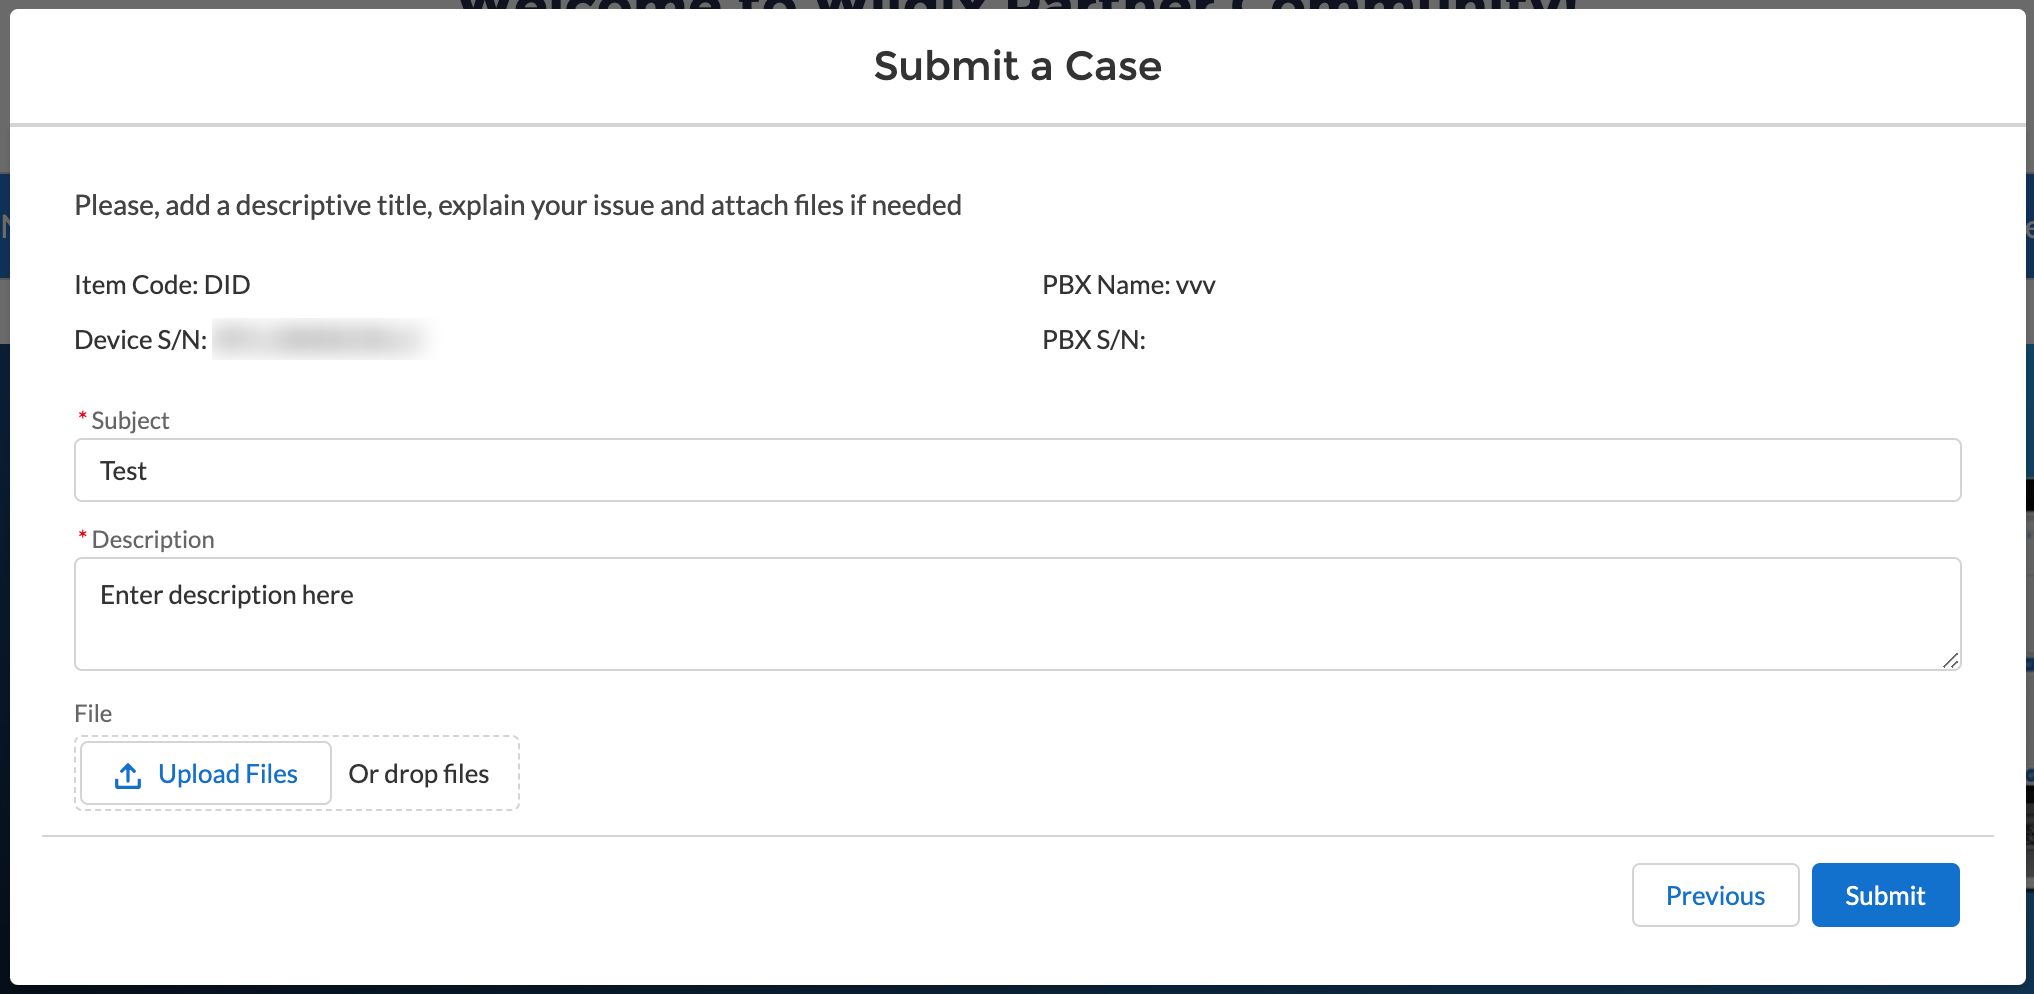
- Enter case Subject and Description and attach any files that are relevant for the case, and click Submit:
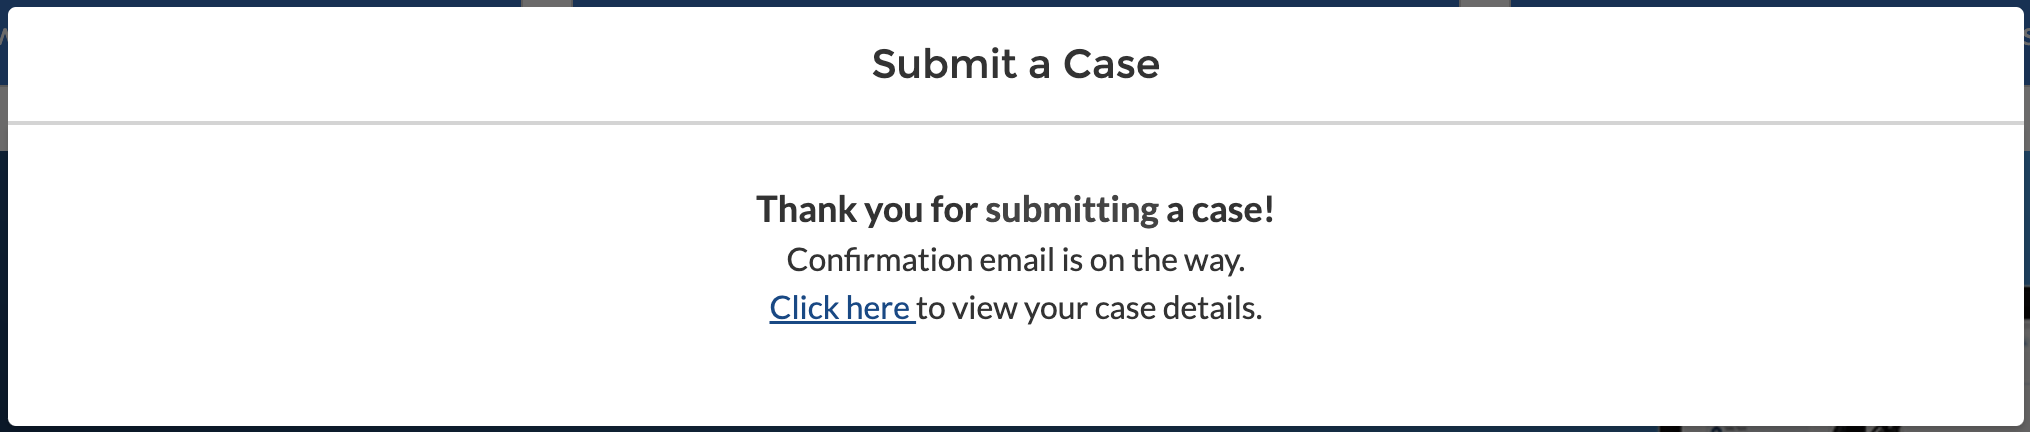
- After clicking Submit, you get the confirmation in Partner Community with the link to your case:
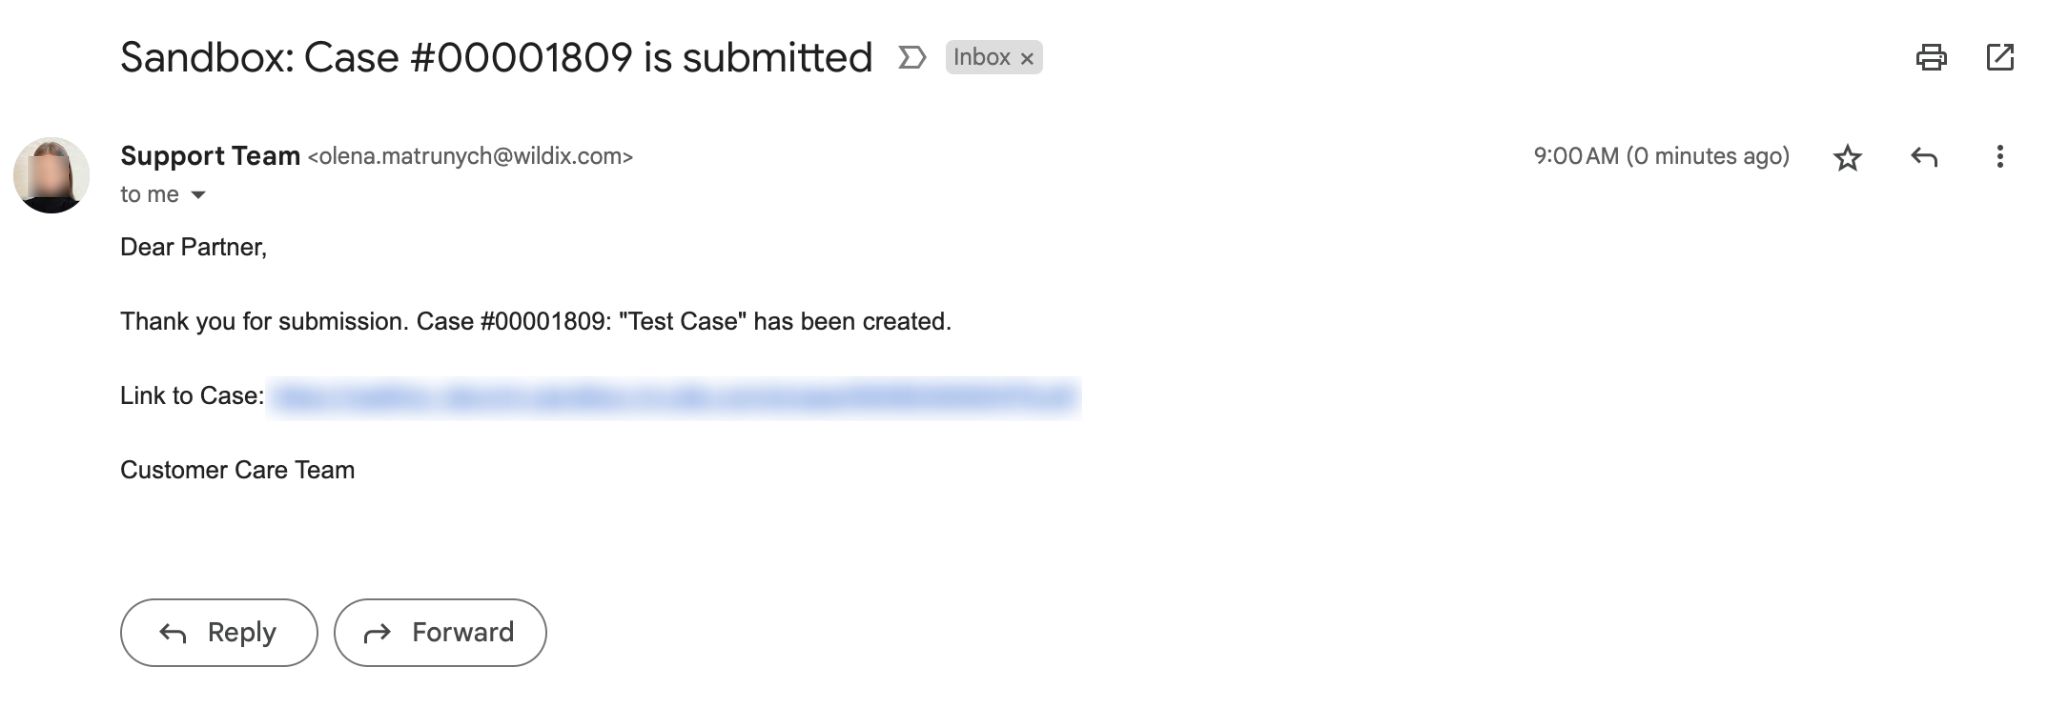
Also, confirmation is sent to your email, which includes the name of the case, case number and link to the Case:
Escalate issue to CSS
If you want to escalate your issue to CSS (Customer Success Specialist) team, e.g. in case you were not fully satisfied with the response from Tech Support team or the proposed solution, you can submit a case of CSS type:

- Select case reason:
- Choose category:
- Select Customer Account and device type (optional) and click Next:

- Select PBX or device your case is related to and click Next:
- Enter title, description, attach files if required and click Submit:
RMA CAPEX
Consult How to open an RMA request for CAPEX to open an RMA request on Salesforce Partner Community.
Manage HWaaS devices
To manage HWaaS devices (replace or cancel):
- On the Home page, click Submit a Case button
- Choose the option HWaaS Management:

- Confirm you have read and understand the notice regarding rental equipment returns

HWaaS Replacement
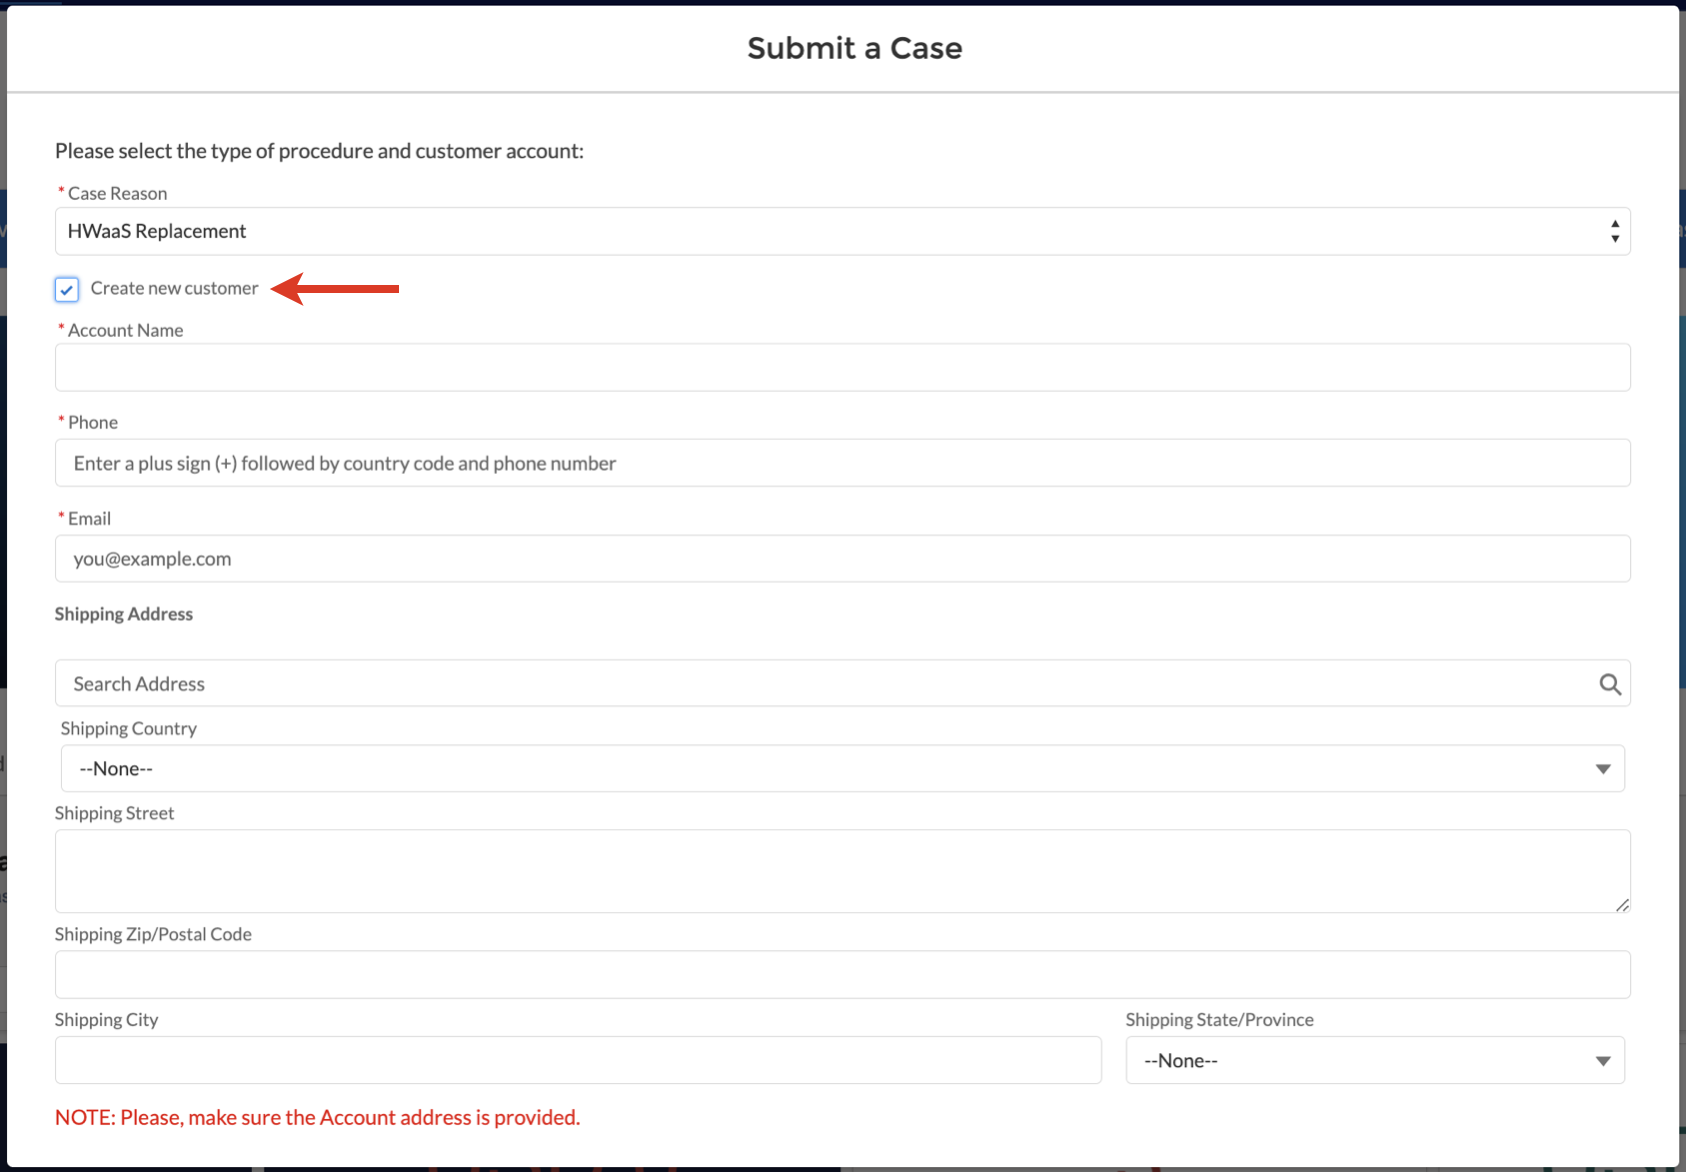
- For Case Reason, select HWaaS Replacement:

- Choose customer account which is related to the request and click Next:

Note: If there is no customer account in the database, you can create a new one by clicking Create new customer and filling out the form:
Select the device and click Next:

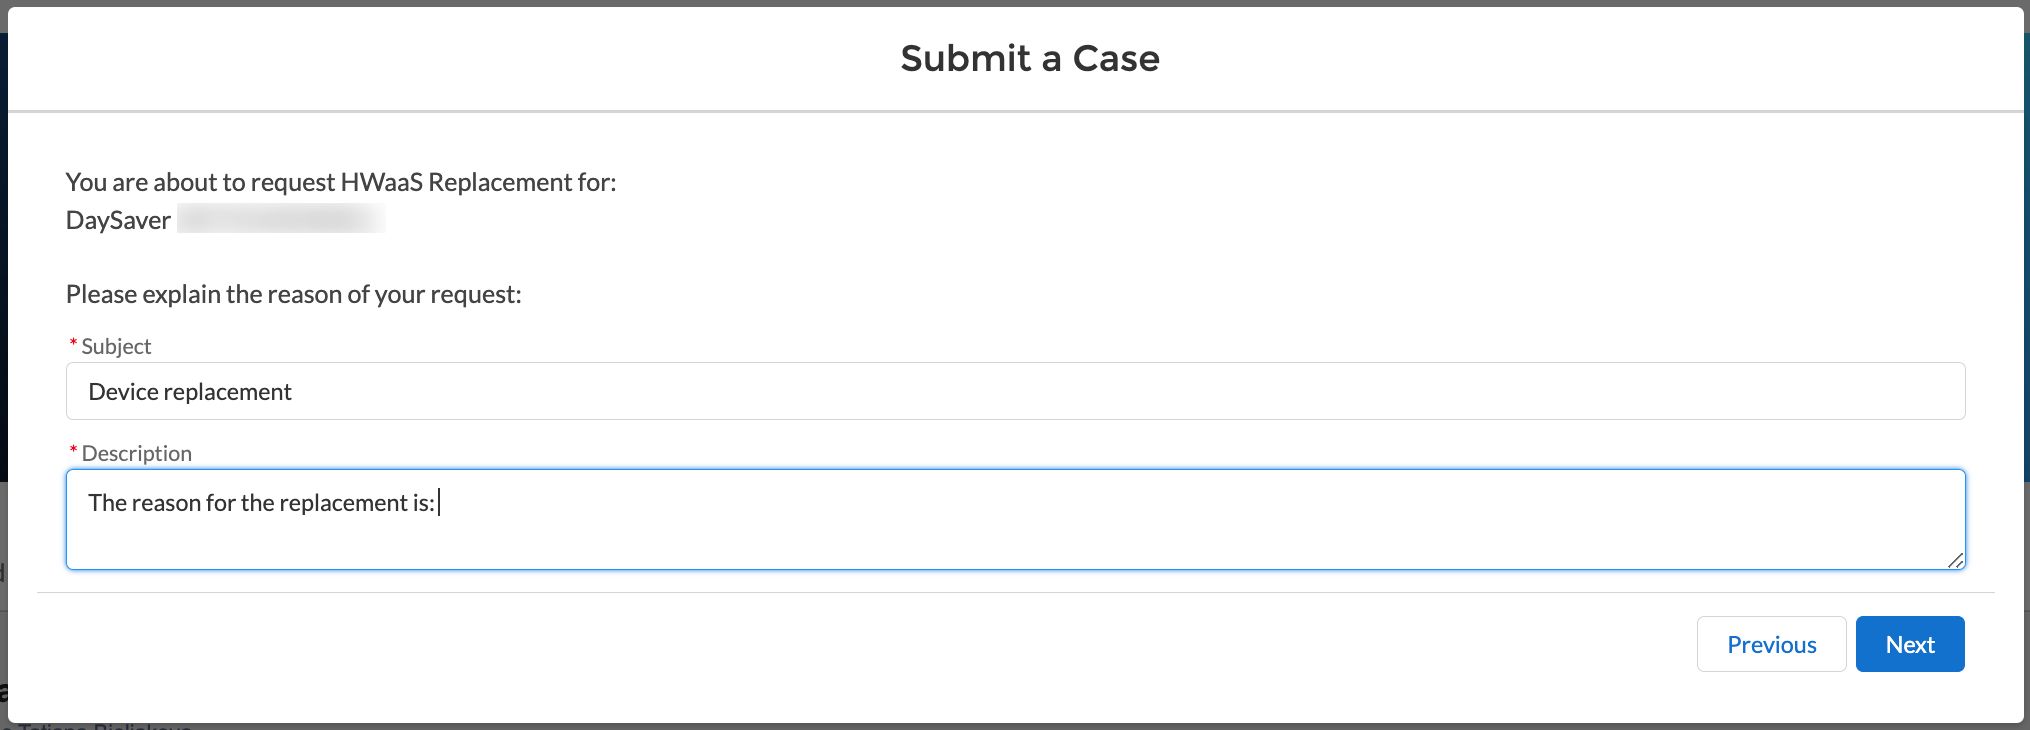
- Provide details, entering the Subject and Description of your request reason and click Next:
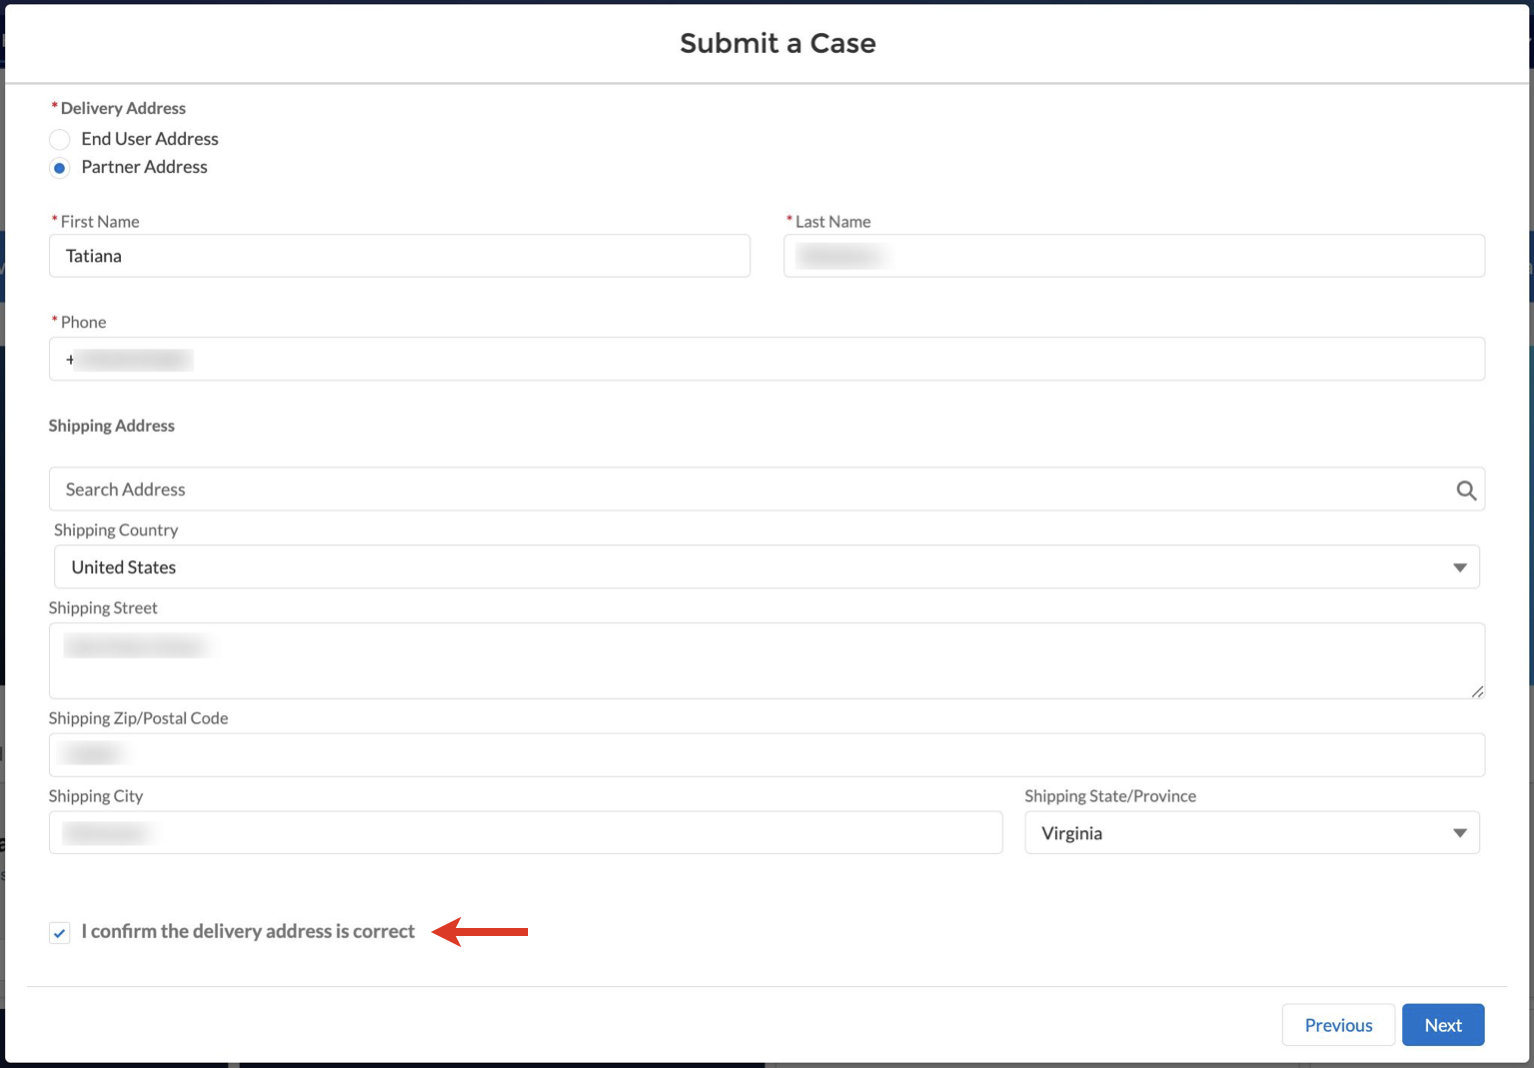
Choose address (End User / Partner / Reseller Address) and click Next:

Note:
- If you choose Partner Address, the contact fields are pre-filled with the details of the Partner submitting the case. The address is taken directly from the current account.
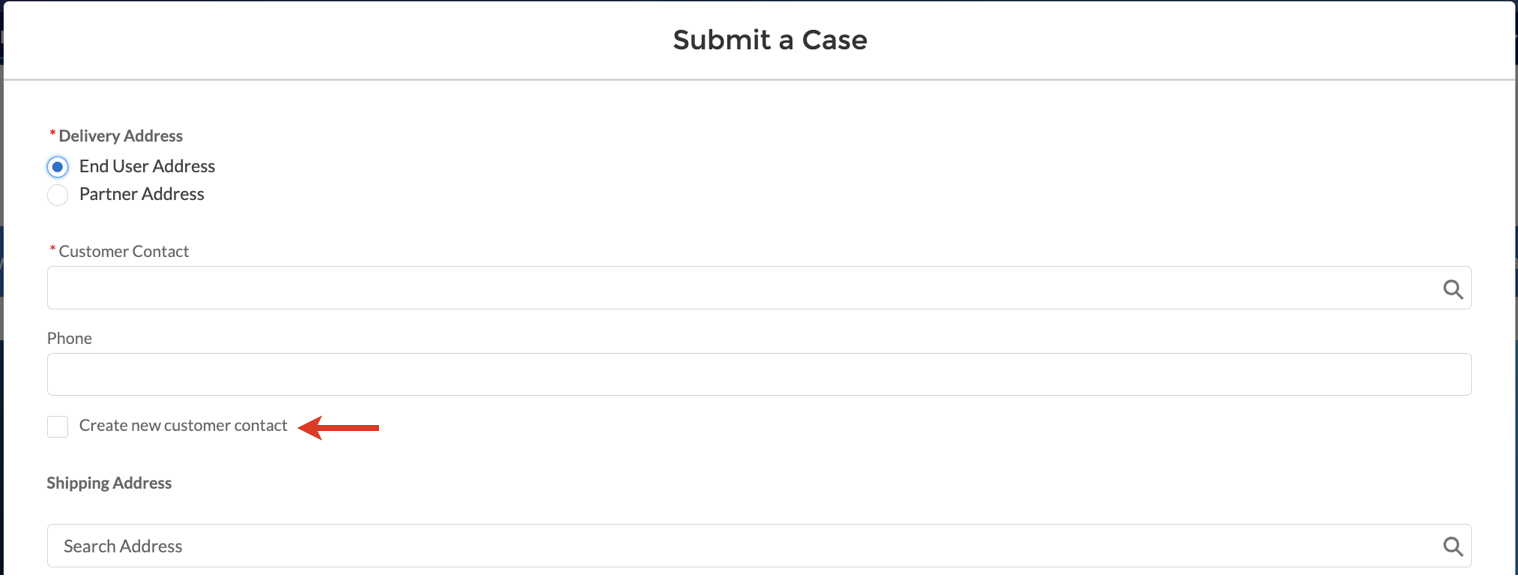
If you choose End User Address, the address fields are pre-filled with the address from the Customer account, which was selected previously.
- In case of choosing Reseller Address, select Reseller Account and press Next to proceed with filling out the address:

If needed, you can modify contact or address details. These changes are saved only for the case record and the contact information are not changed.
Review the delivery address and confirm it is correct and click Next:
Note: For End User Address, you have to select customer contact and provide a contact phone number. If there’s no customer contact in the system, you can create a new one.
- Provide a pick-up address or turn the toggle on if pick-up address is the same and click Next:

- If you provide a a pick-up address, review it and confirm it is correct, click Next:
- Provide box sizes and click Submit:
HWaaS Cancellation
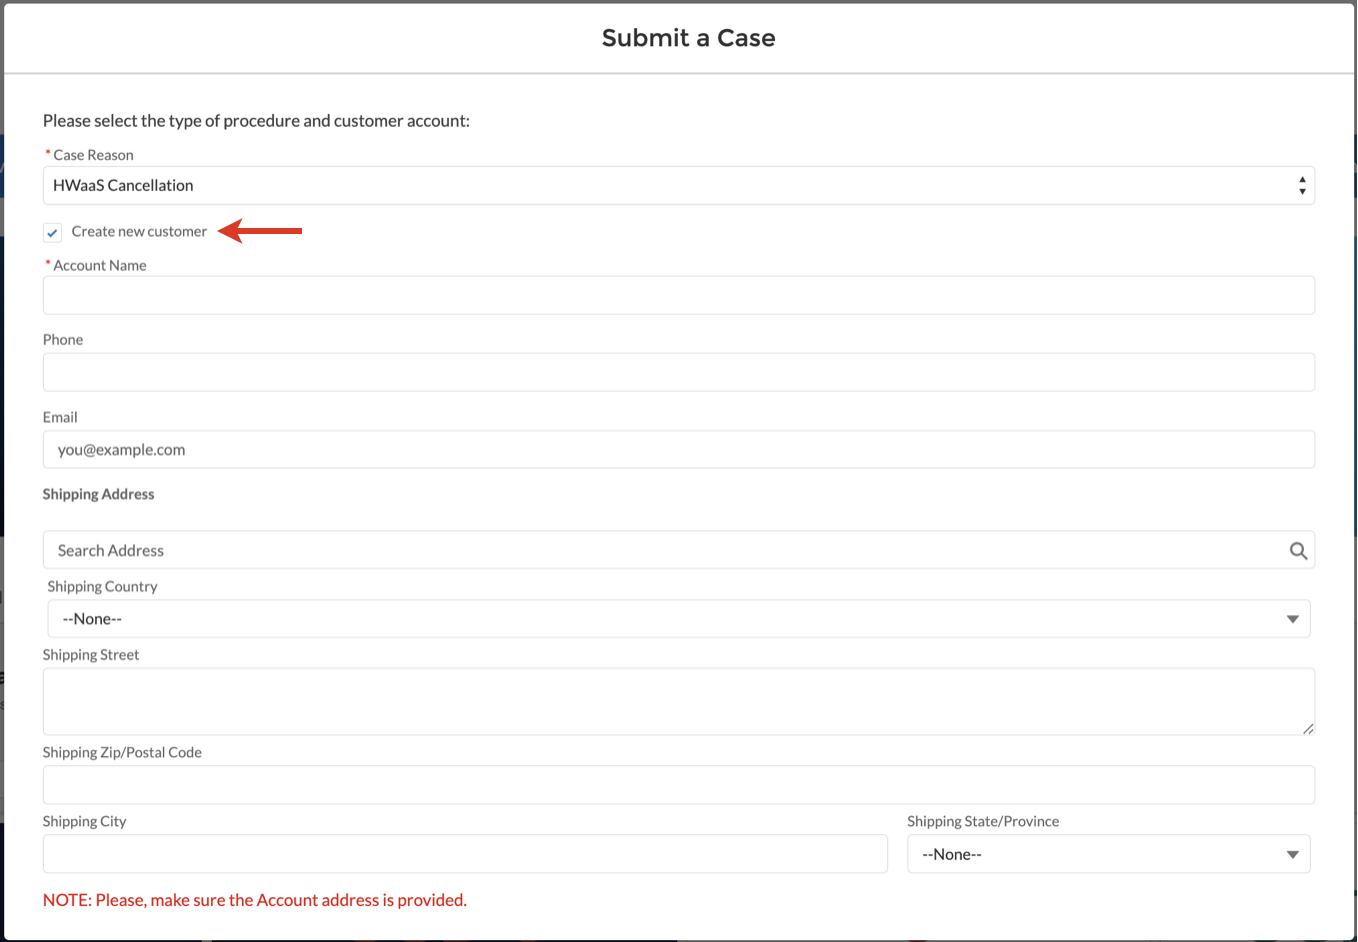
For Case Reason, select HWaaS Cancellation and choose customer account related to the request, click Next:

Note: If there is no customer account in the database, you can create a new one by clicking Create new customer and filling out the form:
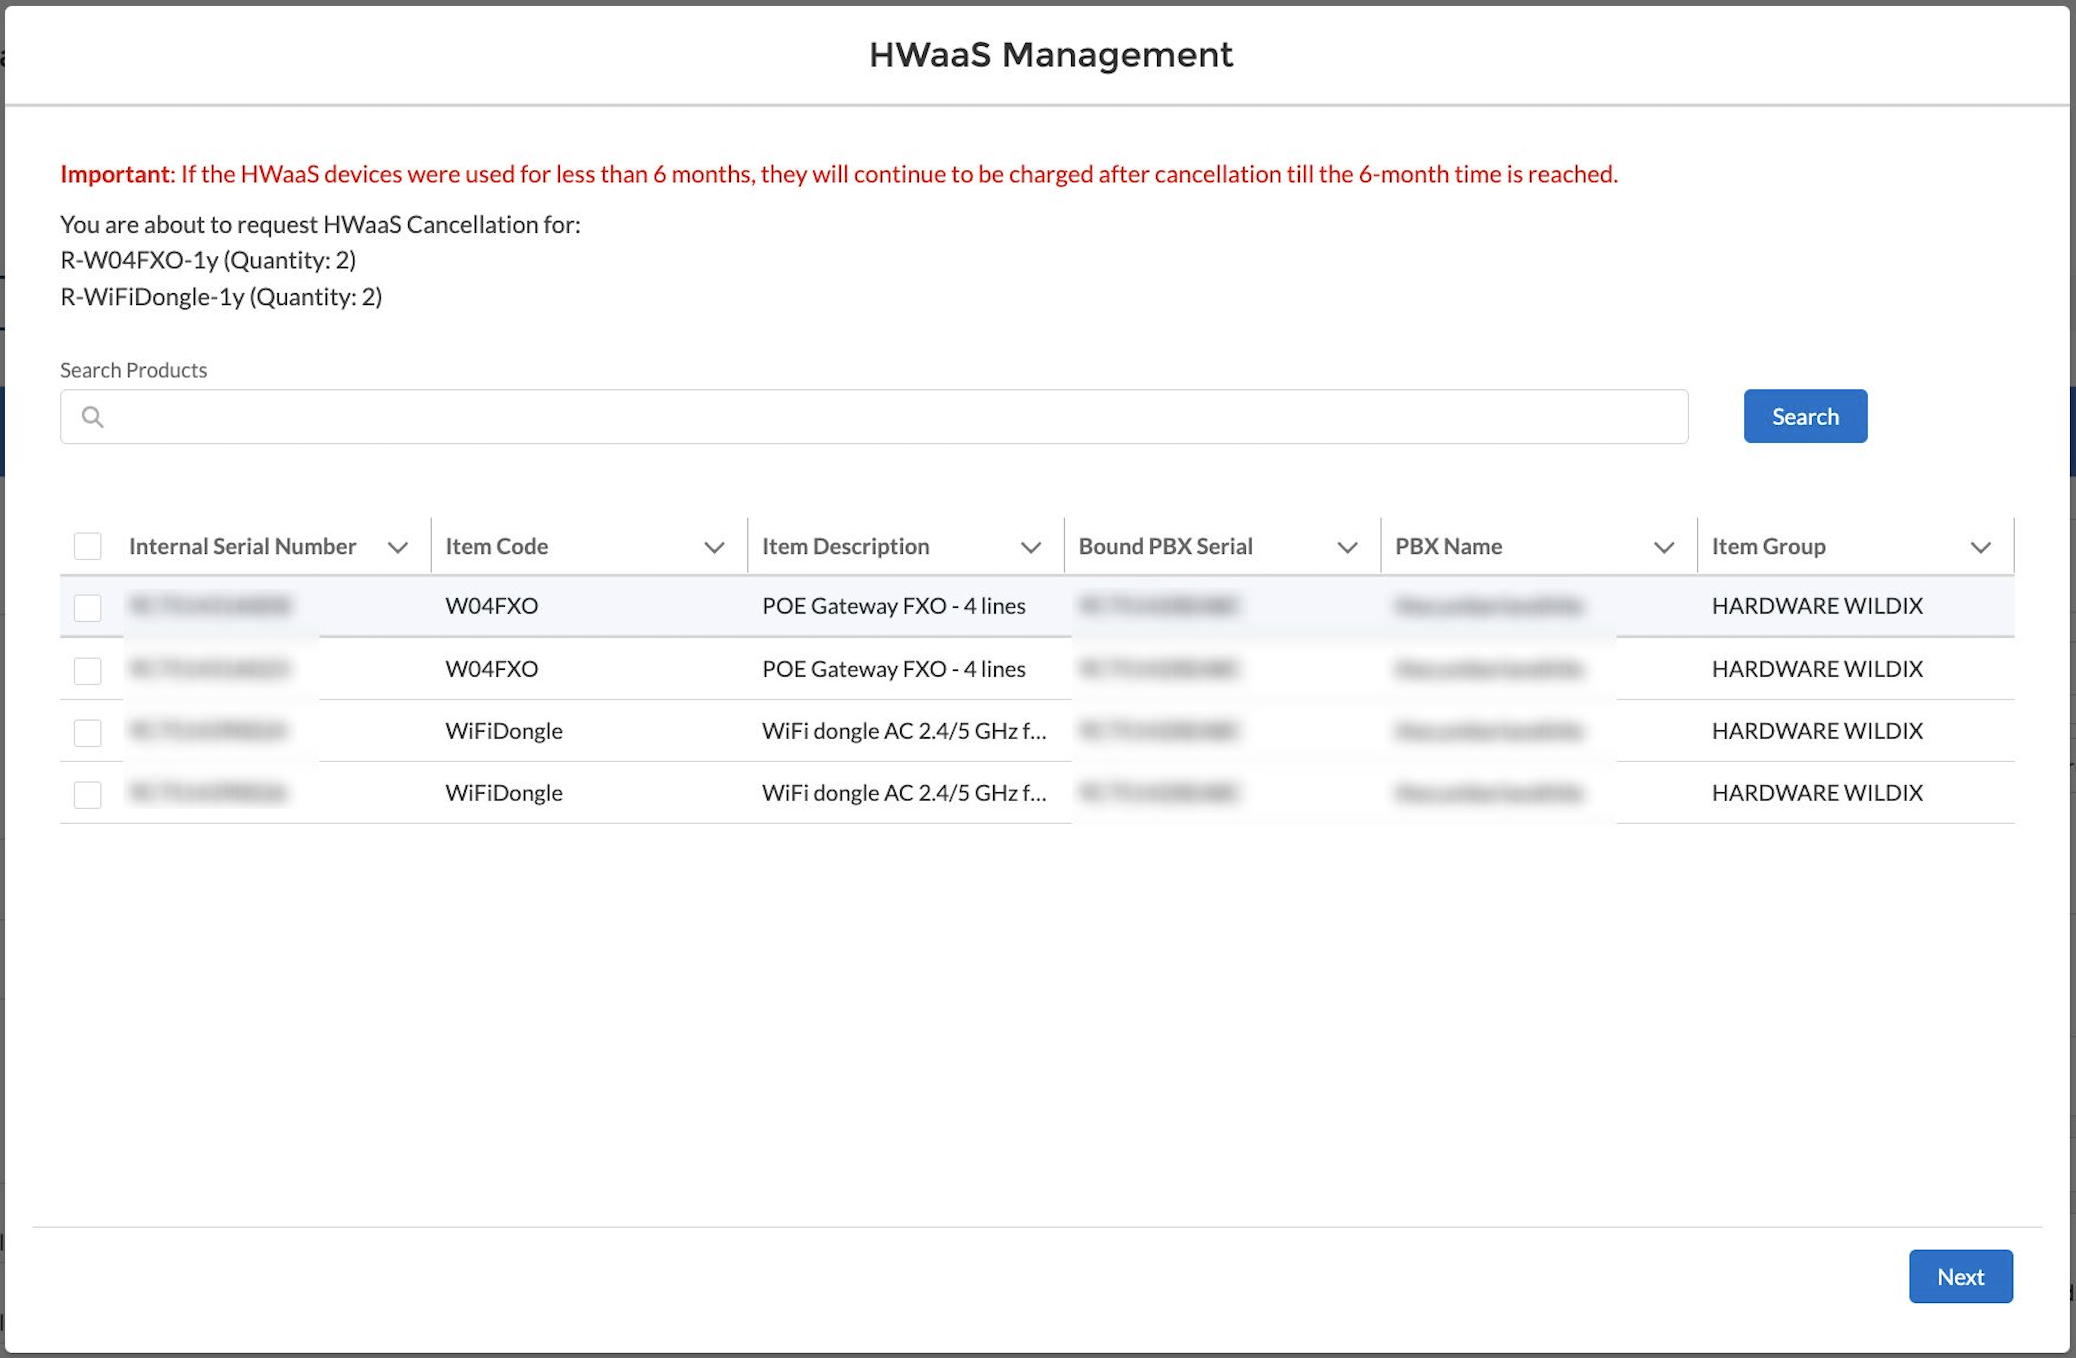
Select the device(s) and click Next:
Note: For HWaaS cancellation you can select multiple devices.
Important: If the HWaaS devices were used for less than 6 months, they will continue to be charged after cancellation till the 6-month time is reached.
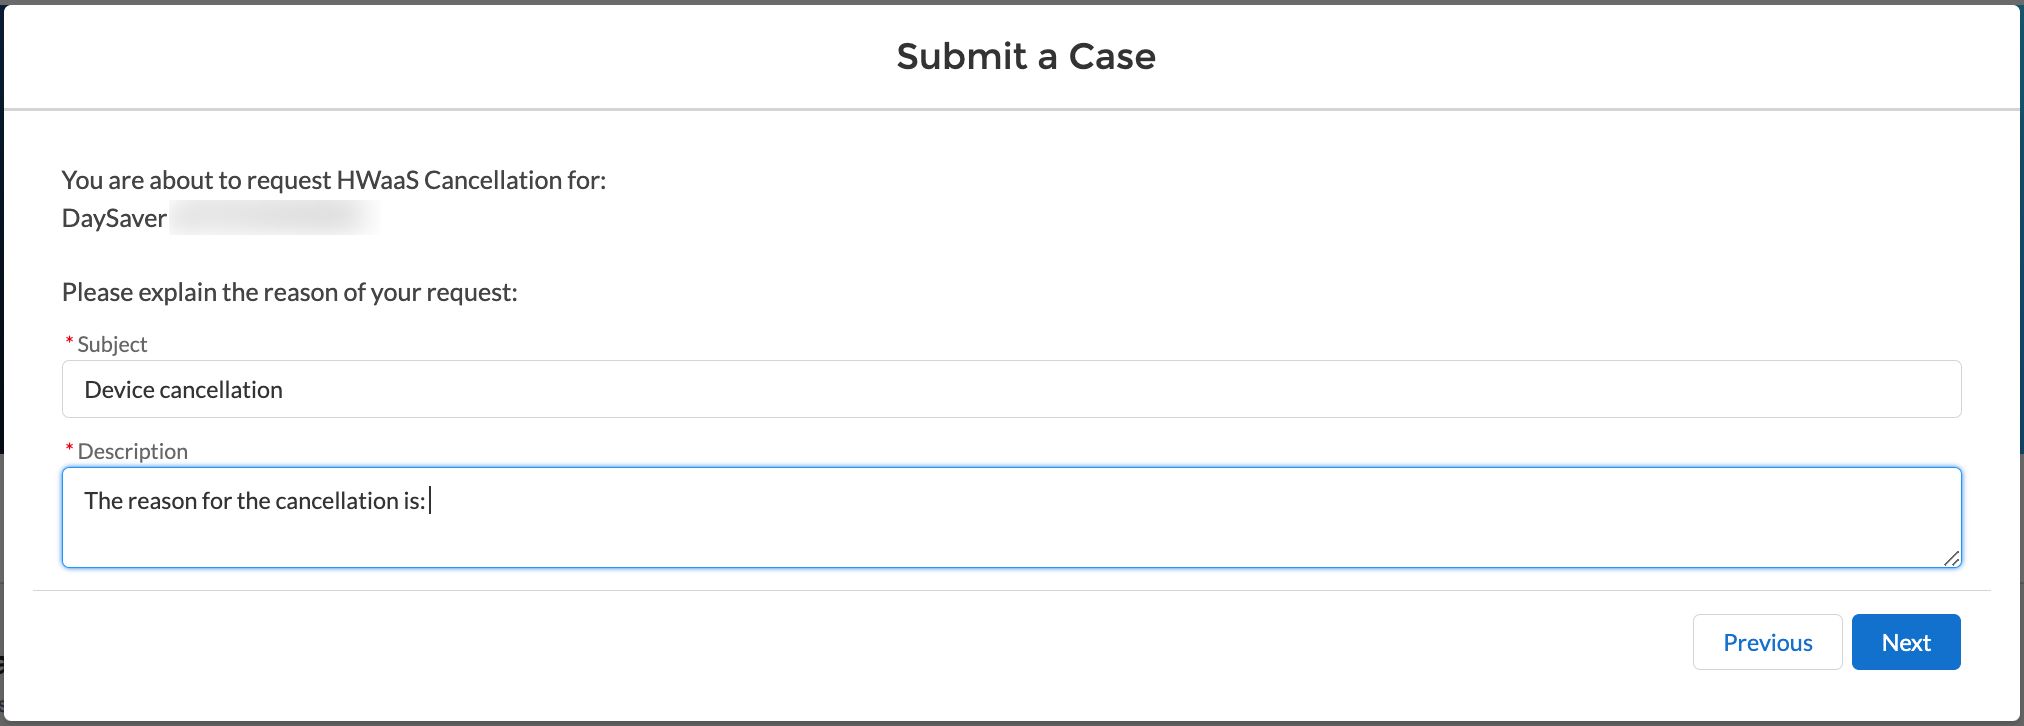
- Provide details, entering the Subject and Description of your request reason, click Next:
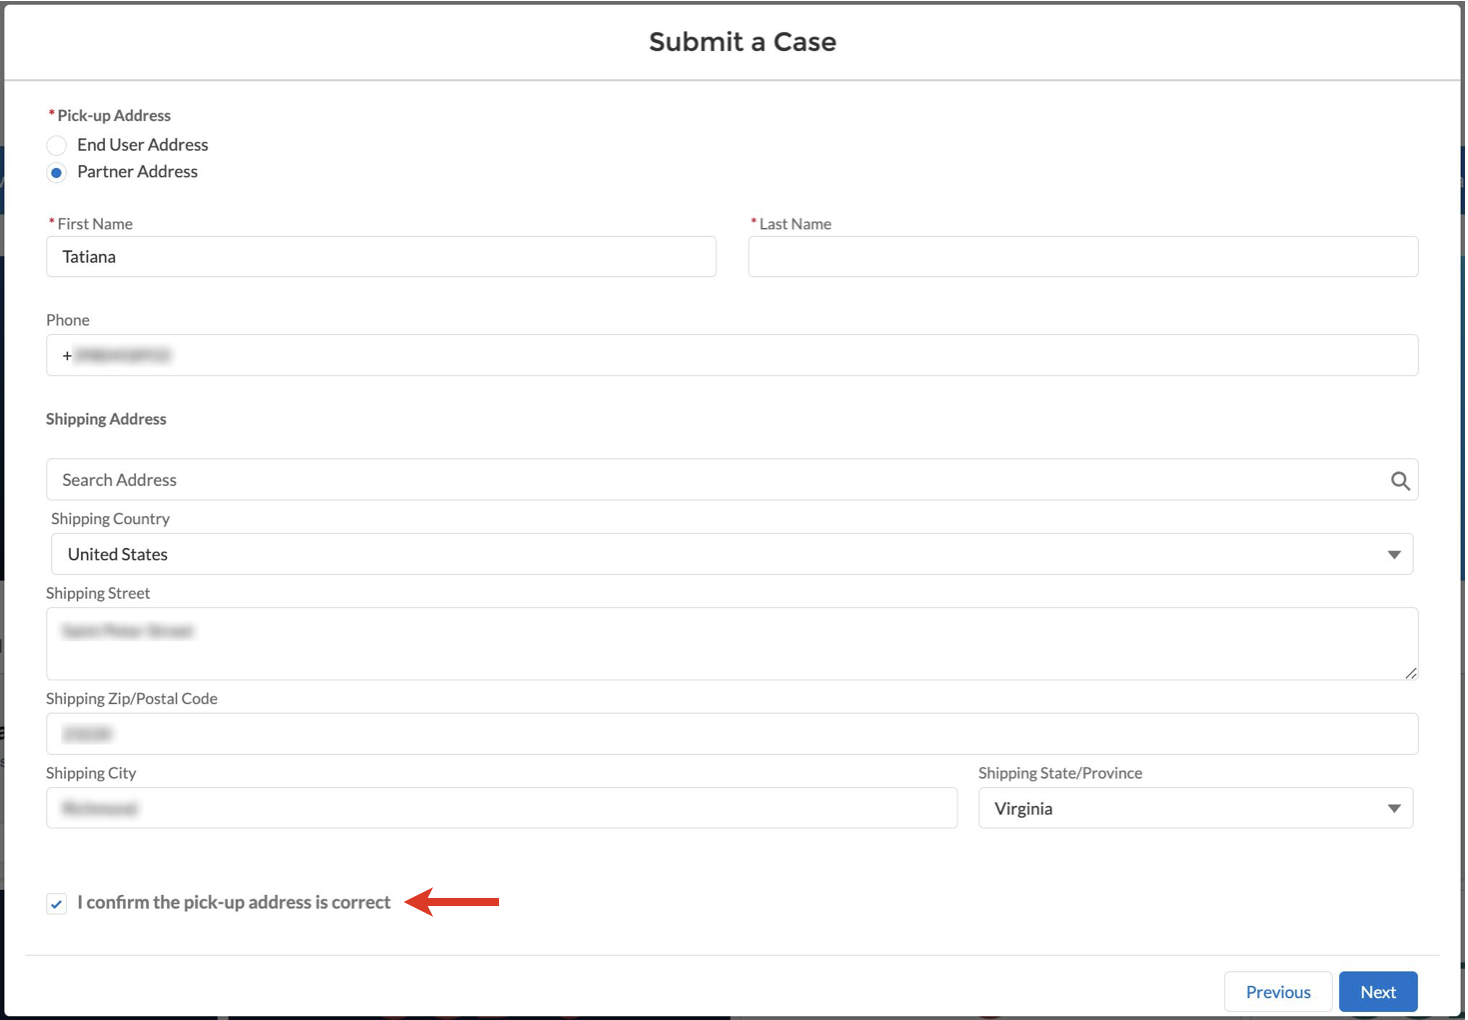
Choose a pick-up address and click Next:
Note:
- If you choose Partner Address, the contact fields are pre-filled with the details of the Partner submitting the case. The address is taken directly from the current account.
If you choose End User Address, the address fields are pre-filled with the address from the Customer account, which was selected previously.
If needed, you can modify contact or address details. These changes are saved only for the case record and the contact information are not changed.
- Review the pick-up address and confirm it is correct, click Next:
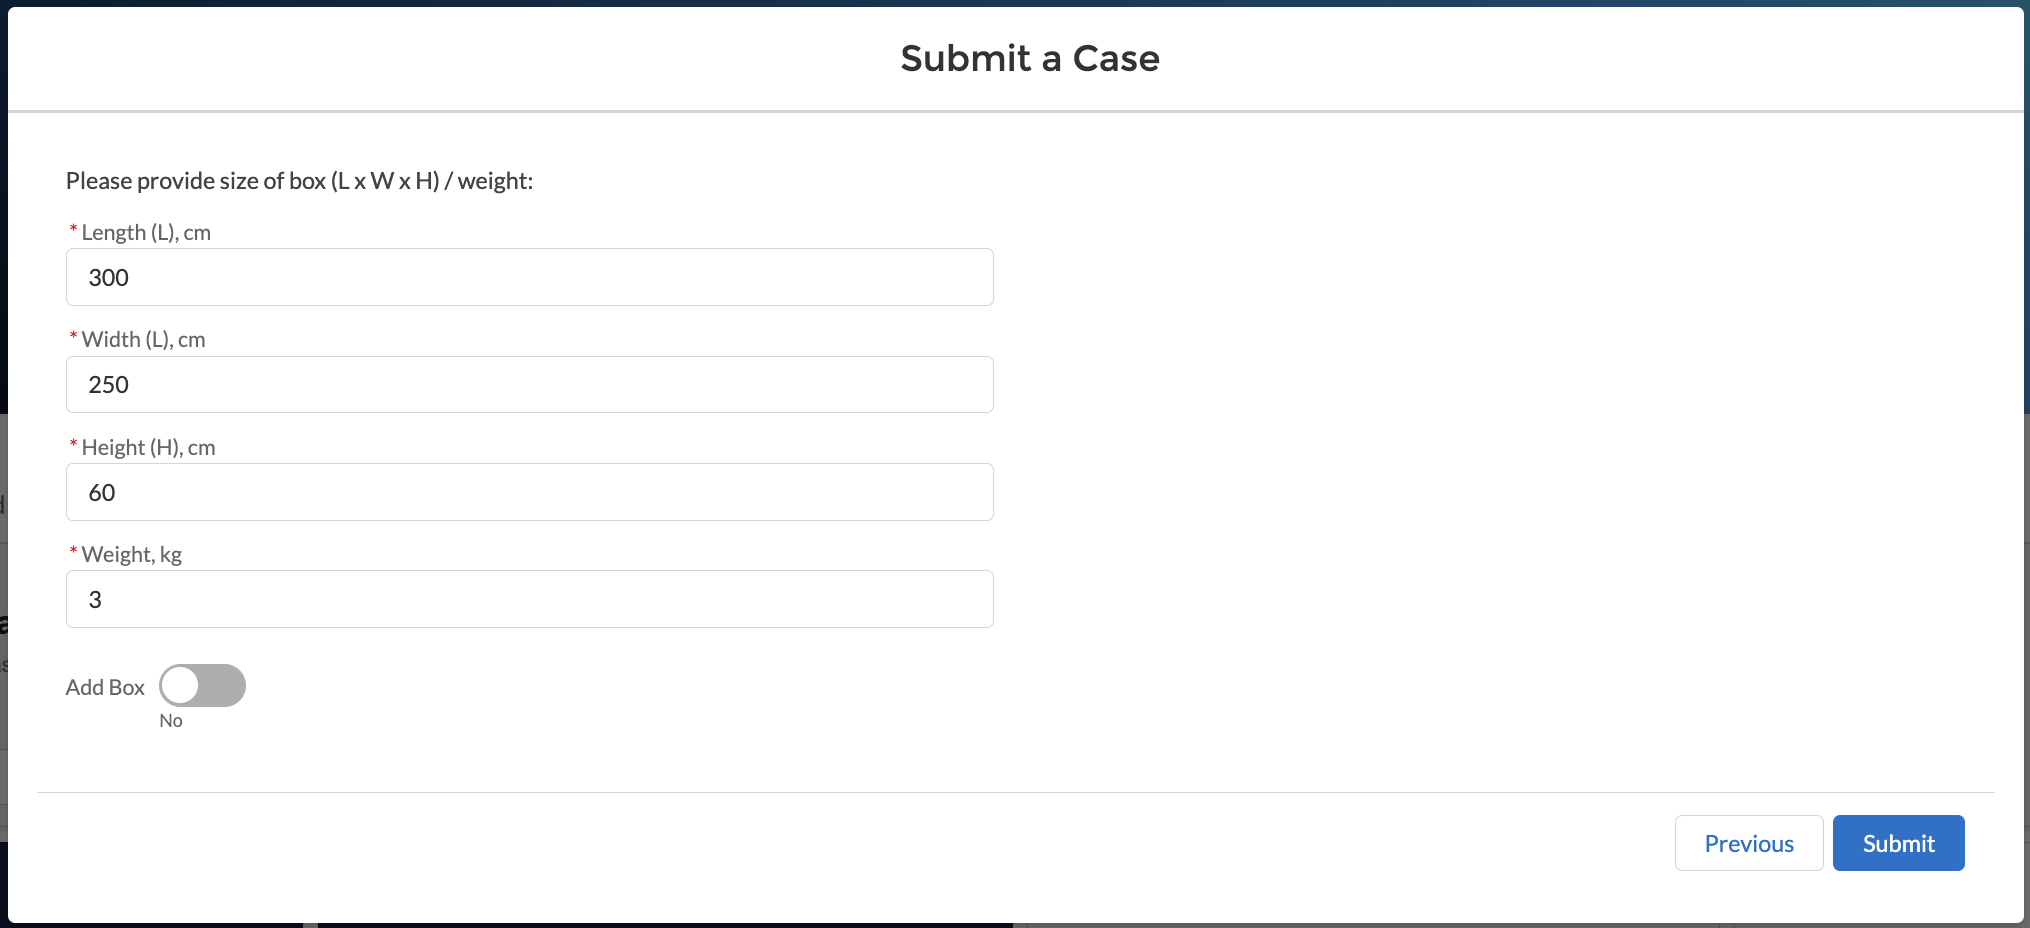
- Provide box sizes and click Submit:
Note: If you need multiple boxes, enable the Add Box toggle:
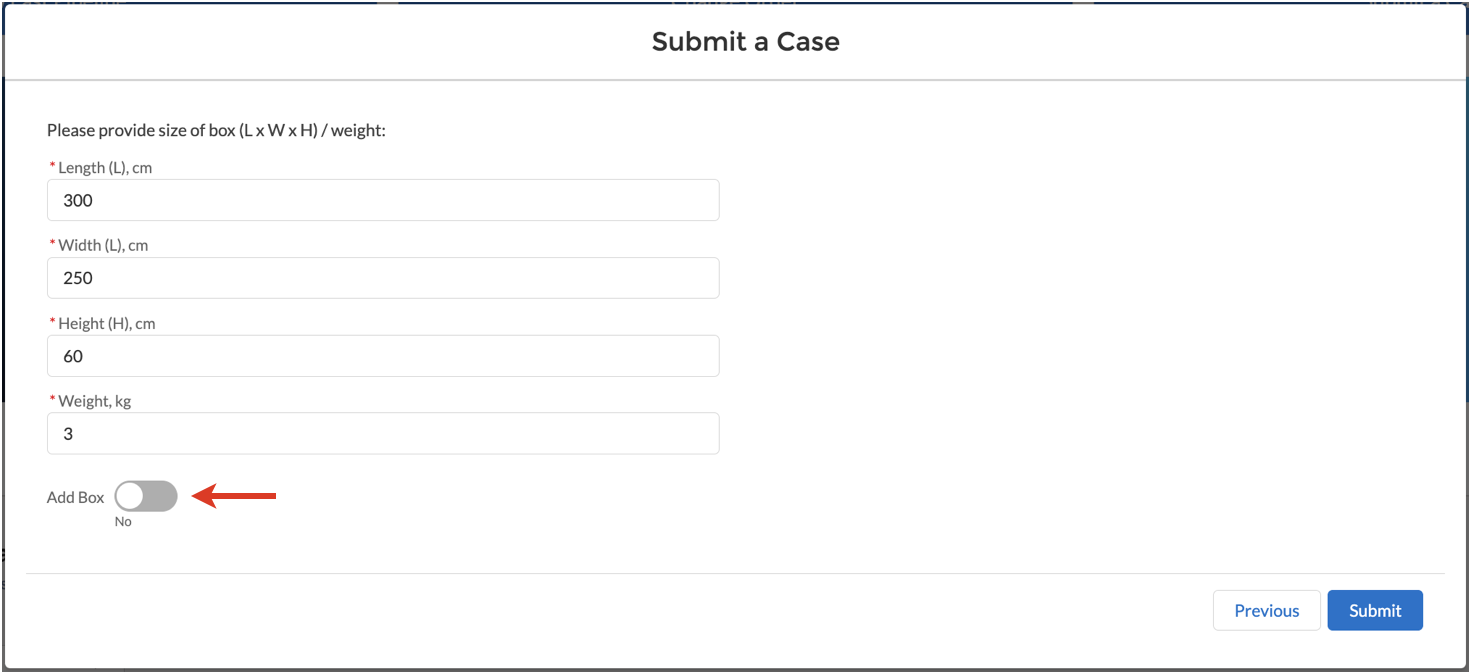
The maximum number of boxes is 3.
Important: In case the devices are not delivered back to the Wildix WareHouse within 1 month, the HWaaS cancellation request is terminated. The warning email is sent in 2 weeks after the cancellation request.
Billing of the devices (provided they had already been in use for more than 6 months) is automatically stopped on the date of cancellation request. In case HWaaS cancellation is terminated, the billing is resumed.
HWaaS Upgrade
Note: Before submitting HWaaS upgrade request, you need to open a Customer Care Case. This Customer Care Case number will then be required to open the HWaaS Upgrade request.
- Select HWaaS Management as Case Type and for Case Reason, select HWaaS Upgrade:

- Link the appropriate Customer Care Case related to this request by adding case number in the Customer Care Case field:

- Choose Customer Account related to the request and click Next:

- Select devices the case is related to and click Next:

- Provide the reason of the request filling out the Subject and Description fields and click Next:

Choose delivery address:
Note:
- If you choose Partner Address, the contact fields are pre-filled with the details of the Partner submitting the case. The address is taken directly from the current account.
If you choose End User Address, the address fields are pre-filled with the address from the Customer account, which was selected previously.
If needed, you can modify contact or address details. These changes are saved only for the case record and the contact information are not changed.
- Review the address and confirm it is correct, click Next:
- Choose pick-up address. In case delivery and pick-up addresses are the same, tick off the checkbox in front of "Pick-up address is the same as shipping address?":

- Provide box sizes and click Submit:
Note: If you need multiple boxes, enable the Add Box toggle:
The maximum number of boxes is 3.
Get RMA ID and Tracking Link
After HWaaS management case is confirmed RMA ID and Tracking links are added on the Case page in the relevant fields:
![]()
HWaaS cancellation submitted during change order
HWaaS cancellation cases can be created as a result of change order operation (documentation Change Order and Fast Change Order Process in SFPC). As soon as order is created, HWaaS Cancellation case is automatically created. On the Order page, there is a notification requesting to proceed to the HWaaS Cancellation case (1) and the relevant case displayed in the Cases section (2):

To proceed with a cancellation request you need to provide device information and pickup address.
- Open to case and click HWaaS Management:

- The products are filtered by product code based on items canceled or downselled in change order. Select the same number of products as the number of products that were canceled/downselled in the change order:
- Choose the address type: End User address or Partner address:

- Provide the pick-up address and confirm it is correct:
- Provide box size and click Save:

- After the case is confirmed, you can proceed with the Order confirmation. Go to the Order page, click Confirm Order and fill out the necessary details (you can view detailed instructions in the guide How to Create Quote and Confirm Order in Salesforce Partner Community).
For Resellers
Report an issue
- Click Submit a case:

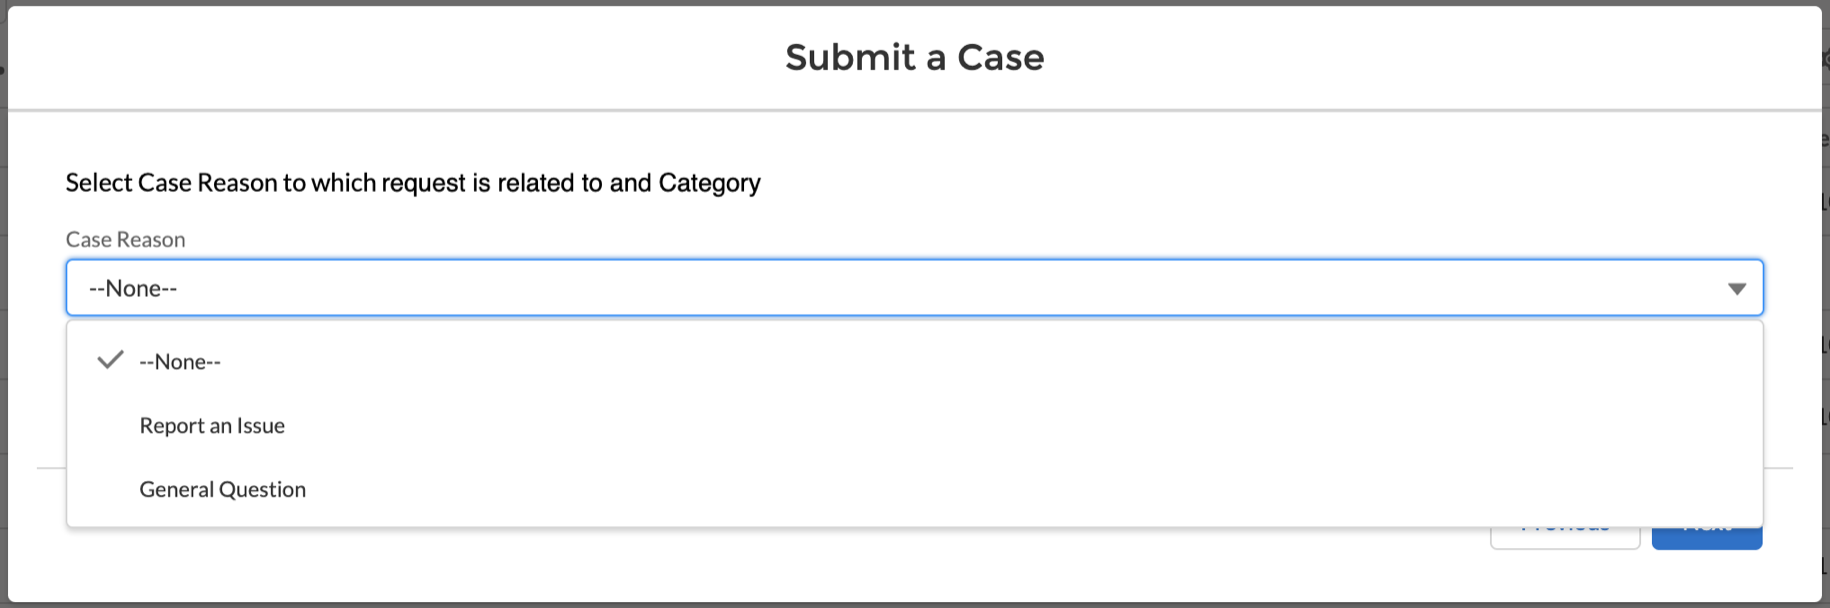
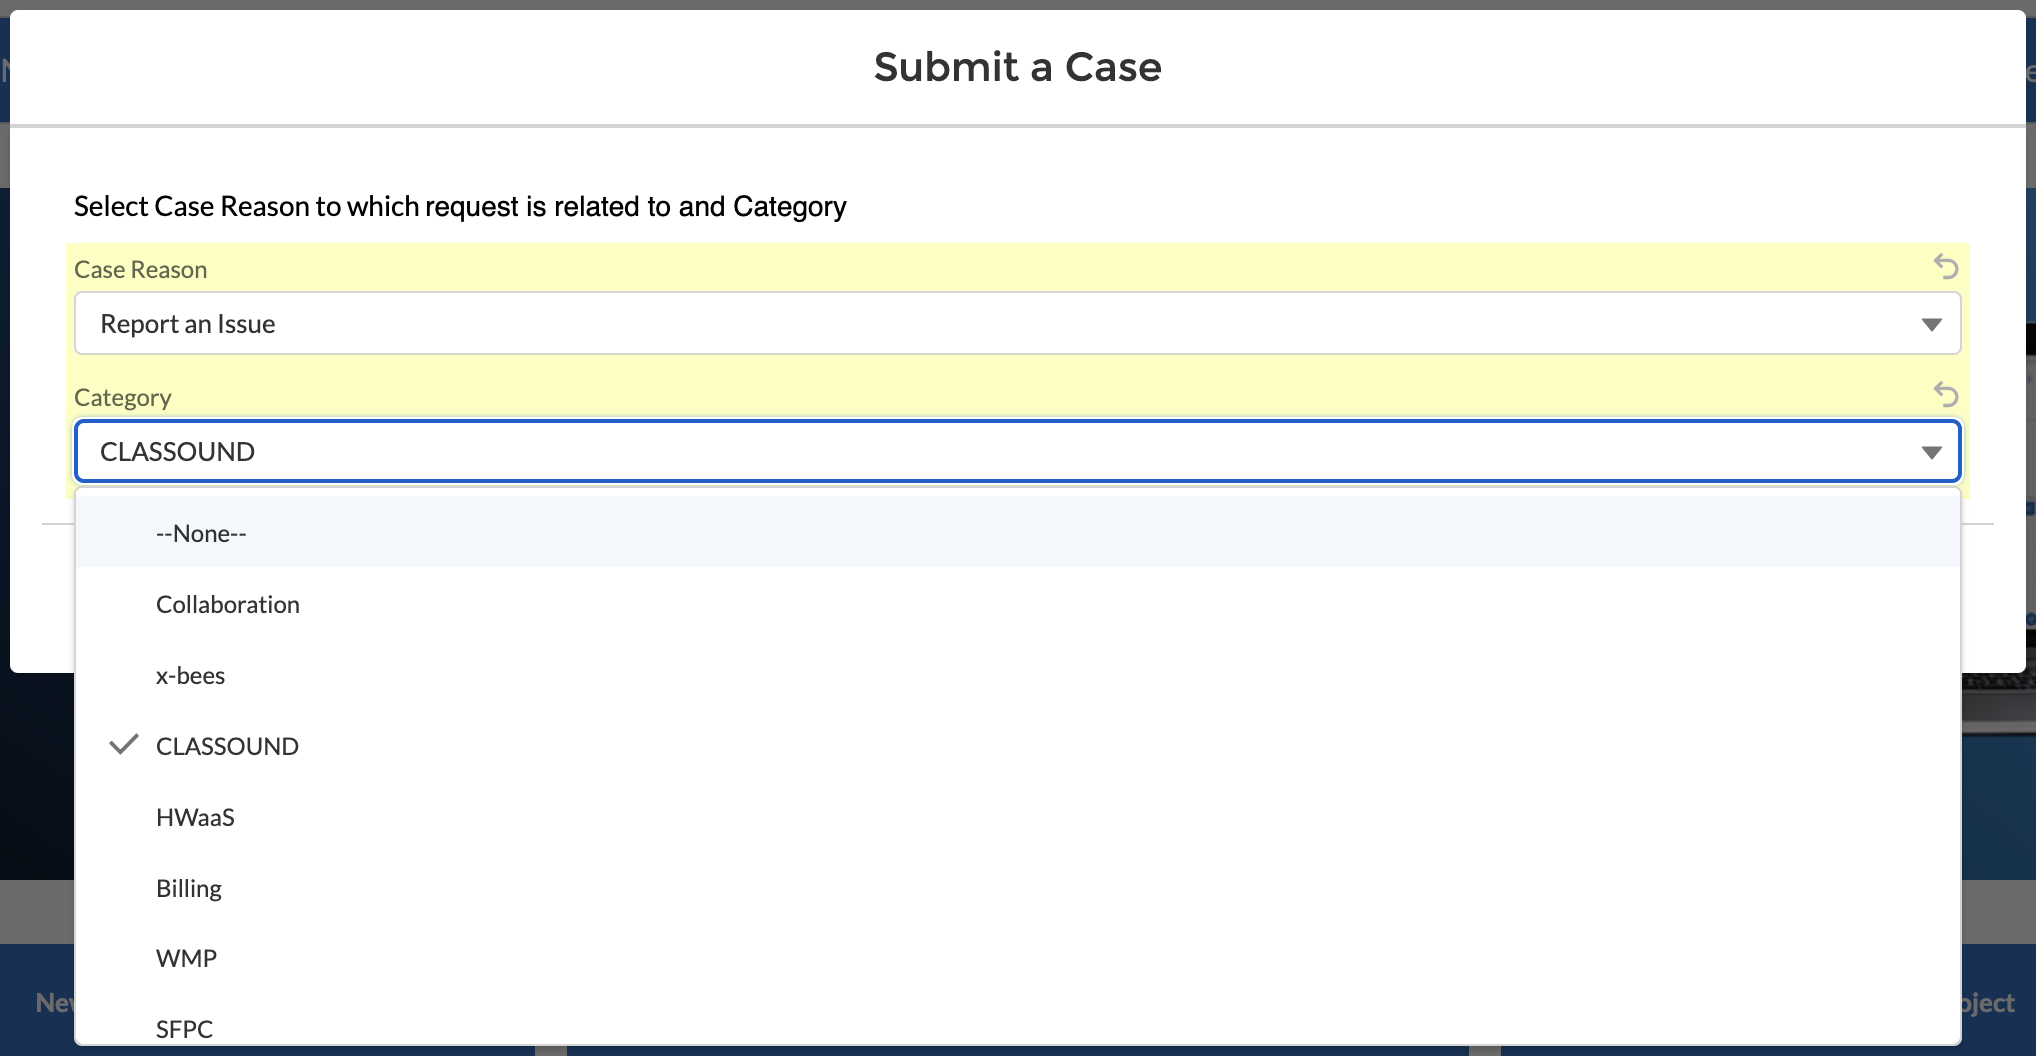
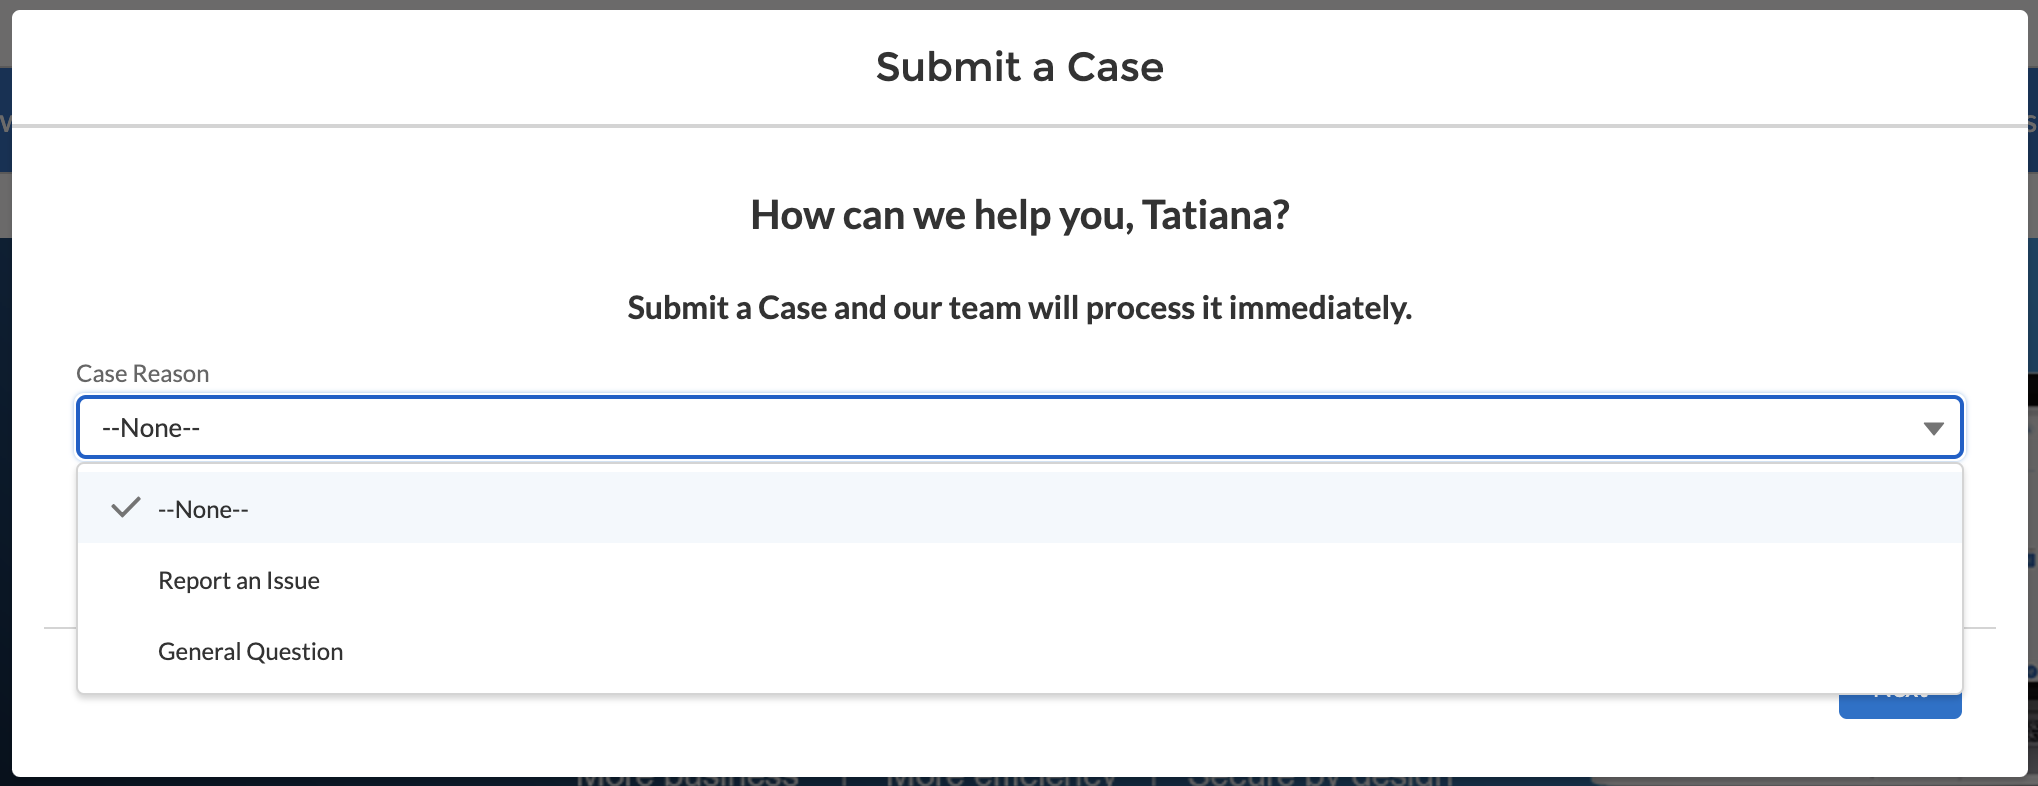
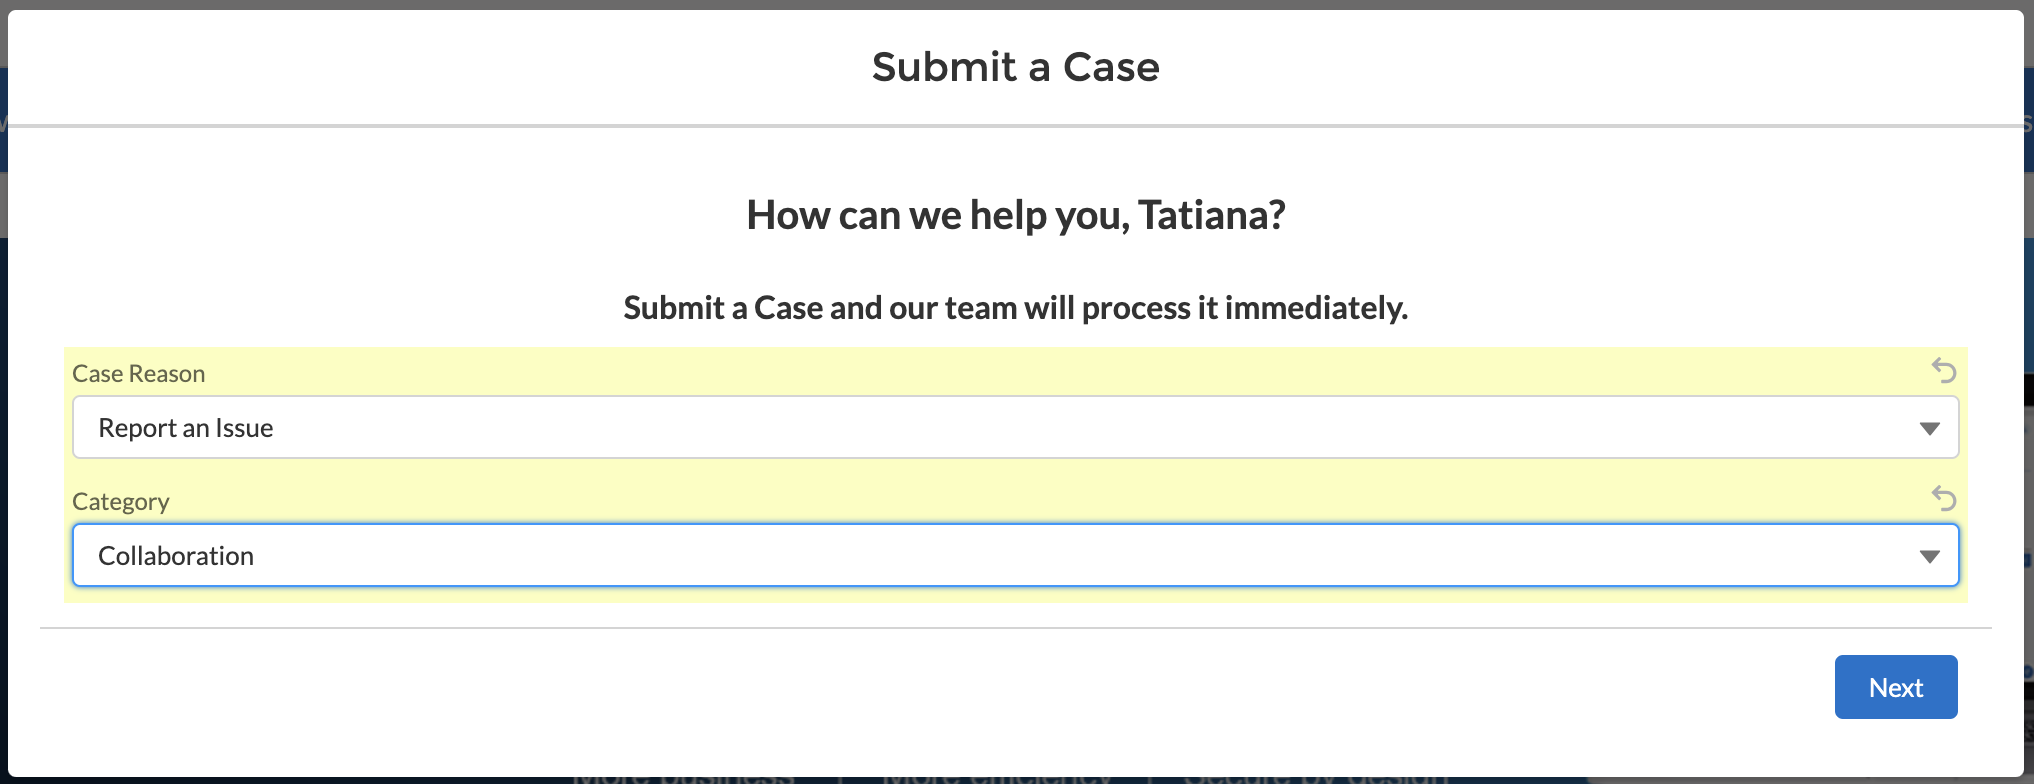
- In the Case Reason, select the option Report an issue:
- Choose category:
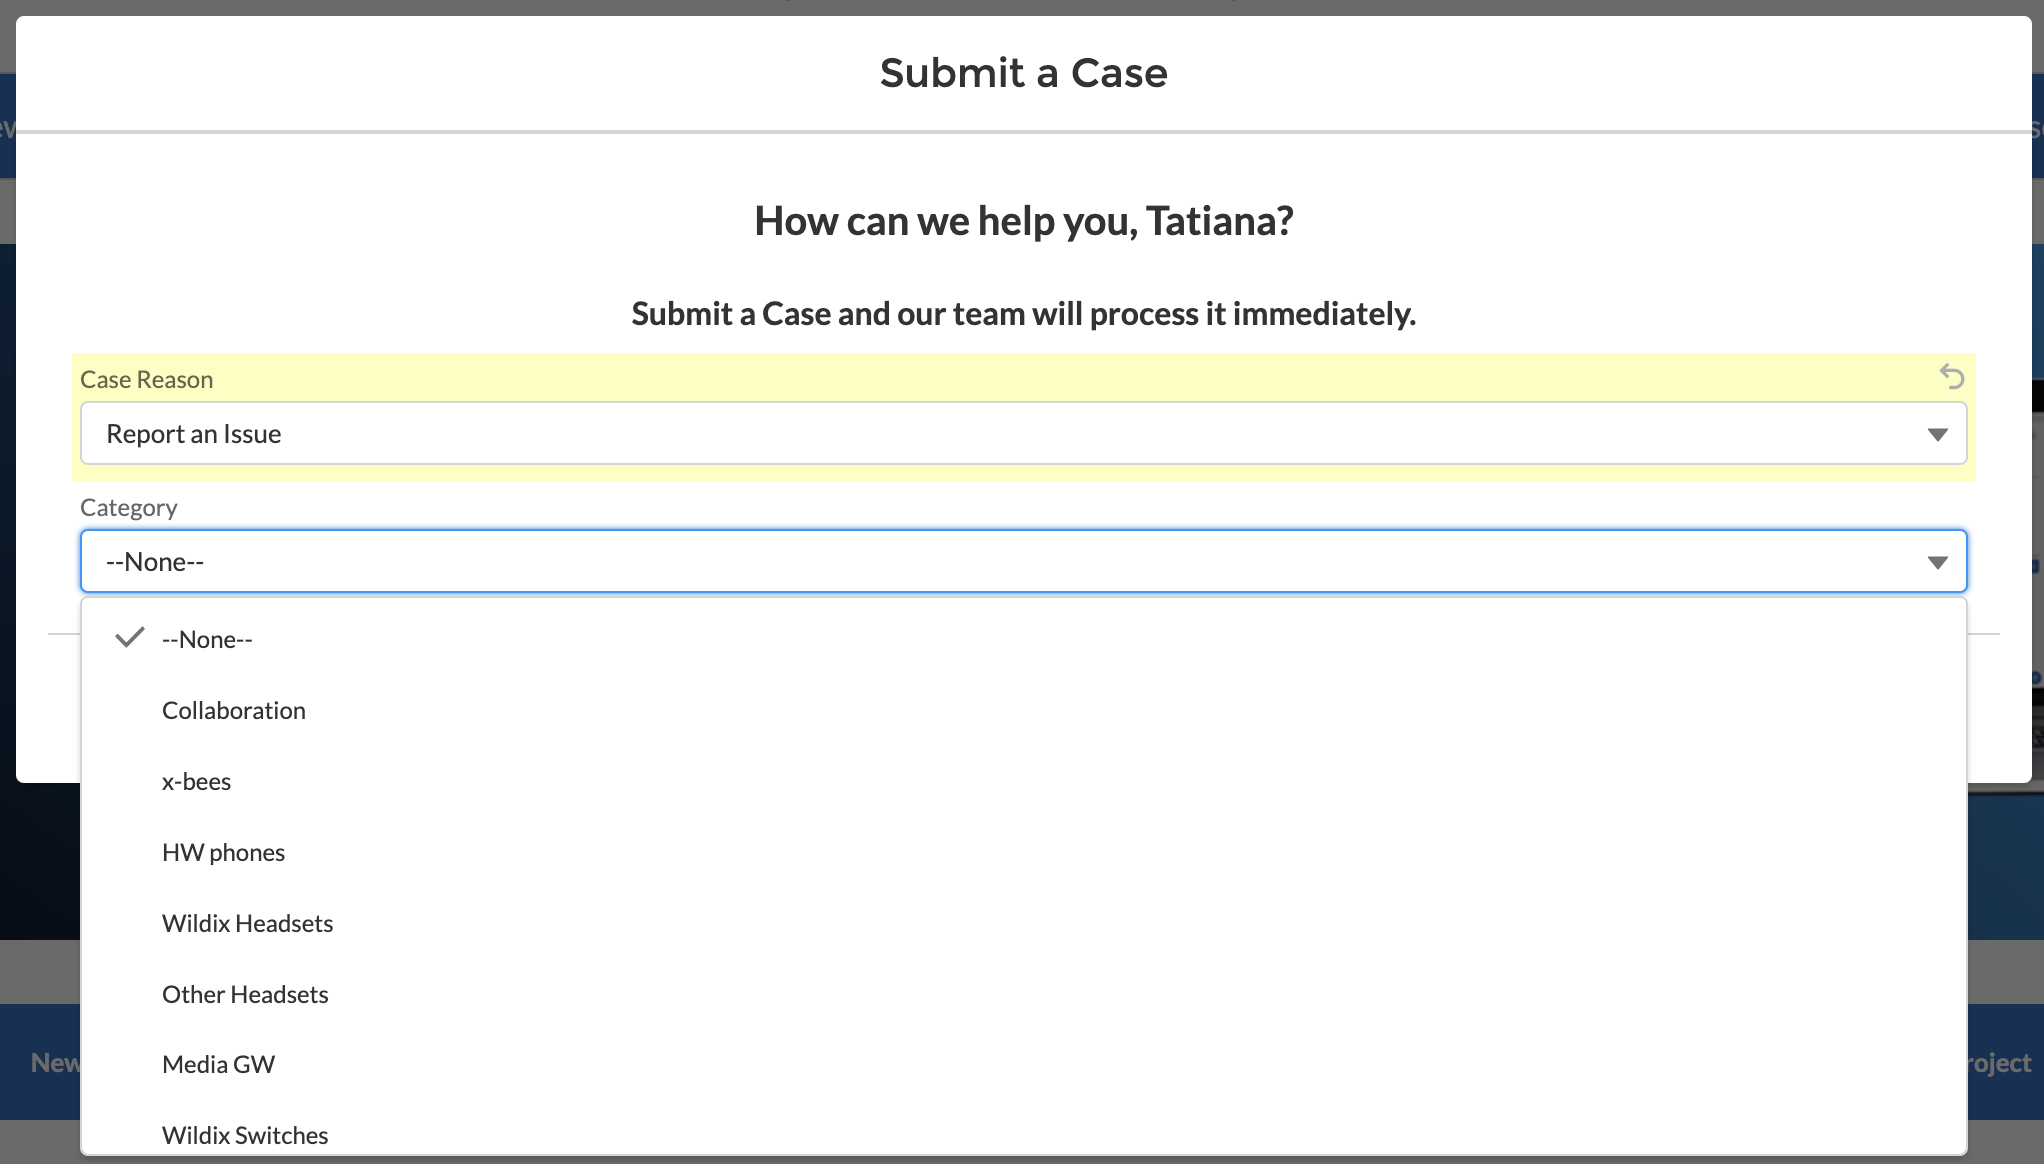
- Once chosen, click Next:
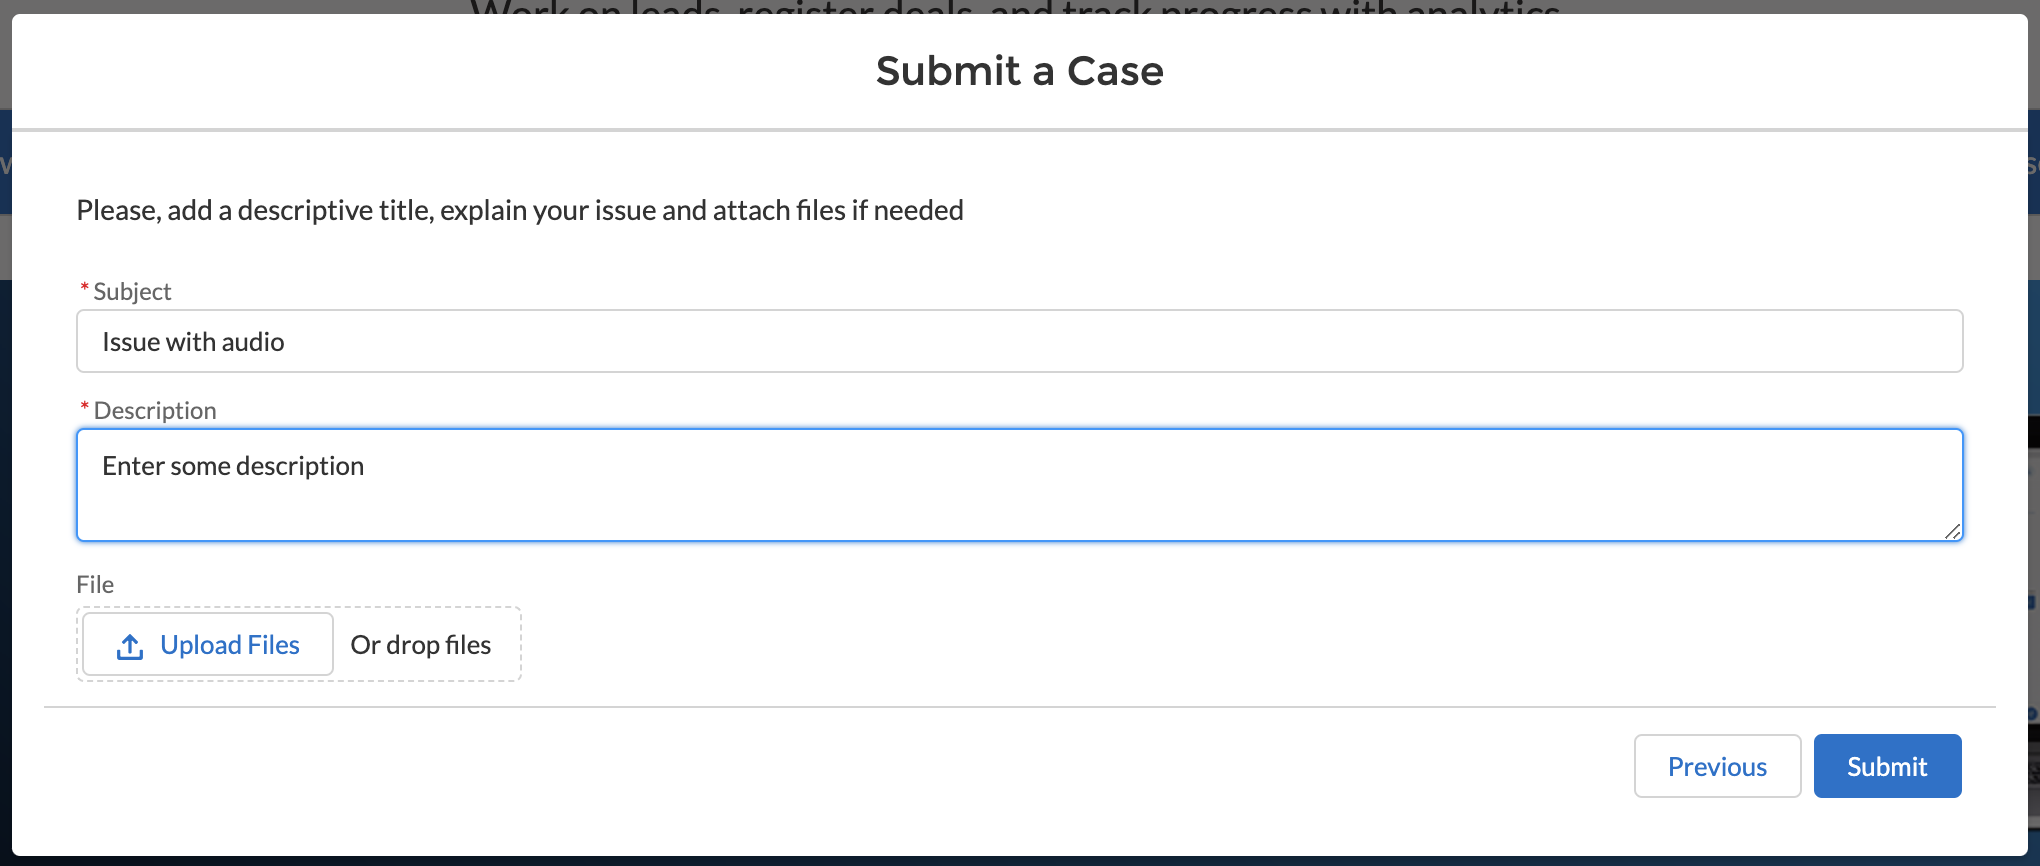
- Enter Subject, Description and attach files, if required and click Submit:
After clicking Submit, you get the confirmation in Partner Community with the link to your case:
Also, confirmation is sent to email, which includes the name of the case, case number and link to the Case. The submitted case is assigned to partner’s queue.
Ask a general question
- Click Submit a case:
Choose the option Tech Support or Customer Success
Note: For UK market, the prerequisite for opening a Tech Support ticket is a completed W-FE Prerequisite training.
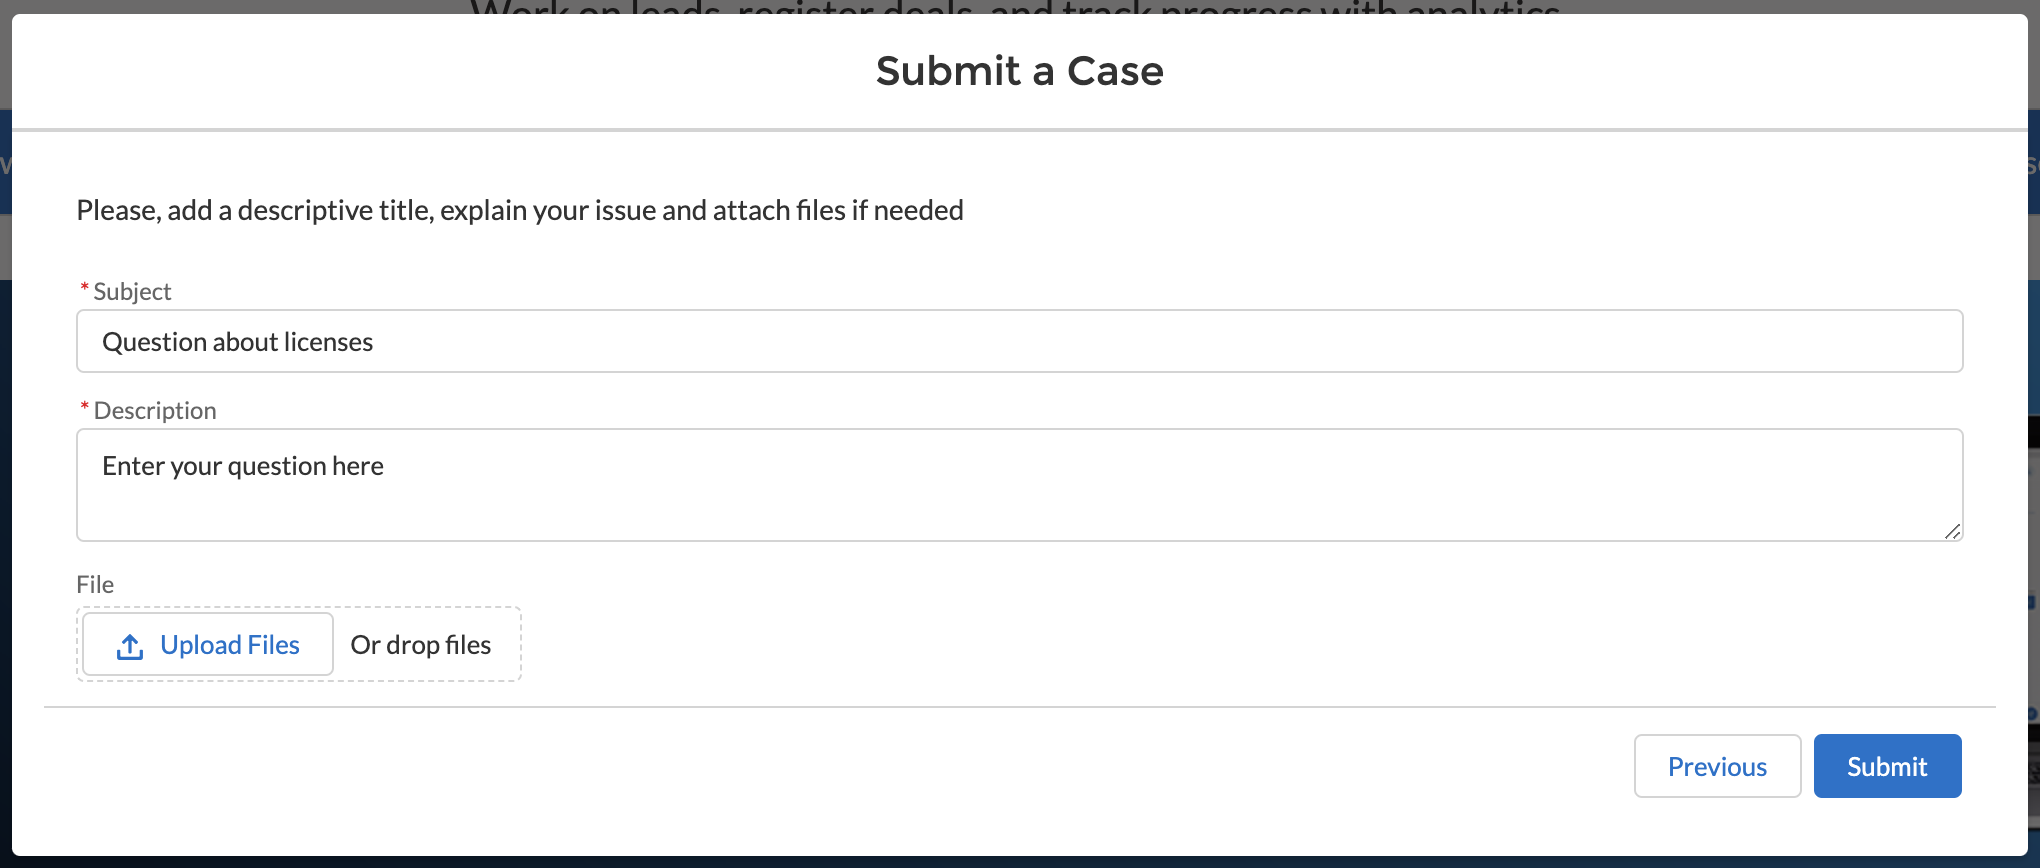
- In the Case Reason, select the option General question:

- Choose Category and Sub-category:

- Select Account and if required, choose device type and click Next:

- Enter Subject, Description and click Submit:
After clicking Submit, you get the confirmation in Partner Community with the link to your case:
Also, confirmation is sent to email, which includes the name of the case, case number and link to the Case. The submitted case is assigned to partner’s queue.
Instructions for Partner when Reseller submits a case
When a Reseller submits a case, it is assigned to Partner's queue:

In case Wildix Customer Support assistance is not required, Partner can change status of the case by himself:

Or, Partner can escalate case to Wildix Support. For this, click Escalate to Support:

Choose type of the issue, Customer Care (e.g. billing issues, invoices, questions about the account) or Tech Support (to report any technical issues):

Choose Case reason and Category, Sub-category (if required) and click Escalate:

Once case is submitted, you should receive confirmation email.
Note: Once reassigned to Support, a new case is created with Tech support or Customer care record type. The contents of the case (subject, description and attachments) are copied from the Reseller's original case. The new case is linked to the reseller's case.
On the Reseller's side, the case gets marked as escalated:

Important: Reseller doesn't have access to the new case. Any updates of the new case are not visible to Resellers, so Partners need to update the original Reseller case to provide Resellers with the necessary information.
View your case
When you click the link to your case either from confirmation pop-up after submitting a case, or from email, the Case tab opens with the details of your case:

The Details tab includes such information as Case Owner, number, status, priority, approximate closure date, device information (item code, device S/N, PBX name, PBX S/N), as well as description:

The Related tab displays cases, emails, and attachments related to the case:

Your case is always accessible on the Cases tab in Salesforce Partner Community:

Manage your case
To provide any further details about the case, open your case in Partner Community and proceed to the right-side panel (called Chatter):

Here, you can write a message to the Support Team and attach any additional files if required, and click Share:

Responses from the Support team are also displayed here:

Once there is a message from Wildix Support, you also get the relevant notification to the email address:
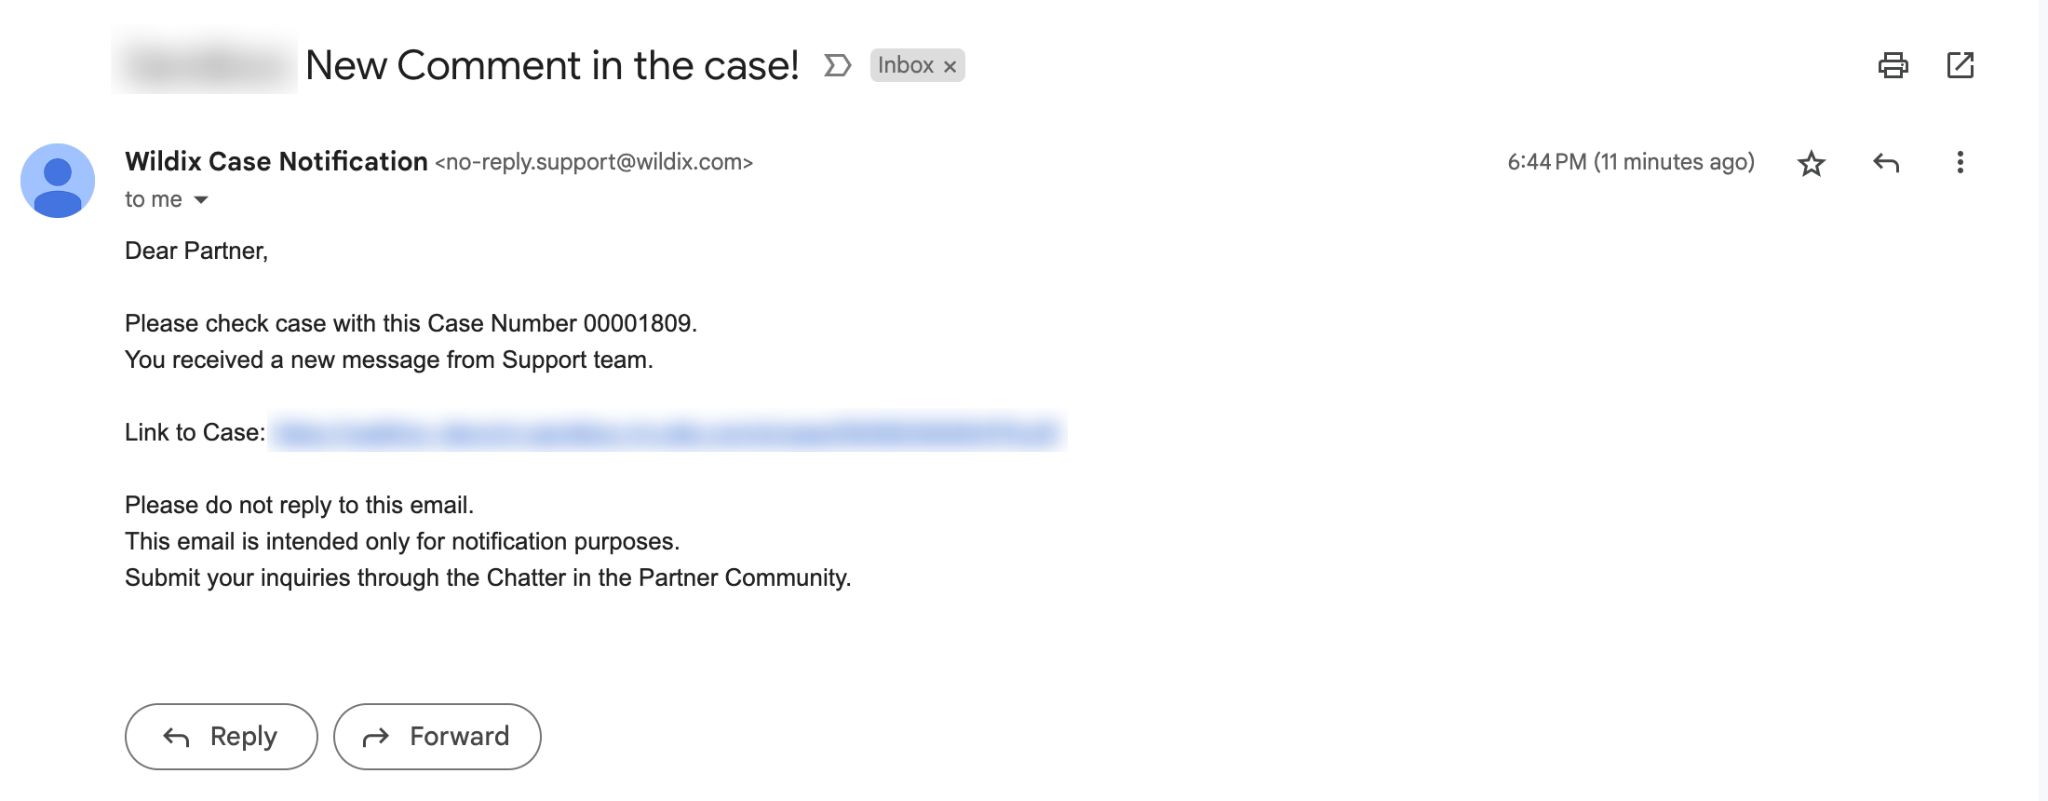
The email is intended for notification purposes only. Any replies or inquiries need to be handled via Partner Community Chatter, so that all communication is in one place.
Re-Open the Case
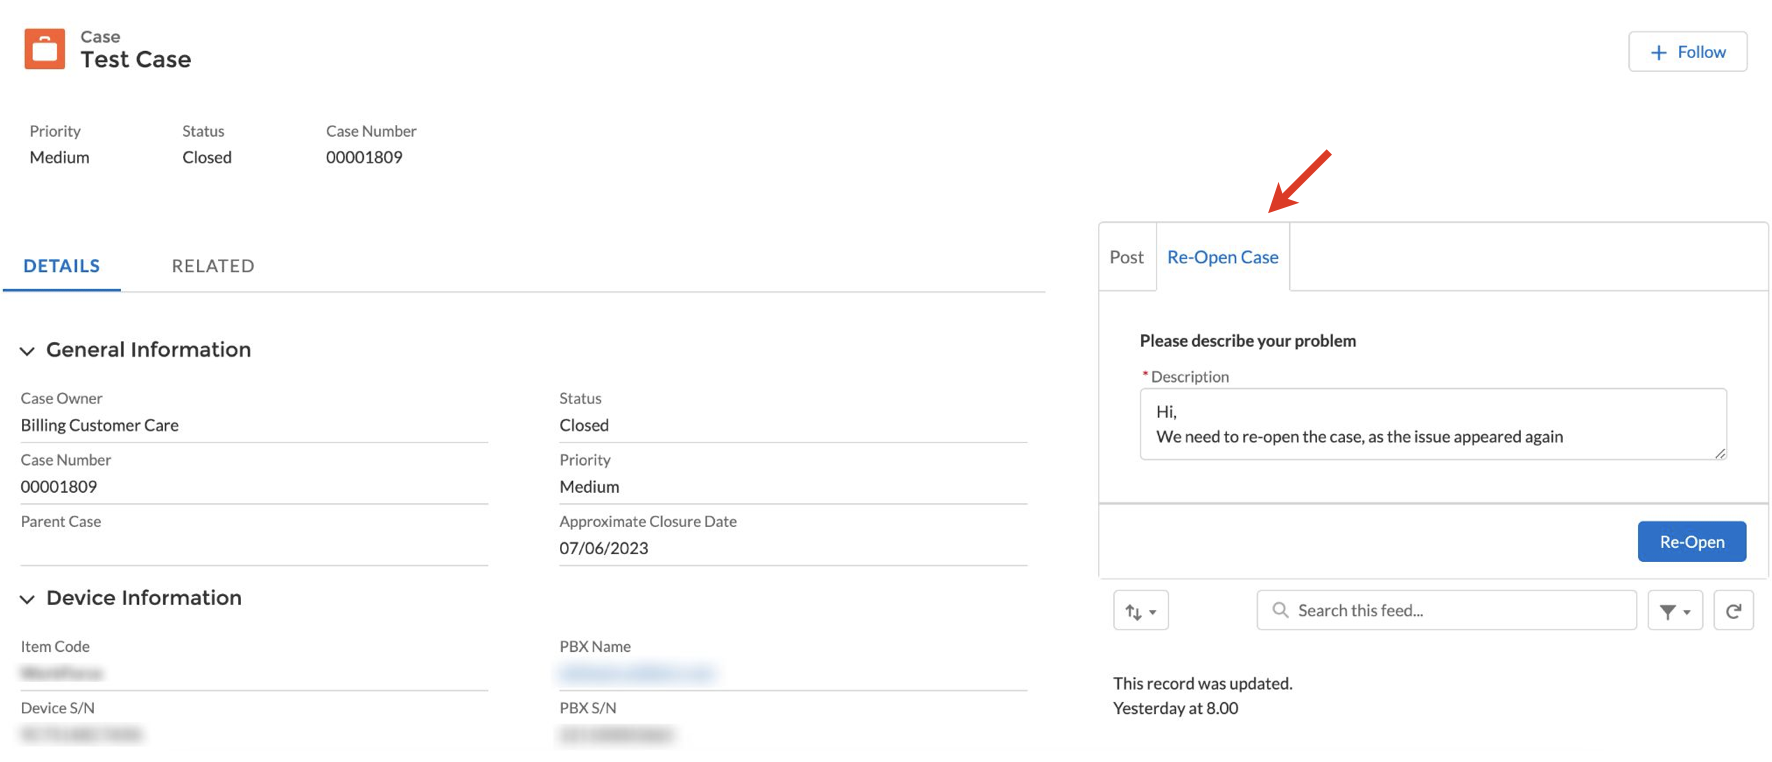
If you need to re-open the case for any reason, click Re-Open Case, provide details in the Description field and click Re-Open:
Note: You can reopen Tech Support and Customer Care cases.
Customer Success and CLASSOUND cases cannot be reopened.
After re-opening, a new case is created and it becomes available in the Related Cases section:
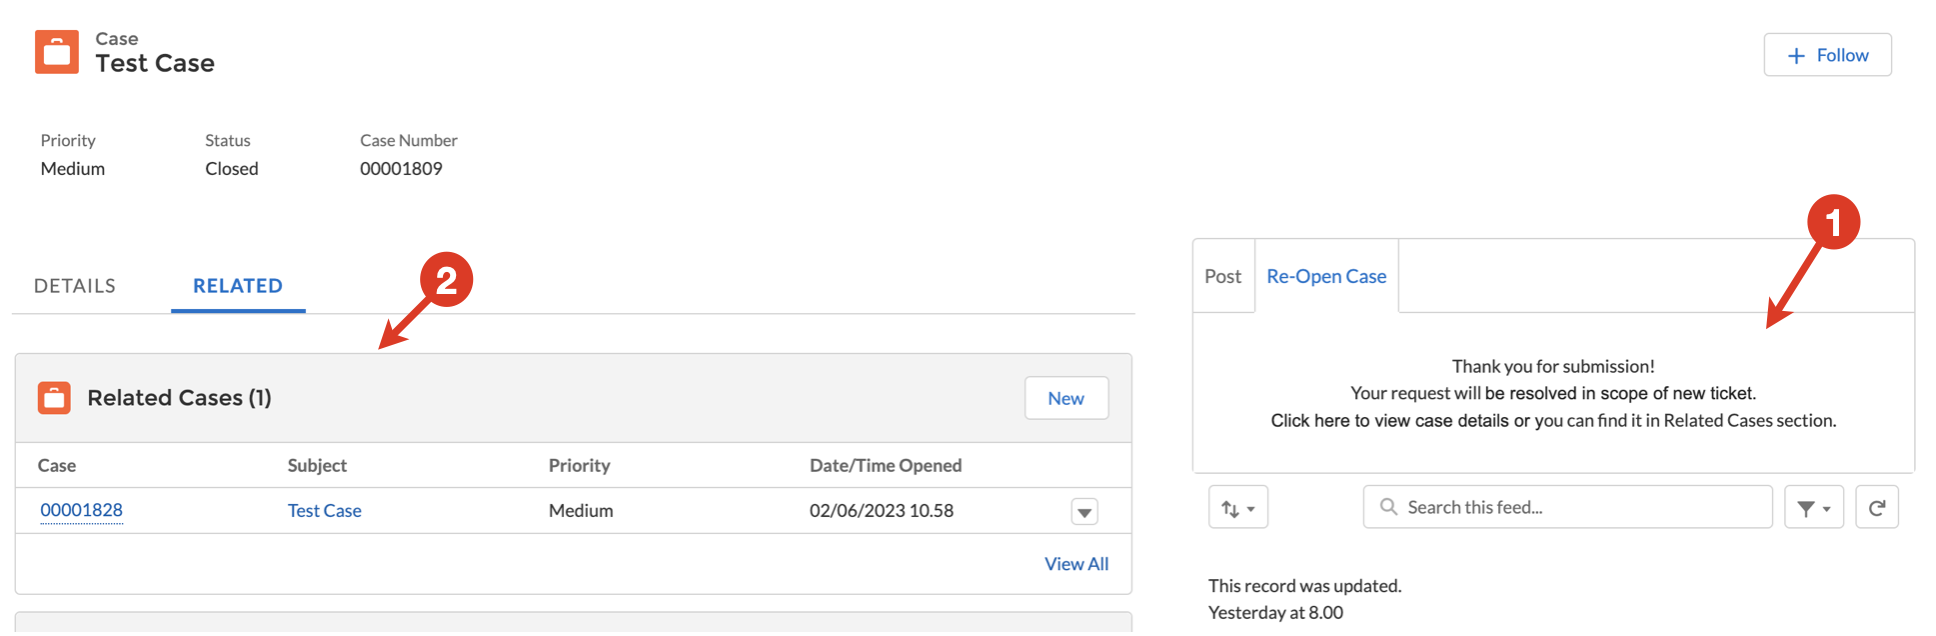
Further communication regarding the re-opened ticket is performed in the newly created related case.
Rate the Service
When the case is closed, you can rate the Support team service and leave your feedback, which could help us make our service even better for you. The relevant email is sent to your email with the request to evaluate the service and the link to the closed case.
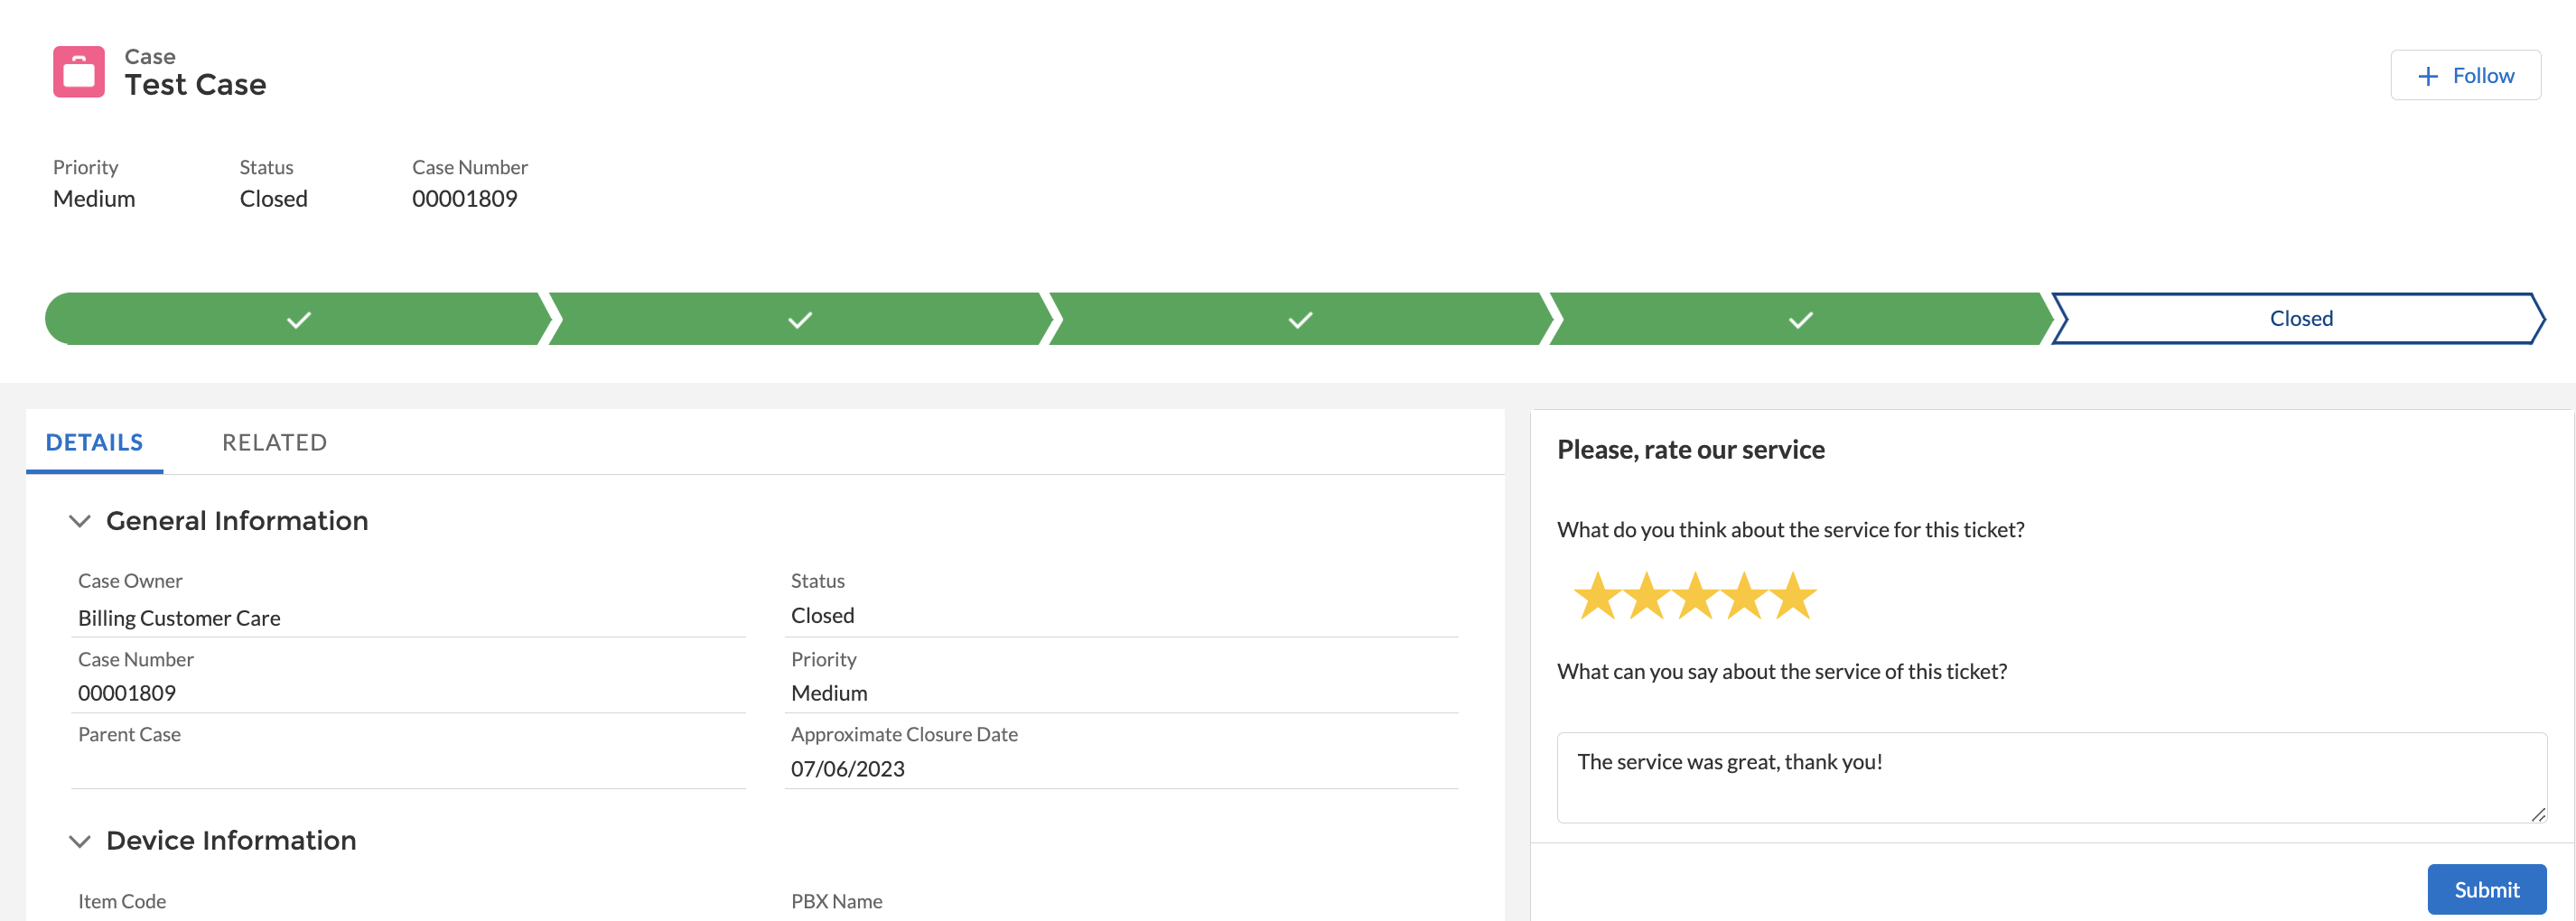
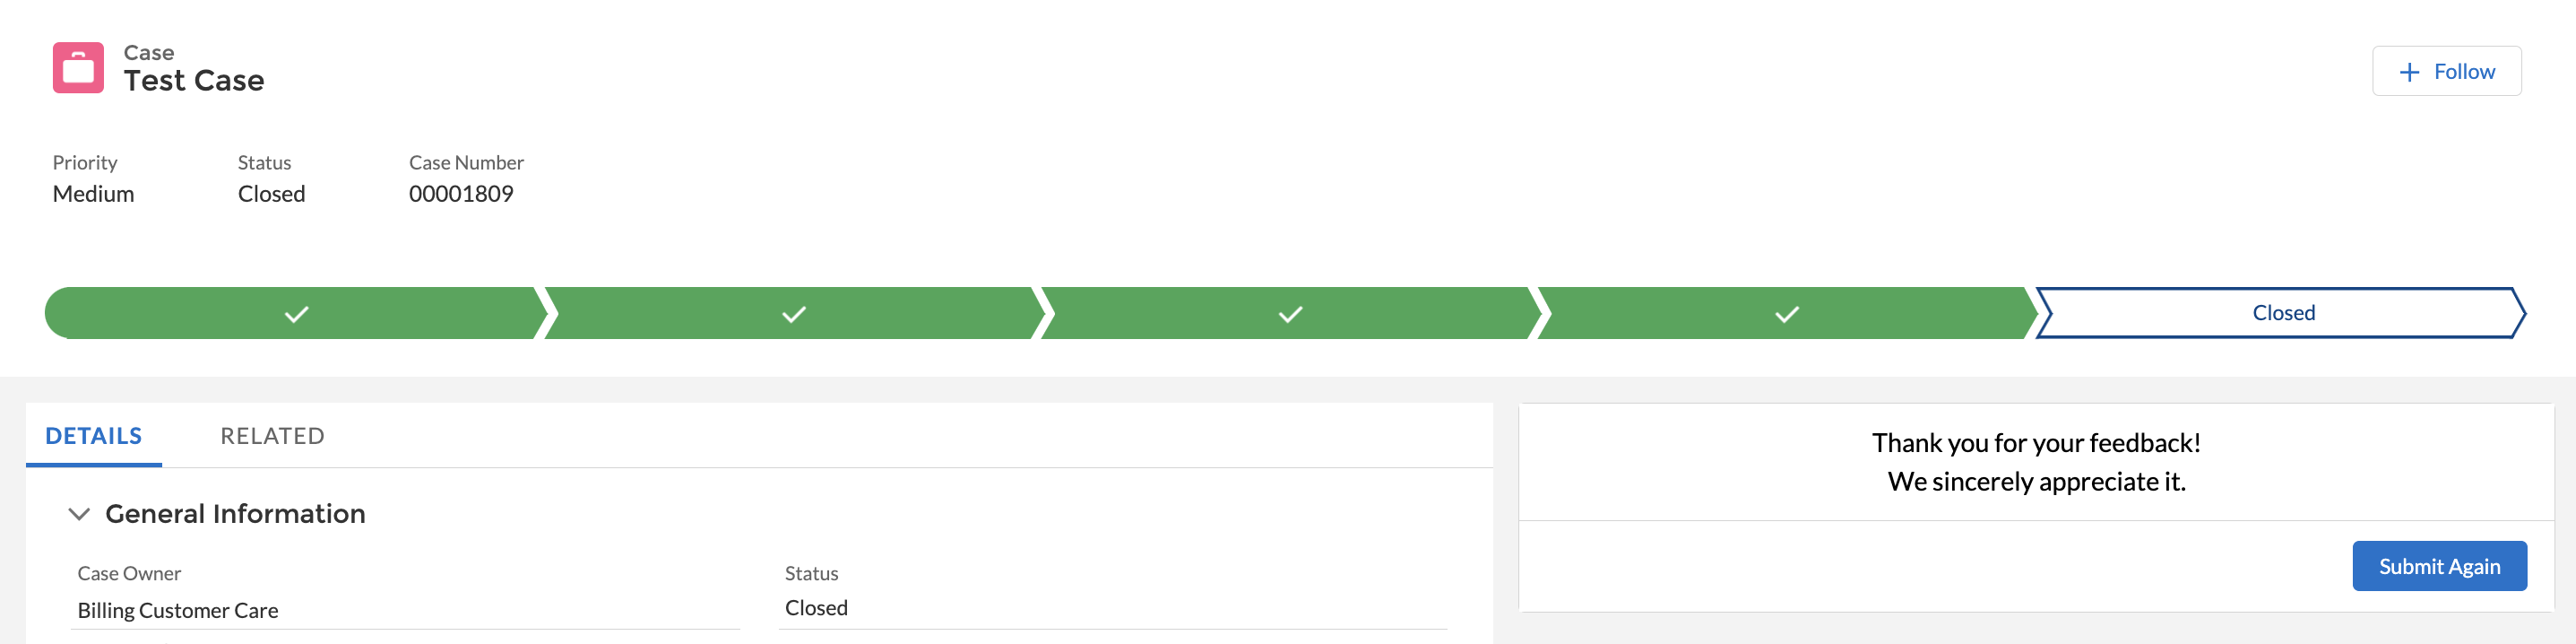
On the page of the case you can find the section Please, rate our service:
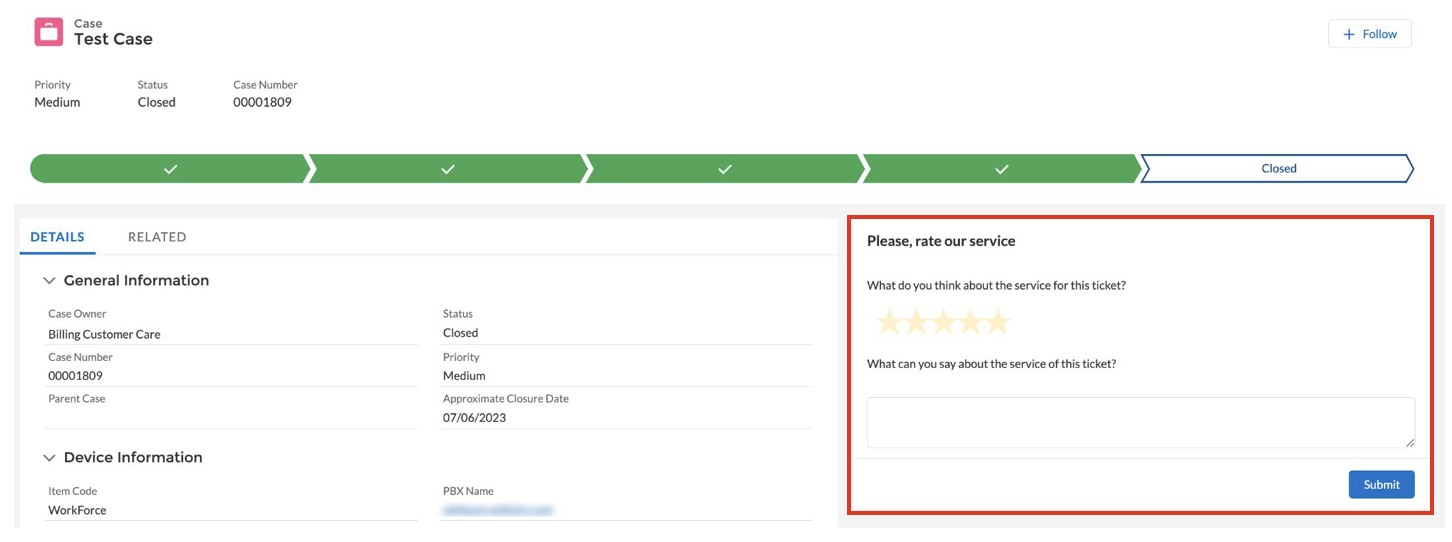
Rate the service, leave a comment if you wish and click Submit:
If you want to submit another feedback, click Submit Again:
Request assistance (POC, Pre-Sales, Feature Request)
It is possible to request assistance by clicking Request Assistance button on the Opportunity page:
 On the window that pops up you can choose one of the options:
POC (available for projects with x-hoppers product of interest only)
Pre-Sales
Feature Request

Note:
- It is possible to request only one POC (proof of concept) per project.
- You can have only one open Pre-Sales case per project.
- For feature requests, you can create multiple cases.
Choose the necessary option and click Next. On the next screen, enter Subject and Description and click Submit:

In case of a Feature Request:
You also need to choose Case Reason (Potential or Existing Customer) and Category (New Feature or New Integration Request), as well as indicate if it is a blocker to win the project:

On the next window, choose if the customer already generates MRR, if it will be possible to arrange a call/ meeting and by when the final decision should be taken:

In case of an Integration request, you are also asked to provide link to the desired integration. Then, provide details about the business case the new feature is required for, by adding Subject and Description:

Click Submit. Once submitted, a relevant case is created:
