Debugging of Wildix Integration Service and related components
- Ksenia Babych
- Tatiana Bieliakova
- Former user (Deleted)
This Article explains how to debug Wildix Integration Service and related components.
Updated: January 2023
Permalink: https://wildix.atlassian.net/wiki/x/RRzOAQ
Review of versions
All integrations/ components can be installed from Collaboration - > Settings - > Extensions:

If an integration/ a component is not yet installed, click INSTALL to download a package and launch the installation.
If a new version is available, click UPDATE to get the latest one. INSTALLED indicates that the latest version is installed.
For more information on WIService installation and update process, check out the guide What is WIService: Installation
How to collect WIService logs on macOS
- Open "Go to Folder" window by pressing Shift+Cmd+G
- Insert the path of the folder: ~/Library/Application Support/com.wildix.wiservice
- Сlick Go
Or
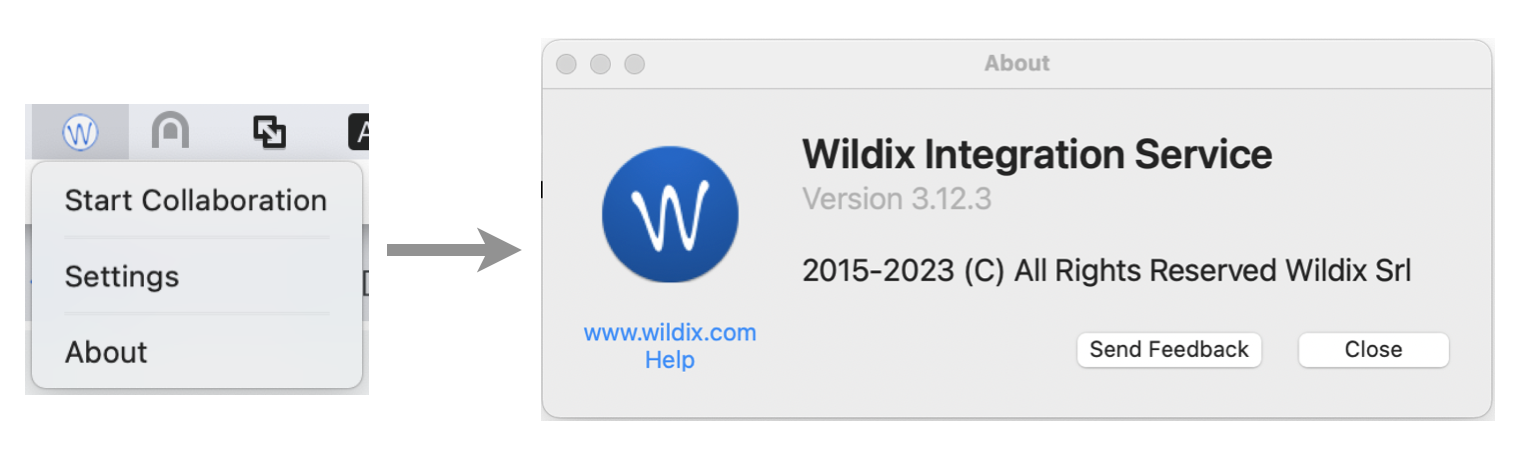
- Go to macOS status menu
- Click on Wildix Integration Service icon
- Select About and click Send Feedback
Enter description of the bug you've encountered and click Send Feedback
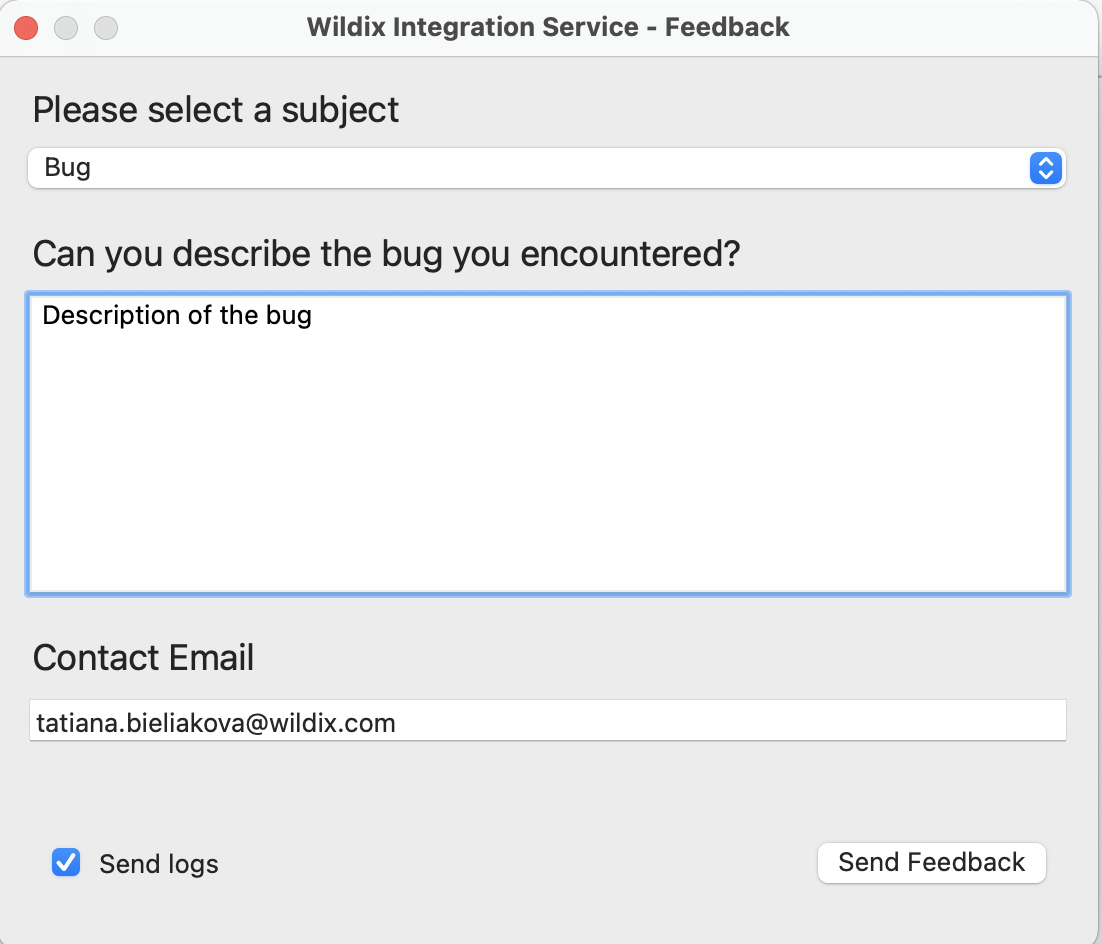
Note: The checkbox Send logs is ticked off by default. Make sure not to disable it.
Note: Starting from v 3.2.17, WIService logs include Headset integration logs.
Starting from v 3.4.1, WIService also includes Screen sharing logs.
How to collect logs from Wildix integrations - Windows
Collect WIService logs
- Open Windows Explorer (File Explorer)
- Insert the path of the folder: %APPDATA%\Wildix\WIService
To view logs, open wislog.txt file.
Or
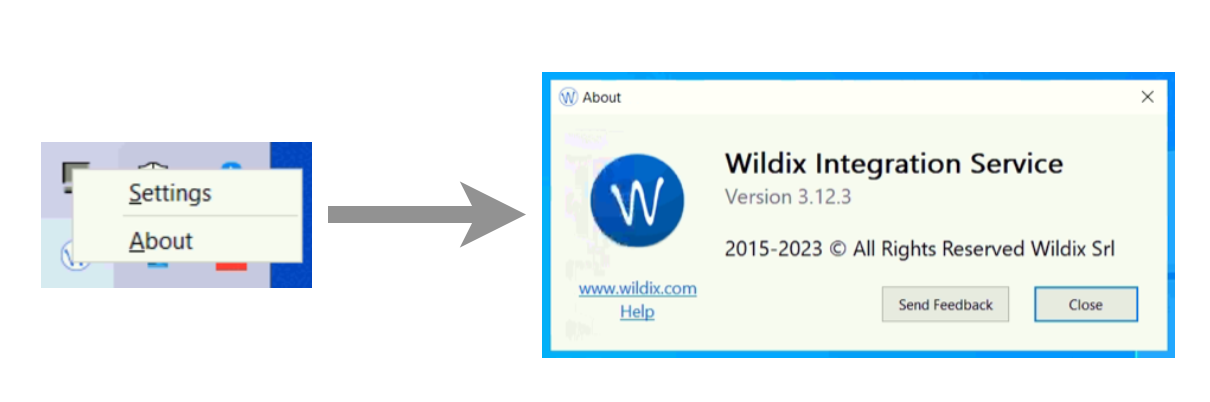
- Go to Windows Quick Launch toolbar
- Click on Wildix Integration service icon
- Select About and click Logs
- Enter description of the bug you've encountered, provide contact email, and click Send Feedback
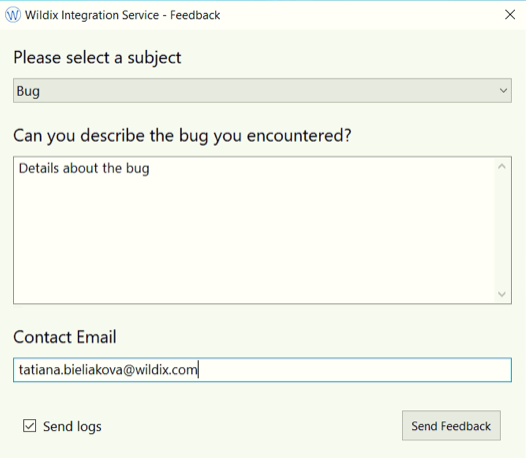
Note: The checkbox Send logs is ticked off by default. Make sure not to disable it.
Note: Starting from WIService v 3.2.2, logs also include Headset integration data.
Starting from v 3.4.1, WIService also includes Screen sharing logs.
Collect Outlook Integration logs
- Open Windows Explorer (File Explorer)
- Insert the path of the folder: %APPDATA%\Wildix\OutlookIntegration
Or
- Go to Outlook Calendar -> Wildix
- Select About and click Logs
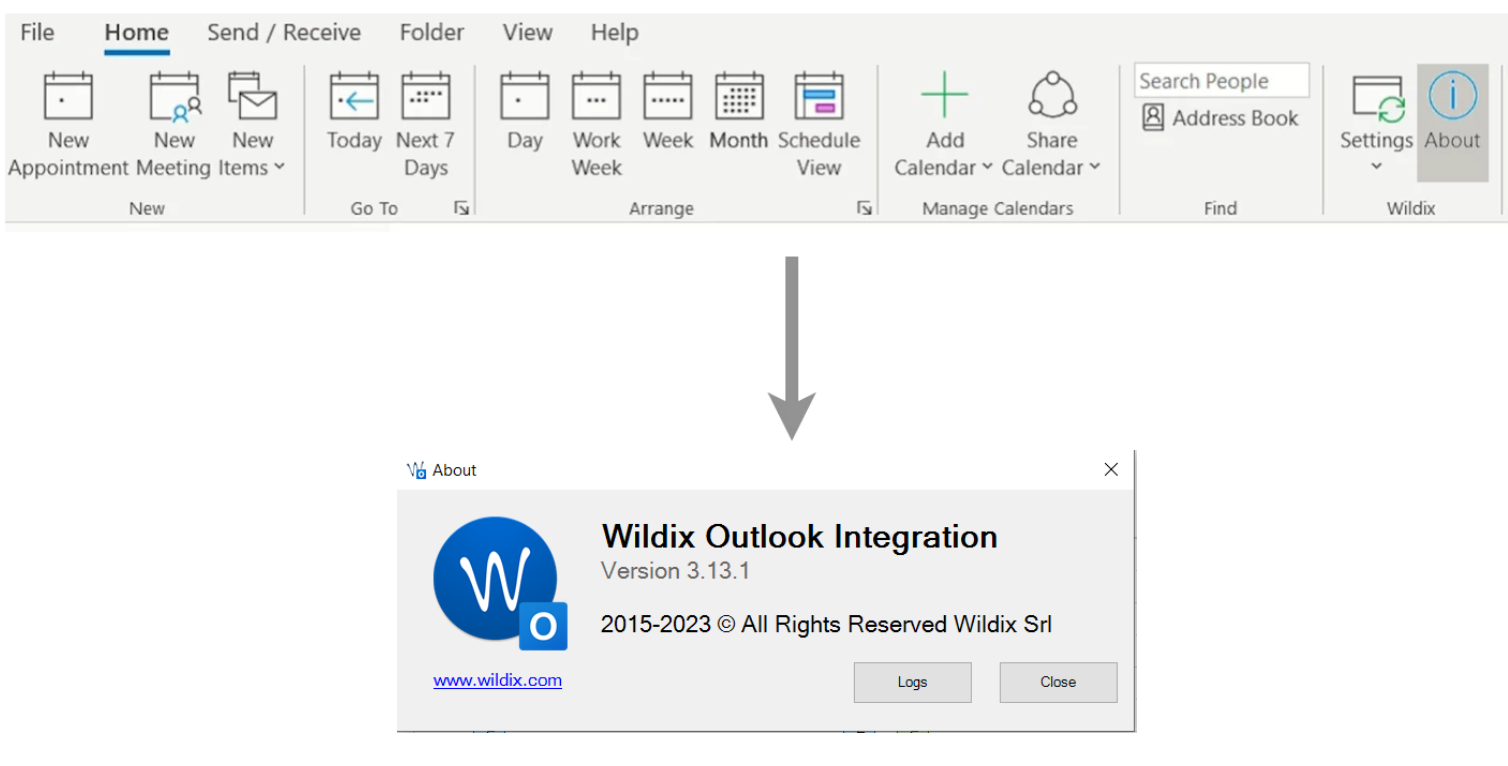
To view logs, open log.txt file.
Restart WIService - MacOS
To restart Wildix Integration Service, run the following commands:
launchctl unload /Library/LaunchDaemons/com.wildix.WIService-wd.plist
su -l wildix -c '/bin/launchctl unload /Library/LaunchAgents/com.wildix.WIService.plist'
Uninstall WIService - MacOS
Note: Starting from WIService v. 3.10.5, it is possible to delete WIService on Mac the same way as other apps (e.g. by moving Wildix Integration Service app to Bin from Launchpad/ Library/ Applications folder)
To delete Wildix Integration Service, run the following commands:
sudo launchctl unload /Library/LaunchDaemons/com.wildix.WIService-wd.plist > /dev/null 2>&1
sudo launchctl unload /Library/LaunchDaemons/com.wildix.wiservice-autoUpdate.plist > /dev/null 2>&1
/bin/launchctl unload /Library/LaunchAgents/com.wildix.MenuIntegration.plist > /dev/null 2>&1
/bin/launchctl unload /Library/LaunchAgents/com.wildix.WIService.plist > /dev/null 2>&1
sudo rm /Library/LaunchDaemons/com.wildix.WIService-wd.plist > /dev/null 2>&1
sudo rm /Library/LaunchDaemons/com.wildix.wiservice-autoUpdate.plist > /dev/null 2>&1
sudo rm /Library/LaunchAgents/com.wildix.MenuIntegration.plist > /dev/null 2>&1
sudo rm /Library/LaunchAgents/com.wildix.WIService.plist > /dev/null 2>&1
sudo rm -r /Library/Services/WIService > /dev/null 2>&1
Silent Uninstall (only for .msi packages) - Windows
Run the following command through the Command Line:
for /f "usebackq skip=1 tokens=*" %i in (`wmic product where "Name like 'Wildix Integration Service'" get IdentifyingNumber ^| findstr /r /v "^$"`) do @cmd /c "msiexec /uninstall %i /qn"
List of possible product id:
- {54F01ADF-1AF3-421E-A848-38FD7AC2C3D5} — Integration Service
- {DB00FEA0-20BF-4BEE-9EEE-8C6D7C19462A} — Screen Sharing component
- {254F78D9-6A62-4C32-BC02-864D49A373A5} — Outlook Integration
- {F9355602-990F-4244-9B43-E462EFD6A6DD} — Headset Integration
- {DFC64212-94A2-489A-864D-16B57B566884} — Fax Printer