WMS Settings Menu Guide provides the basic information on the Settings options and explains how to set up various parameters. Updated: March 2024 Permalink: https://wildix.atlassian.net/wiki/x/mBfOAQ |
Set up the connection between Server and Client PBXs.
Information on ports:
|
Note: Starting from 19 April 2022, only one PBX with active licenses is allowed per customer and this PBX automatically becomes main (Server) PBX. Other PBXs of the same customer are added to the same WMS Network as Client PBX and inherit the licenses from the Server PBX. |
To set up WMS Network:
Click Start button to activate sync between the PBXs (first start the sync on Server, then on Clients).
Click Stop button to deactivate the configuration sync for this PBX.
Click Generate credentials to generate login and password.
Note: starting from WMS 5.02.20201116.5, it is only possible to automatically generate credentials, without manual editing. Admin has to regenerate Server PBX credentials using Generate credentials option. After completing, update credentials also for all Client PBXs in WMS Network. If credentials are not updated, WMS Network will stop working starting from WMS v. 5.03. |
Click Re-initialize Client button to restart the connection (only on Clients).
Click Update parameters button to update the parameters after they have been changed.
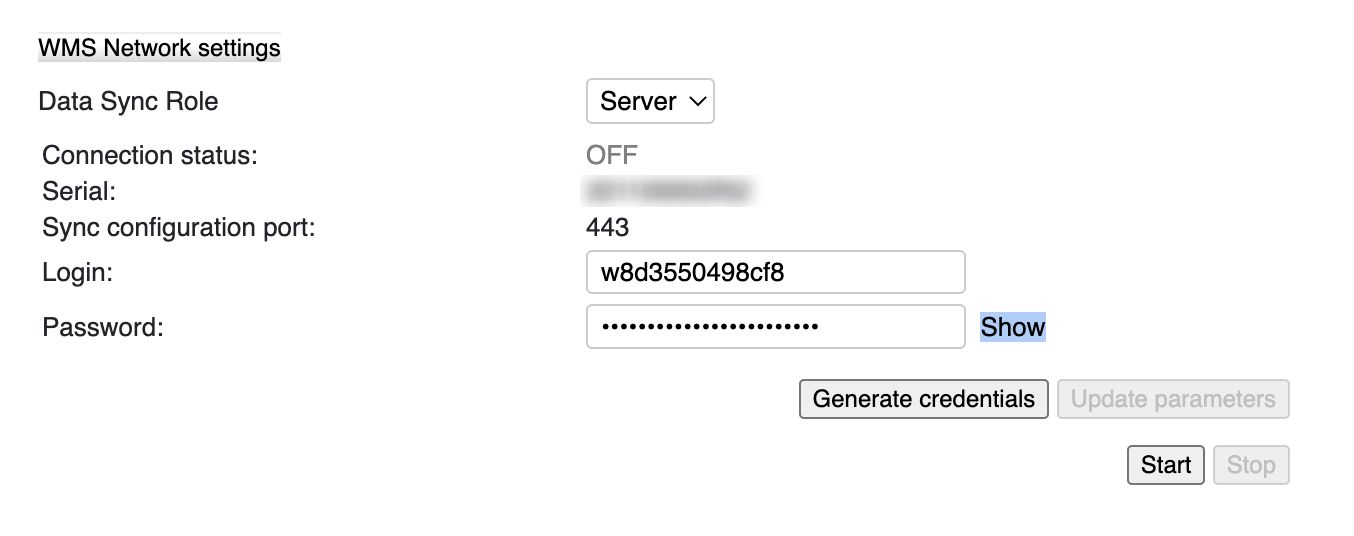
Server configuration example:
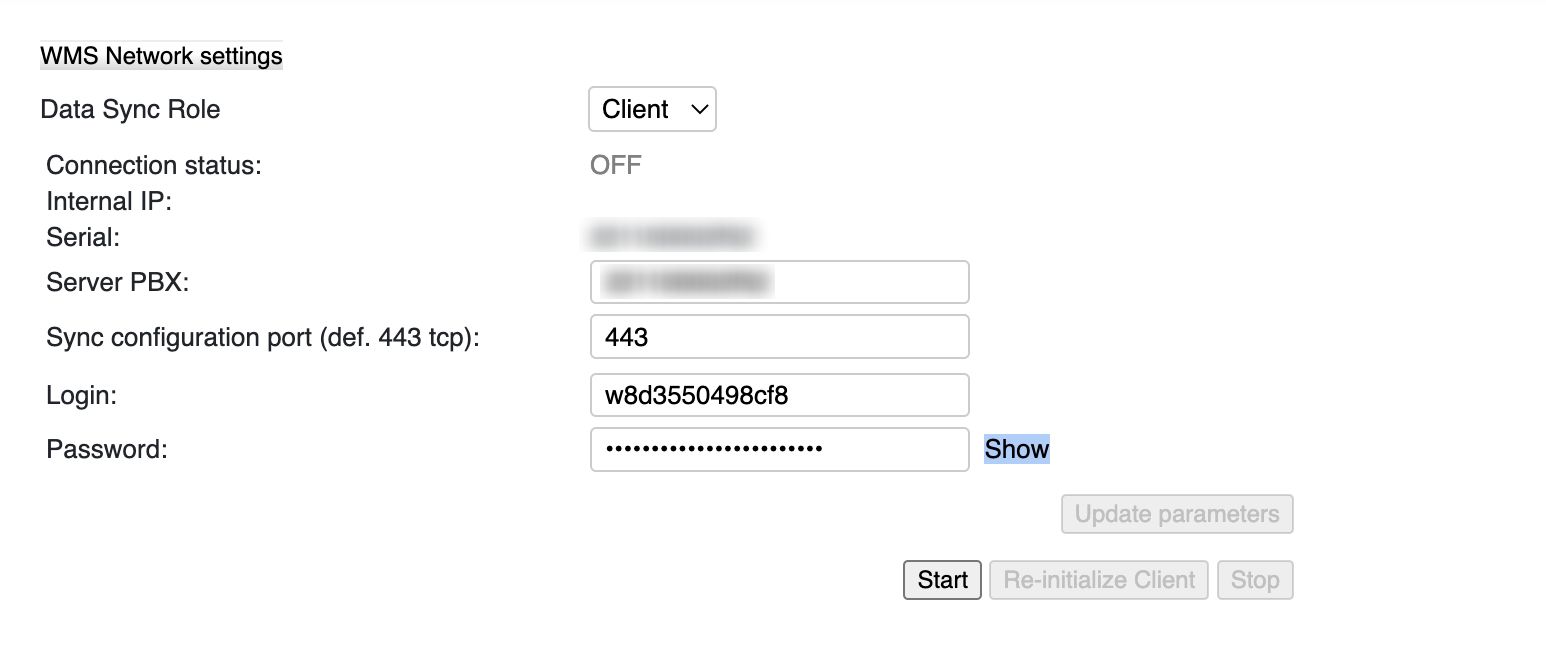
Client configuration example:
All the PBXs belonging to the same WMS Network can have only one admin user, which is the admin user of the Server PBX. |
Enabling WMS Network on a PBX that was previously in use:
In case you enable WMS Network on a Client PBX that had been previously in use, users and groups will be deleted from the PBX. To make sure you keep the existing users, follow these steps:
WMS network Server replacement procedure:
Proceed as follows:
Specify the PBX language and region settings:
Default Tone Zone: select your country / region
Country Code: select your country code for the correct routing of incoming and outgoing calls
Time zone: select your time zone for the sync with the external NTP server (NTP server section)
Sounds packages: select the sound packages to be installed
Each user can select a preferred language in Collaboration Settings -> Personal. This language is applied for Collaboration web interface, WP4X0 interface. All the System sounds (audio prompts) are also played in the language selected by the user, but only if the corresponding Sound package is installed. Otherwise, System sounds are played in the default Language of the PBX. |
On Cloud PBX you can simply disable / enable the PBX to save chat and call history (CDR):

Note: Starting from WMS 6.01.20221019.4, it is possible to set up backend for storing chat and call history (CDR) on Cloud PBX. |
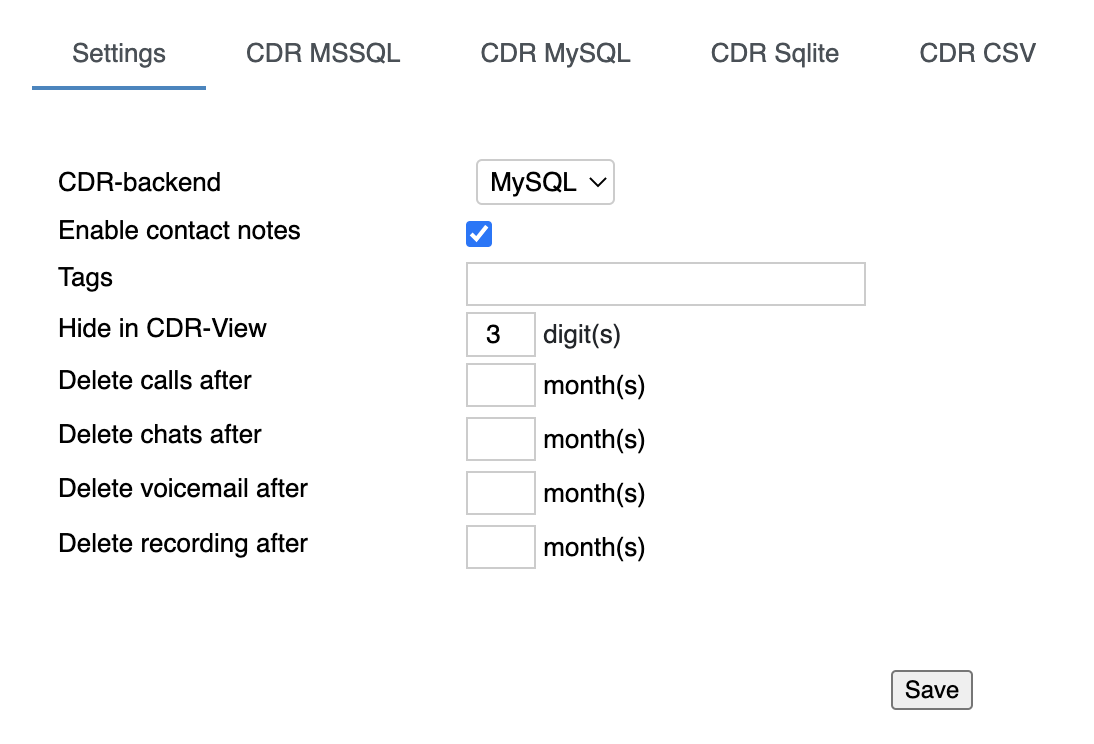
On Hardware / Virtual PBX, you can set up and select the backend used for storing chat history and call history (CDR). Hardware / Virtual PBX supports three CDR storage modes:
External server Microsoft SQL: MySQL or MSSQL. The server must be previously installed and must be reachable by the PBX
Internal database: CDR Sqlite. In this case CDR is stored on the PBX (on the backend specified for CDR storage). This backend is recommended for PBXs with 40 users and less
CSV file: file can be saved to a storage device (USB or network share)

Other Settings:
You can add multiple tags separated by comma. Maximum character length in the "Tags" field is 255 characters.
|
Delete calls / chats / voicemail / recording after: these options allow auto-deleting old calls, chats, voicemails and recordings after a specified number of months
Notes:
|
Limitation: in case of applying backup, empty icons for Call recordings and Voicemails that had been deleted, are still present in CDR-View (also on History page for call recordings). |
Step 1. Enable connection to the database (Hardware, Virtual PBX)
Go to tabs CDR MSSQL / CDR MySQL / CDR Sqlite - you must enable connection to at least one database (however all the modes - CDR MSSQL, CDR MySQL, CDR Sqlite and CDR CSV - can be enabled at the same time).
Example of MSSQL/MySQL configuration:

Note: It is also possible to enable connection to MSSQL instance. Requirement: SQL Server browser must be running on MSSQL host. Please check the Microsoft documentation for detailed information on SQL browser. To enable the connection, check the box "Enabled" and fill in the following data:
 |
Step 2. Select the backend for CDR storage (Hardware, Virtual PBX)
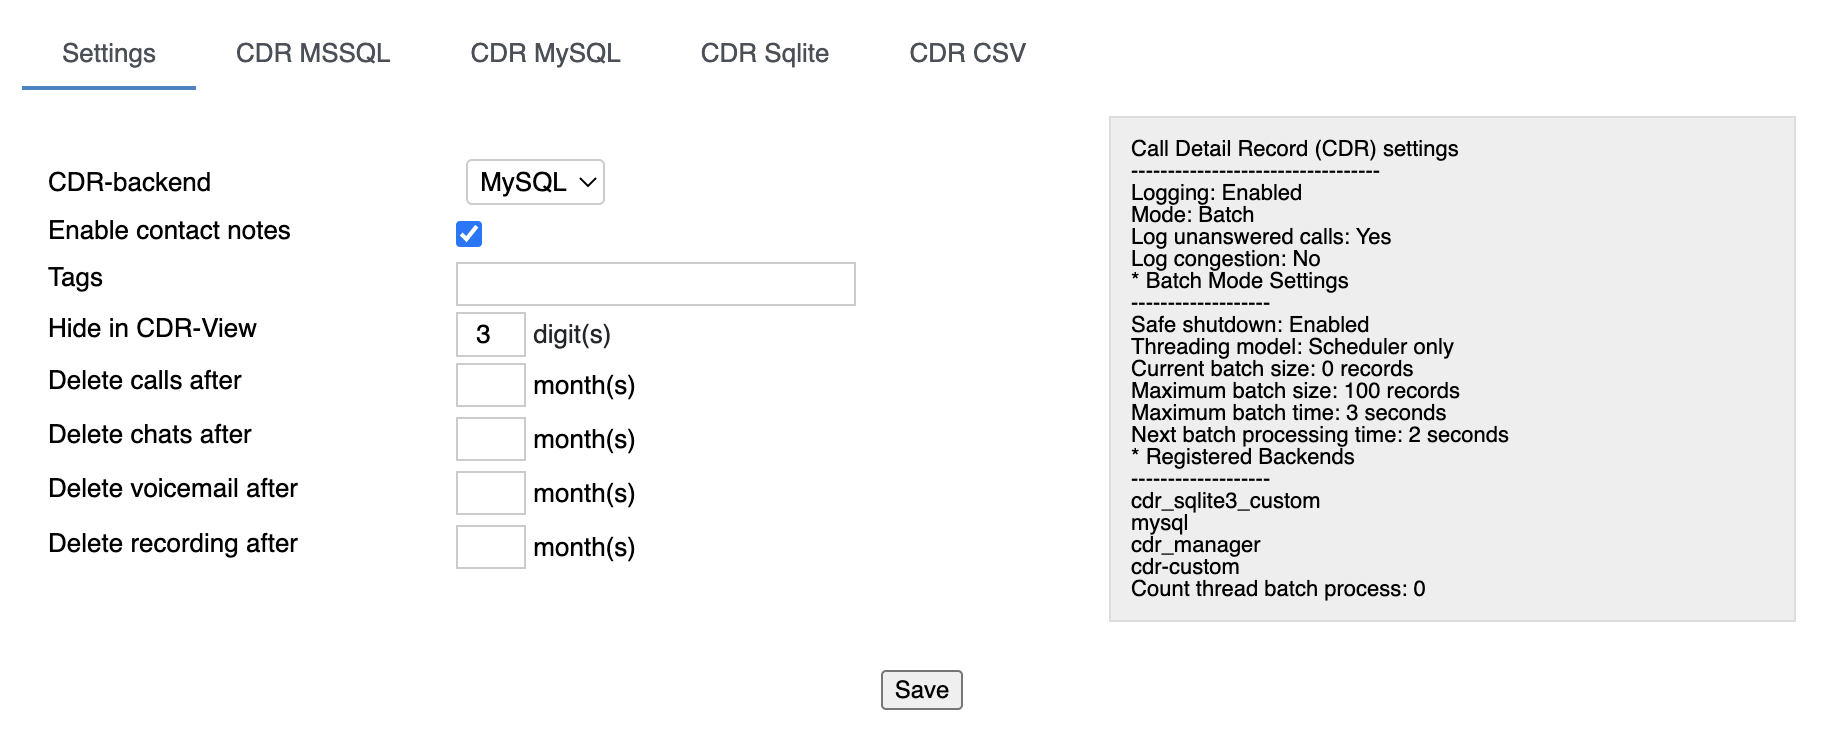
For each backend there is a log shown in the right part of the screen, with the actual status and eventual problems and errors:
General PBX parameters and parameters for the voice transport:
Use only https (Hardware, Virtual PBX): If enabled, all http connections are redirected to the port 443 or the alternative https port (if configured)
Note: the parameter is enabled for Cloud PBXs by default. |
Default music on hold: select default music on hold
Note: Music on hold is selected using different Dialplan applications; in case this option is enabled, files present in the selected Music on hold directory of the Sounds menu, will be played in a random order. |
RTP / T.38 ToS / DSCP and SIP ToS / DSCP: optimal values are set up by default for these parameters and should be changed only if necessary
More information: How to set DSCP QoS for Wildix devices and Web Phone. Important: after having changed DSCP value, to apply the changes in WMS network, it is necessary to restart WMS network in WMS Settings -> PBX -> WMS Network. |
Auto add new devices in local networks (for 2 hours) (Hardware, Virtual PBX): when enabled, devices are added and provisioned automatically in local networks. After 2 hours the option is automatically disabled
TLS Certificate (*.crt)(Hardware, Virtual PBX): upload a TLS certificate file
Generate certificate for SIP-RTP page on LINUX system:
Output: server.crt server.csr server.key Upload server.crt and server.key to WMS Settings -> PBX -> SIP-RTP page. This certificate serves for all types of connections, including SIP-TLS, HTTPs-TLS, XMPP-TLS. LIMITATION: certificate should not be protected by password. |
Note: Starting from WMS 5.04.20220309.1, Wideband codec is forced for all devices (g711 always has higher priority compared to g729). If you want to enforce g729, this can be done via Dialplan configuration (Set application -> Codecs -> choose the preferred option). With wideband codecs, the following priorities apply:
|
Enable integration with Oracle / Fidelio PMS and other hotel management systems that support FIAS protocol.
Refer to the Hotel Integration Guide for detailed information.
Cloud integrations
Note: In case of WMS version lower than 6.05.20240119.1, the tab is named Calendars. |
Enable integration with:
Webhook: refer to the document How to set up Webhook integration for more information
Zoho Integration
Enable integration with Zoho CRM. Refer to Zoho CRM integration with Wildix PBX for detailed information.
Microsoft 365
Enable integration with Microsoft 365 including calendars and phonebooks sync. Consult Microsoft 365 Integration Guide for detailed instructions.
Applications
The option is available only for a super admin user! |
S2S authentication via token for Wildix PBX API significantly increases security and protects your PBX from potential attackers.
Documentation and instruction on how to generate the token and how to sign it with a secret key, is available on your PBX: https://<pbx_host>/api/v1/doc/#tag/Authentication/bearer
The option is available only for a super admin user! |
C2S (client to server) authorization provides the safe use of APIs for integrations without session cookies and without using basic authentication.
Documentation is available on your PBX: https://<pbx_host>/api/v1/doc/#section/Authentication/oauth2
The option is available only for a super admin user. To ensure the best security, it is recommended to use Server to Server or OAuth 2.0 authentication, if possible. |
Simple Token authorization is a simplified method of Wildix PBX API integration via access key (token) that does not expire.
Documentation is available on your PBX: https://<pbx_host>/api/v1/doc/#section/Authentication/Token
Analytics
Enable x-caracal ACD Stats. Refer to x-caracal Guide for detailed information.
Callback URLs
Callback URLs allow opening Zoho CRM or other CRM systems upon receiving or placing a call and pass parameters (static parameters or supported variables).
Refer to How to set up web application integration via Popup URL for detailed information.
Verify certificate (optional)
You can enable the validity verification of the CRM server. Enter your credentials for basic authentication.
Limitations:
|
Manage such PBX Features as:
Cloud Analytics (available from WMS 6.03.20230630.3): enables events sending/ data gathering for Cloud Analytics (CDR-View 2.0) in Collaboration and x-bees. t is automatically activated if a PBX or whole WMS Network are running in the Cloud. Also, enabled Cloud Analytics is required for Webhook integration (for more information, check the document How to set up Webhook integration).
In case of a standalone Virtual/ Hardware PBX, or if there is a mix of Cloud and Virtual/ Hardware PBXs in a WMS Network, Cloud Analytics should be enabled manually by admin.
Documentation: Cloud Analytics (CDR-View 2.0) in Collaboration
Note: If sending of the events was enabled and then disabled, the old data is still stored in the data base. For the old data be removed, a ticket to customer care has to be opened. |
Important: If you need to disable Cloud Analytics on a PBX with x-bees licenses, please contact Wildix Technical Support, as the Cloud Analytics setting may affect presence sync in x-bees. On a PBX with Collaboration licenses Cloud Analytics can be turned off without additional configuration from the Technical Support side. |
Collaboration call control (available from WMS 6.03.20230630.3): enables Call control mode for Collaboration. By default, only 1 active Collaboration session is permitted. However, there is an option to allow the second Collaboration tab – in Call Control mode. This can be used, for example, for media devices when connecting via remote desktop. The option is particularly practical for teams4Wildix integration. Once the feature is activated, an additional option appears on the Collaboration login window – Call Control only.
Use case: User can set "Call control only" mode to be automatically enabled by adding a parameter in the URI (useful when it is needed to share the link among all employees or bookmark the page) How-to: add ?sip=no to PBX domain name -> https://pbxname.wildixin.com/collaboration/?sip=no |

CORS
Configure domain whitelist to protect PBX from cross-site request forgery (CSRF) attacks.
Refer to Domain Whitelist (Allow Origin) Configuration Instruction for detailed information.
Important: Trusted domains must be added to a domain whitelist! Please note that any Web API / PBX API integration will stop working if the domain is not added. |
Trusted IP list
Note: The support starts from WMS 6.02.20230306.1. |
Enter the IP addresses you want to add to the trusted list.
Note:
|
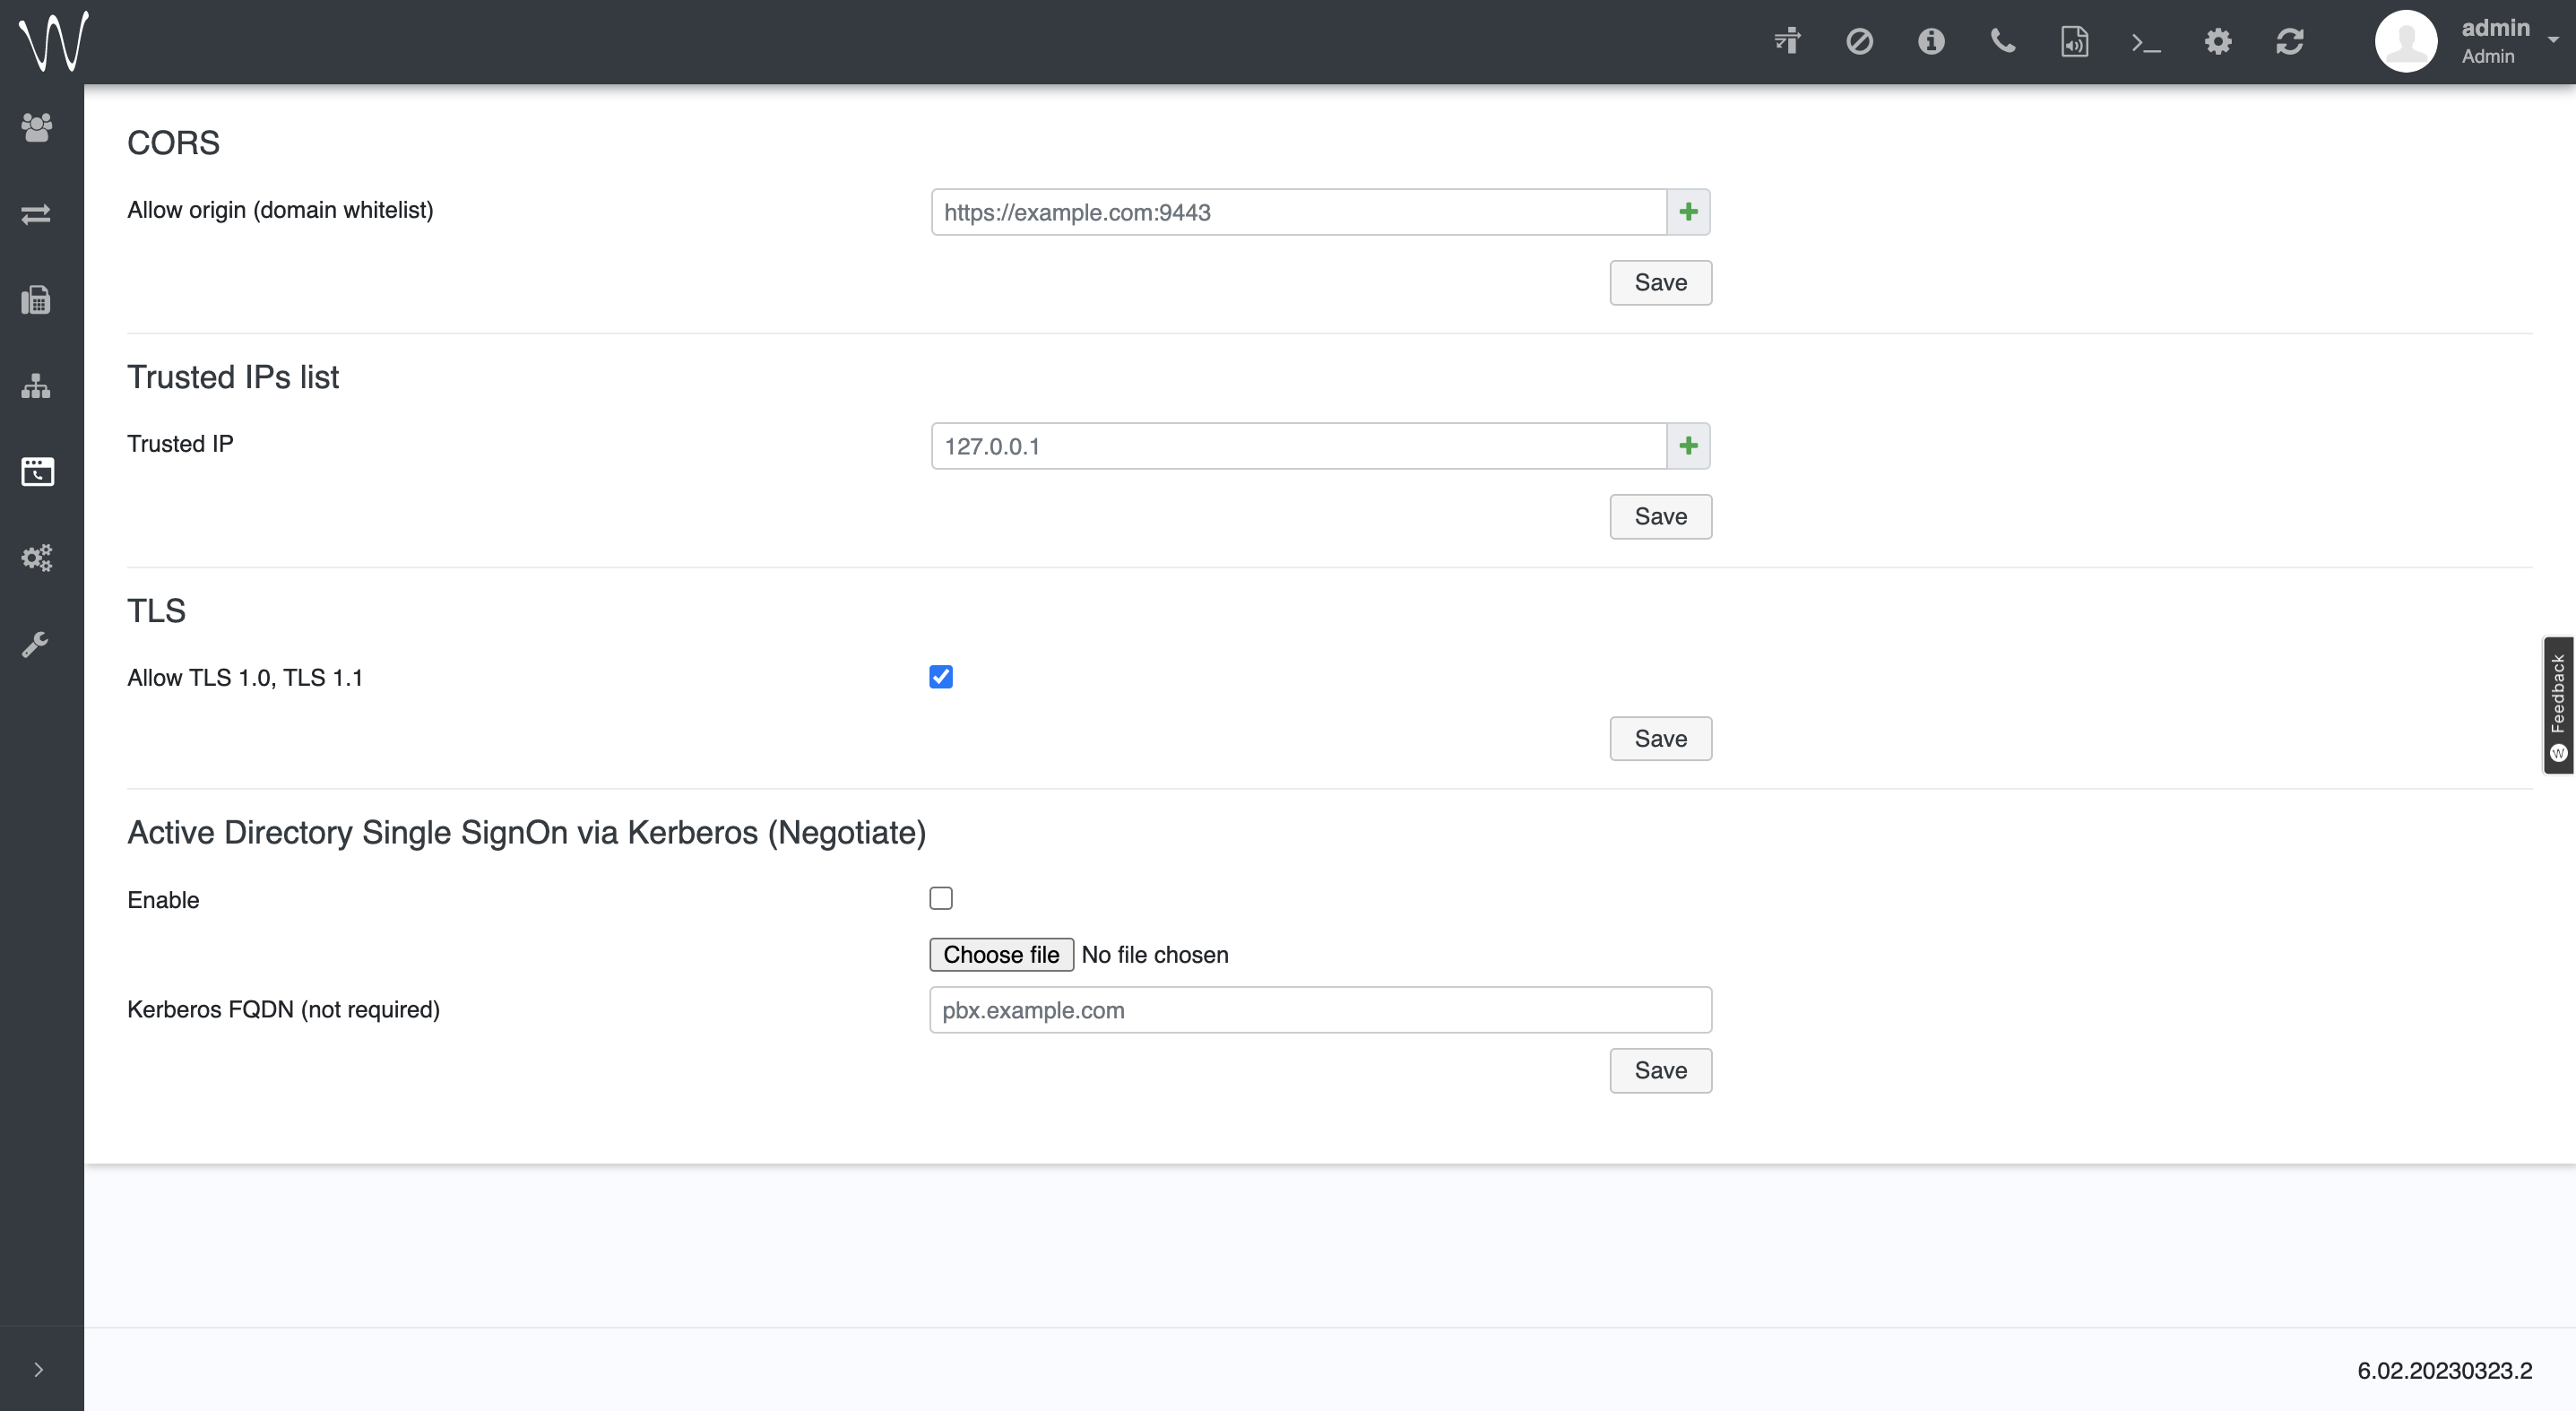
TLS
Enable Allow TLS 1.0, TLS 1.1 option. To ensure better security, Wildix has implemented TLS 1.2, enforcing it by default for newly created systems in WMS 5.03 and right after PBX reset.
However, there is a number of deprecated devices that don’t support TLS 1.2, for example, WP600AXX, WP R1/R2, W04FXOR2, W04FXSR2, and W01/02 FXS R1. Documentation: List of Wildix devices EOL that do not support TLS 1.2.
The option Allow TLS 1.0, TLS 1.1 ensures support and backward compatibility of such deprecated devices. It is enabled by default after the upgrade.
Important: If you disable the option Allow TLS 1.0, TLS 1.1, the devices that don’t support TLS 1.2 stop working. |
Note: For more information on why it is important to switch to TLS 1.2, check out our article TLS 1.2 and You: Why You NEED to Upgrade Your Security. |
Active Directory Single SignOn via Kerberos (Negotiate)
You can set automatic Single Sign-On via Active Directory.
Refer to Active Directory Single Sign-On for detailed description.
Set up the network parameters based on the selected network scenario: you can keep the data and voice networks separated or shared.
On Virtual systems, Network parameters are available in read only mode. |
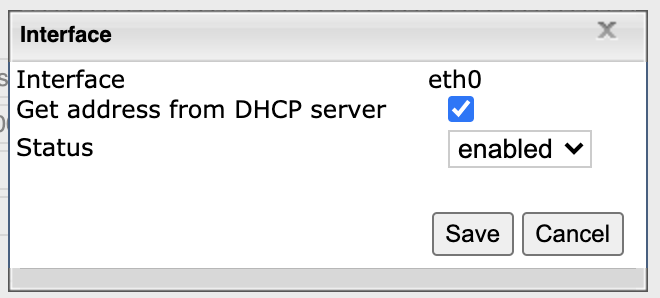
Shared data and voice networks scenario
In this scenario the single connected port is WAN eth0, the IP address is received from the DHCP server.
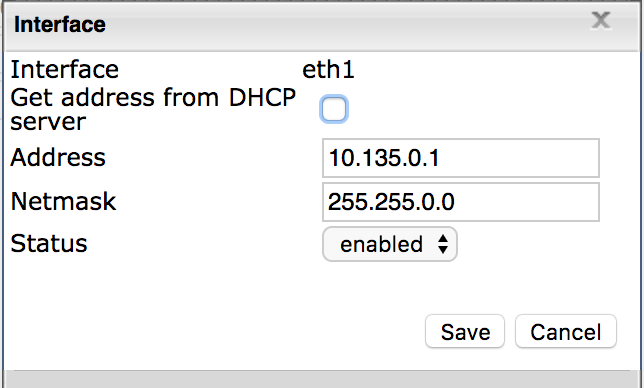
Separated data and voice networks scenario
In this scenario the PBX itself functions as a DHCP server. WAN eth0 port is configured as DHCP client, LAN eth1 port must be set up with the static IP and DHCP server enabled. The default address of the eth1 port is 10.135.0.1.
Read more about network scenarios: Choosing a network scenario (Hardware PBX).
After you have changed the network settings, click Apply network settings to apply the new parameters.
WMS Network interface

Options:
Routing and gateways
If the PBX’s WAN interface is connected to the network with the active DHCP server, the entry is automatically created in this table, containing the gateway assigned by DHCP server.
Hosts

You can also modify the DNS server and System name. System name is used as the PBX alias name – *.wildixin.com domain name.
Each PBX with Public IP can be accessed by either its serial number or by the value set up in System name:
[PBX_serial_number].wildixin.com
[PBX_system_name].wildixin.com
Note: value set up in System name is synced with the one set up in WMP -> PBX Details -> Name. |
If you modify the DNS server, click Apply DNS service to apply the new parameters.
Allows you to enter the data for connection to a proxy server.
Parameters:
Set up connection to LDAP server. This feature allows you to use a PBX as an LDAP server for users sync.
Parameters:
If the chosen network scenario uses the service of the DHCP server of the PBX, make sure that the options of the service are enabled with the correct settings.
DHCP server is integrated for auto provisioning of supported devices. It’s possible to enable the server for the initial configuration of the devices and successively disable it, otherwise, enable the parameter Deny unknown clients.
On WMS 3.88 click + button to expand DHCP server parameters:
After you make some changes, click Save changes button.
DHCP option 176. If you set DHCP option 176 for WP4XO phones, make sure that "VLAN id" data type is set as "string" on DHCP server and LLDP option (accessible on WP480G/490G, WorkForce, WelcomeConsole) on the phone's web interface in Network -> Advanced settings is enabled. Note that on Linux like systems, DHCP option 176 values should be double-quoted. In case Dnsmasq is restarted, values are set to "string" data type. Example in /etc/dnsmasq.d/dhcp.conf: Options |
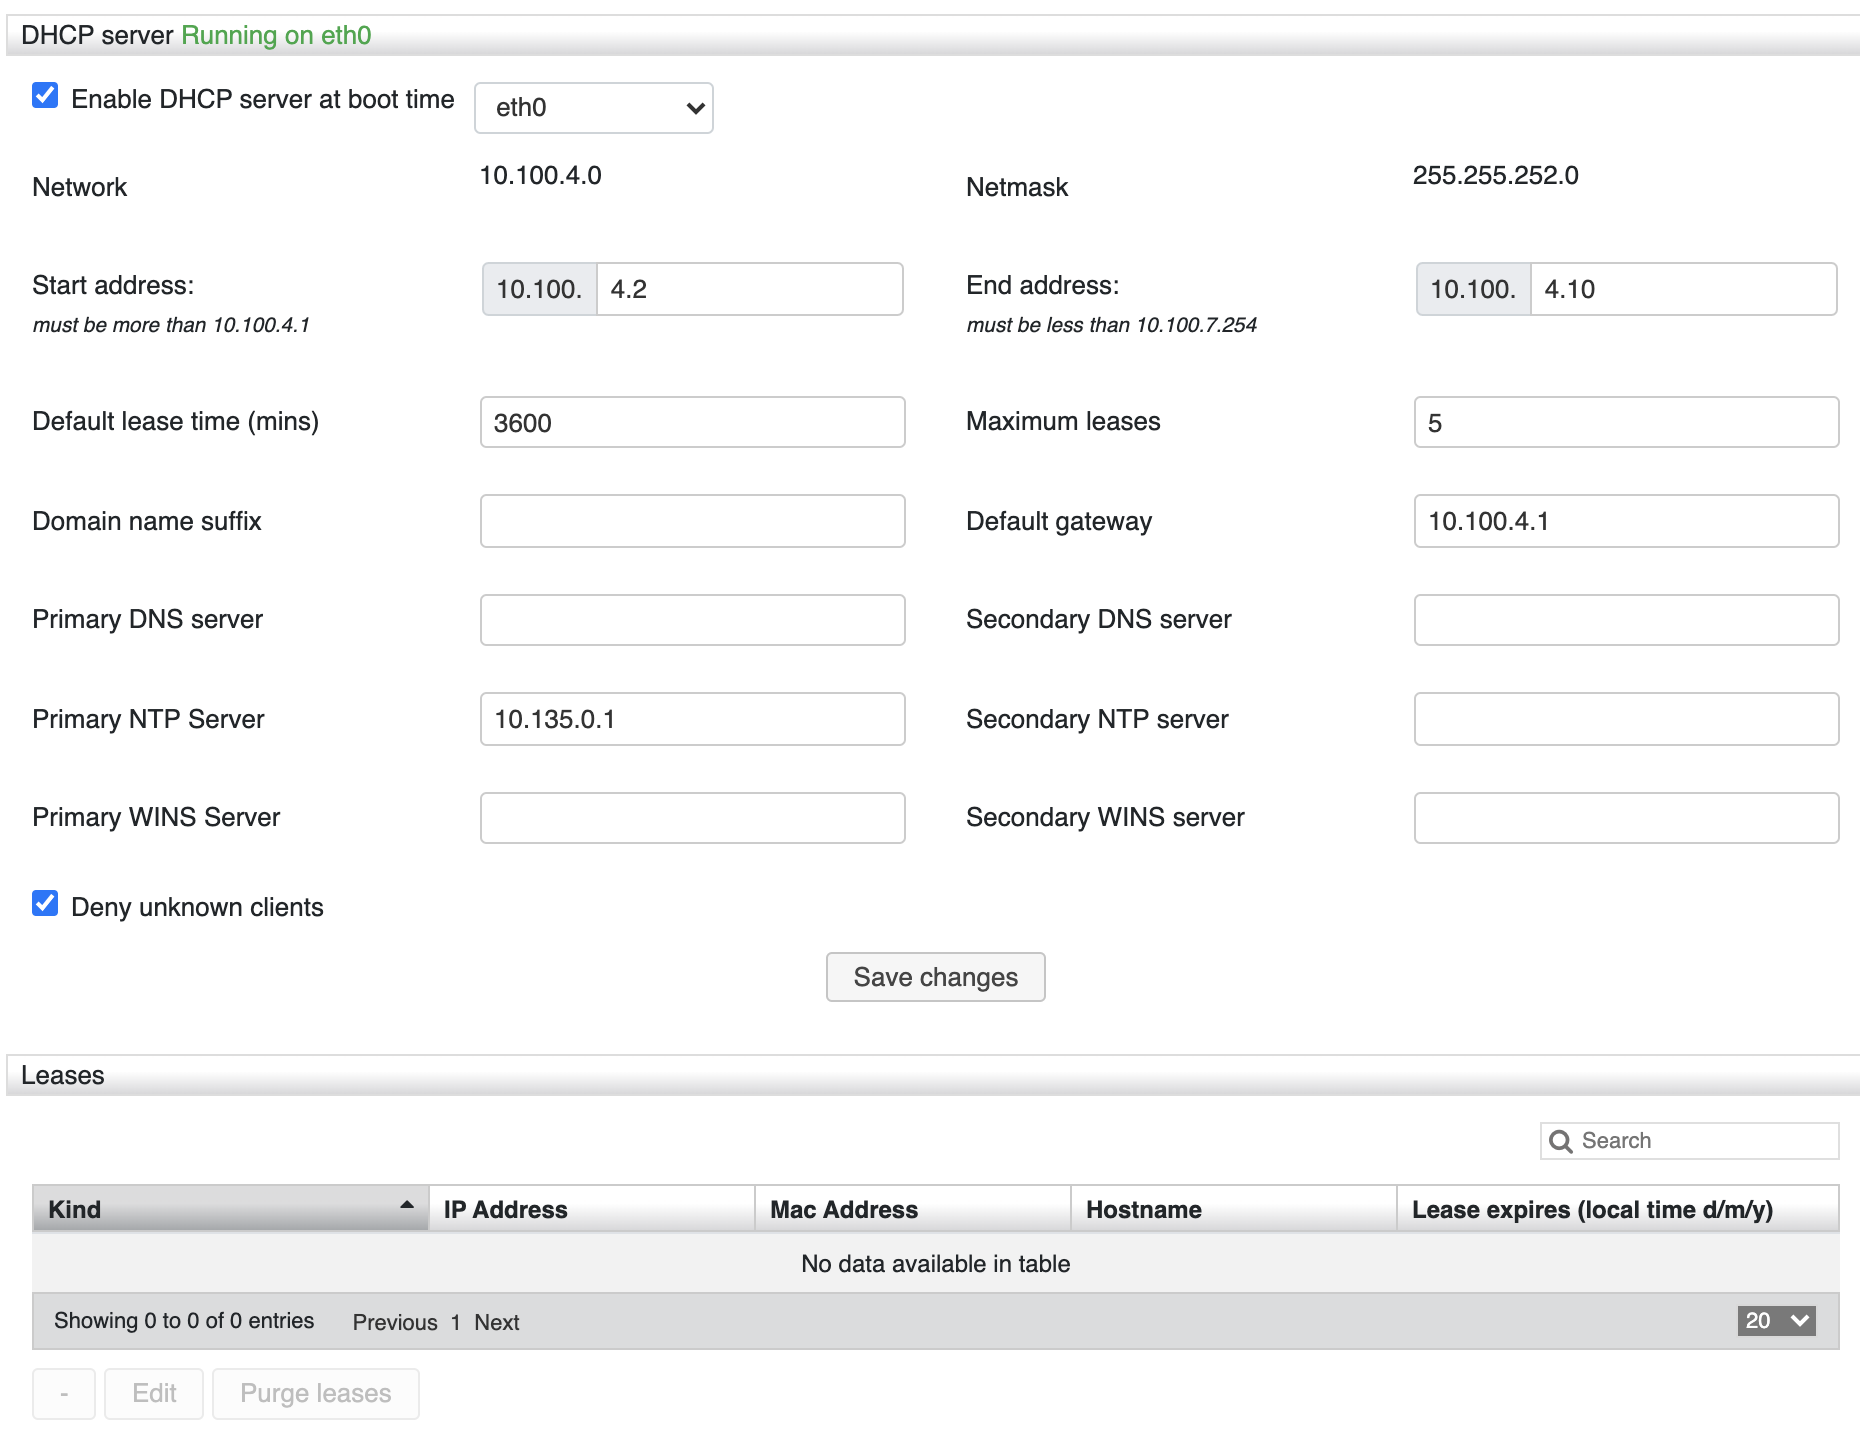
Leases table
All the IP addresses which DHCP server has assigned to devices, appear in this table.
Enable the PBX to send notifications of the new voicemails, missed calls, chat requests, call recordings, faxes, etc.
Wildix Cloud PBXs offer default server for sending email notifications. Just enable Default settings option and click Save to be able to use the default server.

To activate SMTP client on Hardware and Virtual PBXs, enter the following parameters:
After you have entered all the parameters, proceed as follows:
Click Save
To make sure that the entered parameters are correct, enter the email address into the field located in the upper right section and click Test
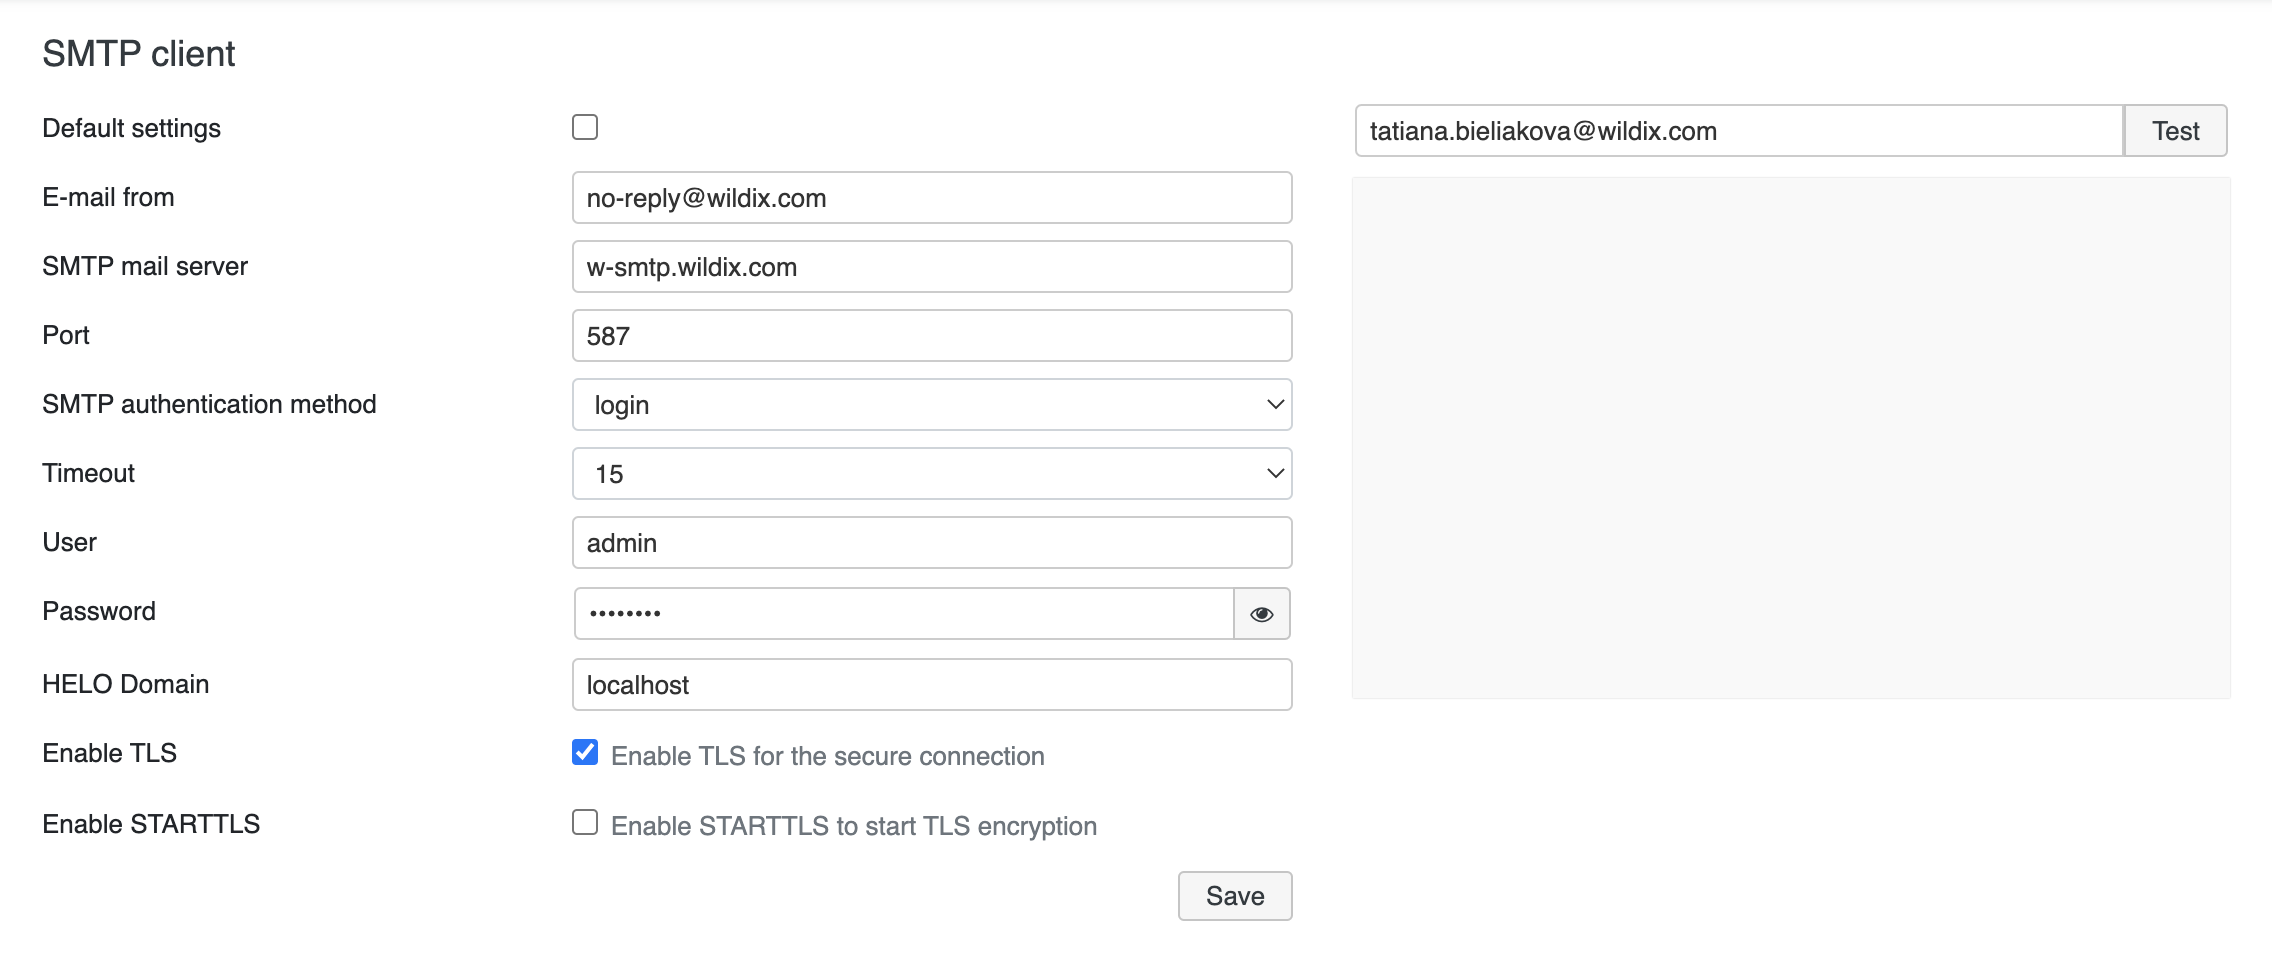
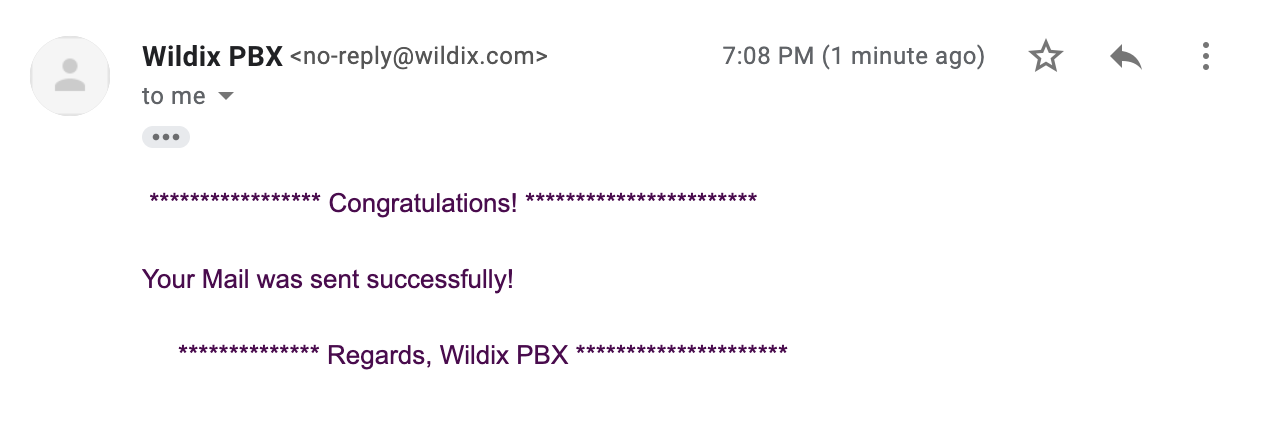
The logs are displayed in the field below and you receive the following email:
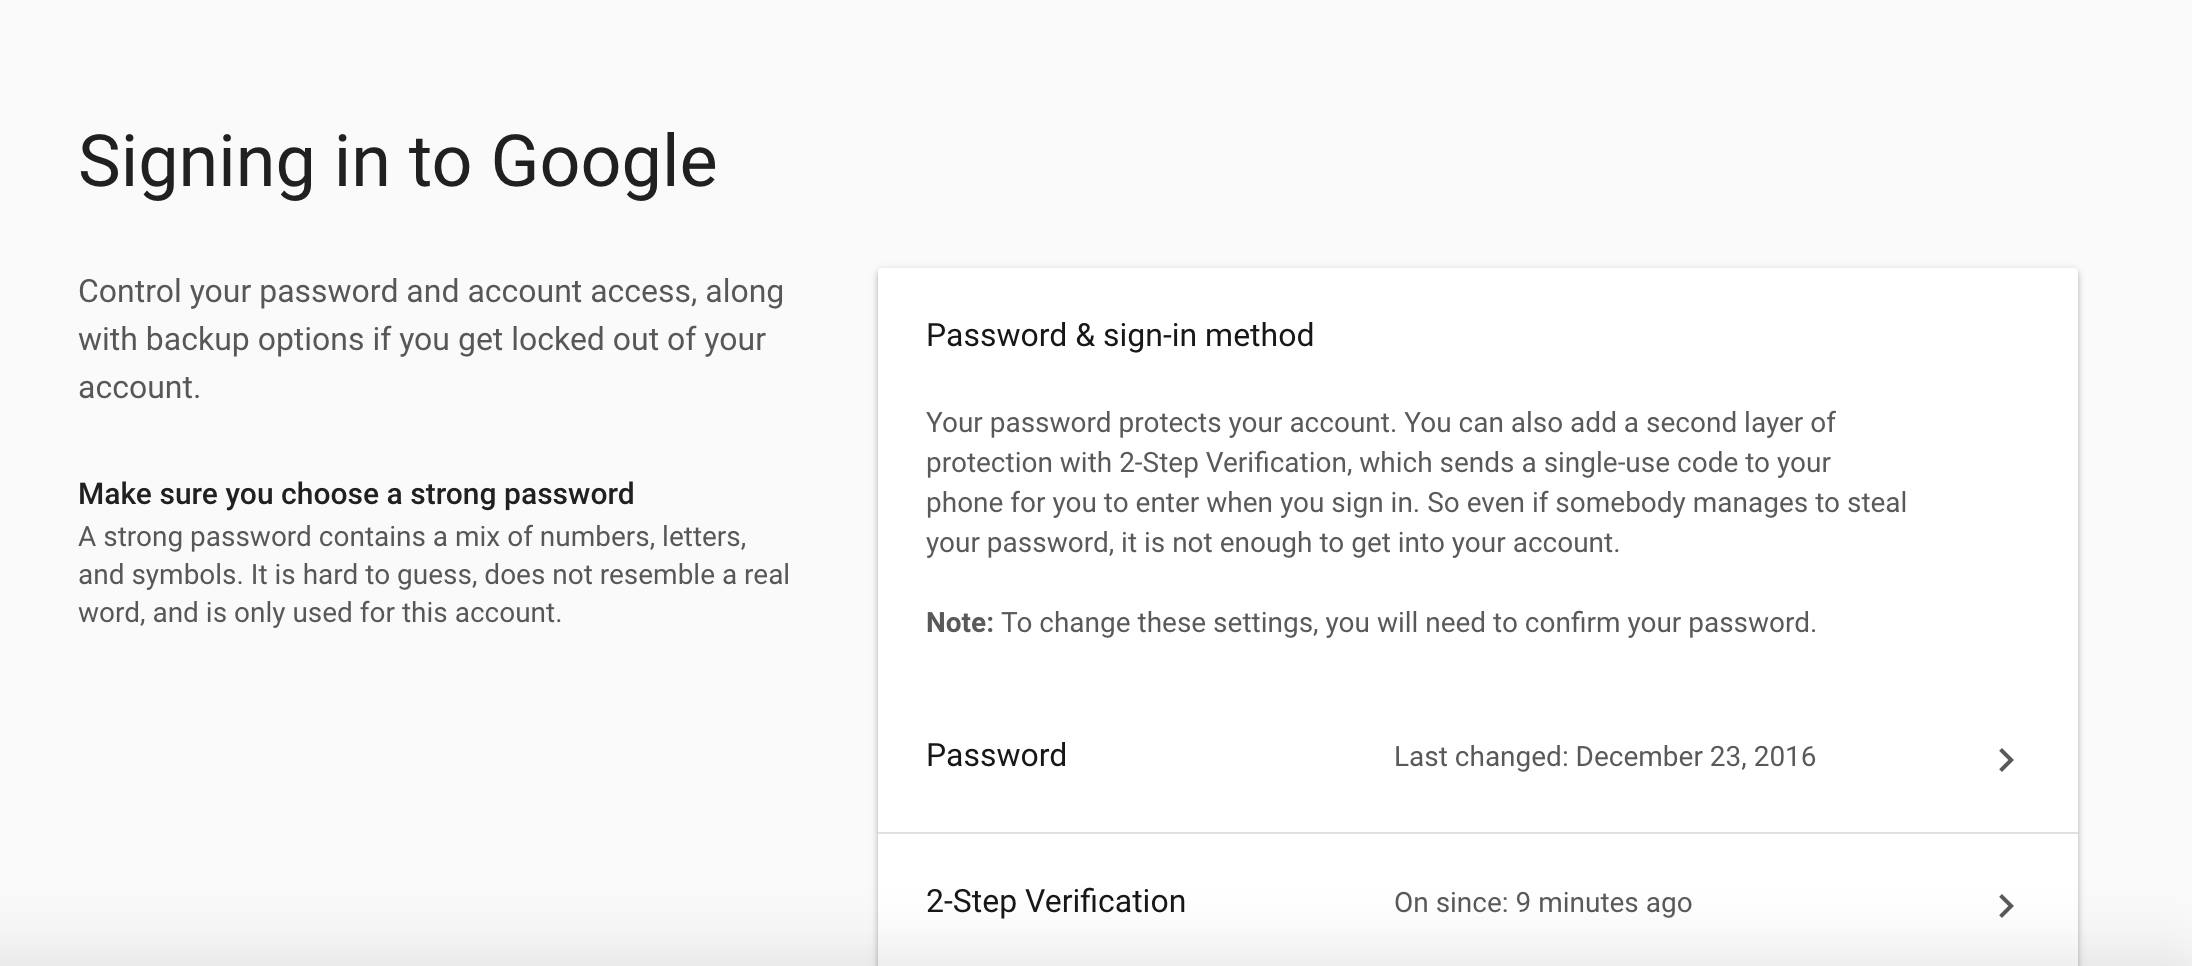
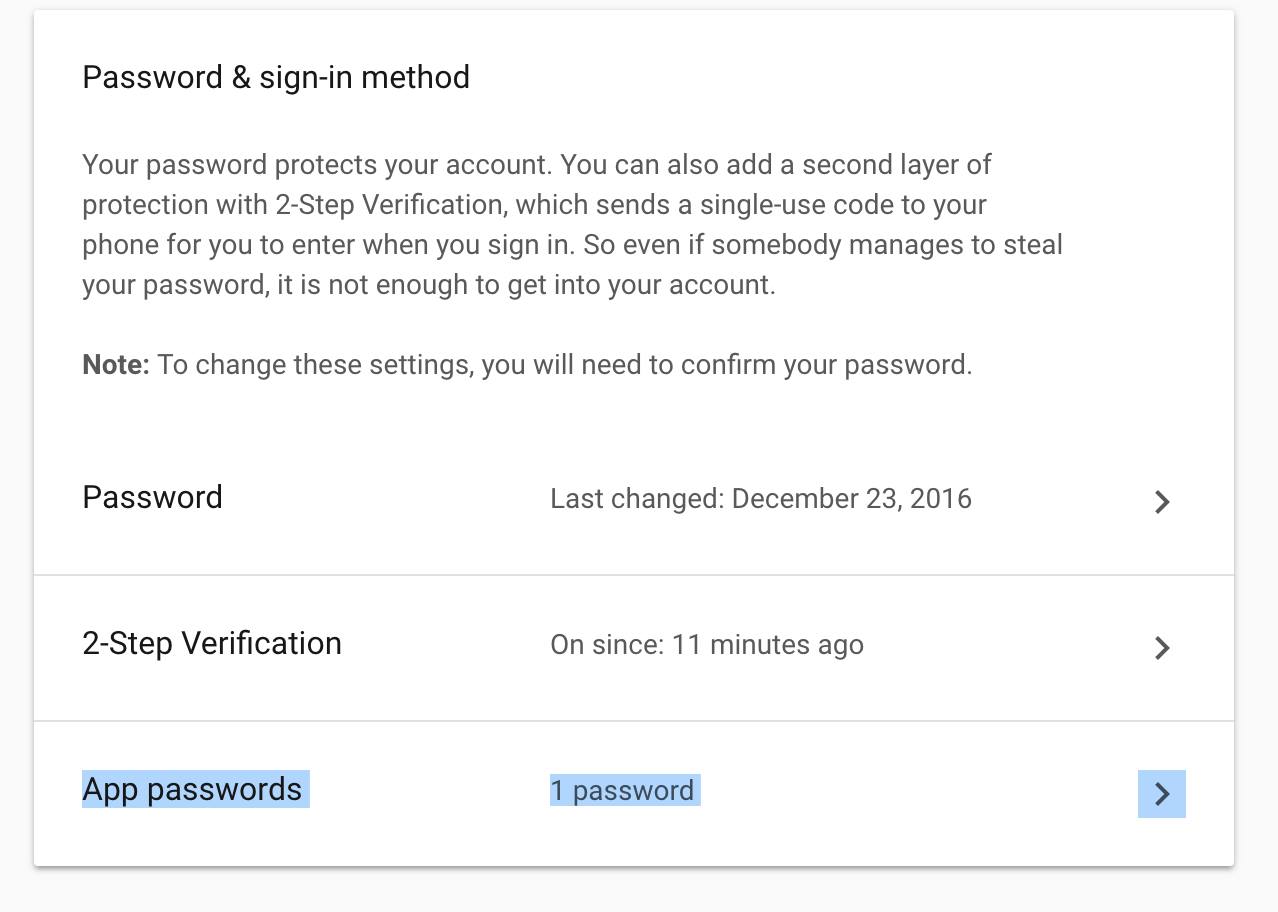
Note: in case you are having problems setting up SMTP client with Google account, proceed as below:
|
Allows you to enable Mail2Fax and Mail2SMS services and specify the general parameters for FAX/SMS management.
For SMS sending, a GSM Media Gateway is required. For SMS Sending without it, use the option "Curl SMS send". |
General parameters:
Curl SMS send enabled: enable this option for SMS sending via HTTP request without registering GSM media gateway
Note: Curl SMS has a higher priority compared to GSM gateway. If the parameter is unavailable or incorrectly configured (incorrect login, password or wrong API request), then the message will be sent via GSM gateway. |
Curl SMS send: the feature allows sending SMS via CURL request using third-party service or another PBX with a configured GSM trunk (using SMS API).
Note: Starting from WMS 6.02.20230306.1, in case SMS sent via CURL contains the following characters, they are replaced with a space: ' (single quote), “ (double quotes), \ (backslash), / (slash). |
To send SMS via third-party service, use the list of of curl command examples and possible variables (click ? button to see the list). For example, curl –request POST \ --url http://www.maitaly.it/maws20/default.asmx/SendSimple? \ d "user=user_name&psw=user_pass&num=(TO_NUMBER)&body={MESSAGE}&idserivce=4&from={FROM_NUMBER}"
To send SMS via another PBX with a configured GSM trunk, you can use the following request: curl -k -X POST -u user:password --url "http://<PBX_IP_Address>/api/v1/originate/sms" --data-urlencode "number={TO_NUMBER}" --data-urlencode "message={MESSAGE}", where <PBX_IP_Address> is IP address of PBX with a configured GSM trunk
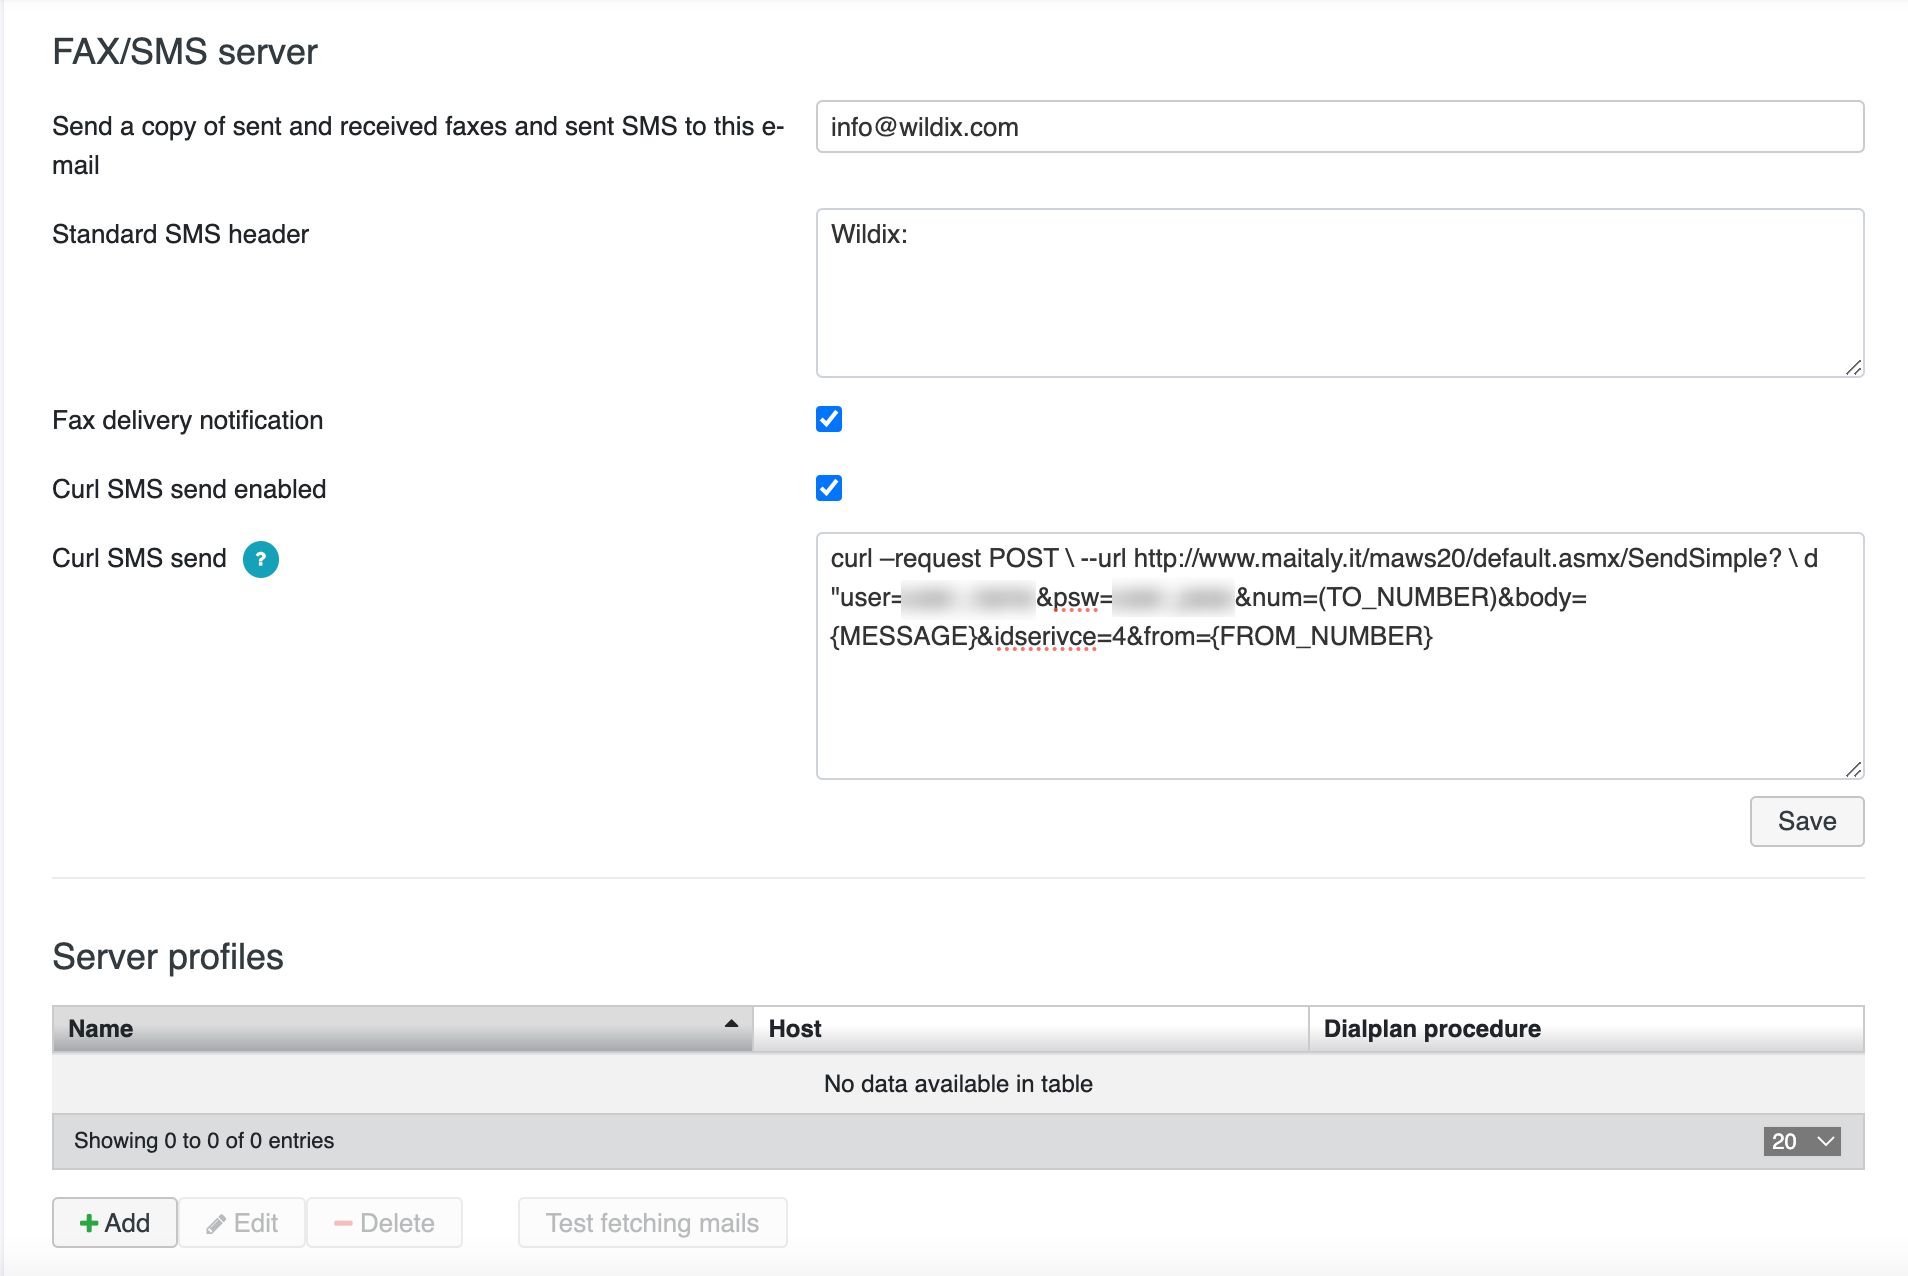
Click Save to apply the settings.
The PBX checks the mailbox, once new emails corresponding to the parameters of Mail2Fax service are found, the PBX sends them to the destination fax number(s) present in the email.
To create a new Fax/ SMS server profile:
Auth type: select the preferred authorization type, Basic or OAuth2 (the support of OAuth2 for Fax/SMS Server starts from WMS 6.01.20221019.4). Depending on the chosen type, fill out the following fields:
a) In case of Basic Auth type:User: email address of user to access to the server
Note: don't use here an email of a user who must send faxes via Fax2Mail service. |
SSL Certificate check: allows to disable SSL certificate check, e.g. in cases when the mail server uses a self-signed certificate. The parameter is enabled by default.
Note: The support starts from WMS 6.03.20230630.3. |
Click Save to apply the changes
Select the profile from the list and click Test fetching mails to make a test and check if the entered parameters are correct.
You can delete a selected profile by clicking - or make changes by clicking Edit.
For more information about Fax/ SMS Server, read FAX/ SMS Server Quick Admin Guide.
Start the SNMP server integrated into the PBX to allow remote monitoring of system resources.
Parameters:
Configure a backend to store all the data of the PBX (Voicemail, call records, faxes, CDR, backups, etc).
For an on-premise PBX, the USB drive inserted into the PBX serves as a backend for storing all the data. It is recommended to store the Backups on another USB drive or on a Windows share, to be able to restore the system in case of the primary USB drive’s failure.
Storage device
This table displays all the storage devices mounted at the system startup with the relative table of the partitions and the usage of the specified partition.
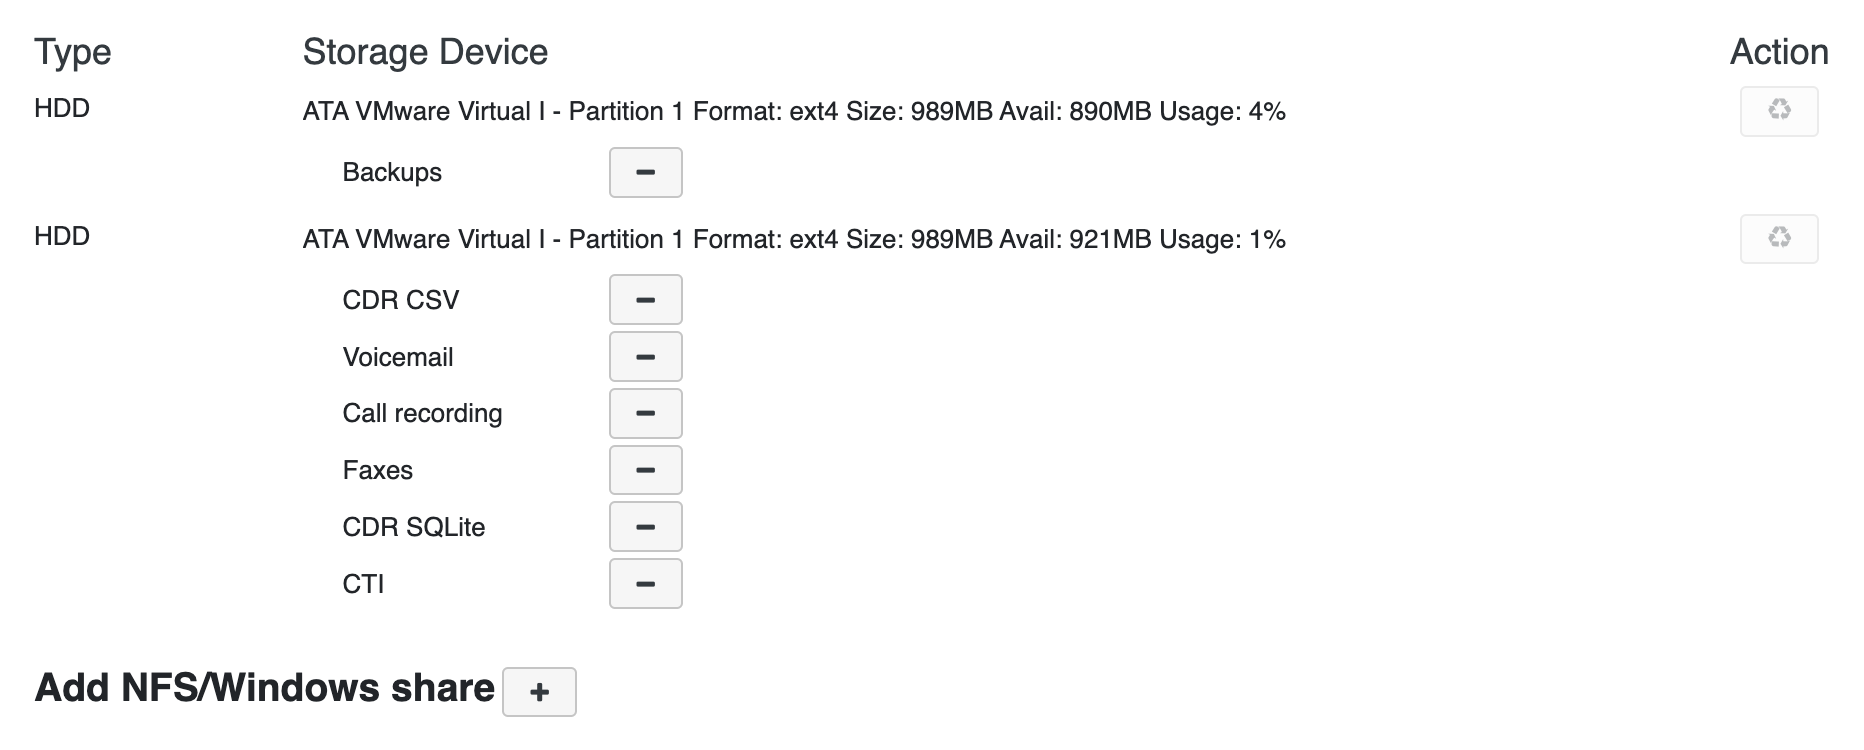
Add NFS/Windows share
Click + to add a new NFS/ Windows share.
Parameters:
Synchronize the PBX with an external NTP server.
Parameters:

Enable remote syslog for log processing in addition to local syslog.
Refer to the online documentation Remote Syslog Guide for details.
Important: Remote support for Cloud PBXs is removed starting from WMS 4.0X. |
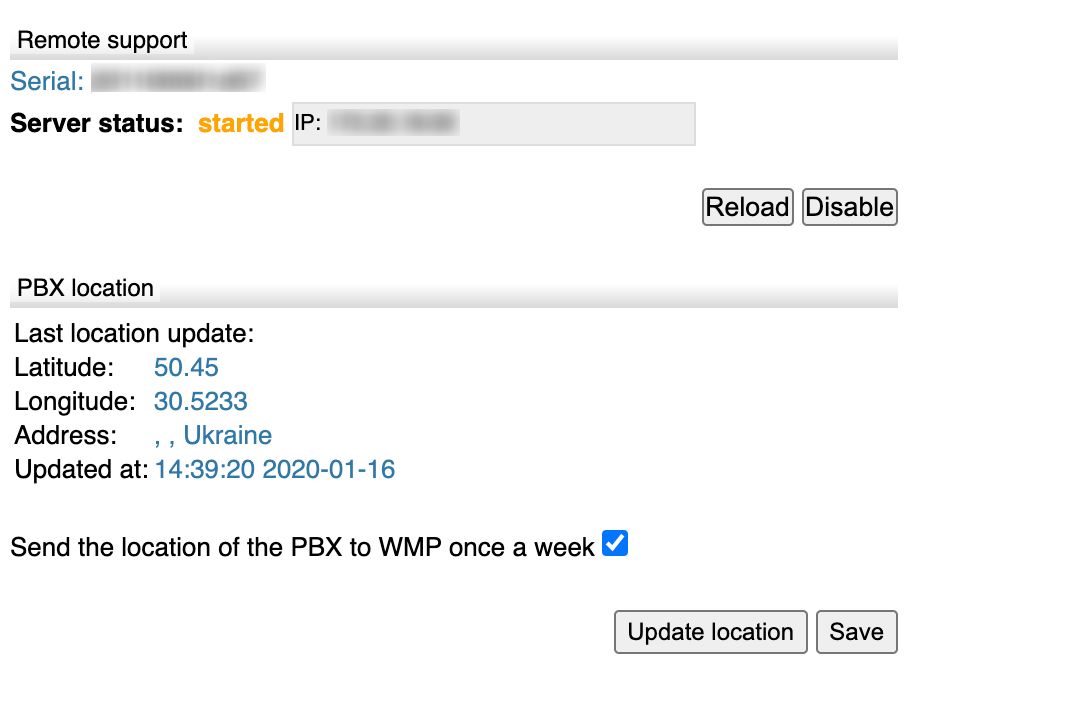
Displays the information about the Wildix server, which is used for remote support and the PBX sync with the Wildix Management Portal.
Check information on ports to open for Remote Support: Ports used by Wildix services.
In the lower part of the screen you can set up the PBX to send the geographic position of the PBX to the Wildix server (geolocation tools are provided by Google) (Hardware, Virtual PBX).
The following IP ranges are used by Remote Support server (make sure they don’t collide with your internal network ranges):
172.16.0.0/16
172.20.0.0/16
172.25.0.0/16
Create and download the system backup and set up a scheduled system backup.
You can create the copies of PBX configuration on the Windows share or on the USB storage device (defined in System -> Storages (Hardware, Virtual PBX), otherwise the backup can be created and downloaded directly on your PC.
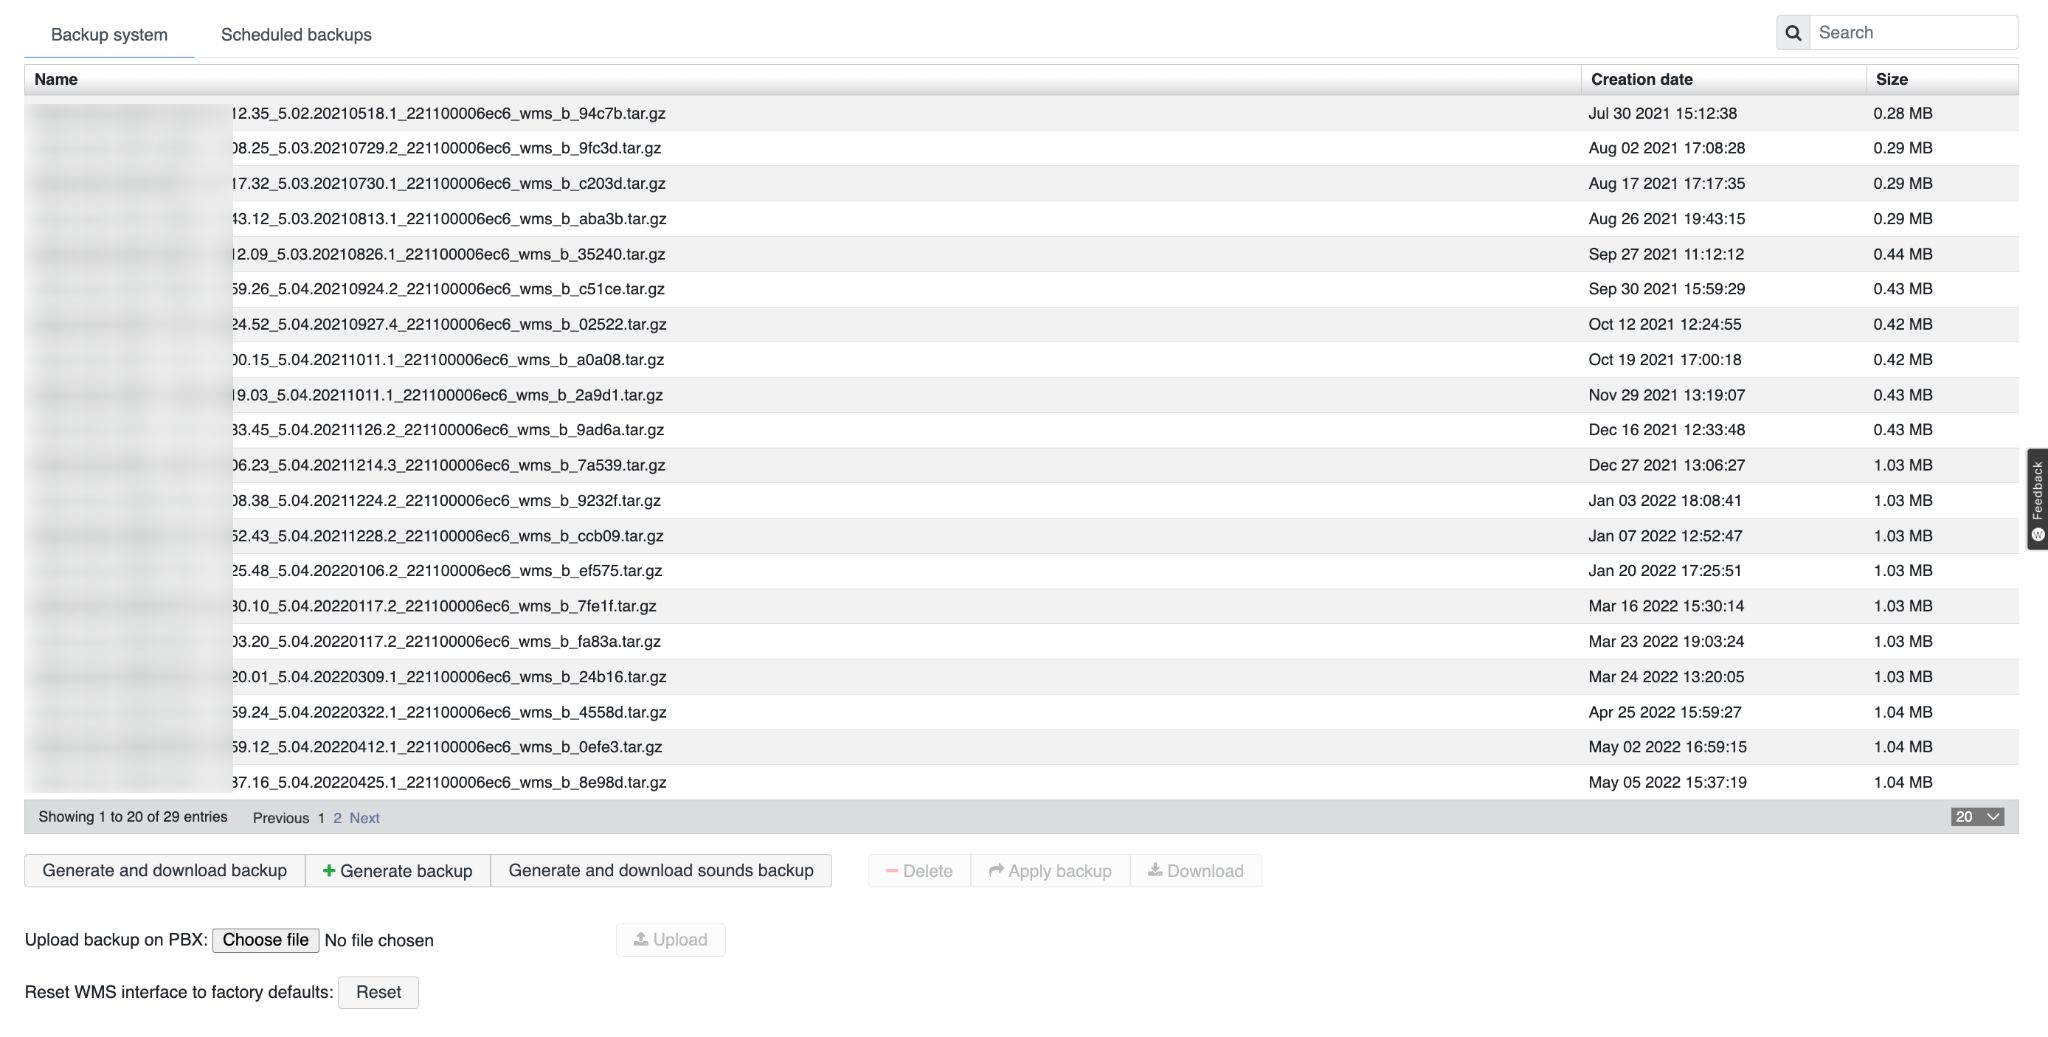
Starting from WMS 6.05, files are moved from local storage to Company Data Storage (CDS). For more information, read Company Data Storage Flow.
To perform the backup procedure:
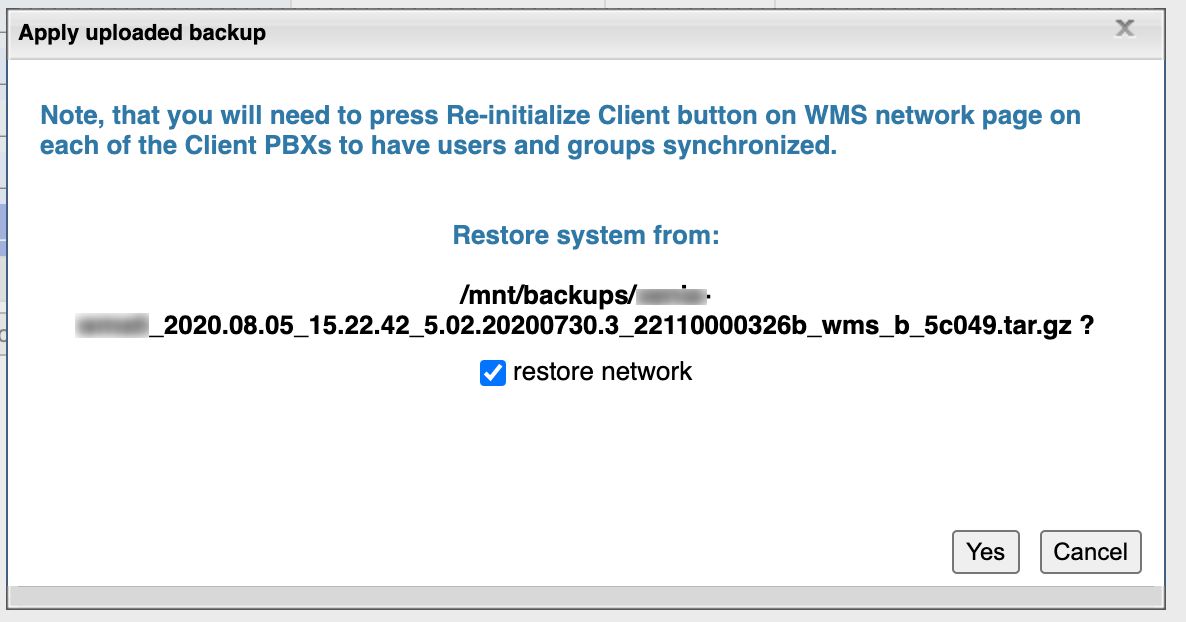
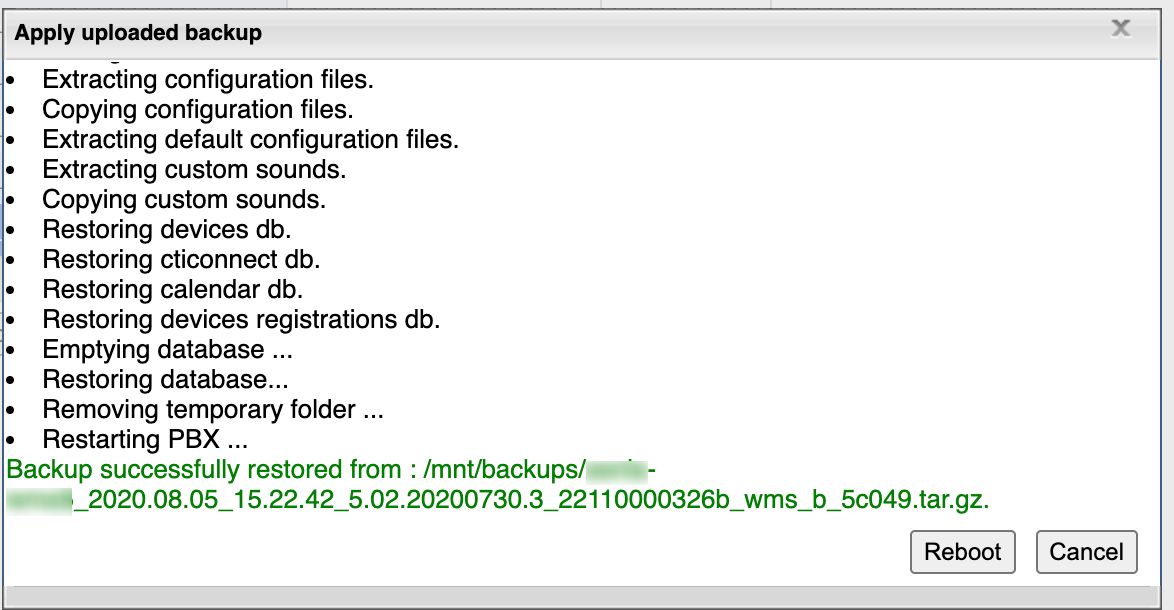
Note: in case you have set up WMS Network, you will need to click Re-initialize Client button on WMS Network page on each of the Client PBXs to have users and groups synchronized. |
Note: "restore network" option allows you to restore network parameters saved in Settings -> System -> Network and the parameters saved in Settings -> System -> HTTP Proxy client. In case you don't need to restore these parameters, uncheck the box (the network parameters will be restored by default). |
Other options:
Limitation: In case of applying backups from another PBX, it is necessary to go to WMS -> System -> Storages and add back storages (for Virtual / HW PBX). |
Scheduled backups
You can set up a scheduled backup to FTP, SFTP or email which will be performed daily/ weekly/ monthly.
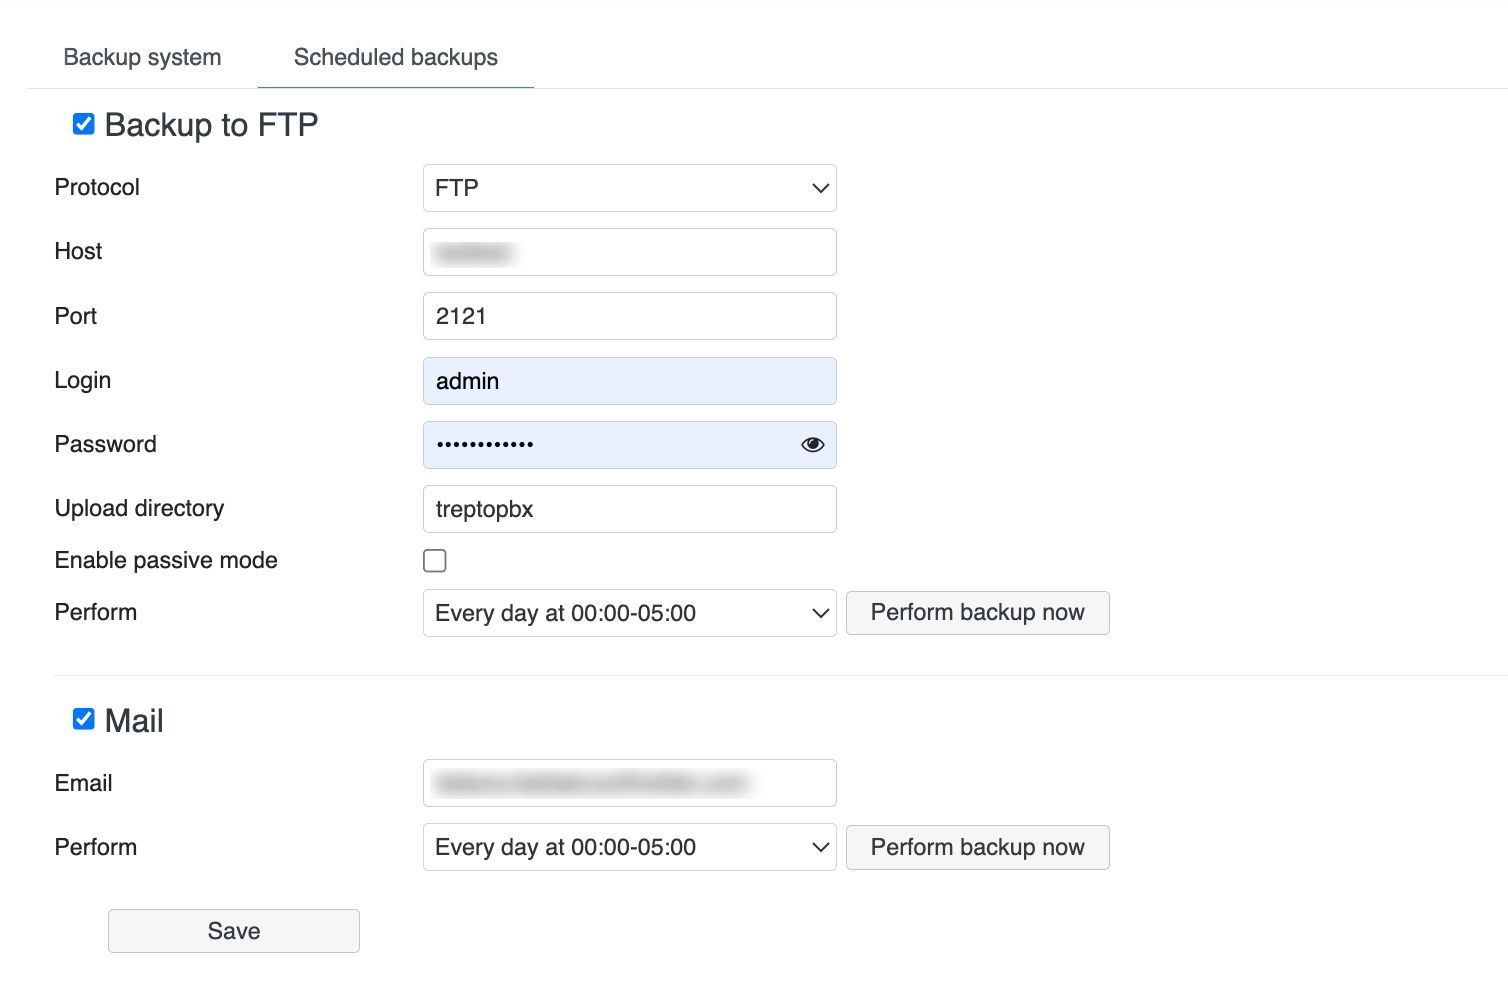
Enable one of the options for the scheduled backup:
Protocol: choose FTP or SFTP
Important: Support for backups to FTP will be removed by January 01, 2025. If you are using FTP, you need to reconfigure the settings using SFTP by the mentioned date. SFTP option is available starting from WMS 6.05.20240119.1. |
Click Save to save the changes.
Click Perform backup now
Check if there is a new version available and perform the upgrade.
Check the ports to open for Upgrade: Ports used by Wildix services. |
Downgrade is not supported! |
Available repositories for upgrade:
|

Note: Starting from WMS 5.0420220819.1, to be able to upgrade to the next major WMS version, e.g. from WMS 5 to WMS 6, WMS Network has to be configured correctly, matching the licences ordered on the Wildix Management Portal. |
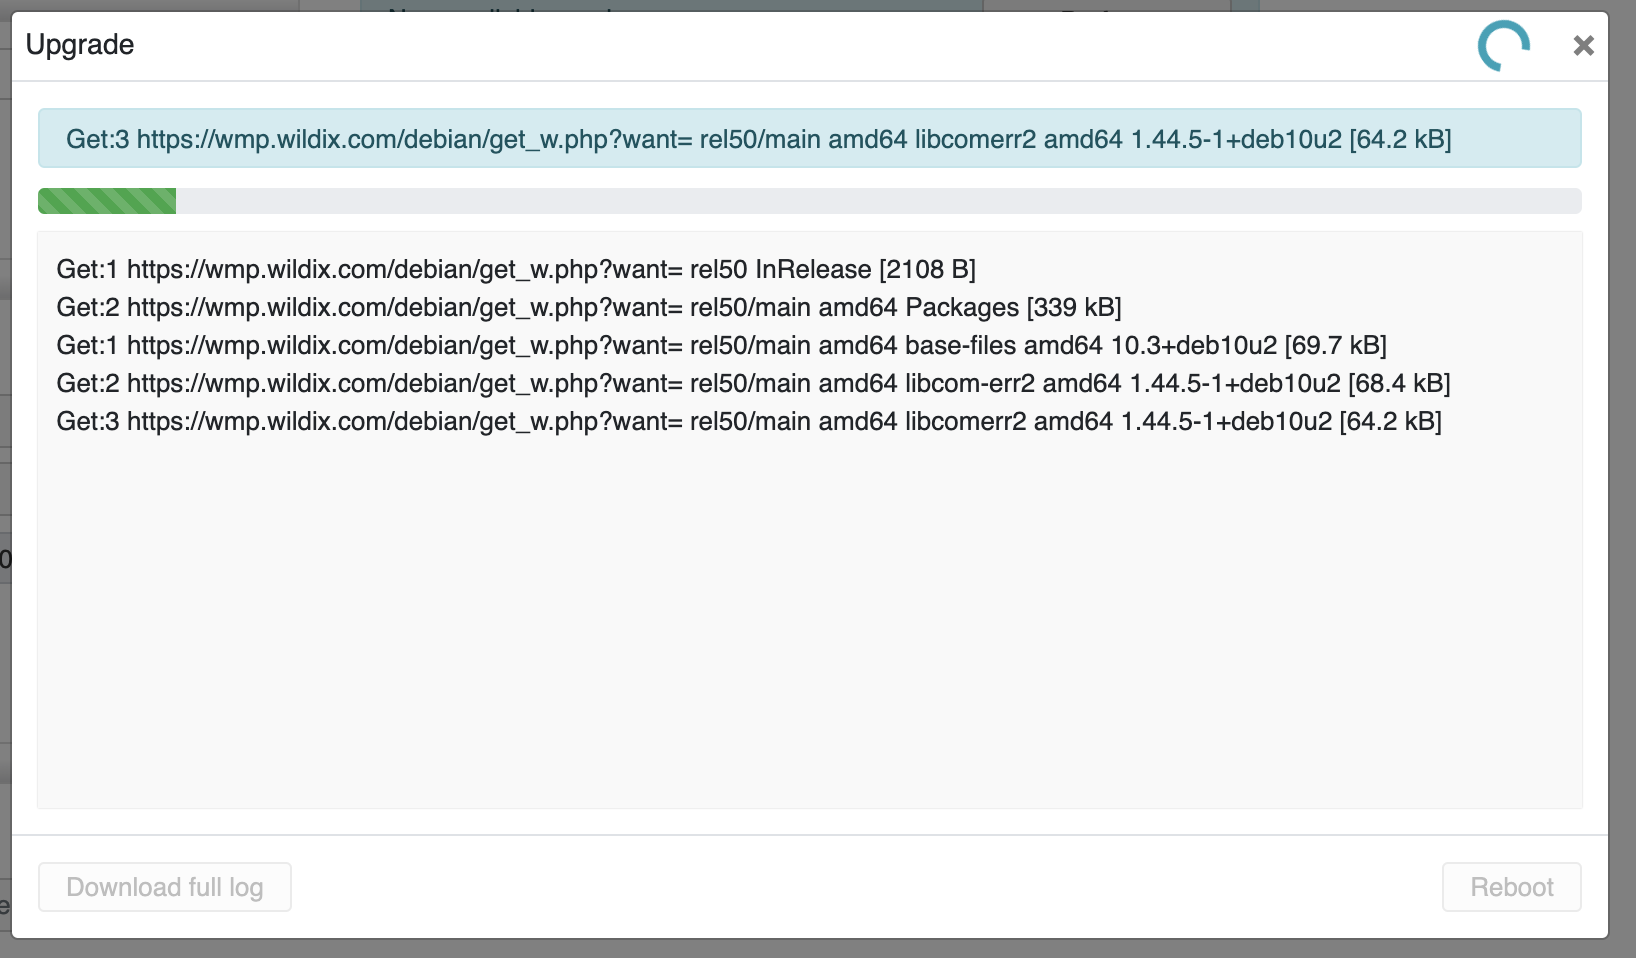
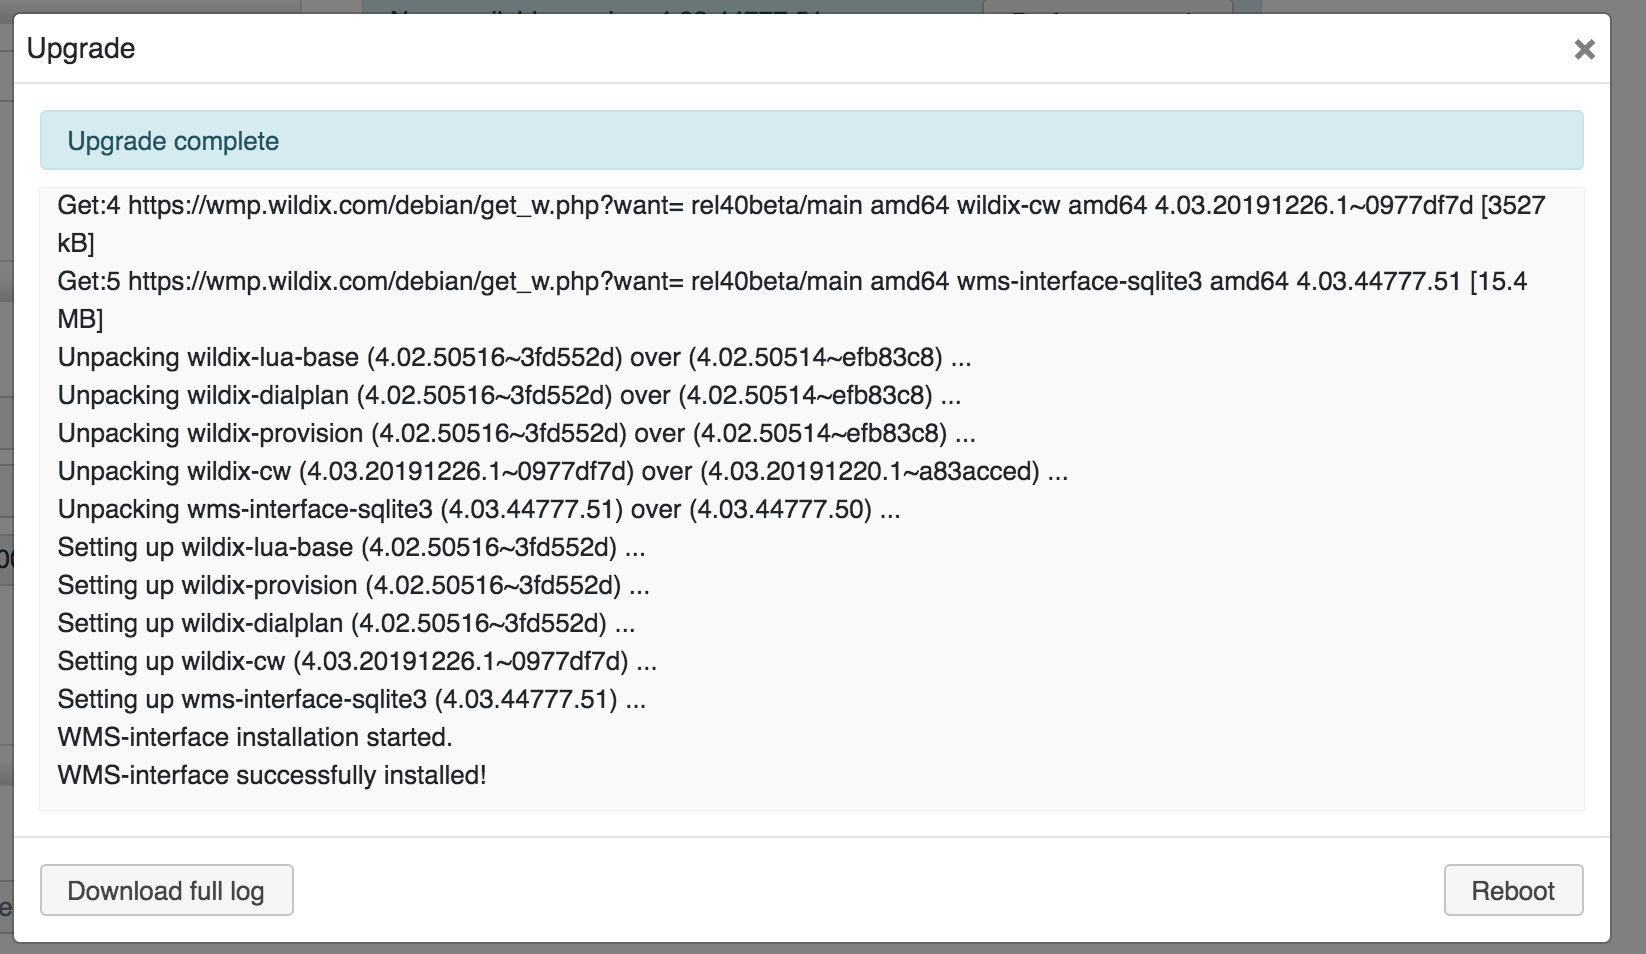
You can check the current WMS version in the upper right part of the screen. |
How to perform the upgrade in case the version contains no WMS interface package? In case the page shows that there is no new WMS version is available, but it was announced by Wildix that there is a new version available, it means that you can install additional packages ("additional packages" = Callweaver package, firmwares, sound files, etc) from the repository. Click Upgrade additional packages. |
Automatic upgrade
Starting from WMS 5.02.20201207.3, weekly automatic upgrade for the Stable repository is enabled by default. You can disable it, but it is re-enabled again after each new upgrade. |
You can enable automatic upgrade to be performed at the specified time.
Parameters:
Note: Starting from 6.01.20220708.5, there is one Upgrade repository field on the Upgrade page in WMS -> Settings -> Tools and utilities. Automatic upgrades are performed from the repository that was manually entered in the field.
|
Custom firmware server
Deploy a local upgrade server for Vision/ SuperVision and PRI/ BRI media gateways (starting from WMS v. 5.01.20200508.1) and indicate the server URL to update firmware in cases when devices cannot get it from firmwares.wildix.com server (for example, connection to the server is blocked from the device; PBX doesn't have access to the server). Please contact Wildix Support for details.
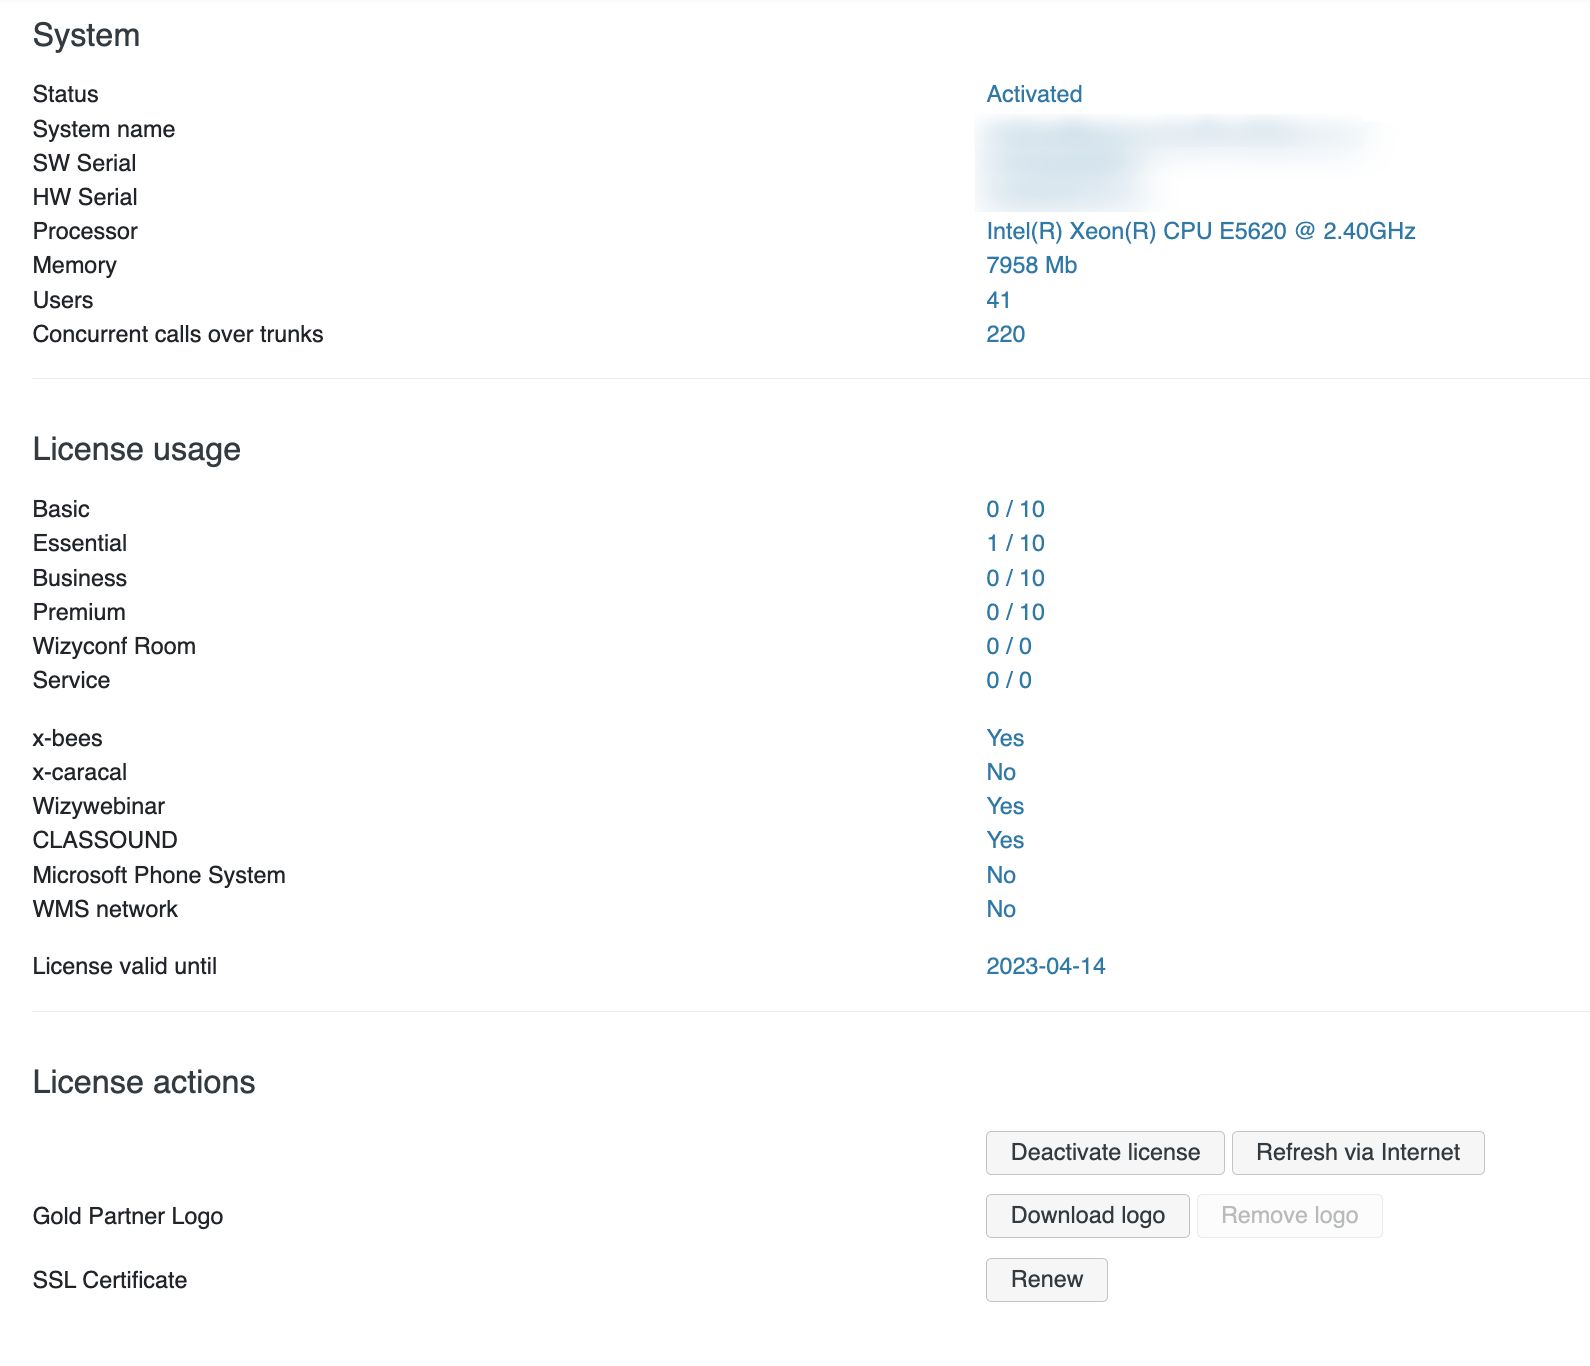
Activate PBX and Wildix licenses.
Read the guide PBX Licensing and Activation for the information about PBX activation and activation of other licenses.
To deactivate the PBX Activation license, click Deactivate license.
If you need to replace an old PBX by reusing PBX Activation license on a new PBX, do not deactivate license, but follow the procedure described in PBX Licensing and Activation guide. |
Gold Partners have the option to display their company logo in WMS / Collaboration interface. The logo must be uploaded in WMP -> PBX per user -> click under user name -> select Company Settings. Requirements: file format: JPG, GIF, PNG; image size: 140px x 60px; file size: < 1MB
Click Download logo to make the logo appear in the upper right part of WMS / Collaboration interface / Remove logo to remove the logo from WMS / Collaboration interface.
Click Renew to update SSL Certificate.
Generate a *.pcap trace which allows you to debug and analyze problems with VoIP traffic.
There are several ways to generate a trace:
This option allows you to capture all the traffic passing through the PBX interfaces.
This option allows you to capture all the traffic passing to or from a specified host.
Example:

After you have selected the way to generate a trace, enter the Trace name and click Start.
When finished, click Stop. You can start a trace and continue navigating other menus of the WMS.
It is possible to stop traces via Dialplan. Consult this Articles for details. |
Open the trace with Wireshark program.
Please find more information on using *.pcap trace generation feature in this Guide on debugging and troubleshooting VoIP problems.
Starting from WMS 6.04.20230731.1 3, it is possible to upload custom prompts via WMS -> Sounds:
1. In WMS -> Sounds, add the directory named "custom":
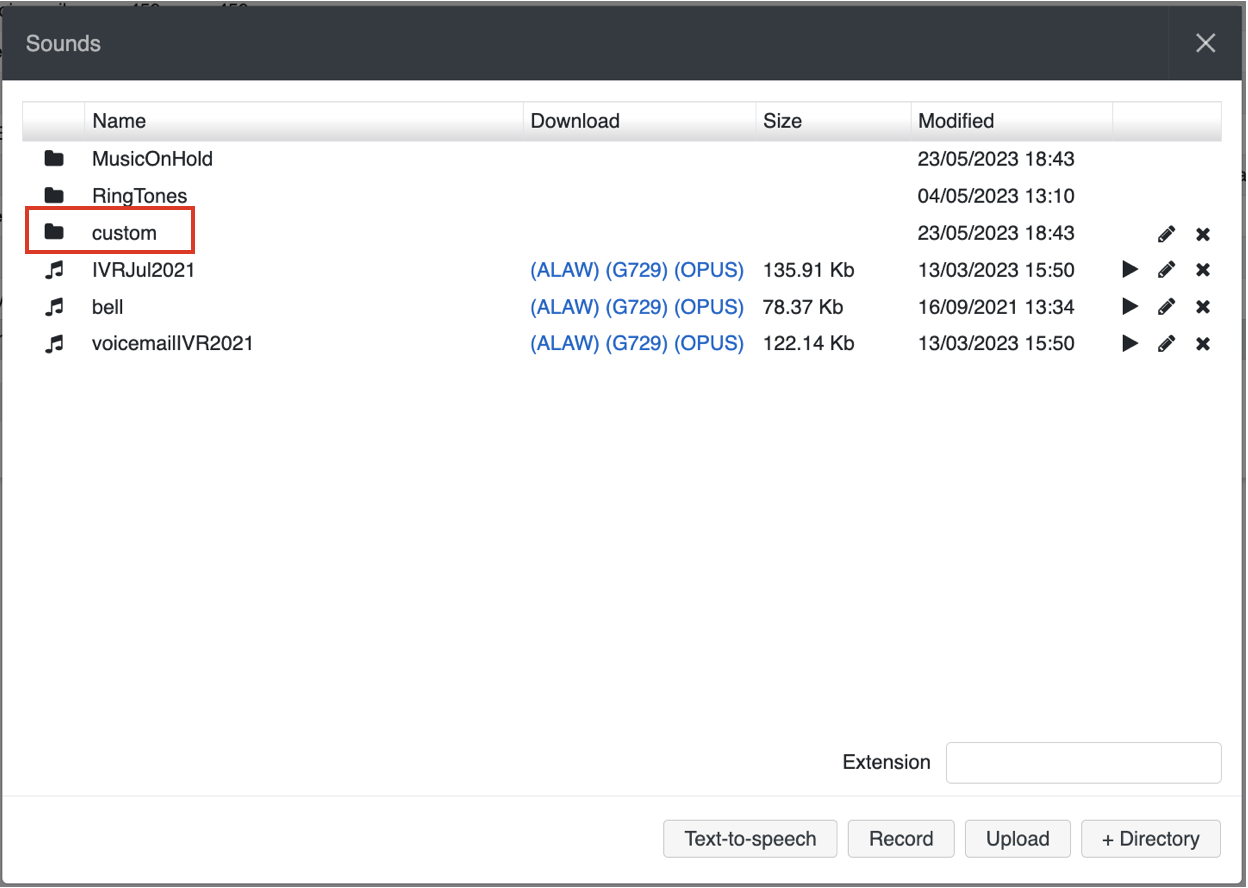
2. Upload the custom files to the directory
Important:
|