The Document describes what is Wildix Integration Service (WIService), the installation process and available features.
Created: February 2019
Updated: September 2022
Permalink: https://wildix.atlassian.net/wiki/x/HgfOAQ
Integration service (WIService)
Wildix Integration Service (WIService) is a component that is required to be installed in order to use CDR-View, Popup App, WebRTC Phone Direct RTP (Windows, removed starting from WMS v 4.02.44497.40), URI dialing (sip-tel-wildix), Headset integration, screen sharing, Fax Printer, and Outlook integration (detailed information about these components can be found in Extensions chapter of Collaboration User Guide). Also, starting from v. 3.6.3 (on Windows) and v.3.7.2 (on macOS), WIService is accountable for automatic updates of Collaboration native app.
WIService integrates with Mac OS Contacts: macOS contacts lookup and call generation.
Requirements
Ports
- Make sure that FQDN “wildixintegration.eu” is correctly resolved with the IP: 127.0.0.1 by your DNS (on the user PC or on the router side)
OS requirements
- macOS X 10.12 and higher
- Windows 7 (64-bit) and higher. WIService for Windows also requires .NET Framework v.4.0 and Visual C++ Redistributable Packages 2015-2019 for x64 platform (download from VC Redist 2019 x64).
Note: WIService is not supported on macOS 10.11 or lower starting from v 3.4.5.
Installation
Go to Collaboration Settings -> Extensions:
Integration service -> click INSTALL
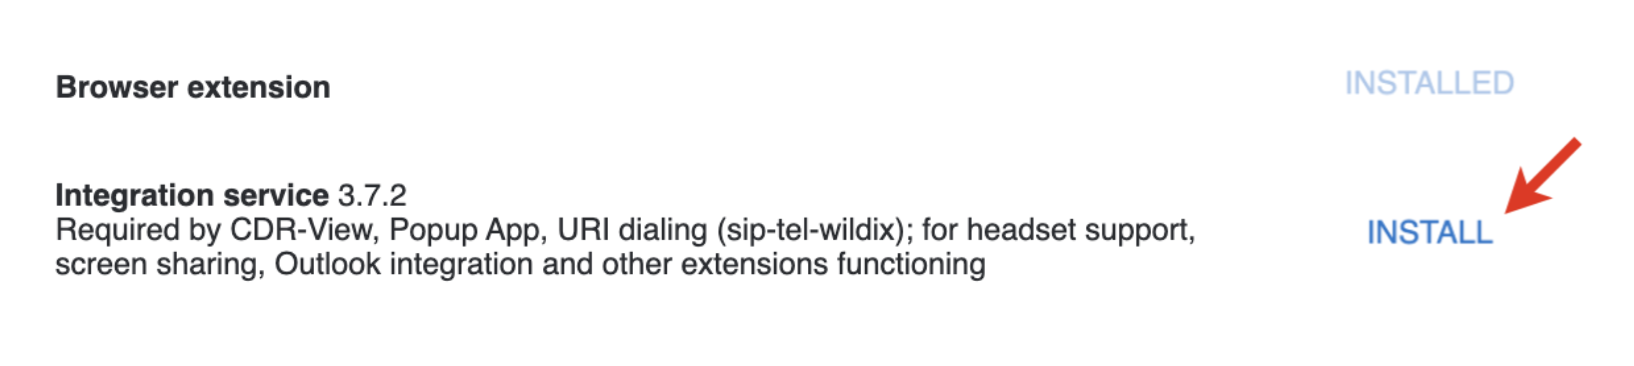
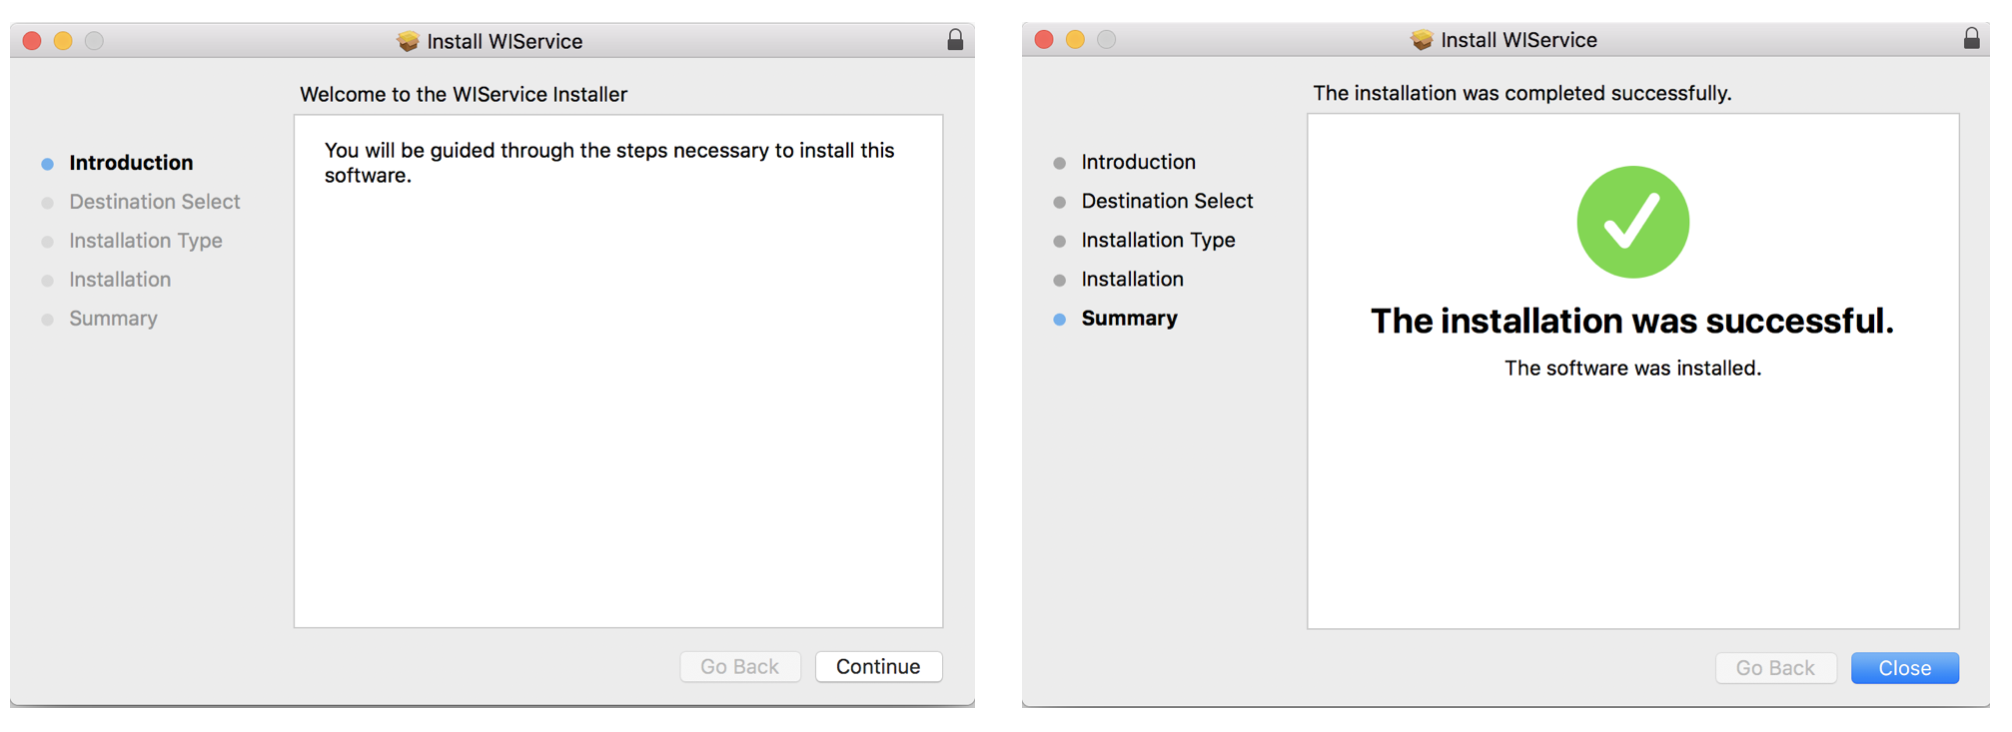
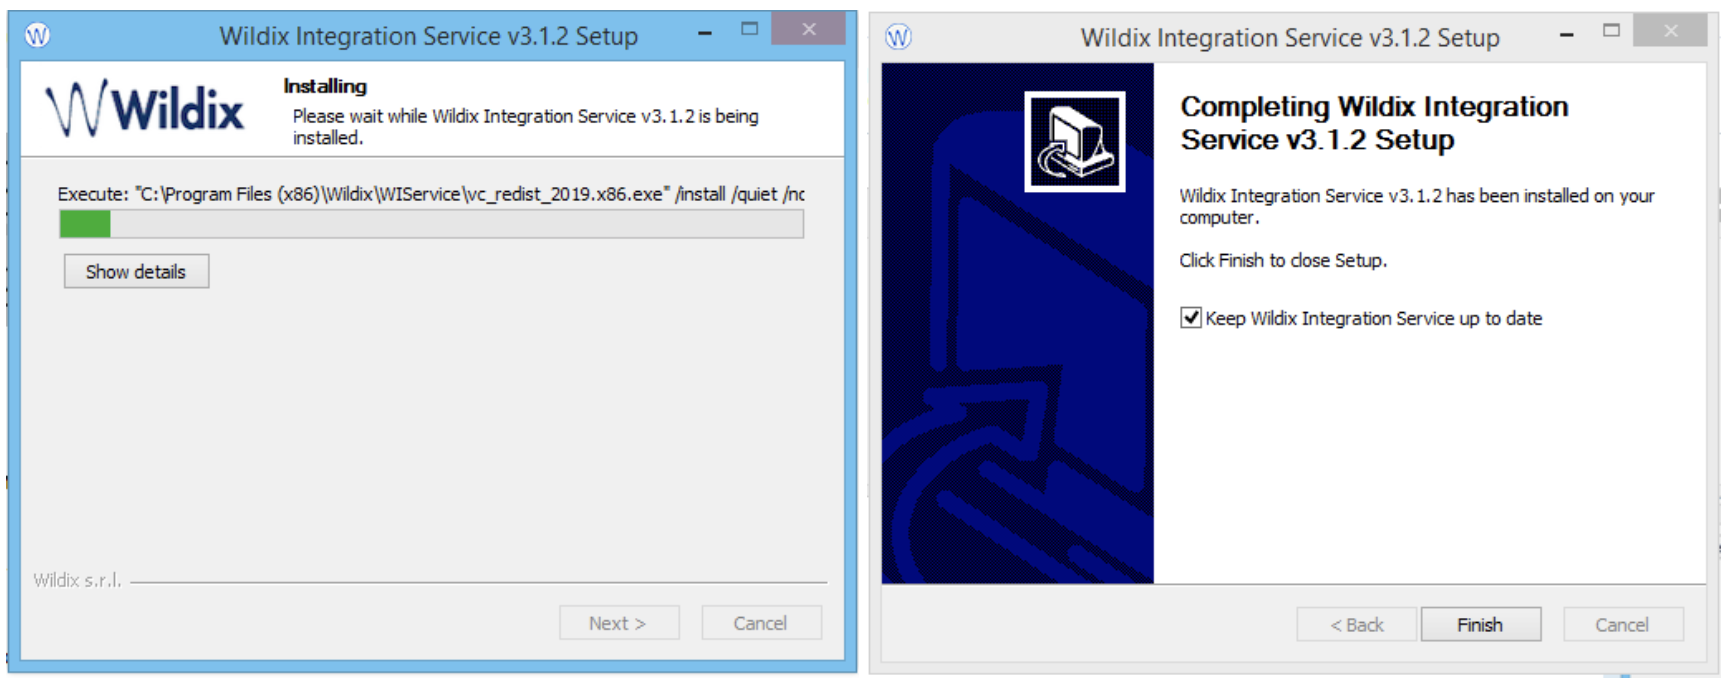
- WIService.pkg (macOS)/ SetupWIService.exe (Windows) is downloaded
- Install the package following the prompts
macOS:
Windows:
You can enable auto update option:
macOS (available from v. 3.1.4)
After WIService installation is completed, click Yes to enable the option Keep Wildix Integration Service up to date
- Auto update starts every day at a random time between 1 AM and 6 AM, or right after the computer starts or wakes up from sleep mode:

or
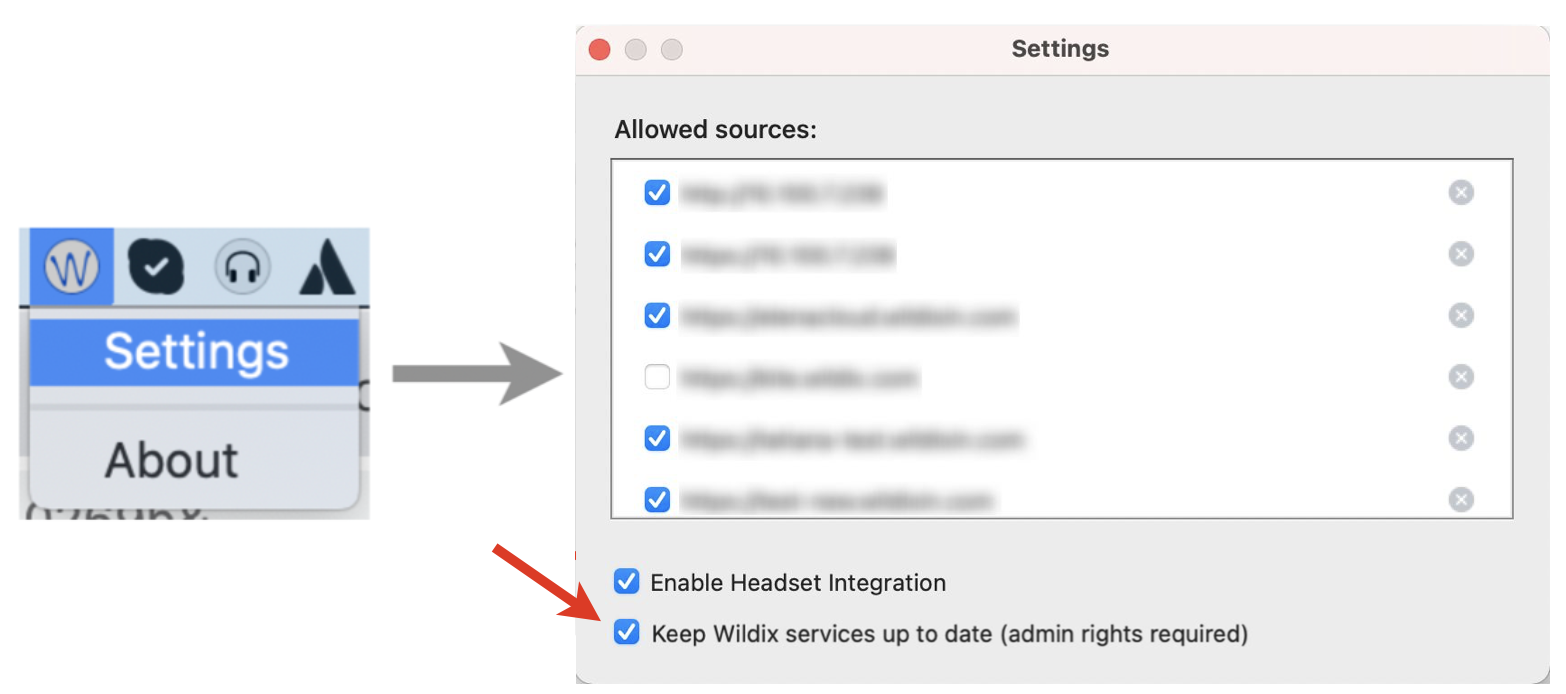
- Go to Menu Bar -> click on Wildix Integration Service icon and select Settings
- Enable the option Keep Wildix services up to date:
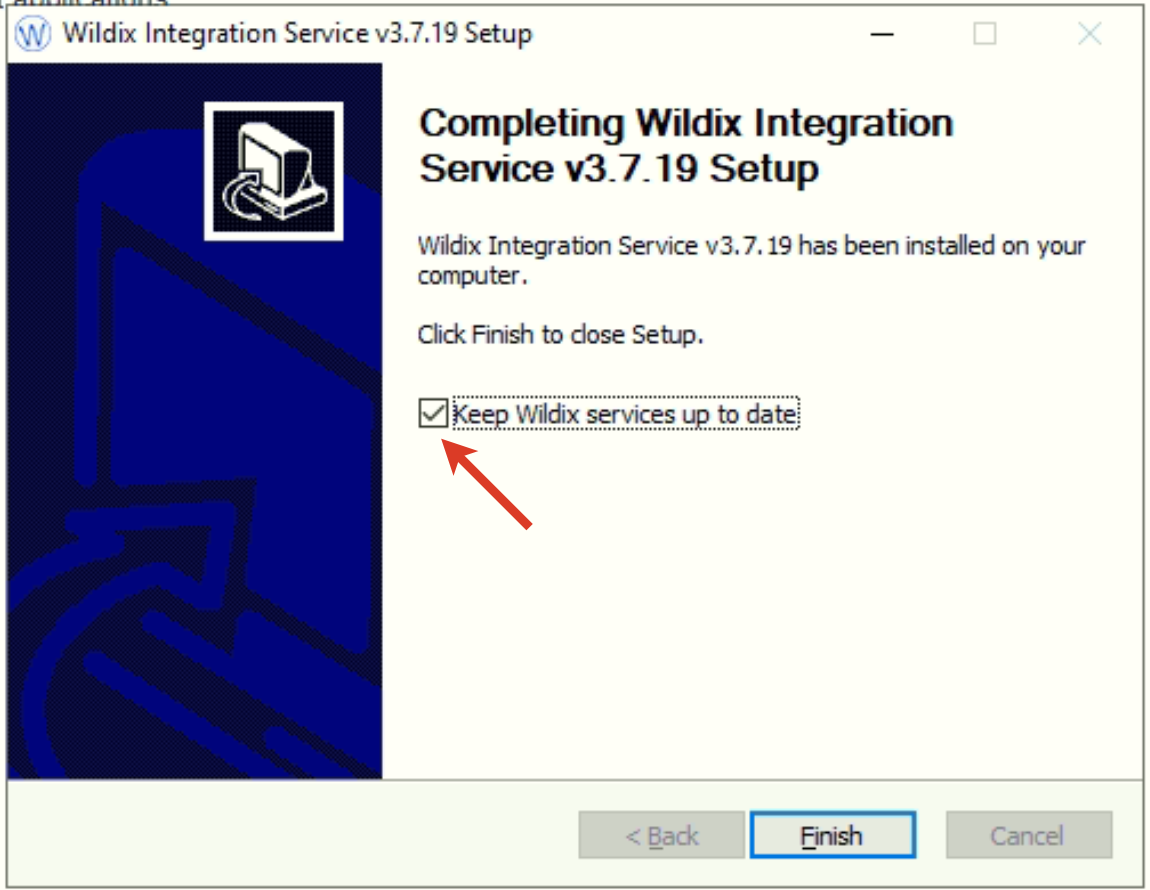
Windows (available from v. 3.1.2)
When completing WIService setup, make sure the box Keep Wildix Integration Service up to date is ticked:
- Windows Task Scheduler checks for updates every day at 01:00-06:00 or after starting PC. If a new version is available, it downloads a new installation package and runs it in silent mode
or
- Go to Quick Launch Toolbar -> right-click on Wildix Integration Service icon and select Settings
- Enable the option Keep Wildix Integration Service up to date:

Important: If you have Sophos antivirus, to avoid Sophos from blocking automatic updates of WIService, make sure to:
a) Option 1: Add WIService to Sophos exceptions
- Go to Sophos Dashboard -> Protection -> Exceptions
- Add Wildix folder path to the Sophos exceptions: “C:\Program Files\Wildix”
b) Option 2: Switch to WIService.msi installer.
Note: Before installing WIService.msi, you need to delete WIService.exe file from the Program Files folder.
MSI file for Windows:
Documentation: Large-Scale Deployment on Windows - Integration Service
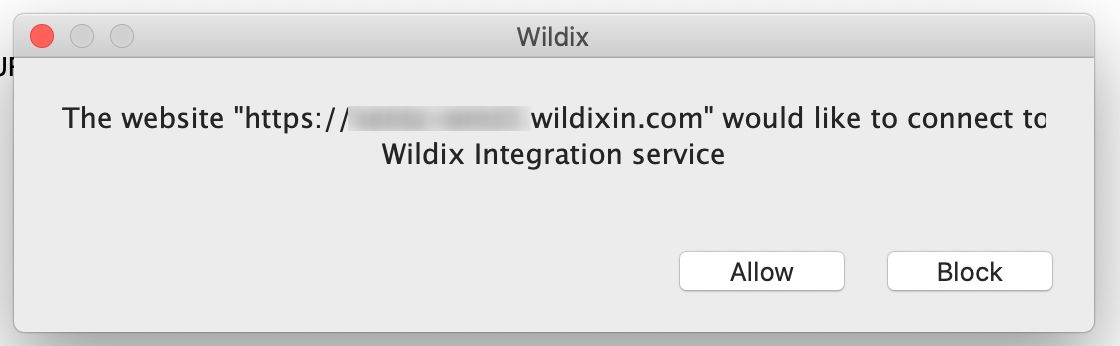
Security permissions and settings
Once WIService is installed, the system asks for security permission to be allowed:
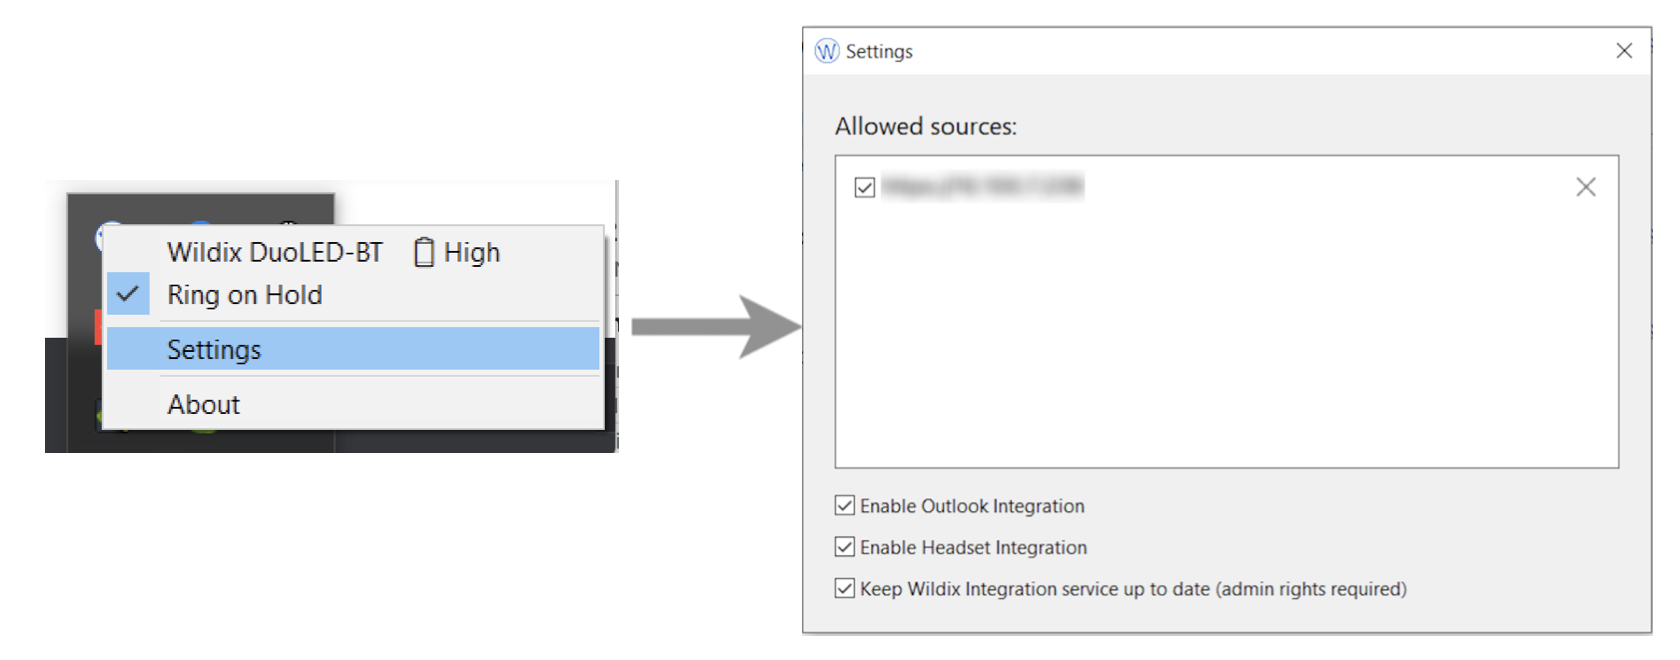
To check allowed sources on:
macOS:
- Go to Menu Bar -> click on Wildix Integration Service icon and select Settings:

Windows:
- Go to Quick Launch Toolbar -> right-click on Wildix Integration Service icon and select Settings:
Manual update of WIService
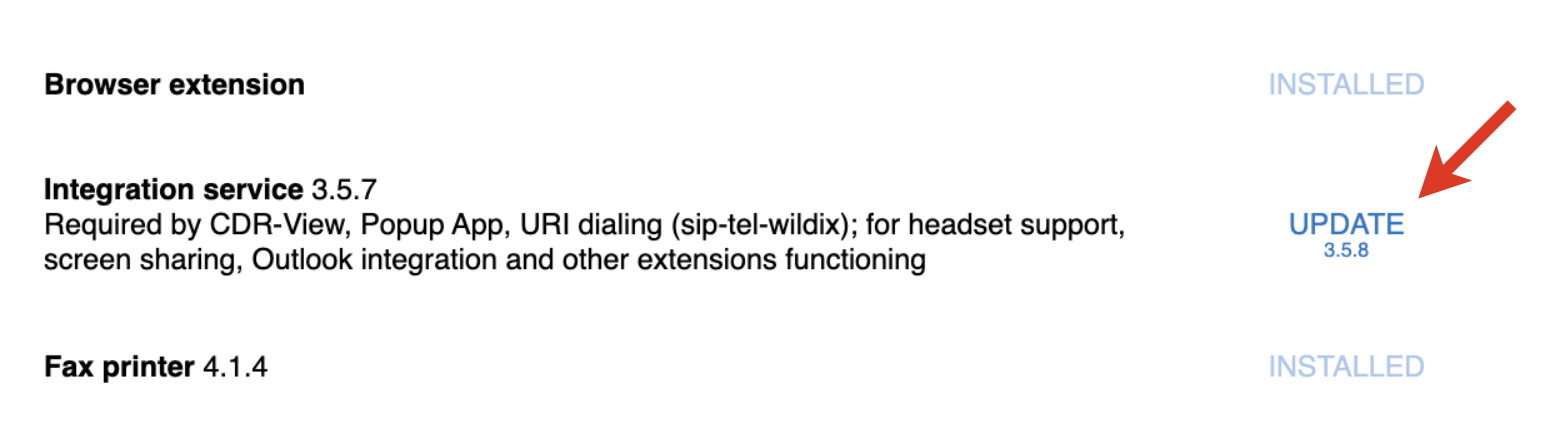
Manual update may be required if you turned off auto update of WIService. If there is an update available, the button next to Integration service in Collaboration Settings -> Extensions changes to UPDATE. Click on it to get the newest version of WIService:
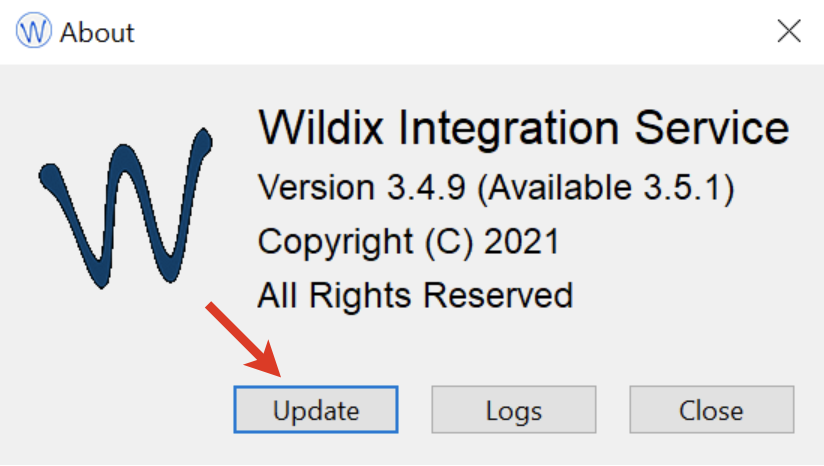
Starting from v 3.4.10 (on Windows and macOS), it is possible to manually update WIService via tray menu:
- Click on the WIService icon -> About
- If an update is available, there is the Update button. Click on it to update the service:
WIService and Collaboration native app
Starting from v. 3.6.3 (on Windows) and v.3.7.2 (on macOS), WIService includes updates of Collaboration native app. And starting from WIService v. 3.7.4 and Collaboration native app v. 2.4.2, the menu bar icons of WIService and Collaboration native app were merged and WIService menu includes "Show collaboration" and "Exit collaboration" options:

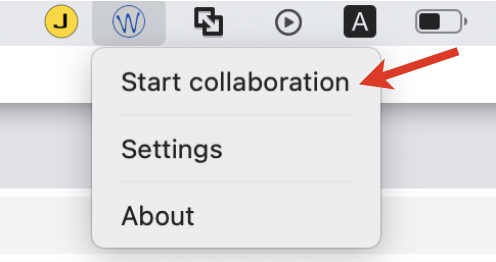
Starting from v. 3.10.3, it is possible to launch Collaboration native app via WIService:
- Go to Menu Bar/ Quick Launch Toolbar
- Click Start Collaboration:
Supported features
After installation of WIService, the following features become available:
- CDR-View
CDR-View is monitoring and reporting tool.
Details: CDR-View User Guide.
- Popup App
Popup URL/ App can be set up in Collaboration Settings -> Personal, see the guide: How to set up web application integration via Popup URL.
- Direct RTP (experimental) (removed starting from WMS v. 4.02.44497.40)
The feature is enabled in Collaboration Settings -> Web Phone -> Enable direct-rtp (experimental). It allows RTP streams to be passed directly between devices.
Details: How to set DSCP QoS for Wildix devices and Web Phone.
- Call generation via URI
Thanks to URI support it is possible to generate a call by clicking on a link containing a phone number. After you click on a link, a call is placed via an active device selected in Collaboration.
Details: What is Wildix URI, Collaboration User Guide.
Call generation via shortcut
Note for macOS: The feature is available starting from WIService v. 2.11.4. Also make sure "Wildix" is added to Accessibility permissions in macOS Security & Privacy settings.
The option is enabled in Collaboration Settings -> Personal -> Dialing hot key. It allows setting up a shortcut for click2call from applications/ web pages. To place a call, select a phone number and press the key combination. The call is placed via an active device set in Collaboration.
Details: Collaboration User Guide.
- Headsets support
The feature ensures support of remote call answer/ hangup and volume control for Wildix and compatible third-party headsets (Jabra, Plantronics, Sennheiser). Depending on the OS of your device, you can enable it in the following way:
Windows:
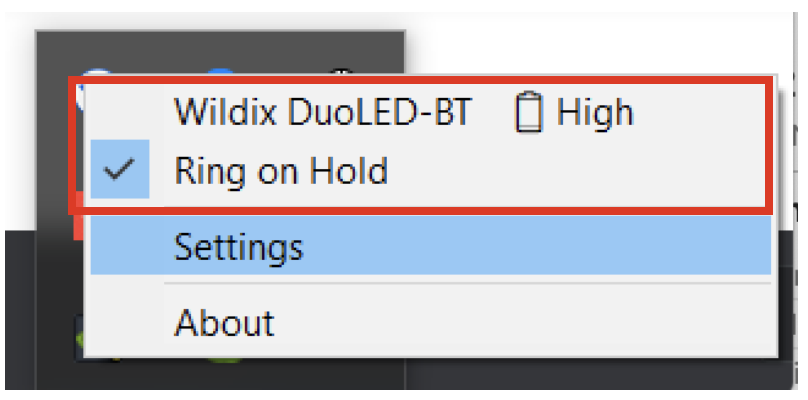
Go to Quick Launch Toolbar -> WIService tray menu -> Settings -> tick off Headset integration enable. Call control options are available in WIService tray menu:
- Outlook integration
Outlook Integration (merged into WIService starting from WIService v. 3.5.1) adds support for Calendar Sync, Presence, click2call, IM, call popup from Outlook
Find more info in this guide: Outlook integration for Microsoft Windows
macOS:
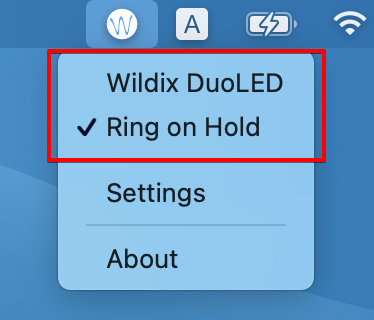
Go to the Menu Bar -> click on the Wildix Integration Service icon -> choose Settings, and make sure the option Headset integration enable is ticked off. You can find call control options in the Wildix Integration Service menu:
- Screen sharing and remote control
The features allow you to share your screen with other users and let them take remote control of your device.
Details: Collaboration User Guide.
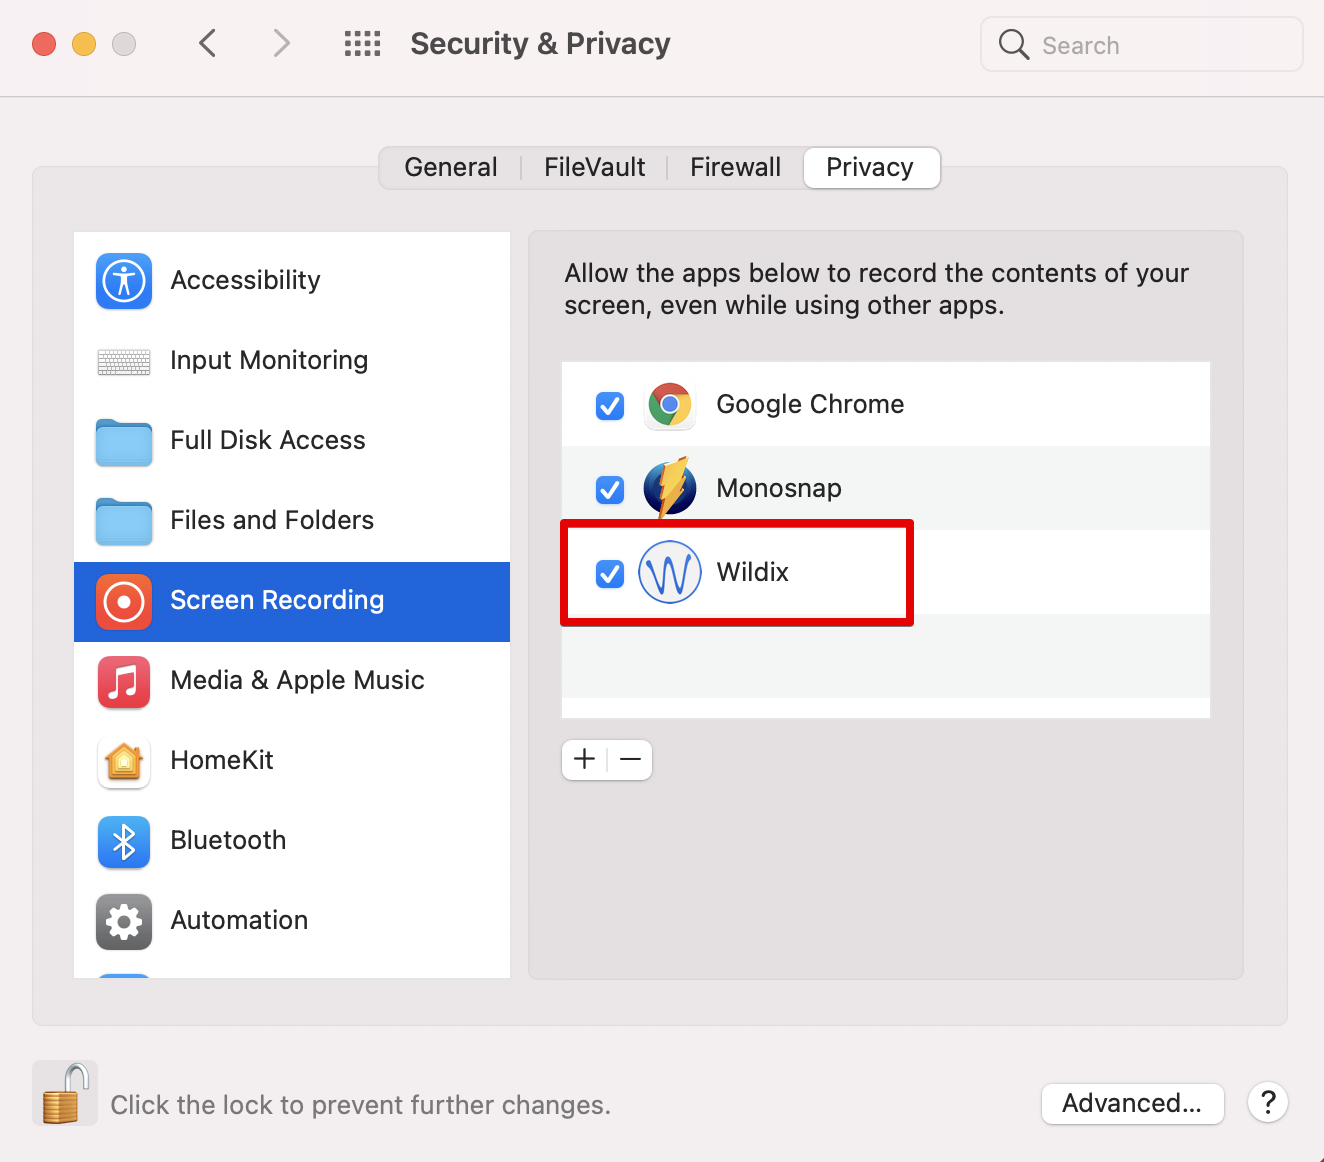
Note for macOS: For screen sharing to work correctly starting from WIService v 3.4.1, make sure to grant the necessary permissions in System Preferences -> Security & Privacy -> Screen Recording -> tick off Wildix:
Send Feedback
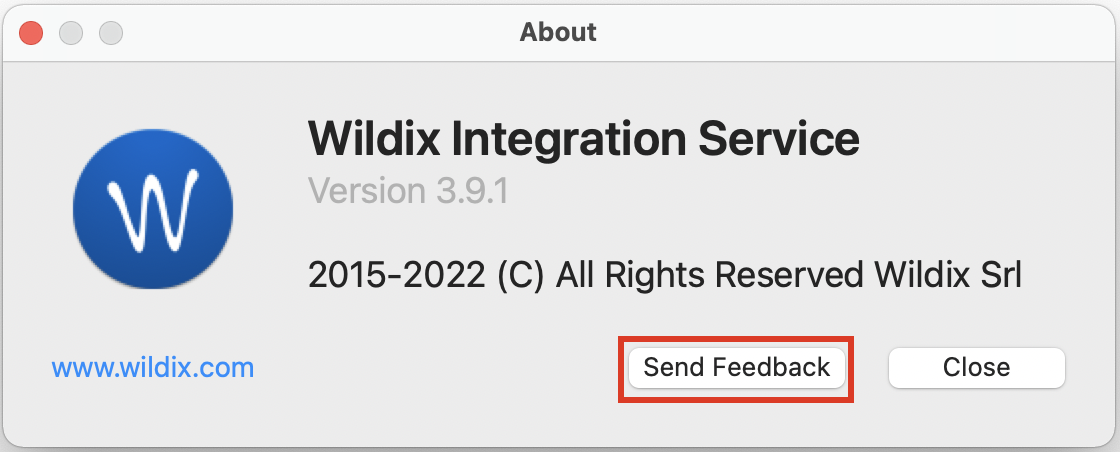
Starting from WIService v. 3.9.1, it is possible to send feedback about WIService:
- Click on the WIService icon -> About
- Click Send Feedback:
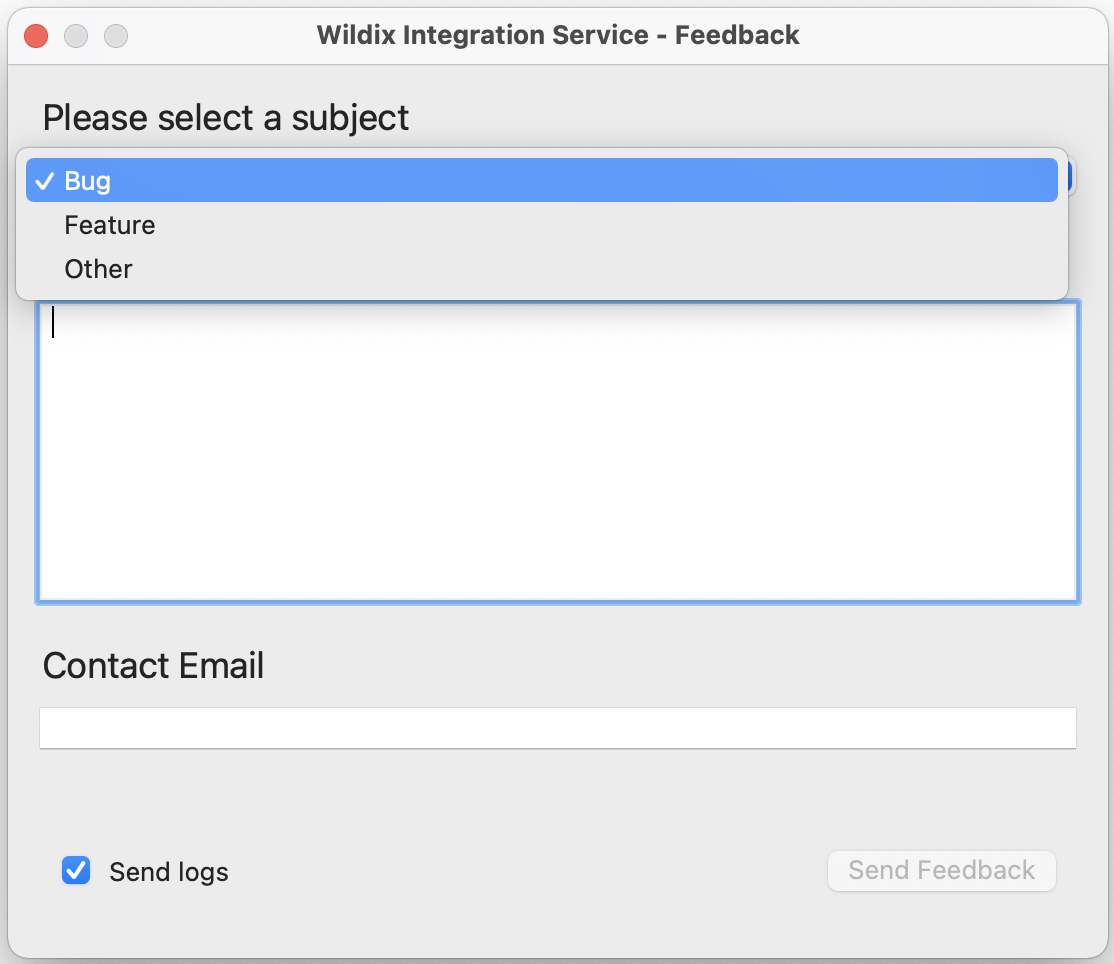
- Select subject: Bug, Feature, or Other:
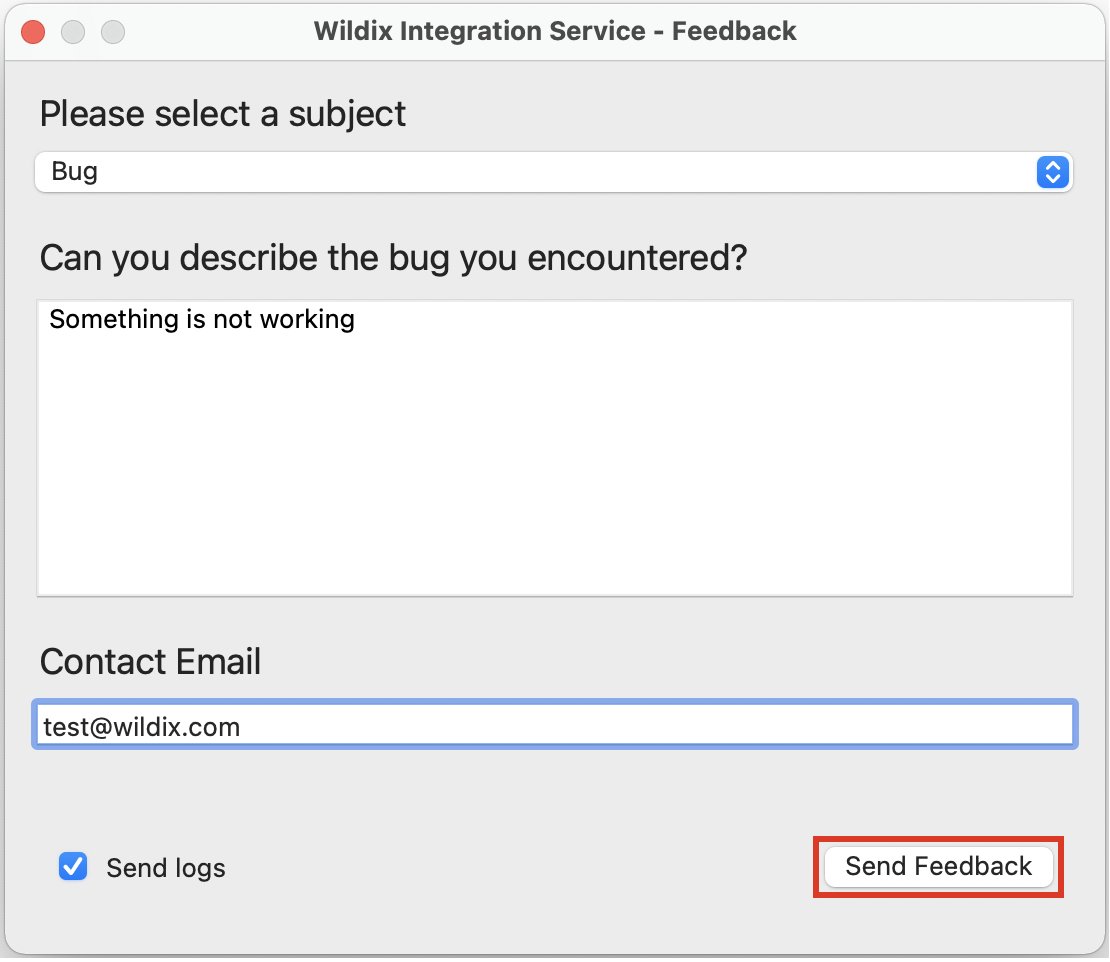
- Enter description, contact email and click Send Feedback:
Troubleshooting
In case you have any issues with the component or want to restart/ uninstall it, follow Debugging of Wildix Integration Service and related components for instructions.