...
| Info |
|---|
This document is a complete guide explaining how you can enable access to Wizywebinar and use it to schedule and run your webinars. Created: January 2021 Updated: November 2022 Permalink: https://wildix.atlassian.net/wiki/x/ahLOAQ |
| Table of Contents |
|---|
| Noprint |
|---|
Wizywebinar White paper |
...
- Click on the Participants tab. In this menu, you can add participants to your webinar using one of 3 modes:
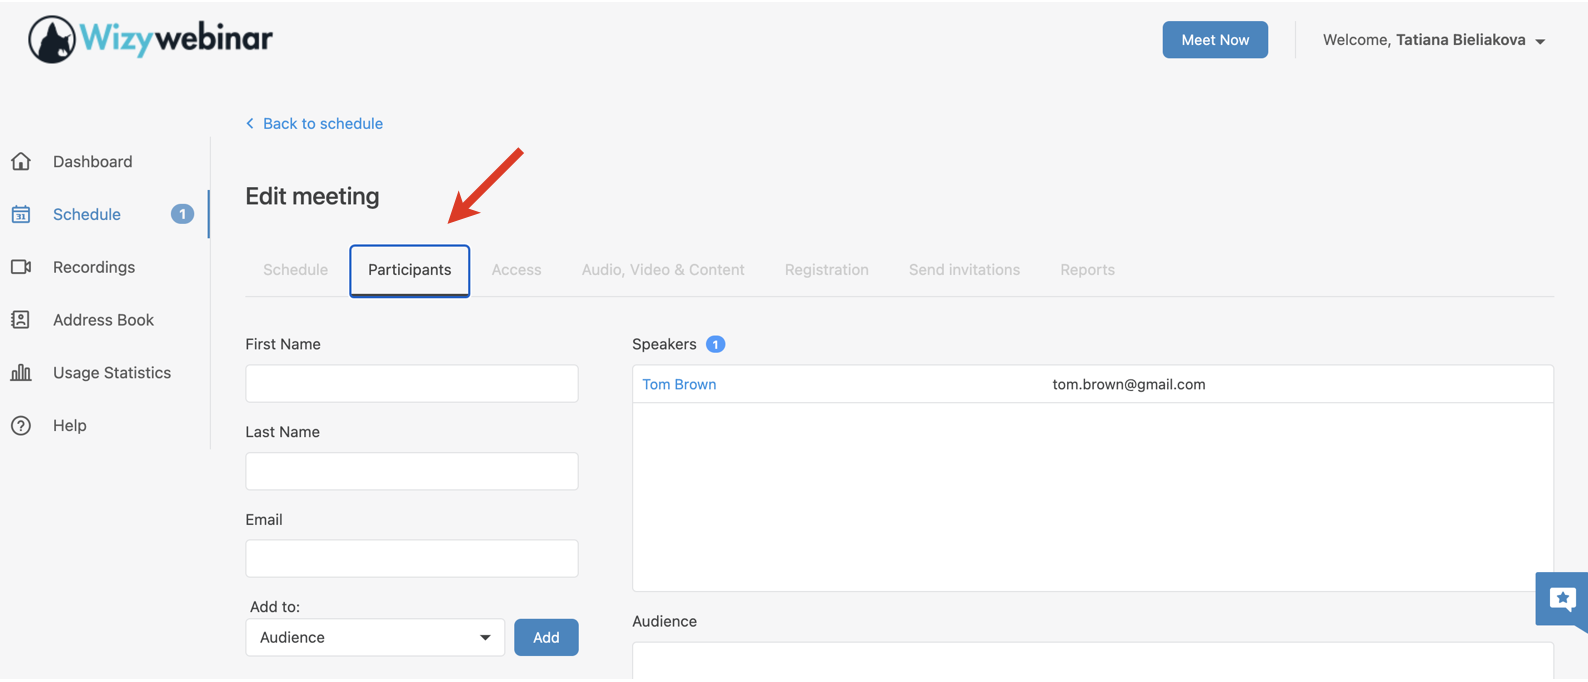
1 - add participants manually: enter user’s First name (1), Last name (2), email (3), set a role (4) and click Add button (5). By default, new contacts are automatically saved in Address Book, unless you change this behavior (see the additional control options in this section):
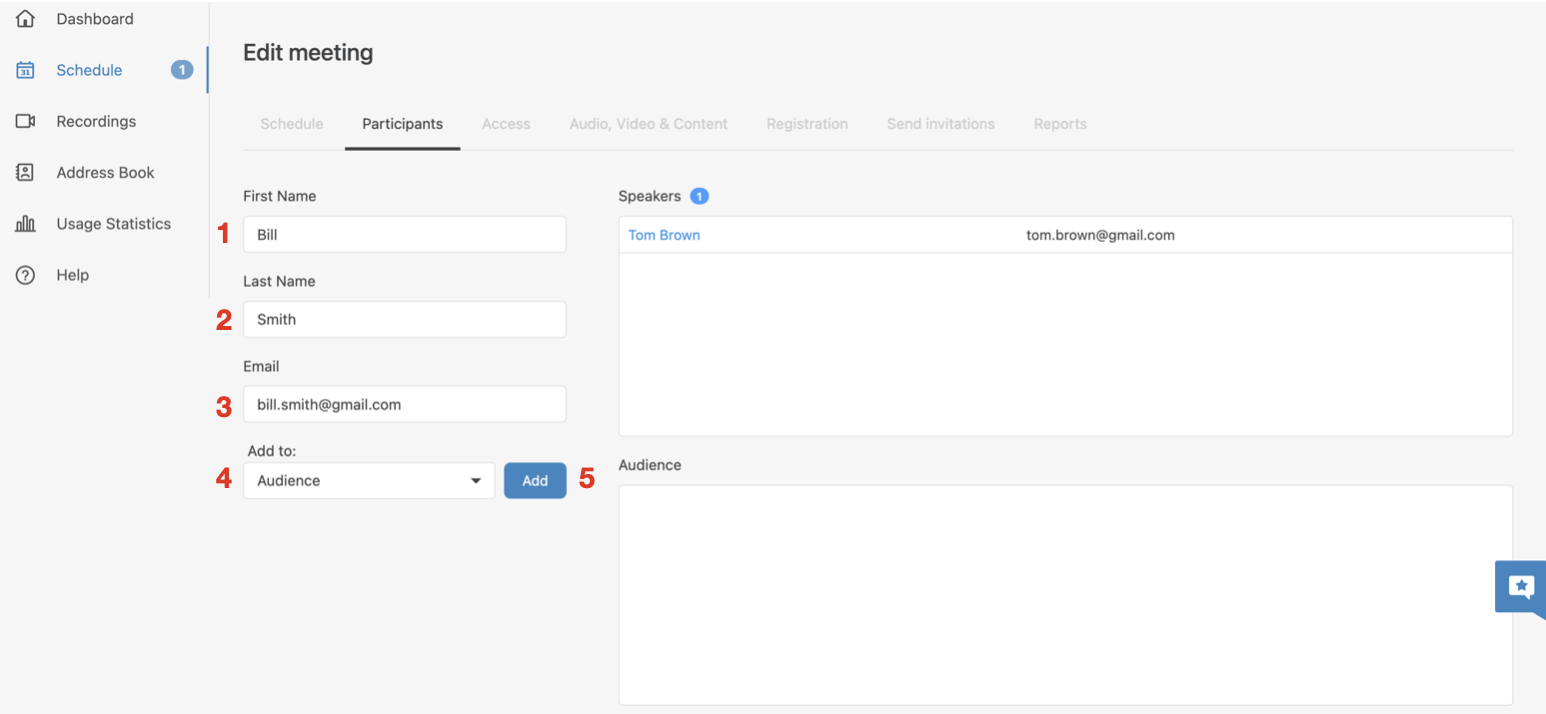
Note Note: When you add participants, you always need to indicate their role:
- Speaker – someone who runs the webinar, broadcasts their audio and video and controls various aspects of the webinar. There can be more than one speaker. Speakers have a number of privileges over other participants, which include: the ability to speak, show video, start the recording, manage other participants, use group chat for speakers, and more as you’ll see later in this Guide
- Audience – mostly passive listeners of the webinar. By default, they don’t have permission to speak, unless allowed by speakers. If needed, they can interact using chat in Conversations, Questions and Answers, etc.
There is also an Account holder – someone who sets up the webinar and the only person who can edit the details of the event before it starts. Account holder belongs to Speakers of the webinar by default.
- 2 - add participants from Address Book: you can add them one by one or select multiple participants
Click the button Add from Address book: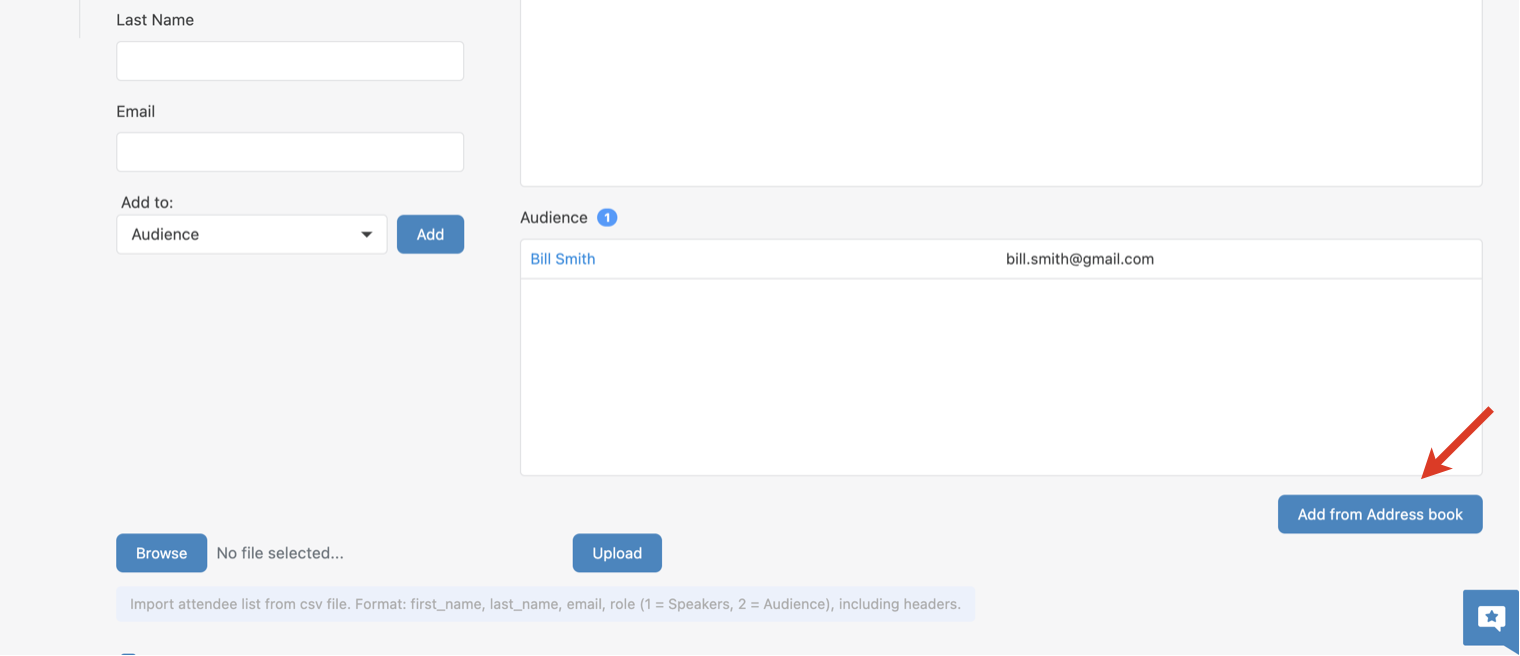
Select participants (1) and click Add (2):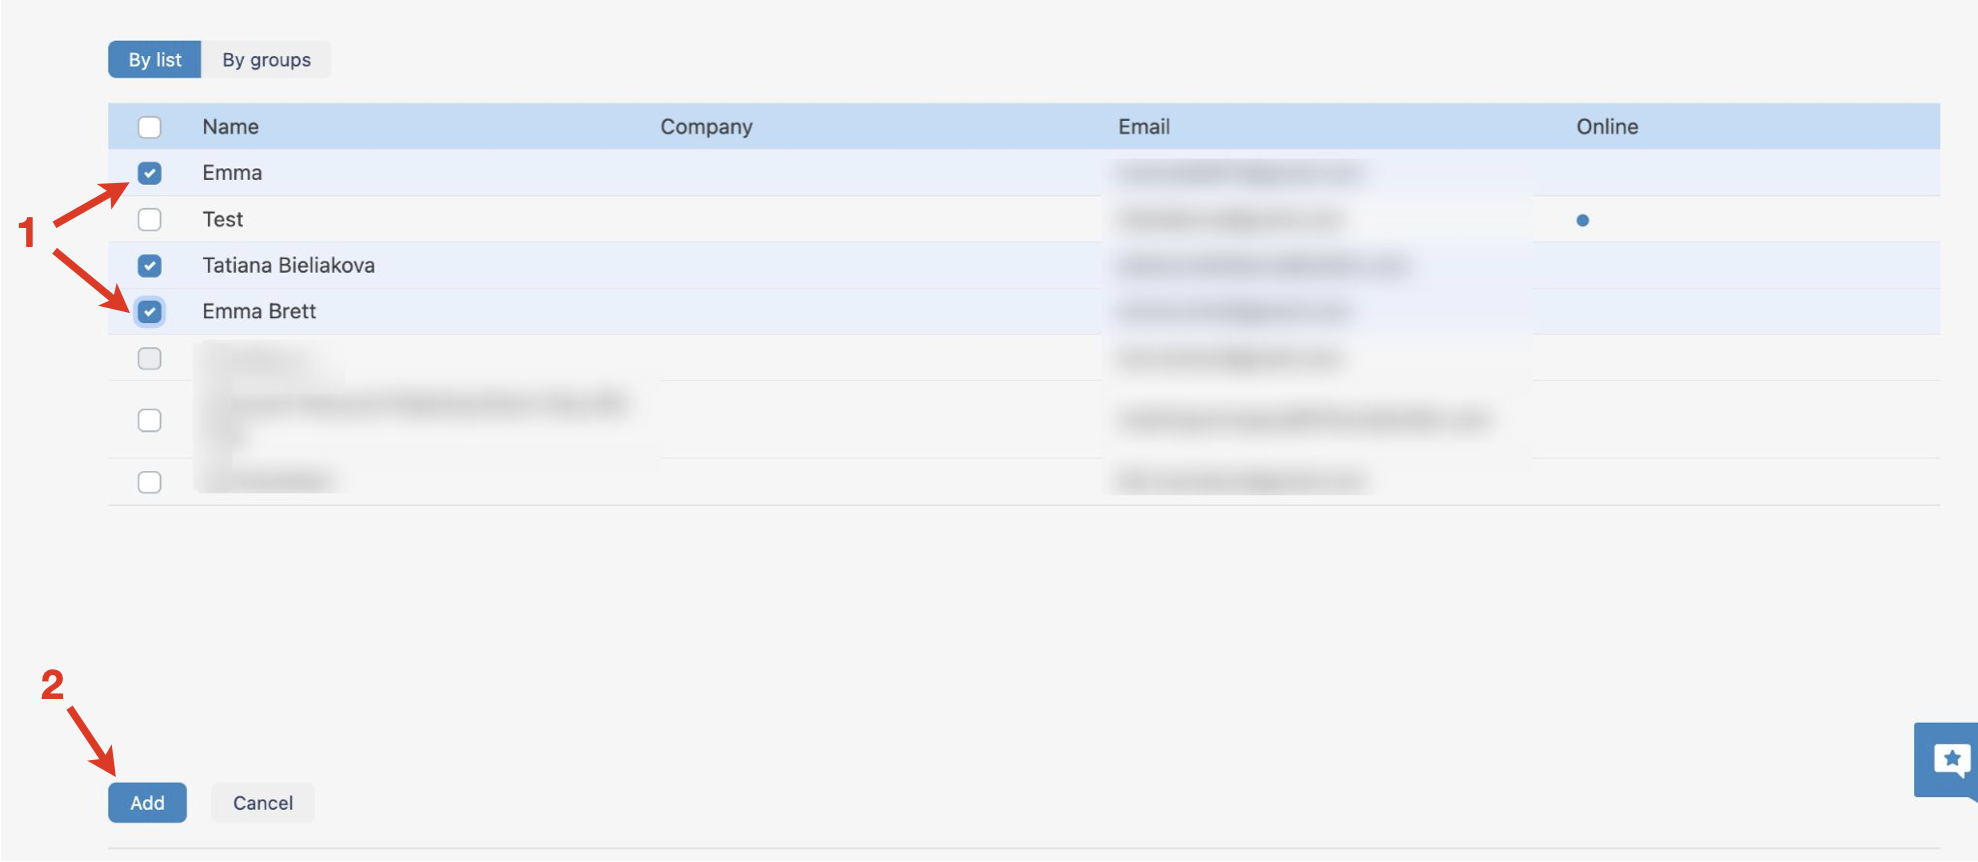
Note: Participants are added to the group (Speakers/ Audience) chosen above. So, if you want to add users from Address book to another group, make sure to adjust the setting accordingly: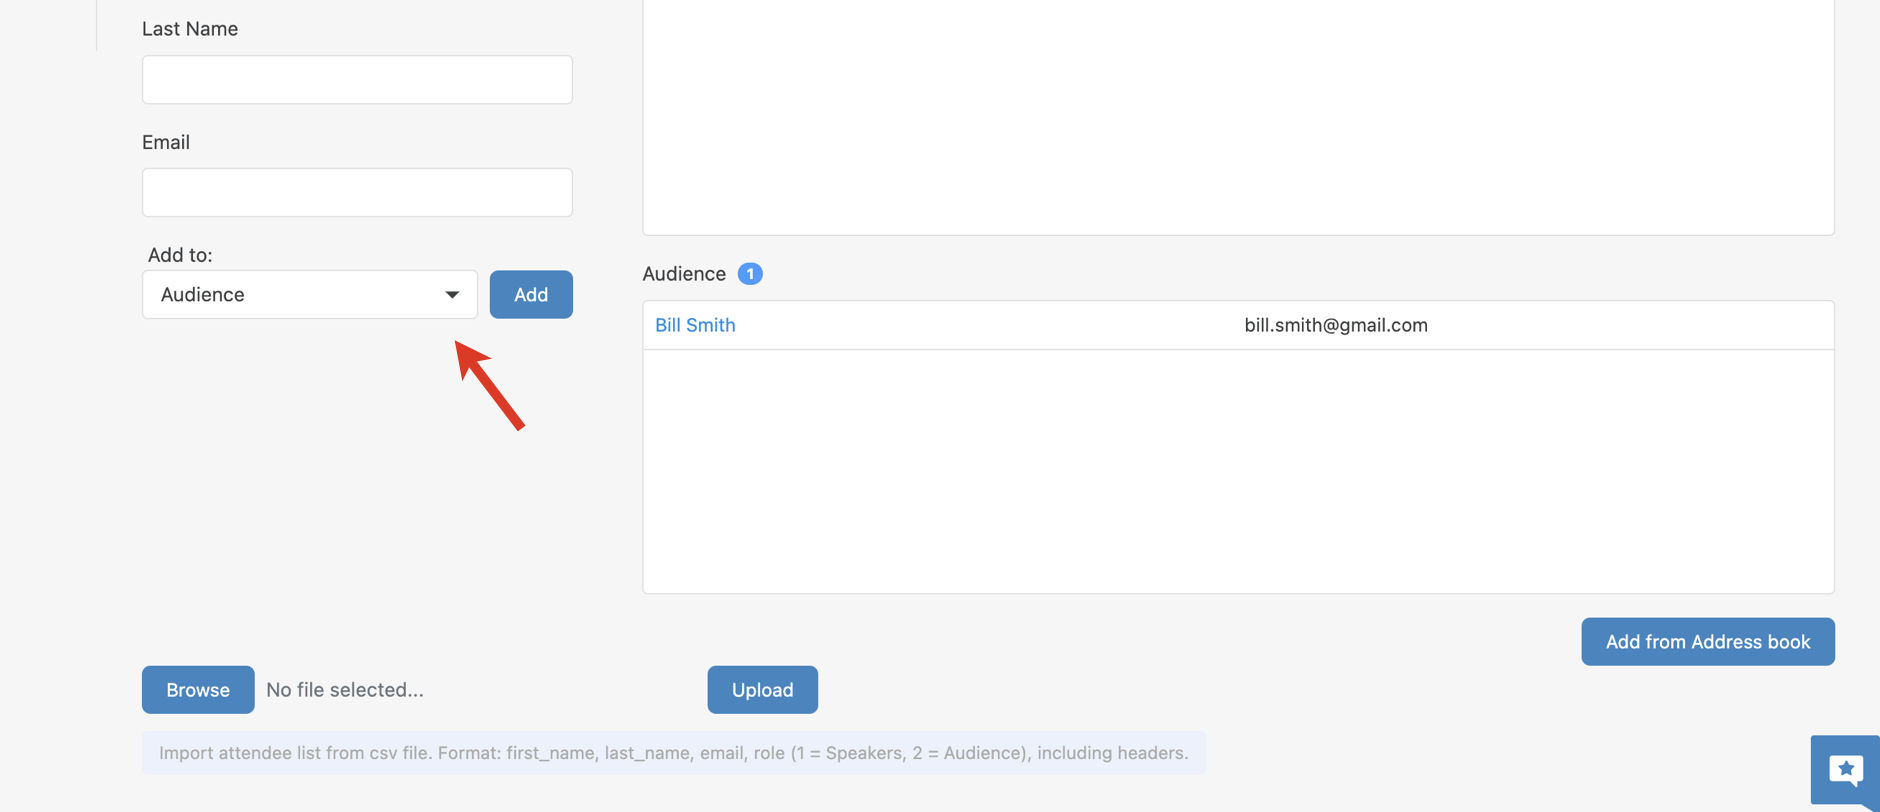
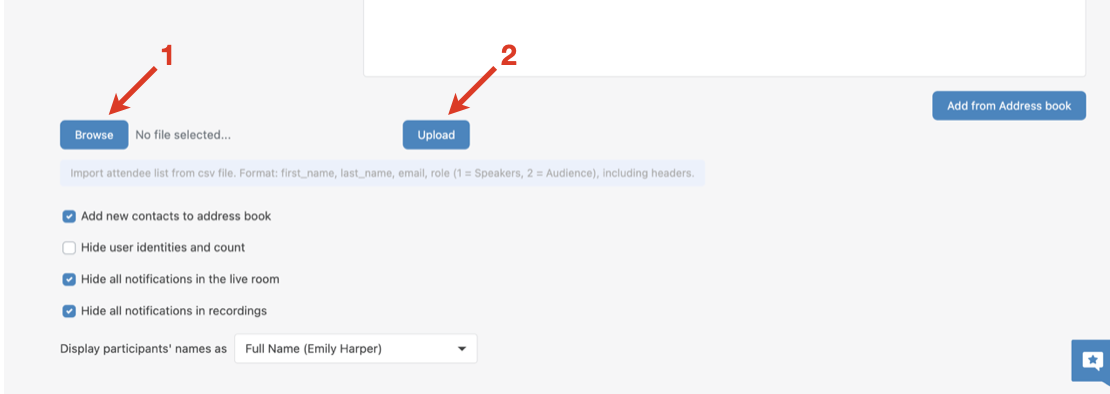
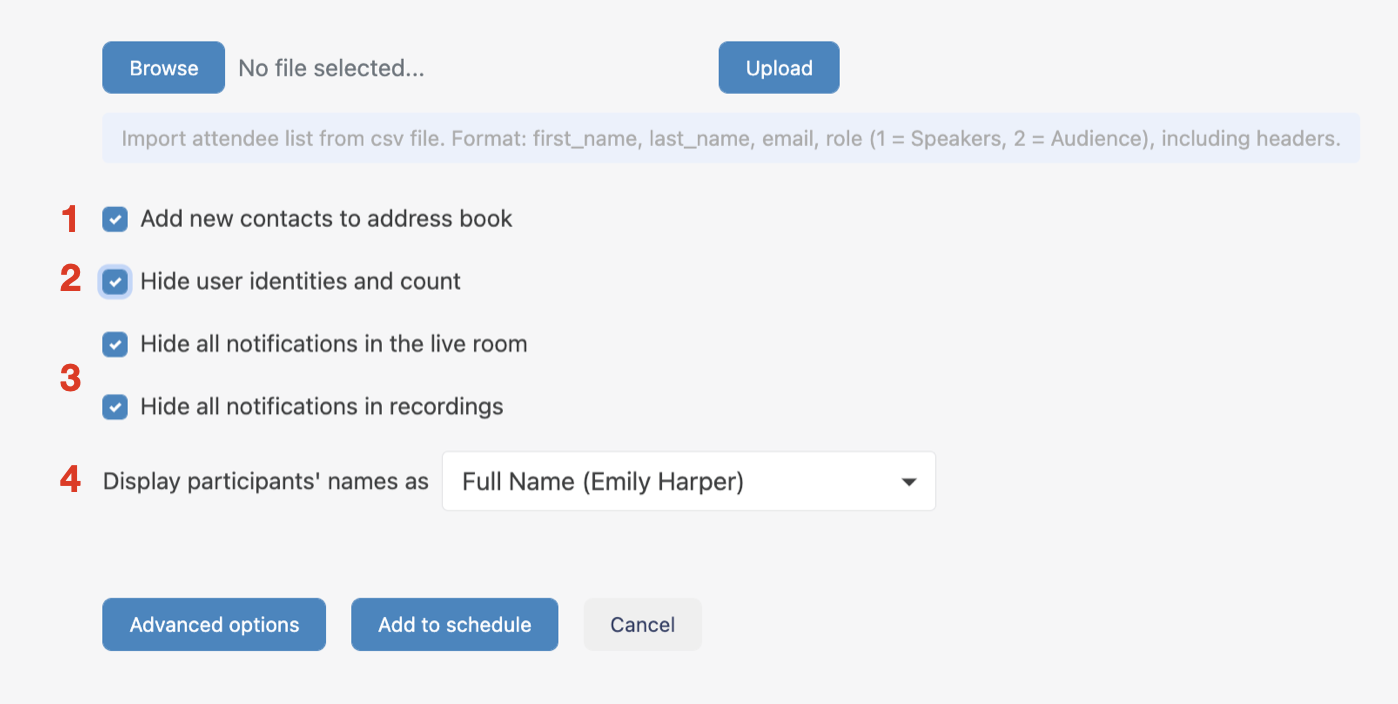
3 - import participants: click on Browse to select the CSV file on your PC (1) and click Upload button to import the list of participants (2):
Note Make sure your CSV file is compliant with the required format: first_name, last_name, email, role (1 = speaker, 2 = audience), including headers.
Example:
first_name last_name email role first_name_of_person1 last_name_of_person2 email@person1 1 first_name_of_person2 last_name_of_person2 email@person2 2 or download a sample CSV file: Sample Wizywebinar participants import.csv.
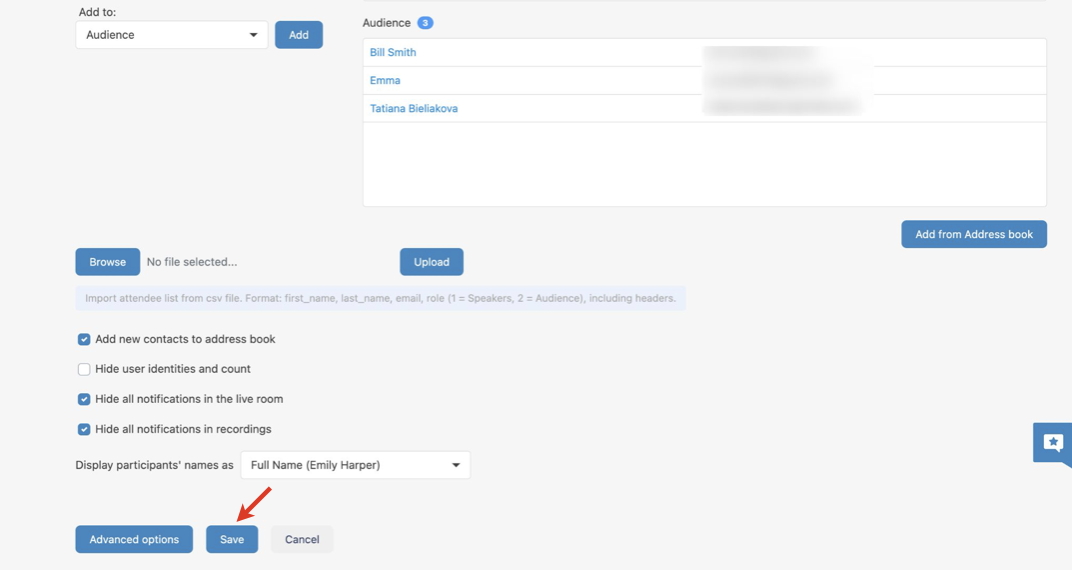
Once imported, participants appear in the list of Speakers/ Audience, depending on their role.
When the list of participants is complete, scroll down and hit Save button:

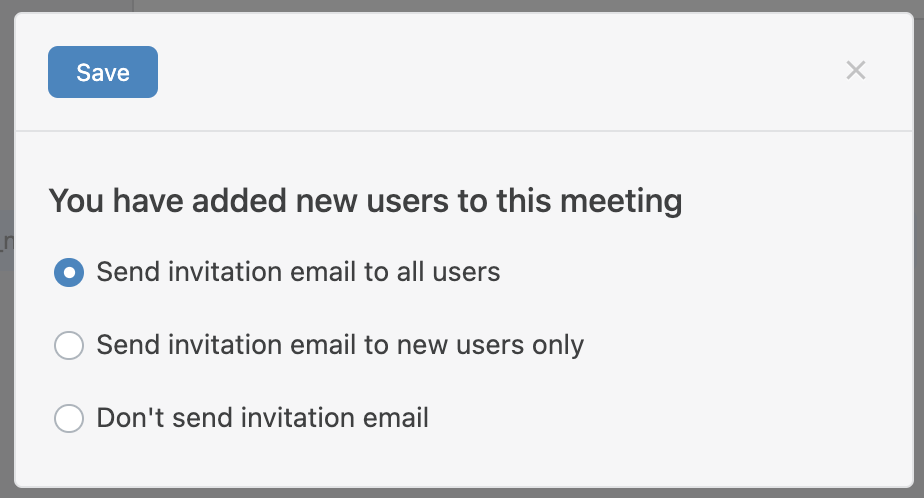
A new dialog opens, make your choice, whether or not the invitation emails should be sent to the participants:

Below the Browse button there are the following checkboxes providing you with additional control options:
- Add new contacts to address book (1) - when enabled, all newly added contacts are automatically added to Address Book
- Hide user identities and count (2): when enabled, people in the audience can't see the total number and names of participants in the participants’ panel
- Hide all notifications in the live room/ in recordings (3) - these options allow you to remove all non-critical UI notifications (e.g. when someone joins a webinar) from a session and UI notifications from recordings correspondingly
- Display participants' names as (4) - decide how to display participants' name: full name, initials etc

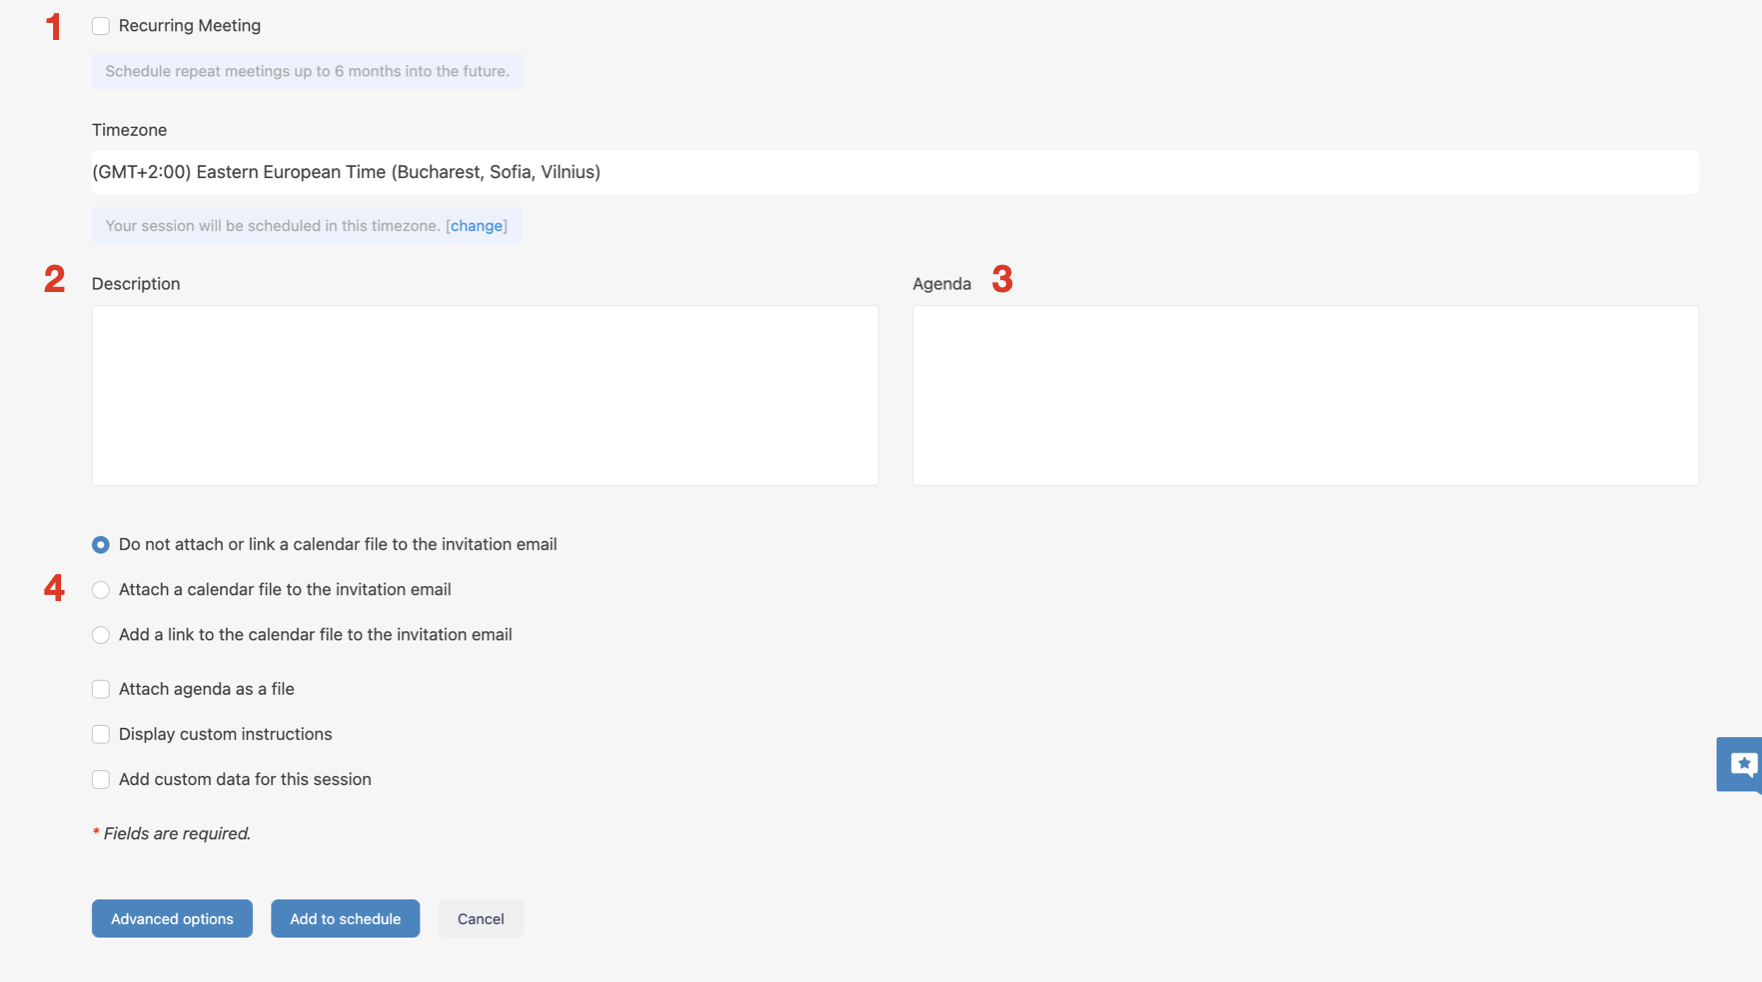
Description, Agenda, Recurrent webinar, Calendar link or file
...
| Warning |
|---|
Important: If you plan to customize an invitation email, the option of attaching a link doesn’t work. For customized emails, you can:
|

Access control: Lobby and Early access
...
- Private/ Public (1): if you choose Private, only registered/ invited guests can enter the webinar. If you choose Public, anyone with the link can join
- Turn on lobby (2): this feature allows you to manage who enters the room. When enabled, participants show up in the lobby list and are held there, unless the webinar host allows certain participants to enter the webinar or decides to remove a participant from the list
- Restrict early access (3): this option allows you to control how early participants can join the webinar
- Make visible on your public page (4): this option lets you display all events scheduled from your account on a dedicated public page. Depending on registration requirements, users may be able to join or register for your webinars through this page
- Password-protect any recordings associated to the session (5): enable password protection of meeting recordings
- Enable chat emojis (6): allow using emojis in chat
- At the session login require guests to provide (57): choose which information to request from guests when they join the session via the link. Guests are those people who didn’t register for the webinar and weren’t invited via email, so they don’t have a private link to join


Audio, Video and Content: starting audio and video broadcast automatically; setting default layout Anchor audiovideo audiovideo
| audiovideo | |
| audiovideo |
...
- Allow maximum one content piece opened (4):if enabled, any piece of content loaded from the Content Library is displayed in the Stage area, entirely replacing the previously loaded content regardless of type. In other words, the Stage area can never be split with multiple content pieces
- Default Layout (5): set the default layout for the session (Full screen, Tiled, or Mixed):


Registration: allowing participants to register for a session
...
- The shared file or folder is then marked as shared and is added to the Shared files folder:
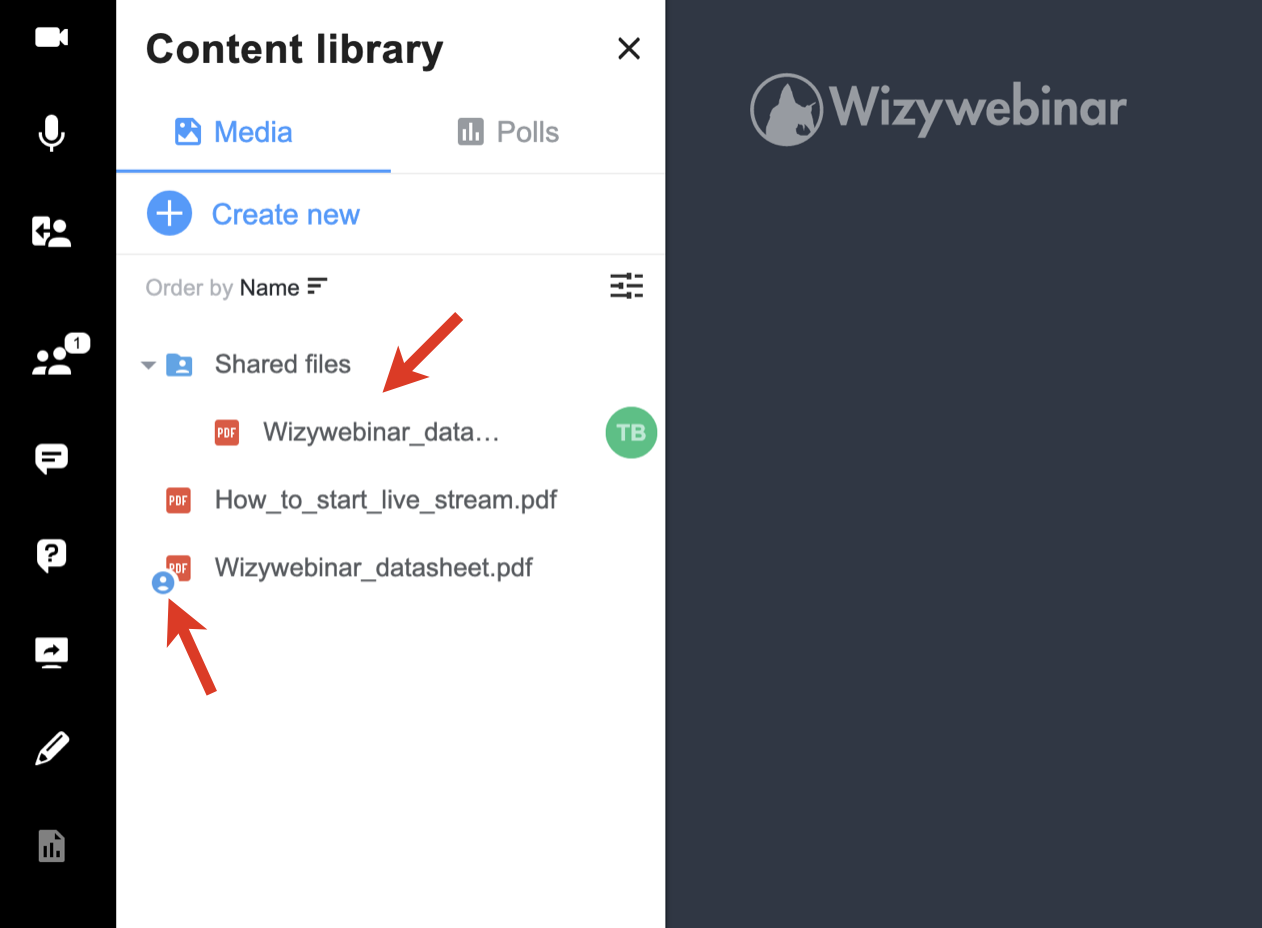
- The speakers you’ve shared the file/ folder with, can access them in the Shared files folder, download, and show to the audience.
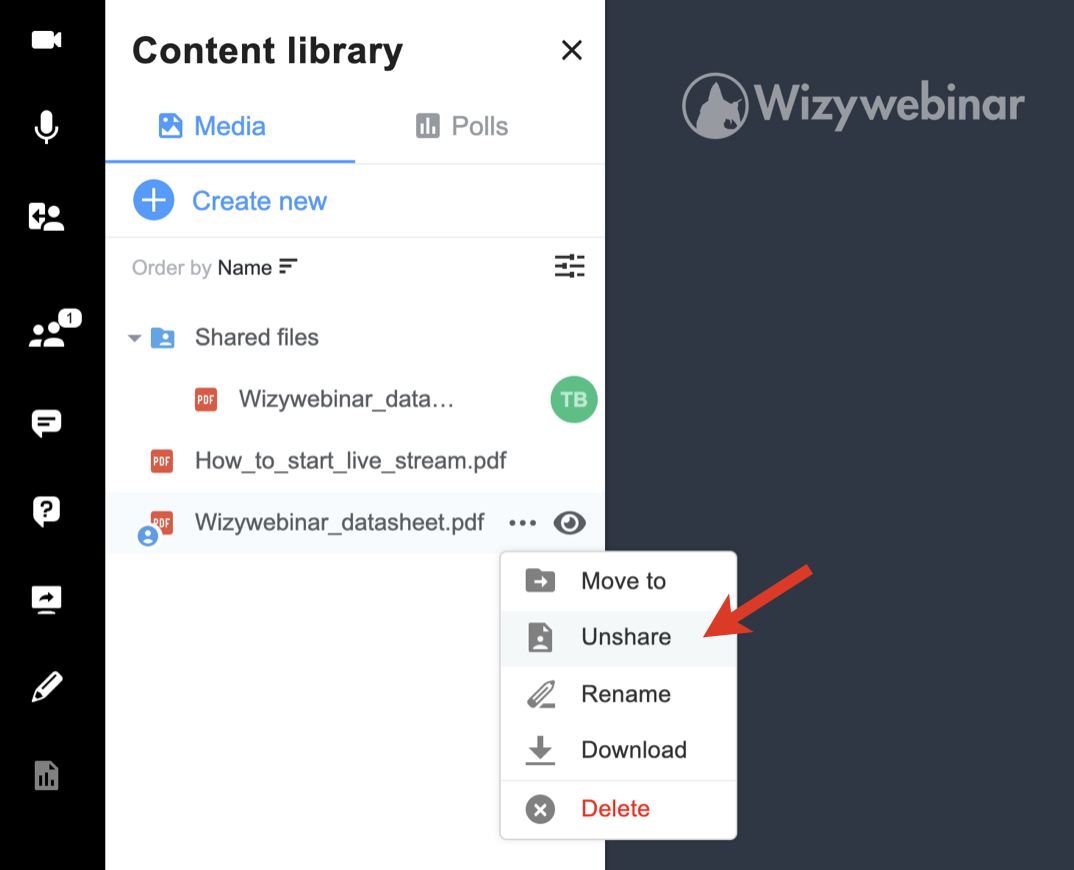
- To unshare the file/ folder, click on the three dots -> Unshare. AnySpeaker can unshare files that are shared by other Speakers:
Play a YouTube/ Vimeo video
...
Integration with Wizyconf HW Station
Starting from Wizyconf App v 1.2.16, Wizyconf Station integrates with Wizywebinar, consult this documentation for details.
Other functionality
Protect sessions with end-to-end encryption (E2EE)
...
| Note |
|---|
Note: E2EE is not compatible with Recordings, Live Streaming. E2EE is also not compatible with mobile - mobile users won't be able to join encrypted sessions. |
Emoji Reactions
| Note |
|---|
Note: The feature is available upon request only. The request should be sent to denis.popov@wildix.com. |
...