...
| Info |
|---|
This document is a complete guide explaining how you can enable access to Wizywebinar and use it to schedule and run your webinars. Created: January 2021 Updated: July 2022 Permalink: https://wildix.atlassian.net/wiki/x/ahLOAQ |
| Table of Contents |
|---|
| Noprint |
|---|
Wizywebinar White paper |
...
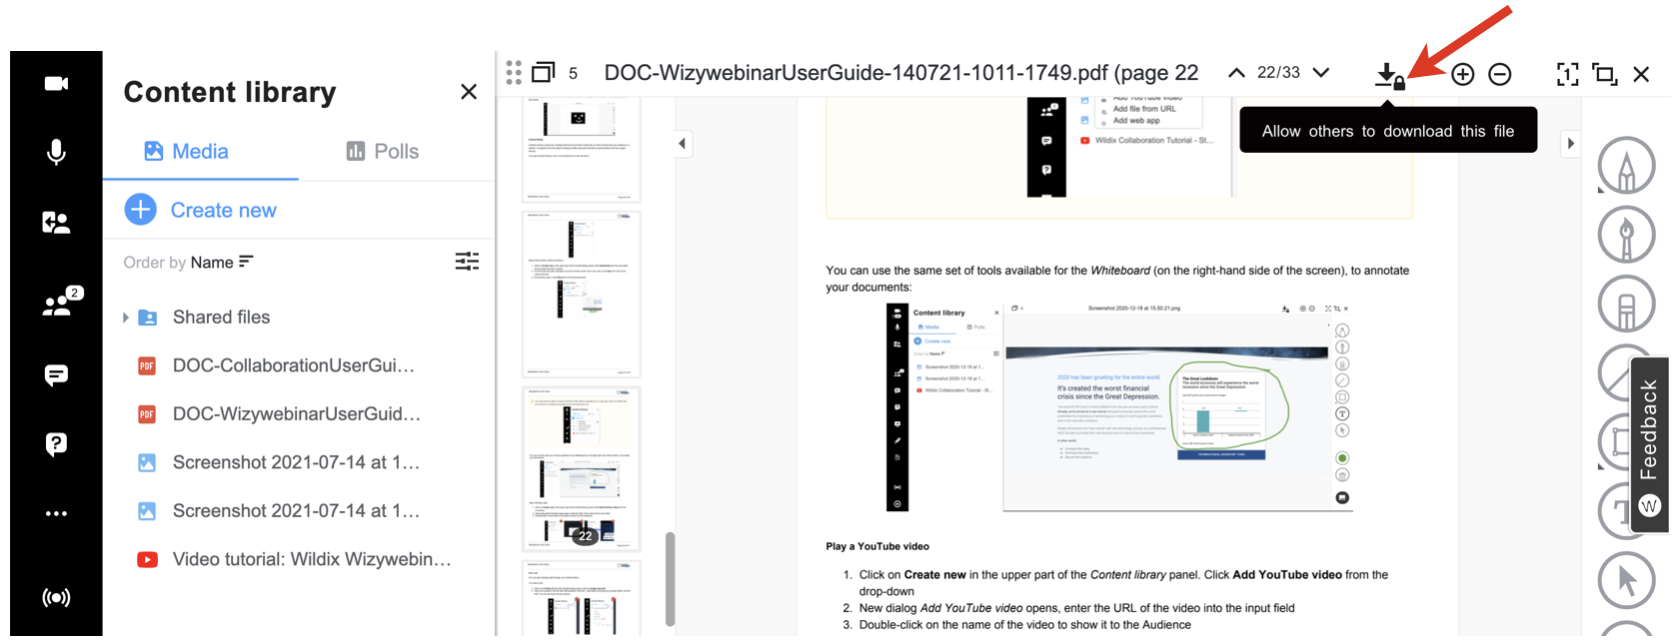
- You can allow the Audience to download the shared file: click on the Lock icon next to the Download Arrow to give permission:
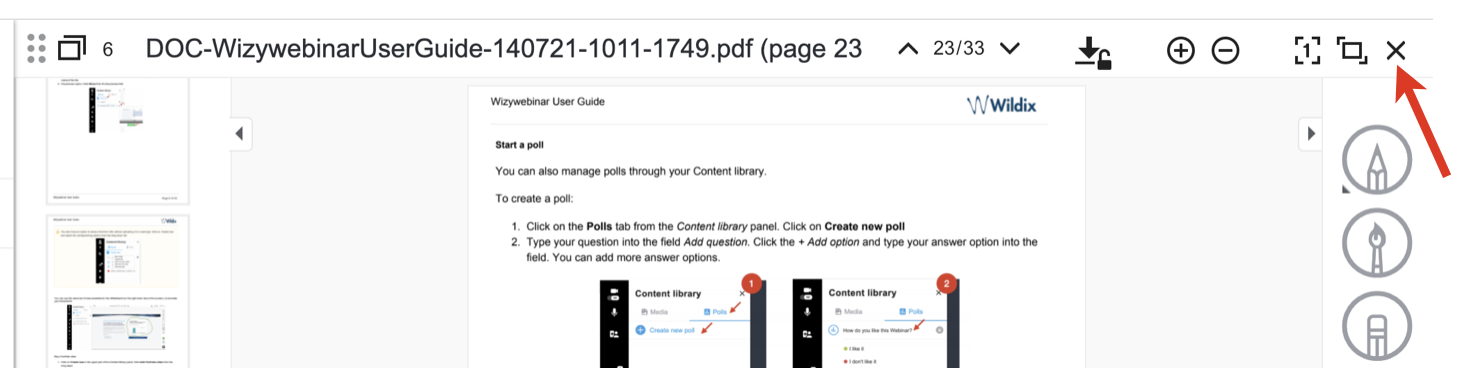
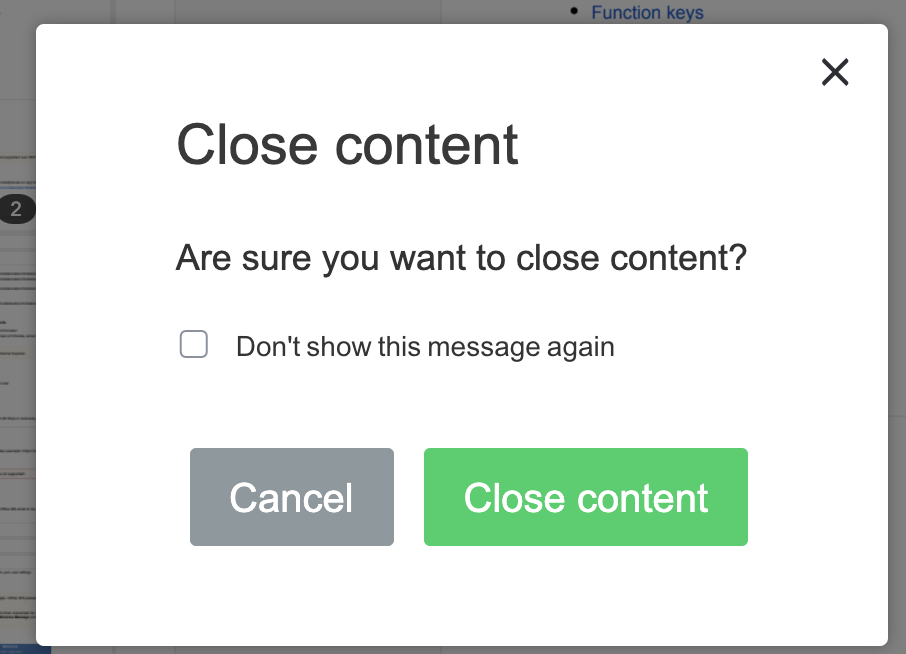
- To stop sharing the file, click the X button at the top right of the screen and confirm by clicking Close content button:
You also have an option to share a file from URL without uploading it or a web app: click on Create new and select the corresponding options from the drop-down list: 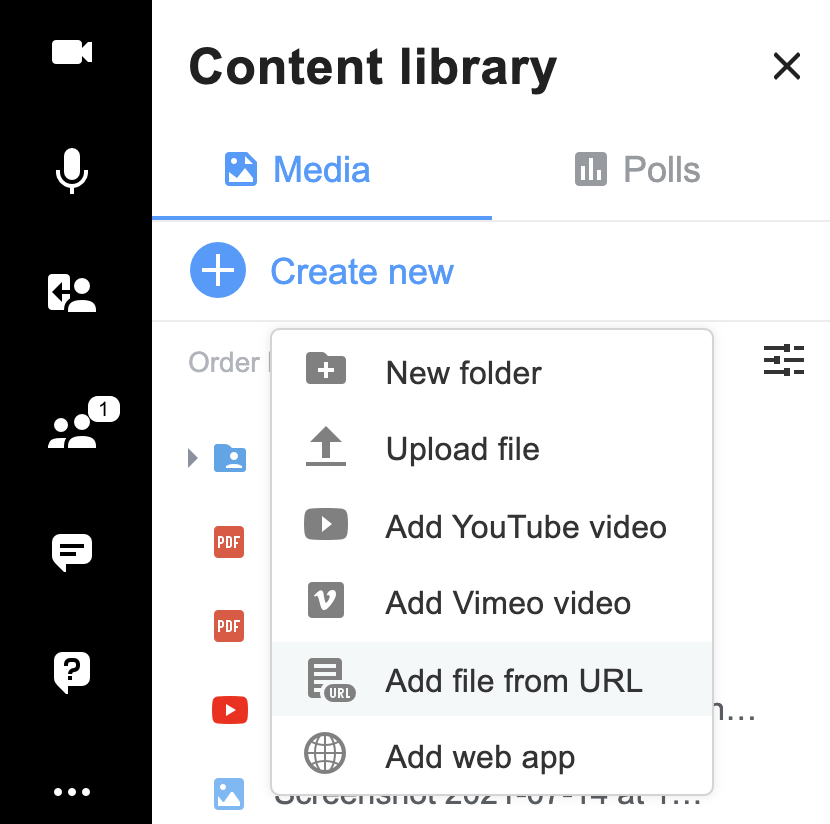
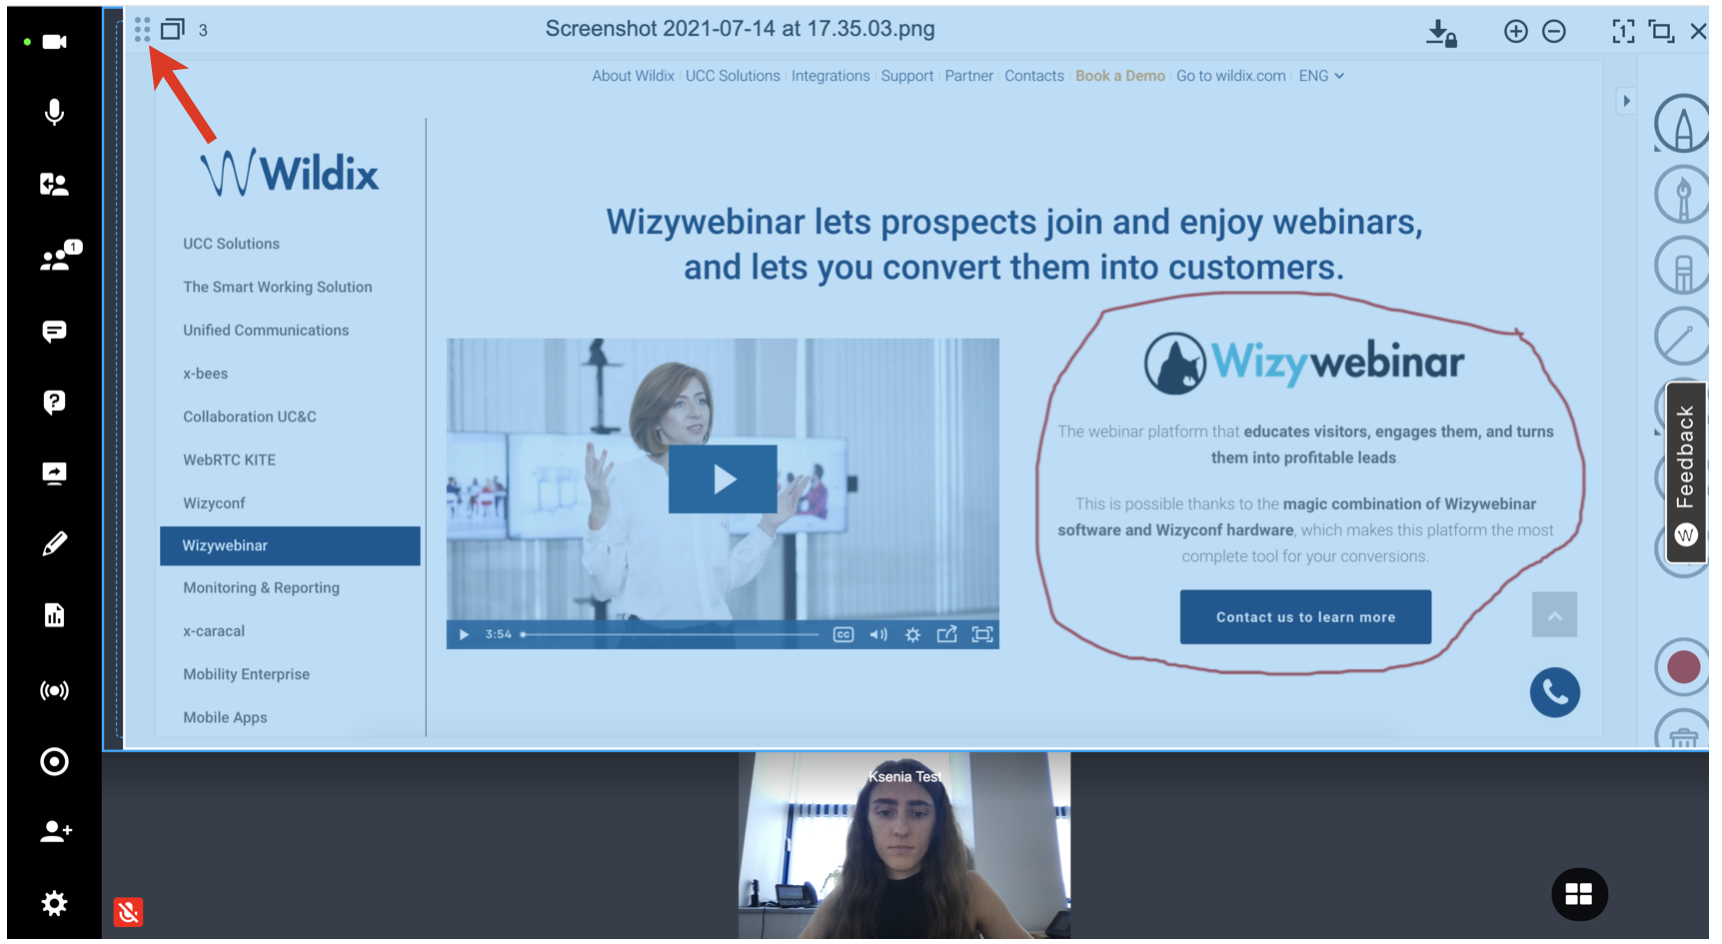
You can use the same set of tools available for the Whiteboard (on the right-hand side of the screen), to annotate your documents: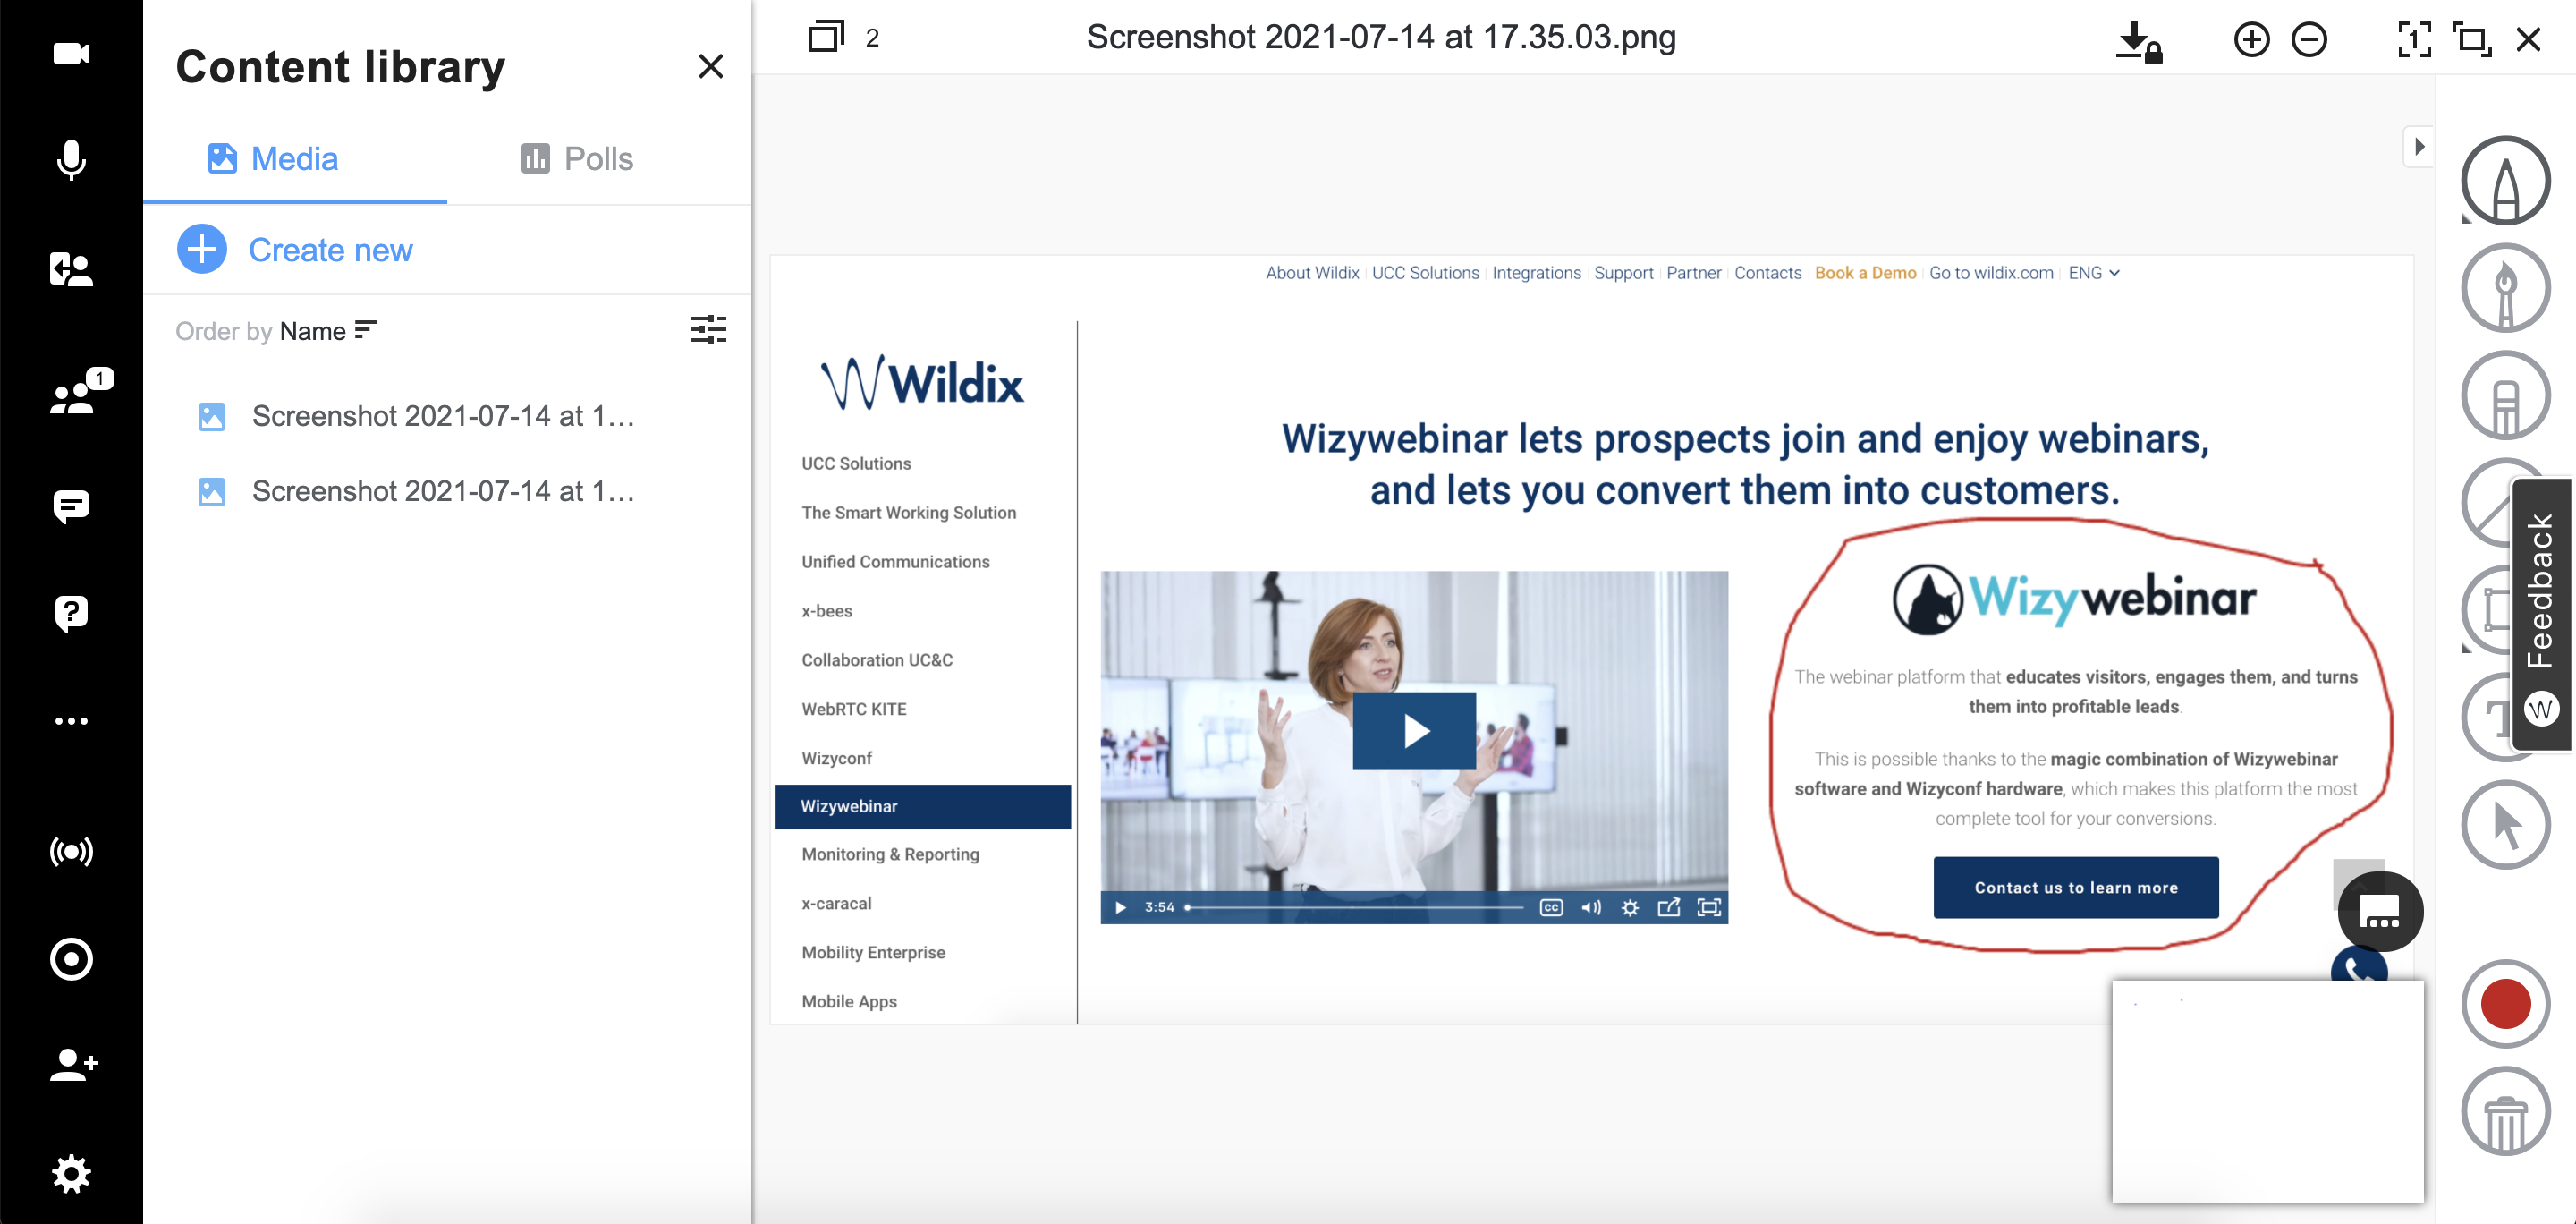
Share files with other speakers
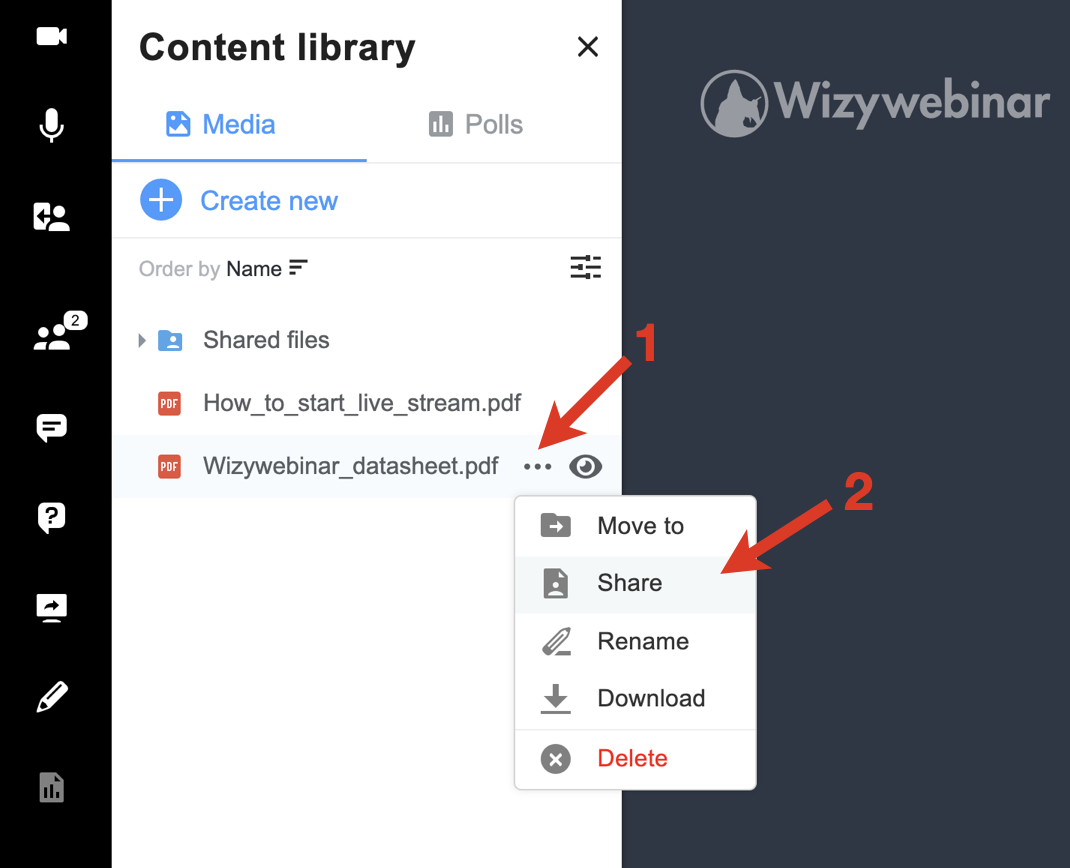
- You can share media of your Content library with other speakers. To do this, click on the three dots next to the necessary file or folder and press Share:
- The shared file or folder is then marked as shared and is added to the Shared files folder:
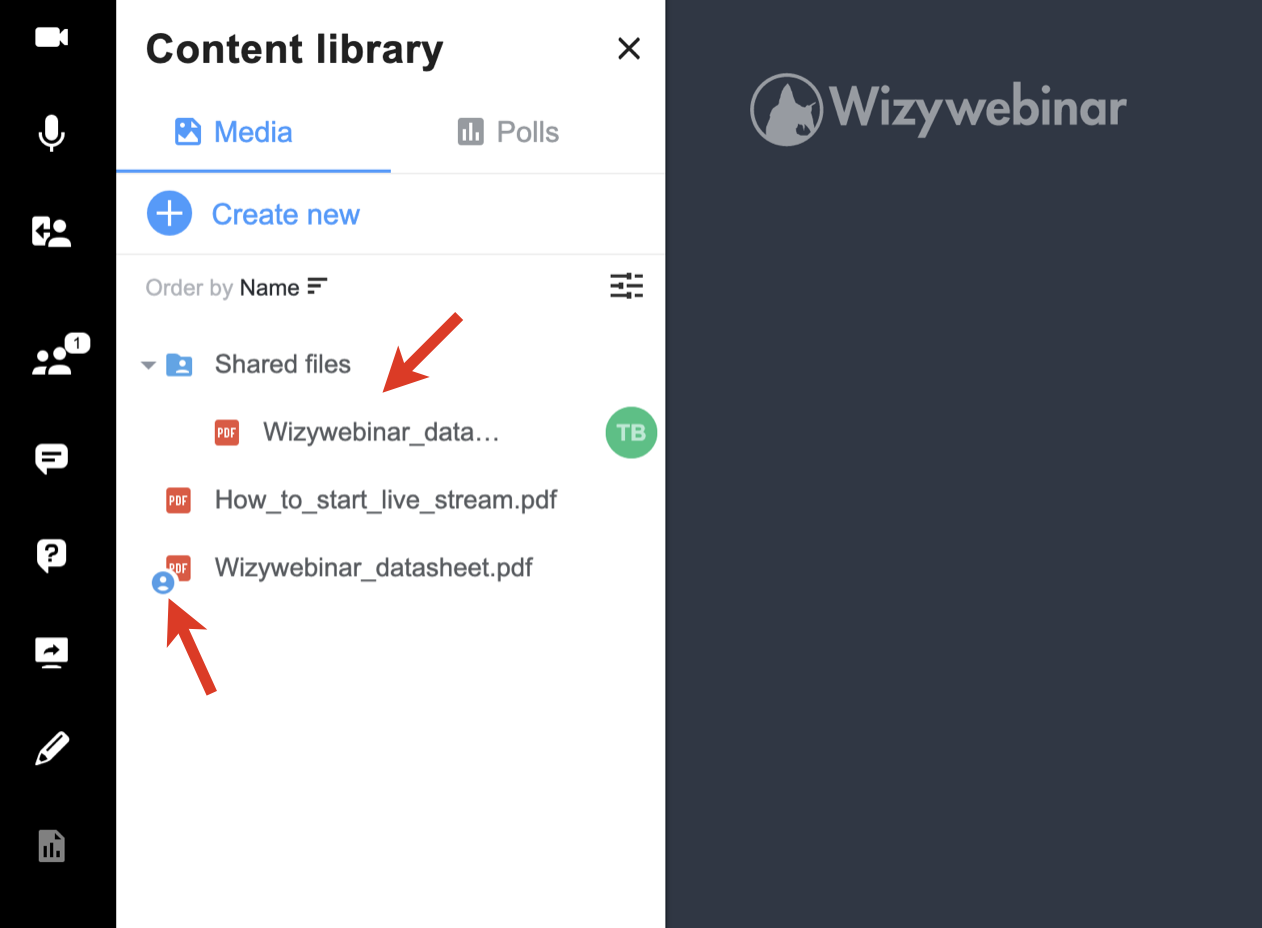
- The speakers you’ve shared the file/ folder with, can access them in the Shared files folder, download, and show to the audience.
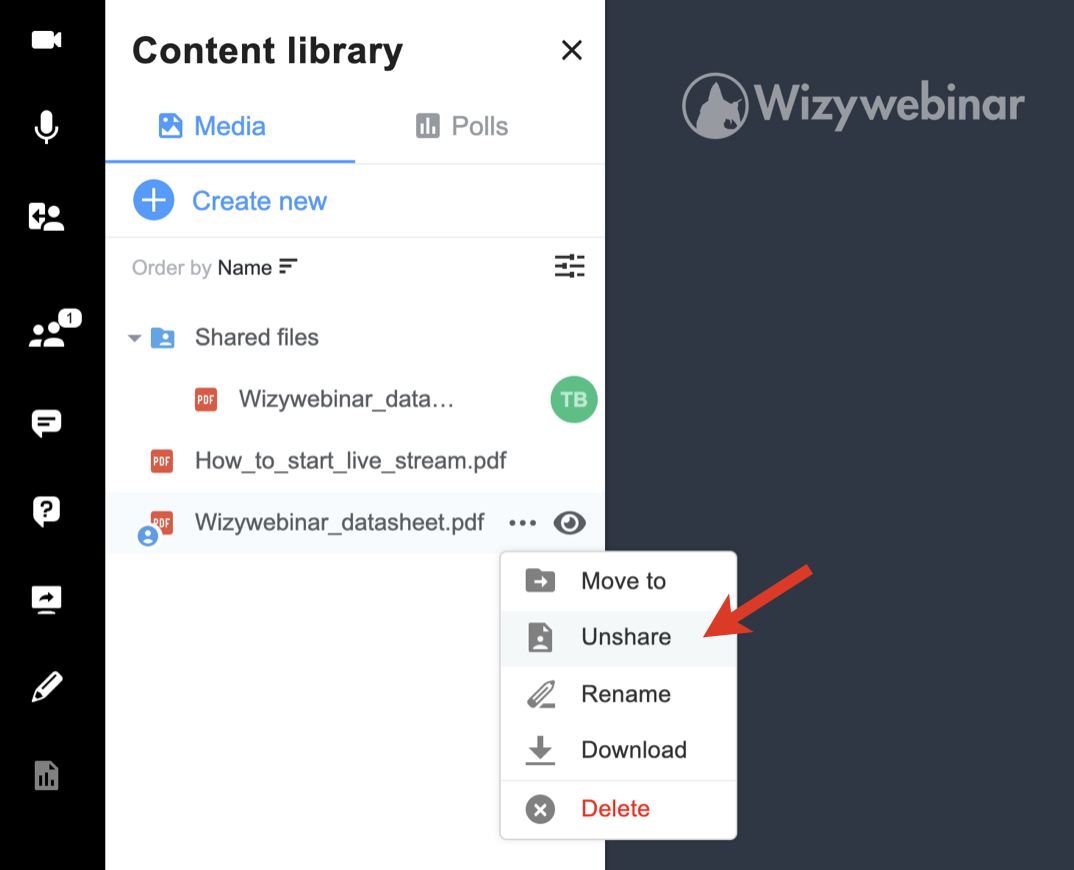
- To unshare the file/ folder, click on the three dots -> Unshare. AnySpeaker can unshare files that are shared by other Speakers:
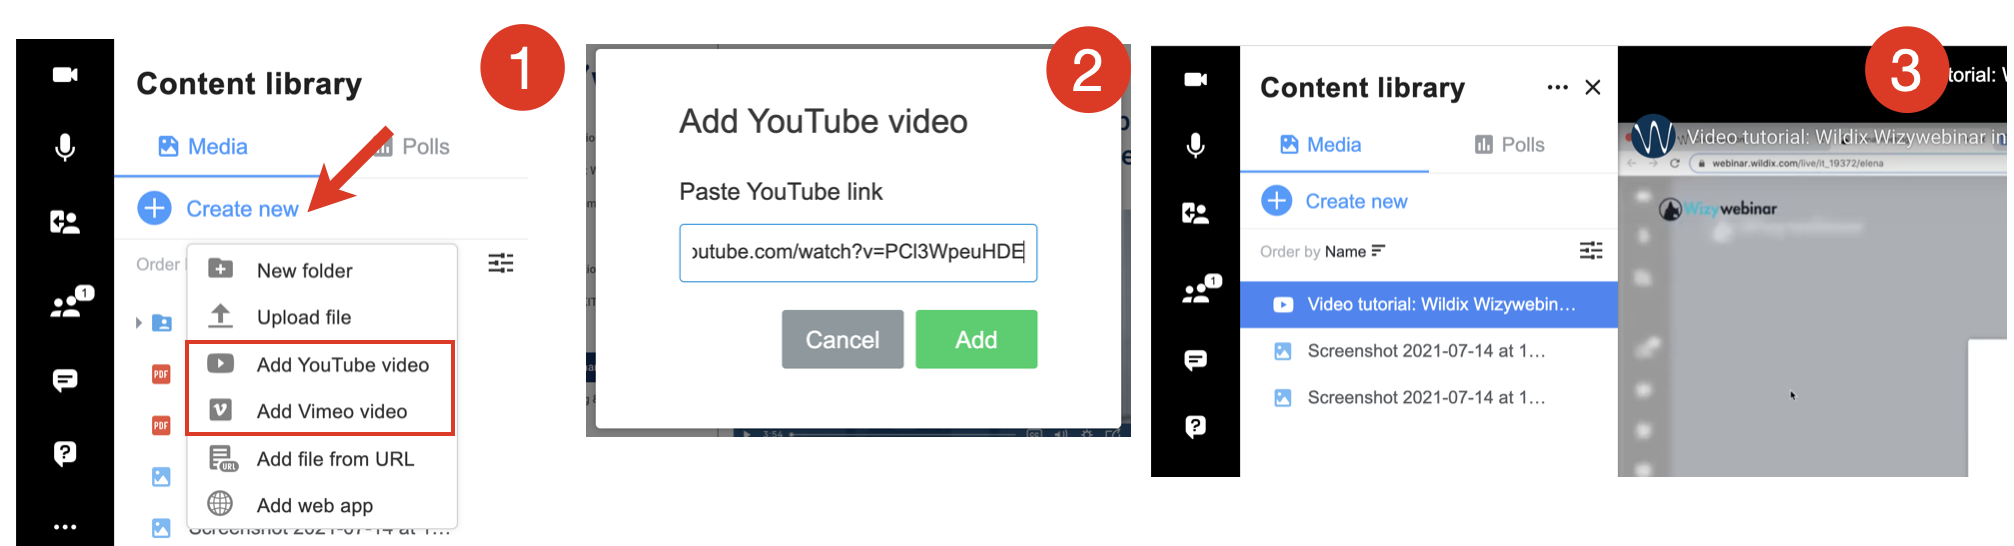
Play a YouTube/ Vimeo video
- Click on Create new in the upper part of the Content library panel. Select one of the options Add YouTube video /Add Vimeo video from the drop-down list
- New dialog Add YouTube video / Add Vimeo video opens, enter the URL of the video into the input field and click Add
- Double-click on the name of the video to show it to the Audience:
Start a poll
You can also manage polls through your Content library.
...
- Click on the Polls tab from the Content library panel
Click on Create new and select New poll
Note It is possible to import polls from a CSV file.
Before importing, download a template CSV file: Wizywebinar polls template.csv.
Type your question into the field Add question. Click the + Add option and type your answer option into the field. You can add more answer options by clicking the Multiple answers check box
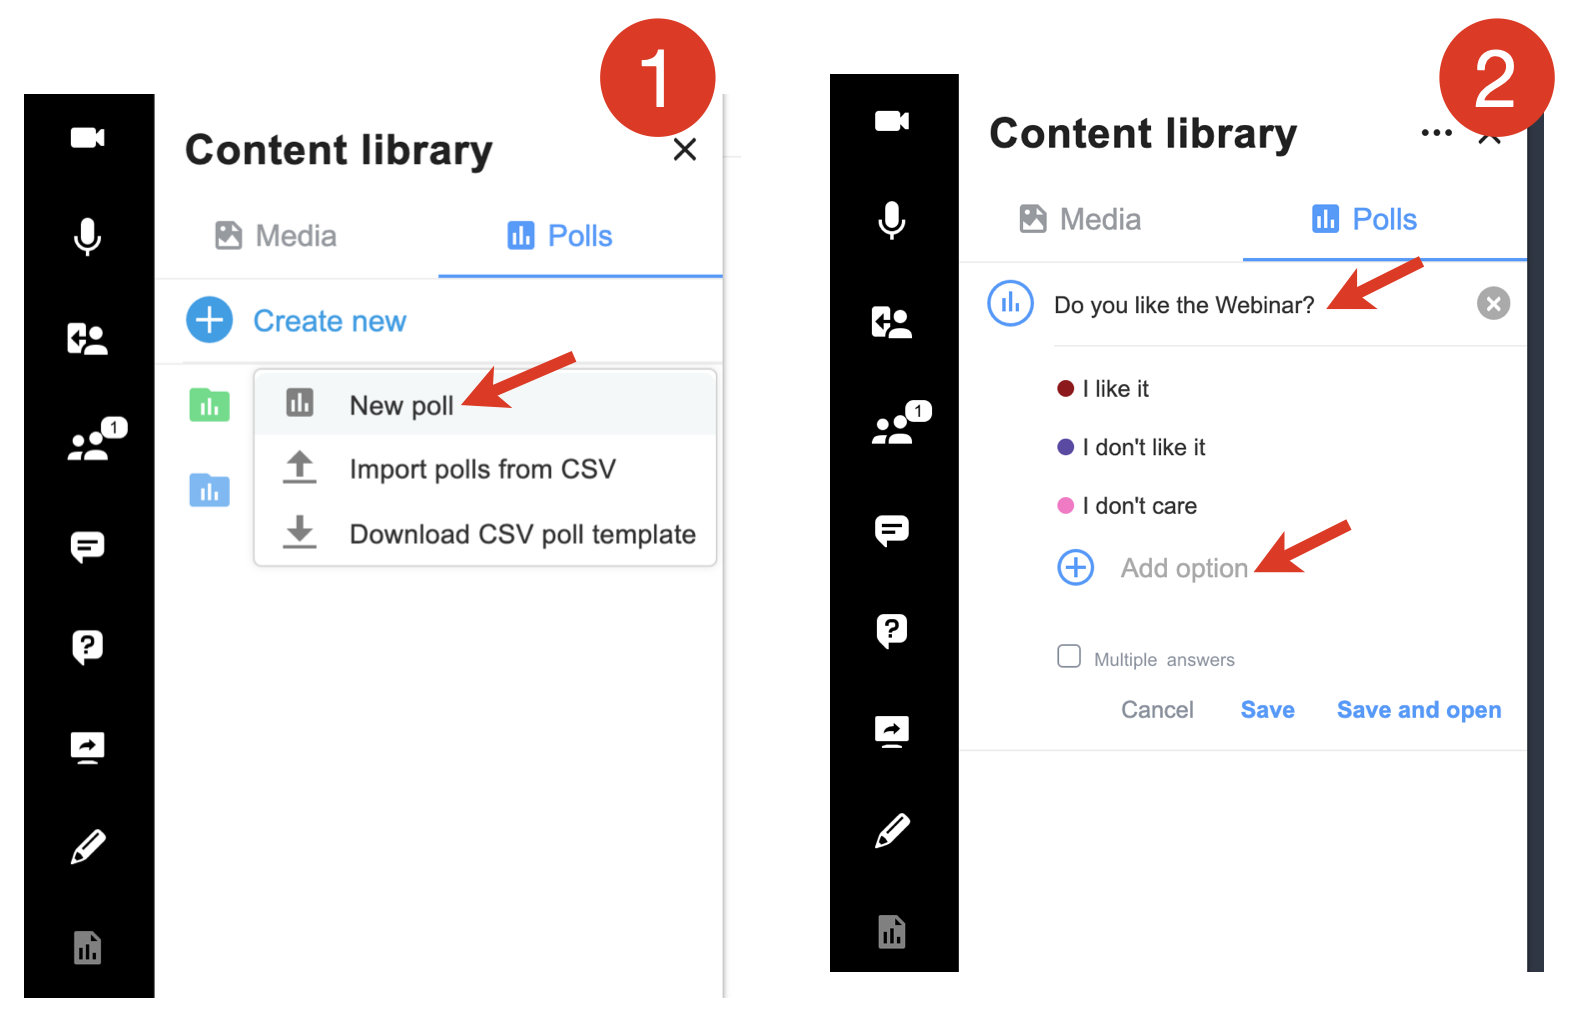
When finished, click Save to save the poll in the Content library. Click Save and open to save the poll in the Content library and open it for your audience to vote:

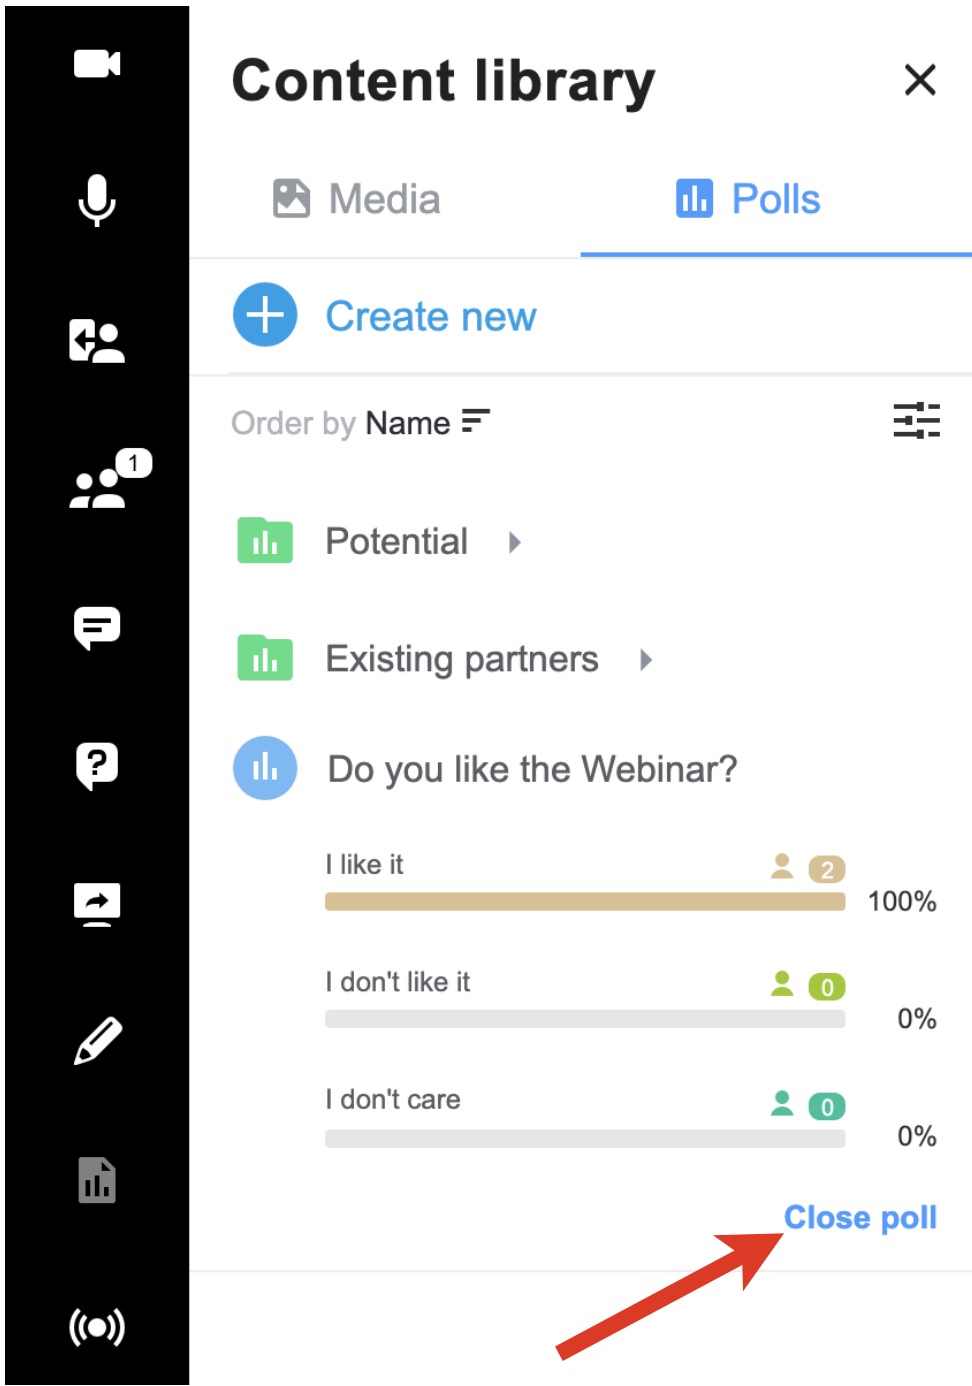
To finish voting, click Close poll:
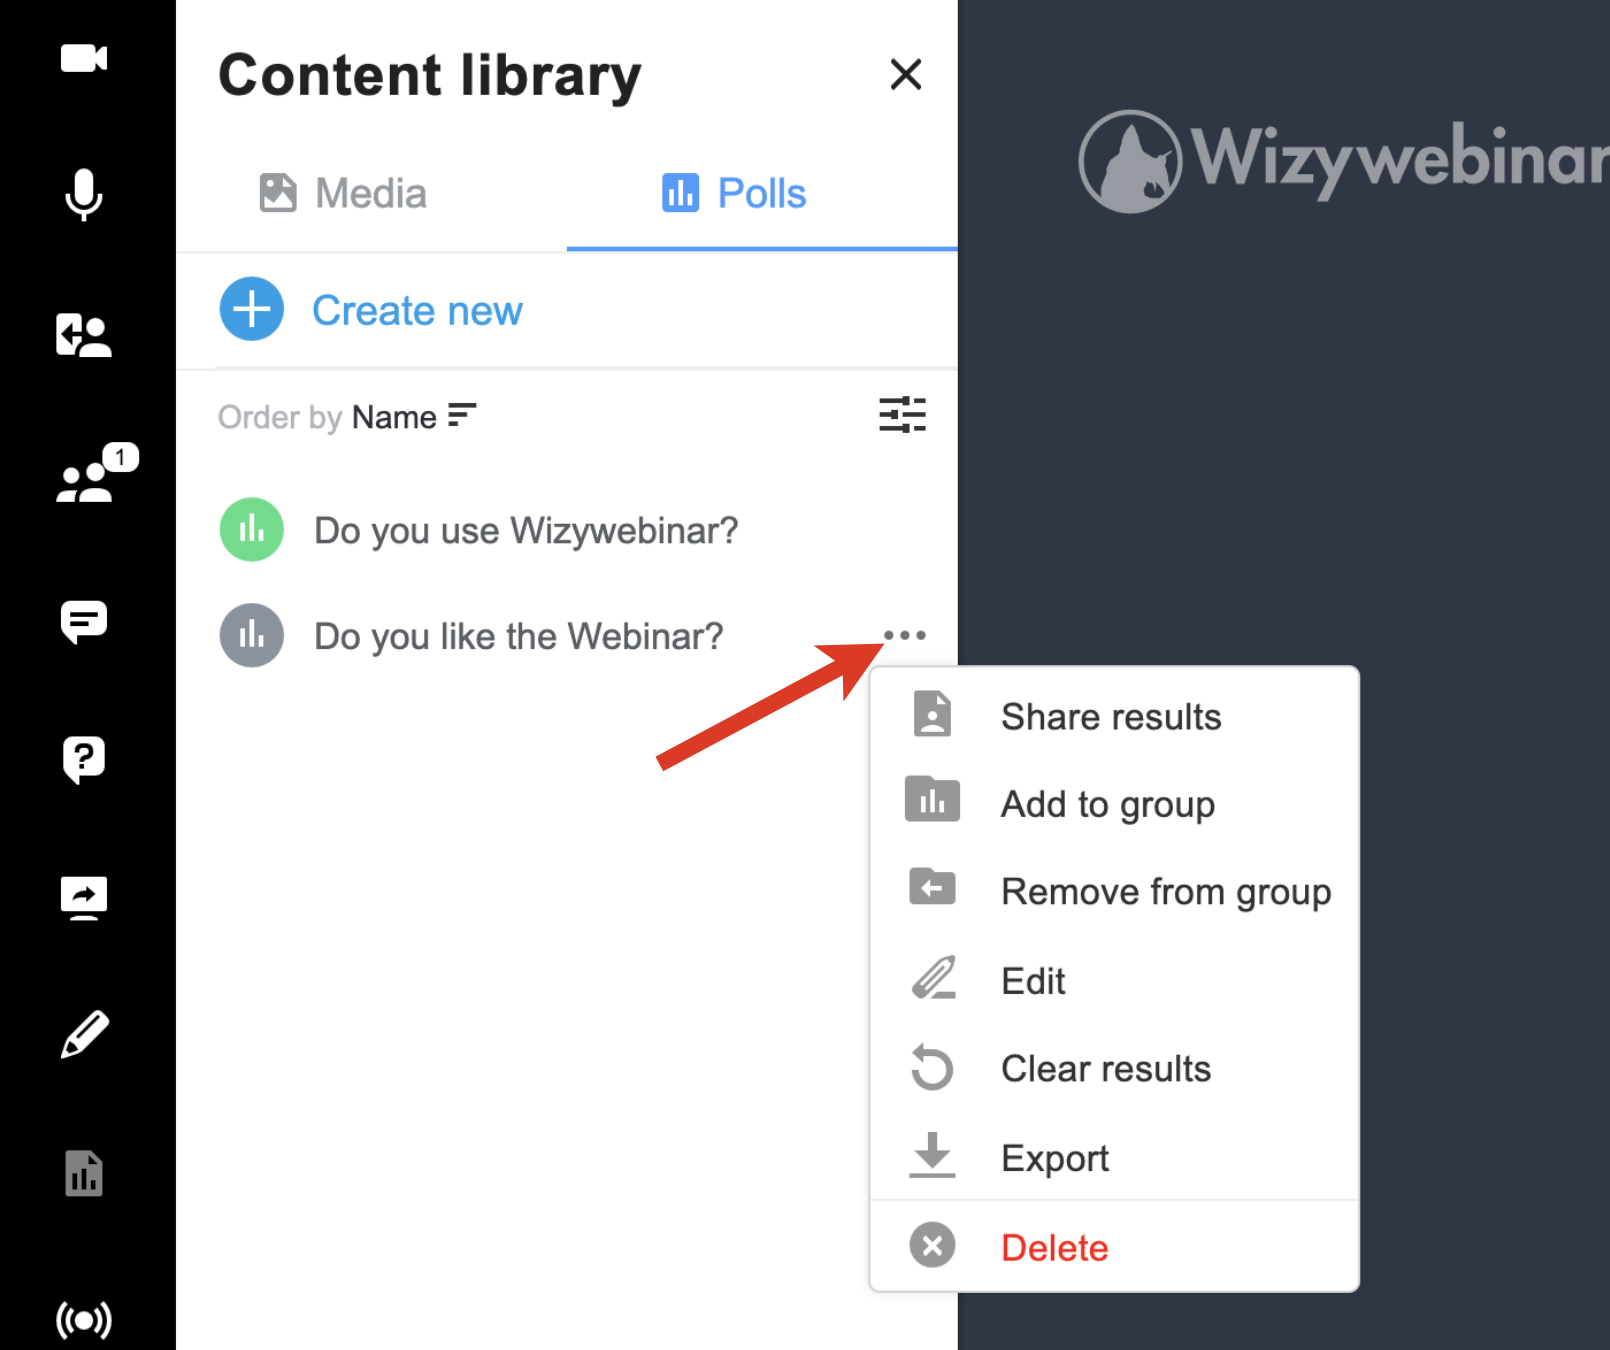
Manage polls
After you close the poll, you have some other options by clicking on the three dots icon next to the question:
- Share Results: share the results of the poll with everyone in your meeting
- Add to group: you can create folders and organize your polls into groups
- Remove from group: allows you to remove a poll from the group
- Edit: allows you to edit the poll. You should Clear and Re-open the poll if new options have been added so that the audience can re-vote with the new options
- Clear results: delete all previous votes in your poll
- Export: export poll results in .txt, .pdf or .csv format. We recommend exporting the poll results before ending the session
Delete: delete the poll
Share polls
You can let other Speakers reuse your poll by adding it to the Shared polls folder.
...
To start live streaming, click on the Live streaming button (Broadcast icon) from the left panel: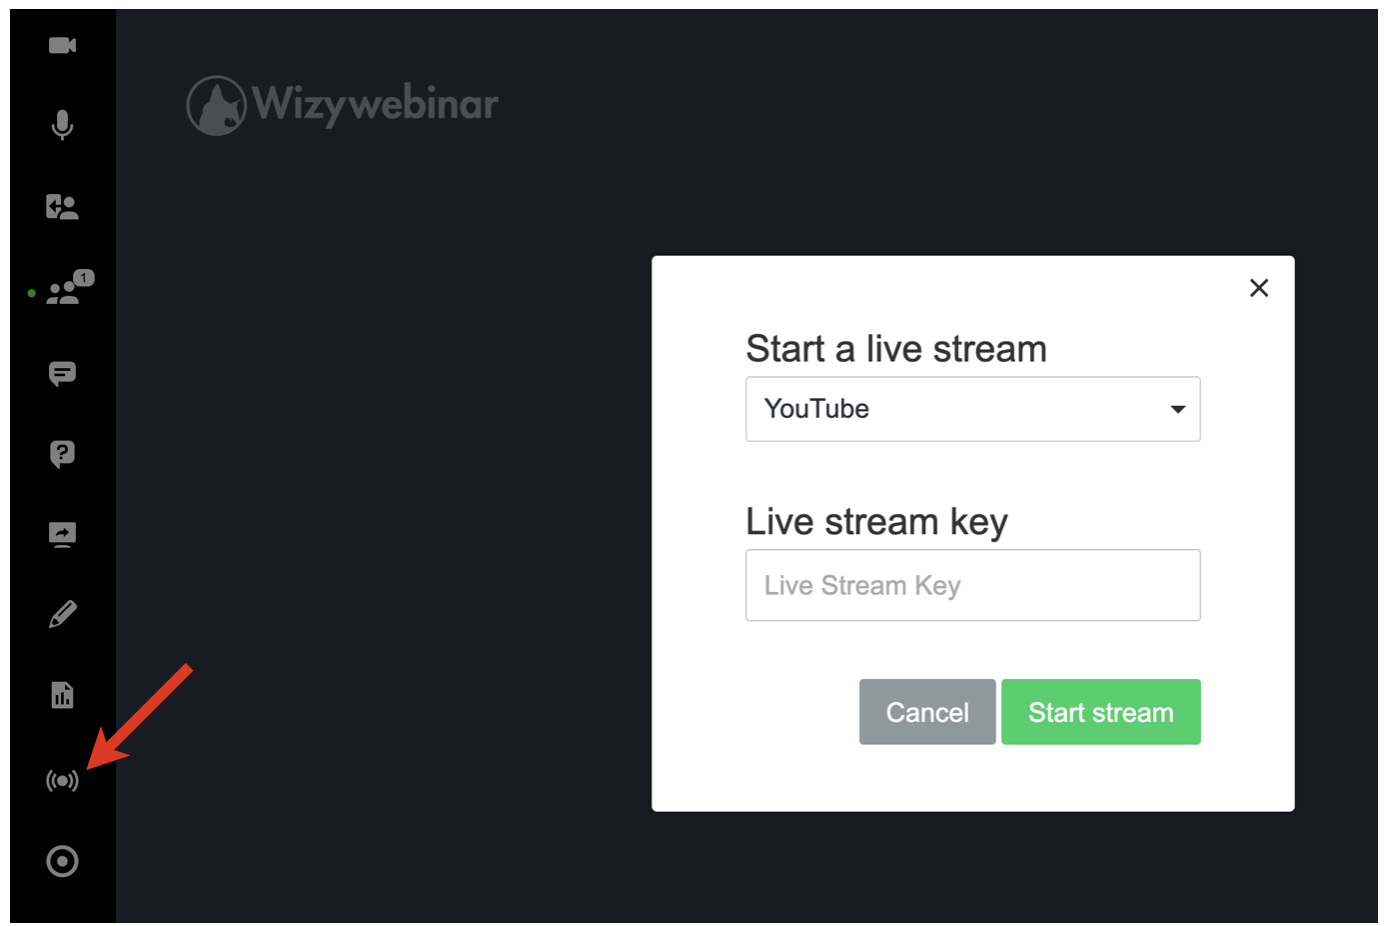
Then you need to select YouTube or Facebook and enter the Live stream key into the input field.
...
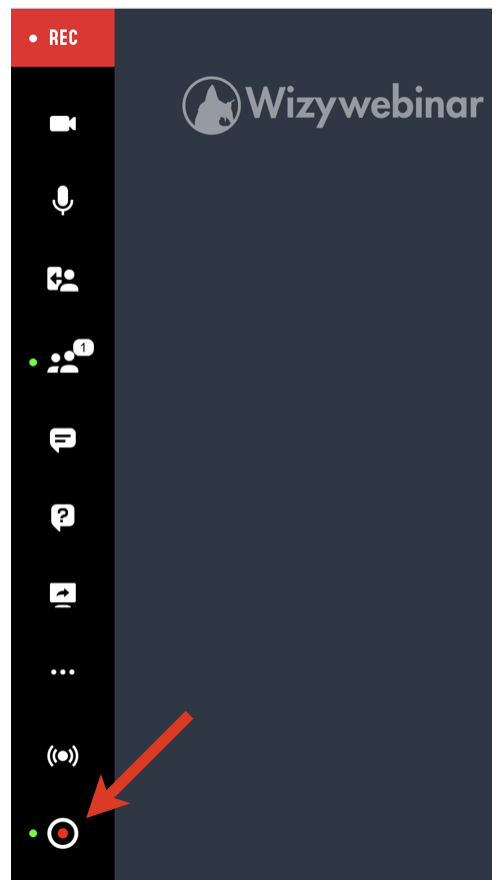
- To start/stop a recording, click on the Recording button from the left panel:
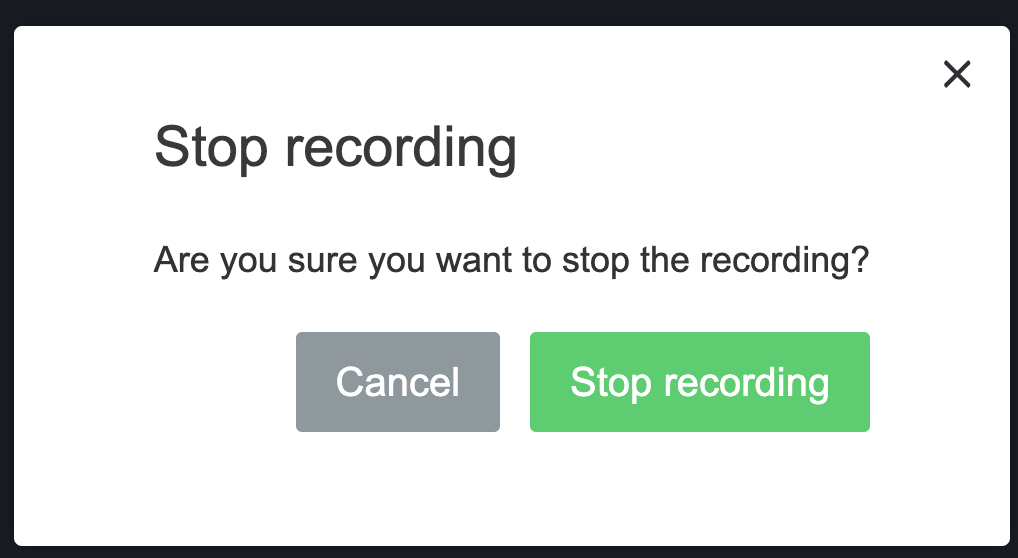
- When stopping a recording, click Stop recording button to confirm:
The number of concurrent recordings for Wizywebinar is limited to one per license.
...
- Open Wizywebinar tab in Collaboration
- Click Recordings from the left panel
- Click on the file to view the recording. If you want to download it, hover the mouse over and click the green arrow-down icon:
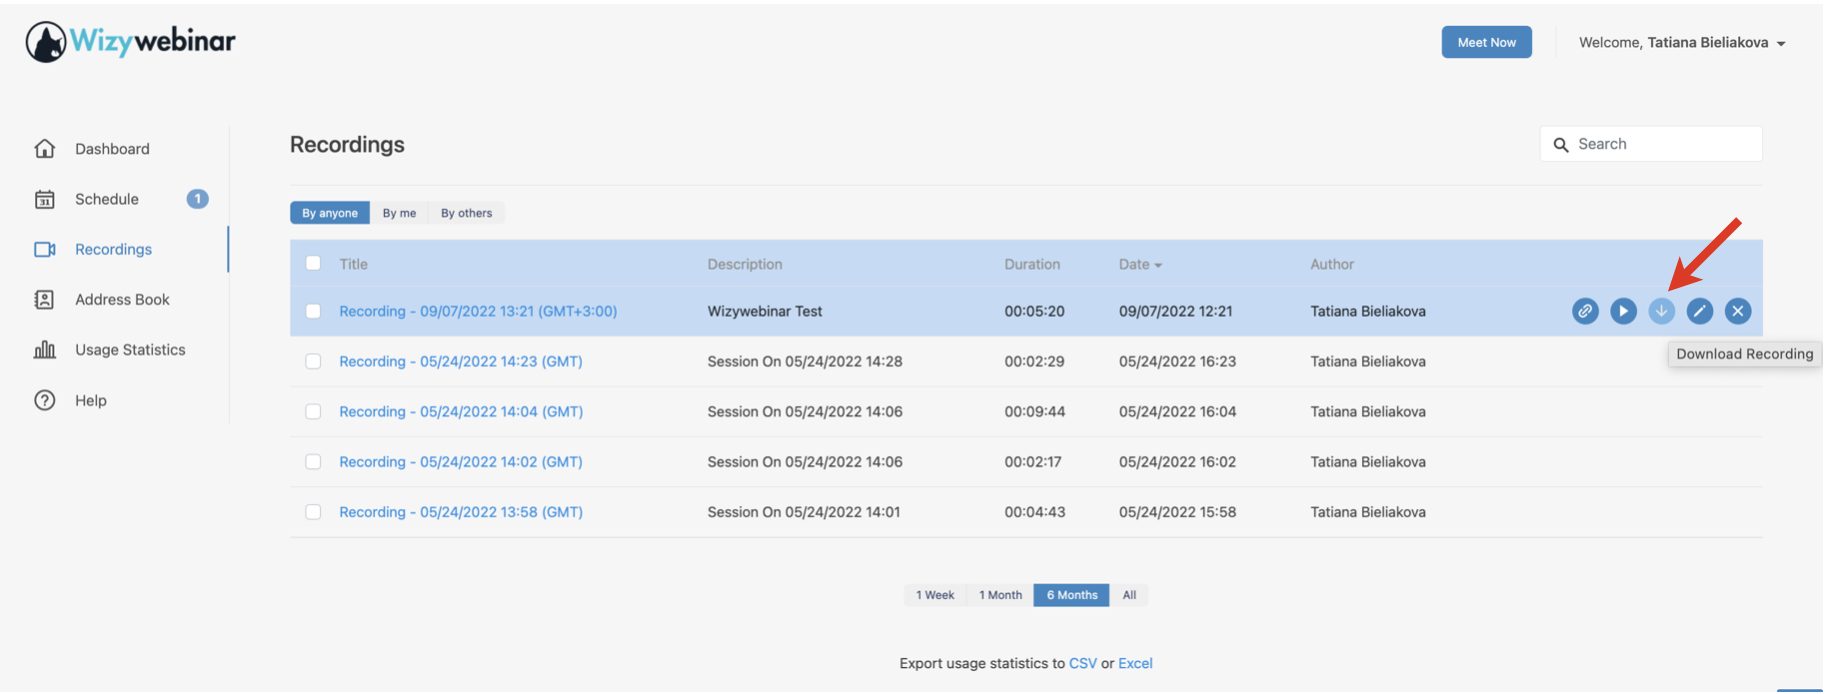
Besides downloading the recording, you also get the following options when you hover the mouse over it: copy the URL, edit the recording name and description, delete the recording. All these actions are also available when you look for the required recording via the search field.
...
- If the functionality is enabled, when recording starts, the Create Bookmark button appears at the top. Click on it to create a bookmark:
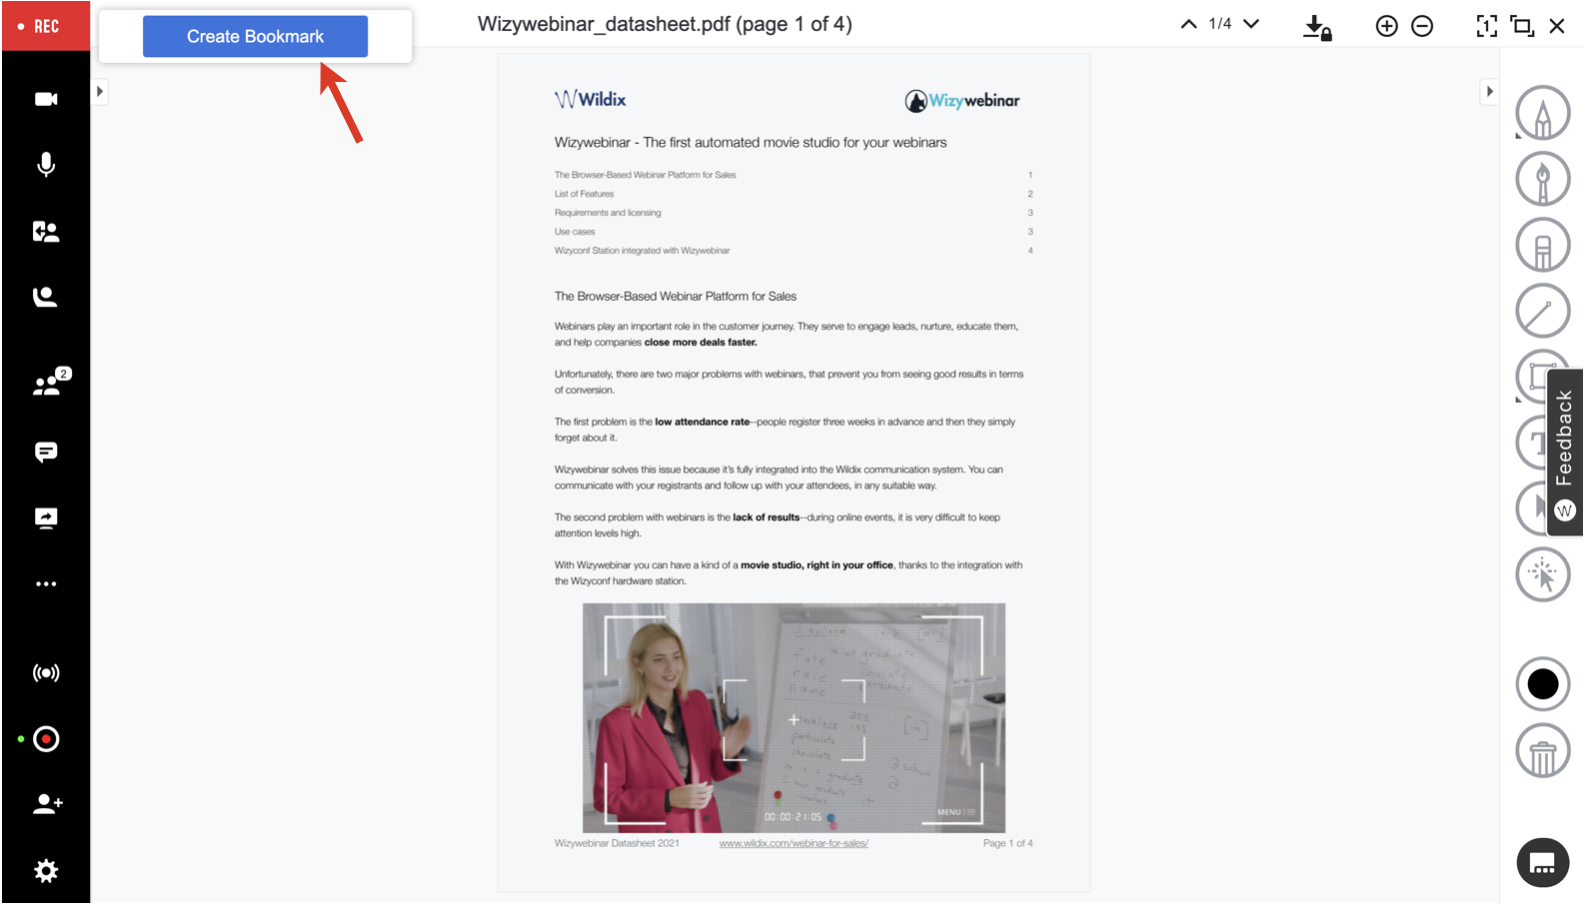
2. Enter the Bookmark name and click Create: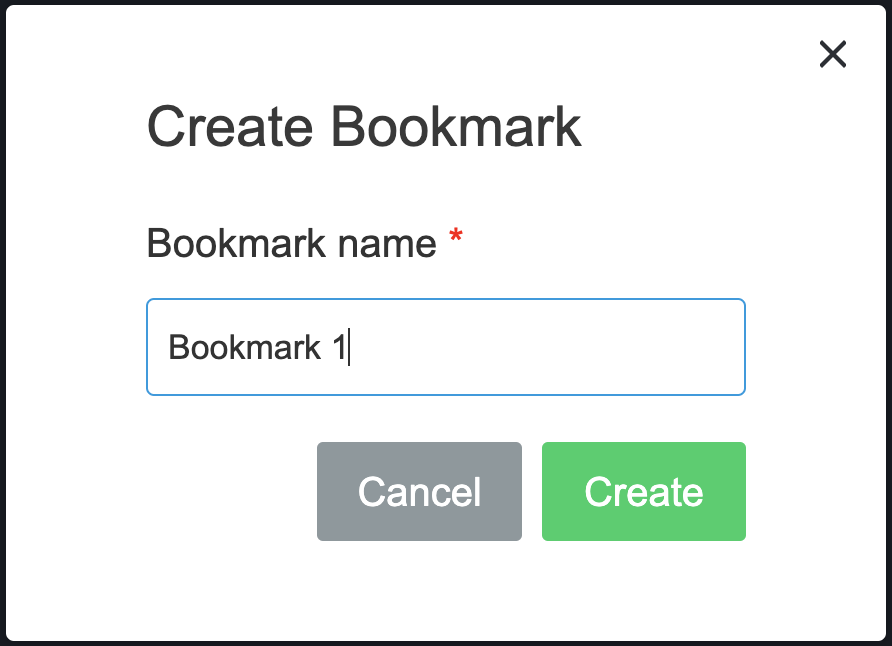
Download bookmarks
- Open Wizywebinar tab in Collaboration
- Click Recordings on the left panel
- Click Edit (pencil icon) next to the necessary recording
- Click Download Bookmarks
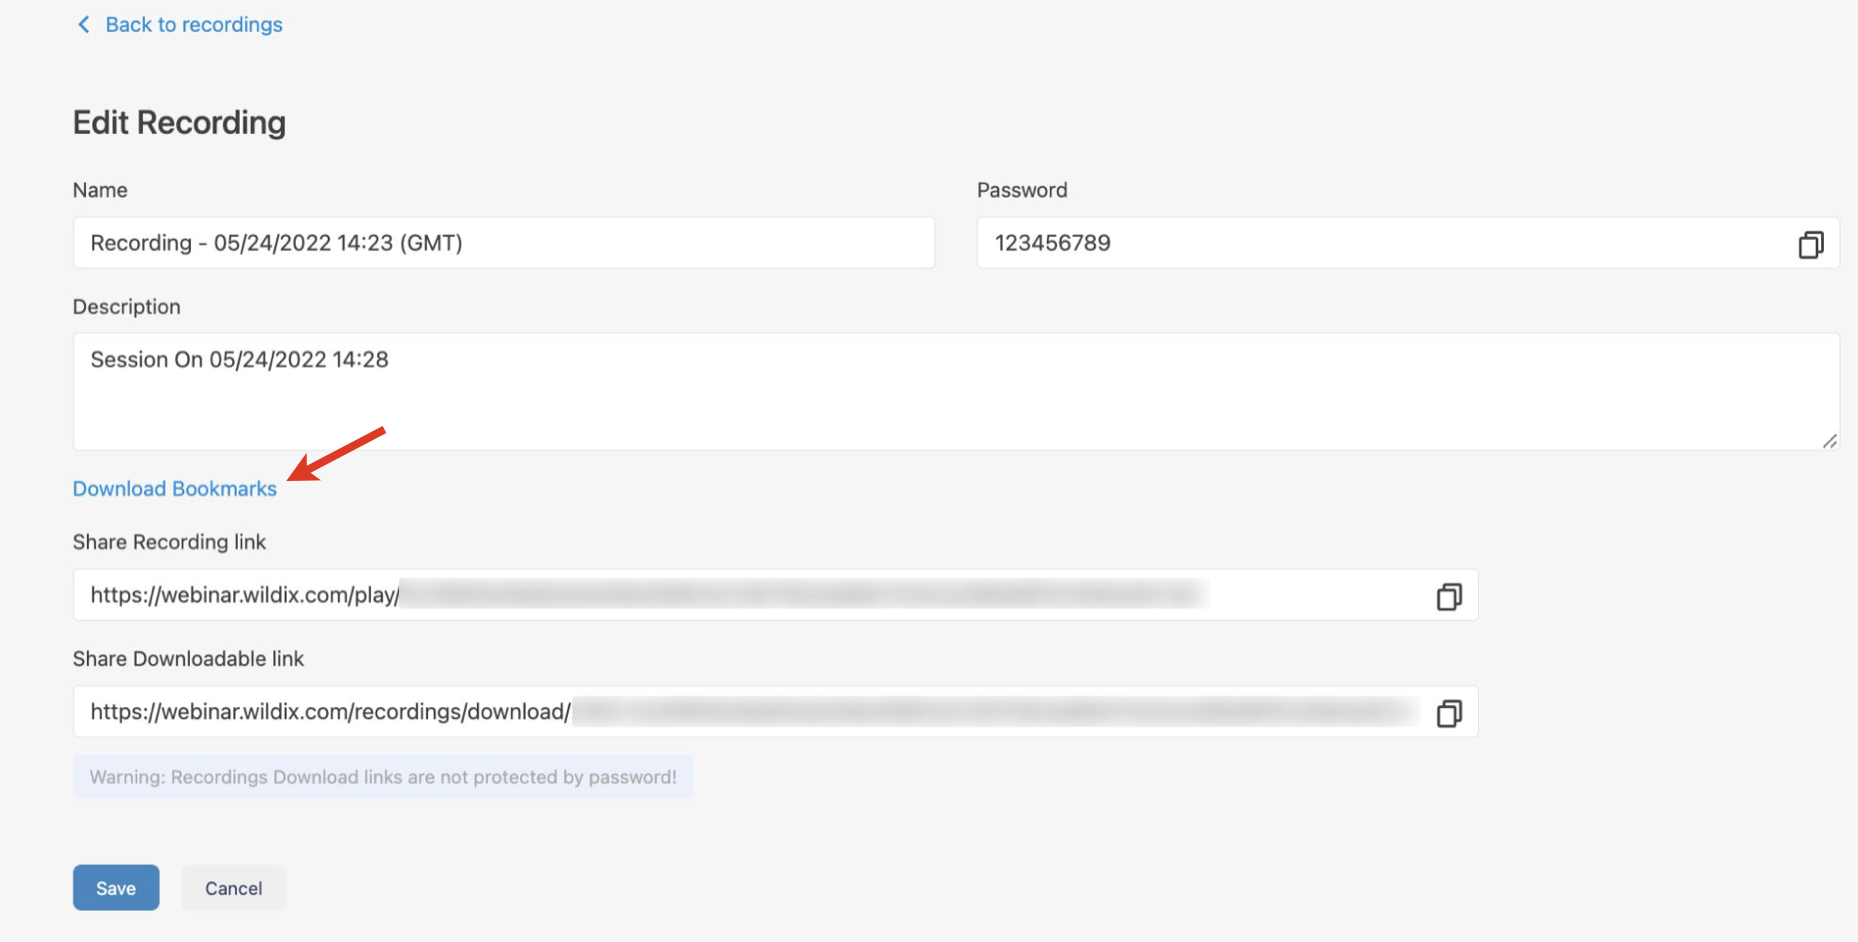
The file is uploaded in .json format and contains the following information: time, label (bookmark name), and user.
...
To end a webinar session, click on the Leave/ End session button (Exit icon) from the left panel: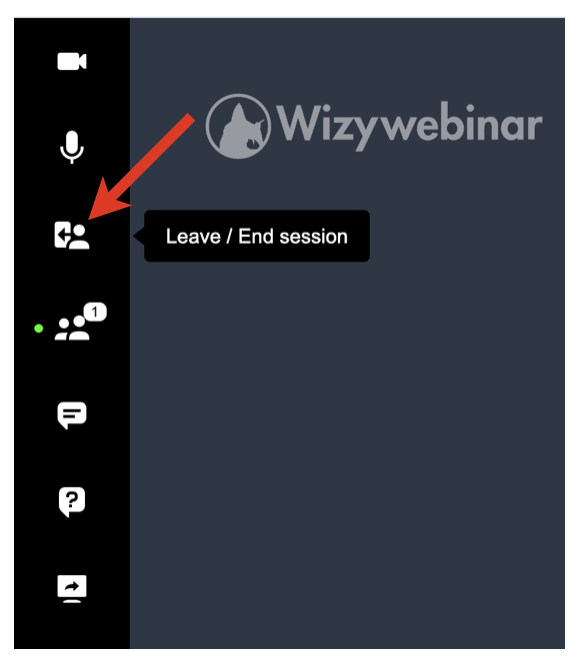
You have three options here:
...
- Click the Gear icon from the left panel -> select Workspace
- A new dialog opens, allowing you to adjust the following settings:

- Enable chat
- Enable private chats (disabled by default)
- Enable questions & answers (disabled by default)
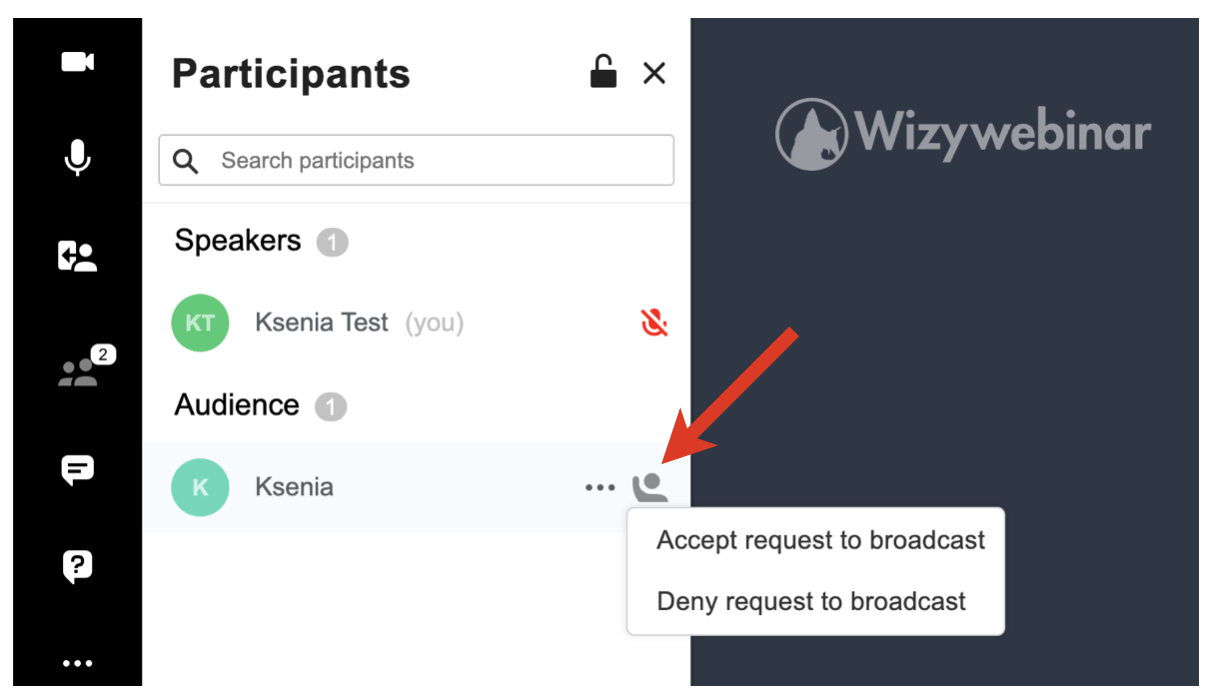
Enable request to broadcast (disabled by default): when enabled, a participant can raise a hand to request to broadcast; you can give broadcast permission from the Participants panel:
- Enable shared notes (disabled by default): when enabled, speakers can add and edit notes by clicking on the Note icon from the left panel; in 3 seconds notes are shared with the participants:

- Enable forced layouts (disabled by default): More information in the chapter Forced layouts
- Enable live streaming
...
Hover the mouse cursor over the Screen icon located in the lower right-hand part of the screen, and then select the preferred mode: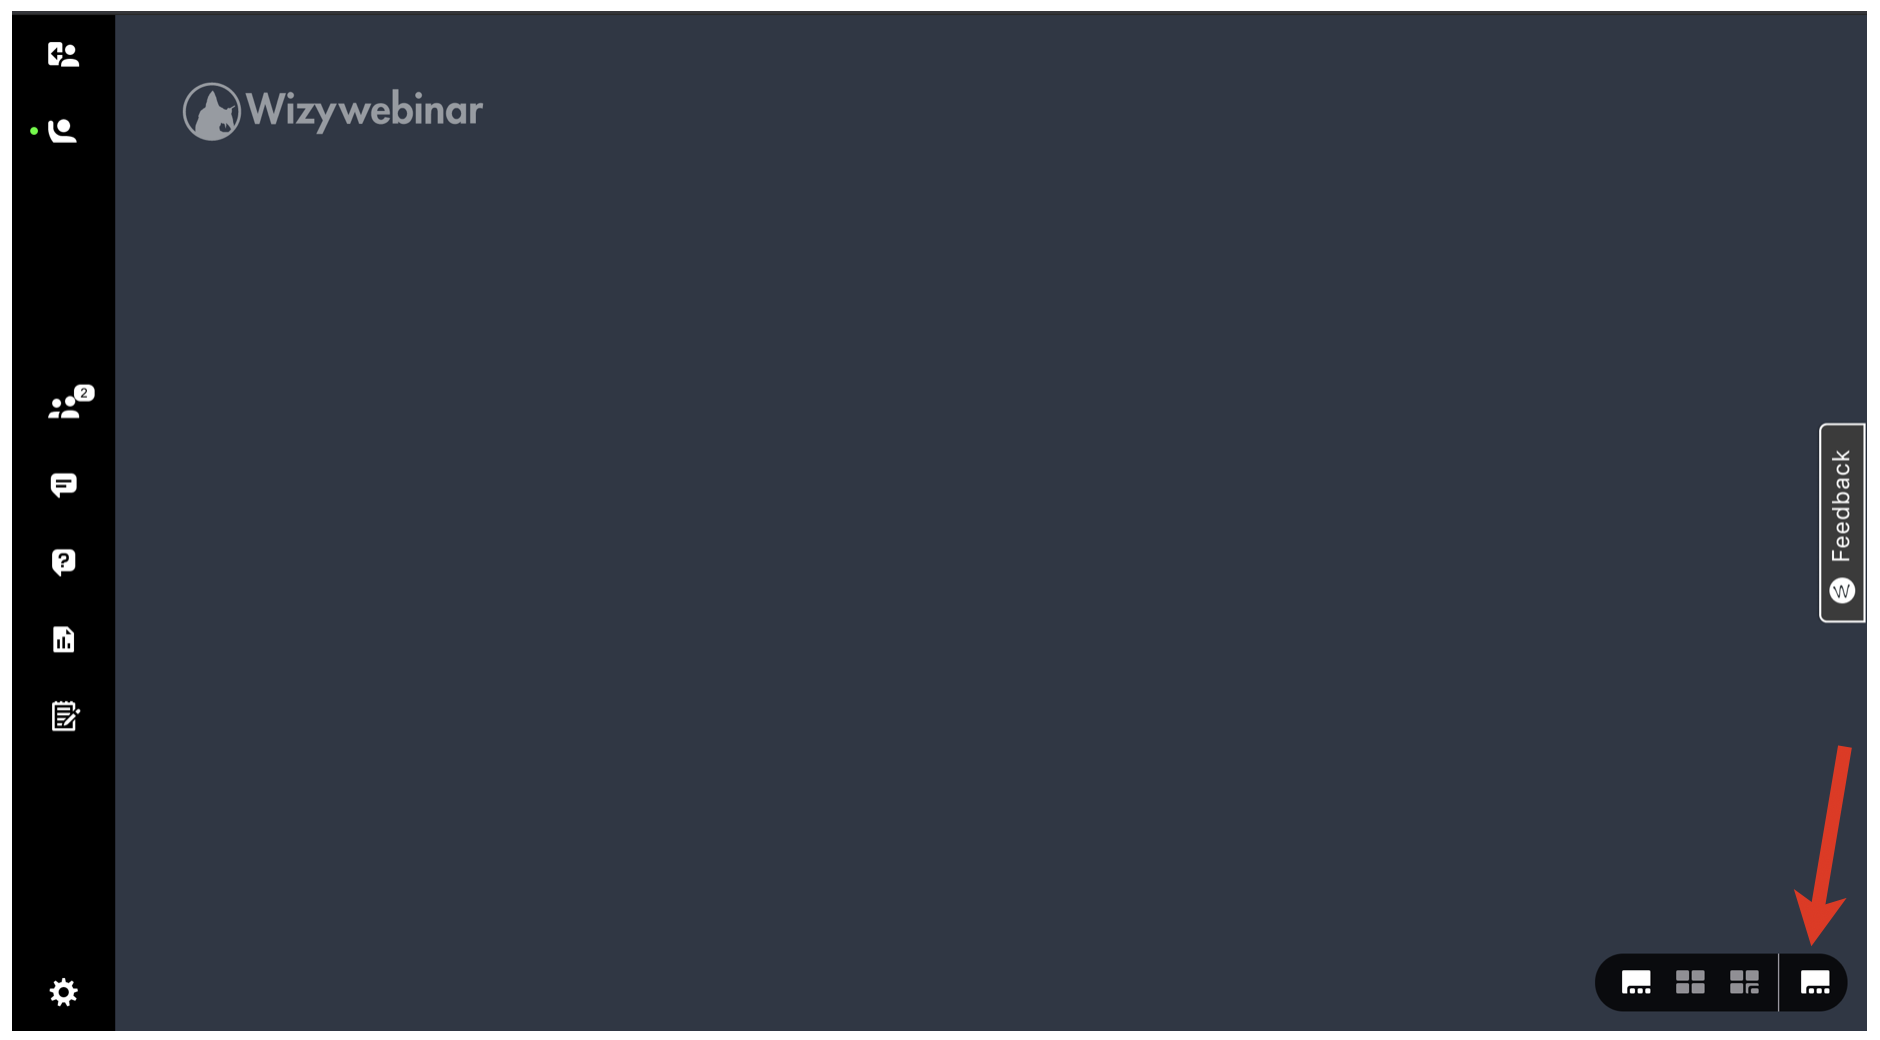
Tiled and thumbnail modes can be customized by users to fit their viewing experience.
...
- Hover to the uppermost left corner of the element that you would like to move until you see the Dice icon
- Tap and hold the icon and then drag and drop the element to rearrange your workspace:
To resize:
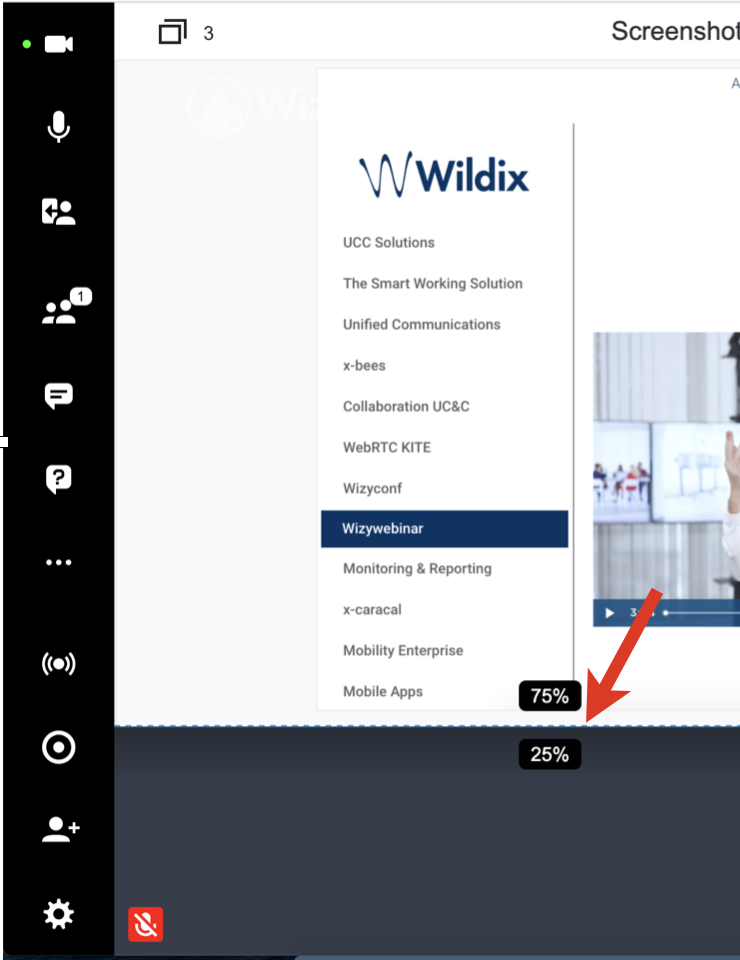
- Hover the mouse cursor over the border between the two elements on the screen, if you would like to resize one of them
- The border between the two elements is now highlighted. Tap and hold the mouse on the highlighted border. You can now see the percentage that each element occupies of the total workspace
- Drag the border up/down, or to the right/to the left to resize the elements; release the mouse when finished:
Forced layouts
...
- Open Settings -> Workspace, check the box Enable forced layouts and click Apply
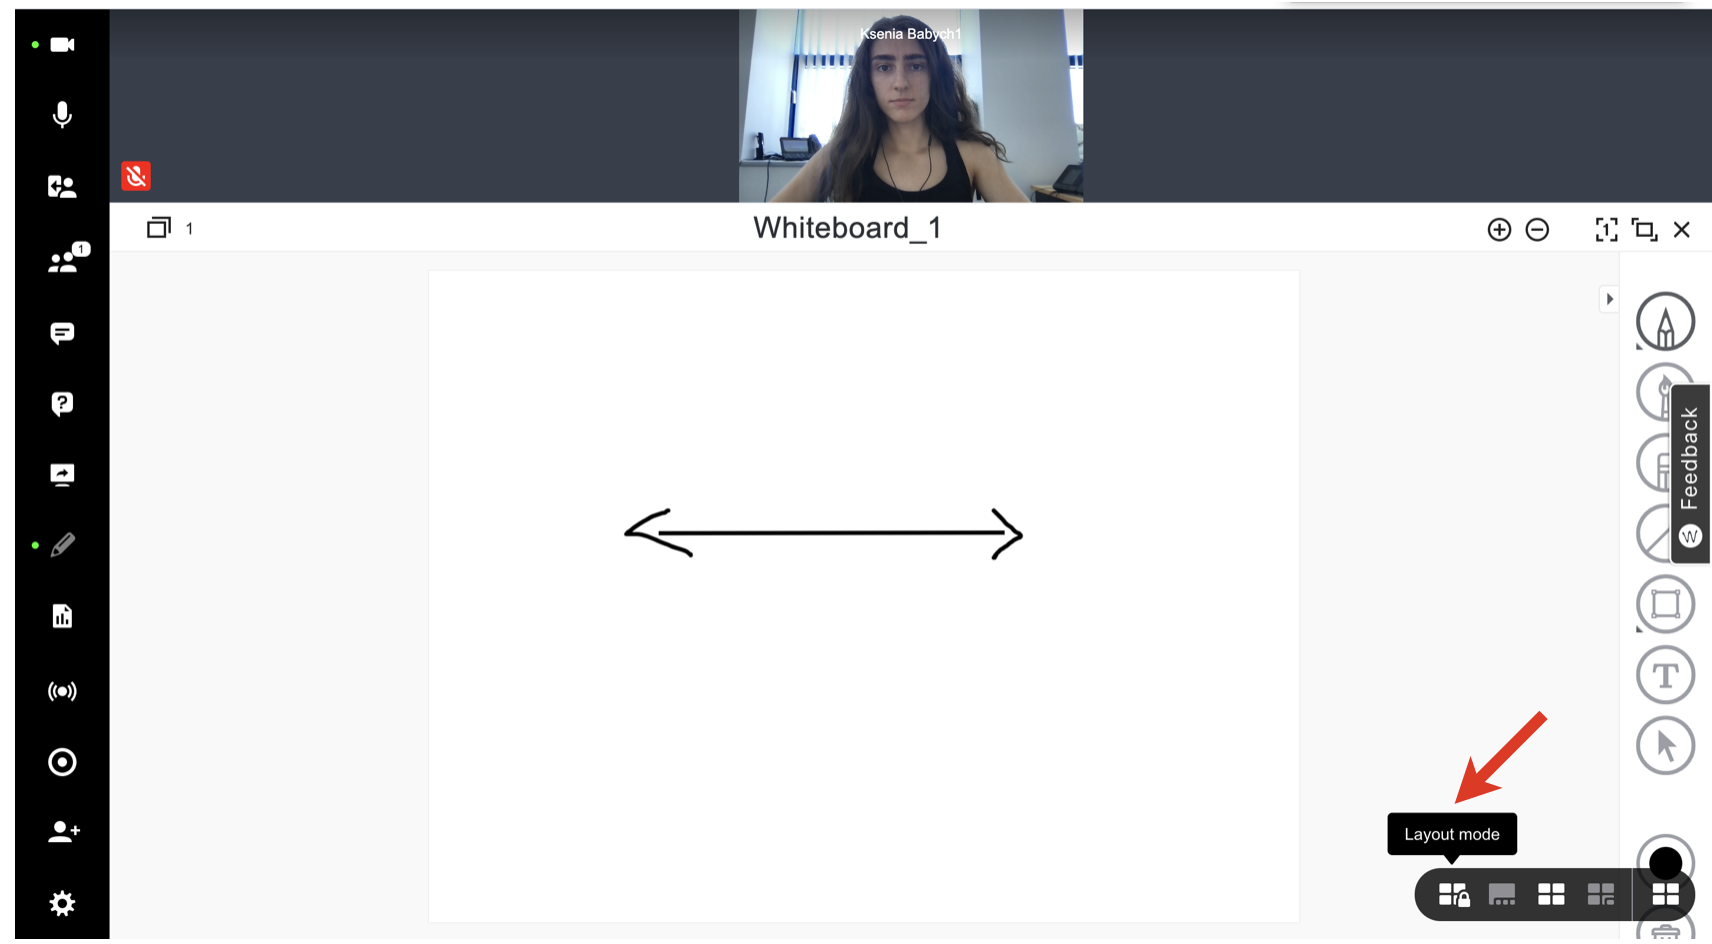
Hover the mouse over the Screen icon in the bottom right-hand part of the screen and click Layout mode:
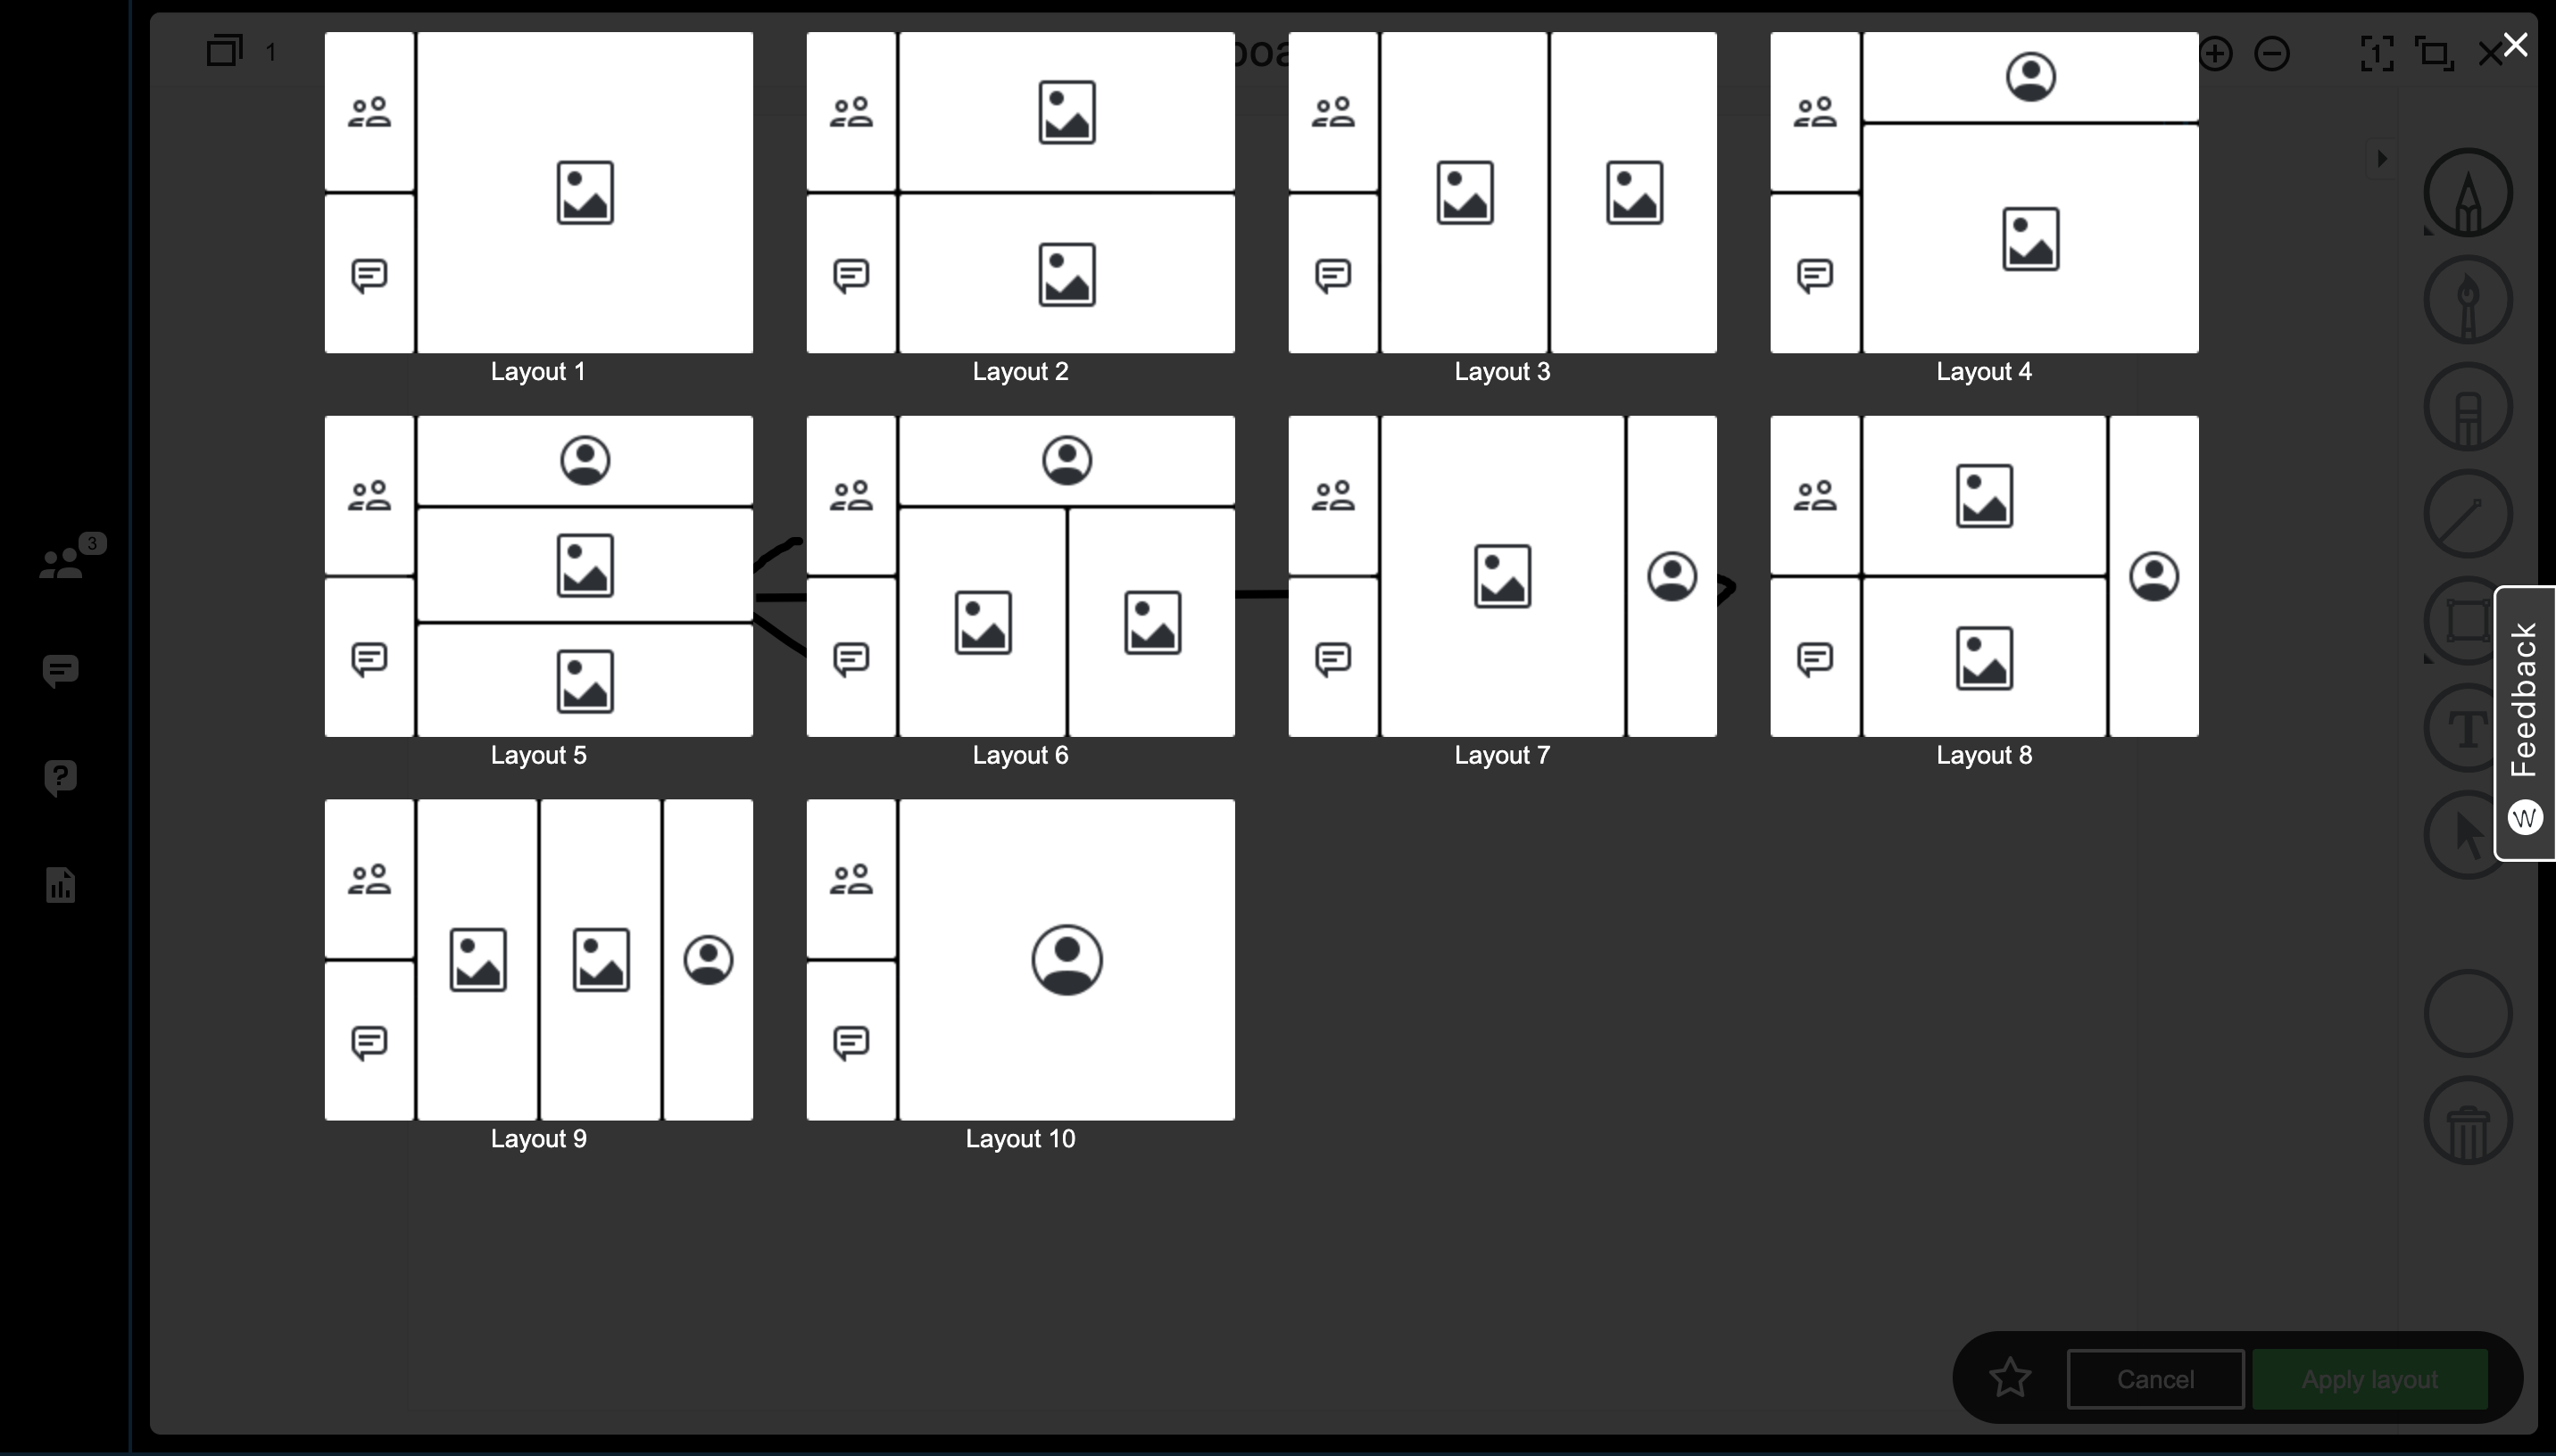
In the Layout mode, you can either arrange menus manually or choose one of the 10 predefined layout templates
For manual arrangement, select the menus that you would like your Participants to view: Participants, Questions & Answers, Conversations, Content library
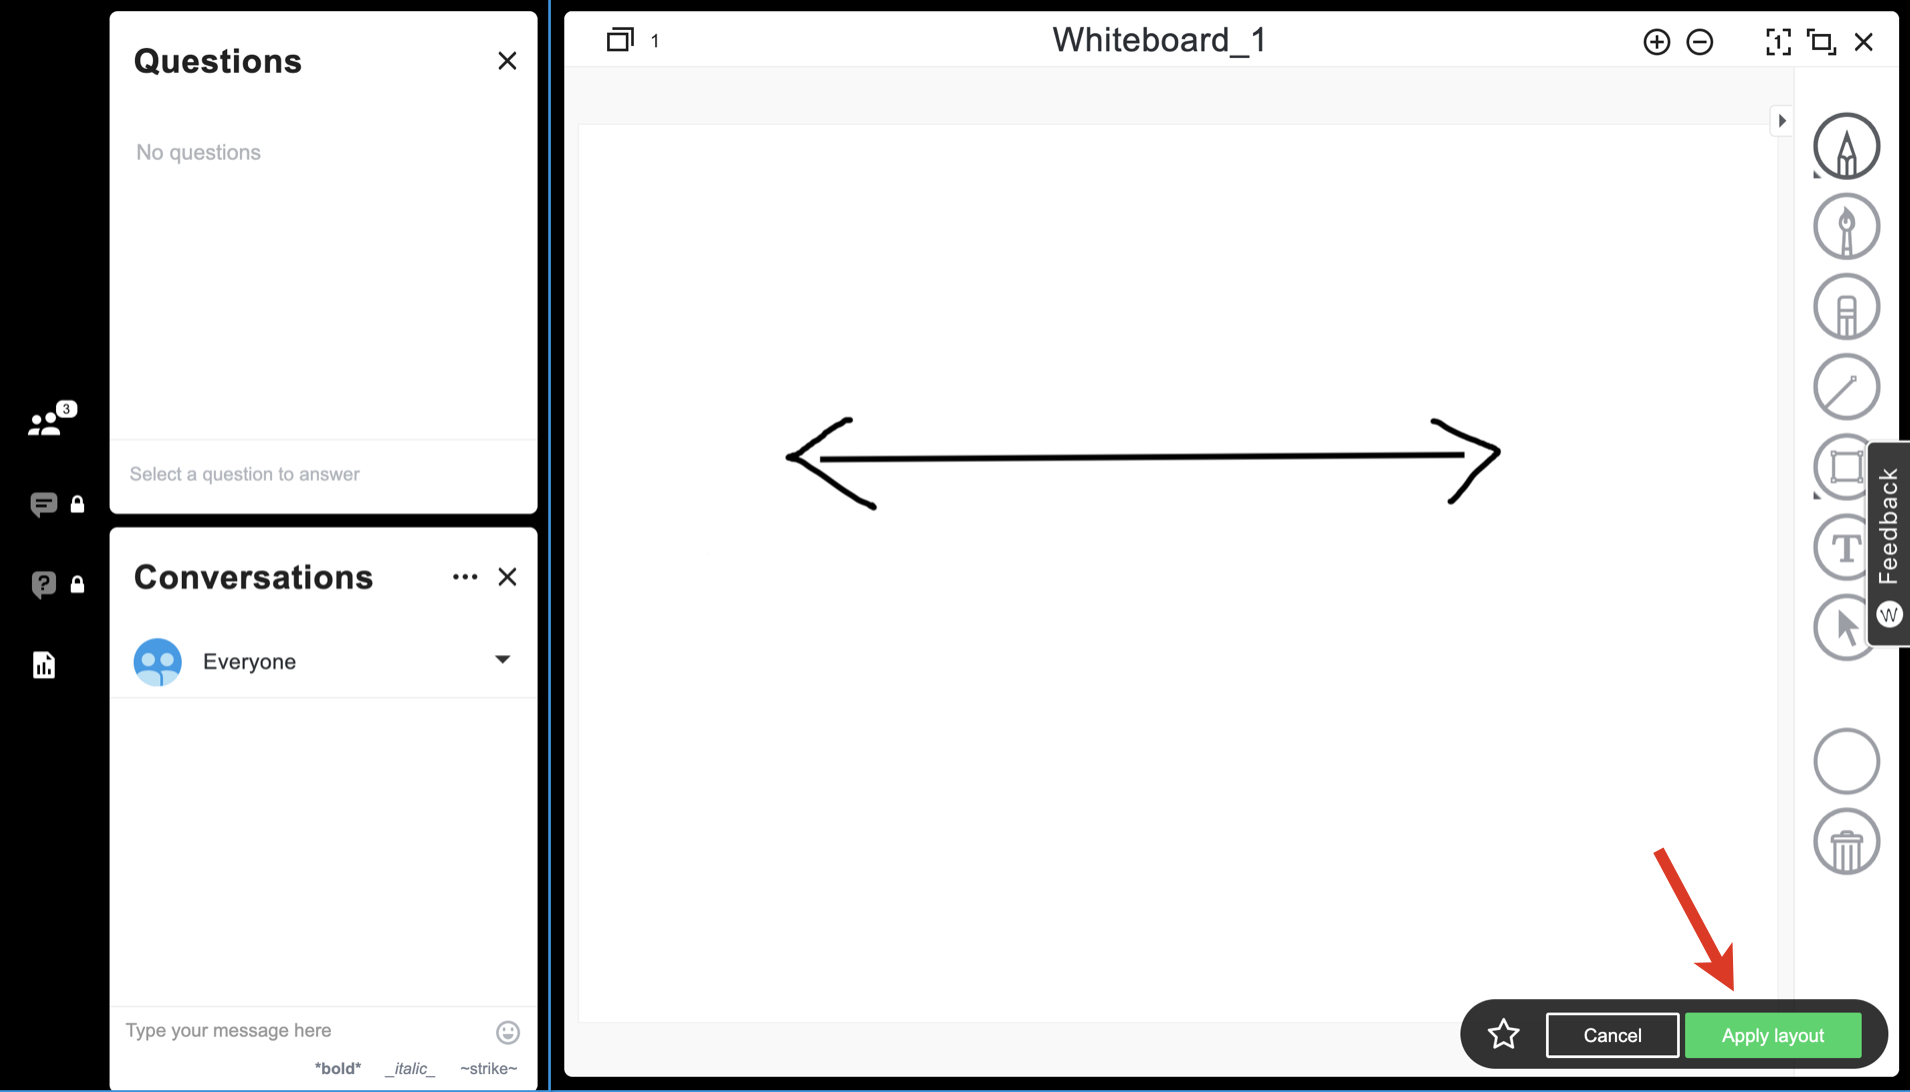
If you want to choose one of predefined layout templates, click the star icon to the left of the Apply layout and Cancel buttons:

Choose the preferred layout template:
Remember that you can also resize and rearrange the elements of your workspace (explained in chapter Change layout). For example:
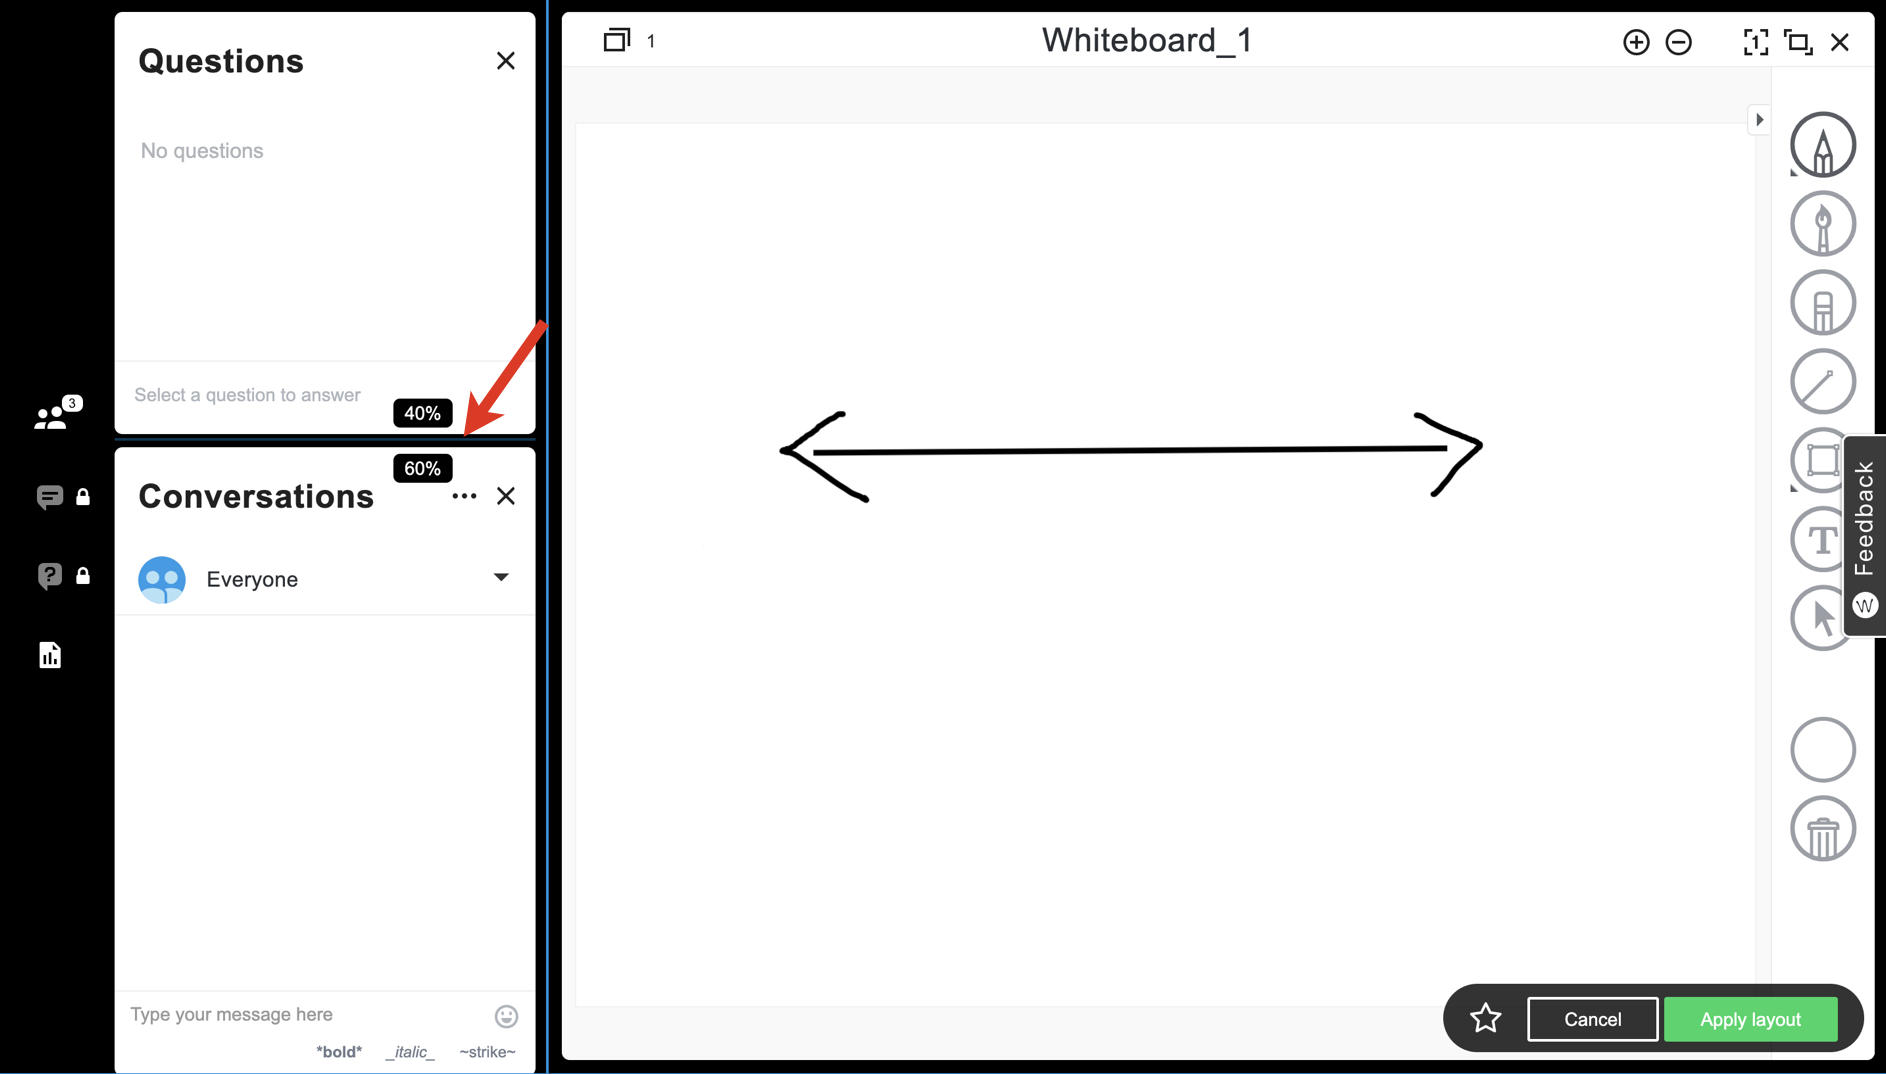
- When you are happy with the layout, click Apply layout in the bottom right-hand part of the screen
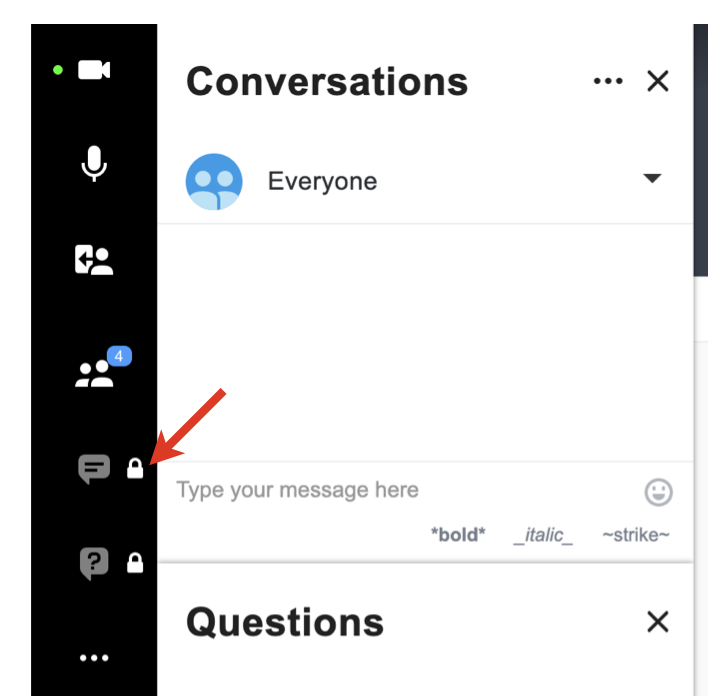
Remember that the Audience can only see the locked menus. In the example below, Audience can only access Conversations and Questions & Answers, but they can't access Participants and Content library. As a Speaker, you can still access other menus (for example, Participants, Conversations, Questions and Answers, Content Library) even if they are not pinned in Forced layouts. 
To change forced layout (Option 1):
Click on one of the locked menus (if any):
- Rearrange your layout
Click Apply layout in the bottom right-hand part of the screen:
To change (Option 2) or exit forced layout:
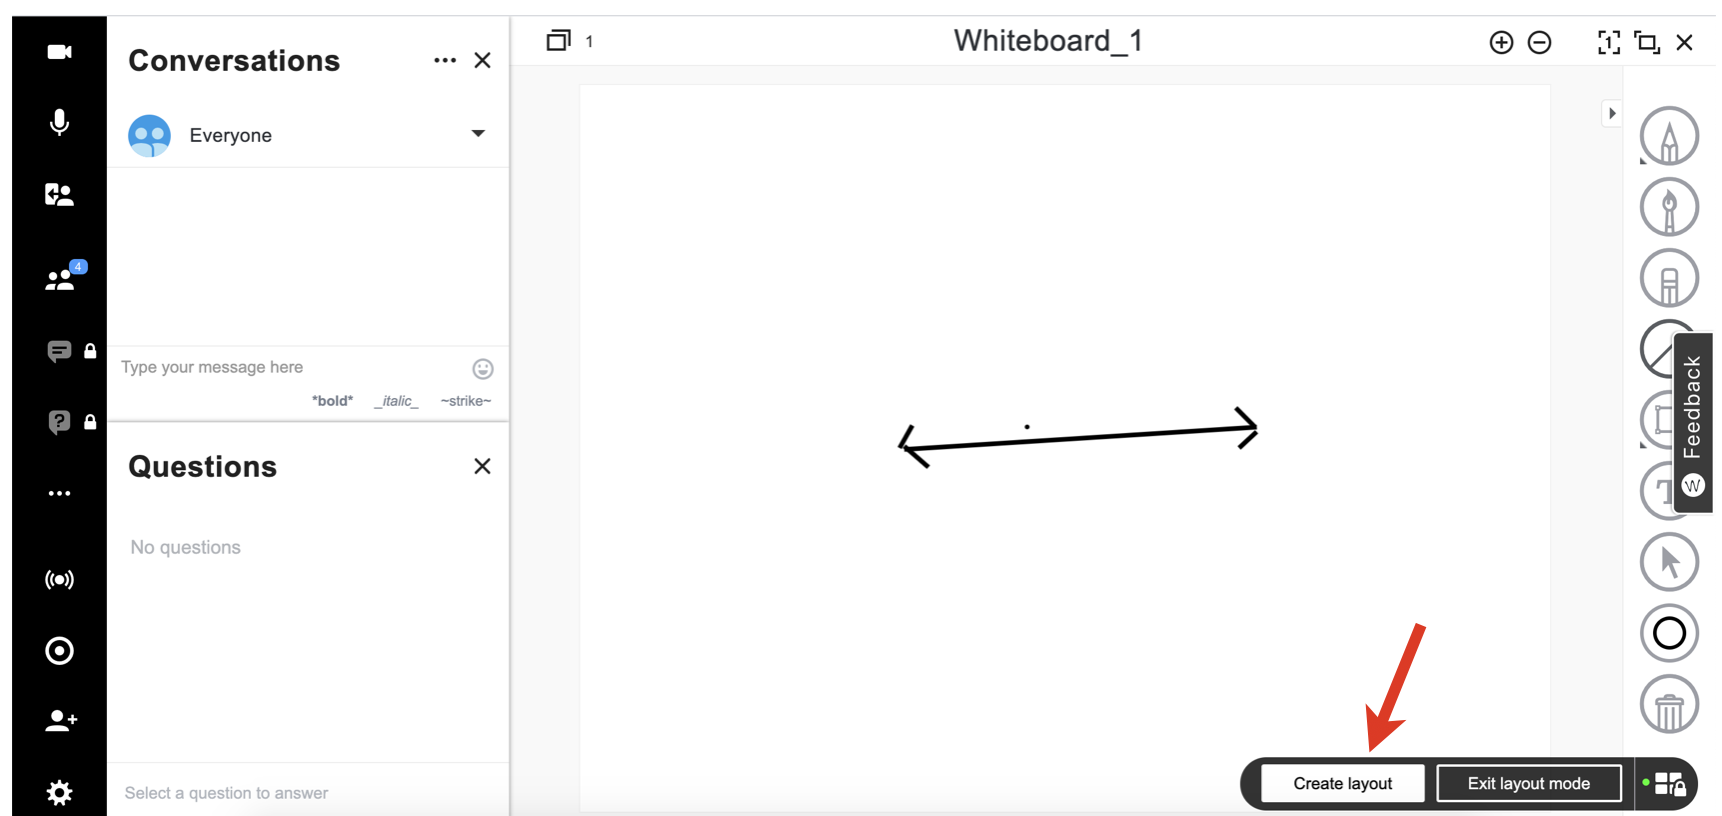
- Hover the mouse on the Locked tiles icon in the bottom right-hand part of the screen
Click on Create layout to change your forced layout. Click on Exit layout mode to exit the forced layout:
Statistics
Download the list of attendees
...
- Click on the Schedule tab from the left panel and then hit history tab. In this menu you can view all the past webinar sessions
- Hover the mouse cursor over a webinar and then click on the Pencil icon
Click Advanced options:

Open the Reports tab. Here you can see a short Summary Report and download it in CSV or Excel:

In the report, you can find information about attendees: whether they were invited, registered, or joined as guests, whether they attended or missed the webinar, as well as the details they provided when registering or joining the webinar.
Also, if Questions & Answers and/or Polls were used during the webinar, the relevant reports with QAs and Polls results are also available for download in CSV or Excel format. They include the following information: the questions, the answers, the date and time asked, users who asked and answered the question, public vote details if any, etc.
Usage stats
In Collaboration -> Webinar tab, open the Usage Statistics tab located on the left panel. Here you can see the total duration of connections per day and the total number of users joining across all sessions per day:
- Click on plot points to see the detailed report: the overall duration of participants' staying in a particular webinar session and the exact time the joined and left the session:


You can export usage statistics to CSV or Excel file by clicking on the relevant option under the chart. The exported report includes the following information: session title and ID, scheduled date and time, user ID, first and last name, email, role, duration, and time when user joined and left. 
Besides, the same report in CSV or Excel file is available about users who are currently live:
Integration with Wizyconf HW Station
Starting from Wizyconf App v 1.2.16, Wizyconf Station integrates with Wizywebinar, consult this documentation for details.
Other functionality
Starting from v. 5.42.4, there is an option to protect sessions with end-to-end encryption (E2EE), which ensures that both audio and video streams, including screen share, are not being read or secretly modified by anyone other than the actual senders and their recipients.
...
| Note |
|---|
Note: E2EE is not compatible with Recordings, Live Streaming. E2EE is also not compatible with mobile - mobile users won't be able to join encrypted sessions. |
| Macrosuite divider macro | ||||||||||||||||||||||||||
|---|---|---|---|---|---|---|---|---|---|---|---|---|---|---|---|---|---|---|---|---|---|---|---|---|---|---|
|
| Button macro | ||||||||||||||||||||||||||||||||||||||||
|---|---|---|---|---|---|---|---|---|---|---|---|---|---|---|---|---|---|---|---|---|---|---|---|---|---|---|---|---|---|---|---|---|---|---|---|---|---|---|---|---|
|