How to synchronise media folder
The following Document describes how to synchronise the media folder from Cloud PBX’s on Windows. Media folder contains call recordings, voicemails, chat history, CDR records, calendars and traces. The Document will guide you through synchronising the files through WinSCP.
Created: April 2019
Permalink: https://wildix.atlassian.net/wiki/x/AYBAAg
Step1. Download WinSCP
- Download and install WinSCP with full setup: LINK
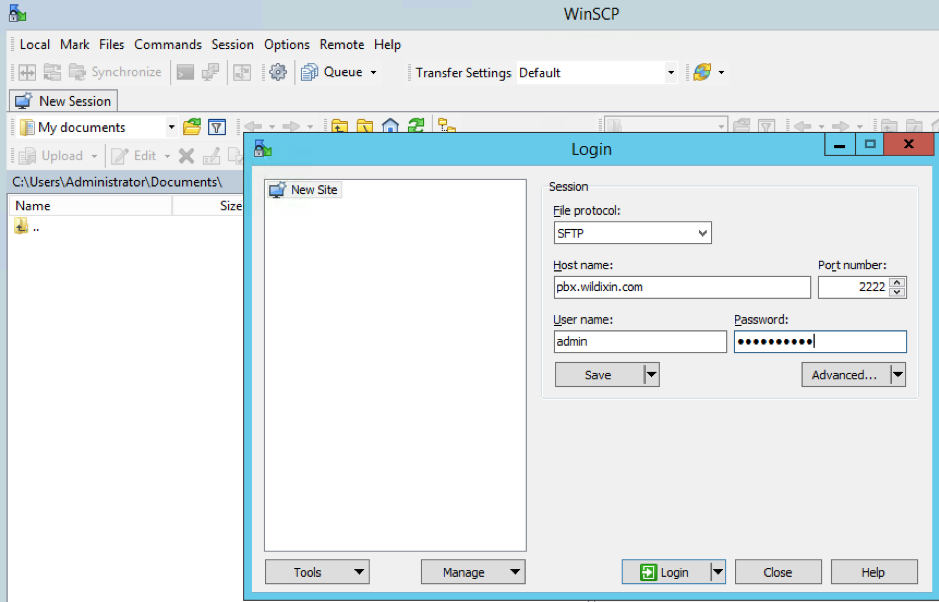
Step 2. Connect to Cloud PBX with WinSCP
SSH is disabled by default on Cloud PBXs. You can temporarily enable it on WMP. For instructions, read PBX Licensing and Activation - Admin guide (Enable SSH port on Cloud PBXs).
Step 3. Scripting media sync
Create a directory on your local machine to sync the media folder
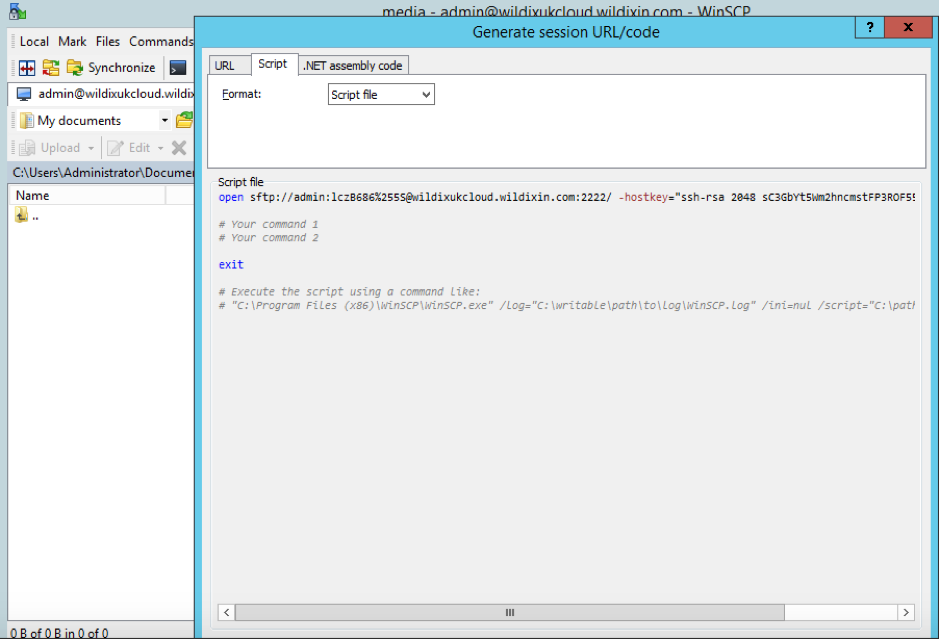
Copy hostkey
- To find the host key, open your WinSCP session
- Click Session -> Generate Session URL/Code…
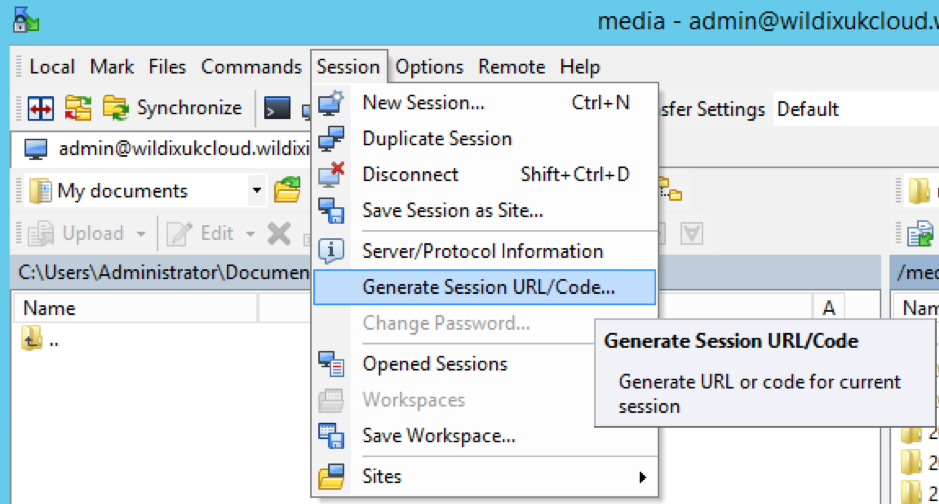
- Copy the hostkey:
Wildix Media Sync
Wildix Media Sync script can be downloaded by clicking here read the readme.txt and edit the relevant scripts.
Additional information about Wildix Media Sync:
Use the WinSCP synchronise feature
This will copy ALL the files on the first run and only copy new files on subsequent runs, this can be run on scheduled task scenarios
The script does not delete any recordings, it is designed to let the pbx do this using either the retention setting in WMS > Settings > Call and Chat history or the inbuilt job when storage fills up.
The script accommodates all system date/time formats