| Scroll export button | ||||||||
|---|---|---|---|---|---|---|---|---|
|
| Info |
|---|
This Documentation describes how to use Partner Community, starting from lead creation and ending with managing opportunities. Created: December 2021 Updated: December 2022 Permalink: https://wildix.atlassian.net/wiki/x/ahXOAQ |
| Table of Contents |
|---|
Get Started
...
- Wildix Partner Community Guide - accept incoming leads, view news & updates, etc.
- Wildix Partner Community Guide - create and manage Leads
- Wildix Partner Community Guide - create and manage Accounts for companies you plan to sell to
- Wildix Partner Community Guide - create and manage Opportunities that refer to the high probability of generating sales revenue
- Wildix Partner Community Guide - create and manage Contacts
- Wildix Partner Community Guide - manage proposed prices of products/ services
- Wildix Partner Community Guide - create and manage orders
- Wildix Partner Community Guide - create and manage business activities
- Wildix Partner Community Guide - generate and manage reports


Home
From the Home page, you can access Wildix Partner Community Guide, accept Incoming Leads and quickly create new Leads and Accounts. The Search Field allows you to find any information.


Lead
A Lead is every potential sales opportunity that has not been qualified yet. It can either come from Marketing (both from your Marketing or Wildix Marketing passed to you), or from any activity you and your sales team have done. You need to make sure this potential sales opportunity (or lead) has some characteristics without which it doesn't make sense to move forward in the sales cycle and make this Lead an opportunity. Up to you to decide which characteristics are required, but generally speaking, we talk about: the company is in target, the person is the right one etc, so Wildix Partner Community gives you the opportunity to track this qualification process through the Lead object.
...
- Fill in the following mandatory fields:
- Company - insert Company name
- Power - specify who is a decision maker
- Lead Status - select status of the Lead

- First and Last Names
- Job Title - select the title from the list
...
Email - add contact Information


- Click Save button to create a Lead (if you want to create one more Lead, click Save & New button)
...
It is also possible to display Projects as a Kanban board by clicking on Display as:


- To open a Project, click on Project Name
...
- Intro/ Qualification - at this stage, you need to determine Users of POC - how many users use Wildix
- Demo - at this stage, you need to indicate Amount MRR or Capex
- Project Presentation
- Proposal - the basic condition to move to the next stage is Verbal Agreement
- Contract out
- Order Management
- Closed


- When the Project passes Contract out stage, you can close the Project. Select the stage Closed Won and click Save. If you select Closed Lost stage, you need to explain the reason in Opportunity lost field
...
- Click New button to create a Contact


Select Customer / Reseller Contact and click Next

- Fill in mandatory fields:
- First and Last Names and Title
Account Name - associate the Contact with an existing Account or create a new one
...
Email - add contact information


- Click Save button to create a Contact (if you want to create one more Contact, click Save & New button)
...
From the Related Details and Actions Panel, you have access to all the detailed information connected with the Contact: you can review Contact History, Notes, upload files, create Tasks and upload files

Quote
Quotes represent proposed prices for products and services. Quotes can be created from and synced with Projects and emailed to customers.
Create a Quote
Select a Project you want to generate a Quote for and click Create Quote button:


| Note |
|---|
Note: Creating a quote for the first time, you may need to wait some seconds till the page loads. |
...
The saved quotes appear in the Quotes section of the Project page:


The checkbox in the field Syncing indicates that everything is synced correctly:
...
- To open a Quote, click on its Name


From the Options Panel, you can create a PDF, stop sync, or send the Quote via email

From the Related Details and Actions Panel, you can view the list of related Products/ Services, add Notes, upload attachments, create Tasks

...
Once you mark Accepted quote status as Complete, the quote is converted into order and is available on the Order page:


To proceed with the order, click on the Confirm Order (1) -> Mark as Current Status (2):


Once order status successfully changed, the first step of the order flow turns green:
...
Here you can track the cases and their progress, as well as communicate with our support team directly through the case. Here you can track the cases and their progress, as well as communicate with our support team directly through the case. So, case is like a ticket that is created to monitor implementation of the CLASSOUND solution.

Cases section is also available on the following pages:
...
 Detailed information about the case can be checked on the Case page:


You can use the panel on the right side of the Case page to communicate with CLASSOUND support on this case and attach files if needed:
...
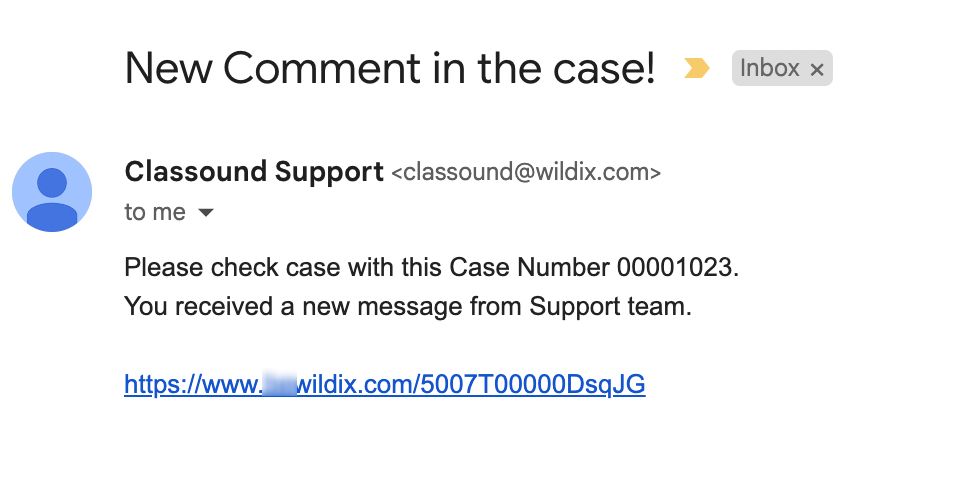
When CLASSOUND support agent replies/ posts a question, you should receive an email notification, to easily navigate to the necessary case and reply there.
Task
Tasks represent business activities such as making calls, sending quotes or other to-do items.
| Note |
|---|
You can also create and manage Tasks in Lead, Account, Project and Contact tabs, under Open Activities or Actions menus. |
...
- To generate a Report, click New Report


Choose Report Type and click Continue

At this stage, you can add/ remove any columns to your Report. Click Save & Run to generate the Report

...
From Settings menu, you can access Home tab, edit your personal Profile and check your Company Account.

- My Profile - this is your personal Profile, you can add user picture, edit your personal information
- My Account - this is your Company Account created by Wildix, you cannot modify the information present on this page
...
- Expand Settings in the top menu
Click Logout


| Macrosuite divider macro | ||||||||||||||||||||||||||
|---|---|---|---|---|---|---|---|---|---|---|---|---|---|---|---|---|---|---|---|---|---|---|---|---|---|---|
|
| Button macro | ||||||||||||||||||||||||||||||||||||||||
|---|---|---|---|---|---|---|---|---|---|---|---|---|---|---|---|---|---|---|---|---|---|---|---|---|---|---|---|---|---|---|---|---|---|---|---|---|---|---|---|---|
|
...