Wildix Partner Community Guide
This Documentation describes how to use Partner Community, starting from lead creation and ending with managing opportunities.
Related documentation: Submit a Case via Wildix Partner Community
Created: December 2021
Updated: January 2024
Permalink: https://wildix.atlassian.net/wiki/x/ahXOAQ
Get Started
Wildix Partner Community allows you to manage your customers and leads, starting from lead creation and ending with managing opportunities. The Community includes powerful tools that generate leads so your sales team can close more deals.
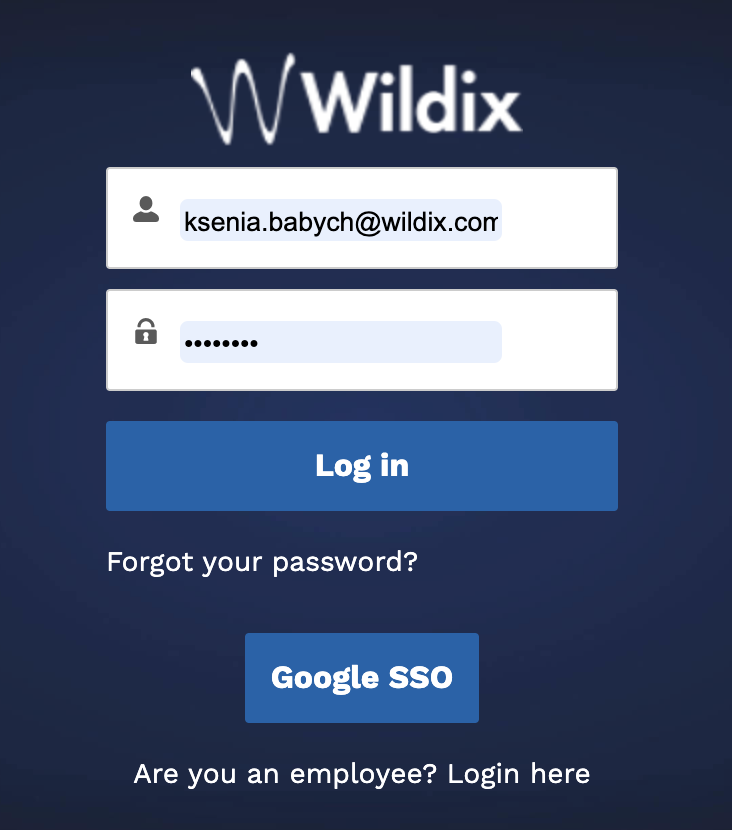
Connect to your Partner Community at www.bewildix.com, enter Login and Password and click Log in:
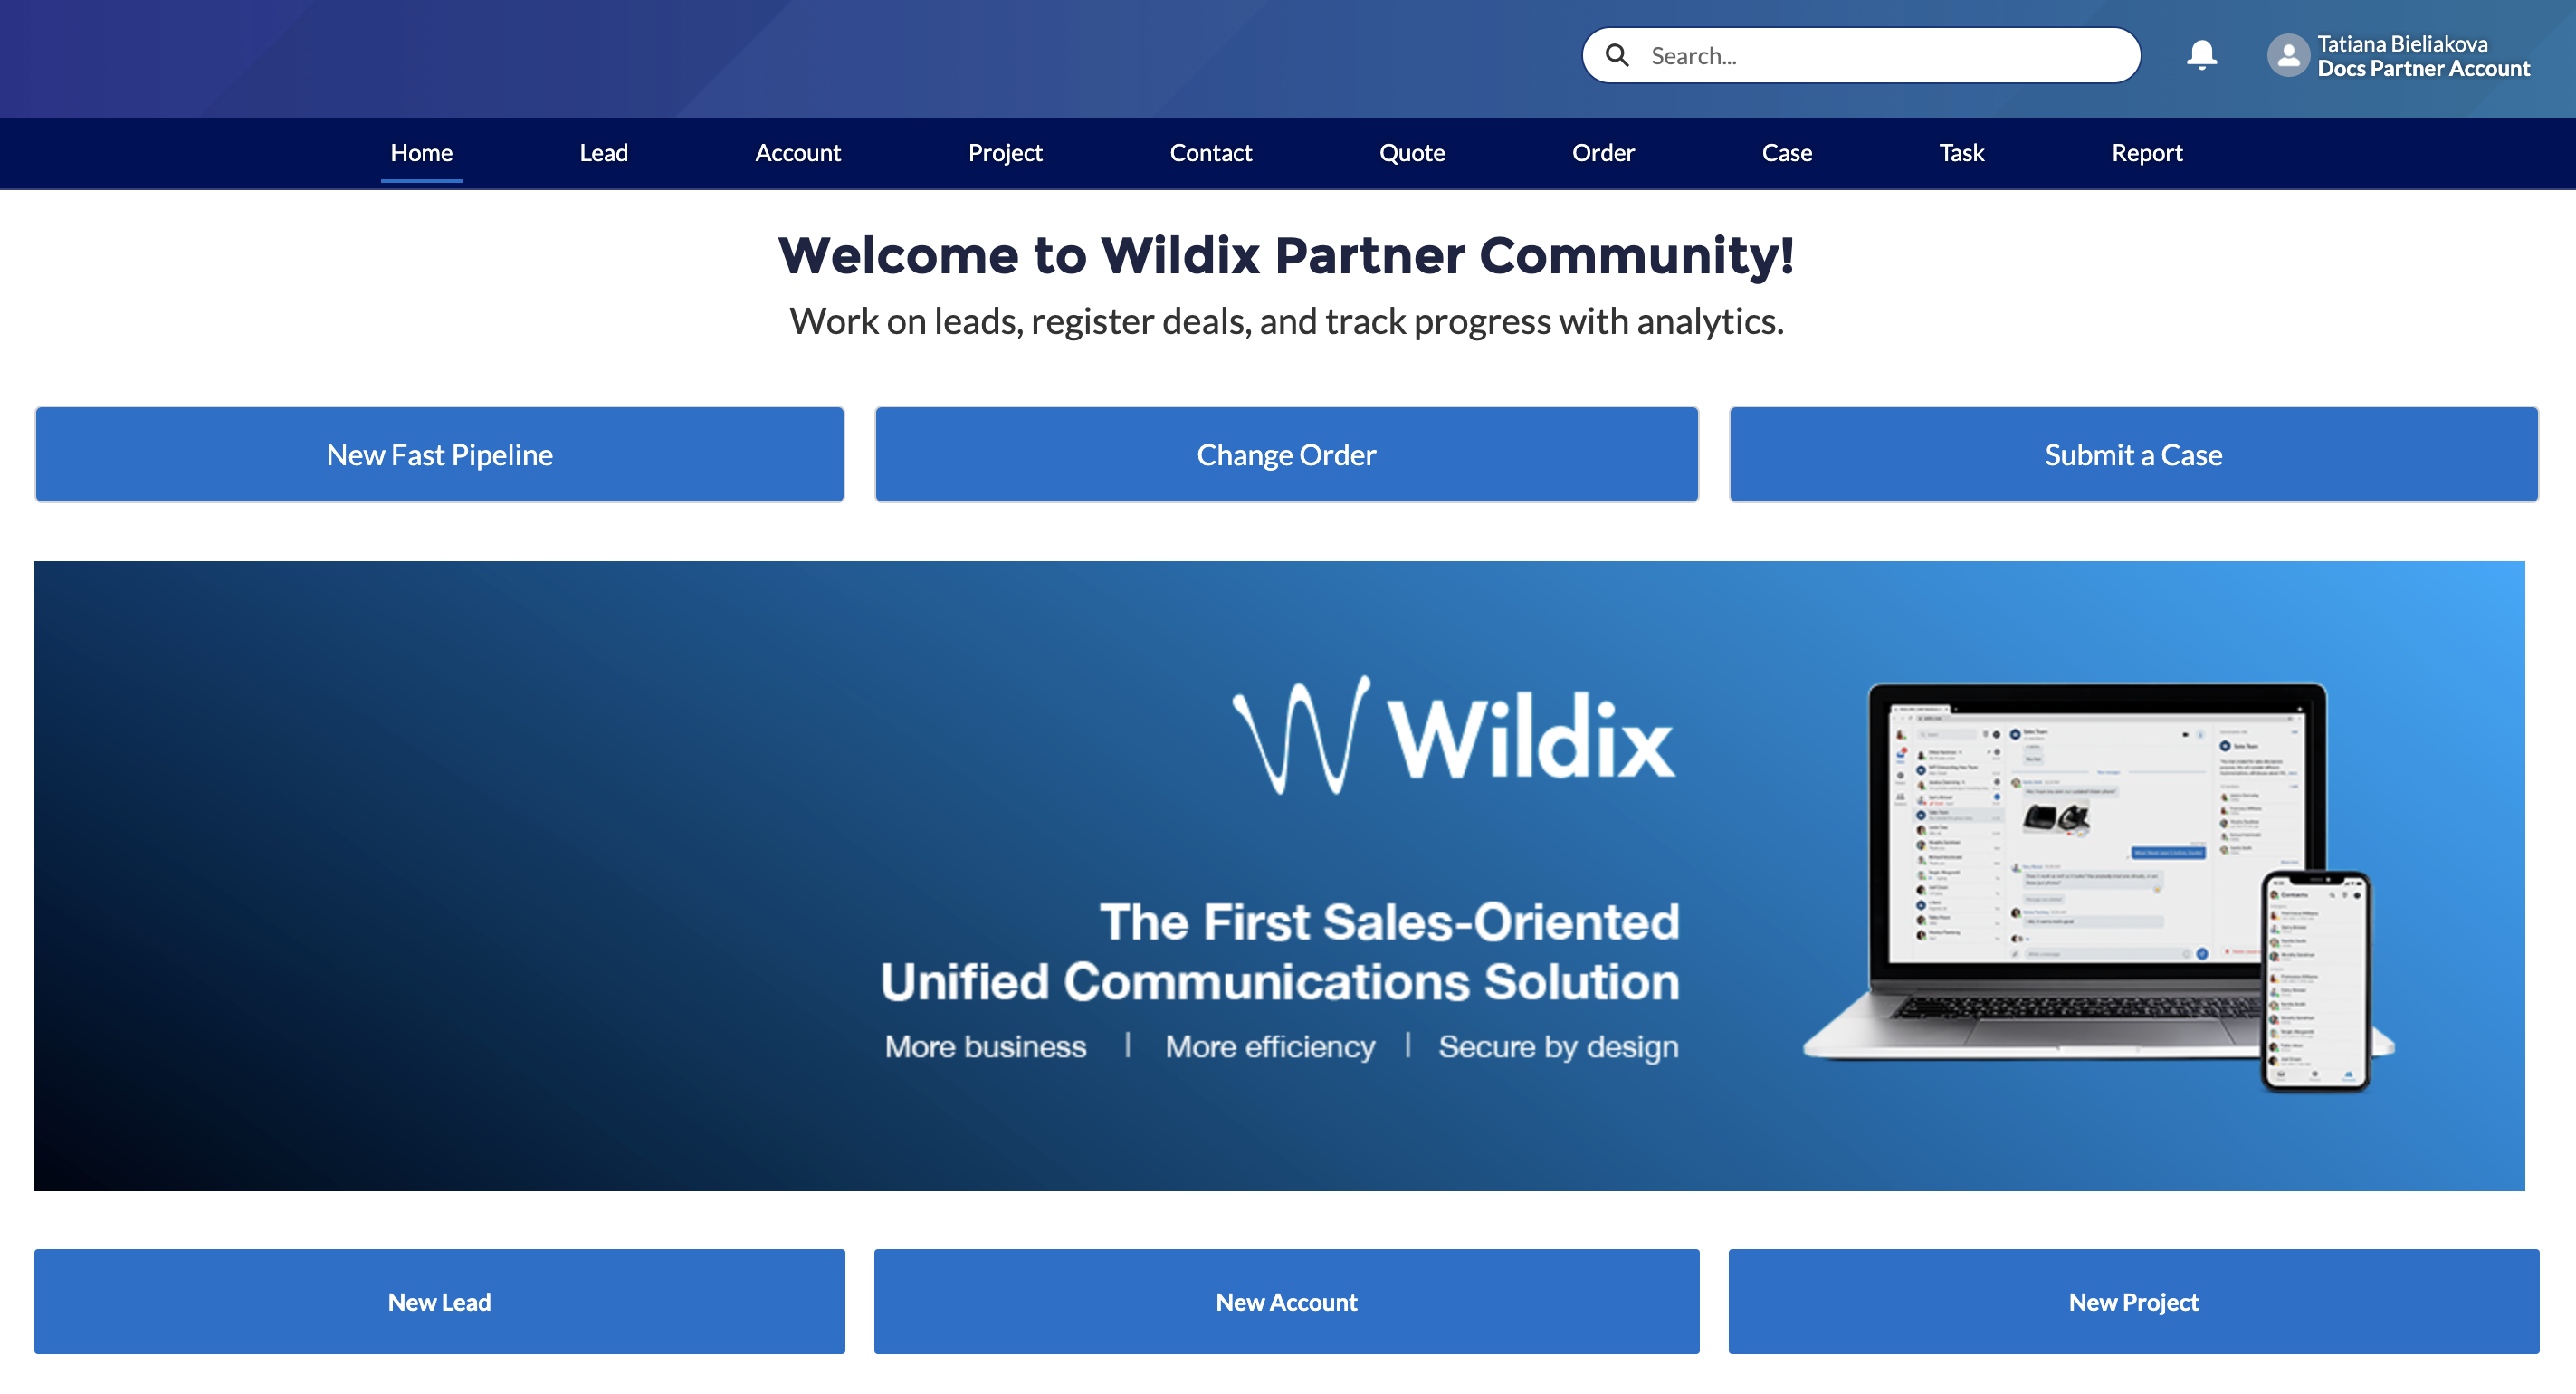
You have access to the different menus:
- Home - view news & updates, submit a case, etc.
- Lead - create and manage Leads
- Account - create and manage Accounts for companies you plan to sell to
- Project - create and manage Opportunities that refer to the high probability of generating sales revenue
- Contact - create and manage Contacts
- Quote - manage proposed prices of products/ services
- Order - create and manage orders, order items to stock
- Task - create and manage business activities
- Report - generate and manage reports
Home
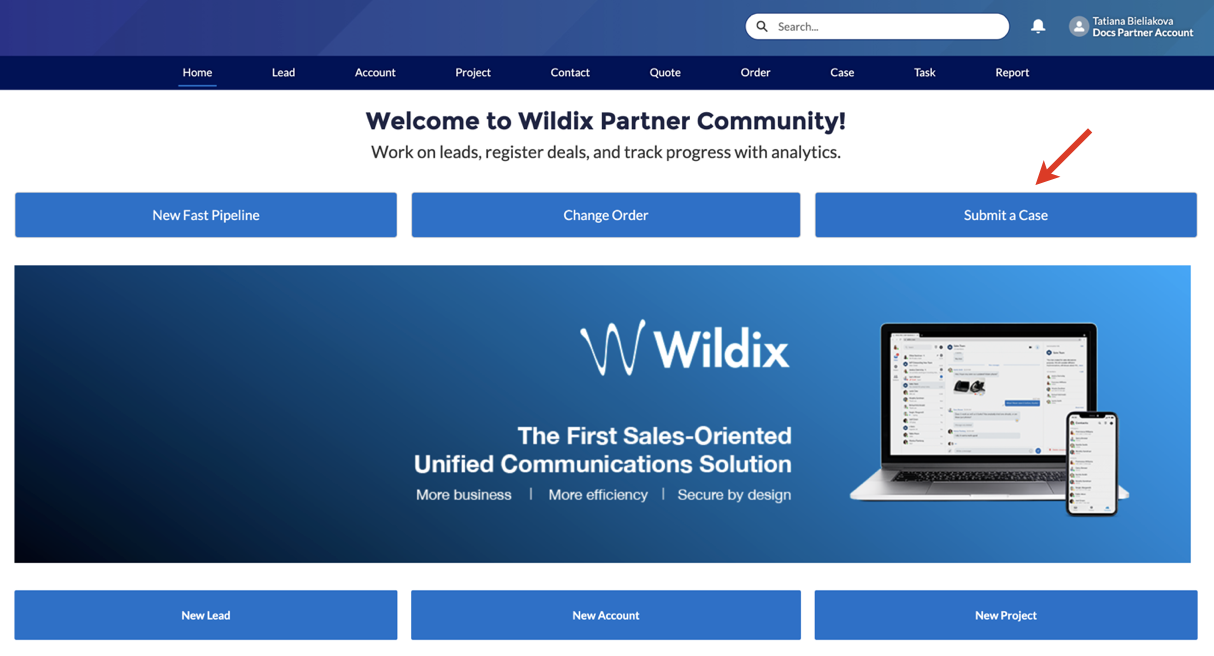
From the Home page, you can access Statistics, quickly create new Leads and Accounts, submit a case. The Search Field allows you to find any information.
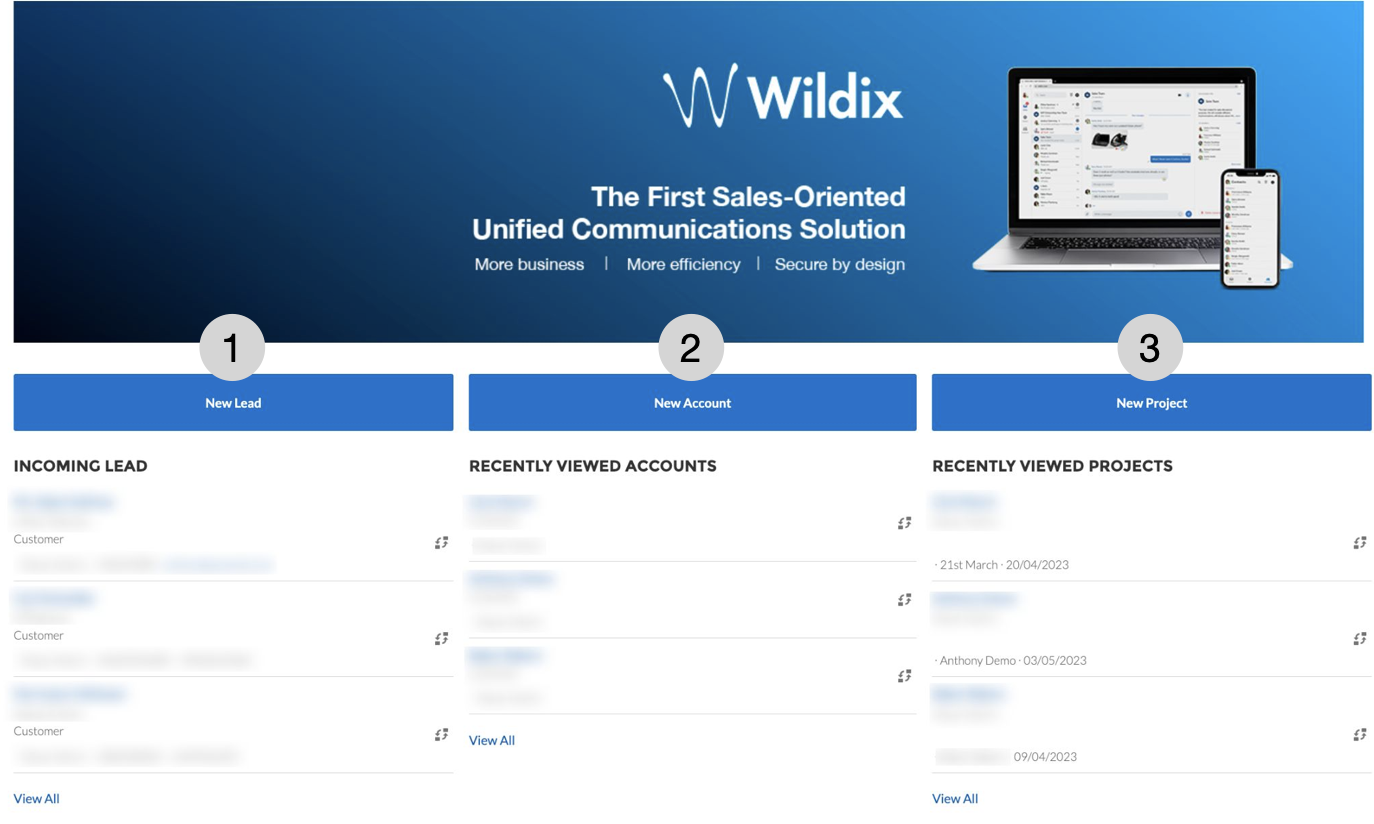
Also, via Home page, you can create a New Lead (1), New Account (2), New Project (3):
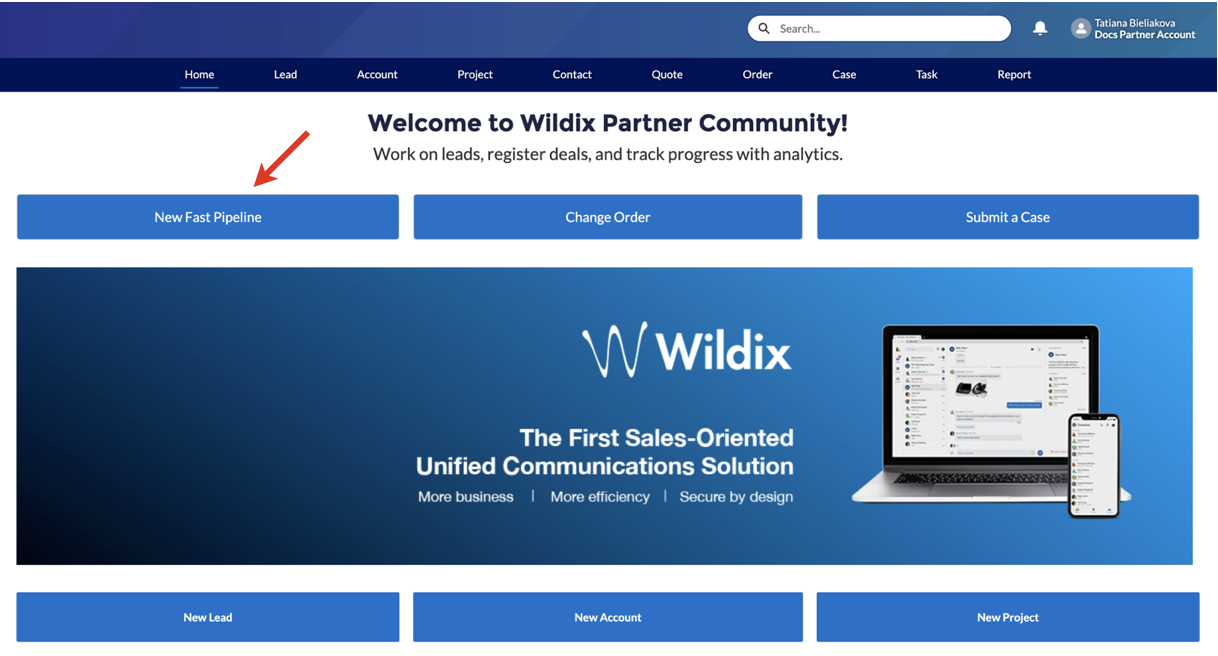
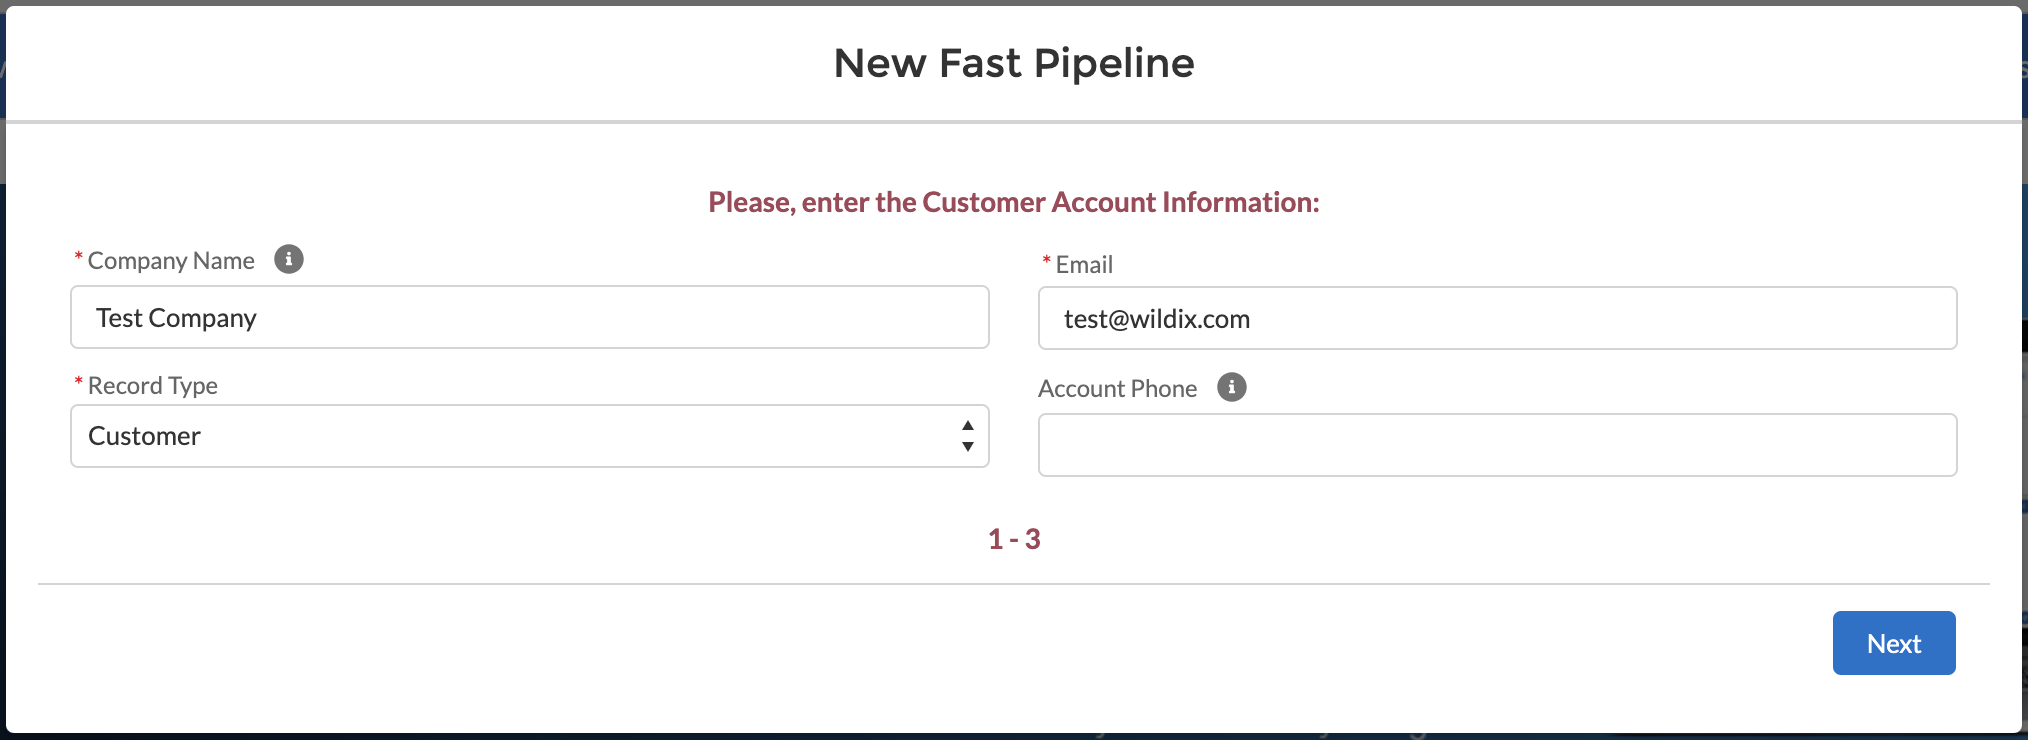
The button New Fast Pipeline offers a quick way to create an Account, Contact and Project:
On the first screen that opens, fill out the following data and click Next:
- Company Name - enter name of the Company
- Record Type - choose record type
- Email - enter email address
- Account phone - enter phone number in international format starting with "+"
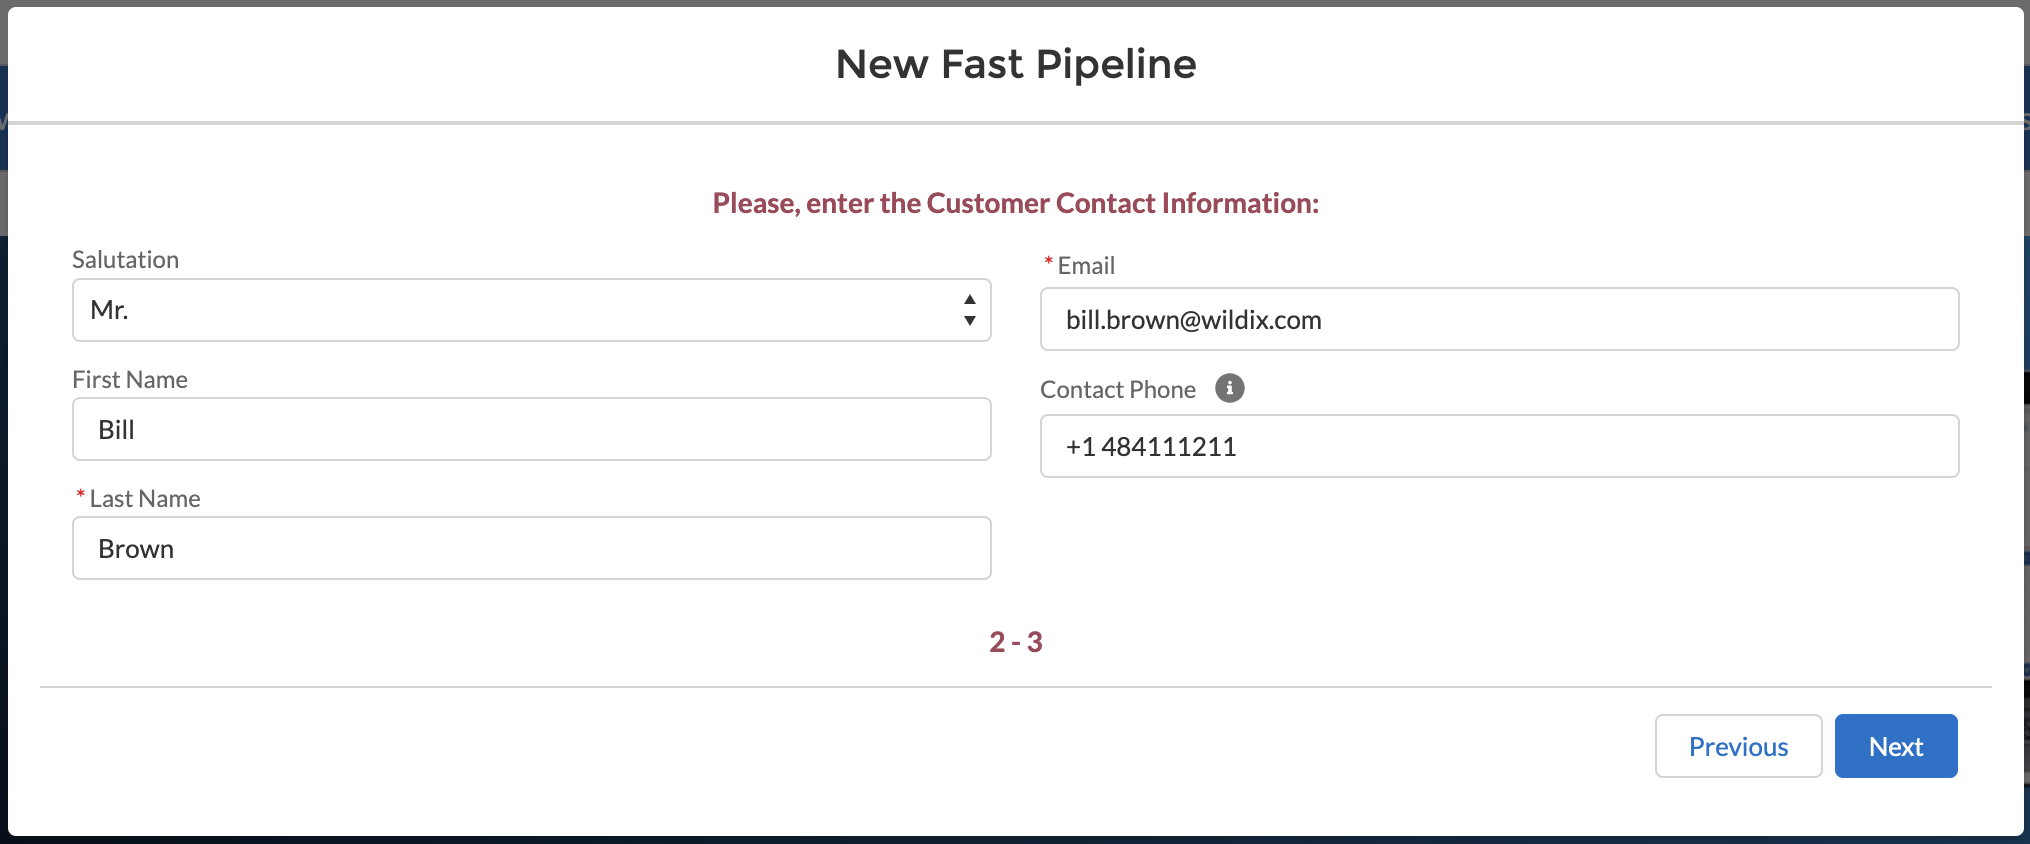
On the next screen provide Customer contact information and click Next:
- Salutation - choose how to turn to the Customer
- First Name - enter first name
- Last Name - provide last name
- Email - enter email
- Contact Phone - provide phone number of the Customer
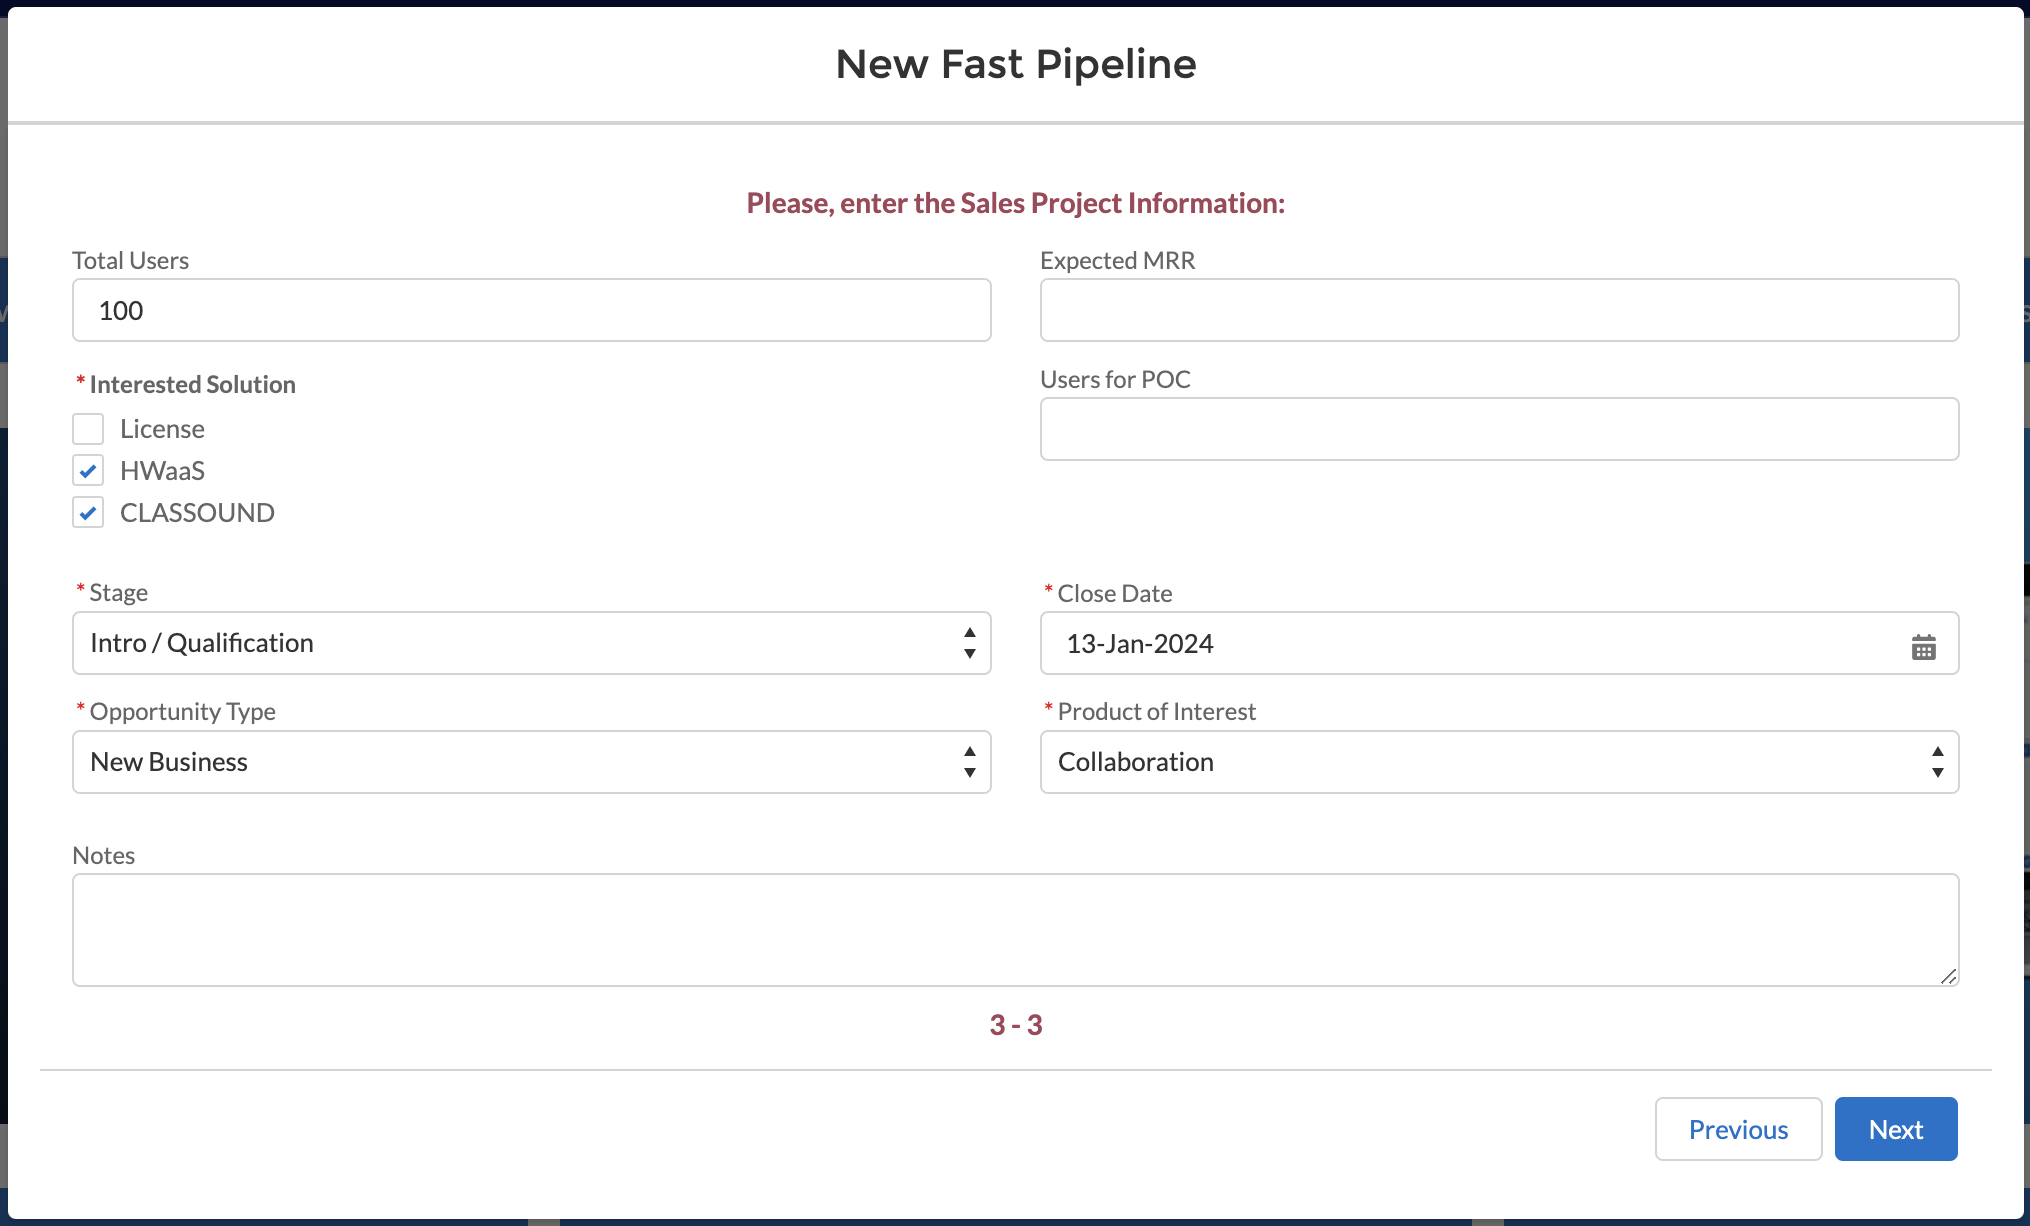
Then, enter Sales Project Information:
- Total Users - enter the total number of users
- Interested Solution - select the preferred solution(s)
- Stage - commonly, when you only create a Project, it is Intro/ Qualification stage
- Opportunity Type - choose if it is a New business or business existing not with Wildix
- Expected MRR - type the expected MRR
- Users for POC - how many users use Wildix
- Close Date - estimate the date when you expect to close the Project
- Product of Interest - choose the product you are interested in (x-bees/ x-hoppers/ Collaboration)
When you click Next, the relevant three records are created in Partner Community: Account, Contact, and Project.
Via the Submit a Case button, you can create a ticket for Customer Care, Tech Support or request a new Feature:
See the document Submit a Case via Wildix Partner Community for more details.
Lead
A Lead is every potential sales opportunity that has not been qualified yet. It can either come from Marketing (both from your Marketing or Wildix Marketing passed to you), or from any activity you and your sales team have done. You need to make sure this potential sales opportunity (or lead) has some characteristics without which it doesn't make sense to move forward in the sales cycle and make this Lead an opportunity. Up to you to decide which characteristics are required, but generally speaking, we talk about: the company is in target, the person is the right one etc, so Wildix Partner Community gives you the opportunity to track this qualification process through the Lead object.
Once all the information needed to characterize the potential customer is collected, Lead is ready to be converted into an Account, Contact and Project.
Account, Contact and Project are the key object related to the Sales Process. Accounts and Contacts are useful in order to store information about your customers. Accounts represent the companies, and Contacts - are the people who work for them.
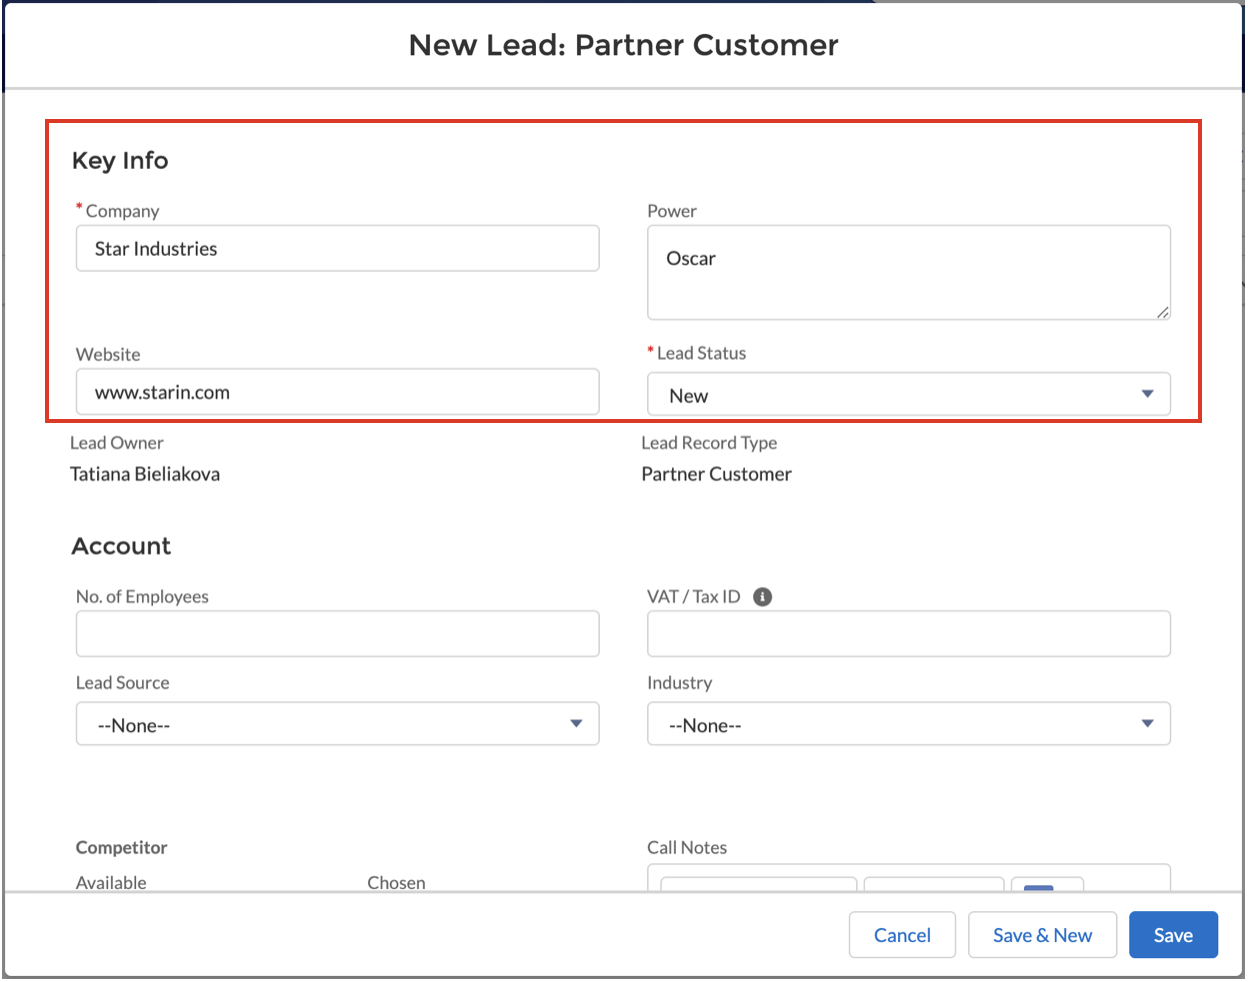
Create a New Lead
- Click New button to create a Lead
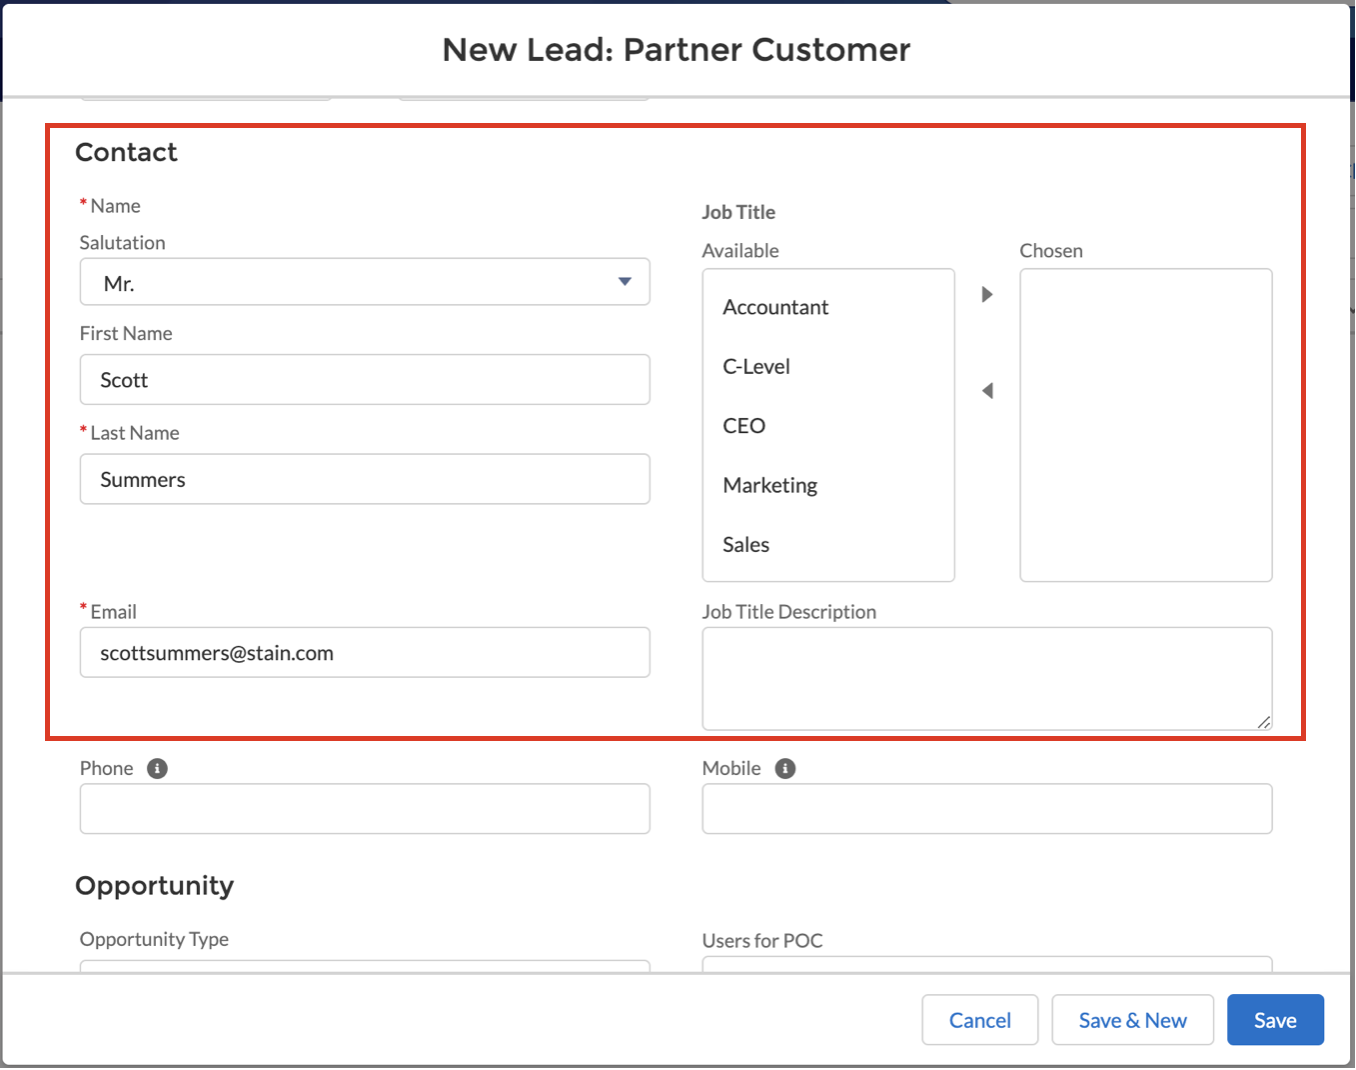
- Fill in the following mandatory fields:
- Company - insert Company name
- Power - specify who is a decision maker
- Lead Status - select status of the Lead
- First and Last Names
- Job Title - select the title from the list
Email - add contact Information
- Click Save button to create a Lead (if you want to create one more Lead, click Save & New button)
Manage existing Leads
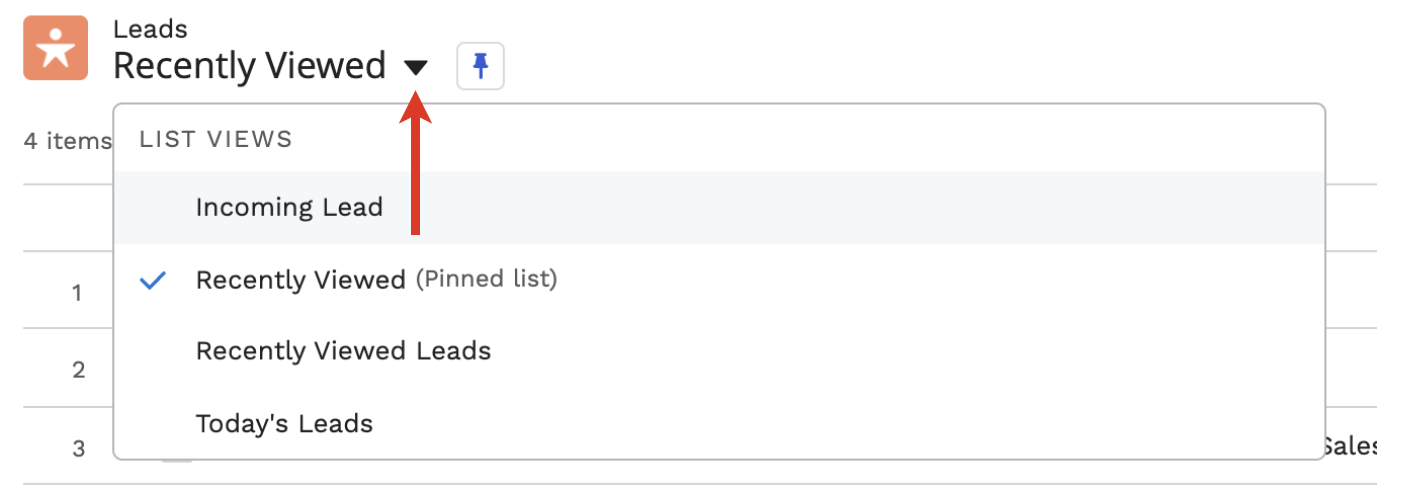
You can sort Leads out by clicking on List Views:
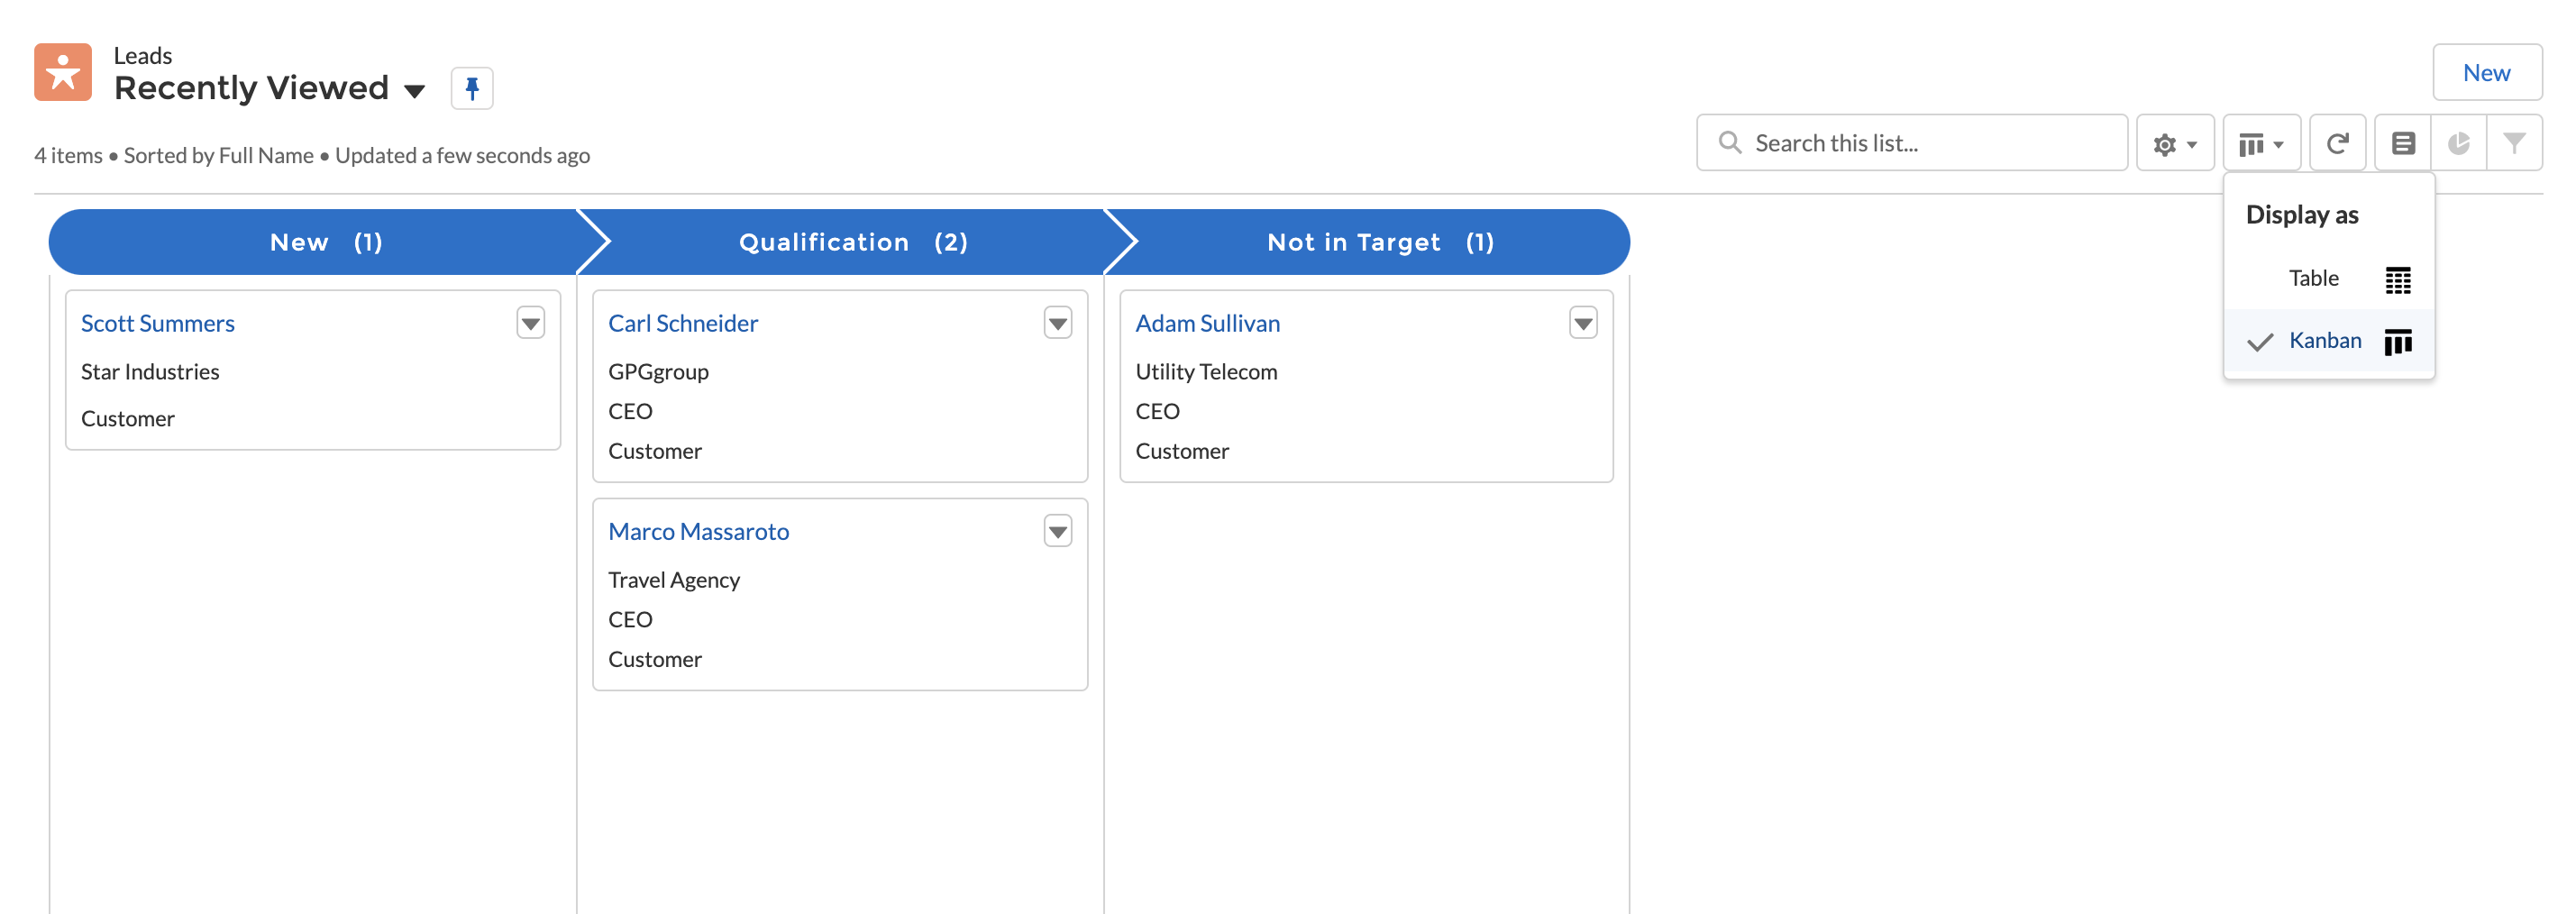
It is also possible to display Leads as a Kanban board by clicking on Display as:
- To view a Lead, click on its Name
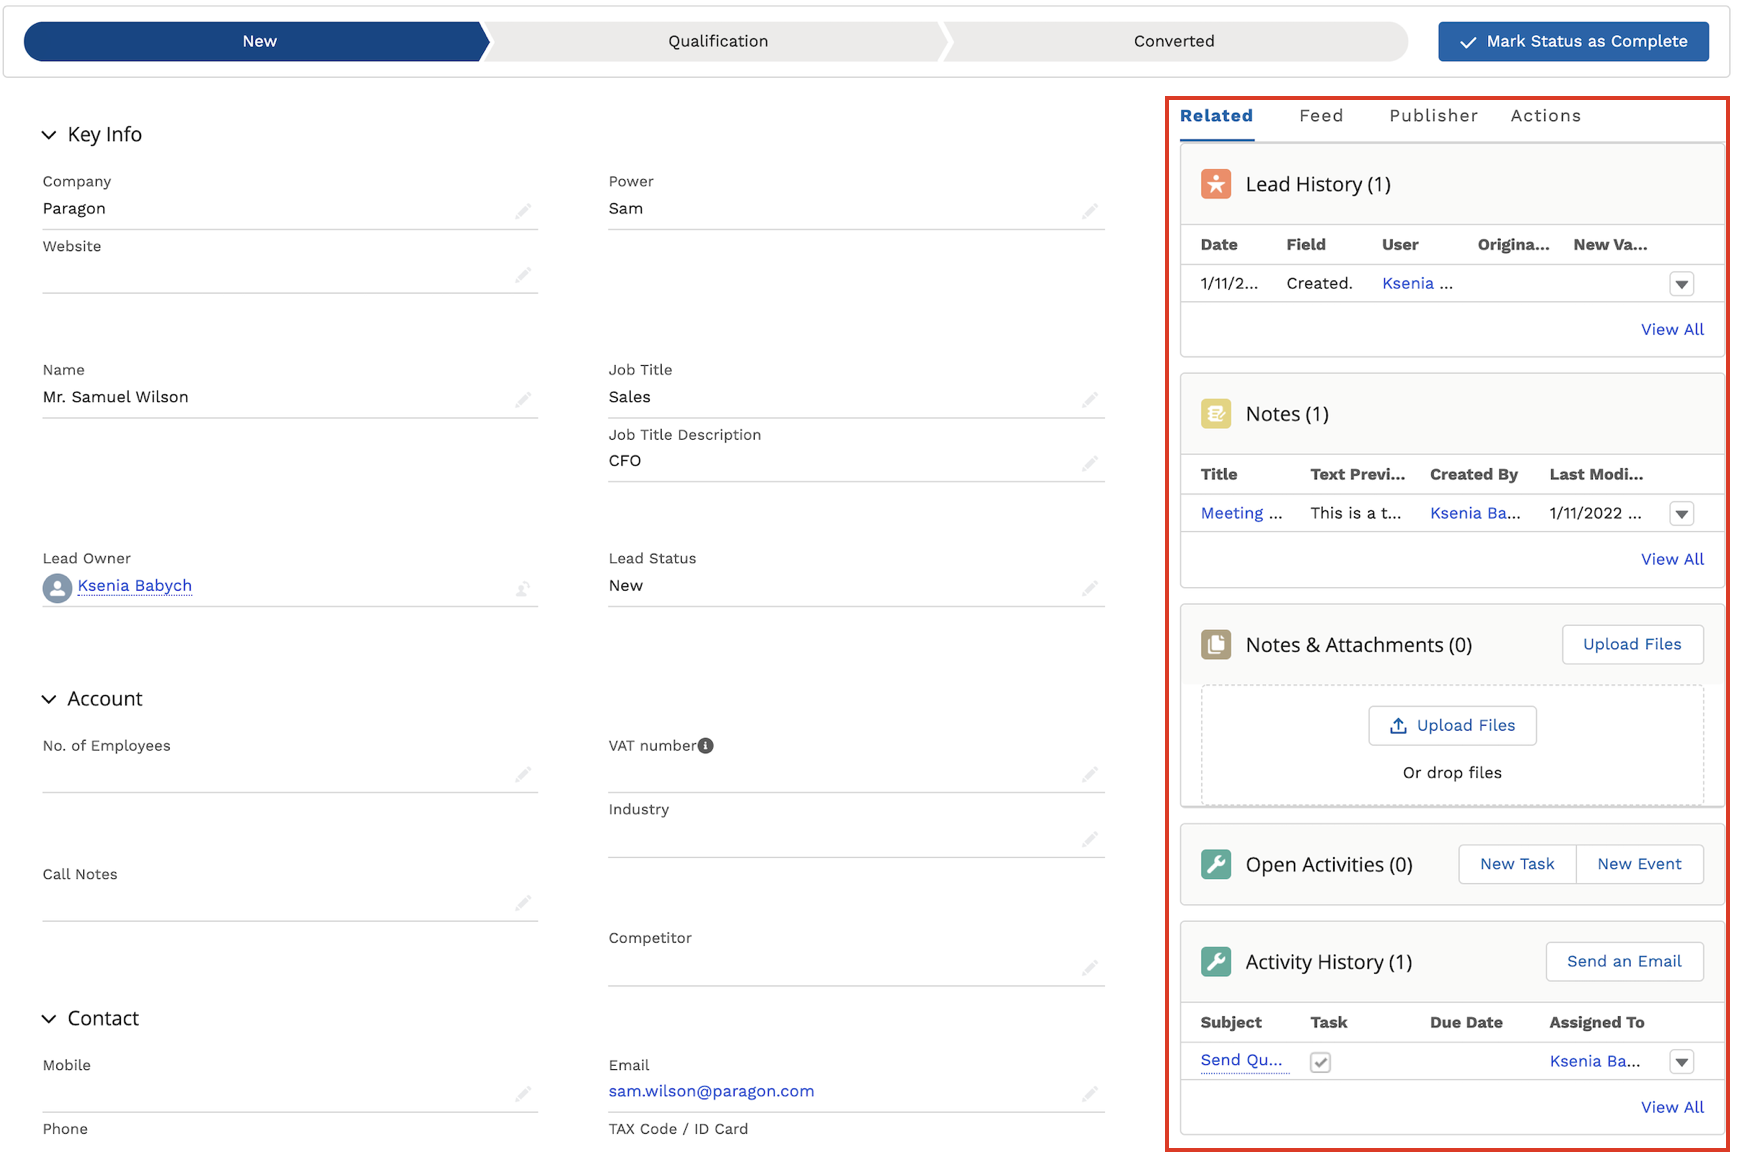
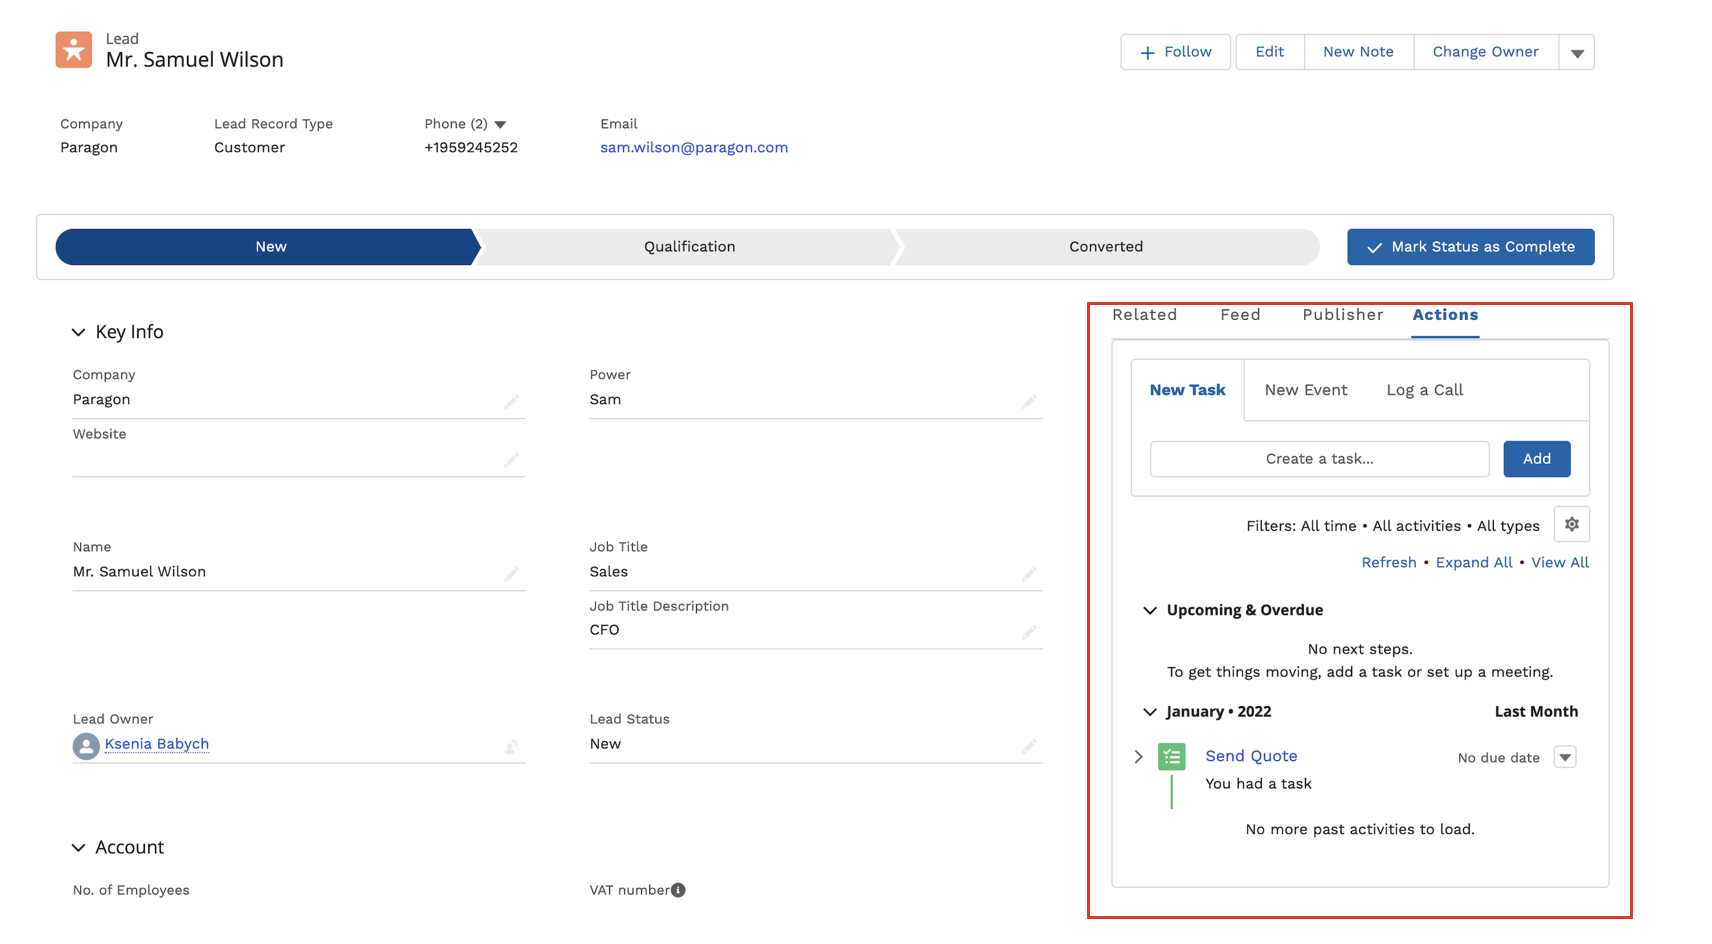
From the Options Panel, you can edit the Lead's information, add Notes, convert and clone it. Follow and Change Owner options allow other colleagues of your company to track the Lead and change the Lead's Owner
From the Related Details and Actions Panel, you have access to all the details connected with the Lead: you can review Lead History, add Notes, upload files, create and manage Tasks
- To process the Lead and move it to the next stage, click Mark Status as Complete button
The Lead conversion process itself consists of 3 stages:
- New - the stage is assigned once a Lead is created
- Qualification - under this stage, you determine whether a Lead is a good fit for a product/ service
- Not in Target - Leads, not fit for a product/ service
- Converted - this stage is assigned when a Lead becomes a Project
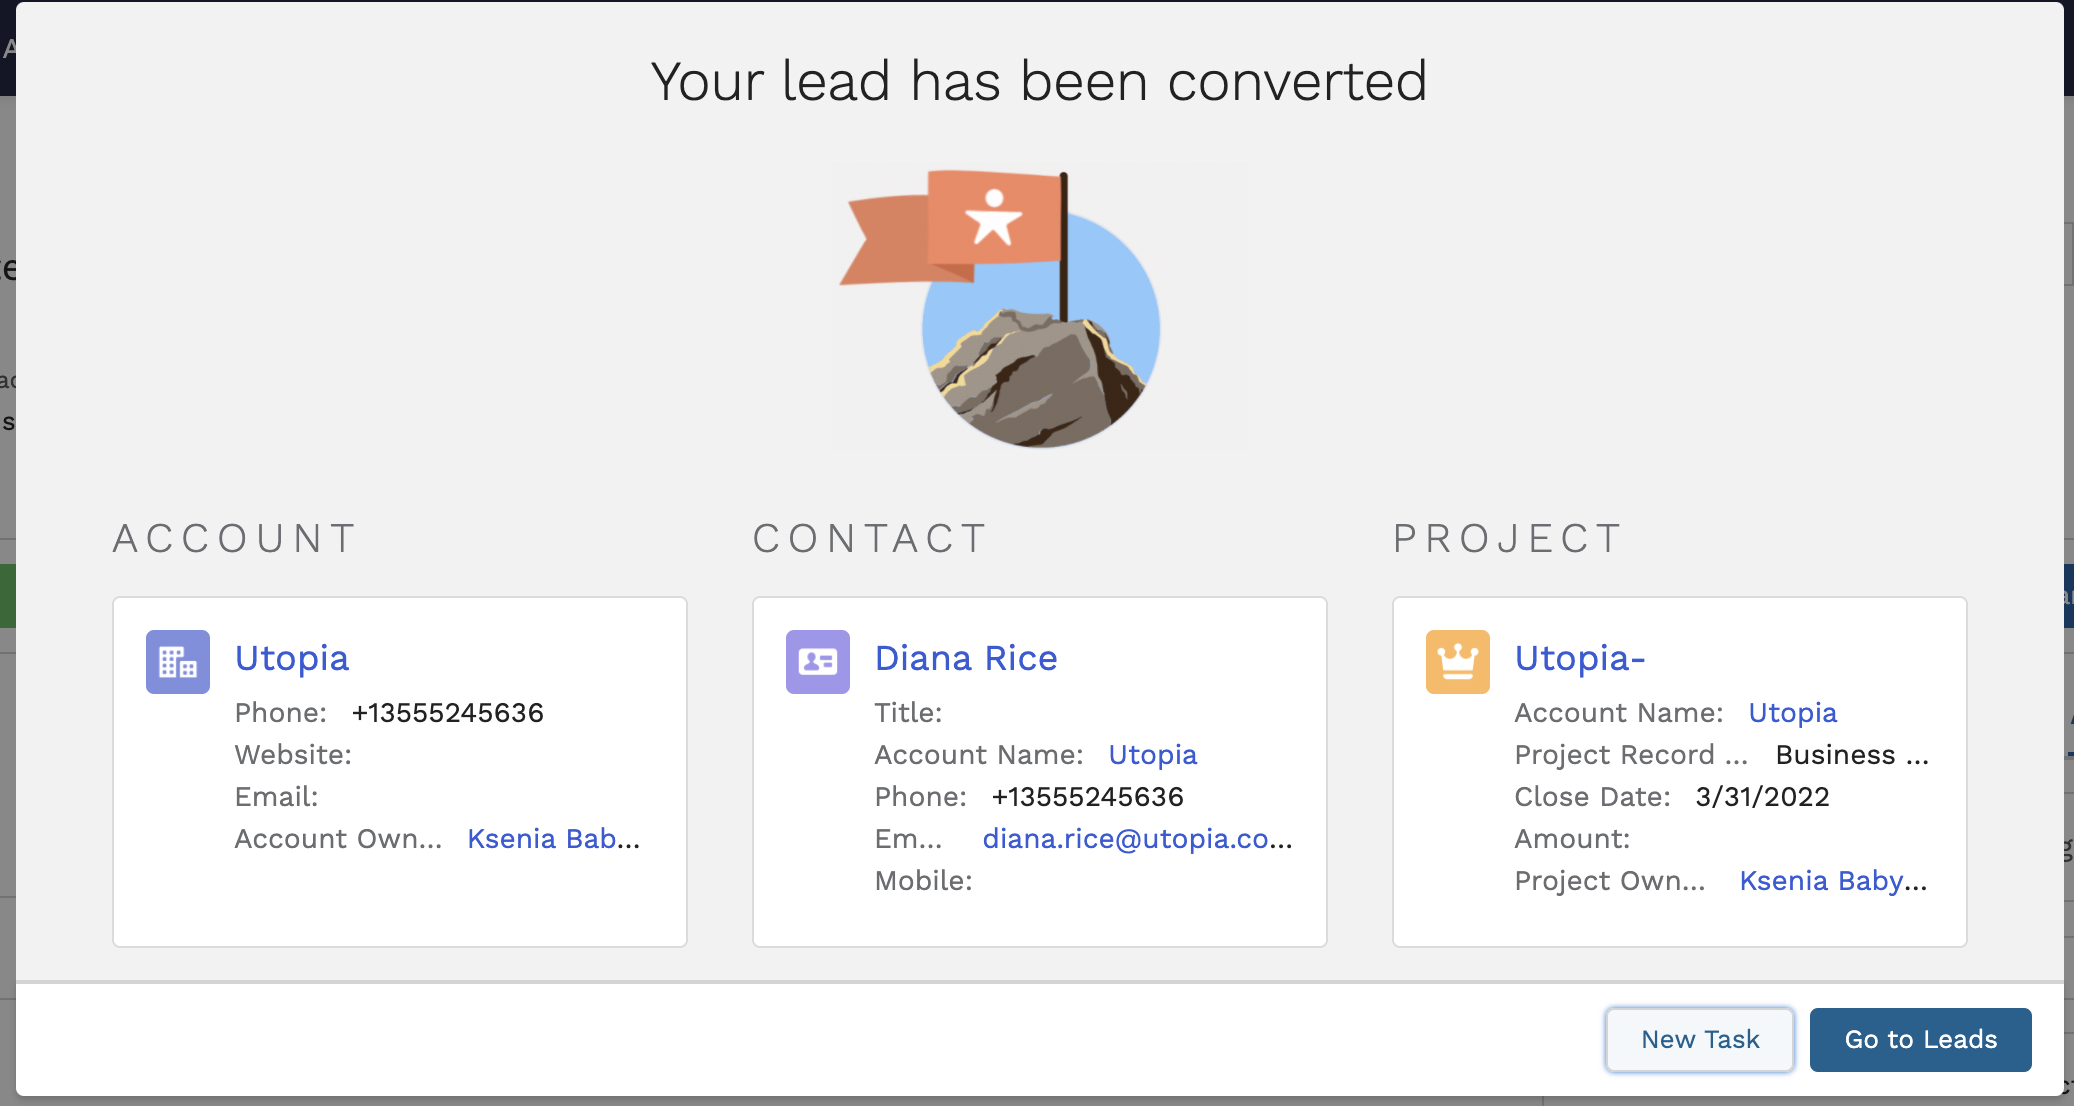
- When the Lead is qualified and ready to be converted, click Convert button. Based on the Lead, 3 entities are created:
- Account
- Contact
- Project
Account
Accounts represent companies you plan to sell to.
Create a New Account
- Click New button to create an Account
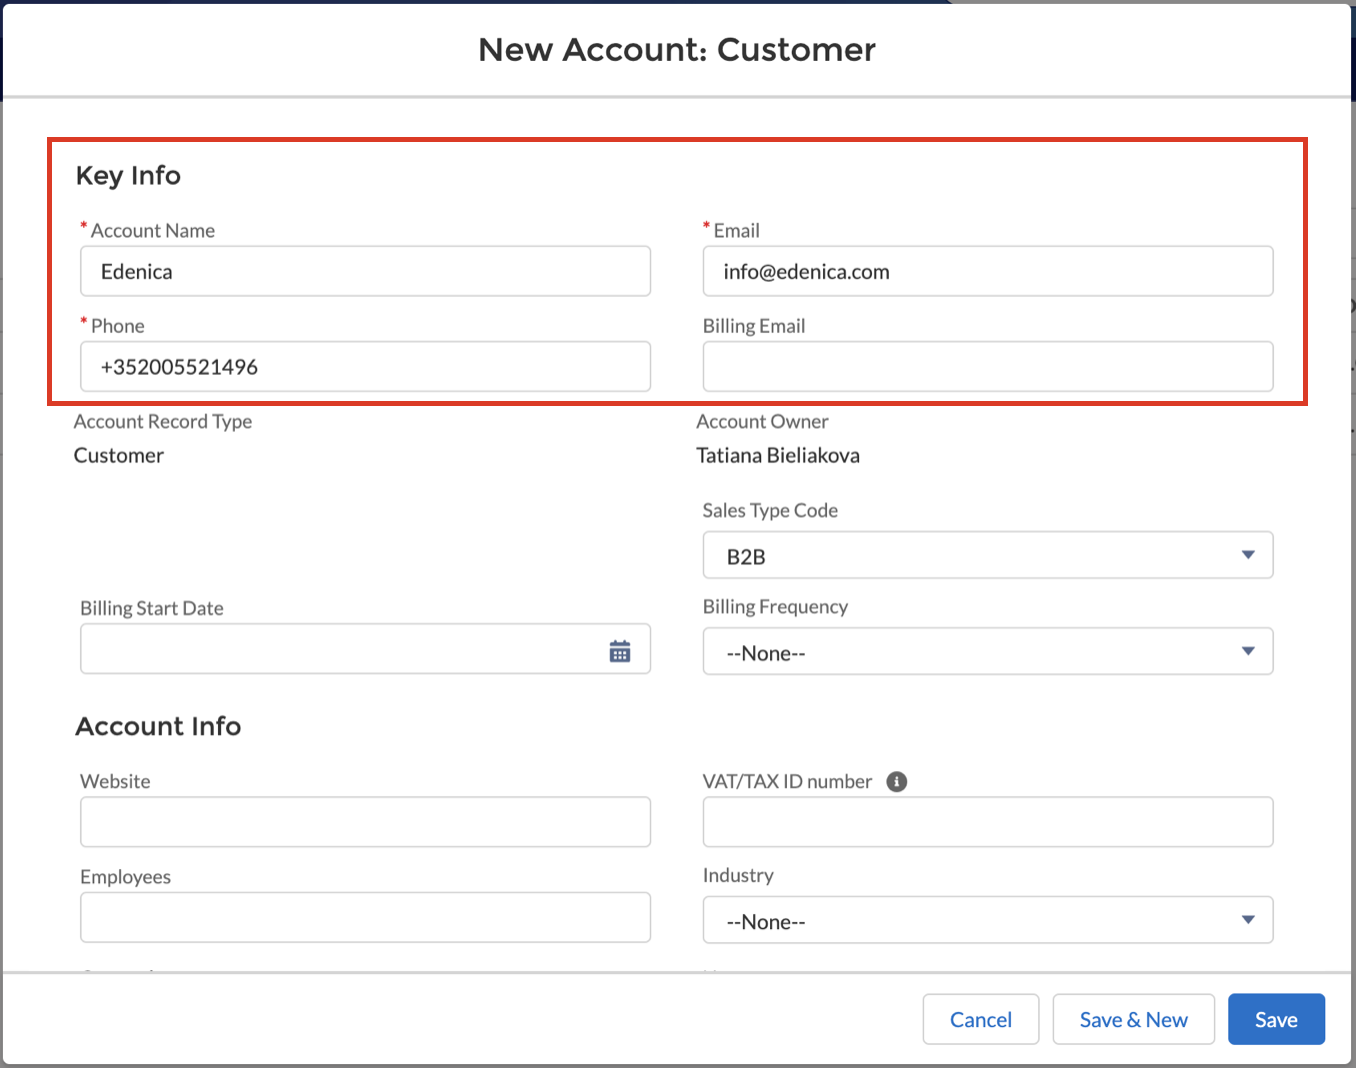
To create a Customer Account, fill in the following mandatory fields:
- Account Name
- Phone
- Email
- Click Save button to create an Account (if you want to create one more Account, click Save & New button)
Manage existing Accounts
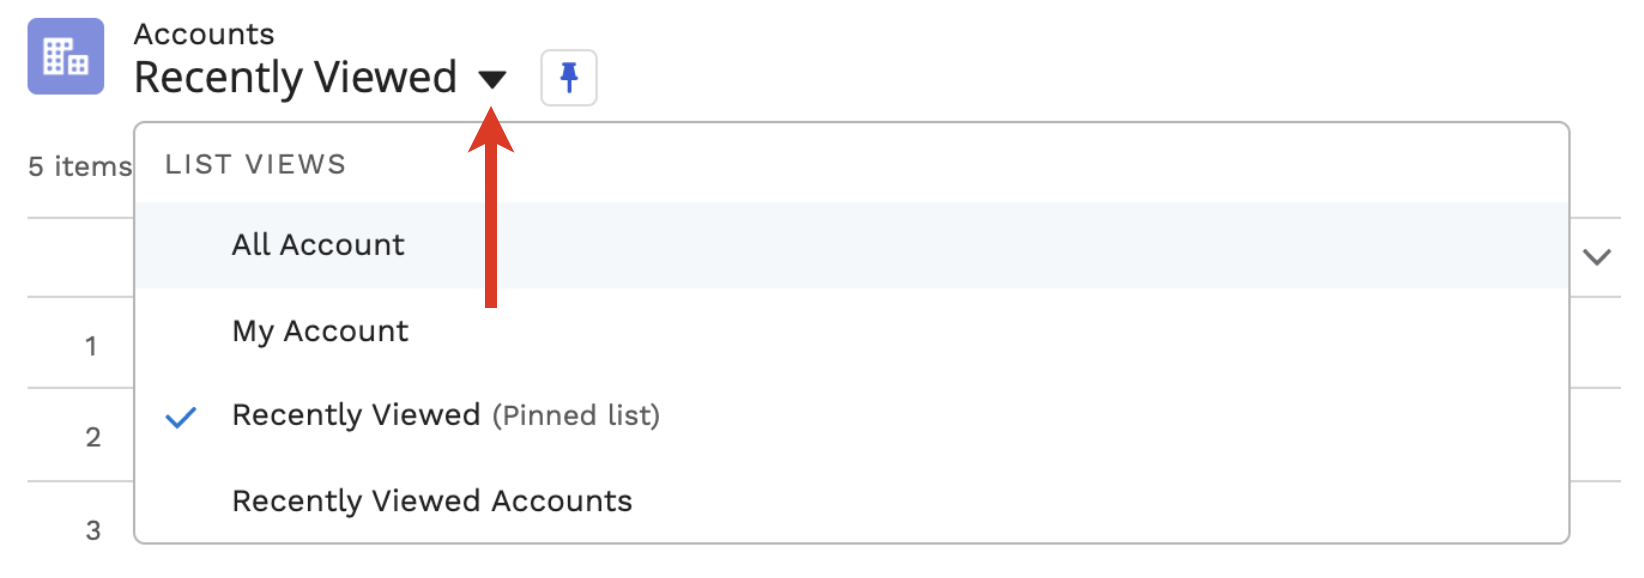
You can sort Accounts out by clicking on List Views:
- To open an Account, click on Account Name
- From the Options Panel, you can edit the Account, add Notes, create an associated Project. Follow and Change Owner options allow other colleagues of your company to track the Account and change its Owner
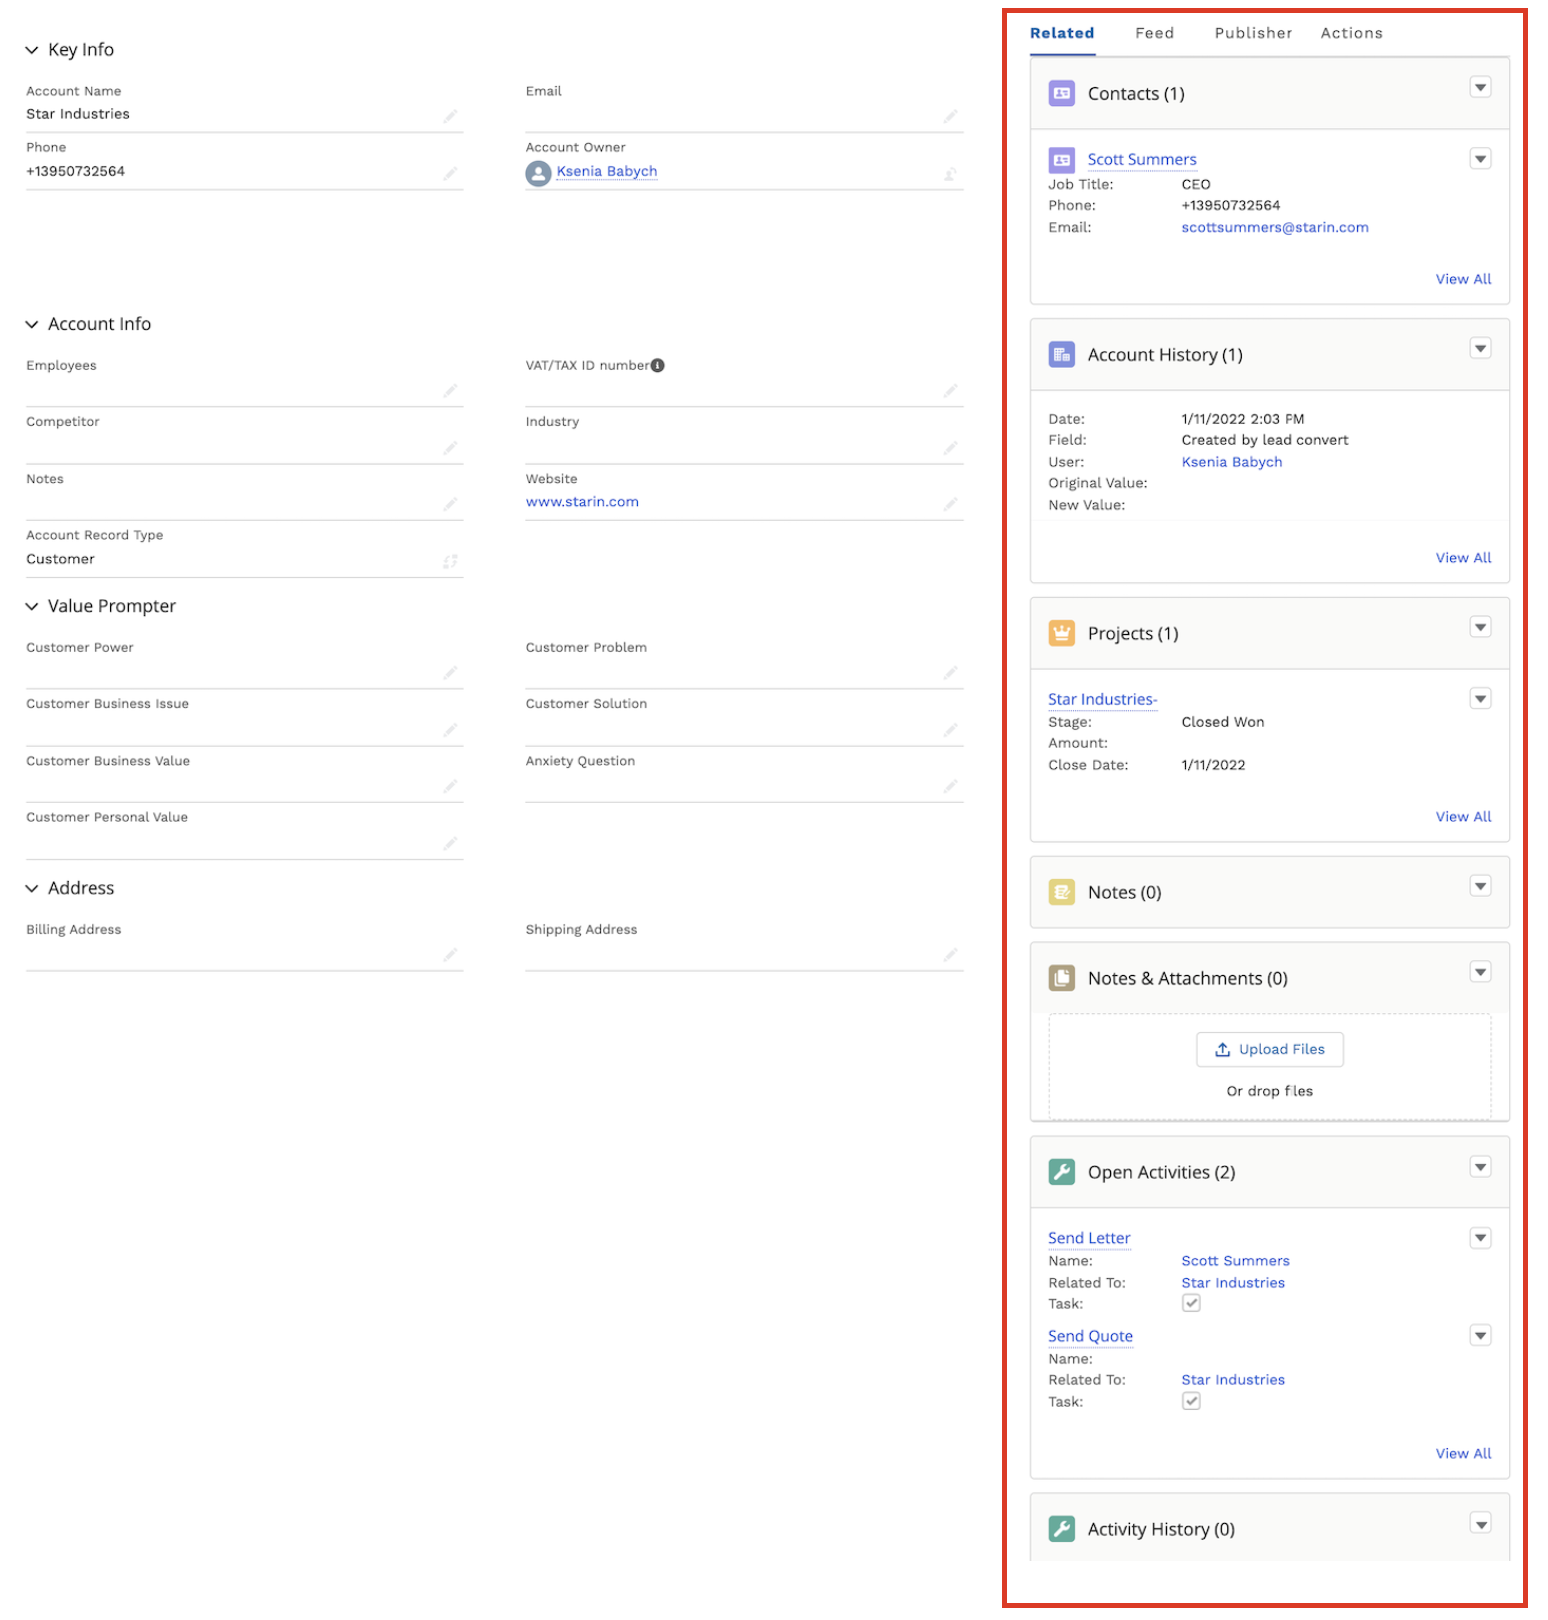
From the Related Details and Actions Panel, you have access to all the details connected with the Account: you can review Account History, associated Contacts, add Notes, create Projects, upload files, create and manage Tasks
Project
Projects represent opportunities that refer to the high probability of generating sales revenue. When a Project is created, it’s a signal of the start of a sales cycle.
Create a New Project
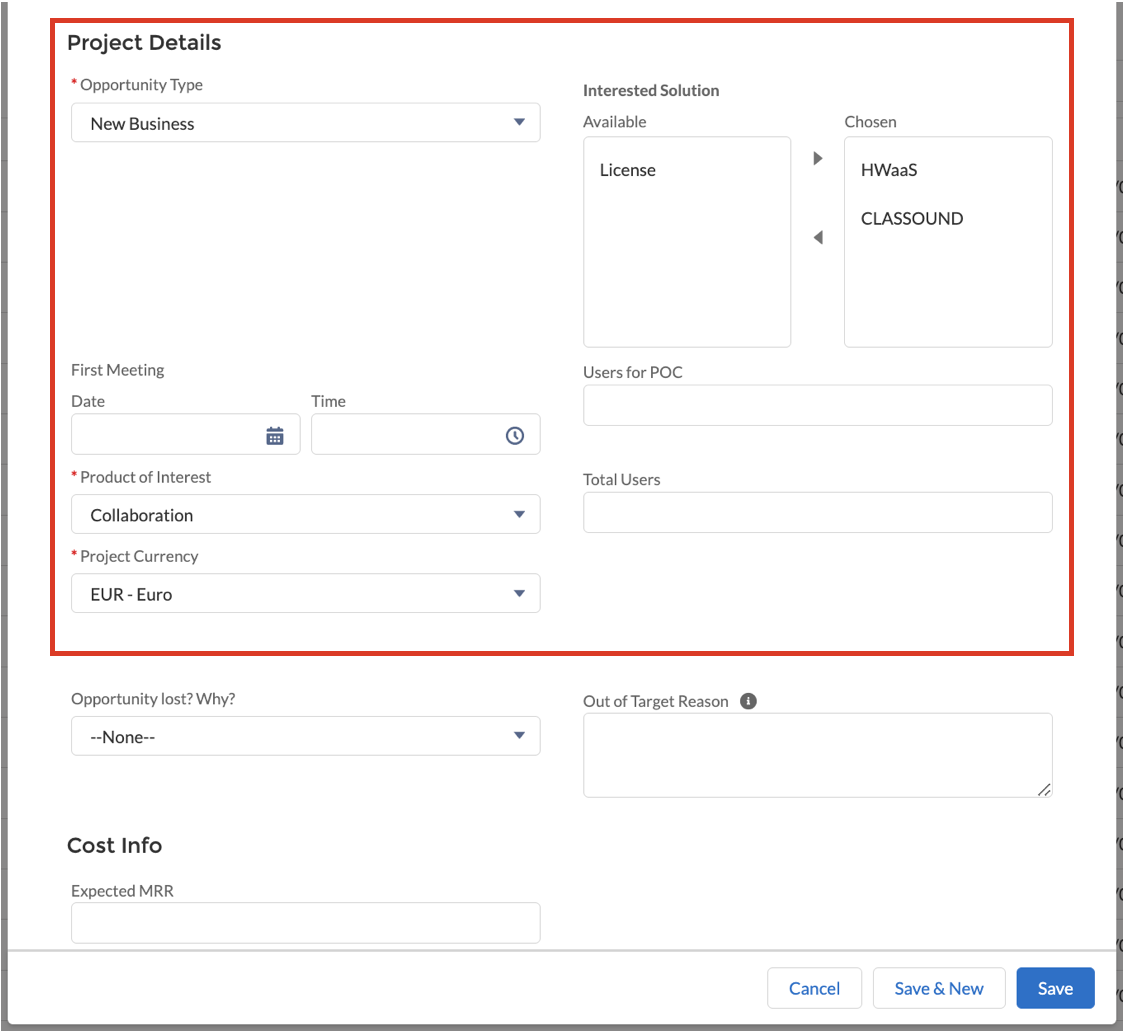
- Click New button to create a Project
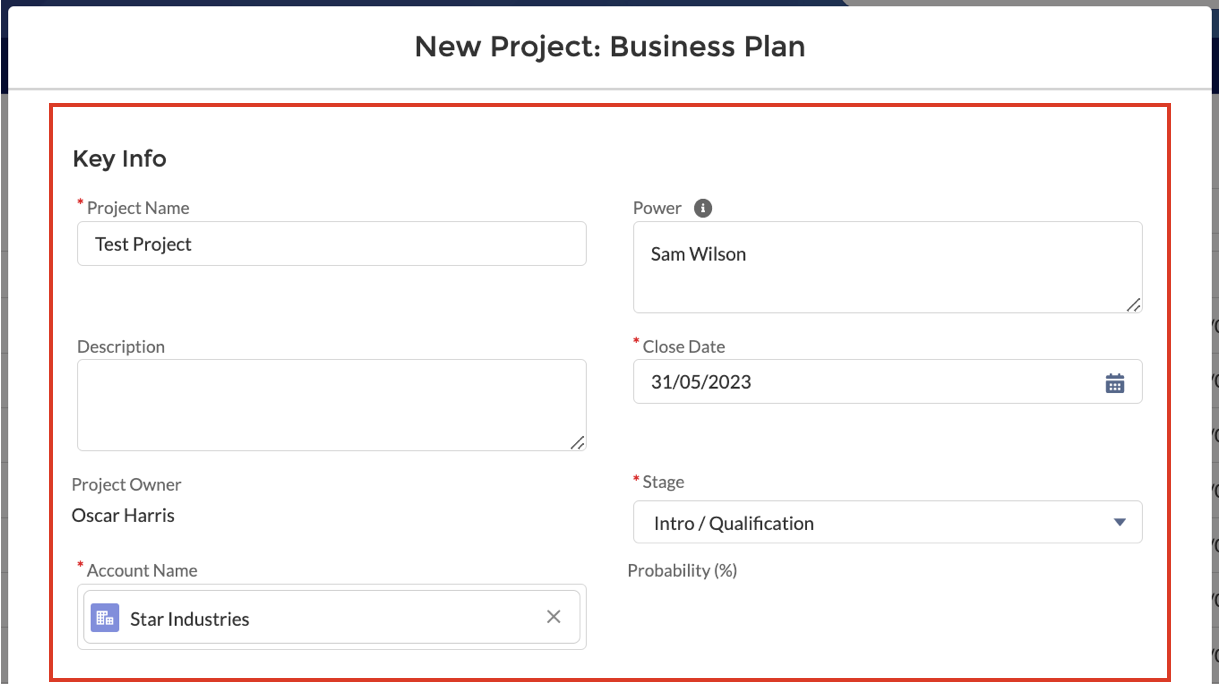
- Fill in mandatory fields:
- Project Name
- Close Date - estimate the date when you expect to close the Project
- Stage - commonly, when you only create a Project, it is Intro/ Qualification stage
Account Name - associate the Project with an existing Account or create a new one
- Opportunity Type - select type of opportunity (New Business / Existing Business/ Existing not with Wildix)
- Product of Interest - select Wildix products/ services for sale
- Project Currency - select currency used for the project
- Click Save button to create a Project (if you want to create one more Project, click Save & New button)
Manage existing Projects
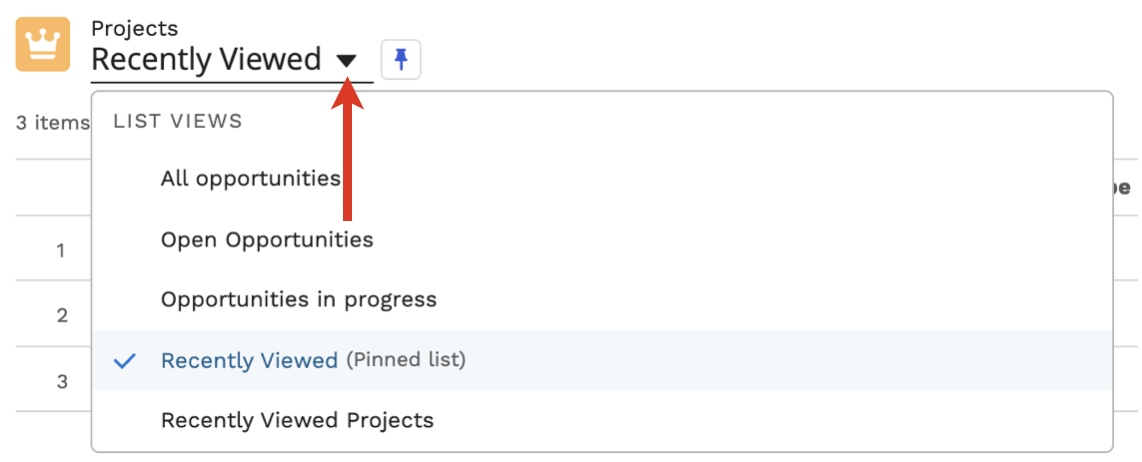
You can sort Projects out by clicking on List Views:
It is also possible to display Projects as a Kanban board by clicking on Display as:
- To open a Project, click on Project Name
From the Options Panel, you can edit the Project, generate a Quote, add Notes, clone it. Follow and Change Owner options allow other colleagues of your company to track the Project and change its Owner
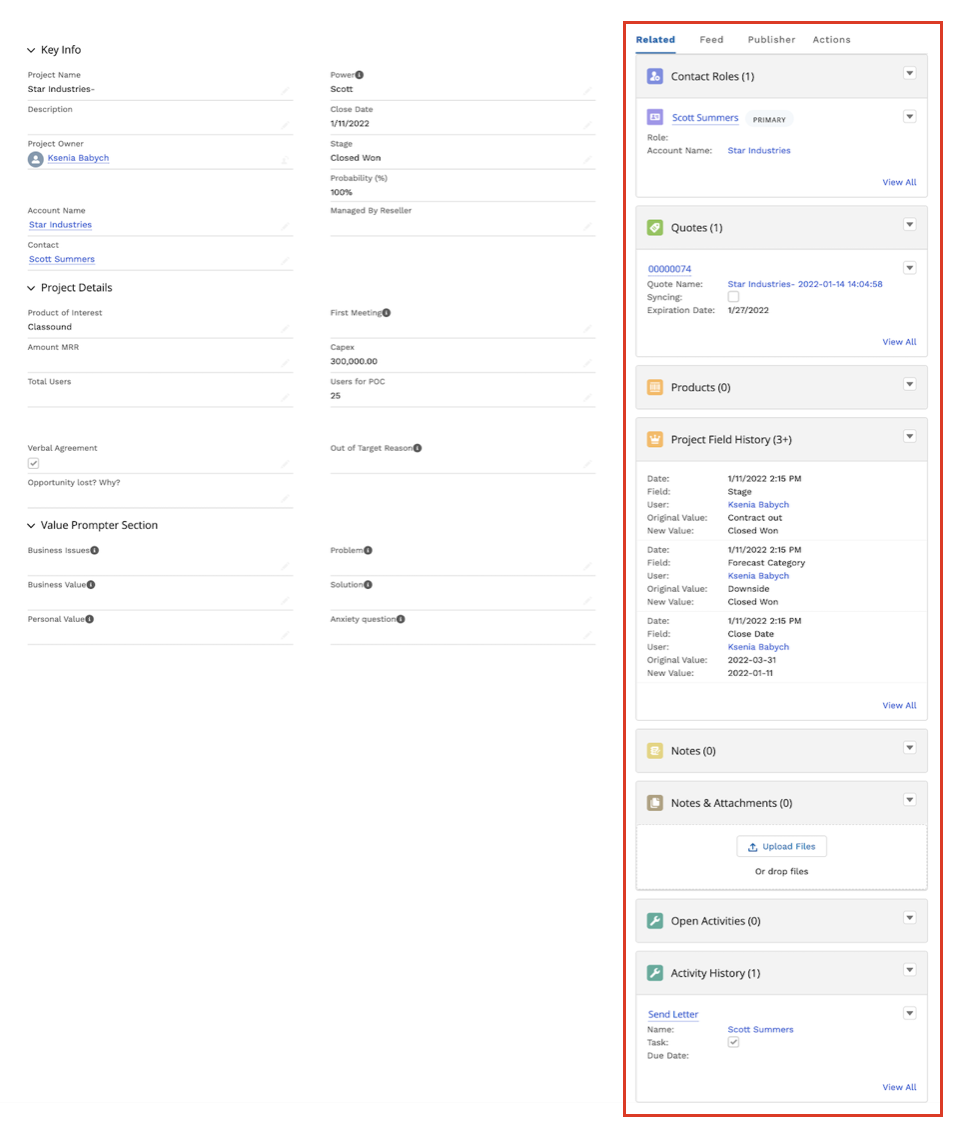
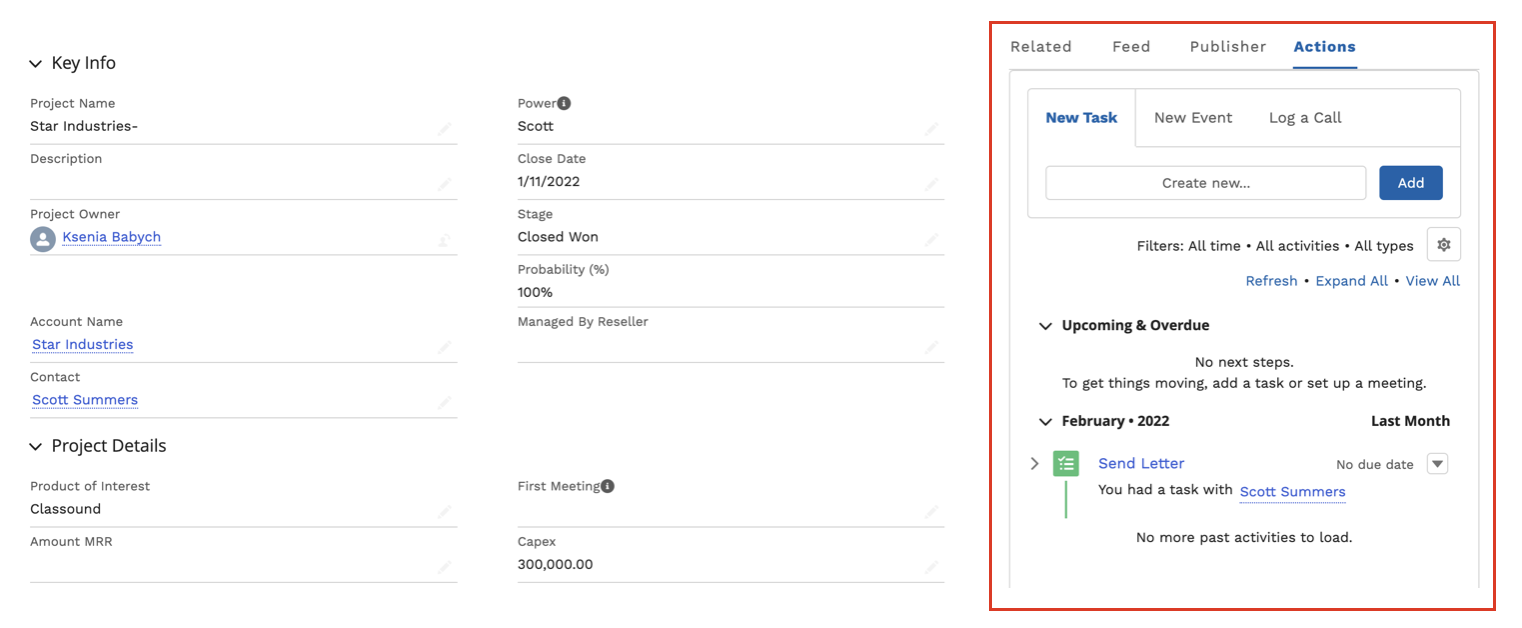
From the Related Details and Actions Panel, you have access to all the details connected with the Project: you can view associated Contacts, open Quotes and related Products, you can review Project History, Notes, upload files, create and manage Tasks
- To process the Project and move it to the next stage, click Mark Stage as Complete button
The Project Management process itself consists of 6 stages:
- Intro/ Qualification - at this stage, you need to determine Users of POC - how many users use Wildix
- Demo - at this stage, you need to indicate Amount MRR or Capex
- Project Presentation
- Proposal - the basic condition to move to the next stage is Verbal Agreement
- Contract out (managed automatically)
- Order Management (managed automatically)
- Closed (managed automatically)
Contact
Contacts represent a person who is qualified to do business with you. By “qualified,” it means that the person could really become a paying customer.
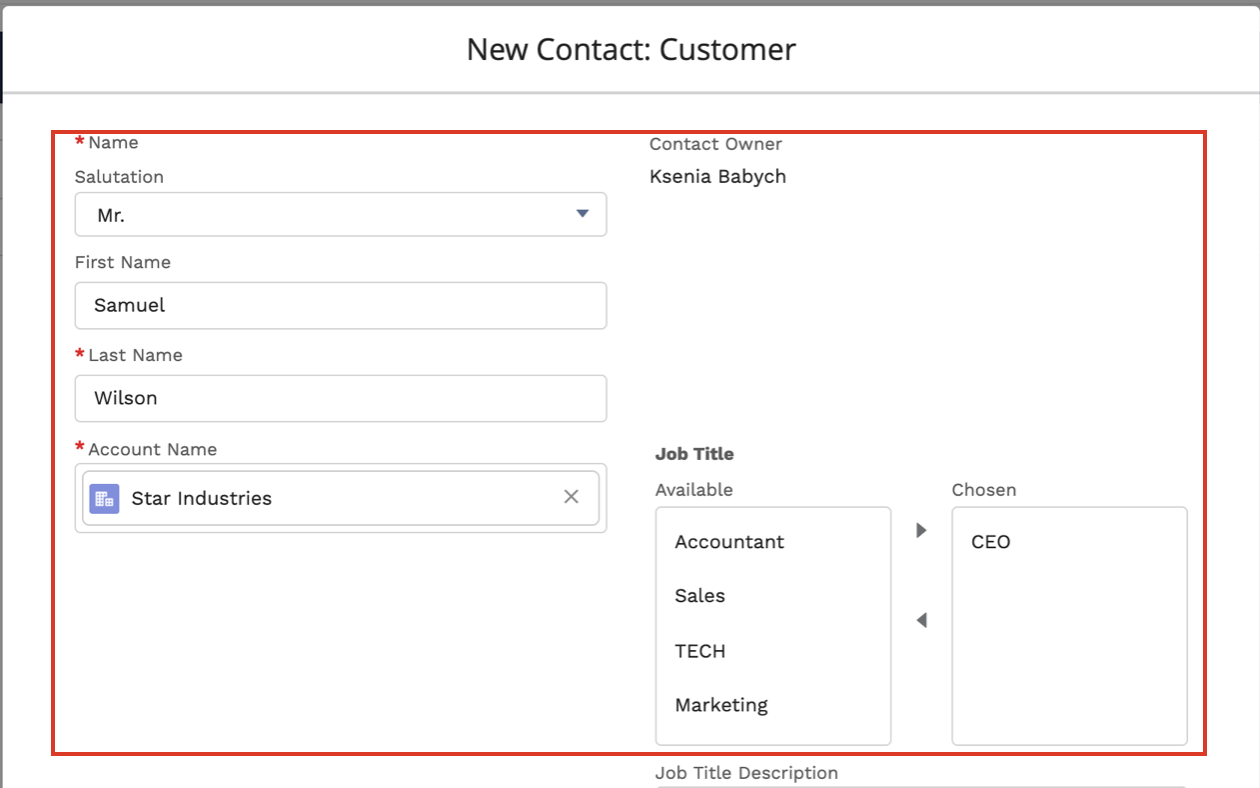
Create a New Contact
- Click New button to create a Contact
- Fill in mandatory fields:
- First and Last Names and Title
Account Name - associate the Contact with an existing Account or create a new one
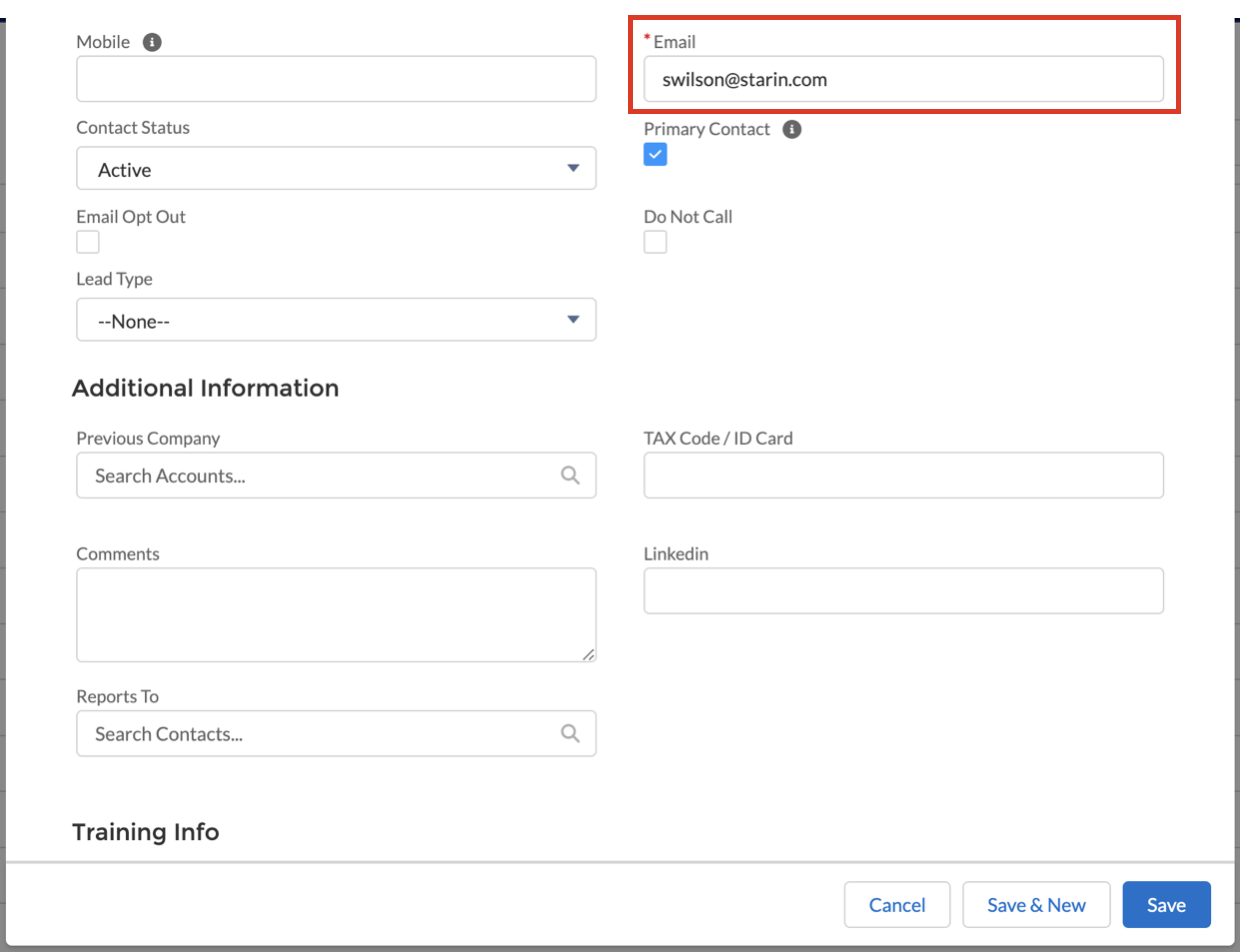
Email - add contact information
- Click Save button to create a Contact (if you want to create one more Contact, click Save & New button)
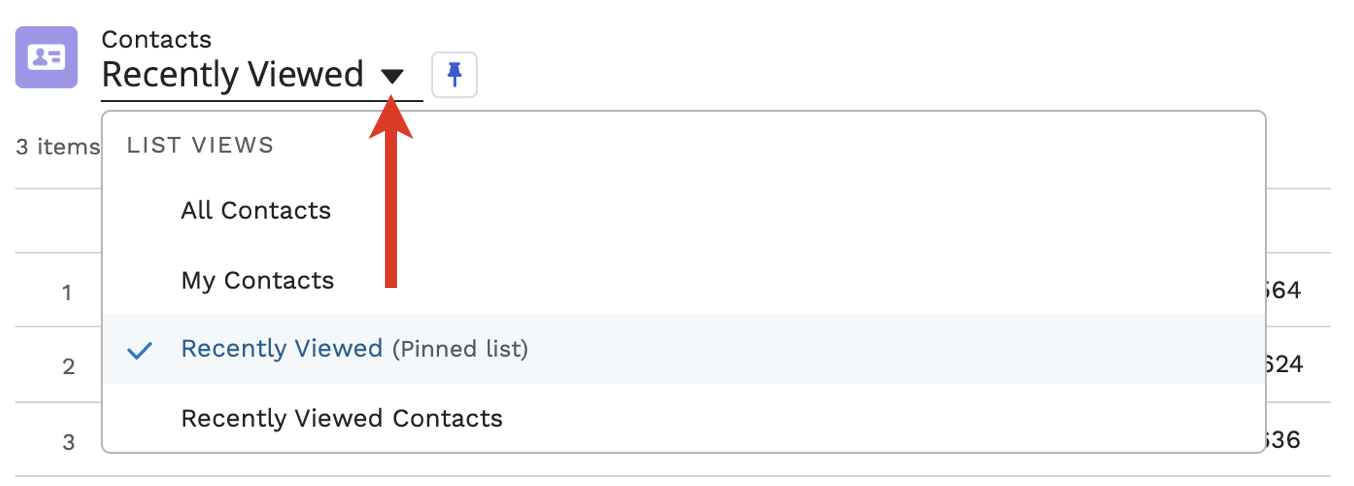
Manage existing Contacts
You can sort Contacts out by clicking on List Views:
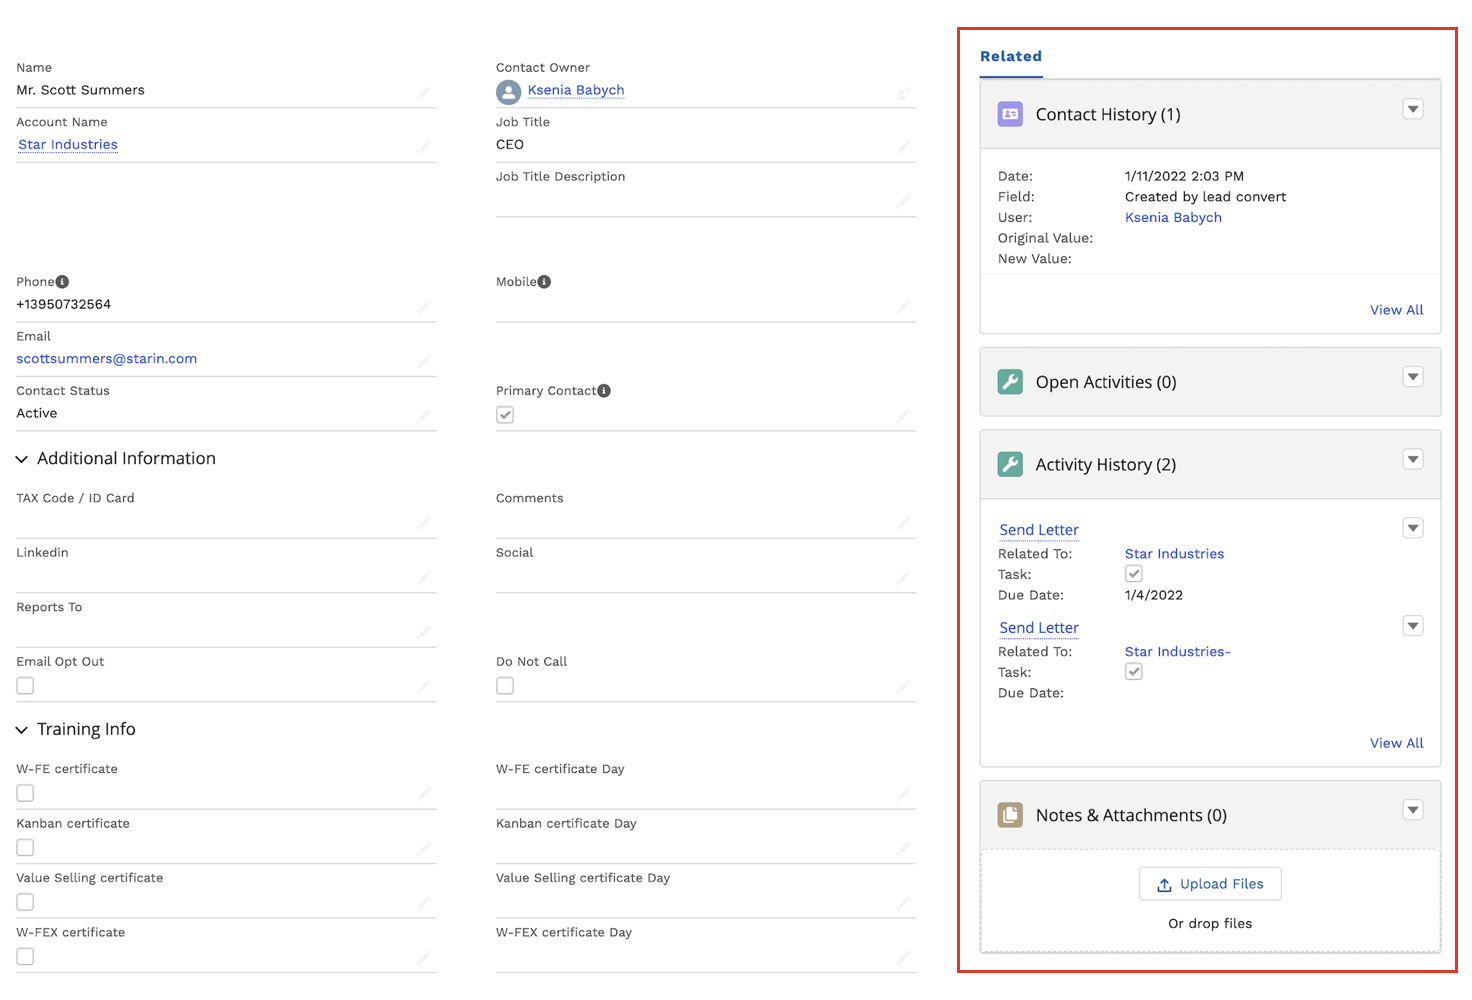
To open a Contact, click on its Name
From the Options Panel, you can edit the Contact and clone it. Follow and Change Owner options allow other colleagues of your company to track the Contact and change its Owner
From the Related Details and Actions Panel, you have access to all the detailed information connected with the Contact: you can review Contact History, Notes, upload files, create Tasks and upload files
Quote
Quotes represent proposed prices for products and services. Quotes can be created from and synced with Projects and emailed to customers.
Create a Quote
Select a Project you want to generate a Quote for and click Create Quote button:
Note: Creating a quote for the first time, you may need to wait some seconds till the page loads.
Settings
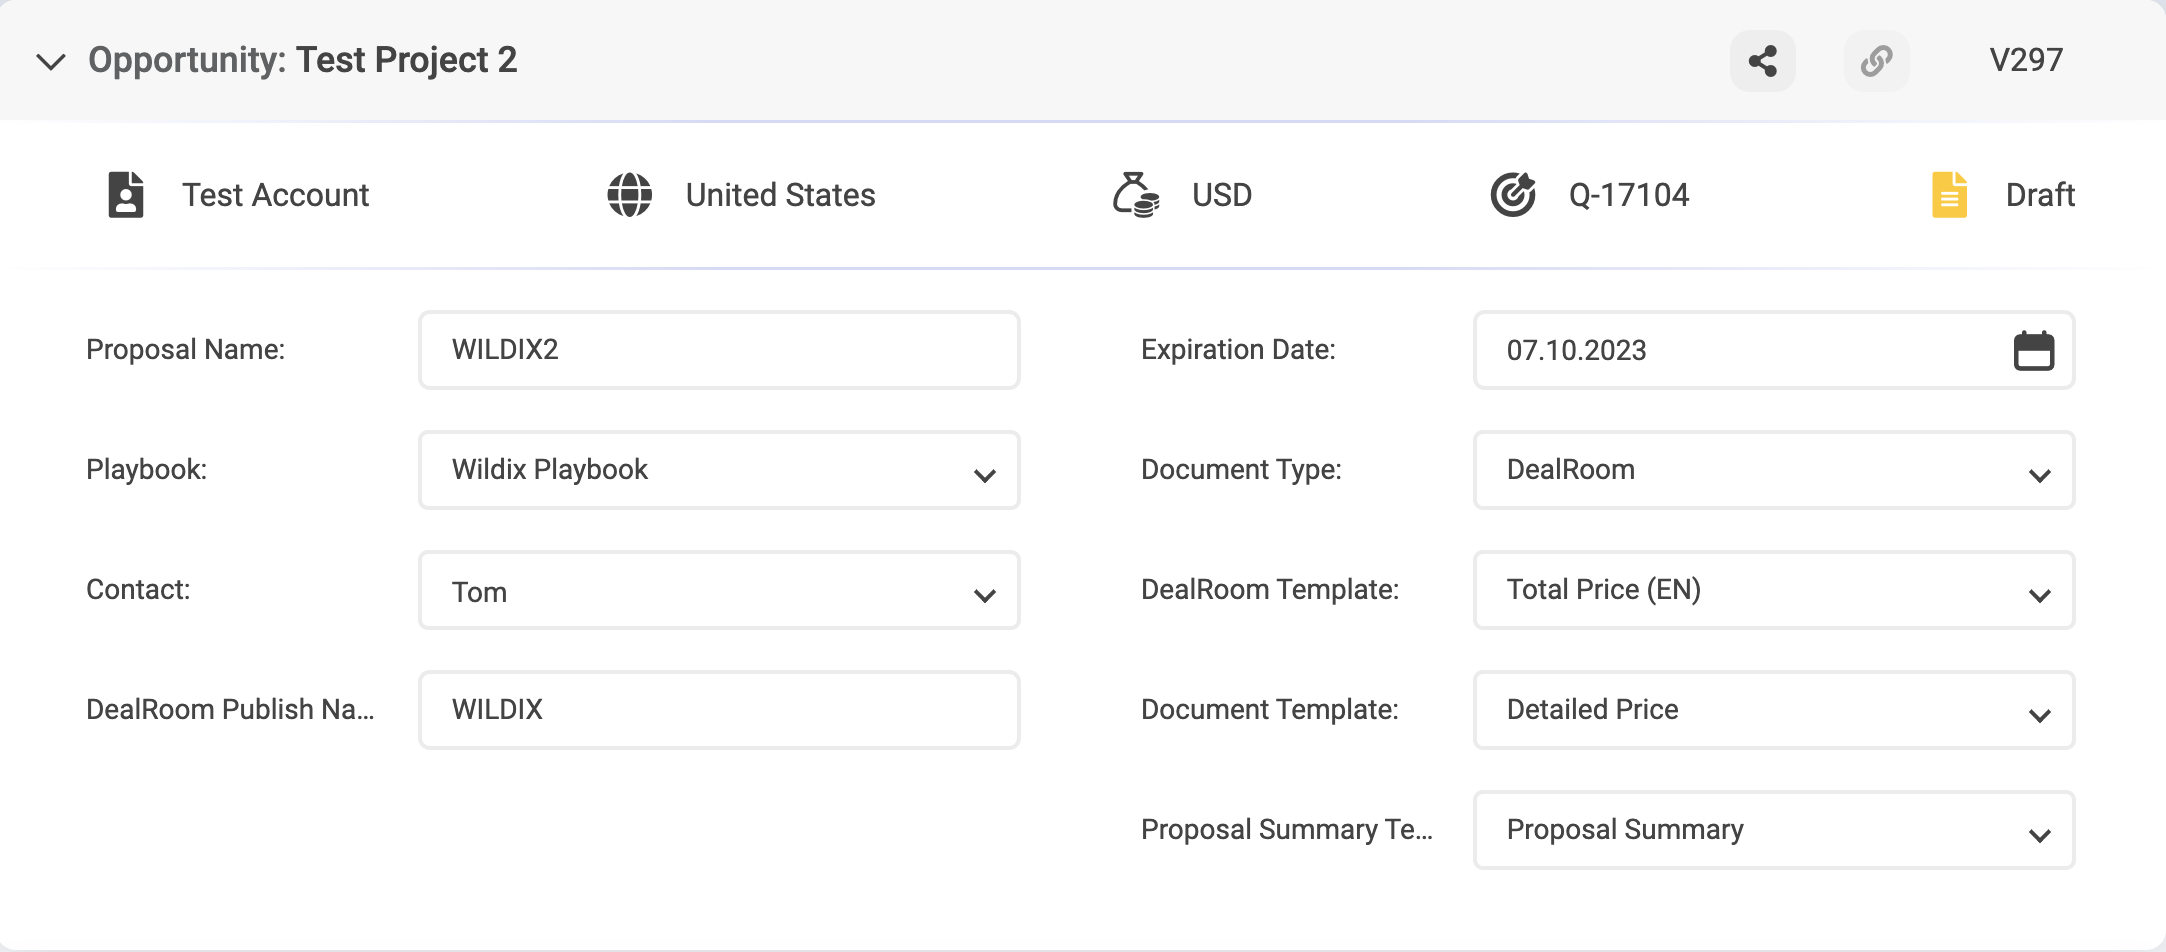
In the Opportunity section, you can find the following information:
- Account
- Opportunity Name
- Geography
- Currency
- ID of the quote that is being prepared
- Quote status (e.g. Draft)
- Proposal Name: a name autogenerated by the system, but you can enter a preferred custom name
- Playbook: Wildix Partners (default value)
- Contact: contact indicated in your Project details
- DealRoom Publish Name: a name autogenerated by the system, but you can enter a preferred custom name
- Expiration Date: expiration date of the proposal. By default, it is one month from the quote generation, but you can enter a custom date if required.
- Document Type: it is DealRoom by default.
- DealRoom Template: Wildix (default value)
- Document Template: Proposal V2 (default value)
- Proposal Summary Template: Internal (default value)
General Questions
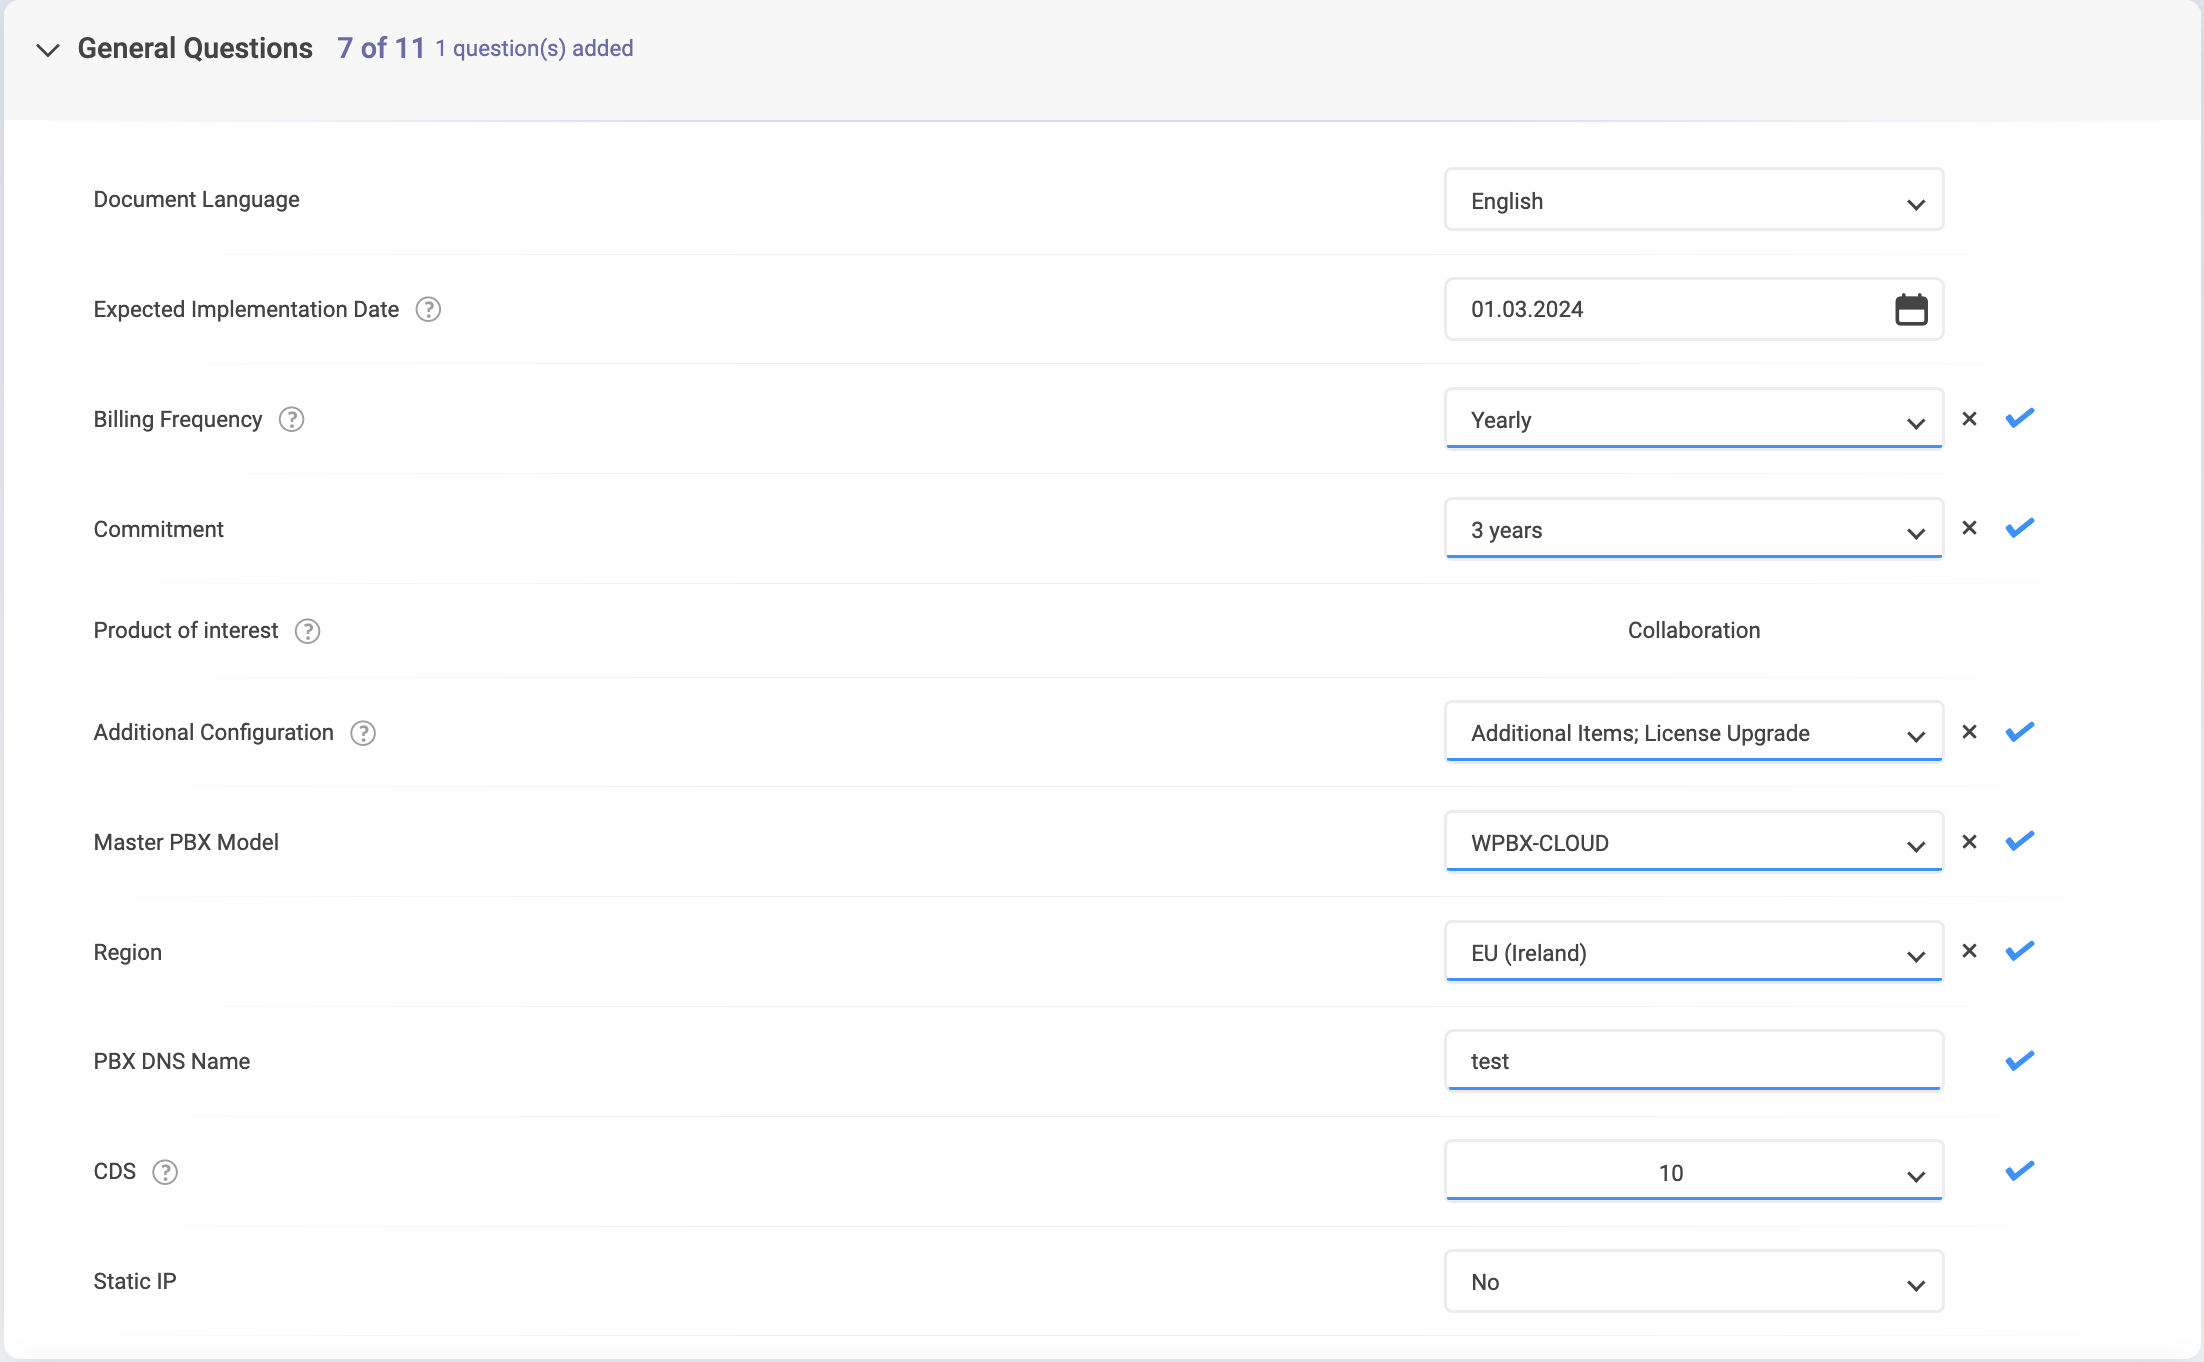
- Document language: select language of the document
- Opportunity Type: synced from Project Details (New Business/ Existing Business/ Existing not with Wildix)
- Expected Implementation Date: select the date when the project starts (when all licenses get activated, etc.). By default, the first date of the next month is displayed.
- Billing Frequency: depending on the product chosen (Collaboration, x-bees, or x-hoppers), there are relevant billing frequency options available.
- Commitment: choose if you wish to commit for 3 or 5 years or proceed without commitment.
- Product of interest (read-only field): the product you’ve previously chosen for your project. You can select licenses for the chosen product, as well as devices in the Bundle section.
- Additional Configuration: here you have the following options:
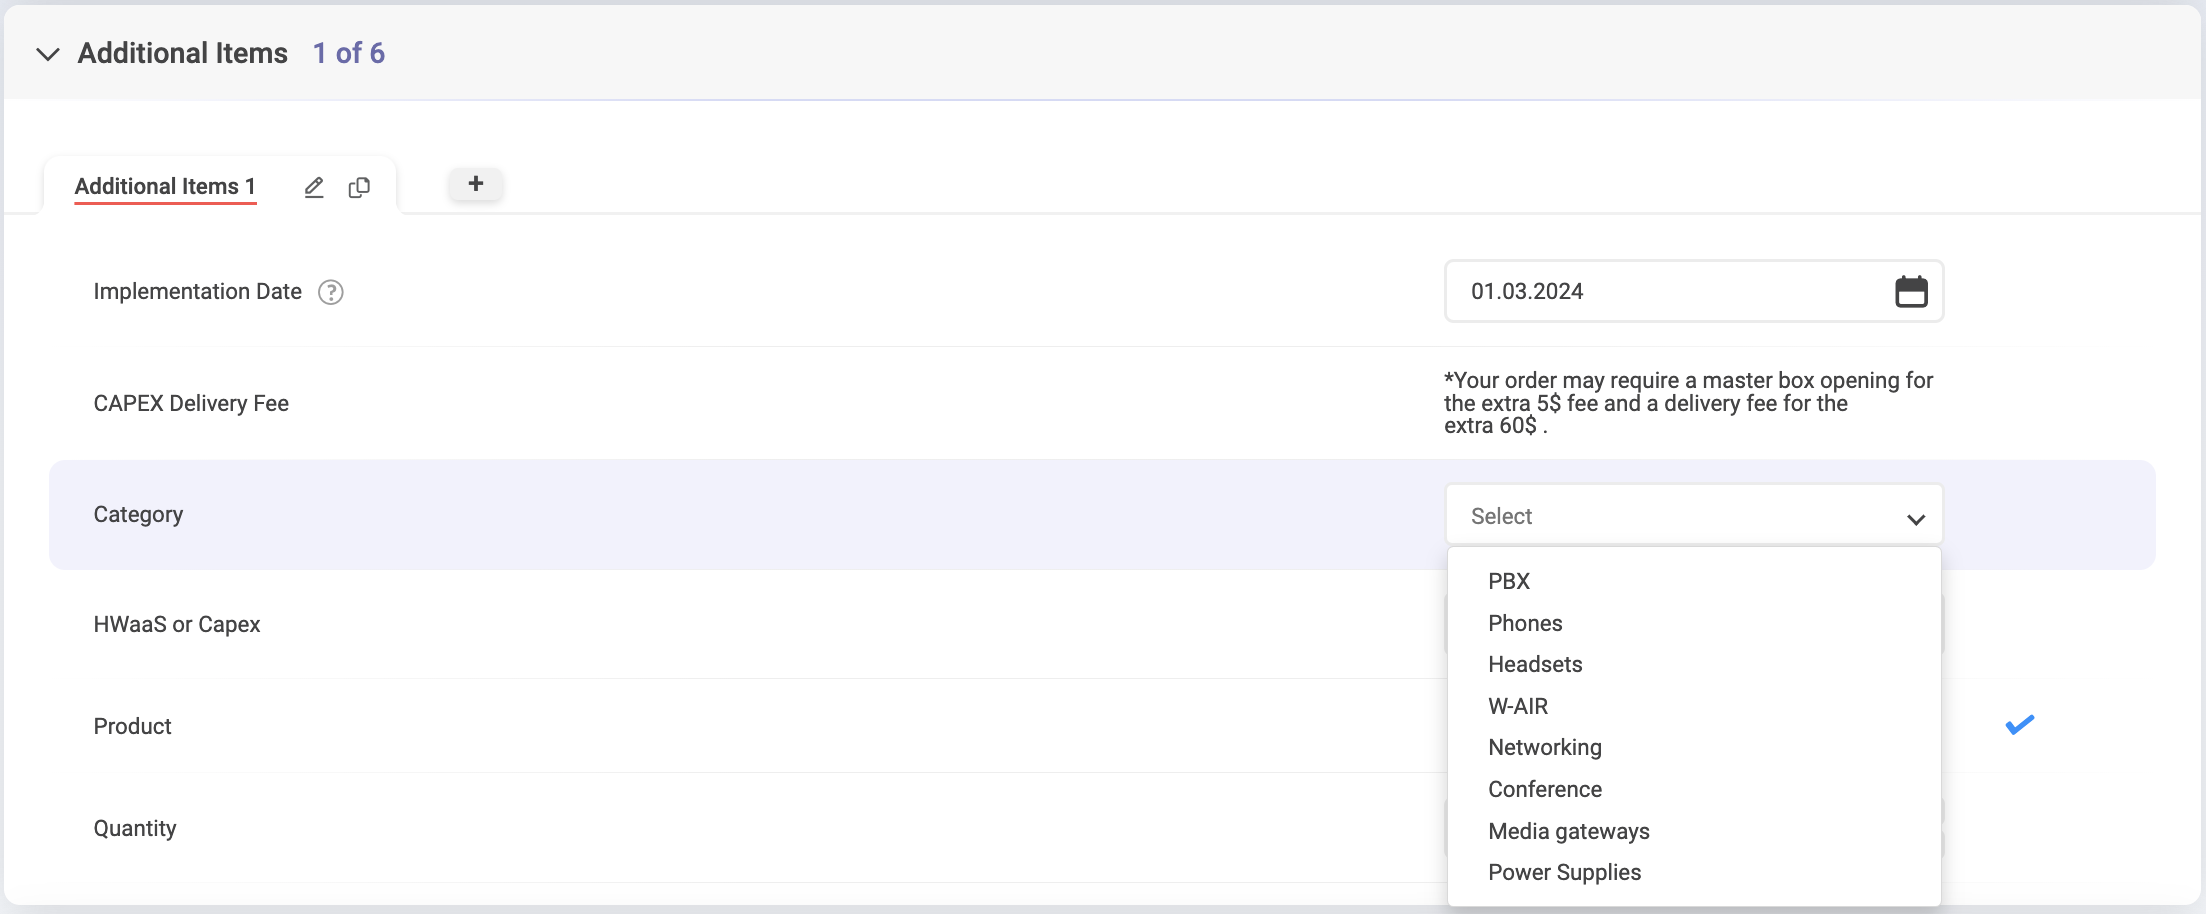
- Additional Items: these include PBX, Phones, Headsets, W-AIR, Networking, Conference, Media gateways, Power supplies - anything you would like to add outside of the bundle.
- Licenses Upgrade: here you can get x-caracal, Wizywebinar, Wizyconf, MS-PhoneSystem license or add storage and get Static IP
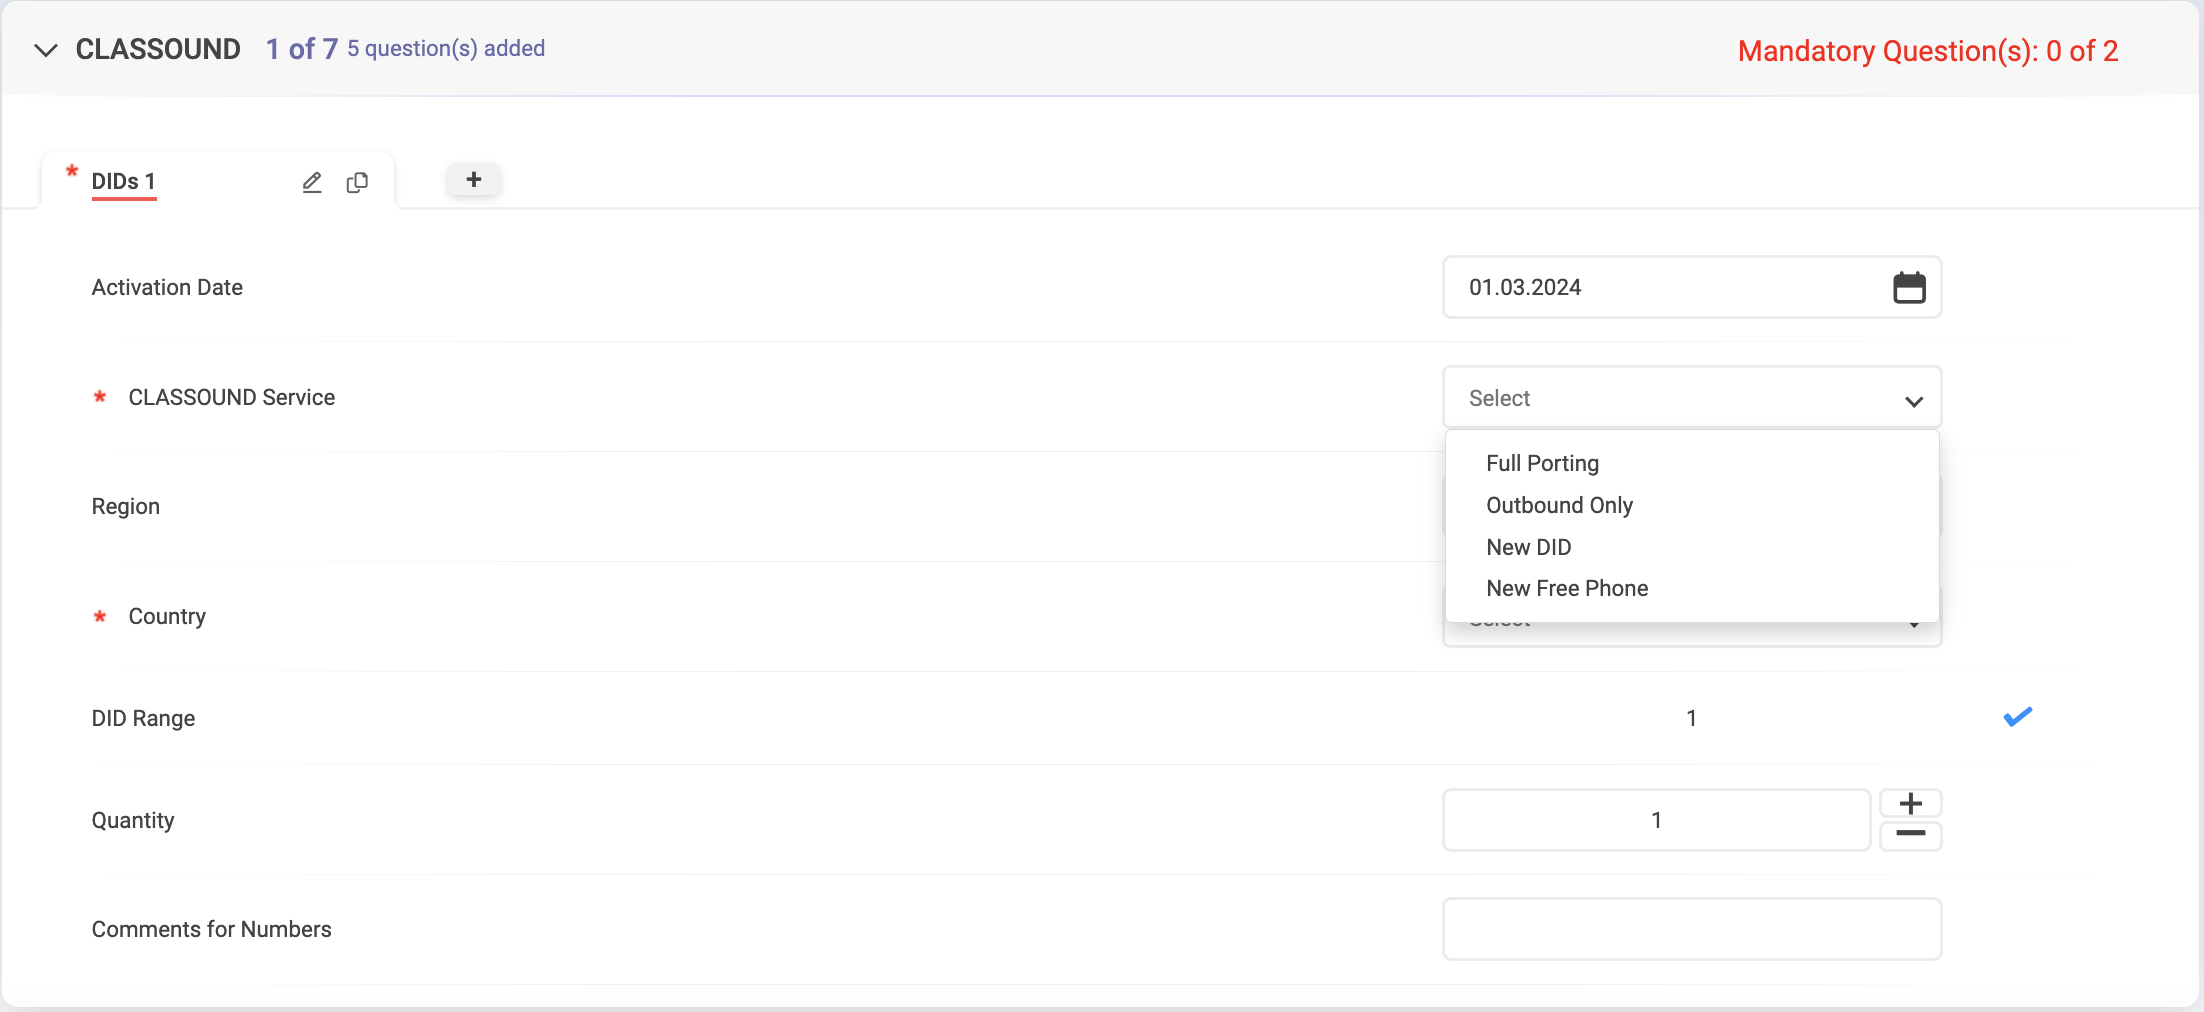
- CLASSOUND: lets to order New DID, Full Porting, Outbound Only, New Free Phone
Miscellaneous items: includes such services as Hardware, Software, Installation, Maintenance, Internet Connection
- Master PBX Model: choose the preferred option (Cloud or VM/HW PBX)
- Region: Select region
PBX DNS Name: enter name of the PBX. The following characters are allowed: small letters, symbol “-”, numbers.
Uppercase letters and all symbols other than “-” are not supported in the PBX DNS Name.CDS: choose the preferred CDS Bundle (for more information, check the document Company Data Storage Flow)
Static IP: choose if Static IP is required
Note: You can select multiple addons if required. Depending on the chosen addons, the relevant sections appear on the page.
PBX Service
Choose if you need PBX Service licences, indicate number and the Service License Date:
Bundle
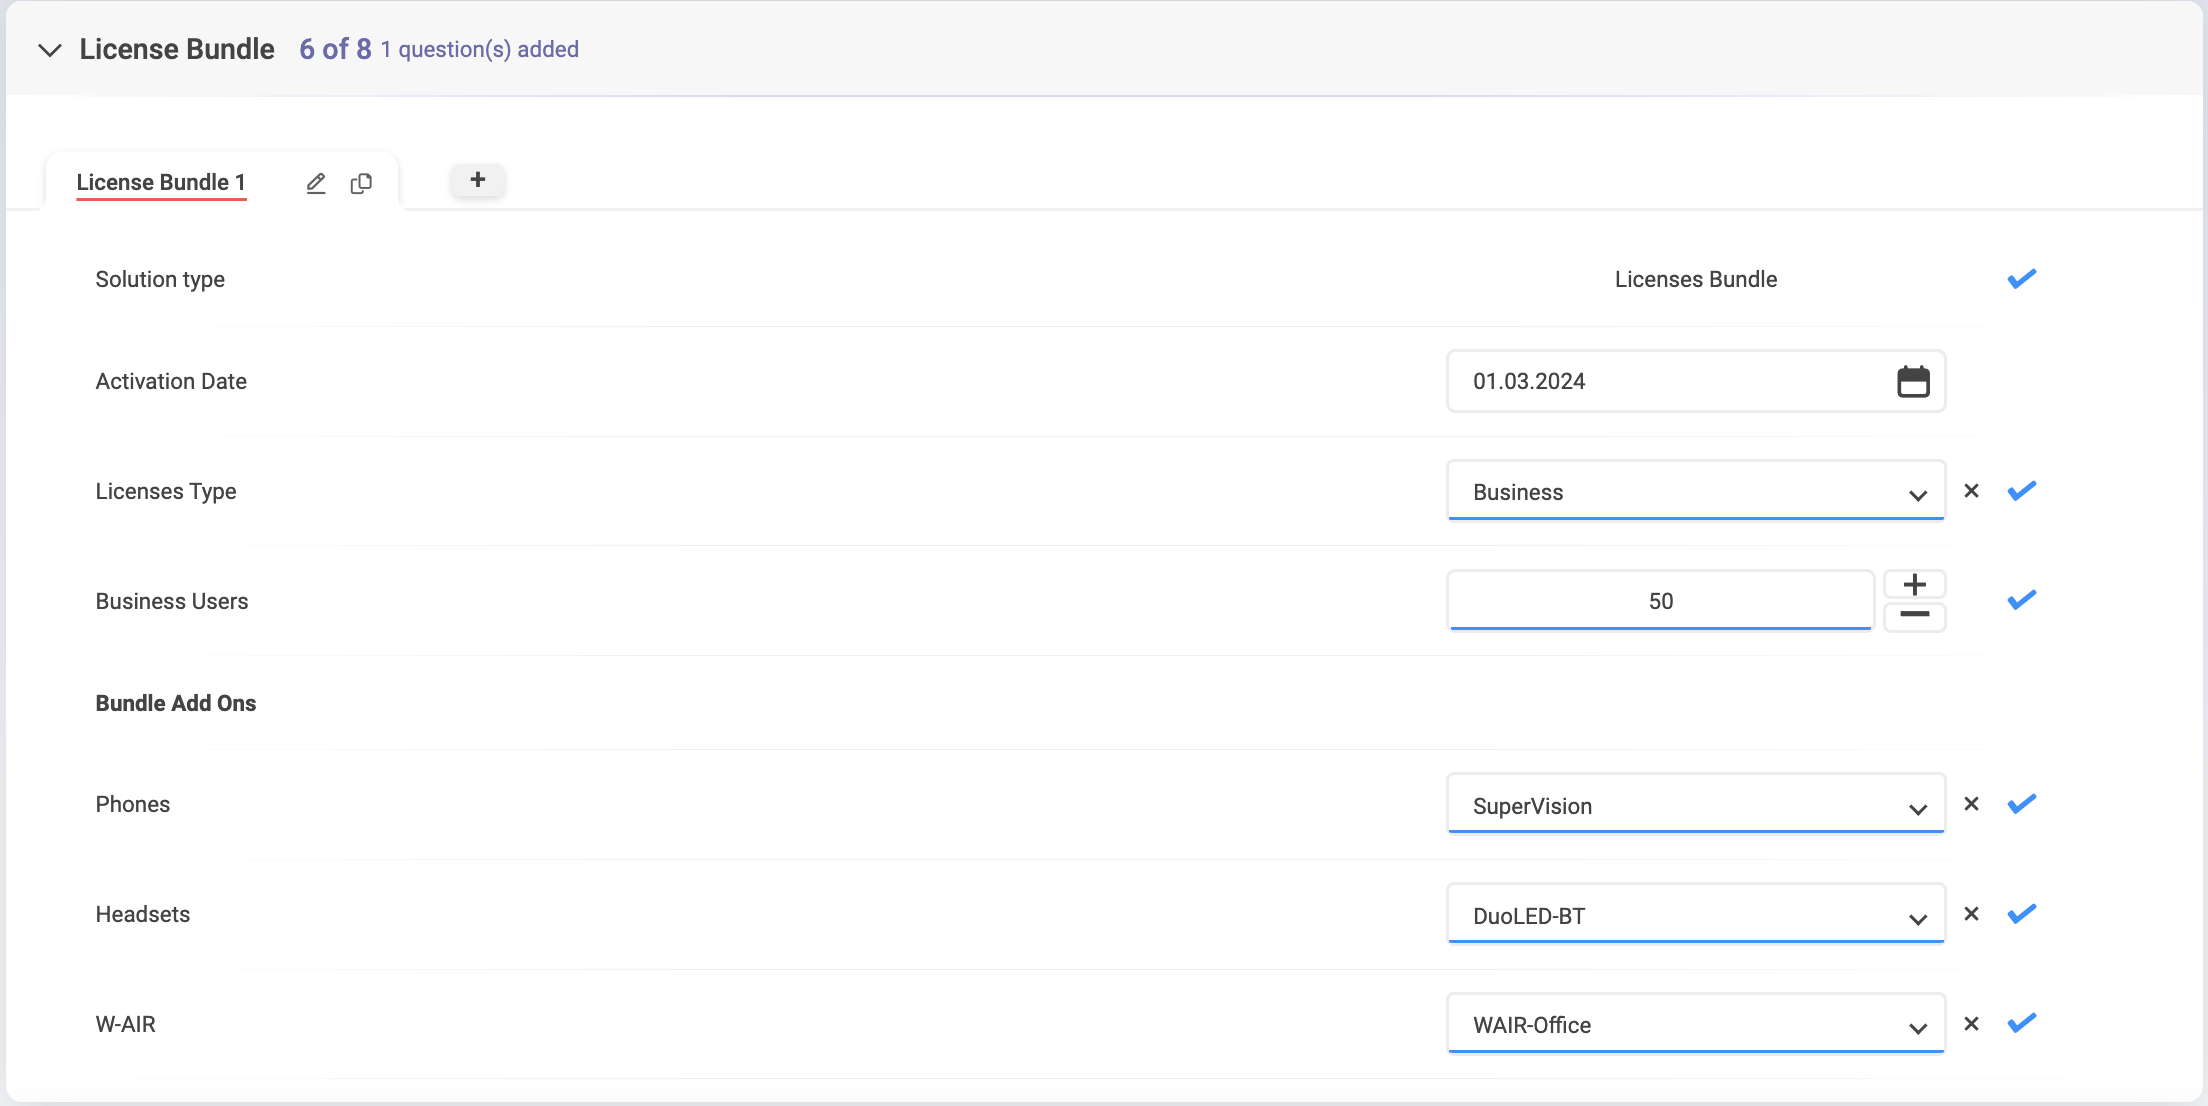
In the bundle section, you choose the activation date and licenses type:
Once you select a license type, fill out the following fields:
- Number of users
Specify which bundle add-ons are required:
- Phones (Start, WorkForce, Vision, SuperVision, etc.)
- Headsets (DuoLED, MonoLED, DuoLED-BT, MonoLED-BT, etc.)
- W-AIR (WAIR-Basic, WAIR-Office, WAIR-LifeSaver, etc.)
Notes:
- You can select multiple items from the list.
- If you want to add all items, click Select All.
- All the added items are displayed in the Products Summary. Quantity of each item corresponds to the number of users in Bundle section. If you want the quantity of devices to be different from the number of licenses in the bundle, you can add the necessary items via the Additional Items section.
To add another bundle, click + (Add) button:
Choose a license and repeat the steps described above.
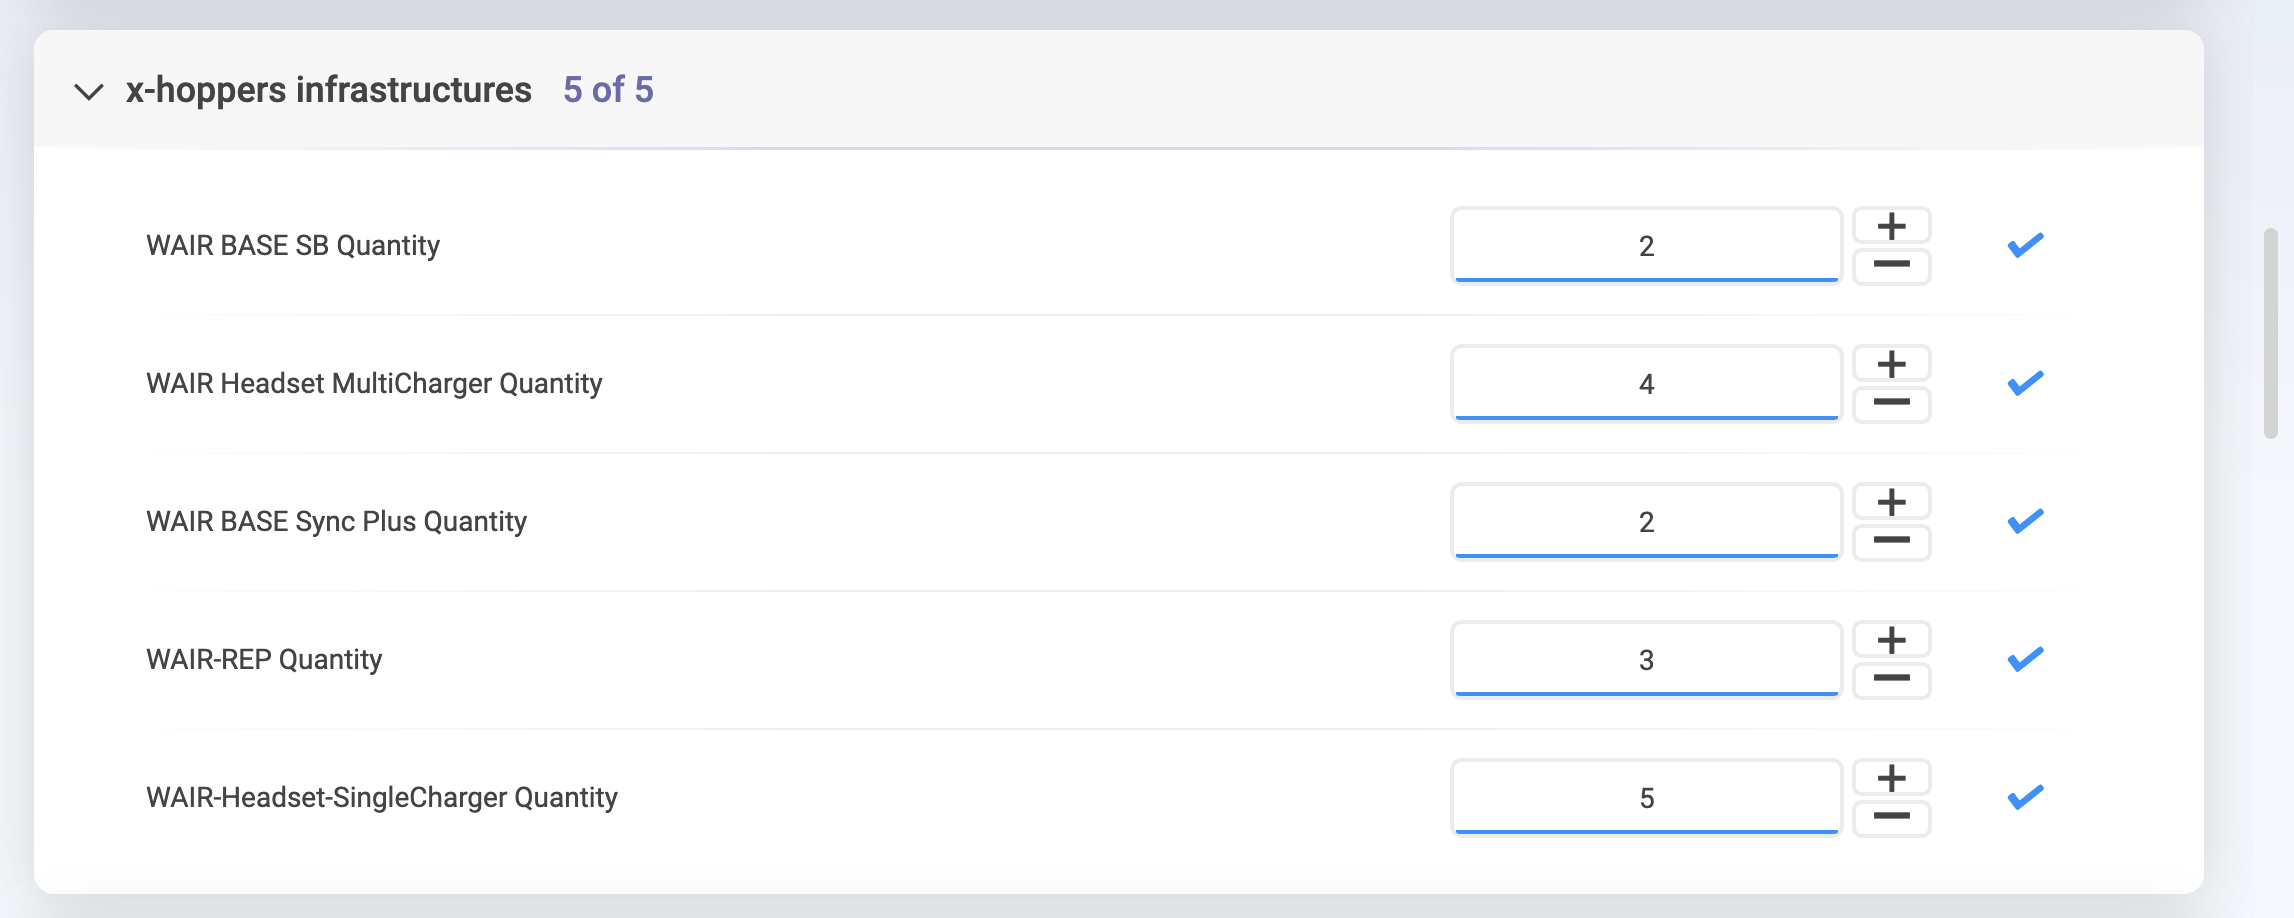
Note: In case of x-hoppers, there is also a section name x-hoppers infrastructures where you can select items related to x-hoppers solution (e.g. Base stations, W-AIR Headset Multichargers etc.):
Additional Items
Note: Additional items are displayed only if the relevant item is selected in Addons field of the General Questions section.
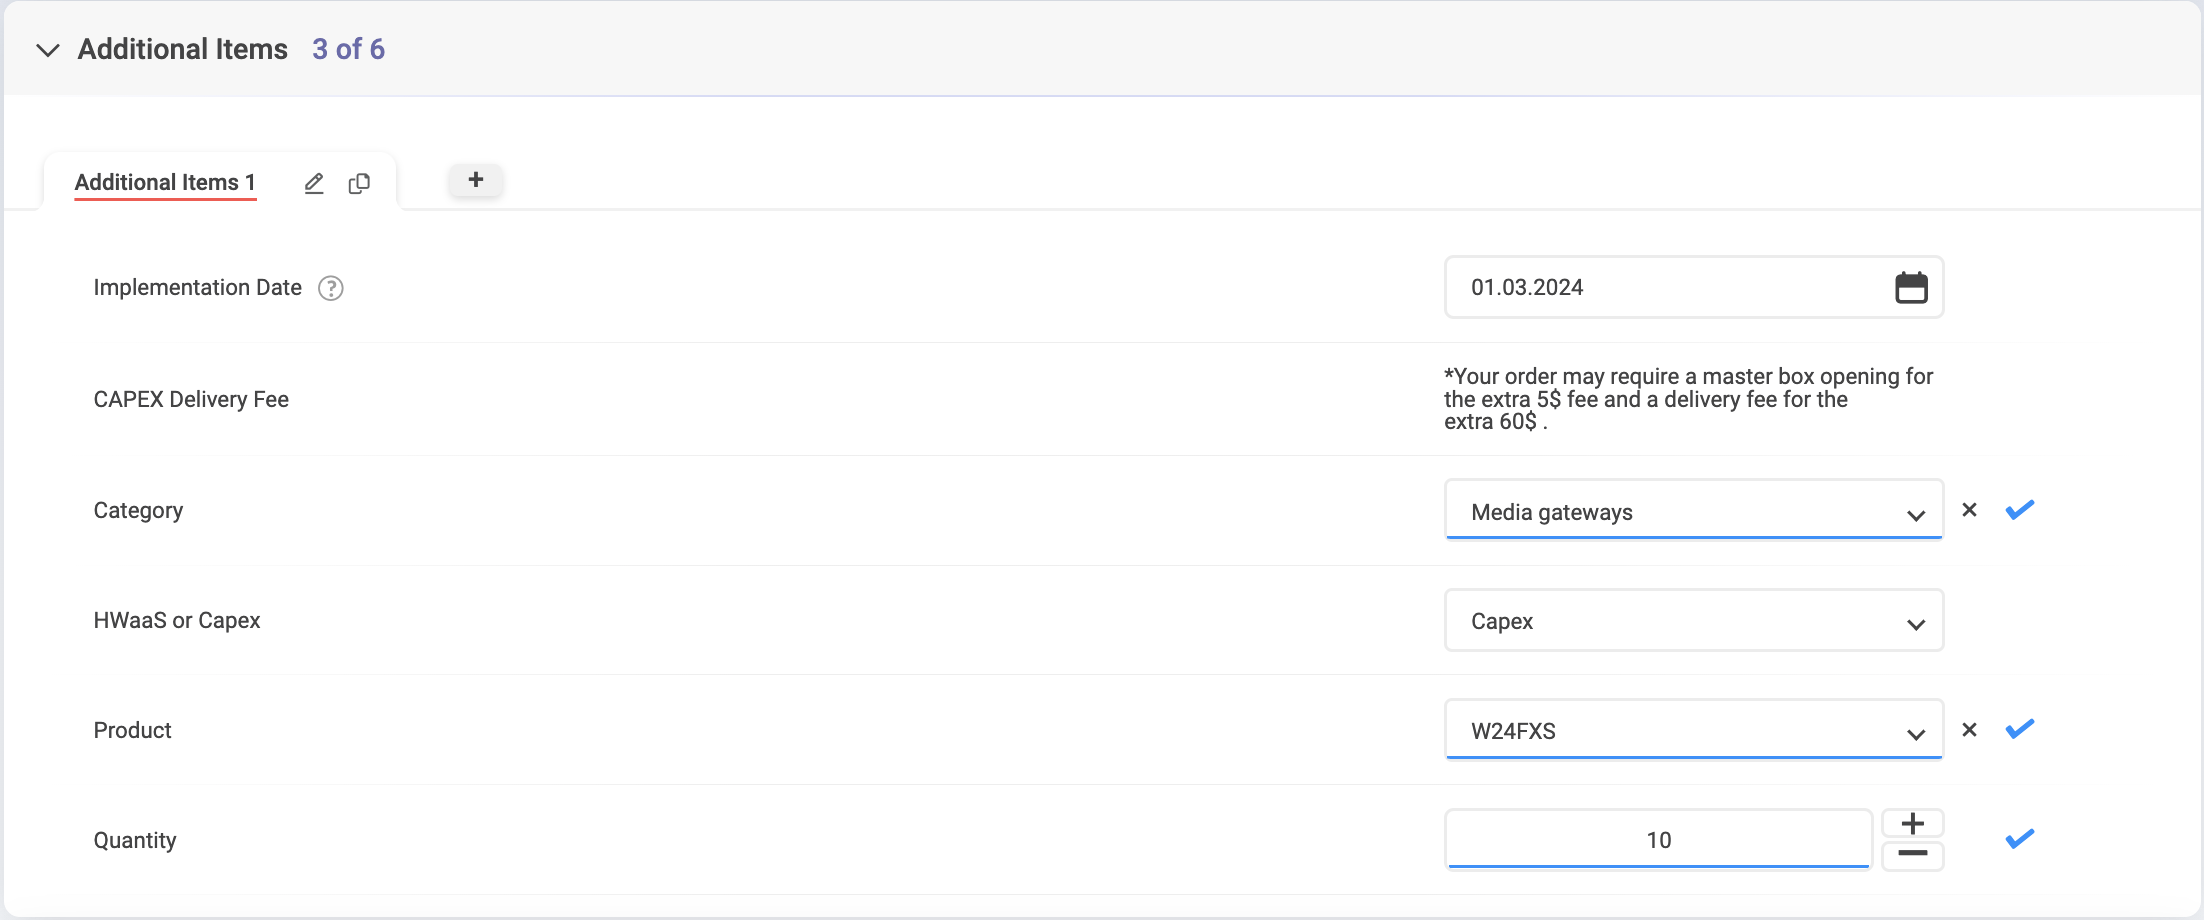
Fill out the following fields:
- Implementation Date: select the activation date for the selected additional items
- Category: PBX, Phones, Headsets, W-AIR, Networking, Conference, Media gateways, or Power supplies
- HWaaS or CAPEX: select if you want to order the product as HWaaS or CAPEX
- Product: select necessary product of the chosen category
- Quantity: indicate the needed number of items
To add other additional items, just click the + (Add) button and repeat the steps.
Licenses Upgrade
Note: The section is displayed only if the relevant item is selected in Addons field of the General Questions section.
Here you can get x-caracal, Wizywebinar, Wizyconf, MS-PhoneSystem license once the necessary license requirements are met (otherwise, you will see the relevant notification)
- Choose the Activation date
- x-caracal: choose if you need x-caracal license
- Wizywebinar: indicate if you need Wizywebinar license. If positive, fill out the below field:
Wizywebinar Licenses Quantity: enter the preferred number of licenses - MS-PhoneSystem: select if MS-PhoneSystem is required.
CLASSOUND
Note: CLASSOUND section is displayed only if the relevant item is selected in Addons field of General Questions.
- Choose Activation Date
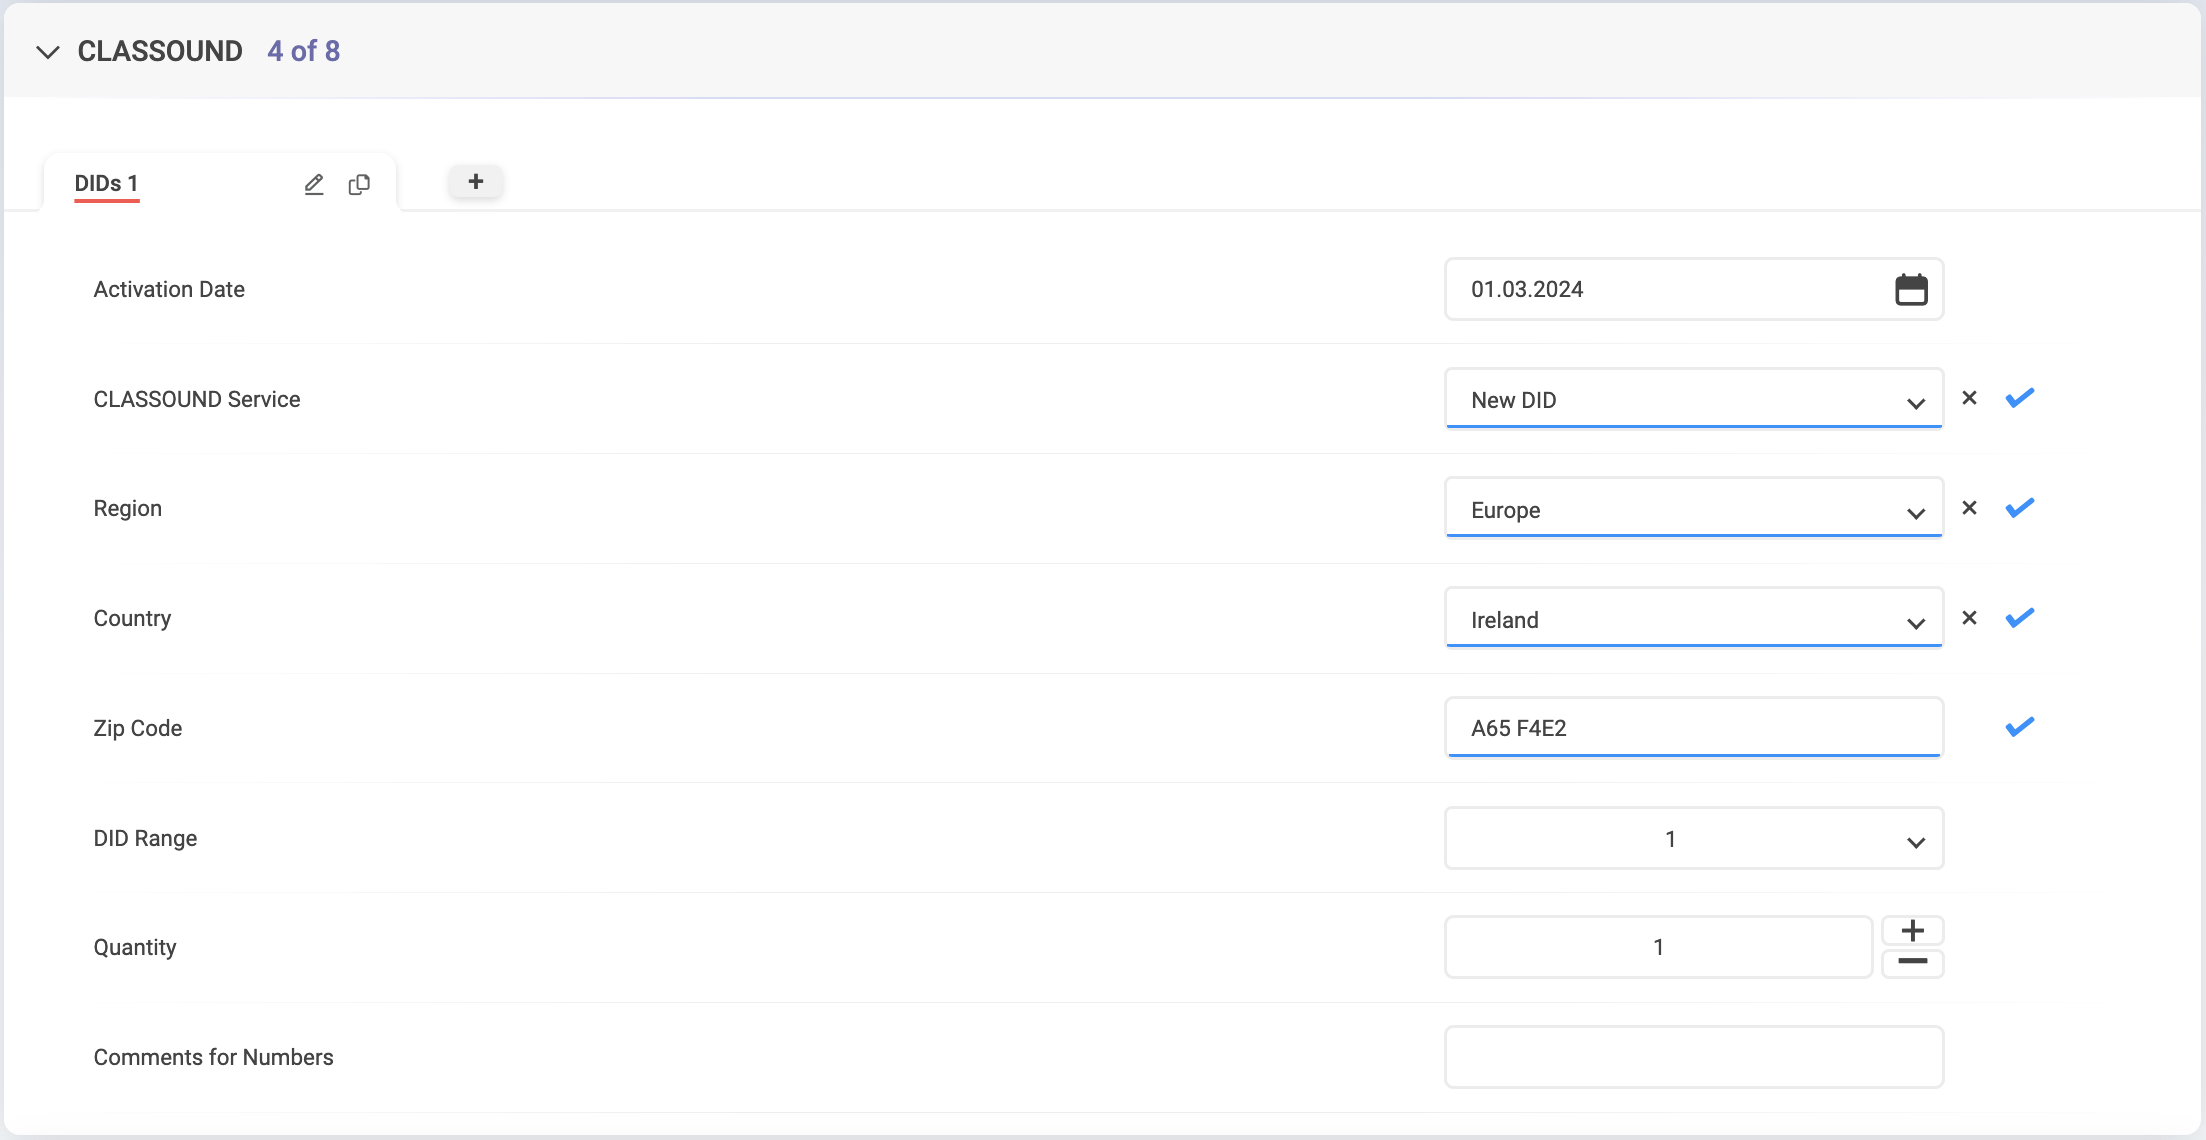
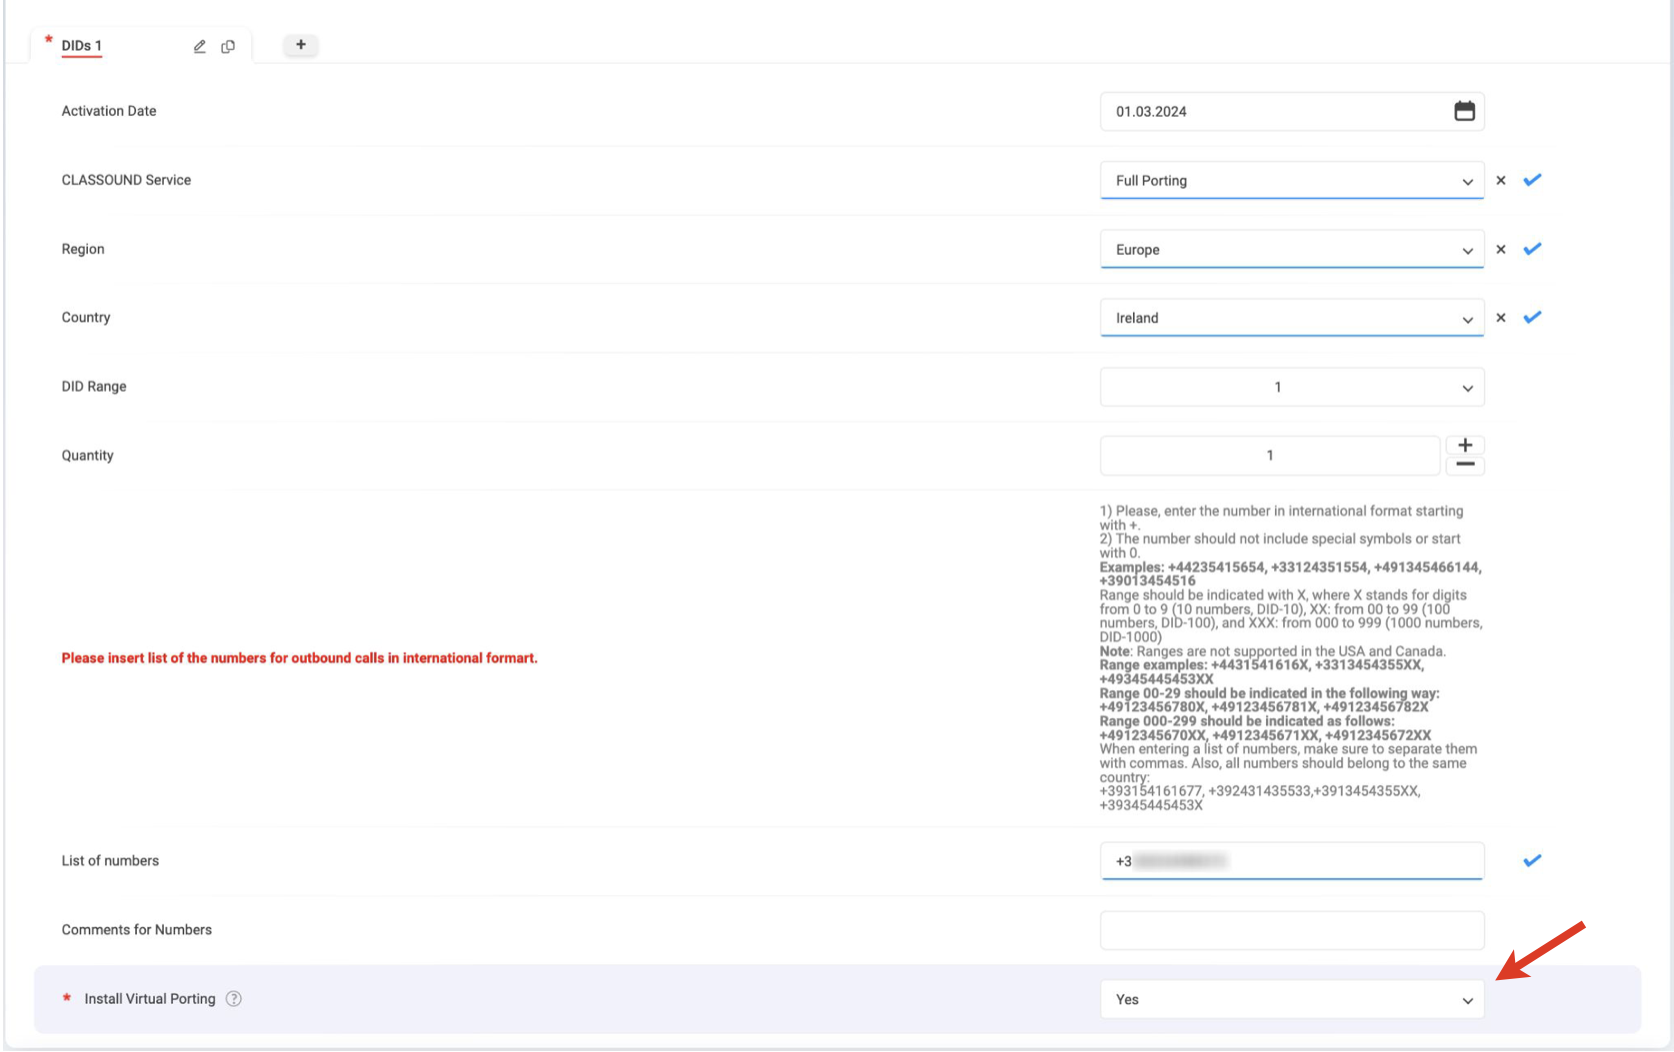
- CLASSOUND Service: select the service required (Full Porting, Outbound Only, New DID, New Free Phone)
Depending on service chosen, fill out the necessary fields. E.g. for New DID, fill out region, country, ZIP code, DID range, and quantity.
Note: In case of choosing the Full Porting option, an additional section, Instant Virtual Porting appears below, where you can choose if you want to use the option or not:
To learn more about the feature, check out the documentation: CLASSOUND Instant Virtual Porting (IVP)
Miscellaneous items
Note: Miscellaneous items are displayed only if they are selected in Addons field of General Questions.
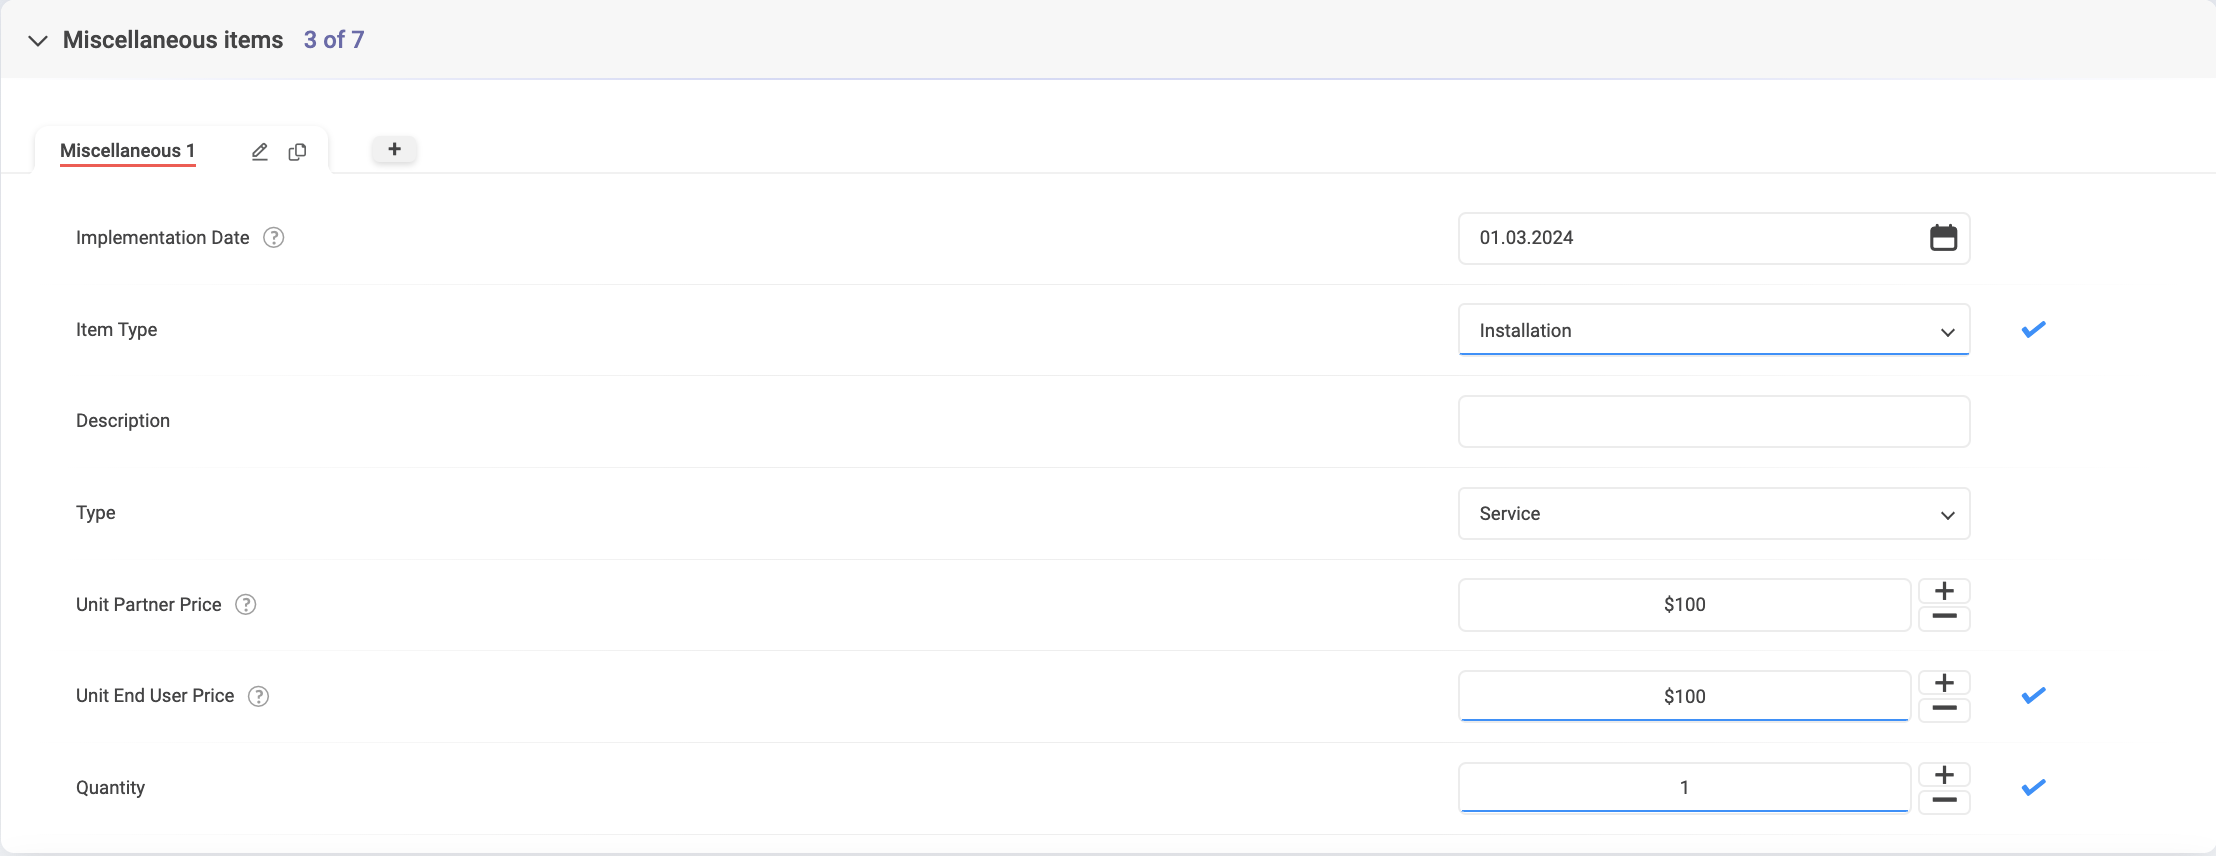
- Select Implementation Date
- In Miscellaneous Items field, choose the preferred service: Installation, Maintenance, Internet Connection.
- Cost: indicate cost of the service
- Service or Capex: select type (Service in case it's recurring, e.g. monthly or Capex)
Tax
Note: Tax calculation is applicable for US Partners only.
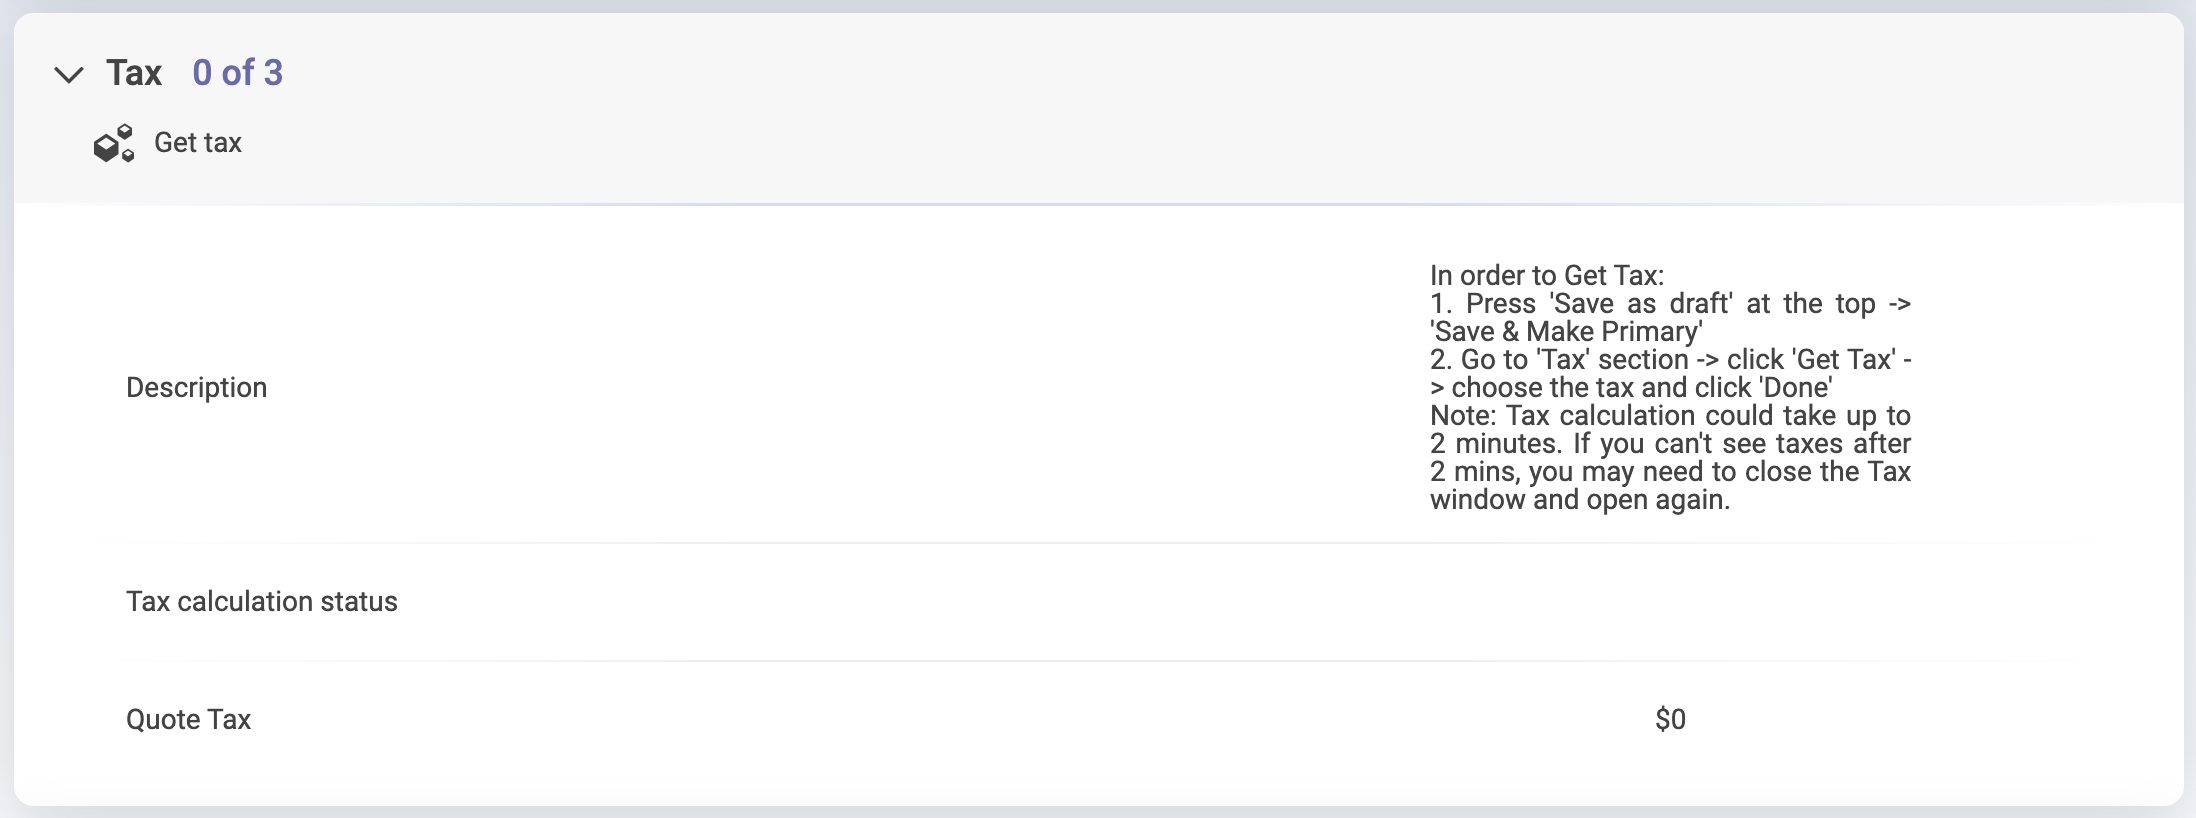
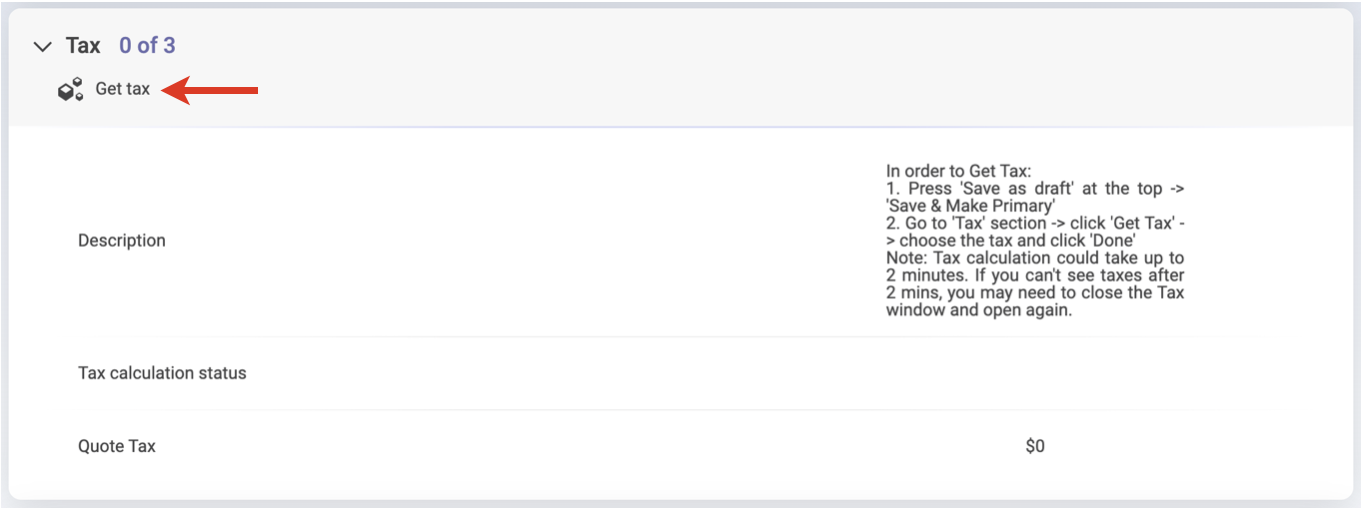
Important: Tax generation becomes available only after the quote is saved:
1. Press 'Save as draft' at the top -> 'Save & Make Primary'
2. Go to 'Tax' section -> click 'Get Tax' -> choose the tax and click 'Done'
Note: Tax calculation could take up to 2 minutes. If you can't see taxes after 2 min, you may need to reload the page.
See the section Get Tax for more details.
Billing Information
Billing information is synced from Account data.
Products Summary
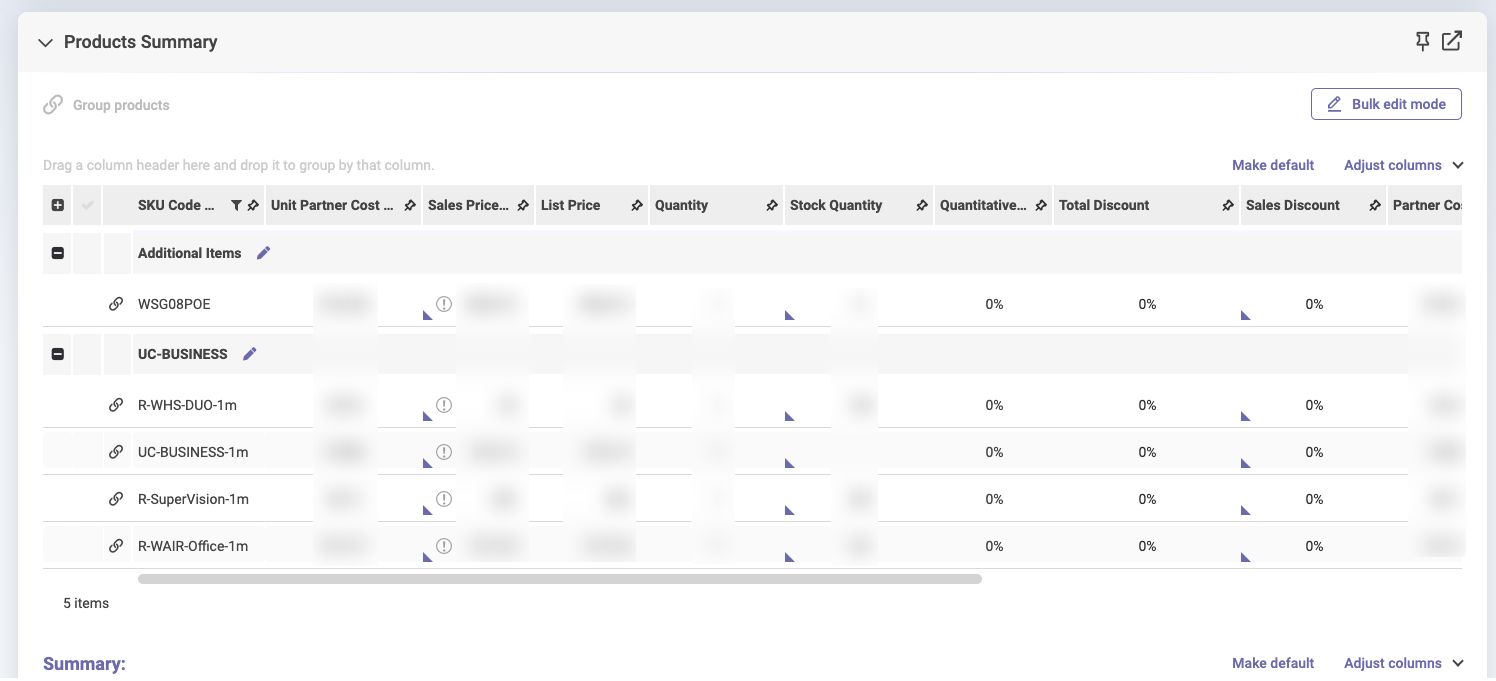
In the Products Summary section, you can see the list of all items of the quote, including such information: item name, sale price, quantity, stock quantity, commitment discount, cost per item, total cost, description, billing frequency, etc.:
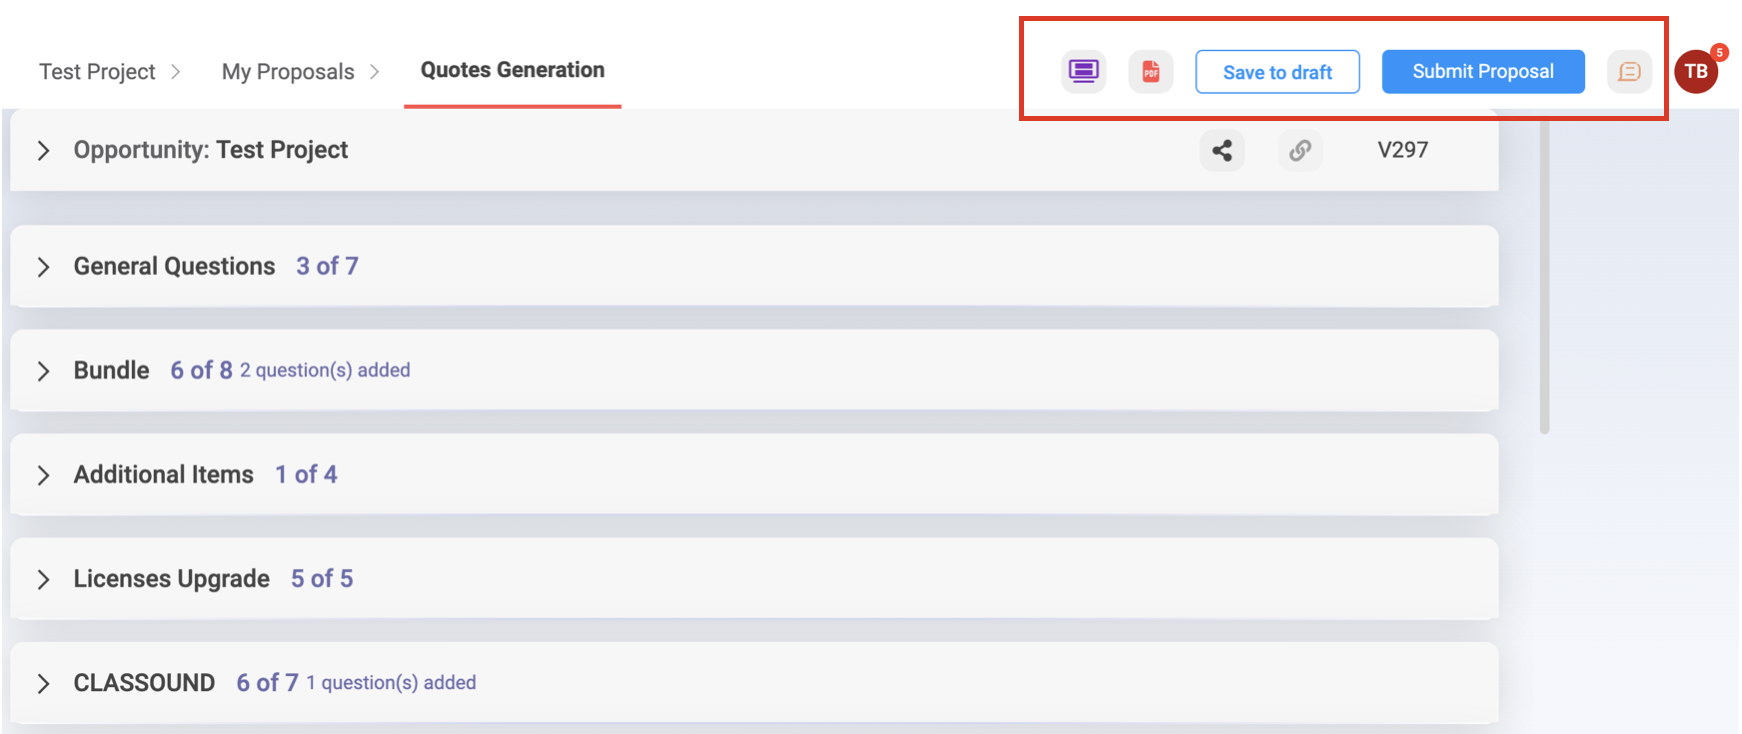
Once you've prepared your quote, you can preview and save it. Preview and save options are available at the top panel:
Preview DealRoom: click on the Preview DealRoom button at the top:
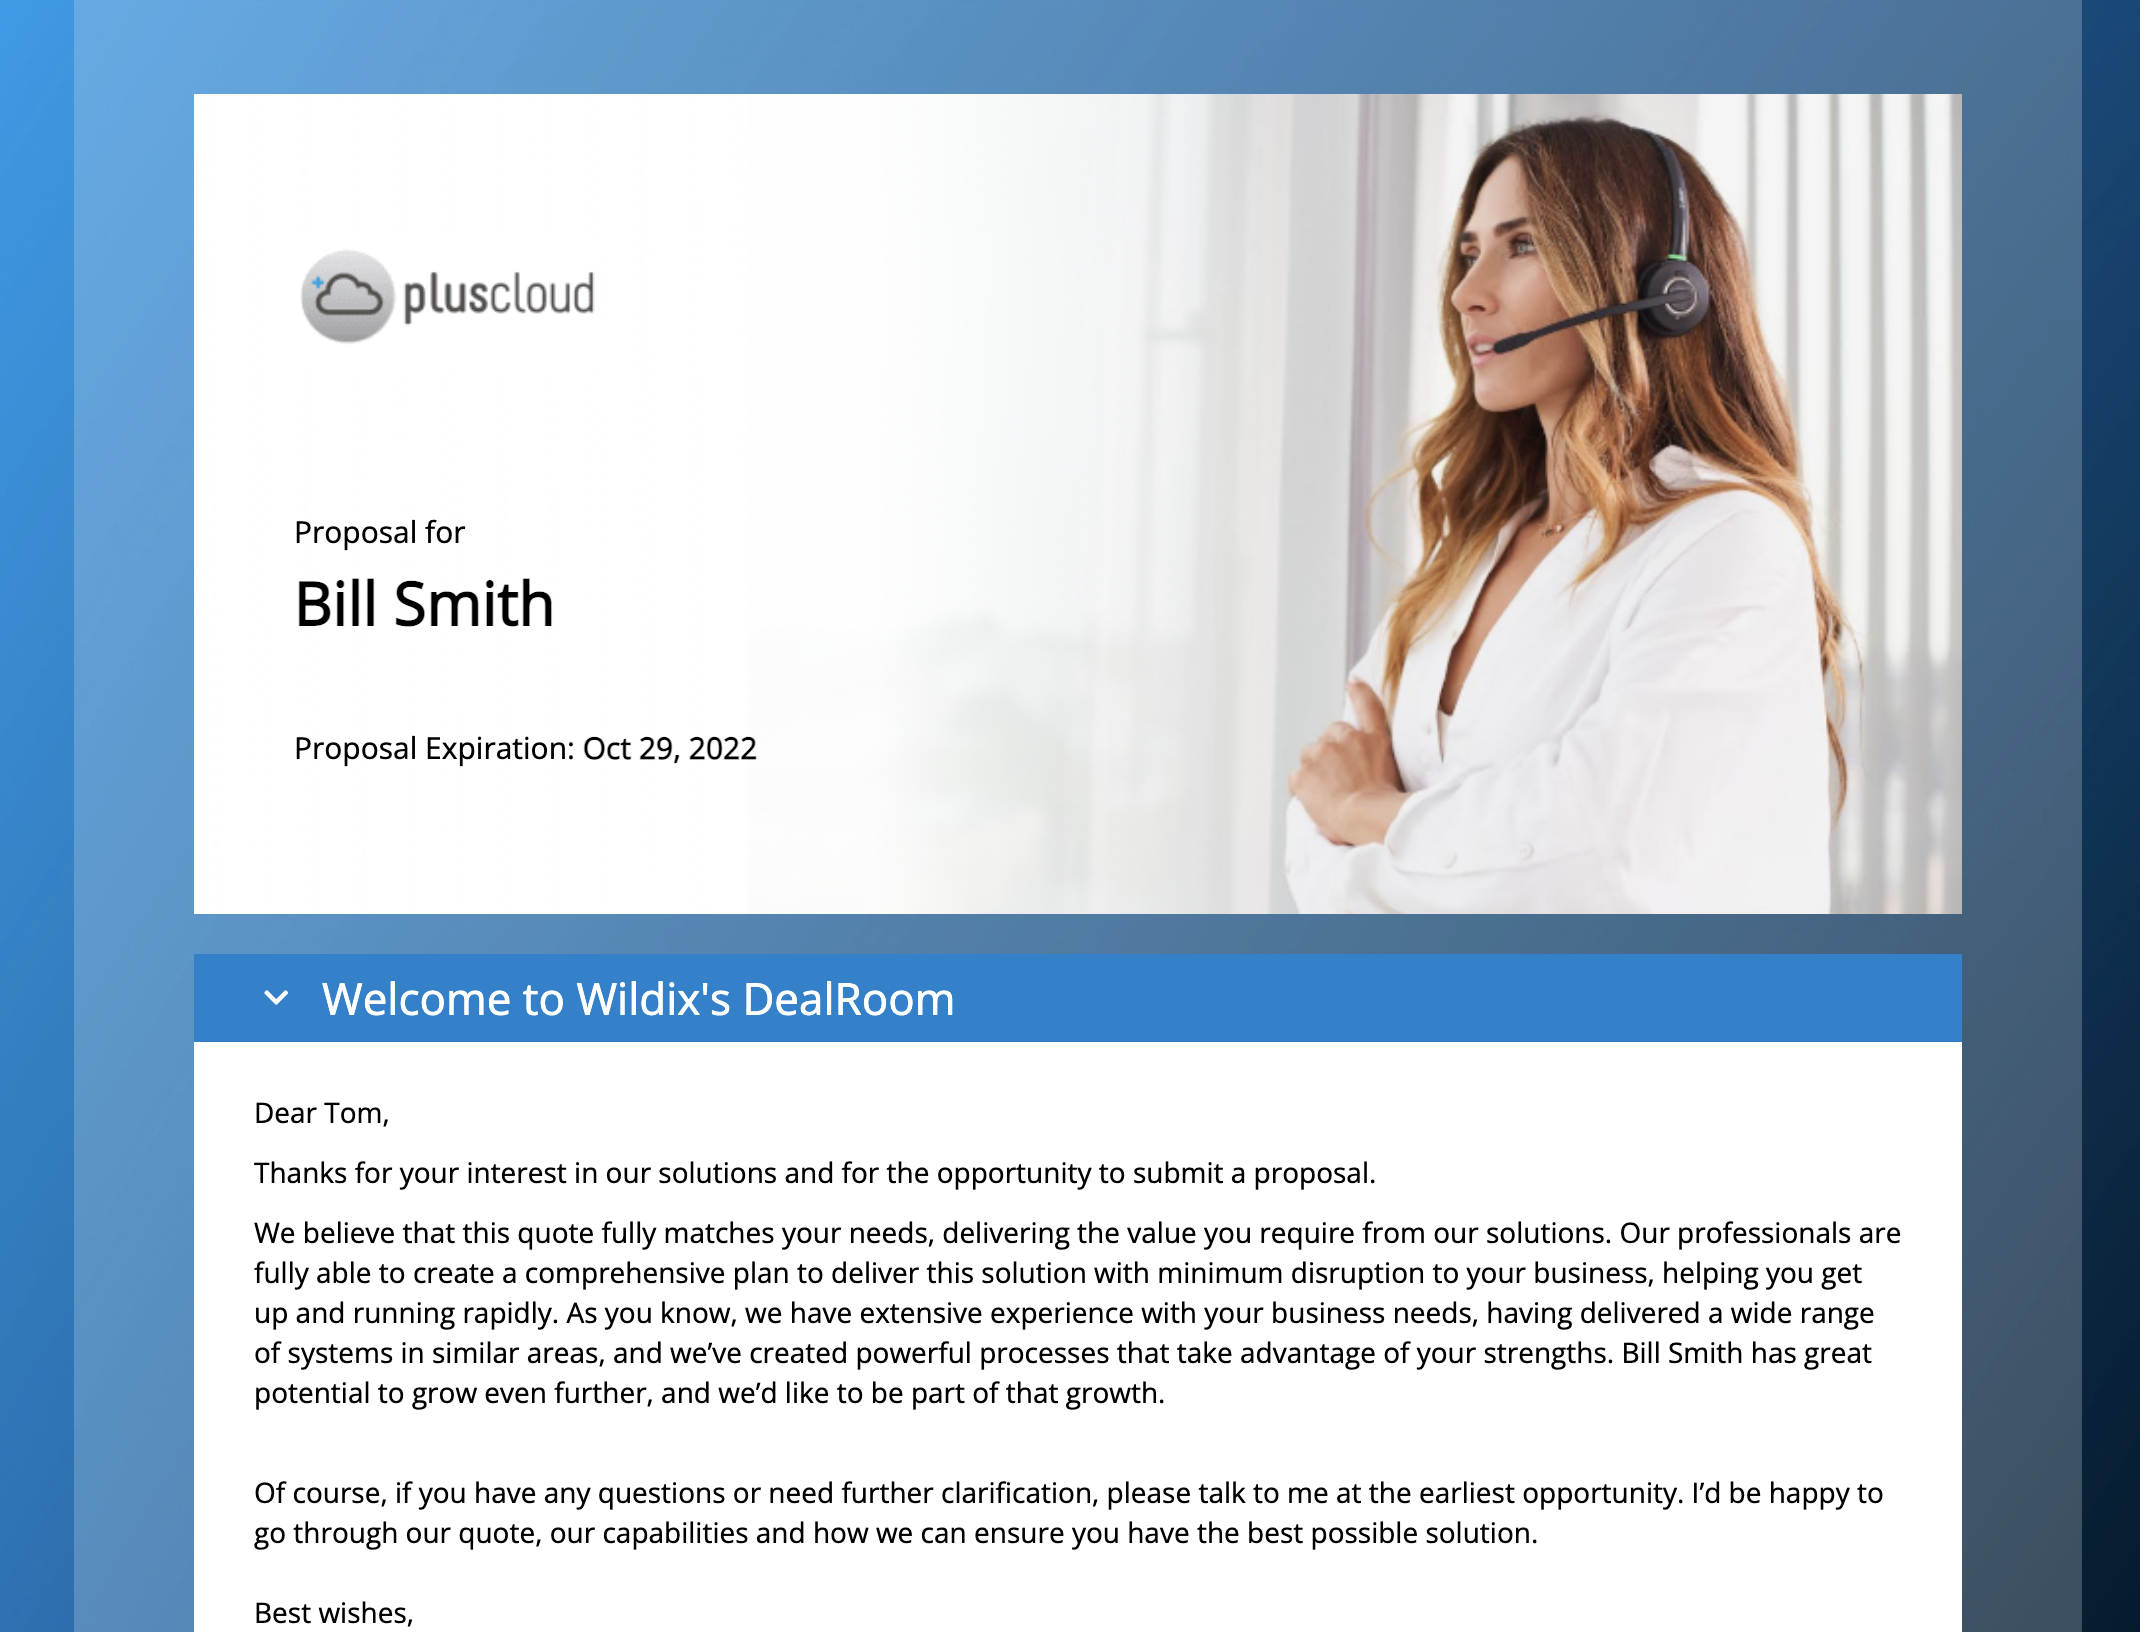
It opens the preview of the proposal in DealRoom:Notes:
- The proposal is valid for 1 month, within which it should be signed.
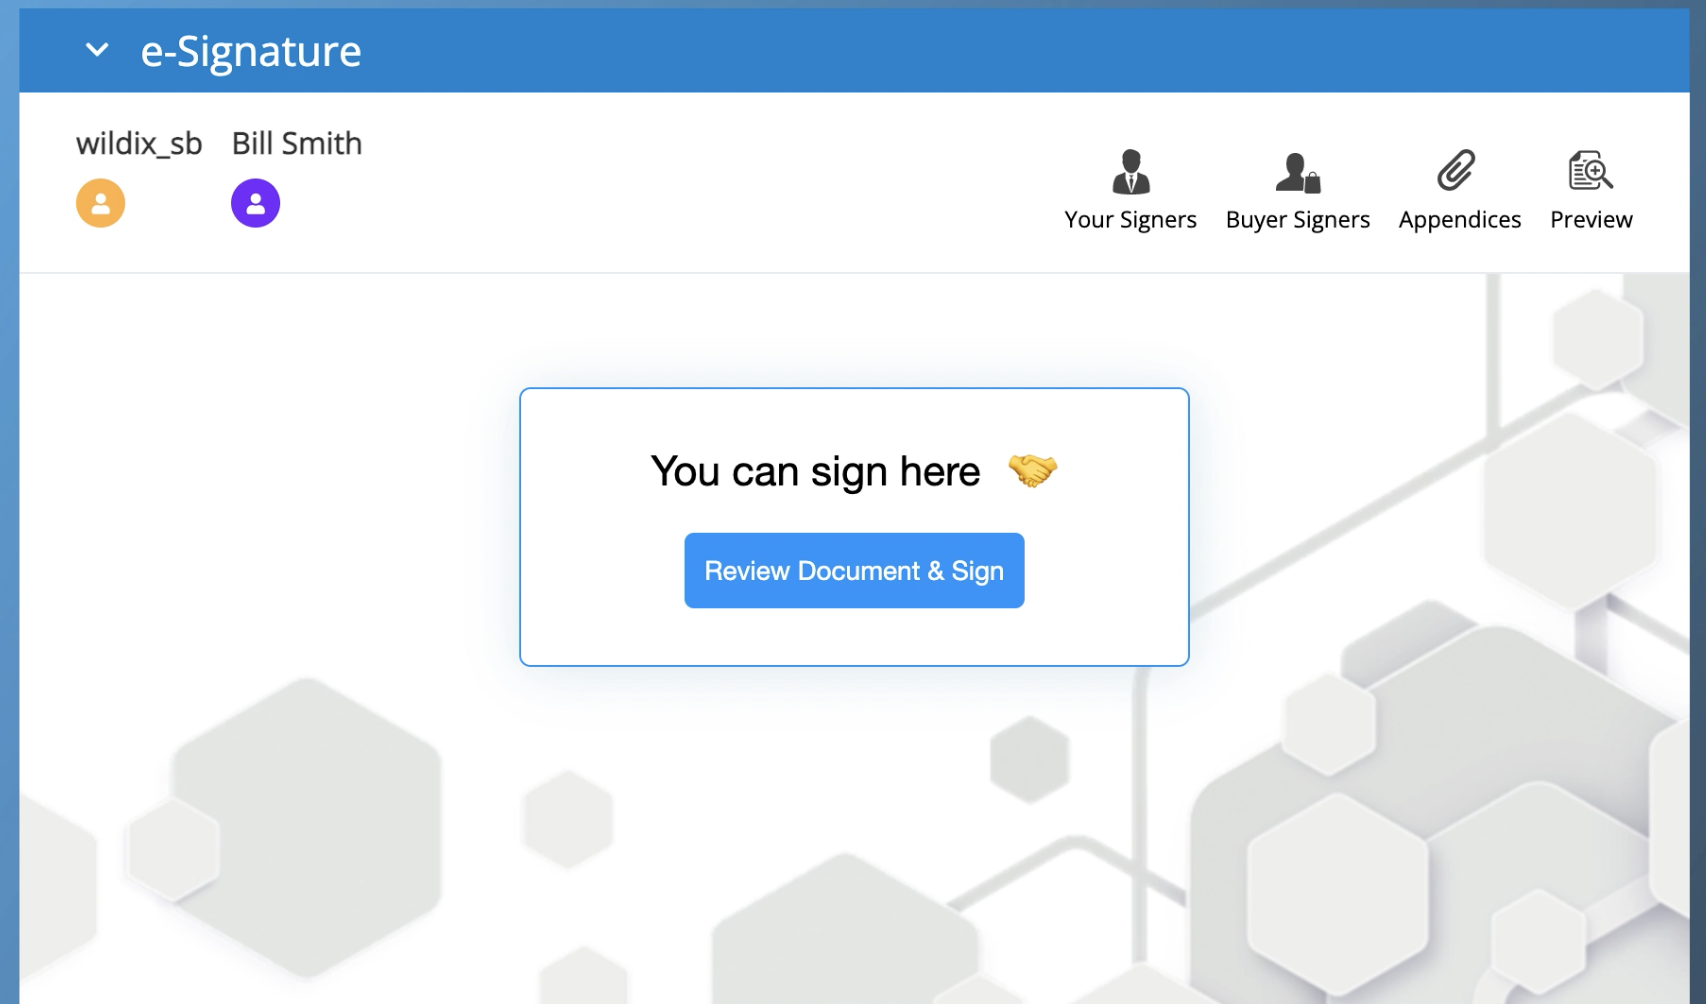
- The quote can be signed only after it is saved (signing option not available in draft).
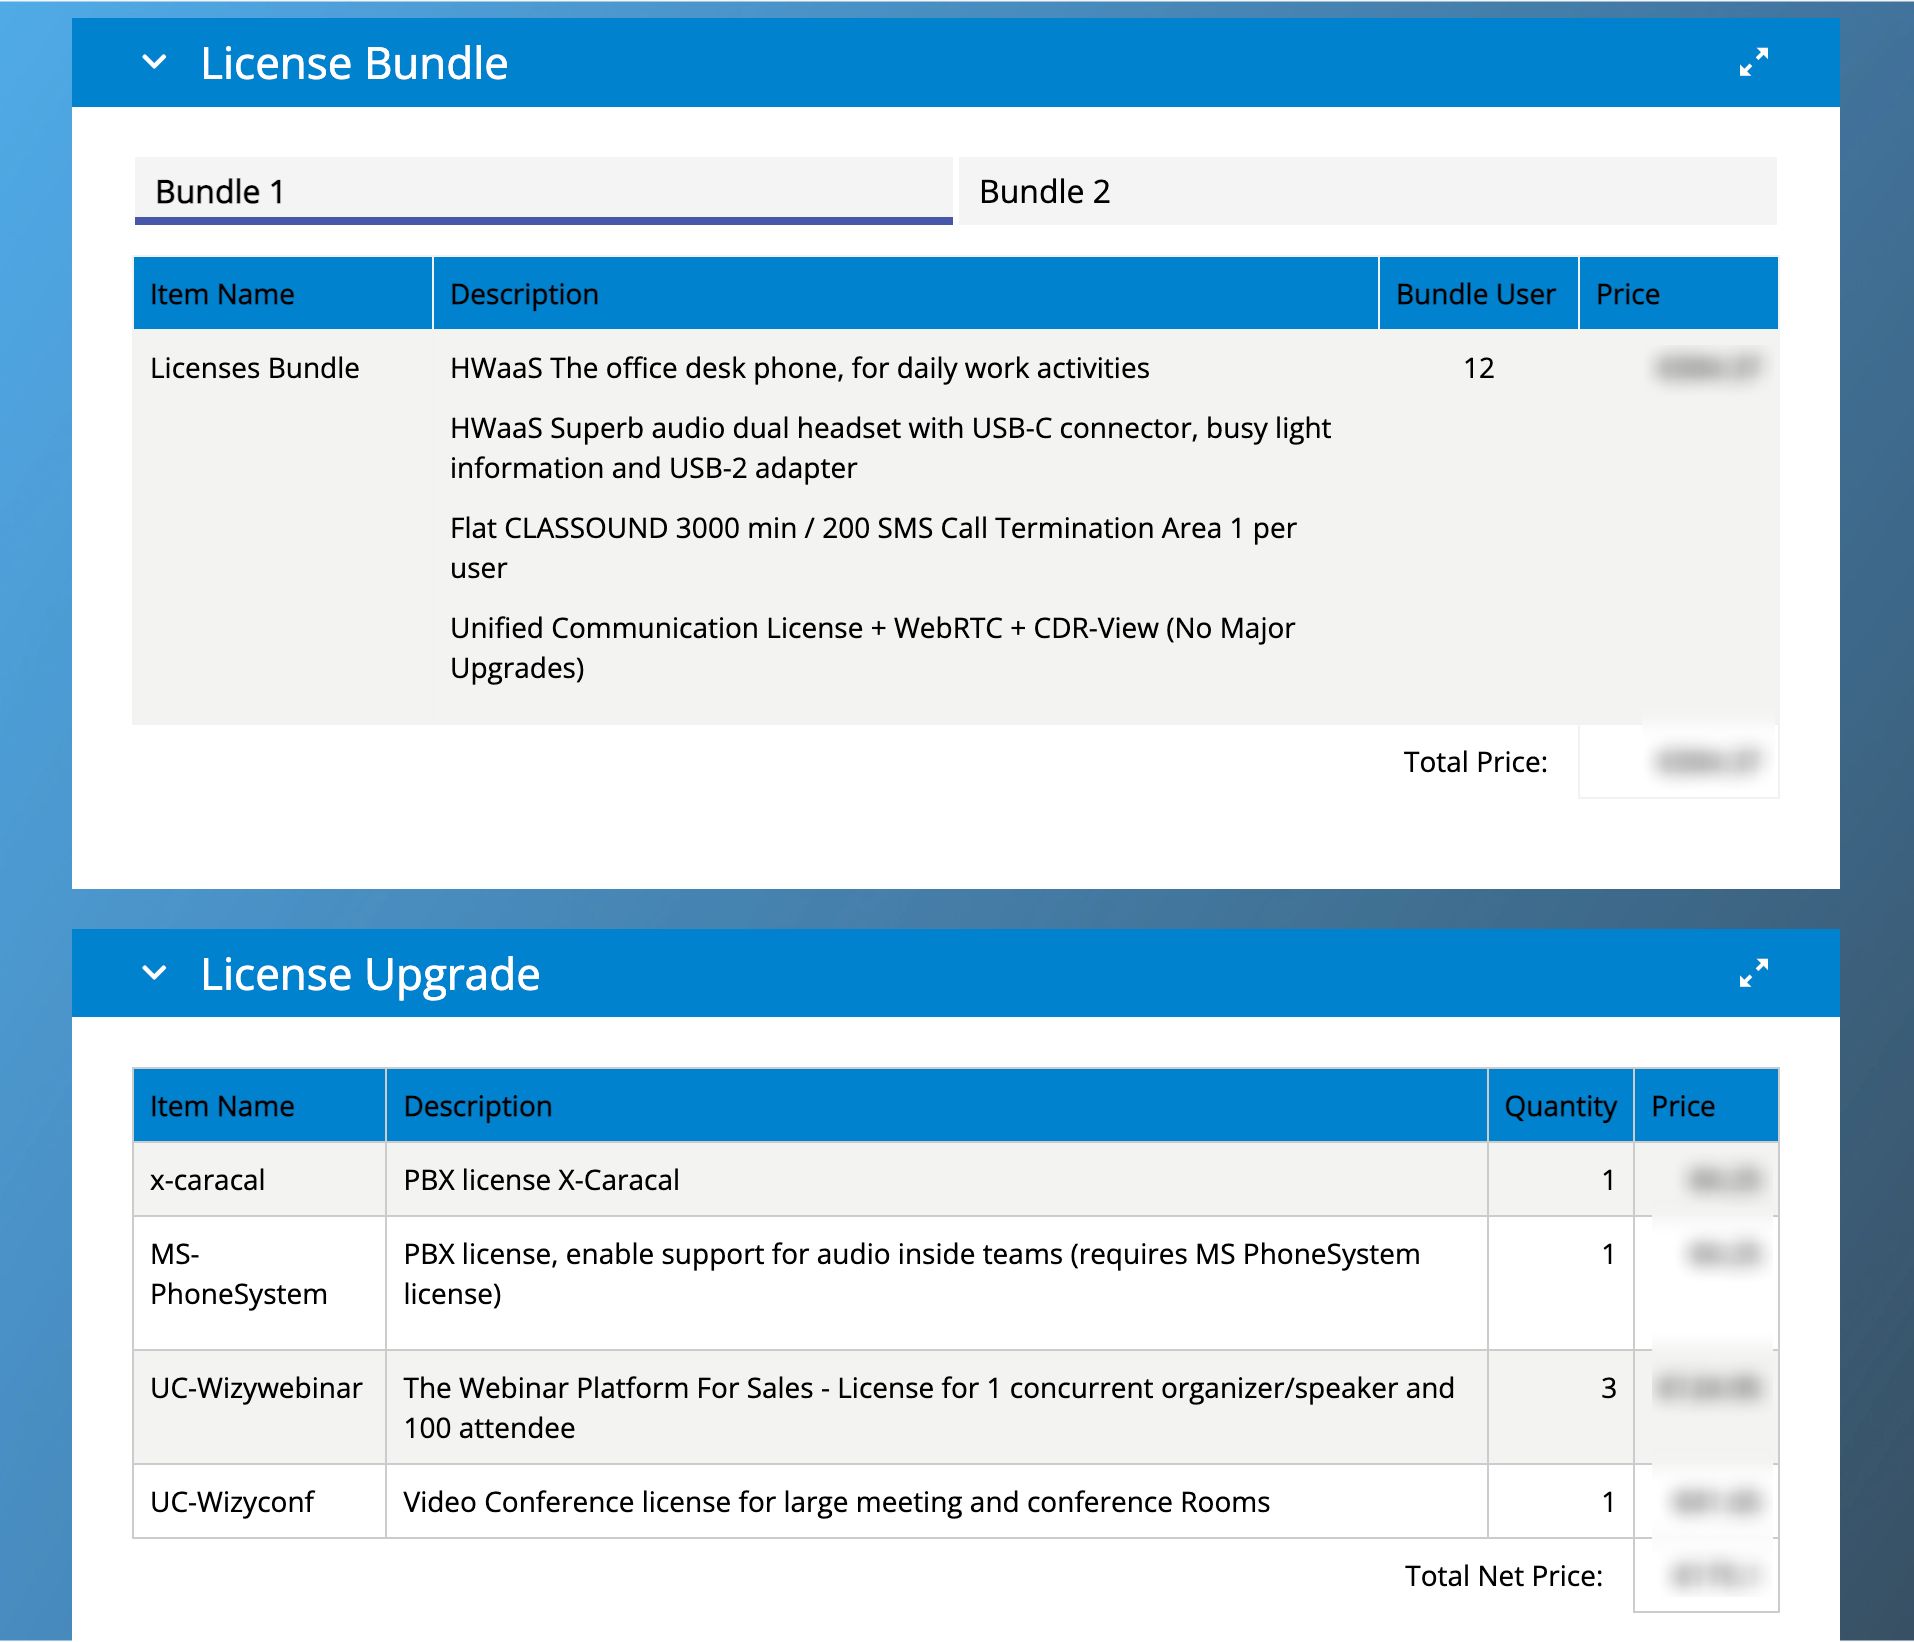
Here you can view information about Wildix services, see the list of items added to.the proposal, billing information, billing frequency, whether there is commitment or not, as well as terms and conditions.
At the end of the document, there is e-Signature section:Notes: Signing option is not available until the quote is saved.
- Preview PDF: after you click the Preview PDF button, PDF file with the draft of the quote is loaded on your device, so that you can view the quote details, terms and conditions, etc.
When you are ready to save your quote, click Save to draft (1) -> Save & Make Primary (2):
Notes:
- When clicking Save & Make Primary button, the quote is synced with Salesforce. No syncing with Salesforce occurs if you click just Save.
- Only a Quote that has been made Primary, can be converted to an Order.
- There is an option Submit Proposal:
When you click on it, an email is sent to the customer with the link to the DealRoom and all the fields of the quote become available in read-only mode.
View saved Quote
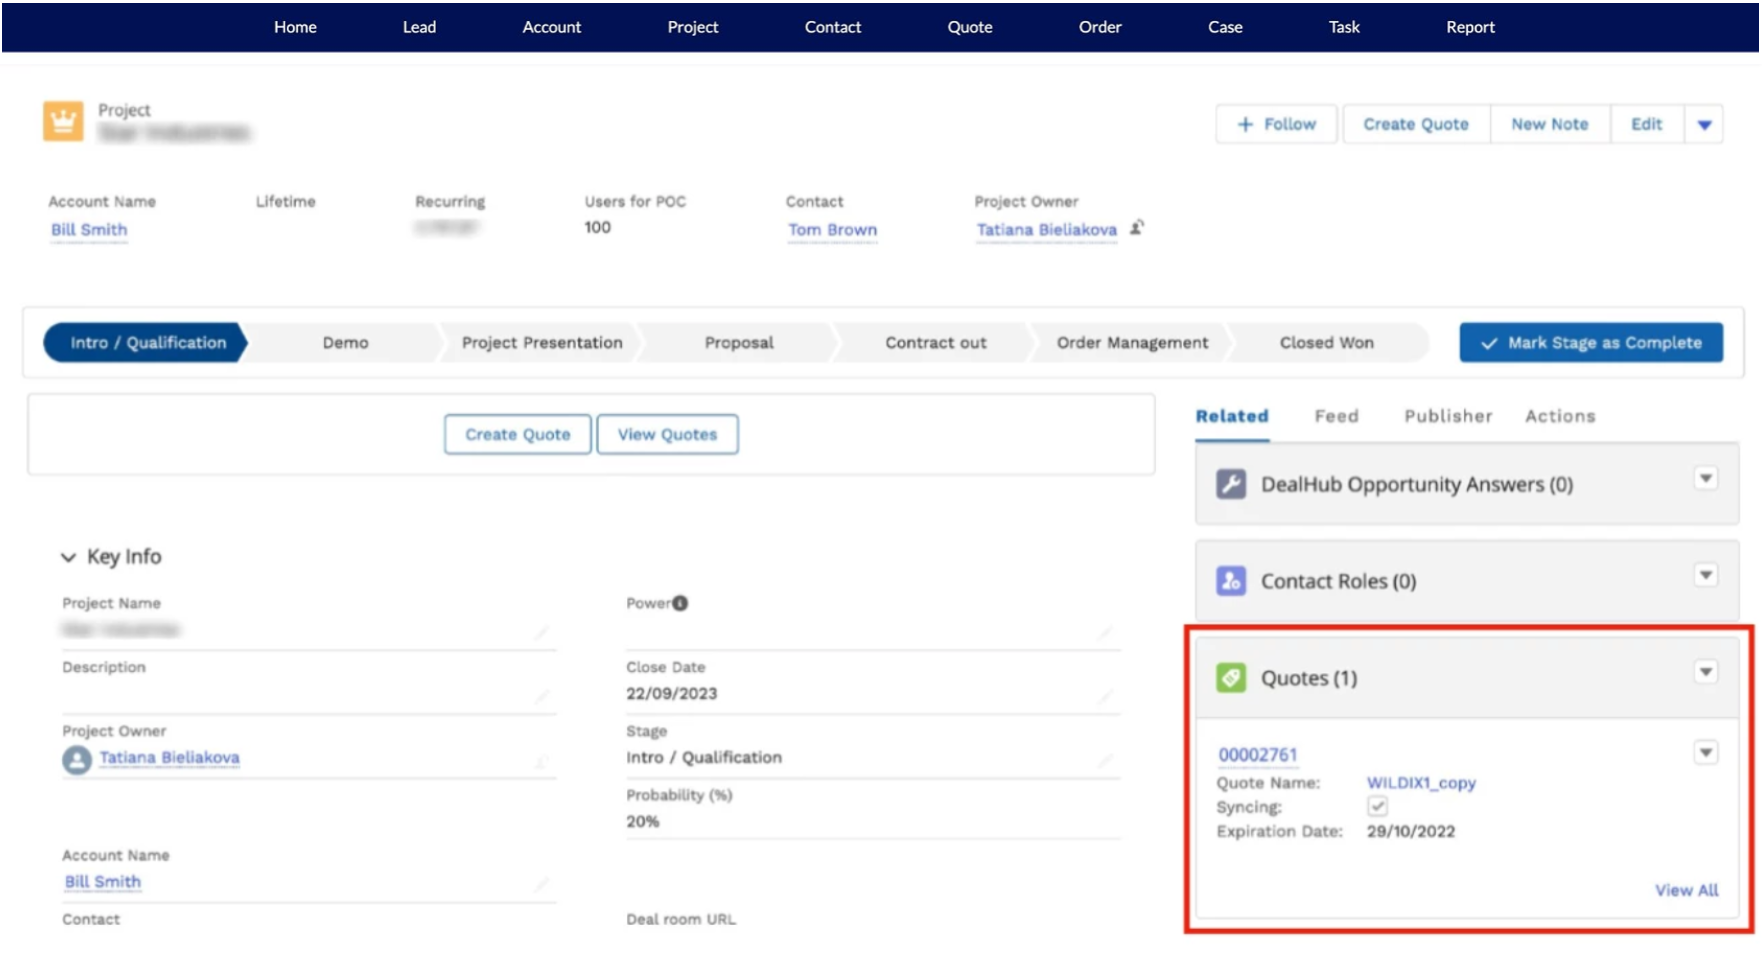
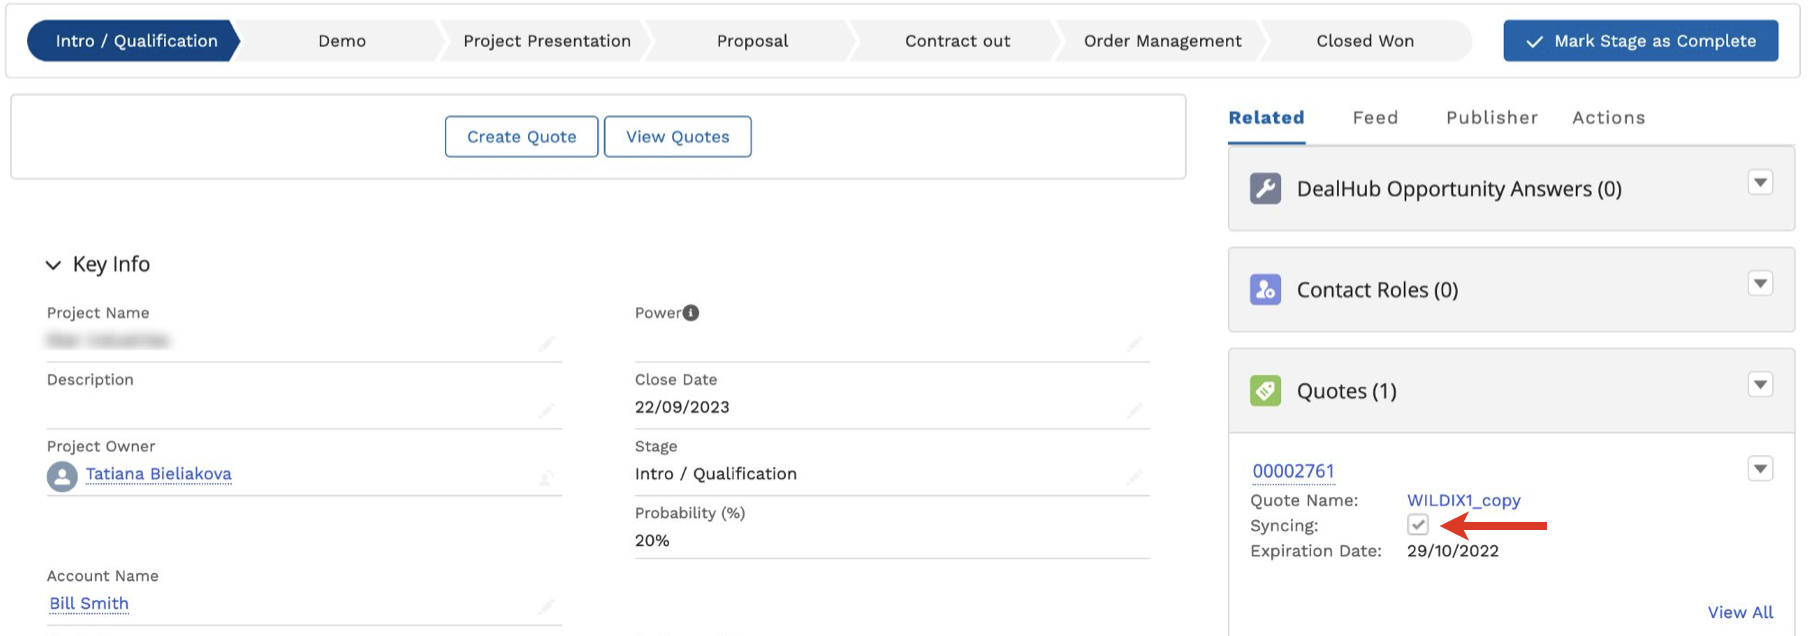
The saved quotes appear in the Quotes section of the Project page:
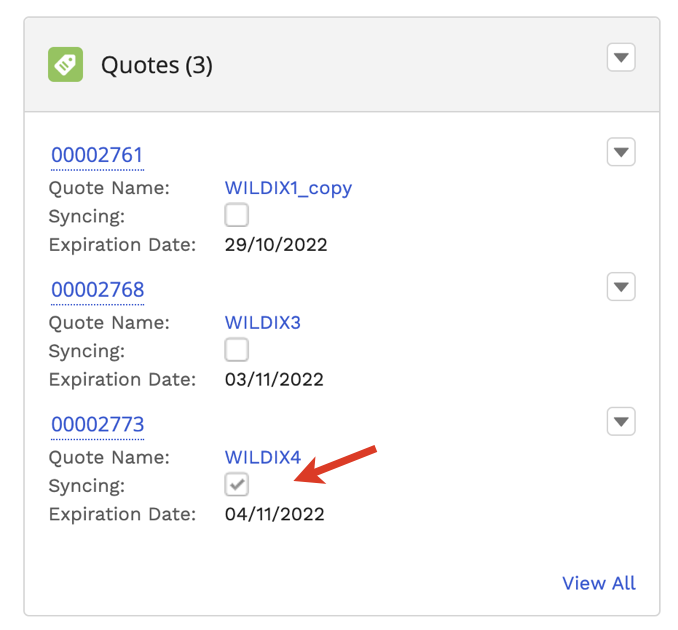
The checkbox in the field Syncing indicates that everything is synced correctly:
Note: If you have several quote drafts, only one of the quotes can be primary and synced. Only primary quote can be further converted into order.
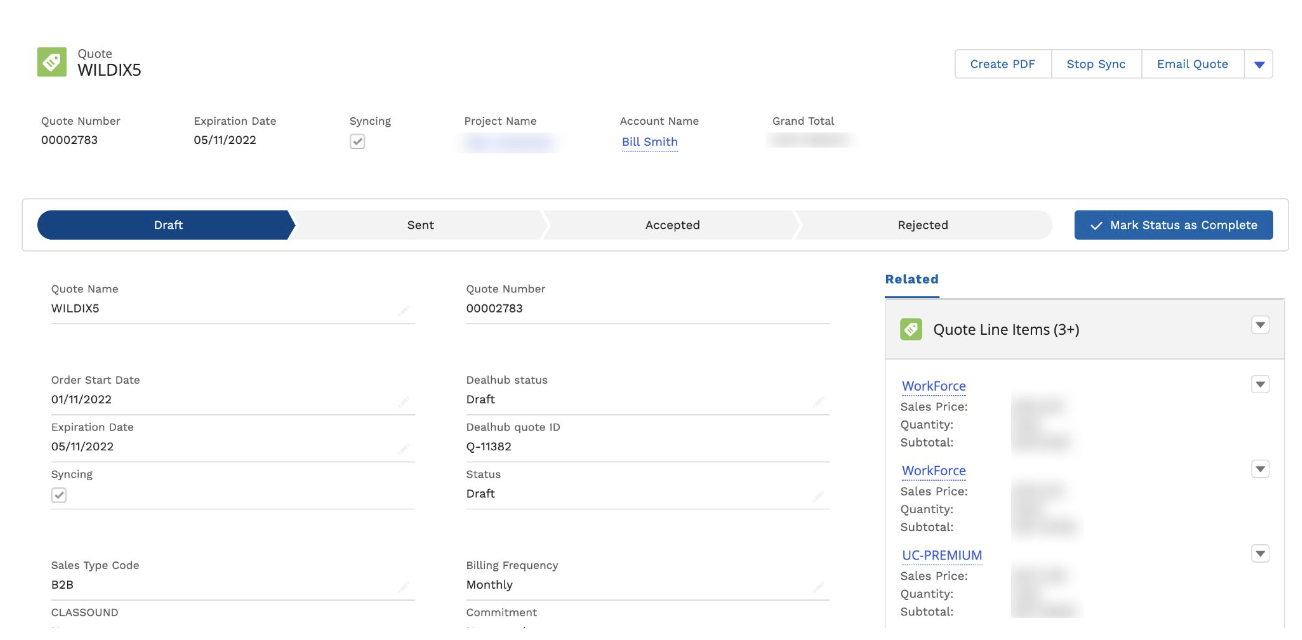
To view quote details, you can click on the quote name:
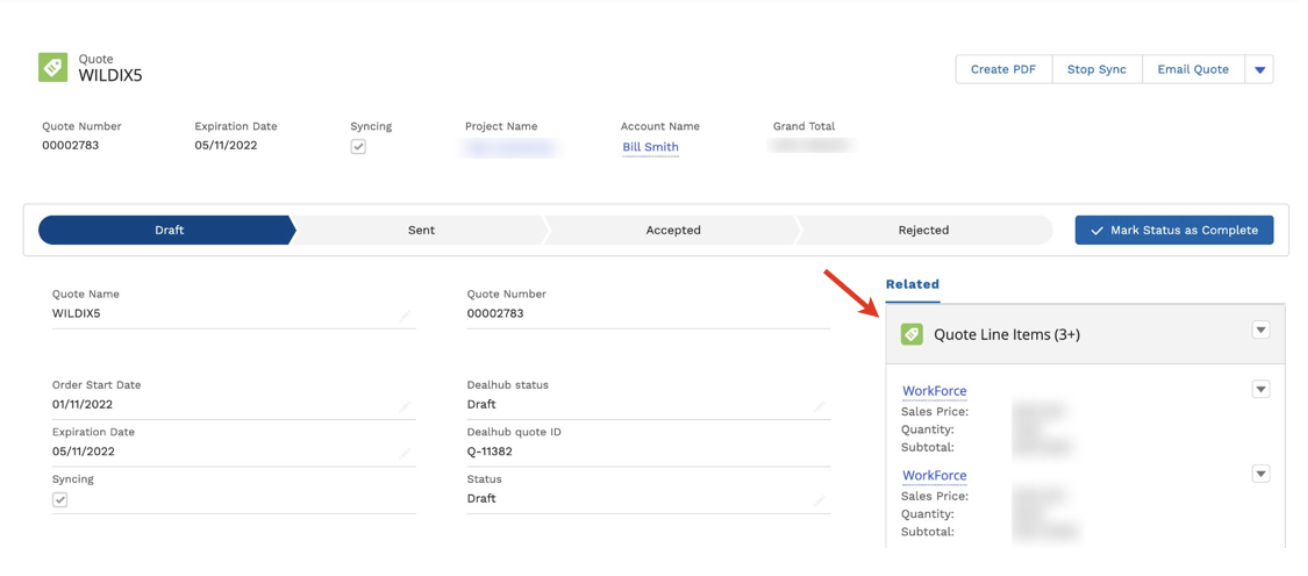
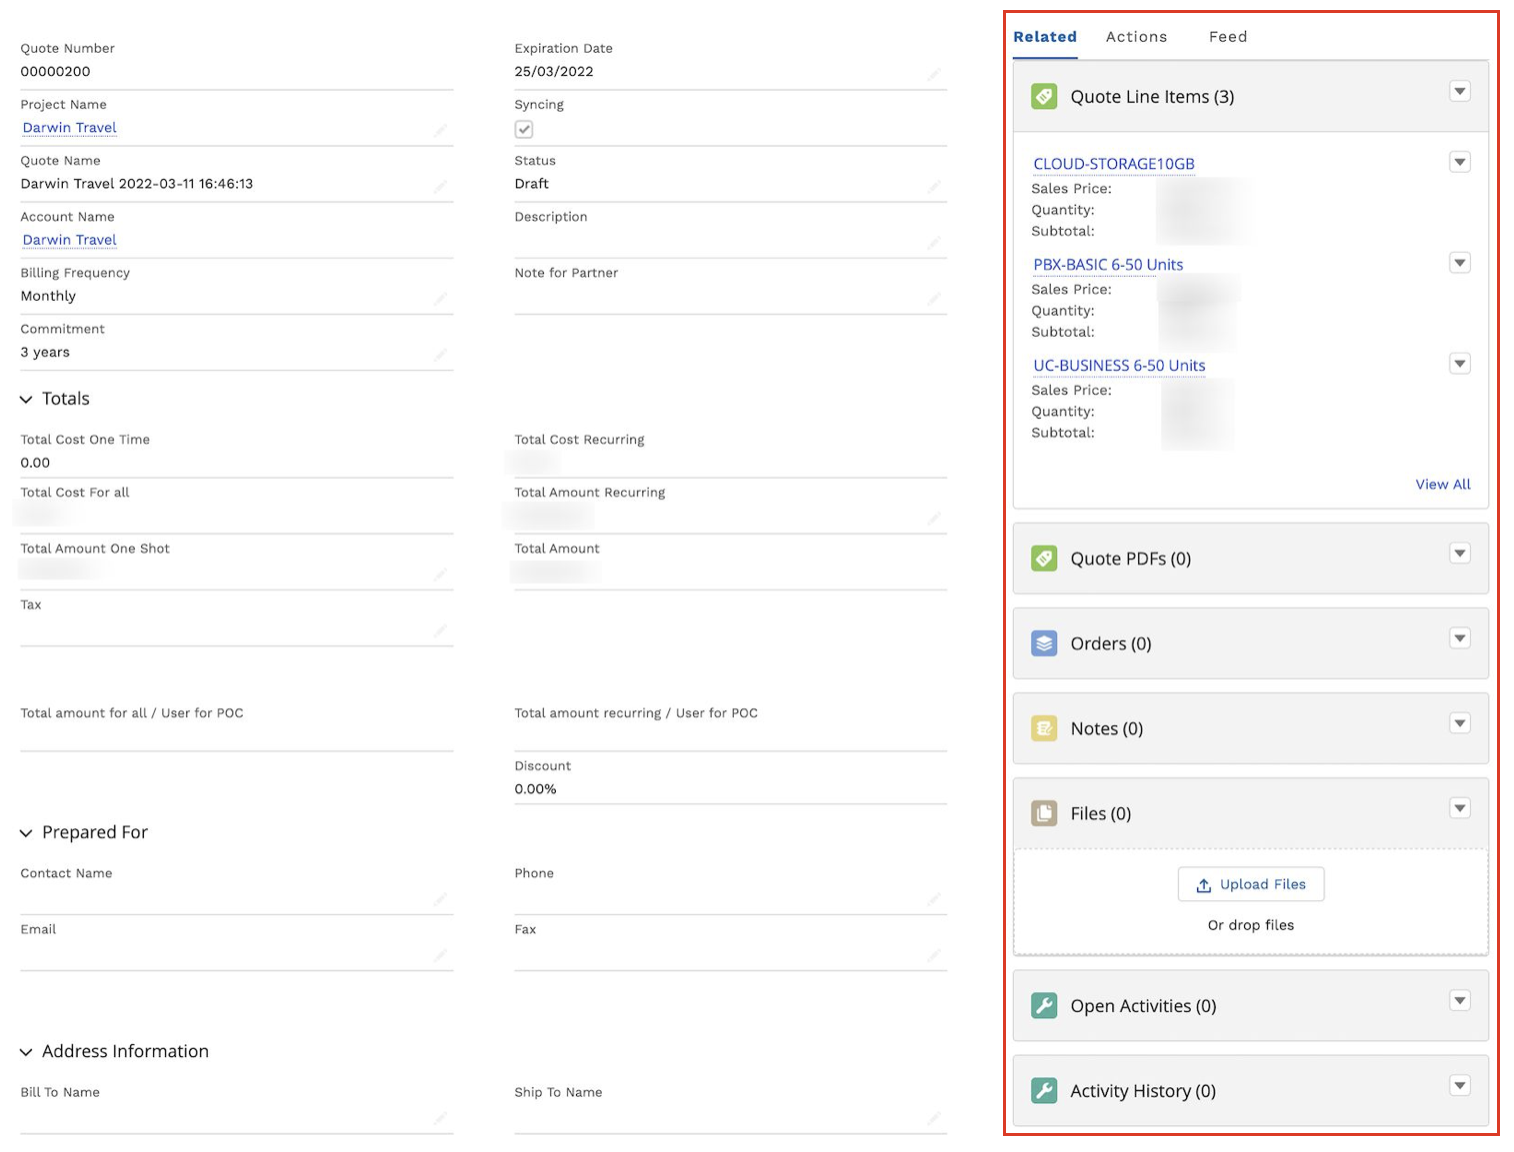
The quote page opens. Here, you can view details of your quote (e.g. quote name, order start and expiration date, total cost, etc.):
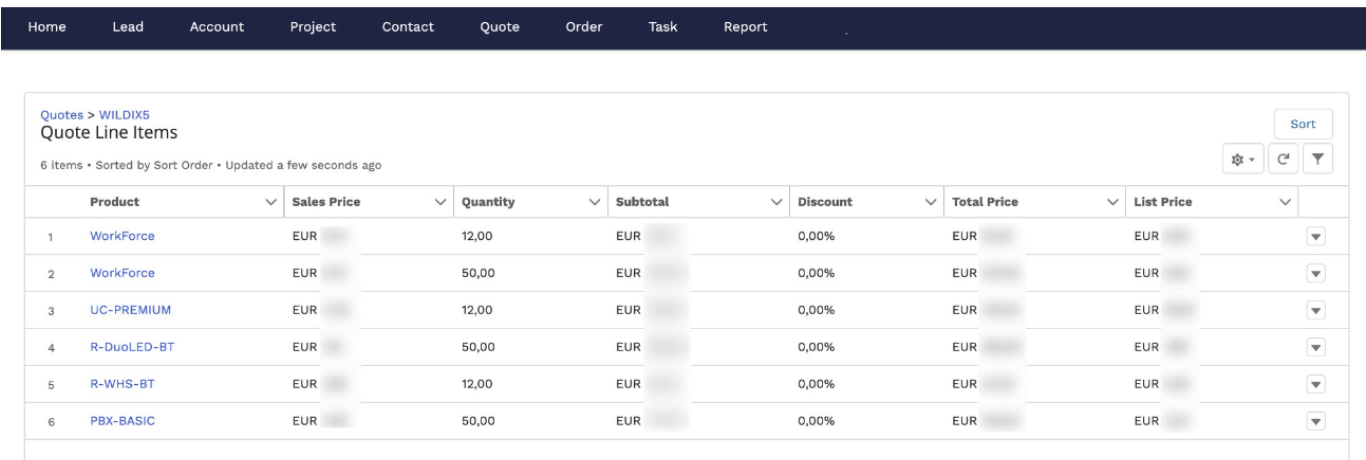
There is section Quote Line Items. Click on it to view the full list of selected items:
The Quote Line Items page opens:
Get Tax
Note: Applicable only for US Partners.
After you save and make the Quote primary, return to the Tax section and click Get tax:
Note: Tax calculation could take up to 2 minutes. If you can't see taxes after 2 mins, you may need to reload the page.
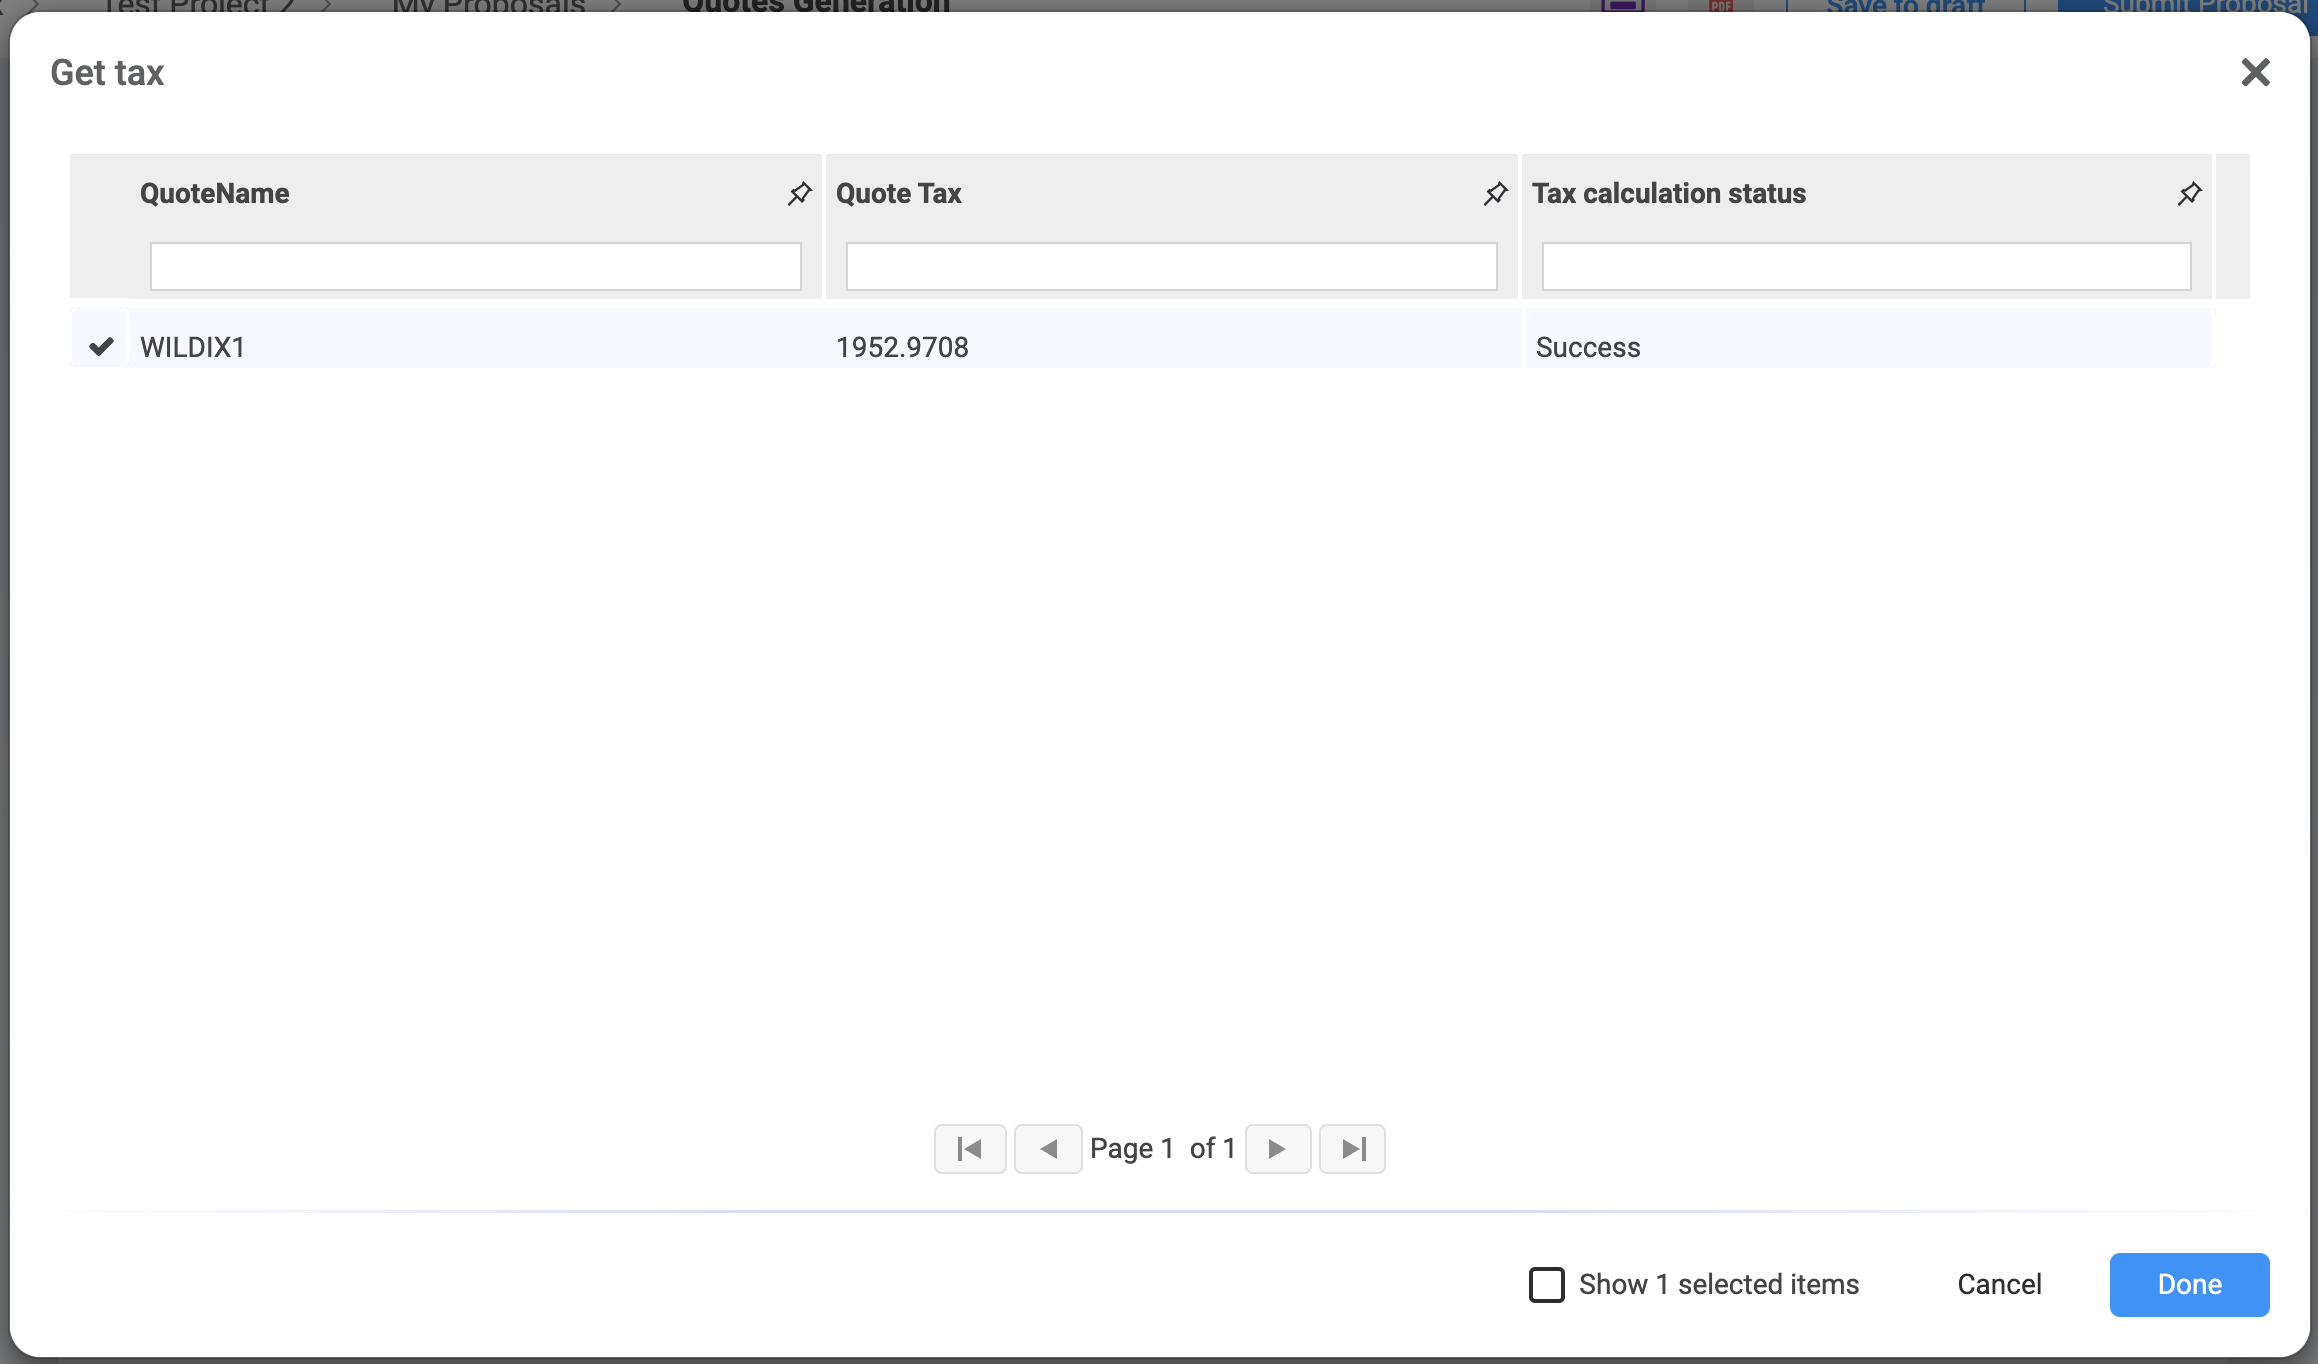
On the window that opens, select the tax that displays (you can see quote name, amount of tax, and tax calculation status) and click Done:
Manage existing Quotes
You can sort Tasks out by clicking on List Views:
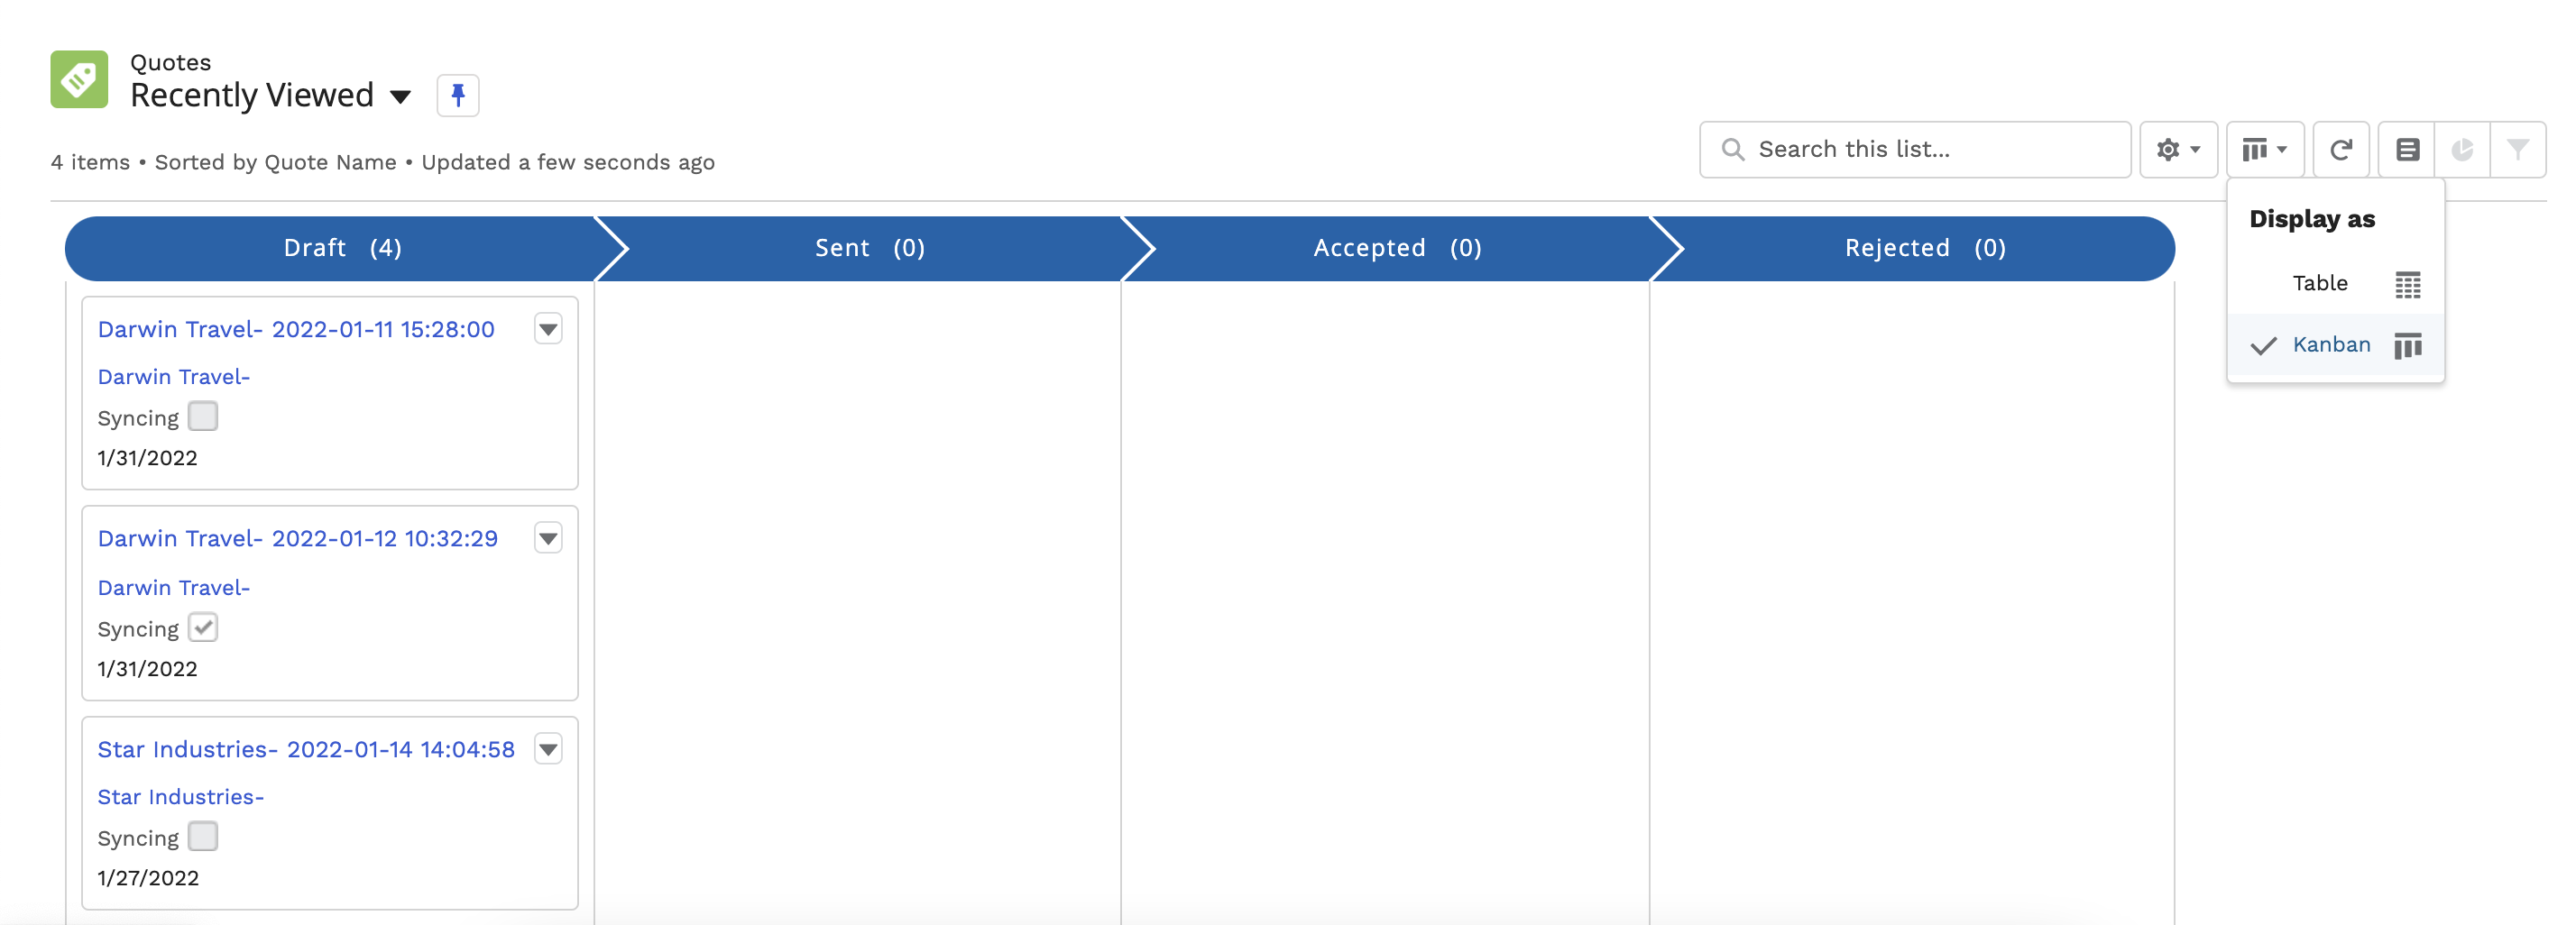
It is also possible to display Quotes as a Kanban board by clicking on Display as:
- To open a Quote, click on its Name
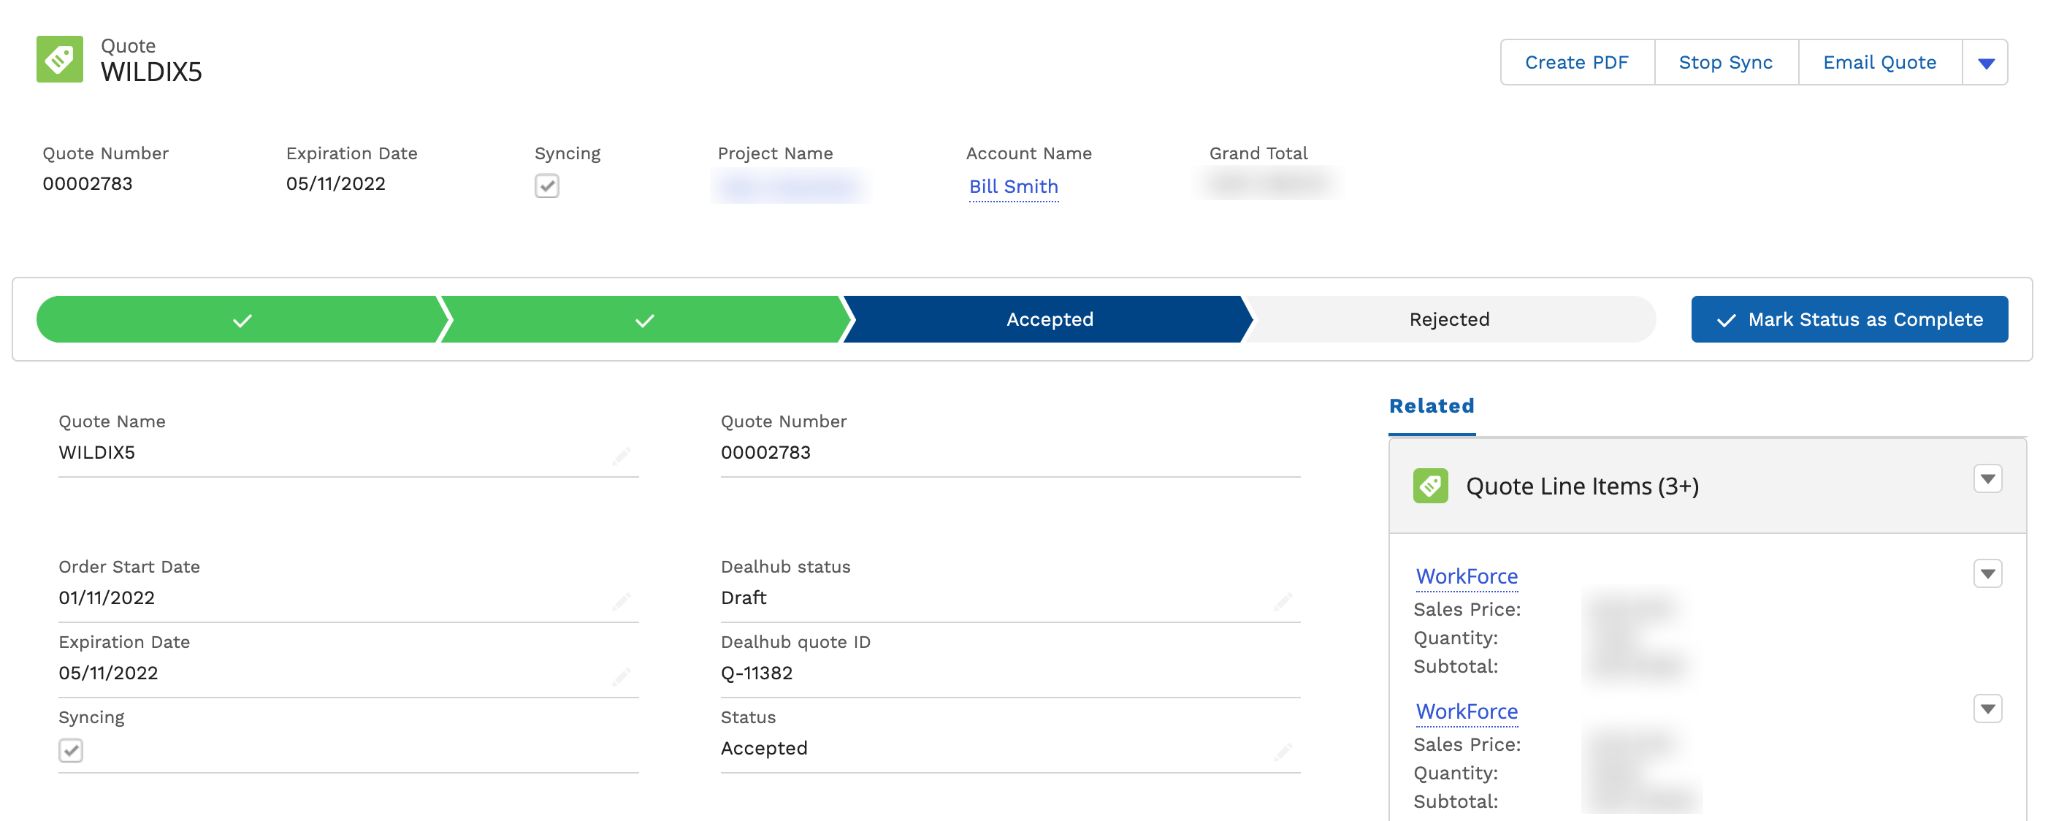
From the Options Panel, you can create a PDF, stop sync, or send the Quote via email
From the Related Details and Actions Panel, you can view the list of related Products/ Services, add Notes, upload attachments, create Tasks
Order
Create an Order from a Quote
- Proceed to your quote: Project -> Quotes -> click on the quote name:
At the top of the quote page, click on the status Accepted:
Note: Quote can also be accepted automatically – when the quote is signed by both parties via DealRoom. In this case, quote status automatically changes to Accepted and the relevant order is created.
- Then, click Mark as Current Status:
- The status is successfully changed:
You can now find the quote on the Order page.
Once you mark Accepted quote status as Complete, the quote is converted into order and is available on the Order page:
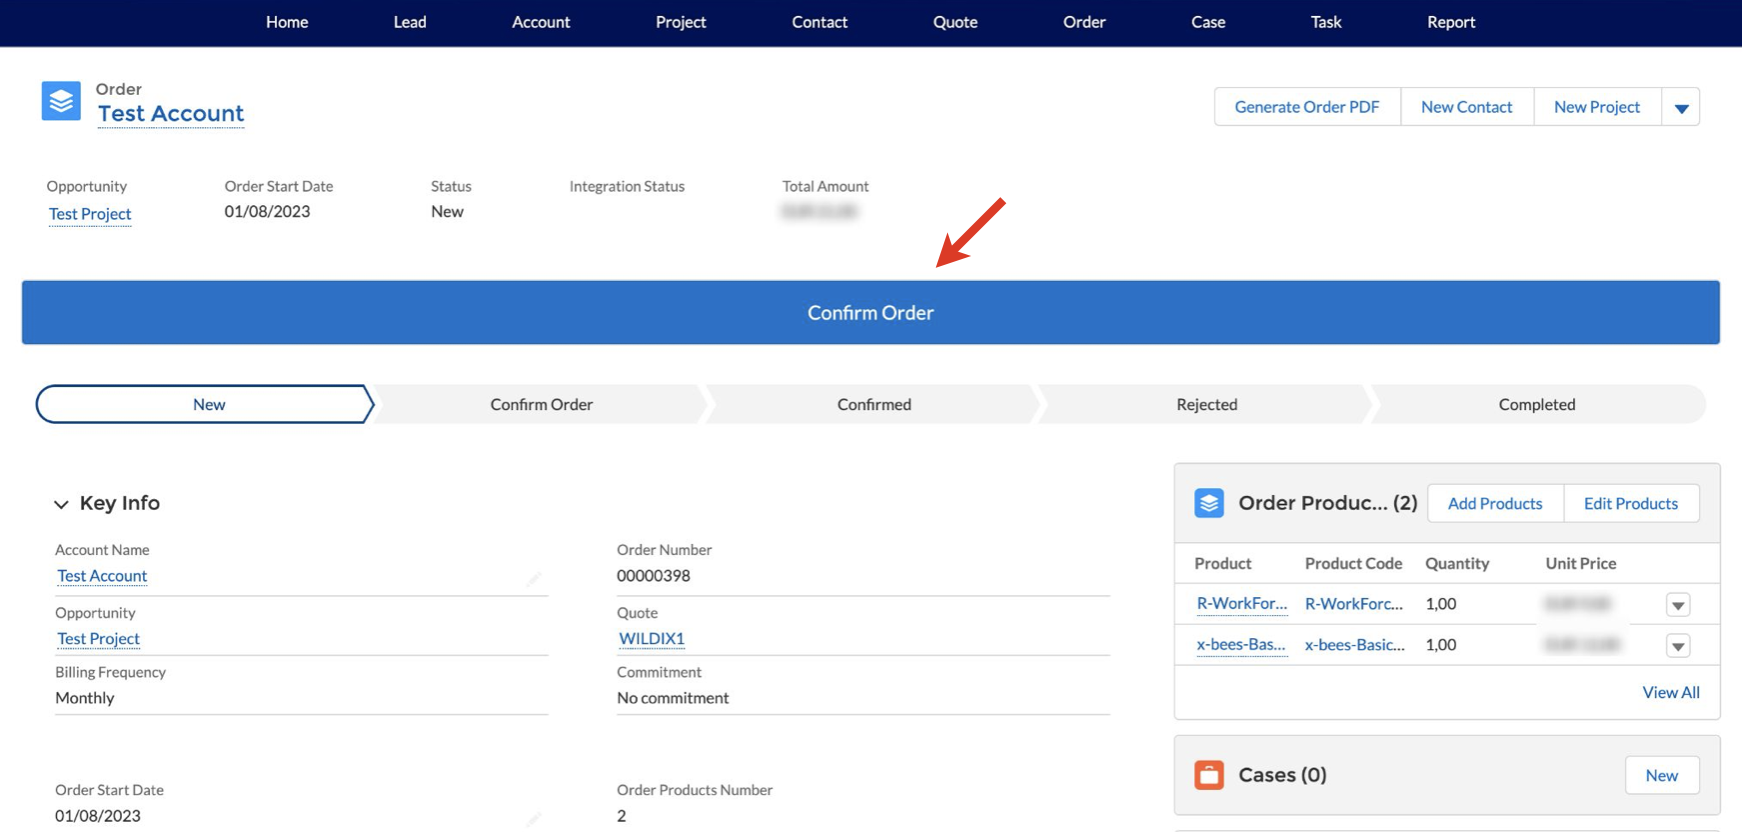
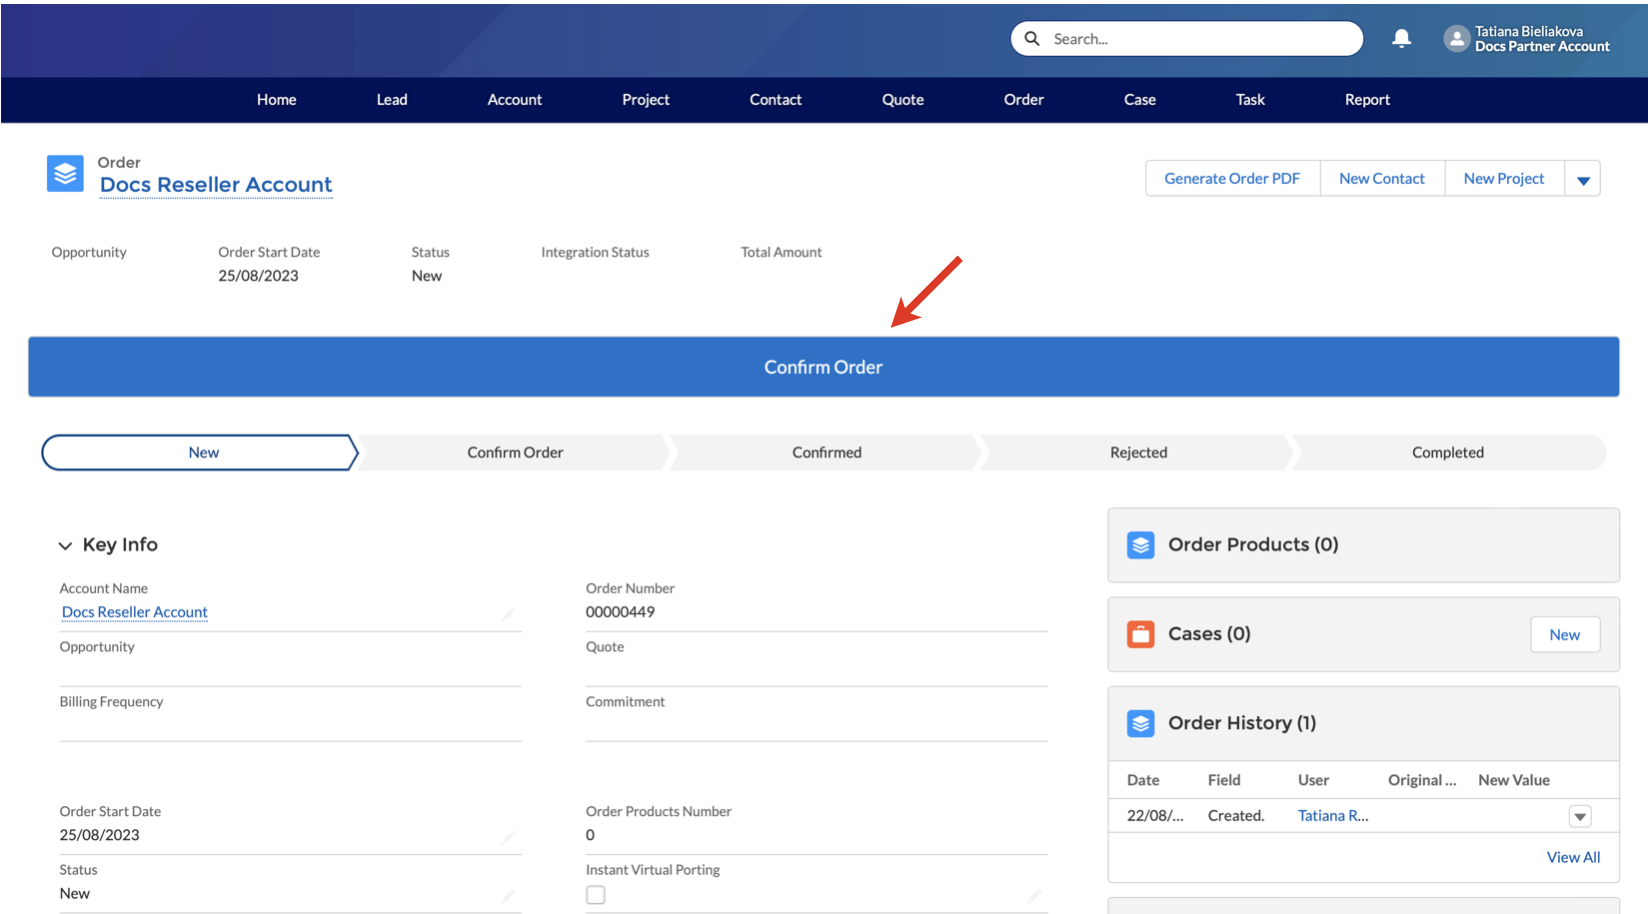
To proceed with the order, click Confirm Order:
Note: The Confirm Order button is active on "New" status (in order to confirm a new order) and on "Rejected" status (in order to reconfirm the order that was rejected for some reason).
Then, you can select CAPEX items that should be delivered from Wildix and click Next:
Note: Only CAPEX items are displayed.
If you uncheck the items, the deselected items will not be processed by Wildix.
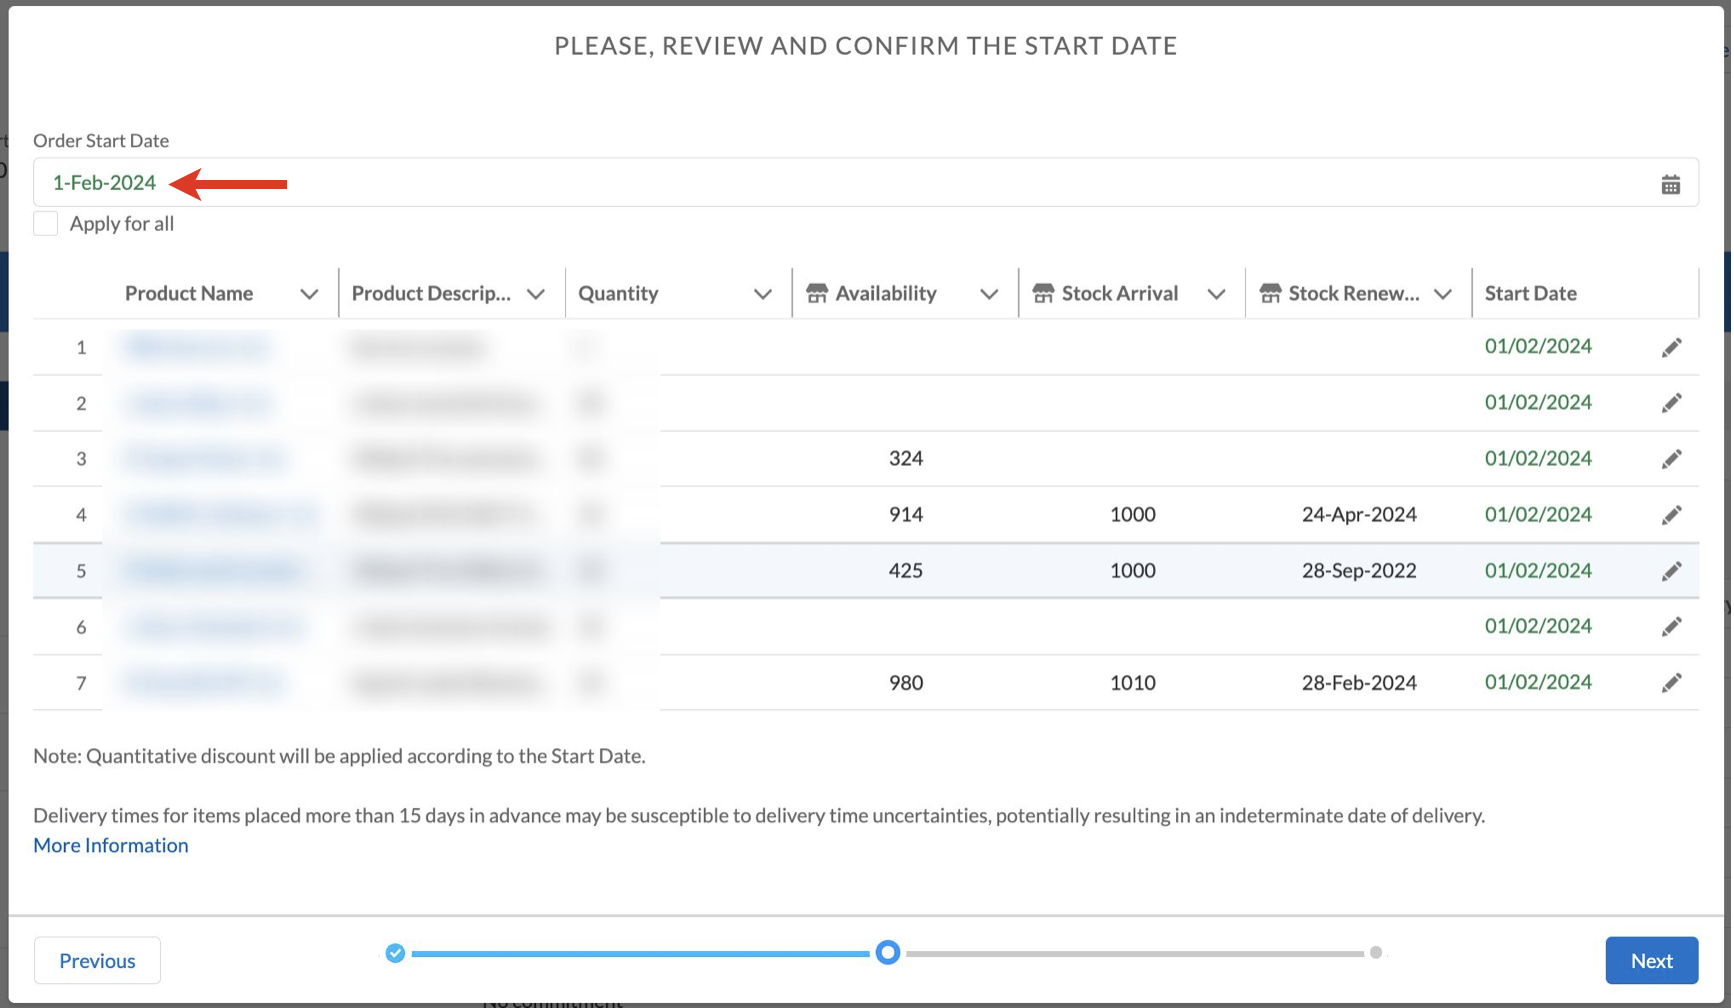
On the next screen, you can see the list of items. Check the Order Start Date. In case you need to change the start date, you have the following options:
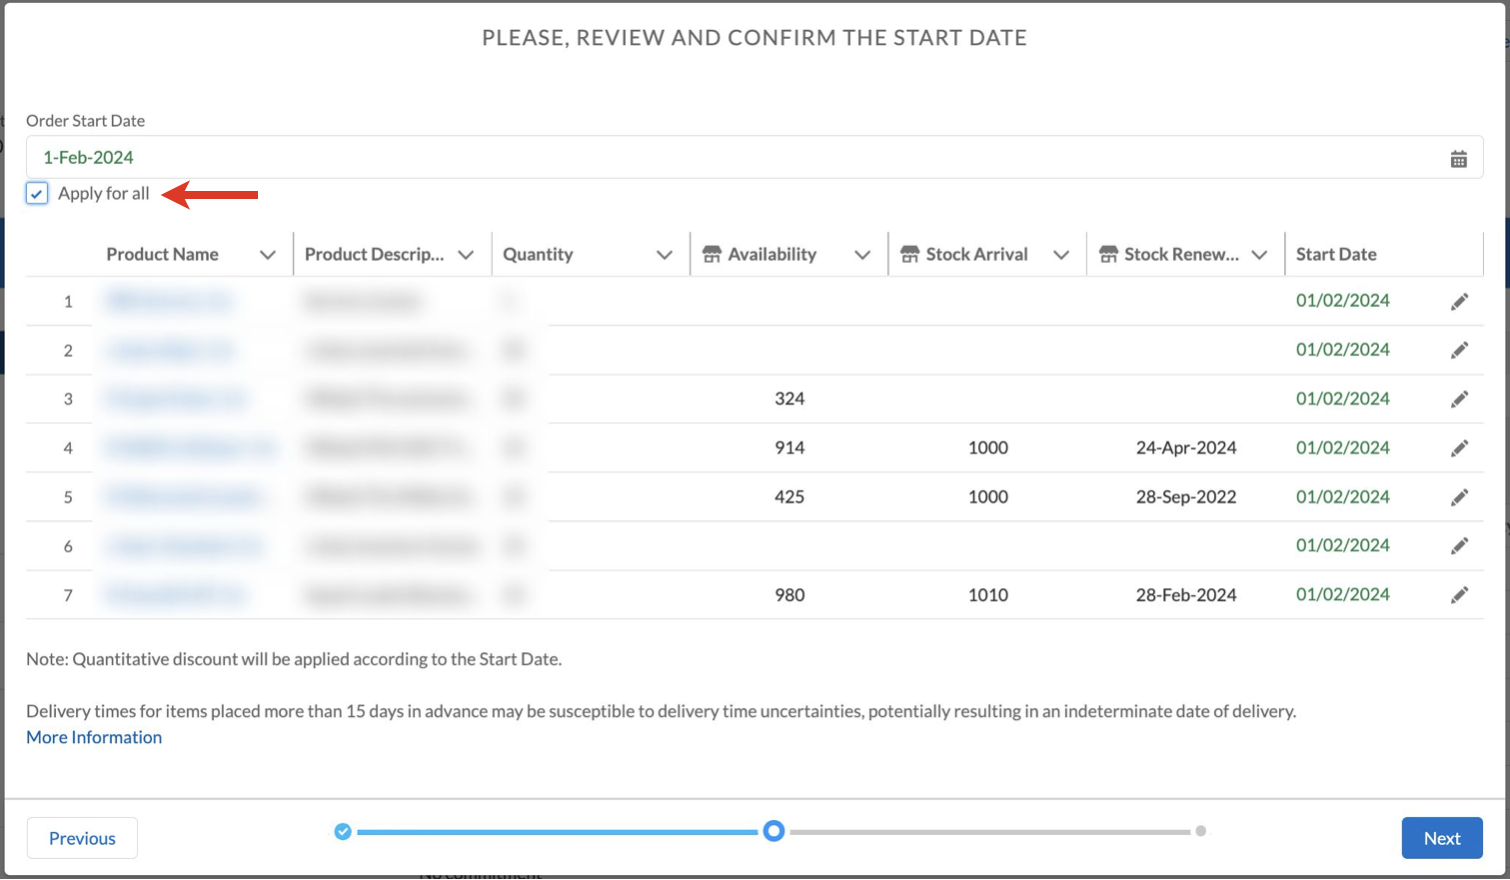
a) Change start date for all products:
- Enter the date in the field Order Start Date at the top:
- Tick off the checkbox Apply for all to have the new date automatically applied to all items:
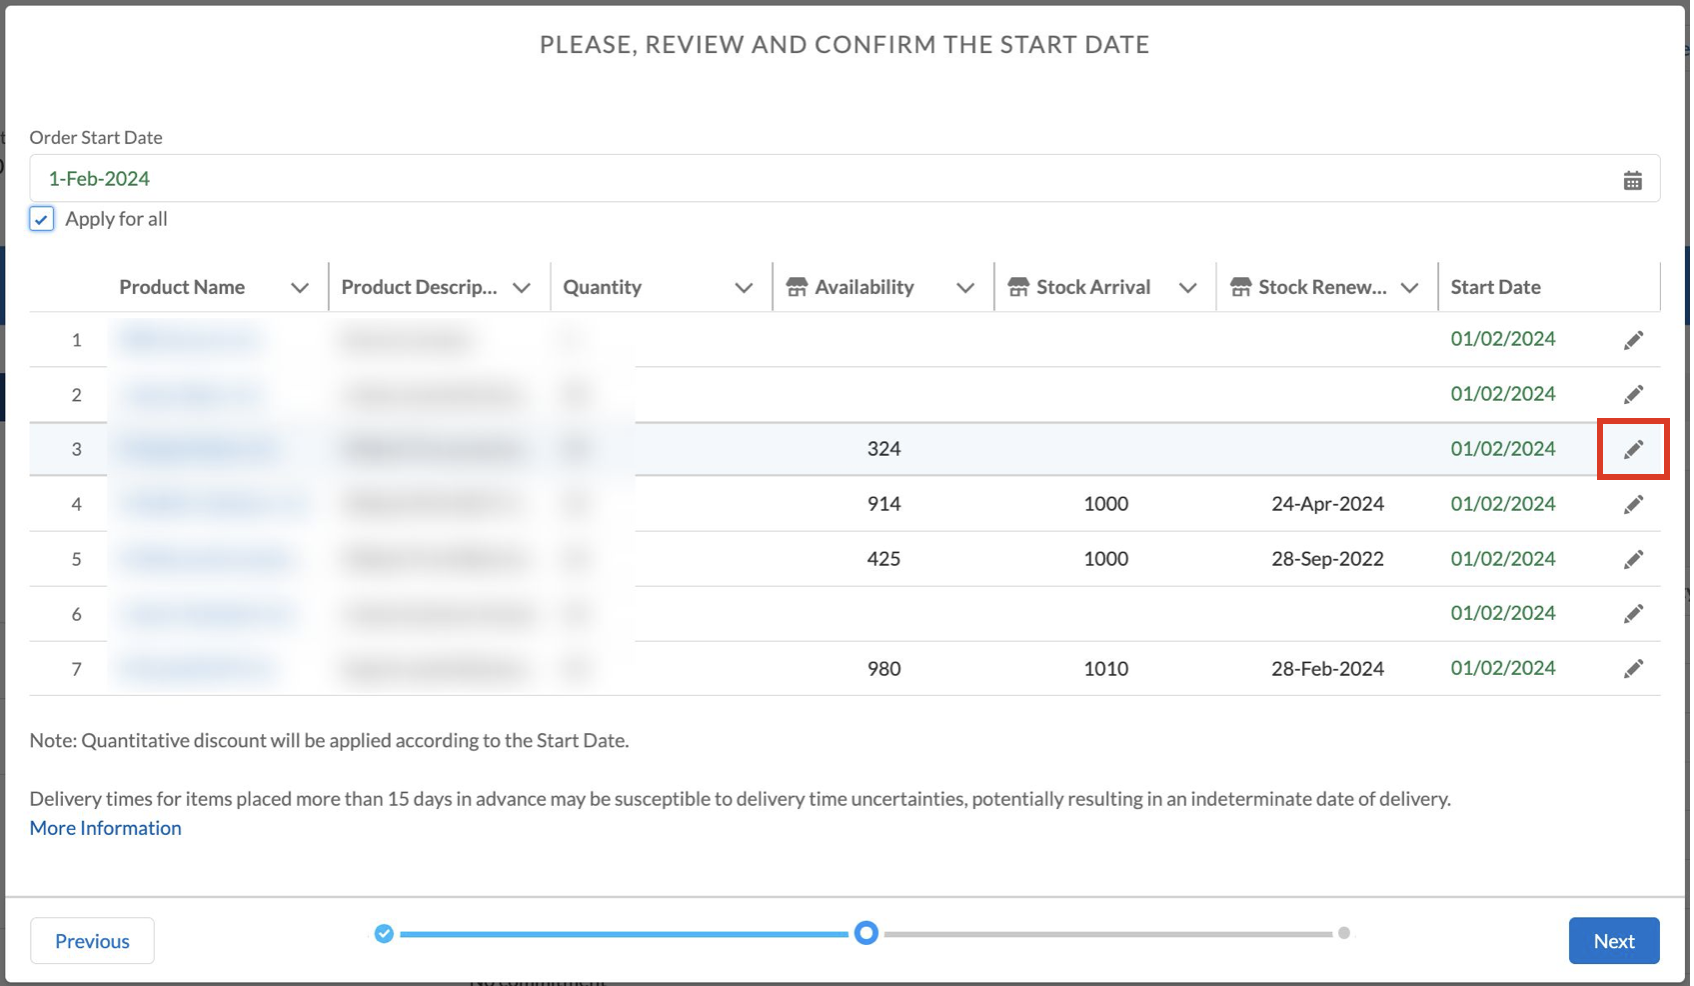
b) Change start date for specific products:
If you want to change order start date for some products only, click on the Edit button (pencil icon) in front of the date of the selected product:
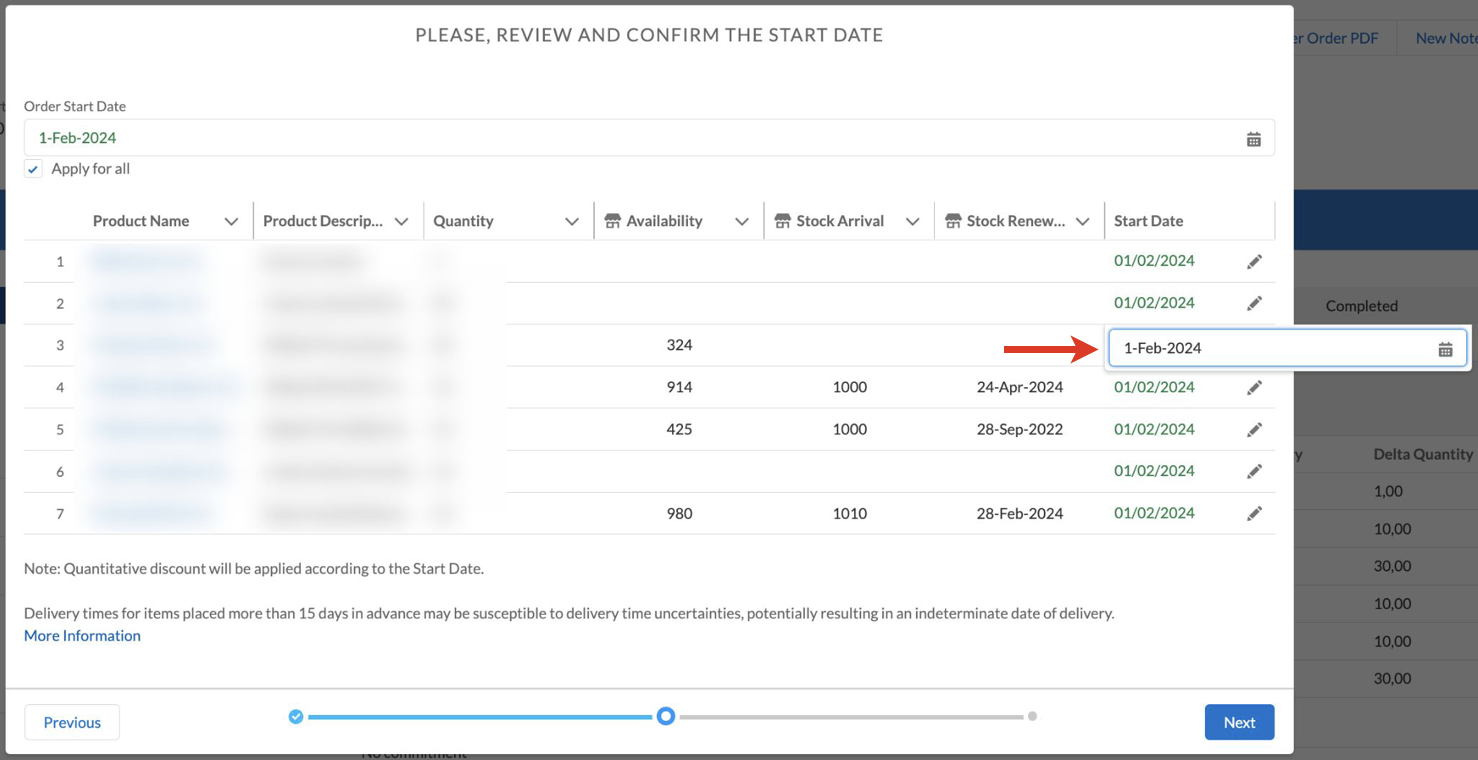
Choose the preferred date:
Once completed, click Next.
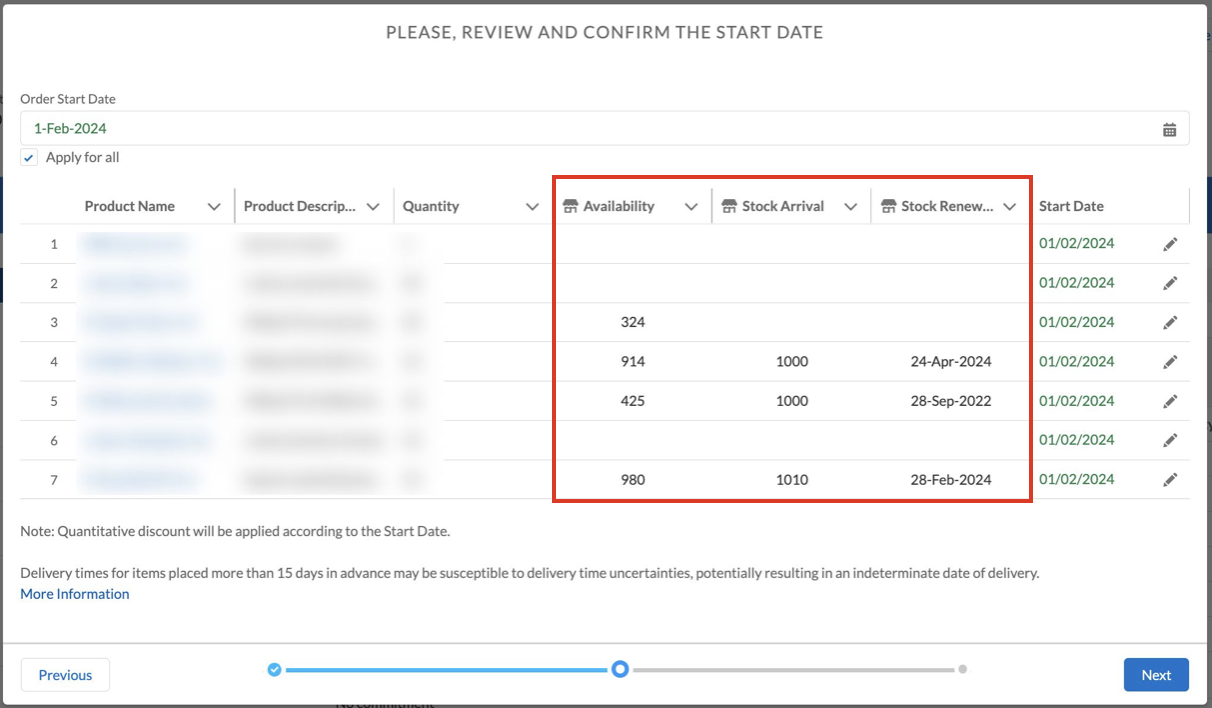
Also, during order confirmation you can view the availability of items and when they should arrive in Wildix stock:
- Availability: here you can see the number of items currently in Wildix stock
- Stock Arrival: how many items are planned to arrive
- Stock Renewal Date: date when new items should arrive at Wildix stock
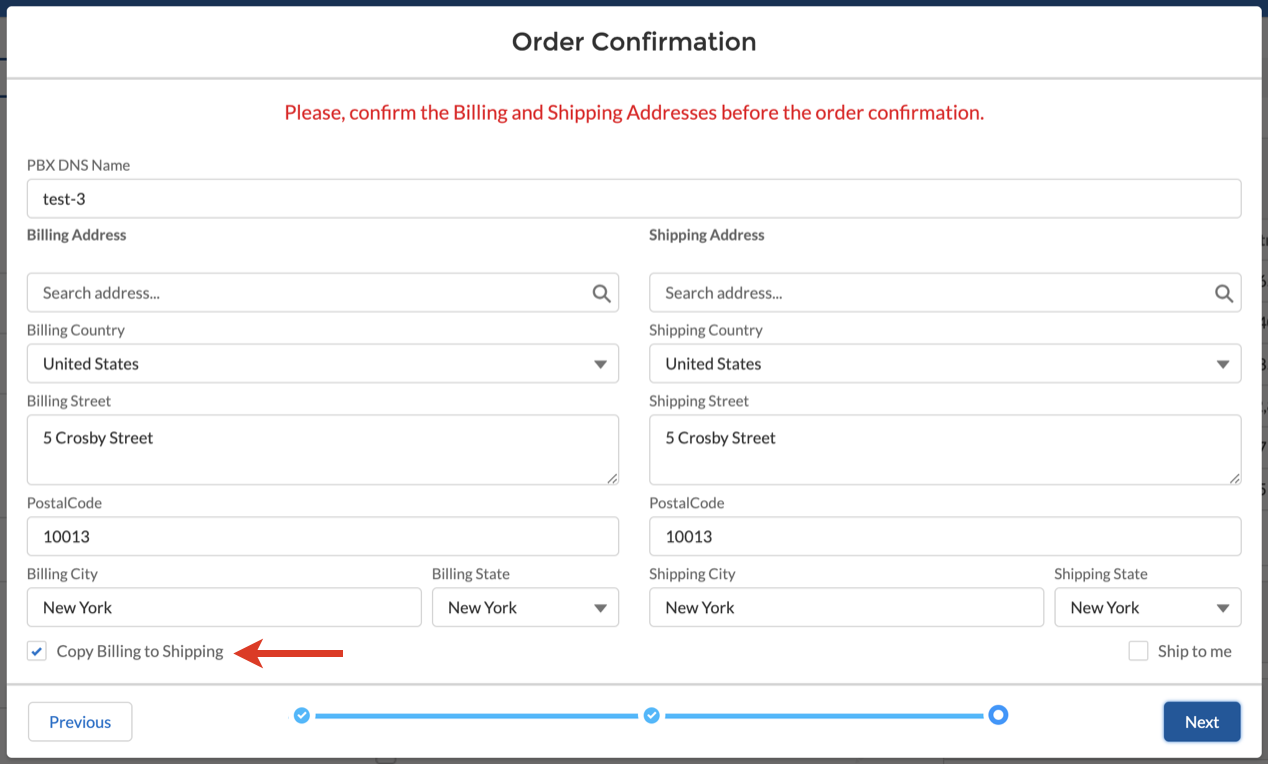
On the next screen, check the Billing and Shipping addresses. If Billing and Shipping addresses are the same, you can tick the checkbox Copy Billing to Shipping at the bottom:
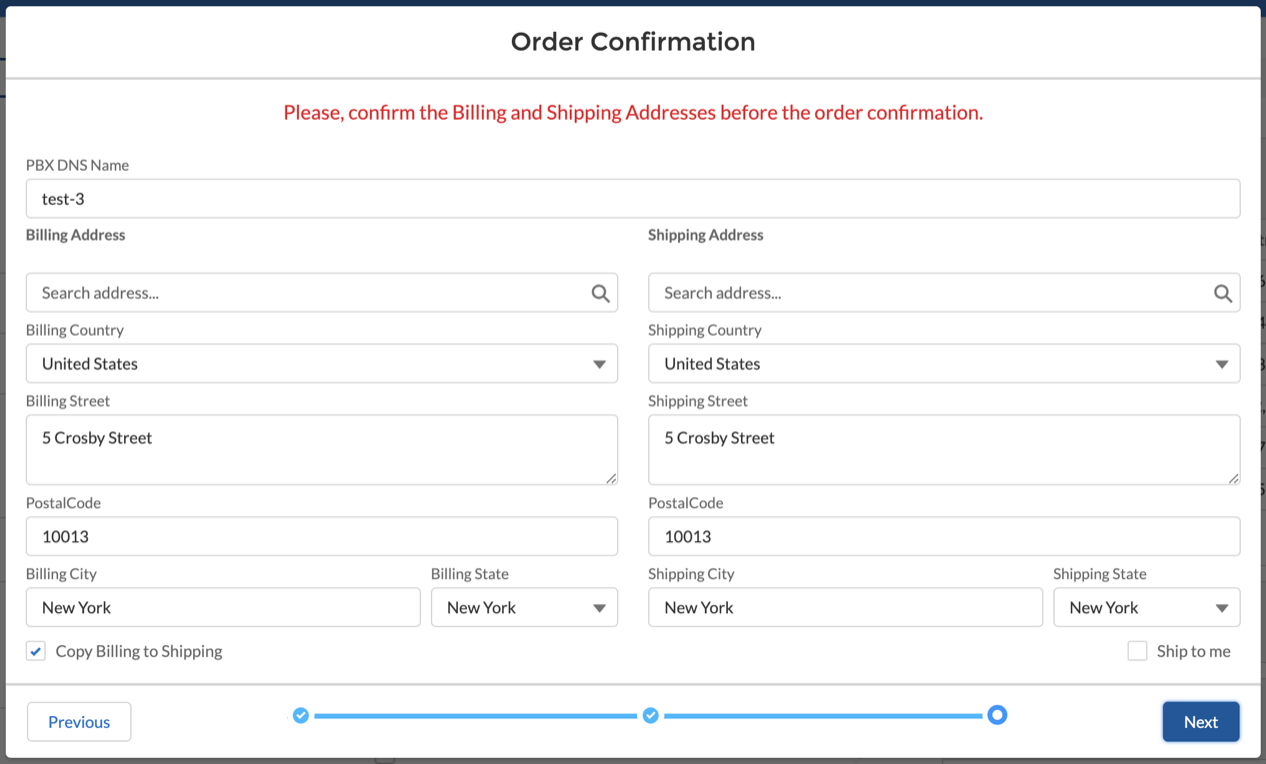
If needed, you can change PBX DNS Name. Enter the name of the PBX in the PBX DNS Name at the top (the following characters are allowed: small letters, symbol “-”, numbers).
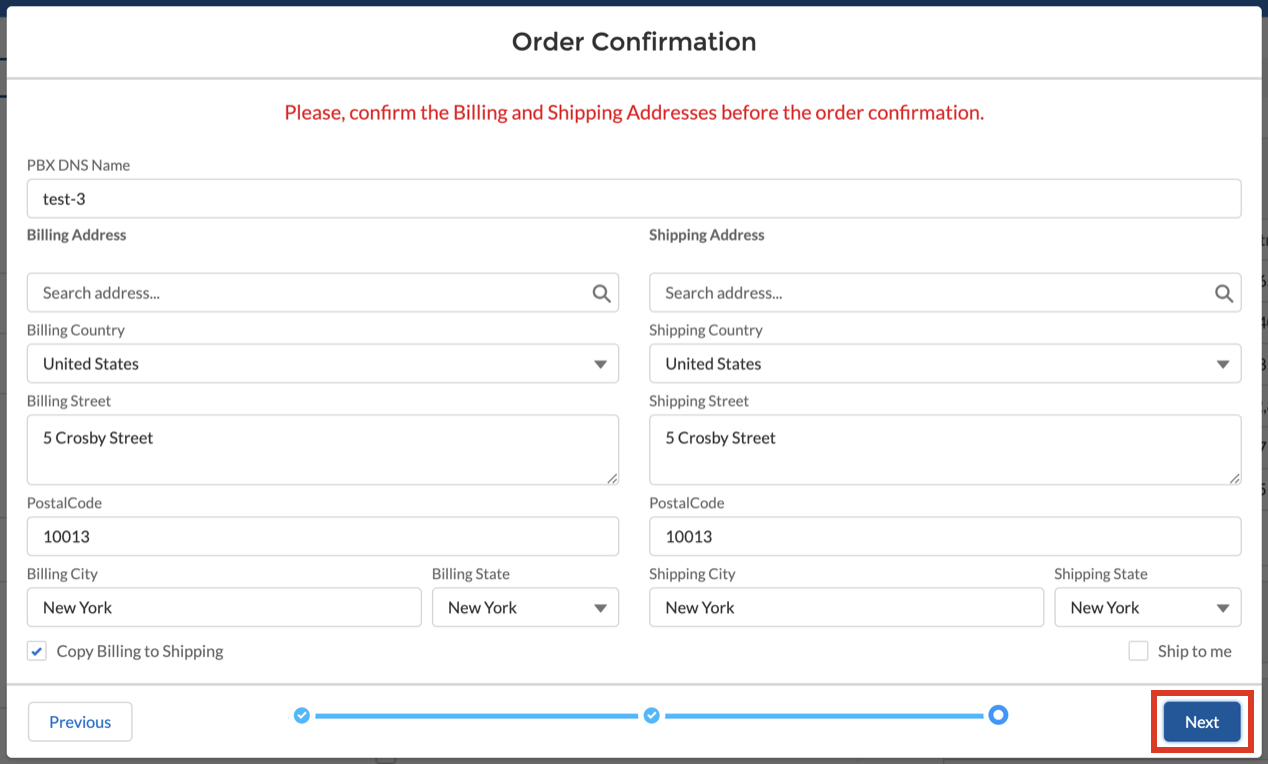
Once completed, click Next:
Click OK on the pop-up screen that appears to confirm the order:
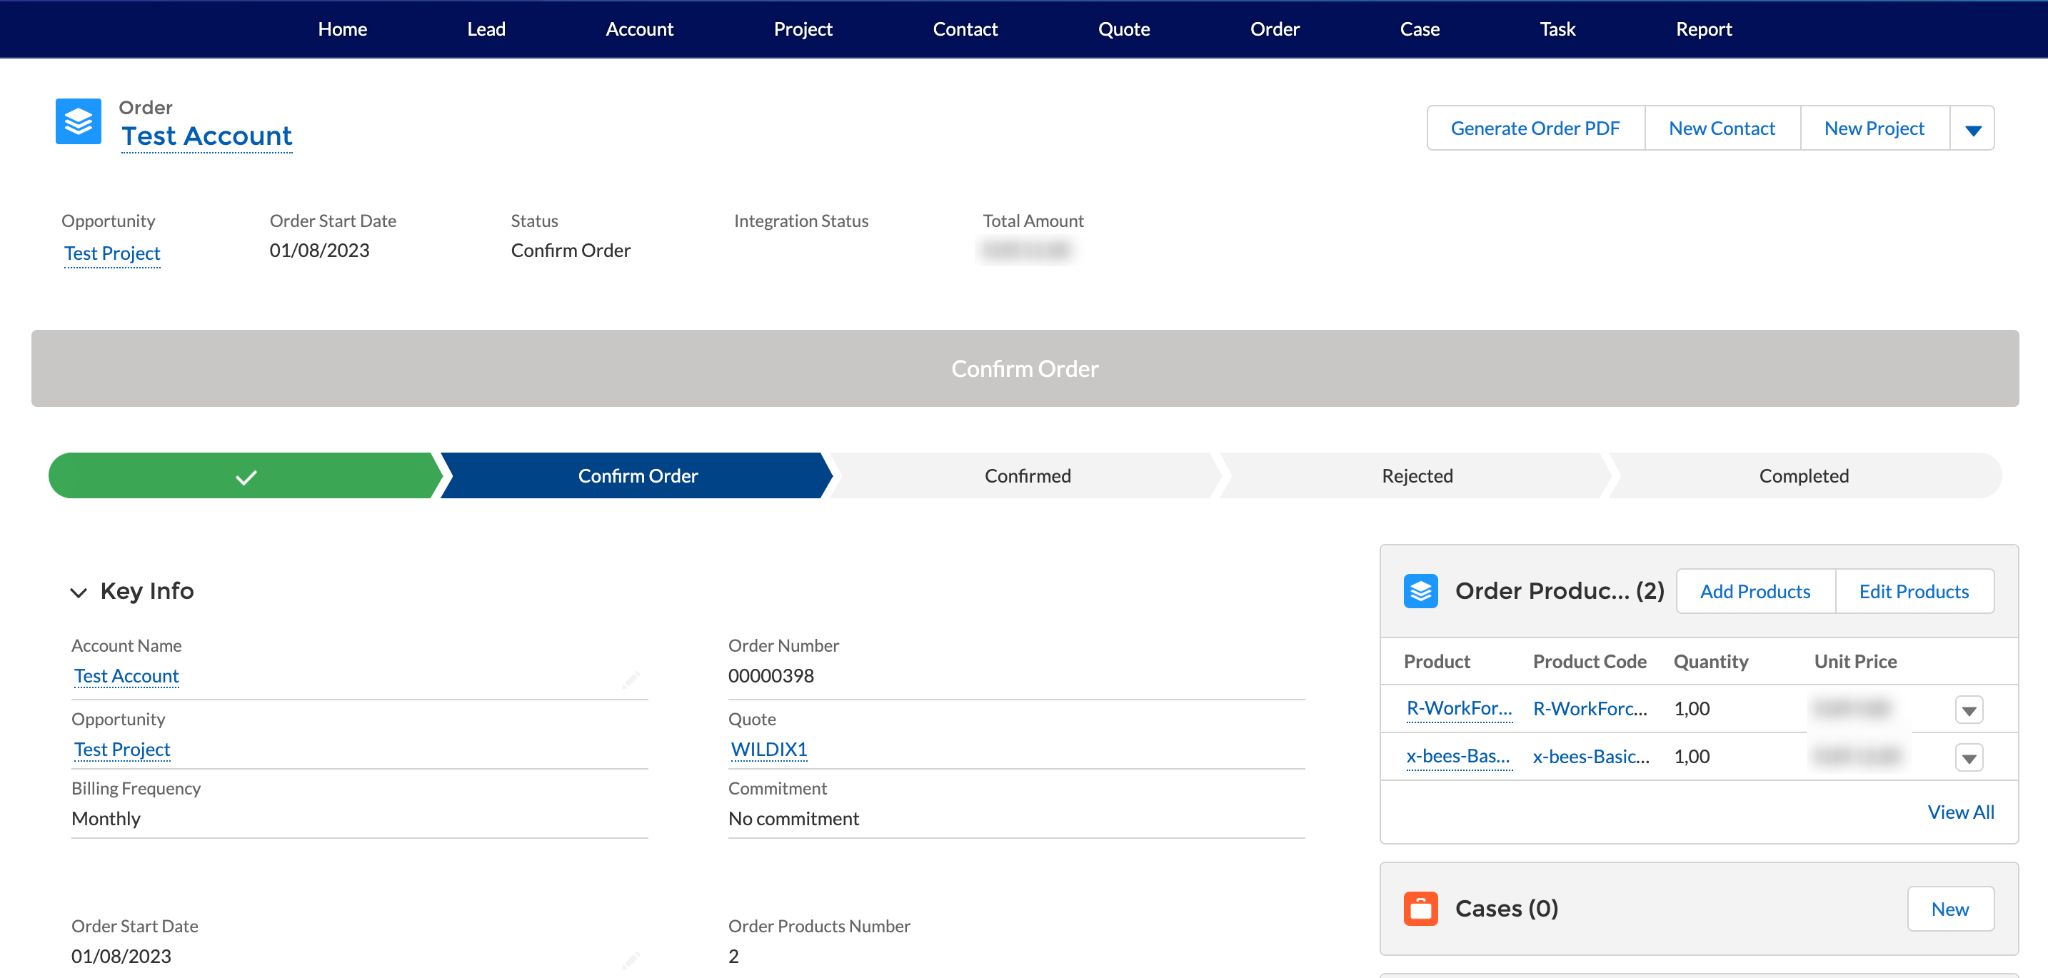
Once order status successfully changed, the first step of the order flow turns green:
Note: After generating the order and clicking Confirm Order, US partners can see a breakdown of taxes for each product in the Tax section and see different types of taxes (before converting quote to an order, there was the total amount of taxes only).
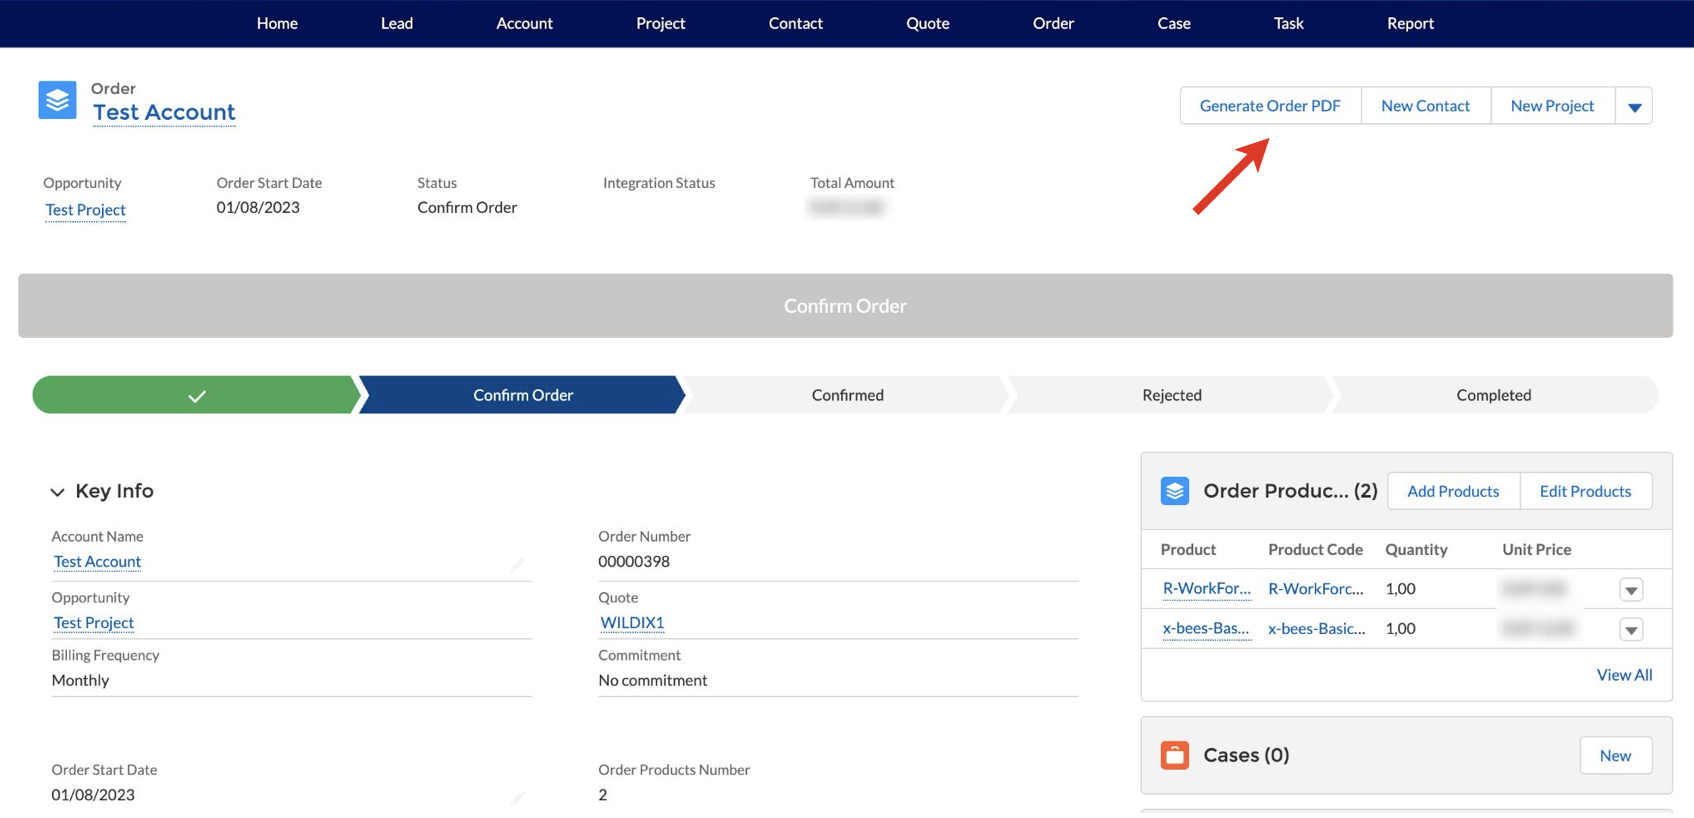
Also, on the Order page you can generate PDF file of the Order, by clicking Generate Order PDF:
Order items to Stock
It is possible to order CAPEX products to your stock, so that you can order products anytime and use them with new or existing PBX:
Go to the Order tab and click on the Order to Stock button:
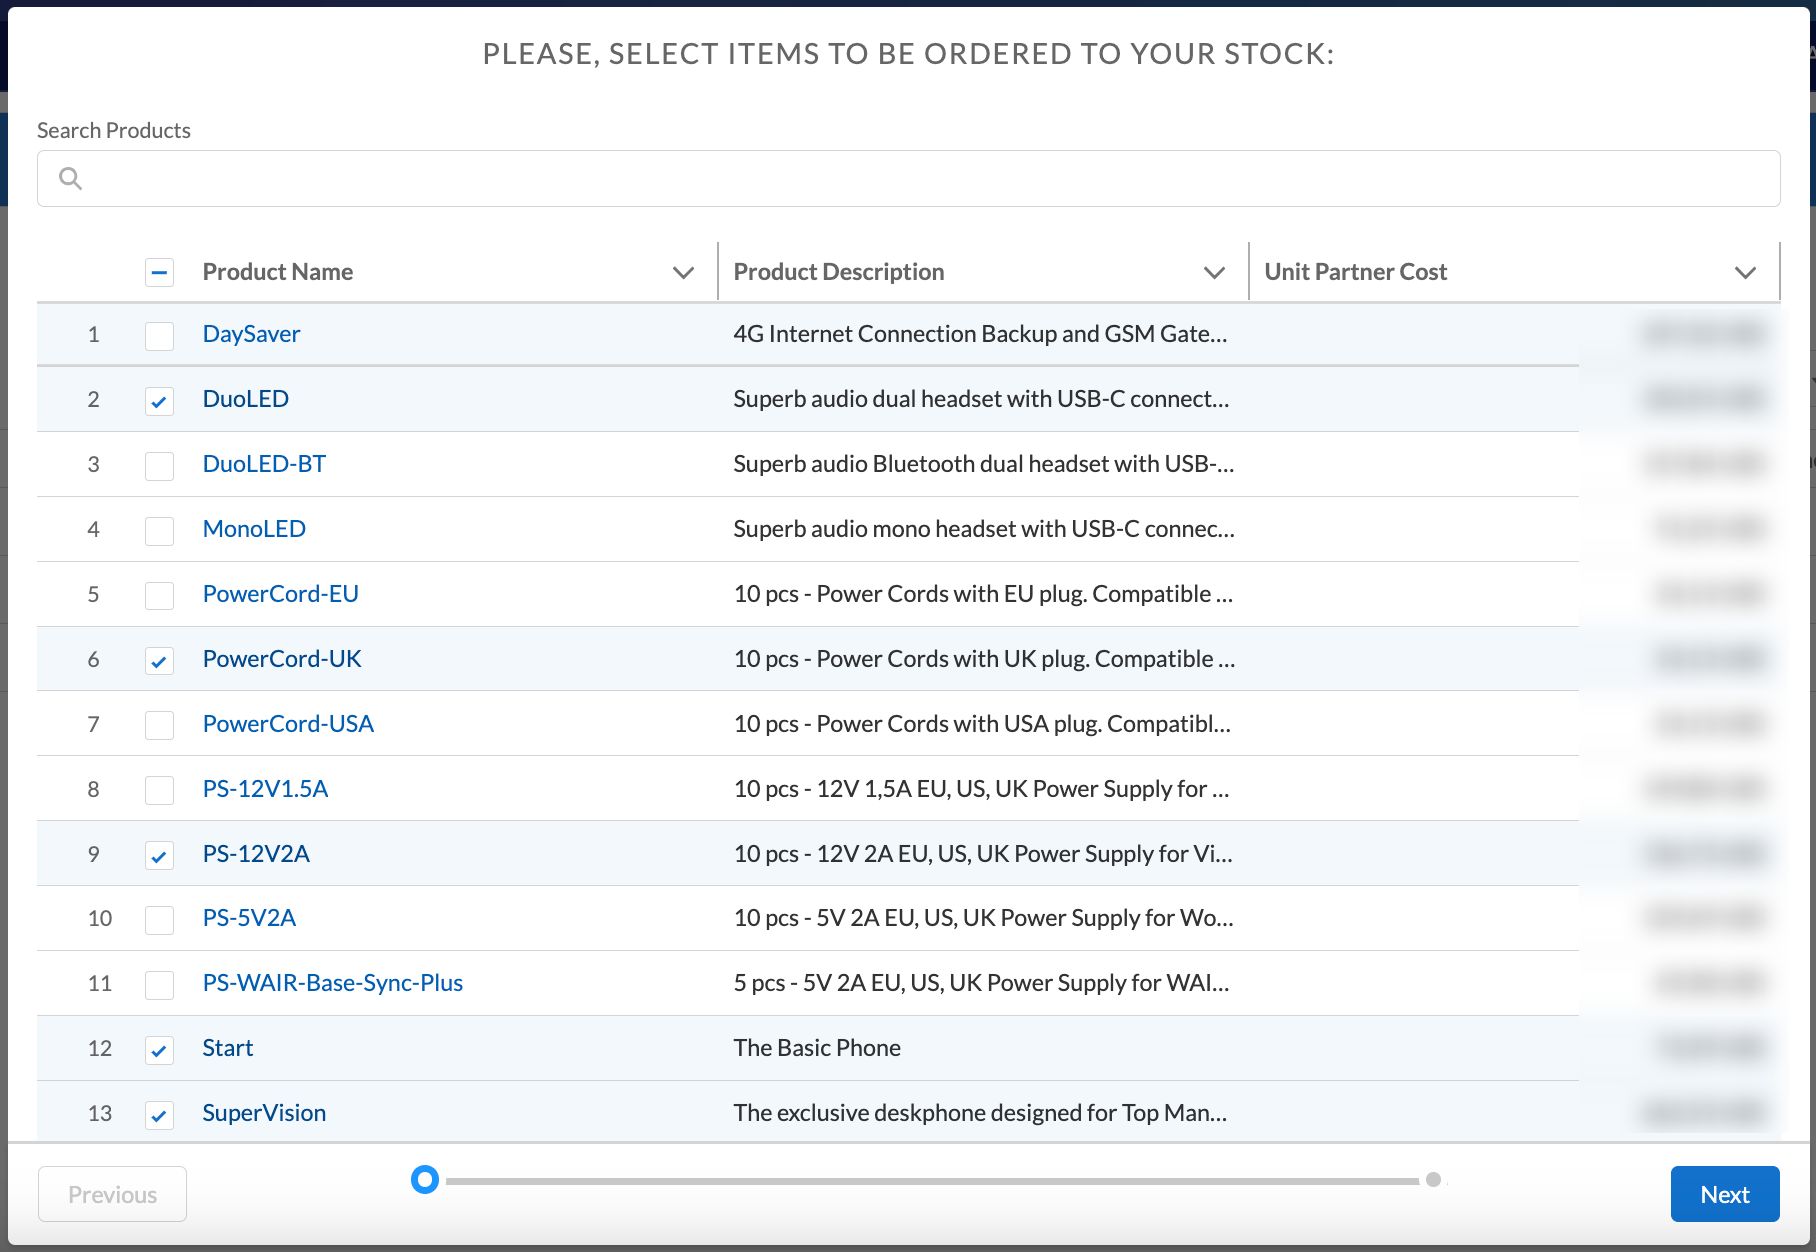
Select the desired CAPEX products and click Next:
To enter the needed quantity of items, hover the mouse next to the necessary item and click on the Edit button (pencil icon):
- Enter the necessary number of items. You can also have an overview of available items in stock (in the Availability, Stock Arrival and Stock Renewal Date columns):
Once done, click Next to confirm your order. On the stock order confirmation popup, click OK to proceed:
Confirm Reseller Orders
Resellers cannot approve their orders. Reseller orders need to be approved on the Partner side. To do this, proceed to the Orders tab, find the Reseller order you want to confirm:
Open the order and click Confirm:
Case
The tab can be used to monitor the status of CLASSOUND orders. Each time when a quote with CLASSOUND add-on (Full Porting, Outbound Only, New DID, New Free Phone) is signed and an order is created, the system automatically creates the relevant number of cases, depending on the number of CLASSOUND add-ons ordered.
Here you can track the cases and their progress, as well as communicate with our support team directly through the case. Here you can track the cases and their progress, as well as communicate with our support team directly through the case. So, case is like a ticket that is created to monitor implementation of the CLASSOUND solution.
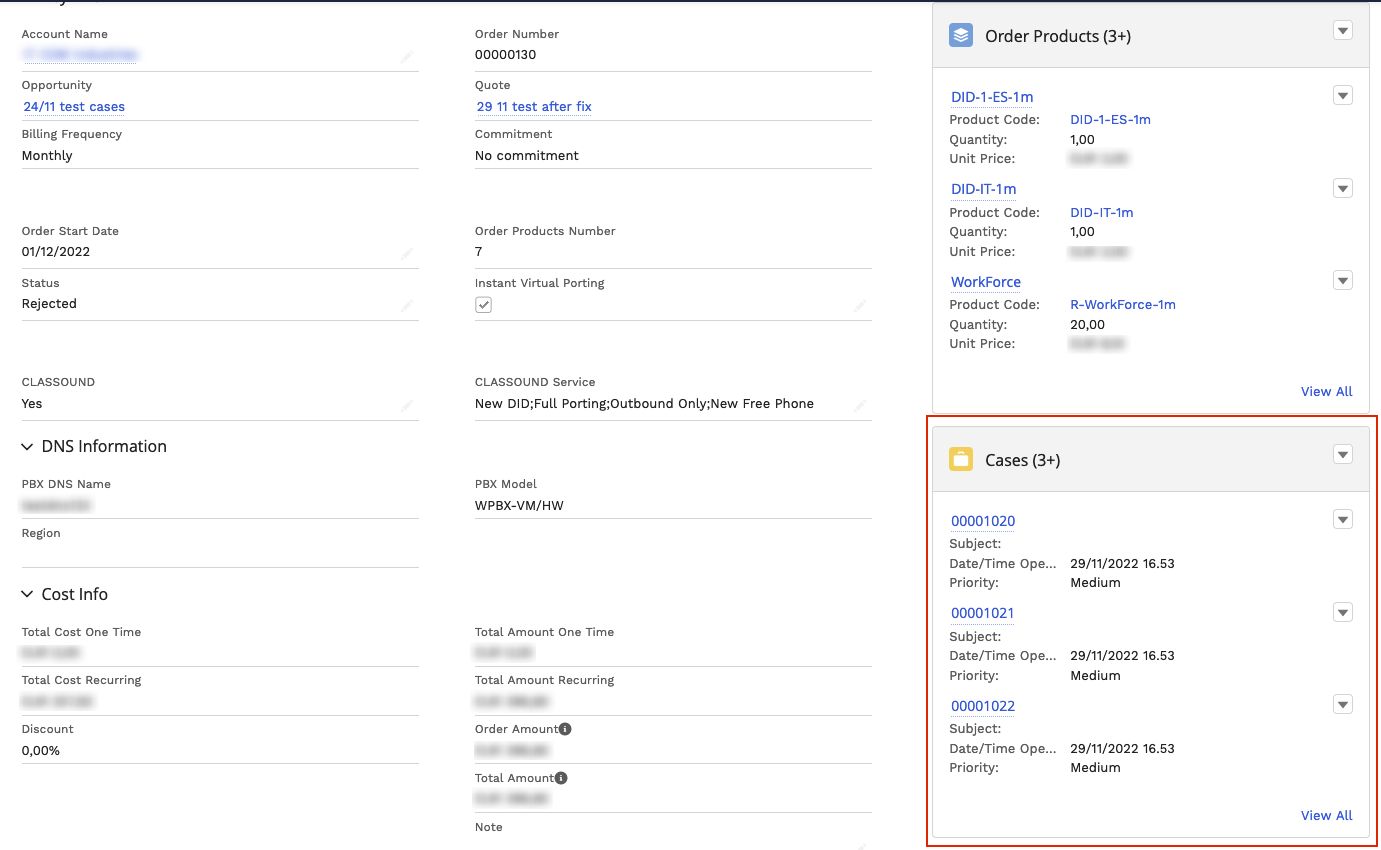
Cases section is also available on the following pages:
- Account: displays all cases related to a specific account
- Order: displays all cases related to a specific order
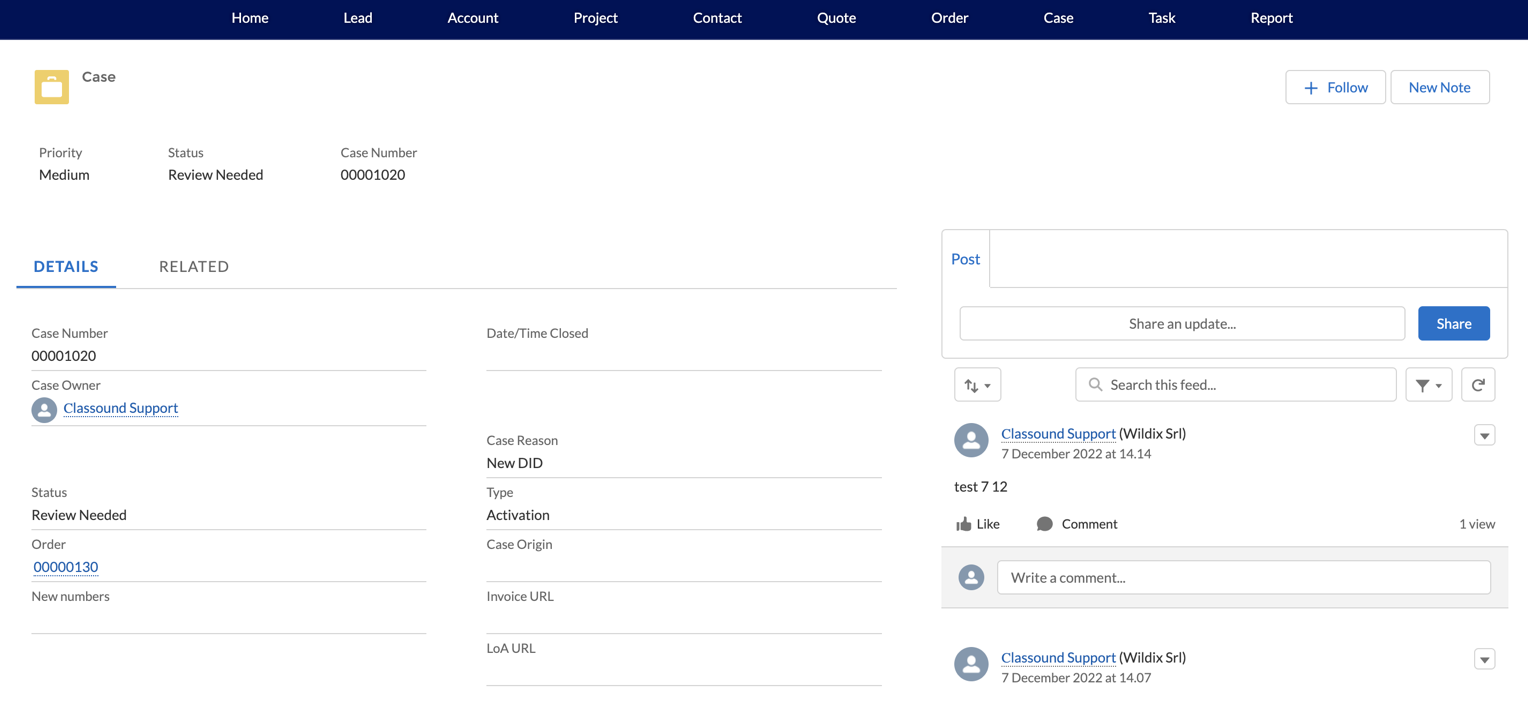
Detailed information about the case can be checked on the Case page:
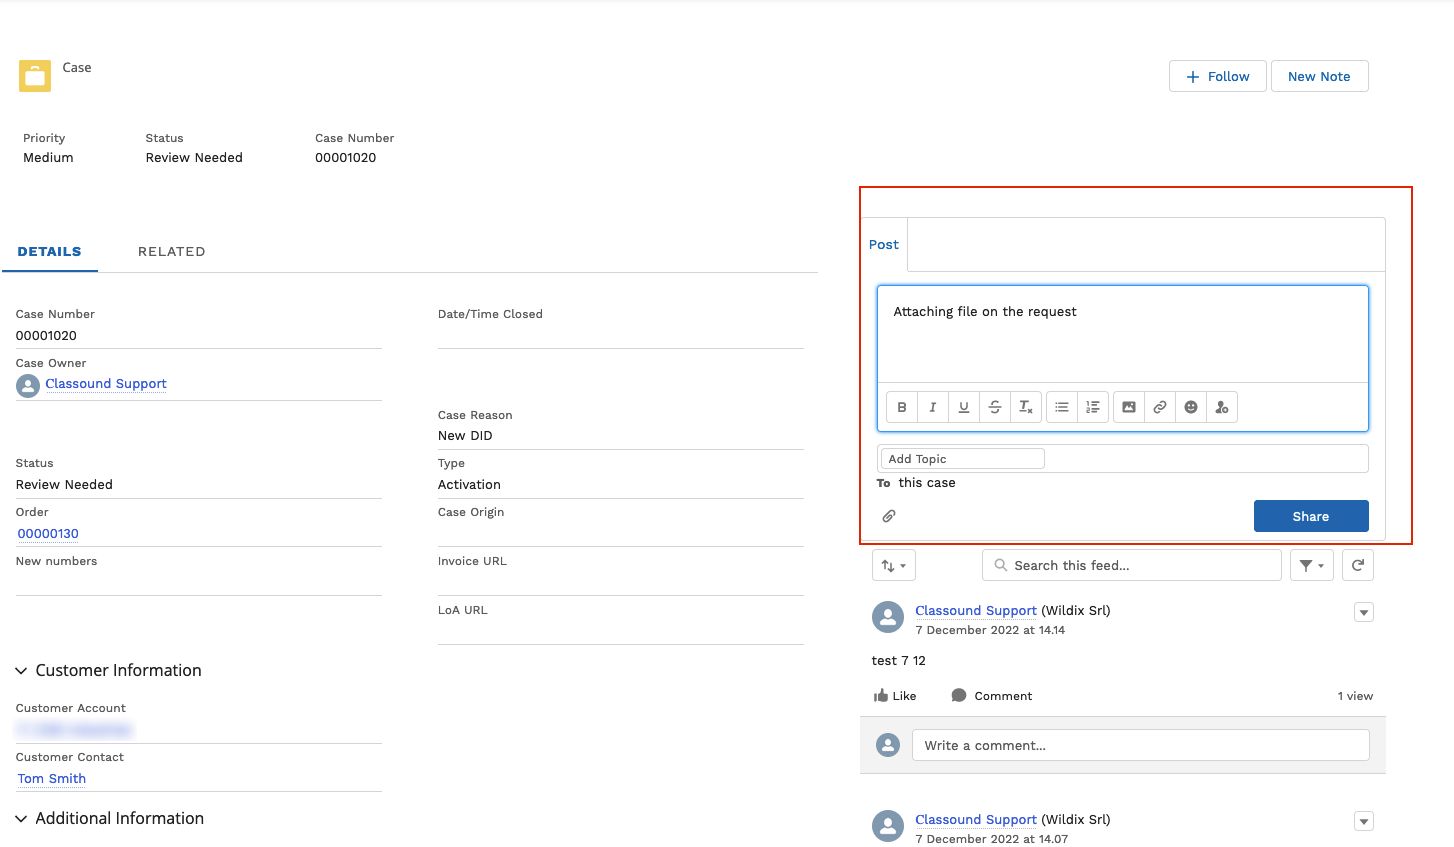
You can use the panel on the right side of the Case page to communicate with CLASSOUND support on this case and attach files if needed:
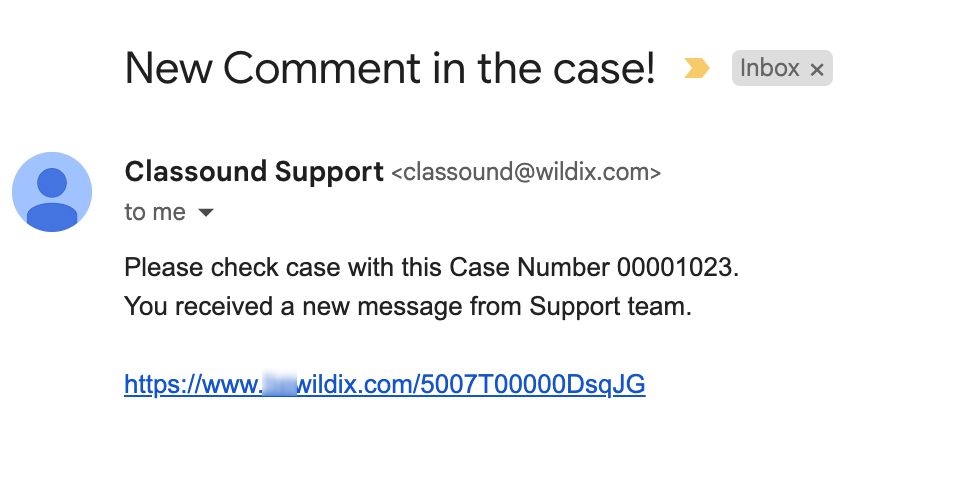
When CLASSOUND support agent replies/ posts a question, you should receive an email notification, to easily navigate to the necessary case and reply there.
Task
Tasks represent business activities such as making calls, sending quotes or other to-do items.
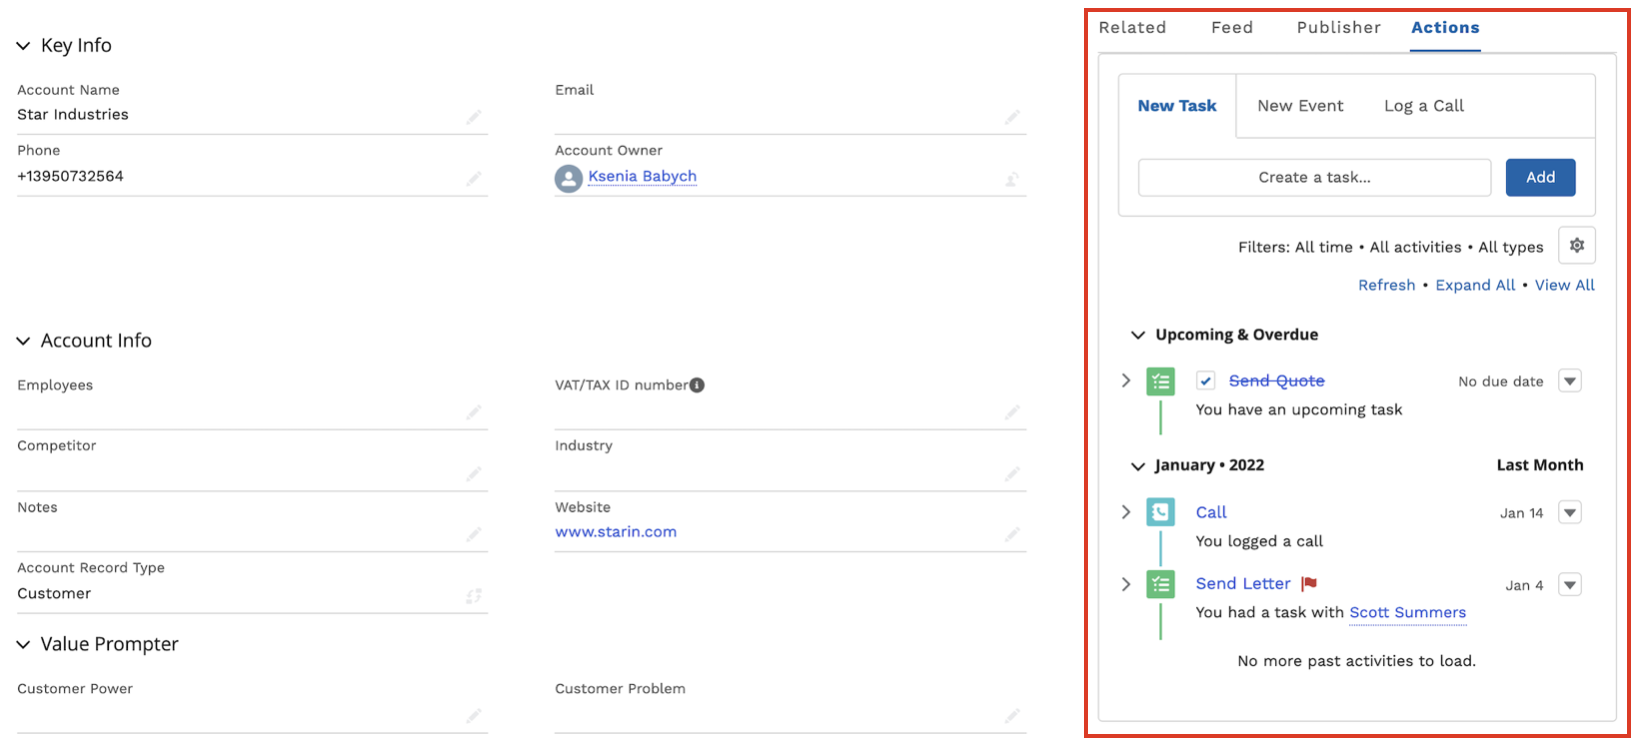
You can also create and manage Tasks in Lead, Account, Project and Contact tabs, under Open Activities or Actions menus.
Create a New Task
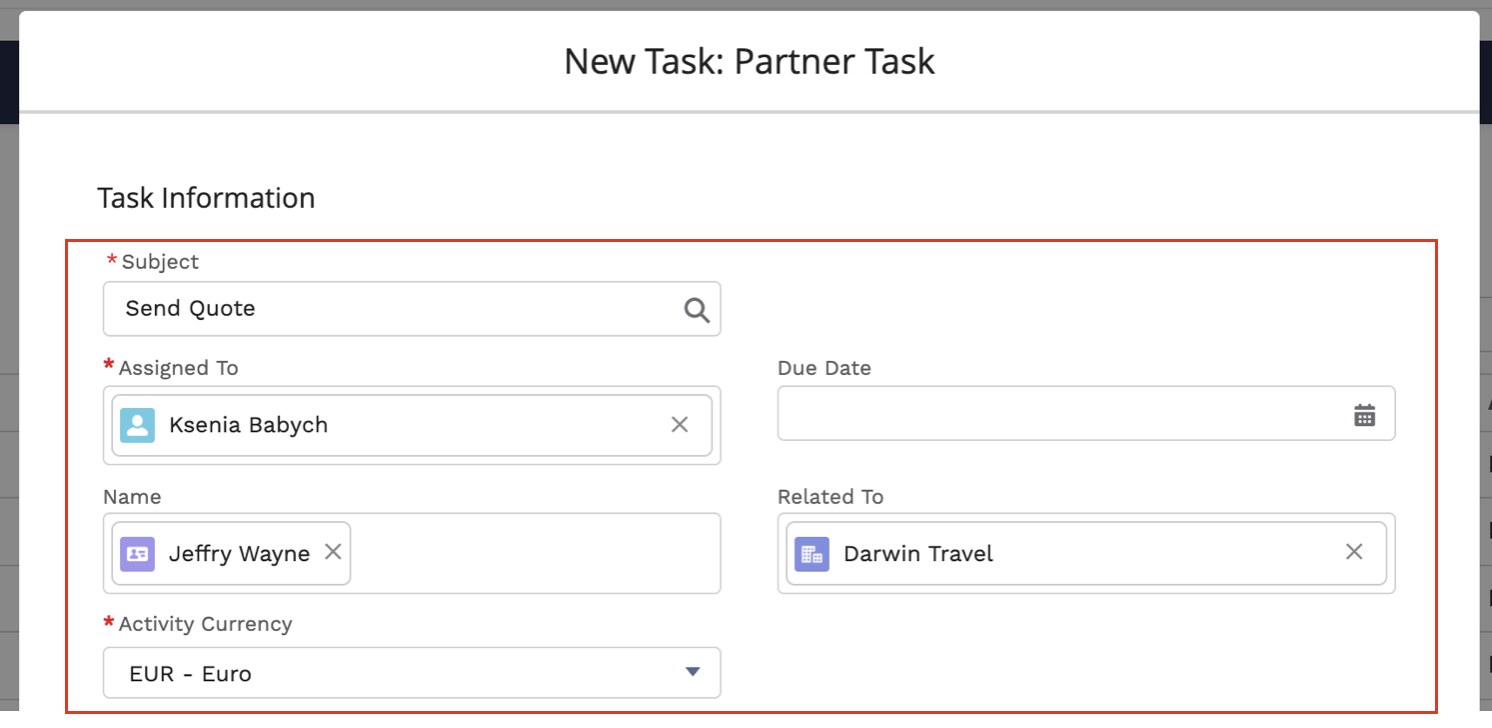
- Click New Task button to create a Task
Fill in the following mandatory fields:- Subject - add your own or select one of the options: Call/ Send Letter/ Send Quote/ Other
- Assigned To - specify the Task assignee. By default, the Task is assigned to you
- Name - associate it with an existing Contact or create a new one
- Related To - associate it with an existing Account or create a new one
- Activity Currency - indicate the default currency
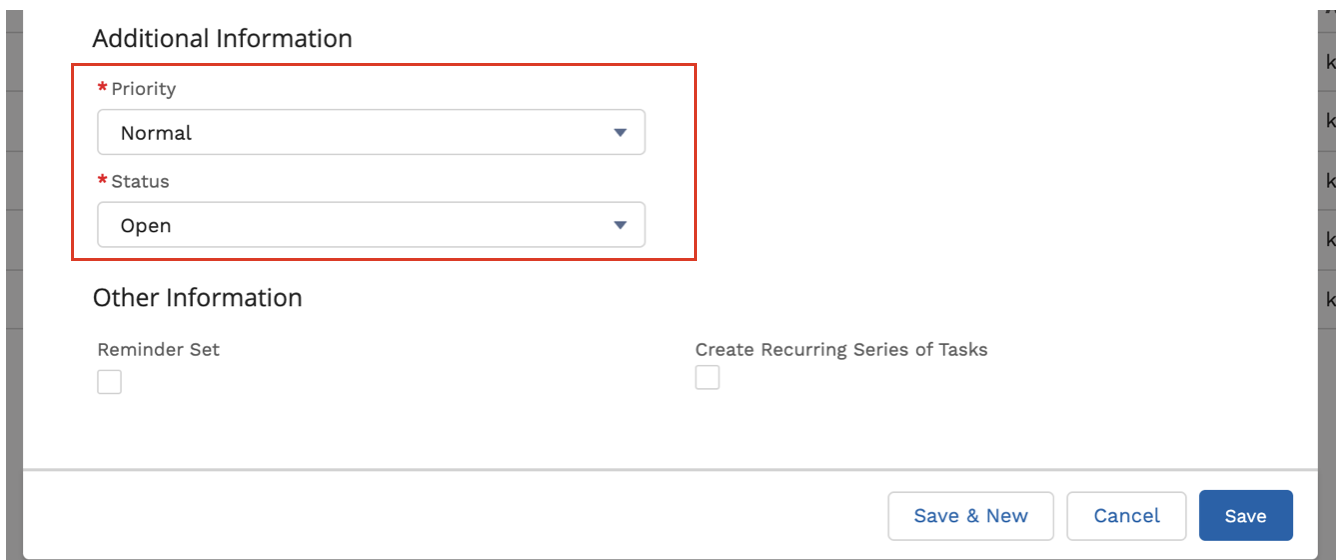
- Priority - set the Task priority: Normal/ High
- Click Save to create a Task (if you want to create one more Task, click Save & New button)
Manage existing Tasks
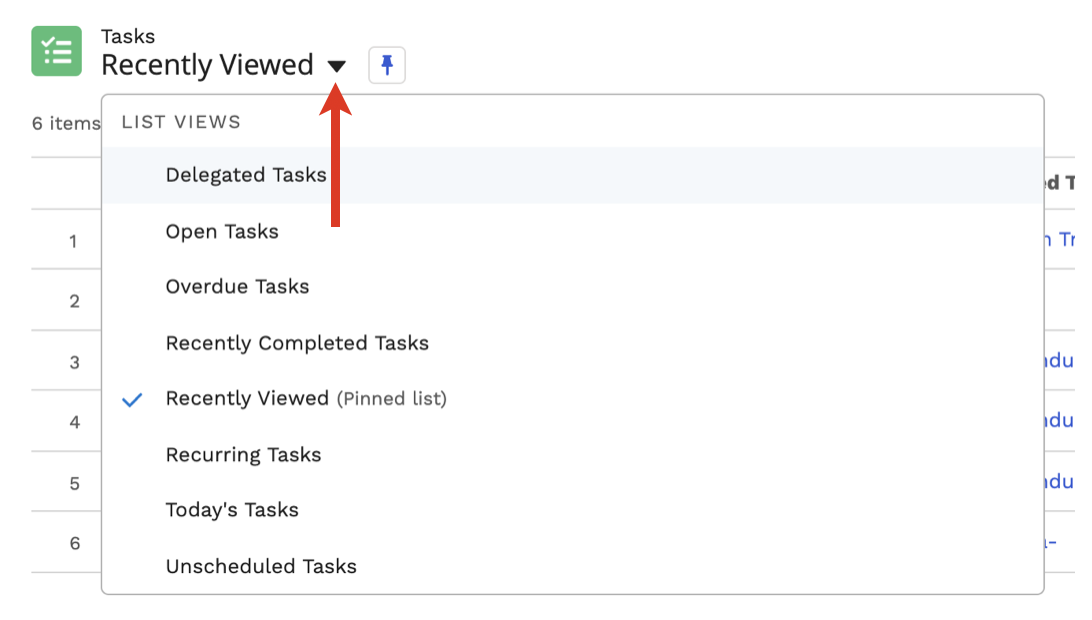
You can sort Tasks out by clicking on List Views:
It is also possible to display Tasks as a Kanban board by clicking on Display as:
To open a Task, click on its Subject:
From the Options Panel, you can edit the Task, quickly change Date, Status and Priority, delete it
Once the Task is done, click Mark Complete button
Report
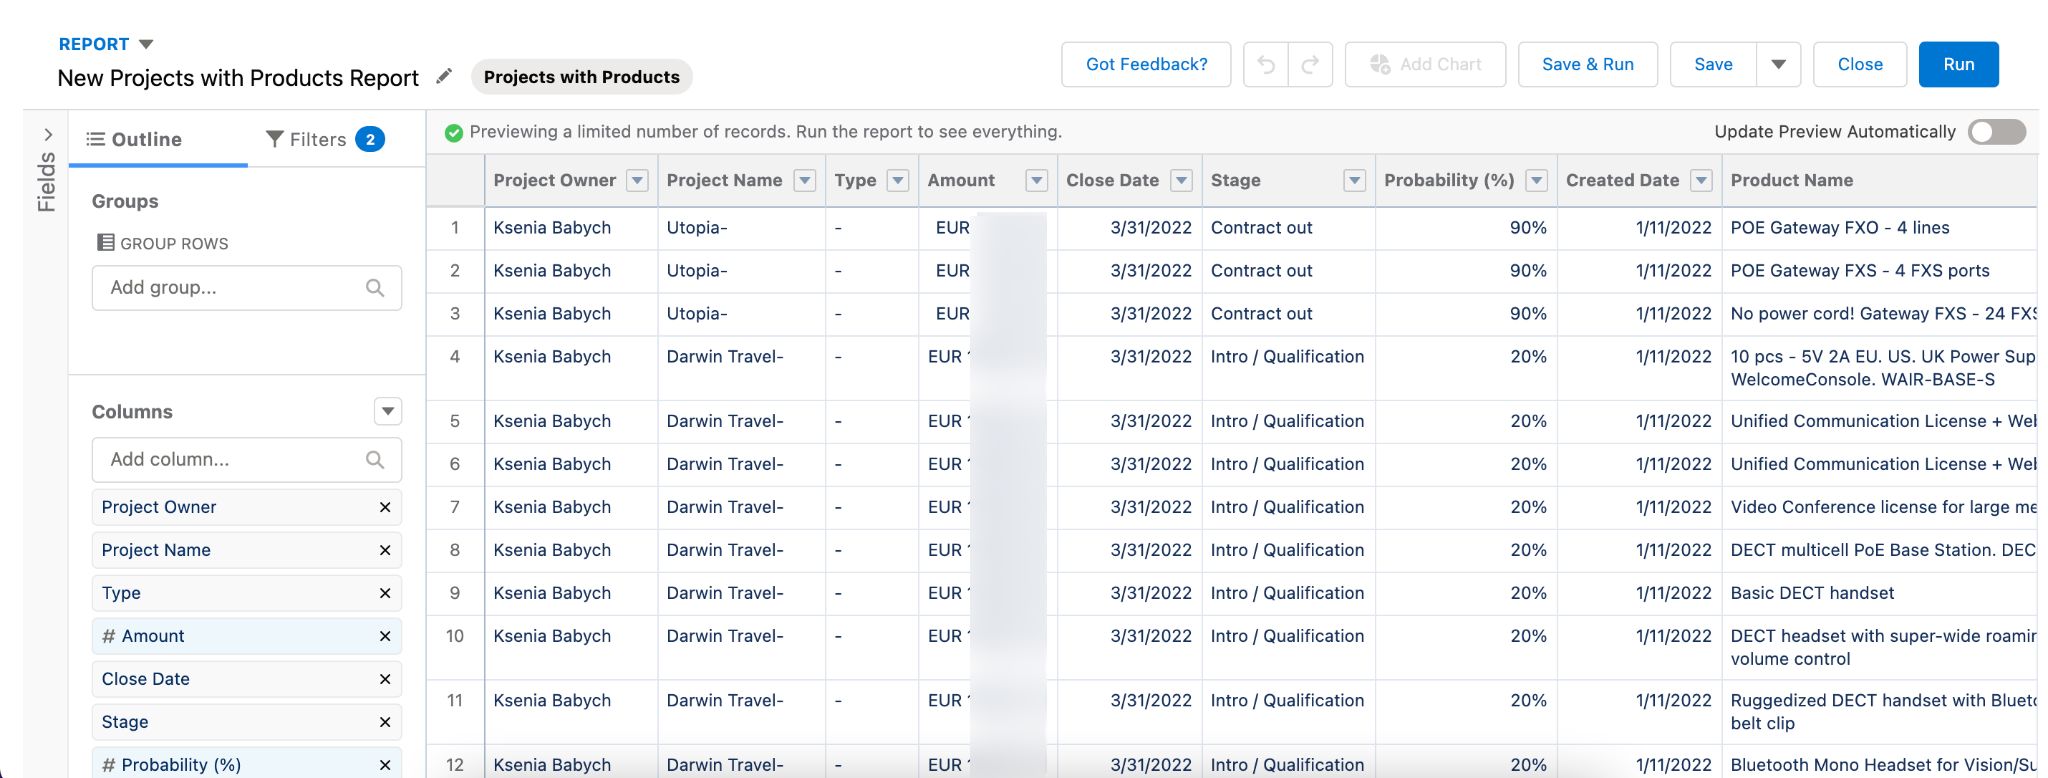
Create a new Report
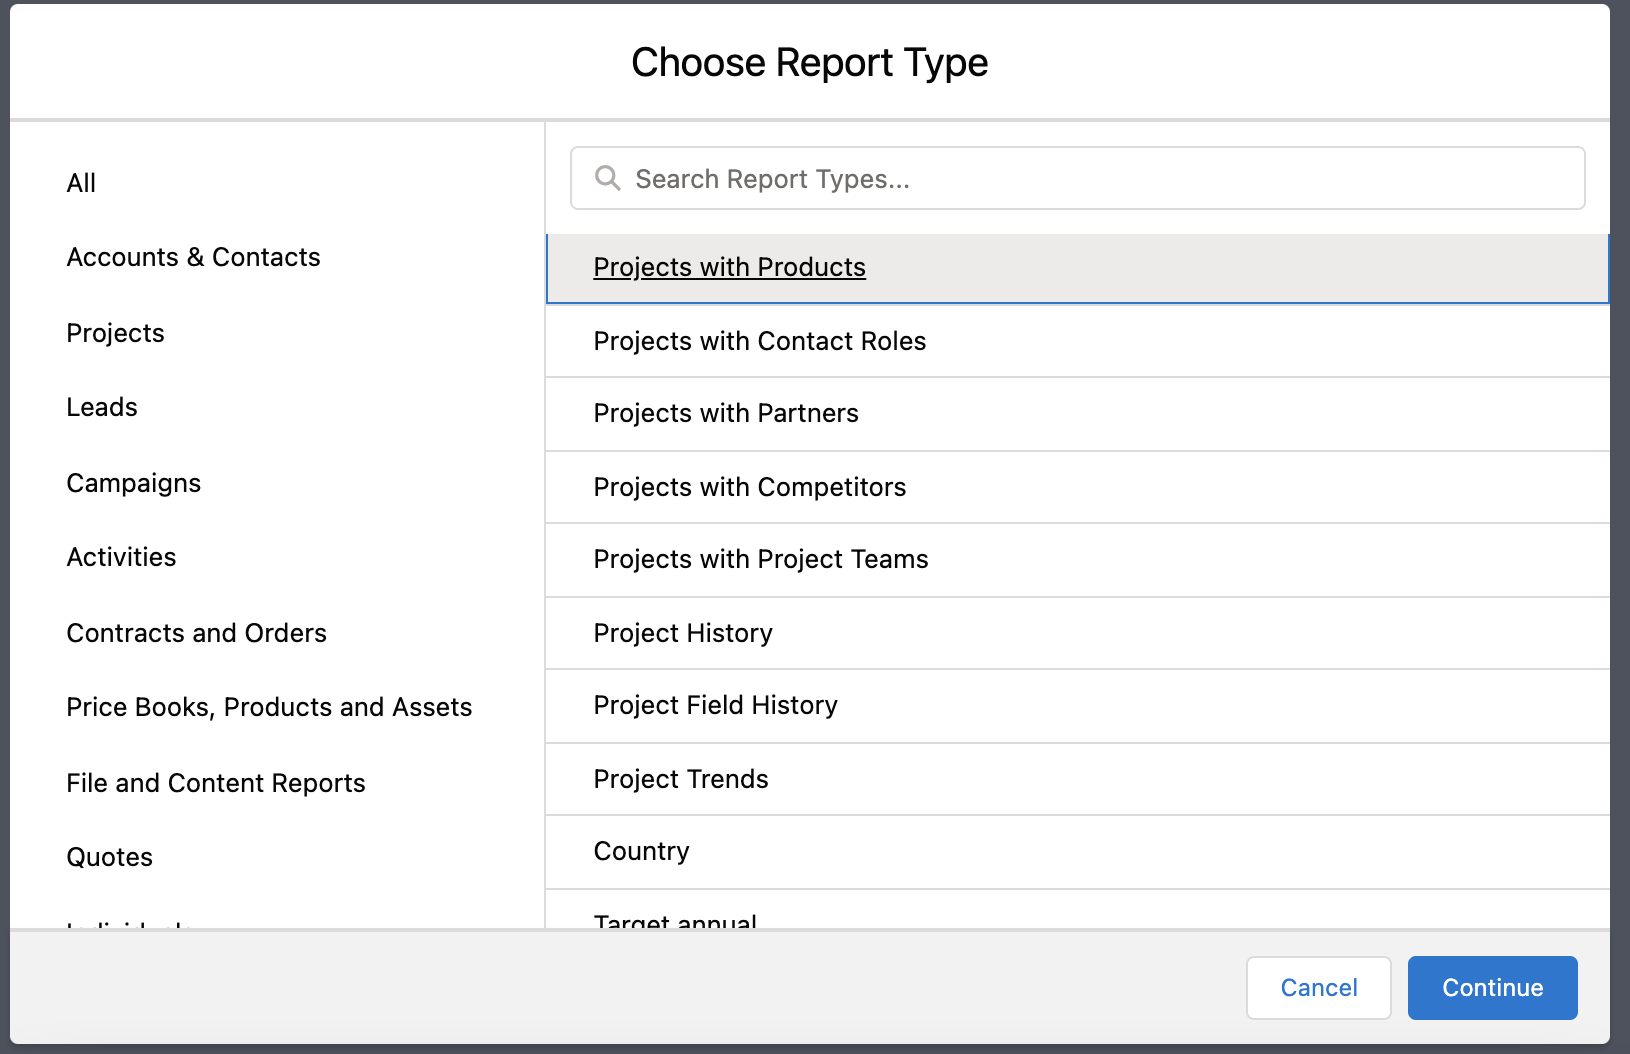
- To generate a Report, click New Report
Choose Report Type and click Continue
At this stage, you can add/ remove any columns to your Report. Click Save & Run to generate the Report
Manage existing Reports
To open a Report, click on its Name
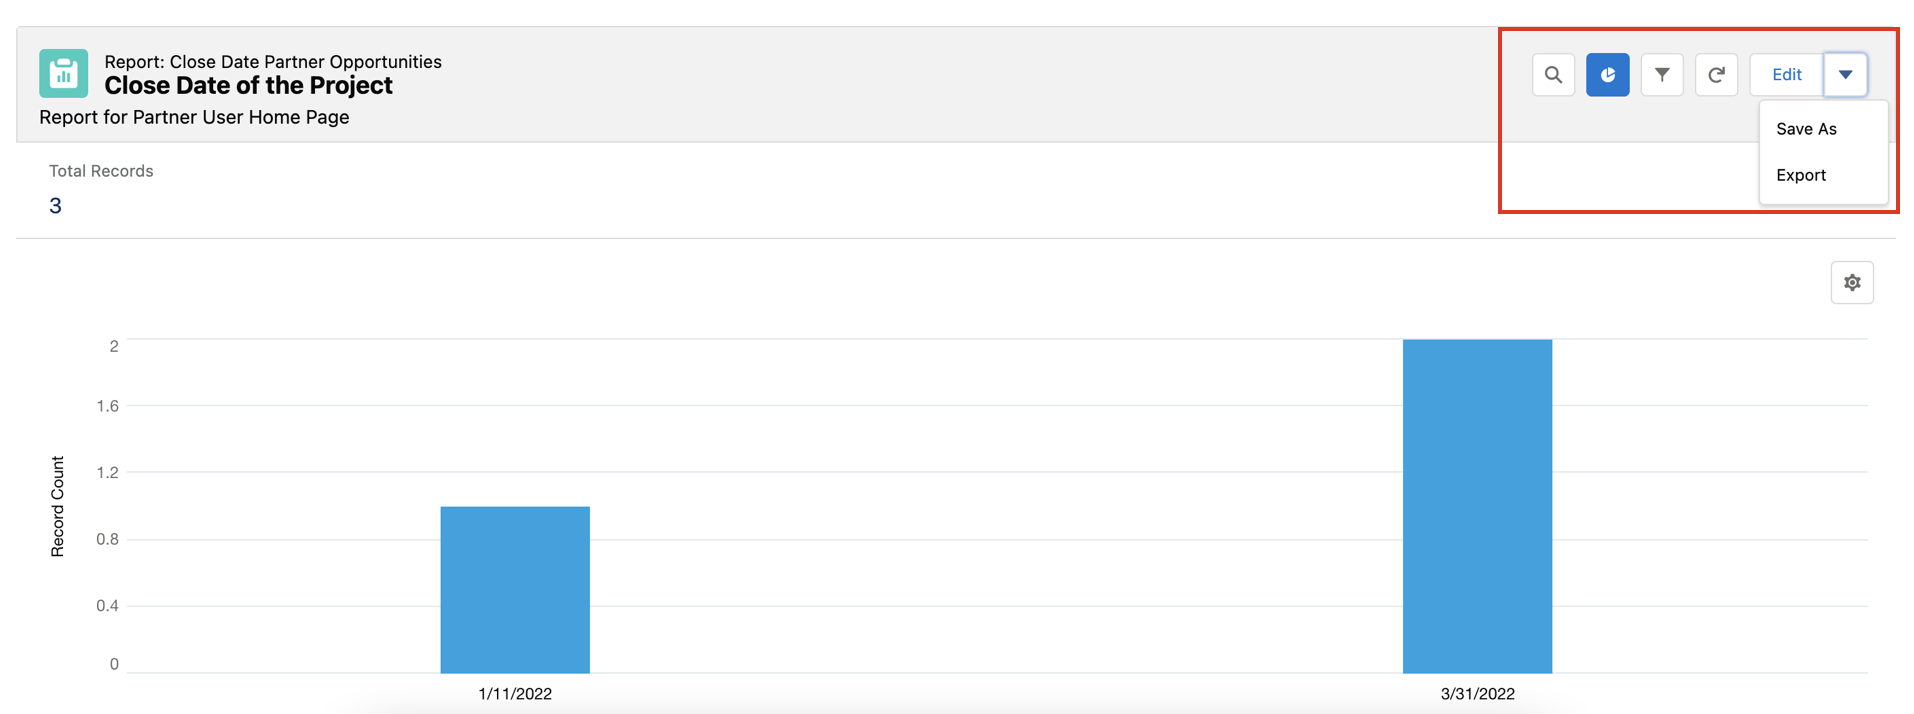
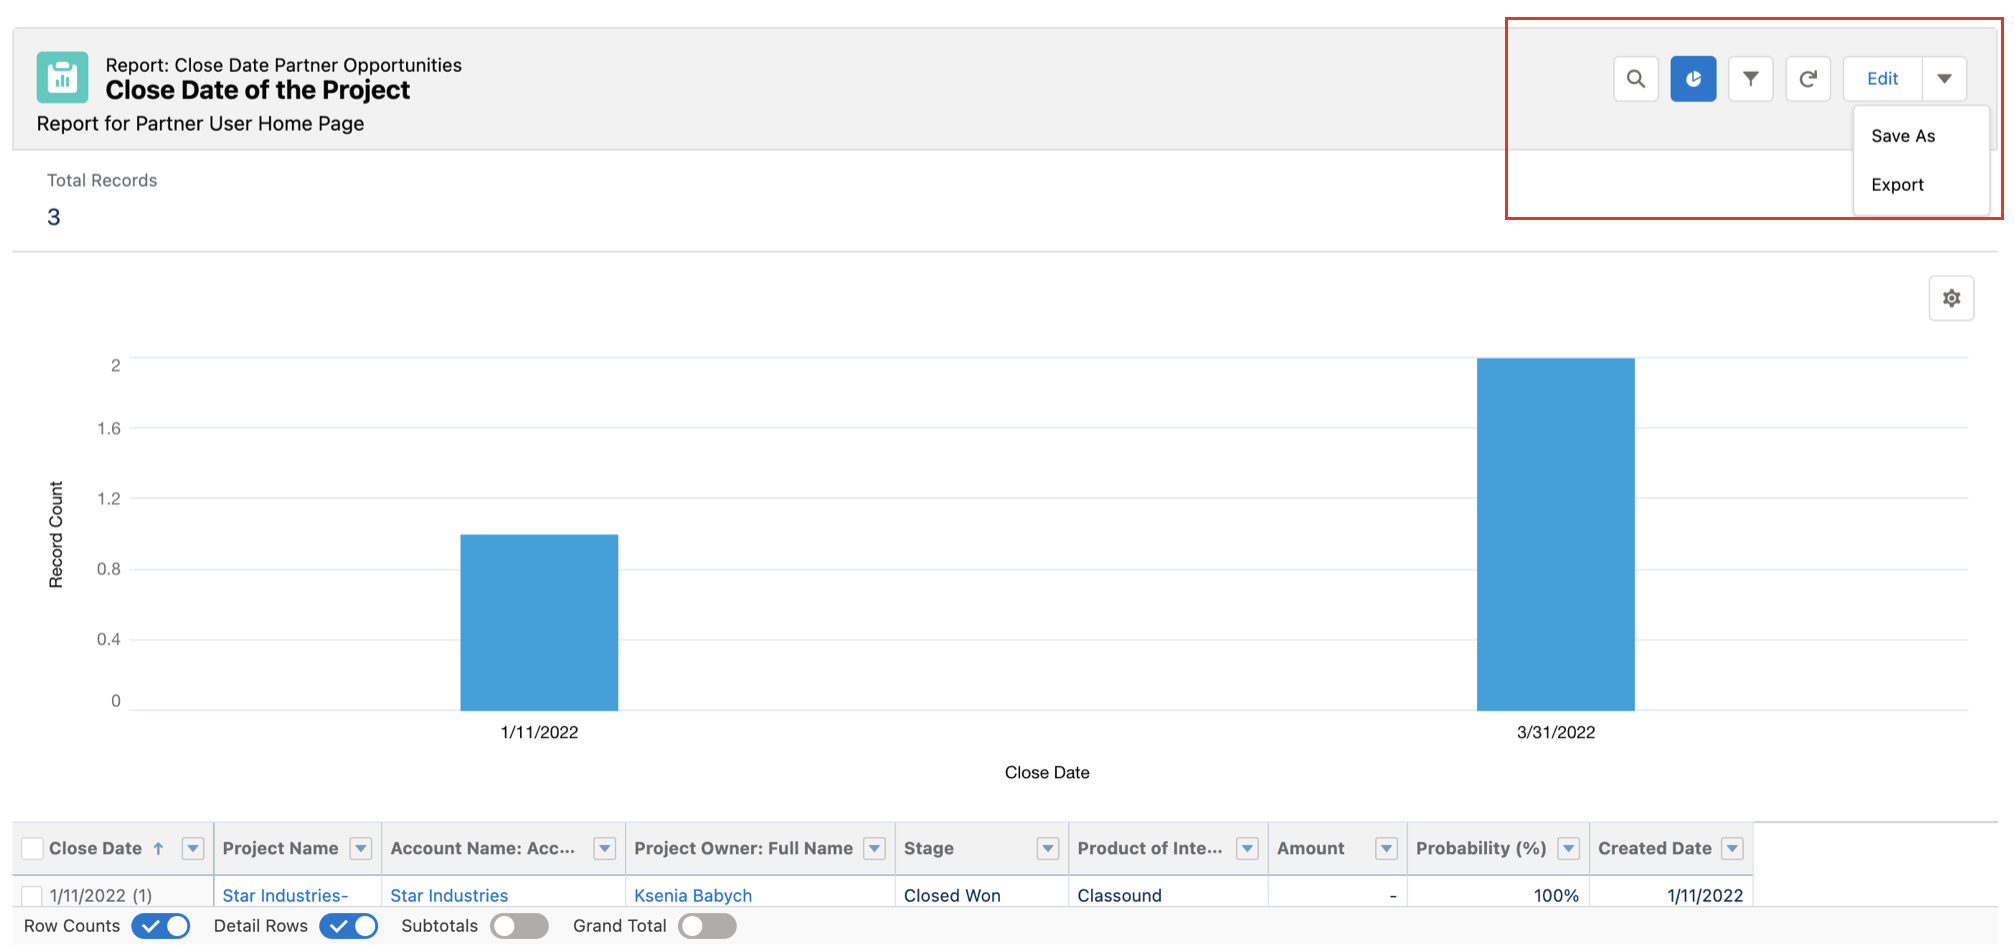
You can edit the Report or export it in .xls format:
Export Quote information
It is possible to export quote information via Report tab:
- Use Search field to search for the necessary Quote
- Click on the arrow icon on the right and choose the Export in the drop-down menu:
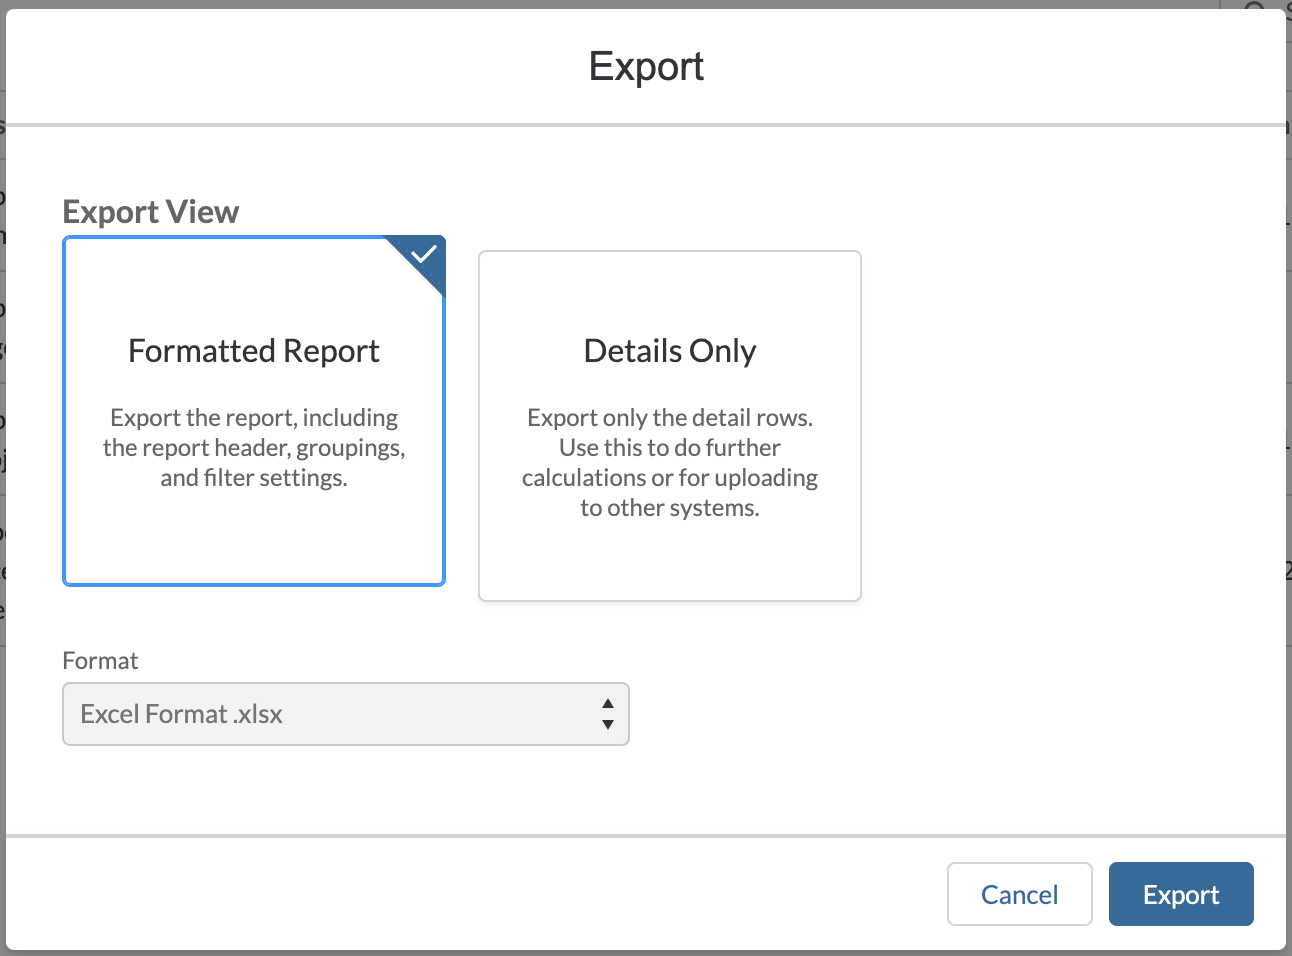
- Proceed with the export, choosing the desired option:
- Formatted Report, which includes report header, groupings, and filter settings
- Details Only, which include detail rows only
Statistics
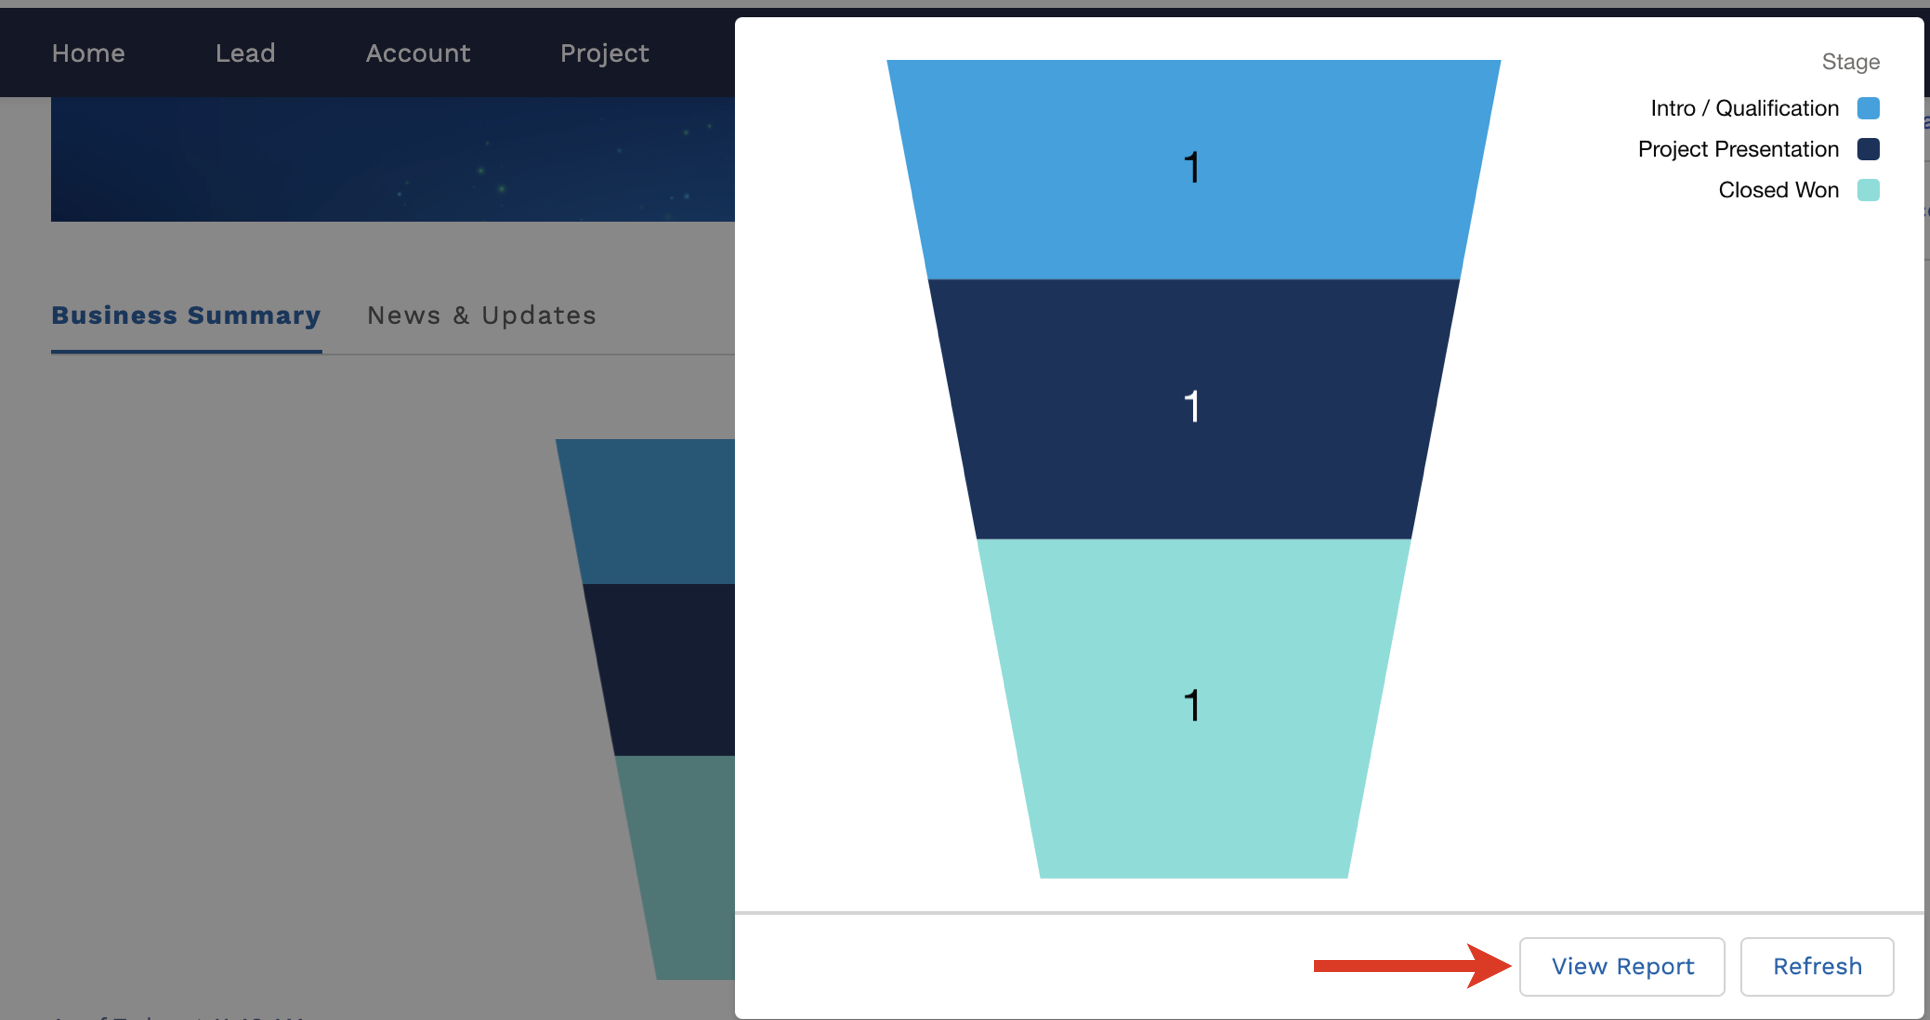
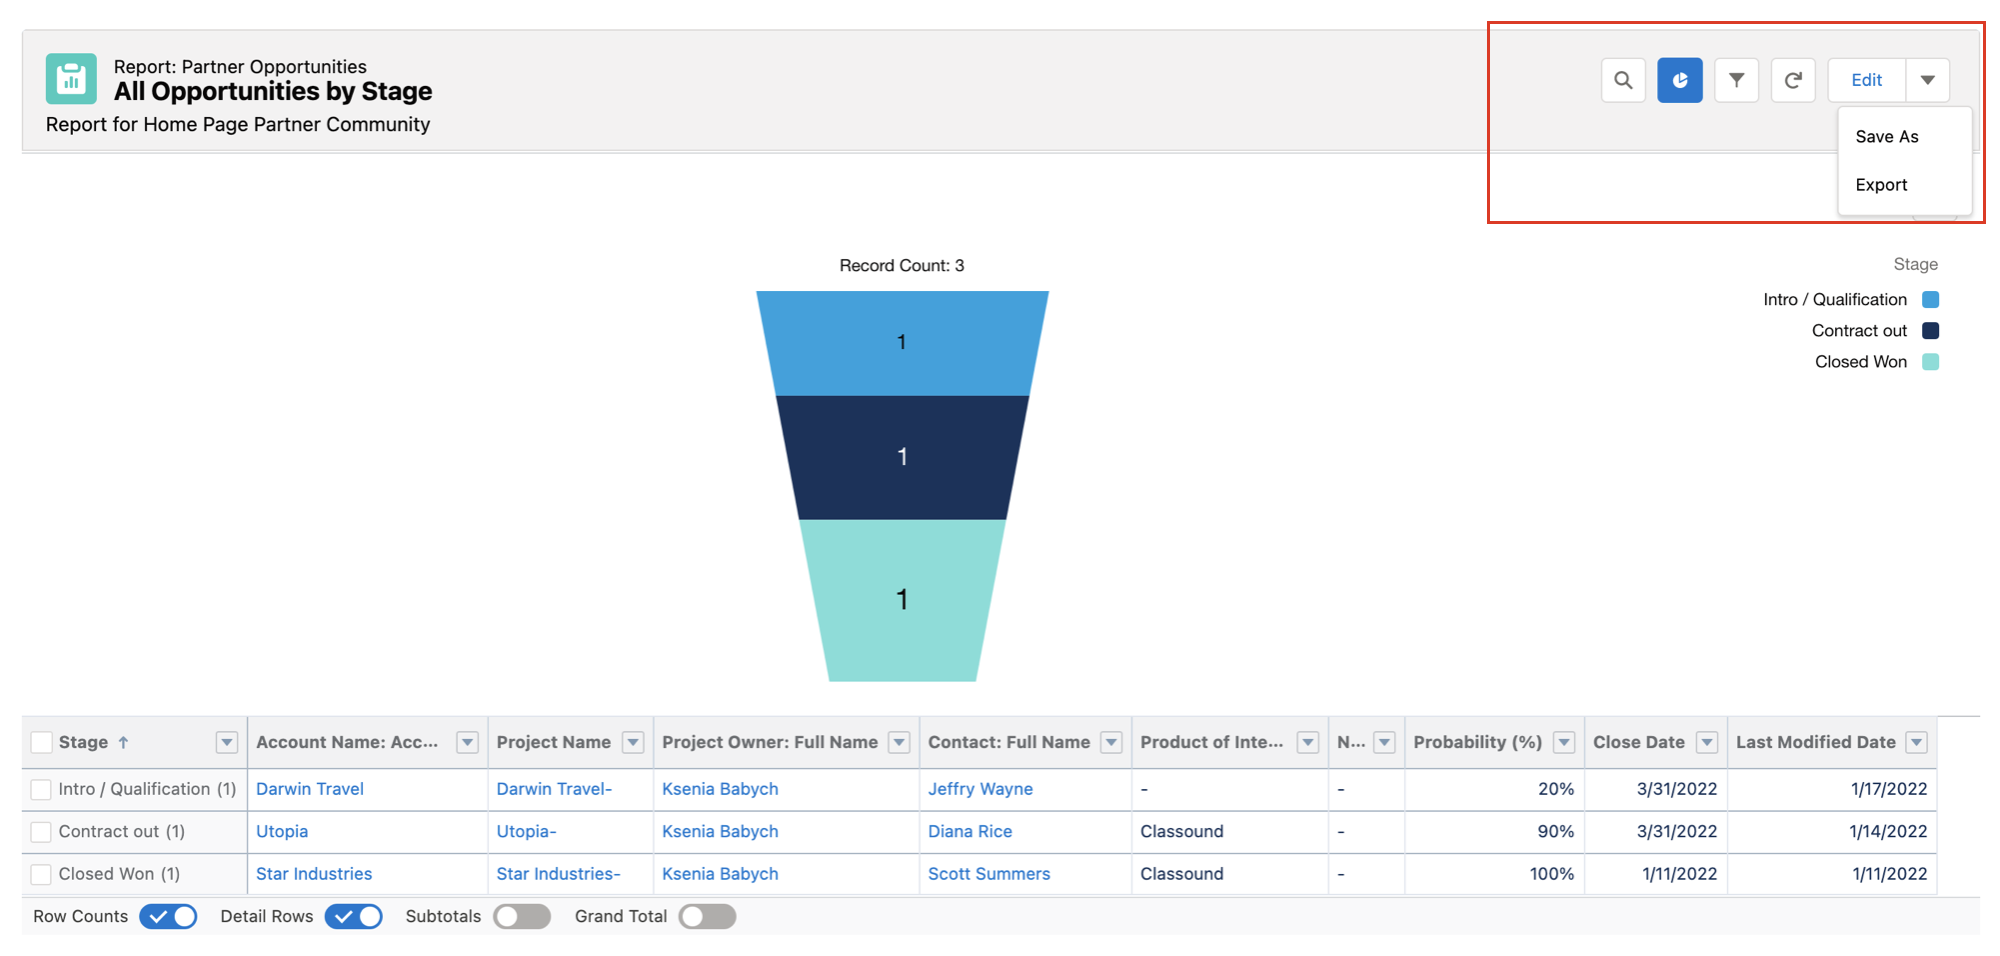
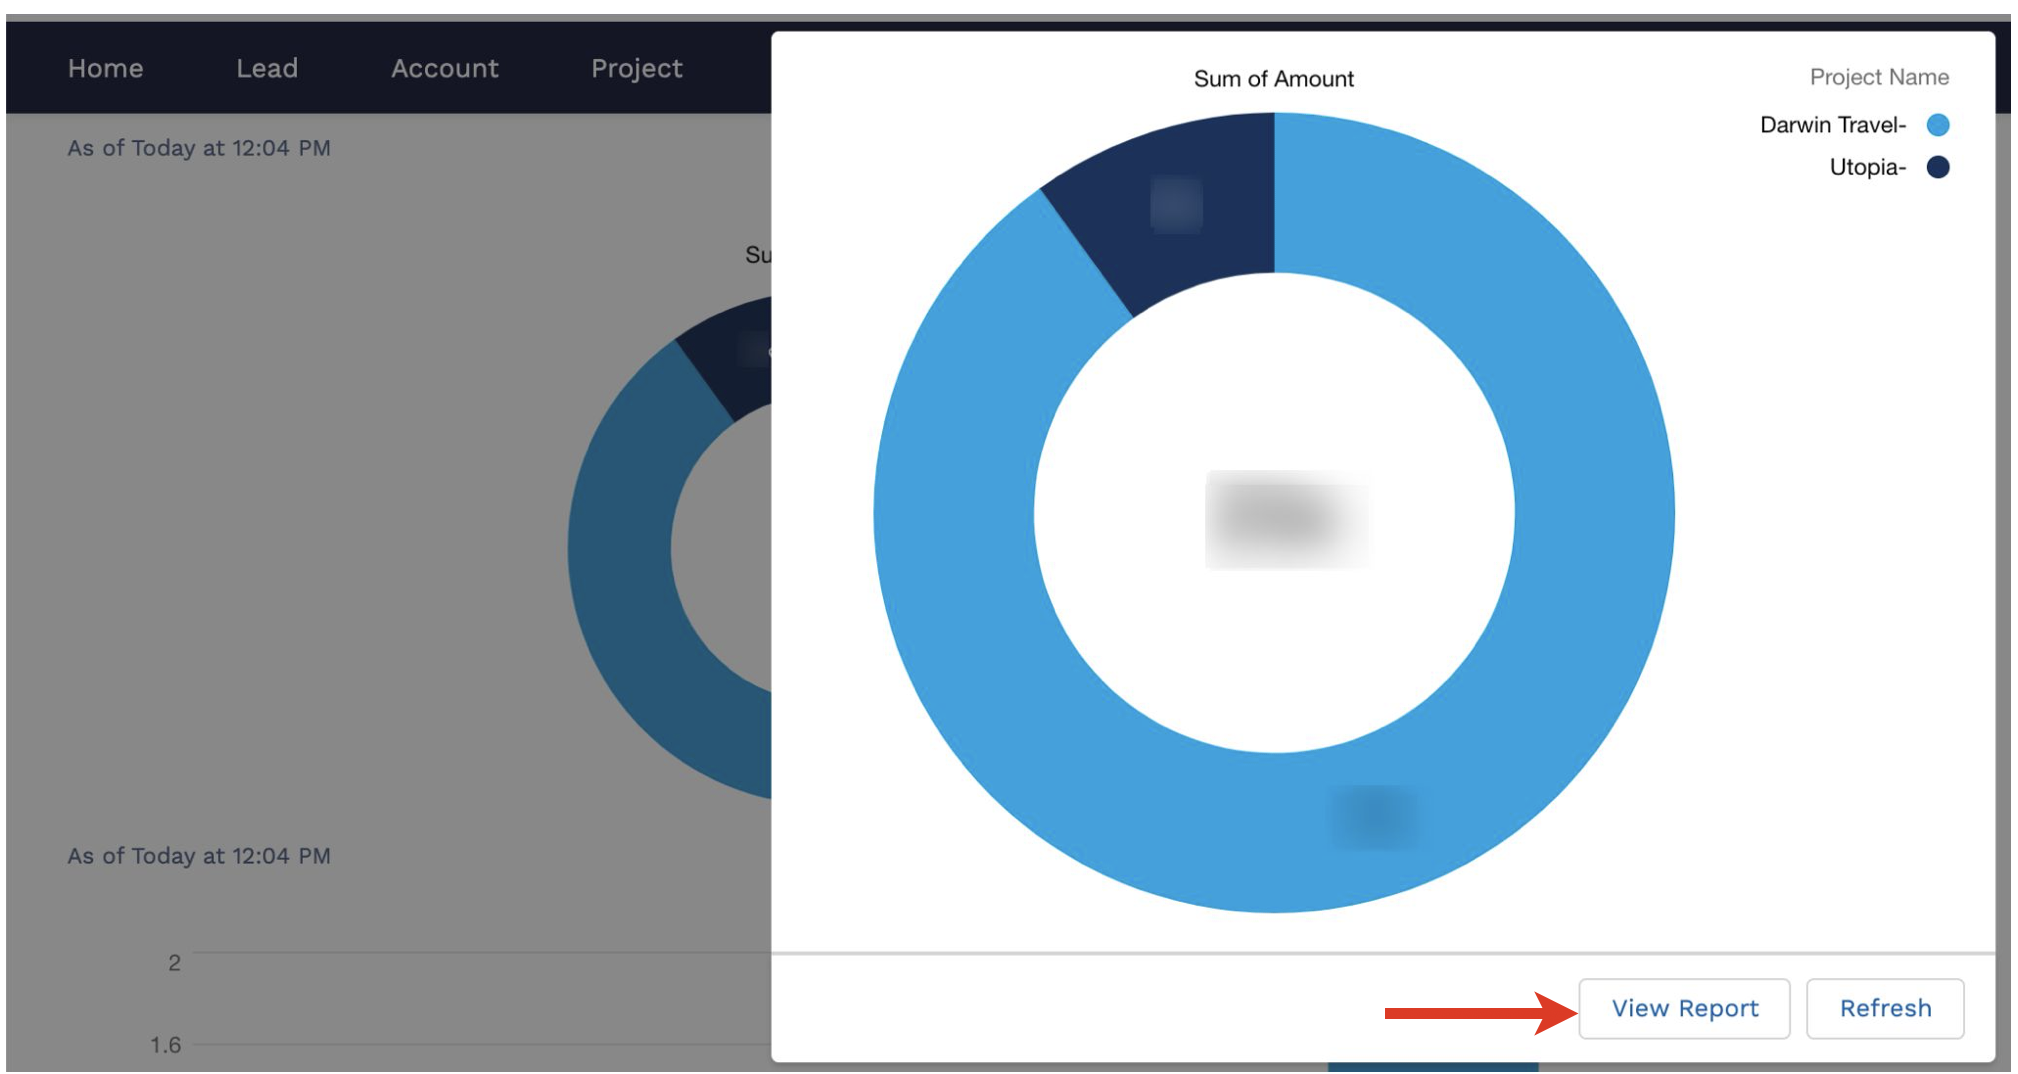
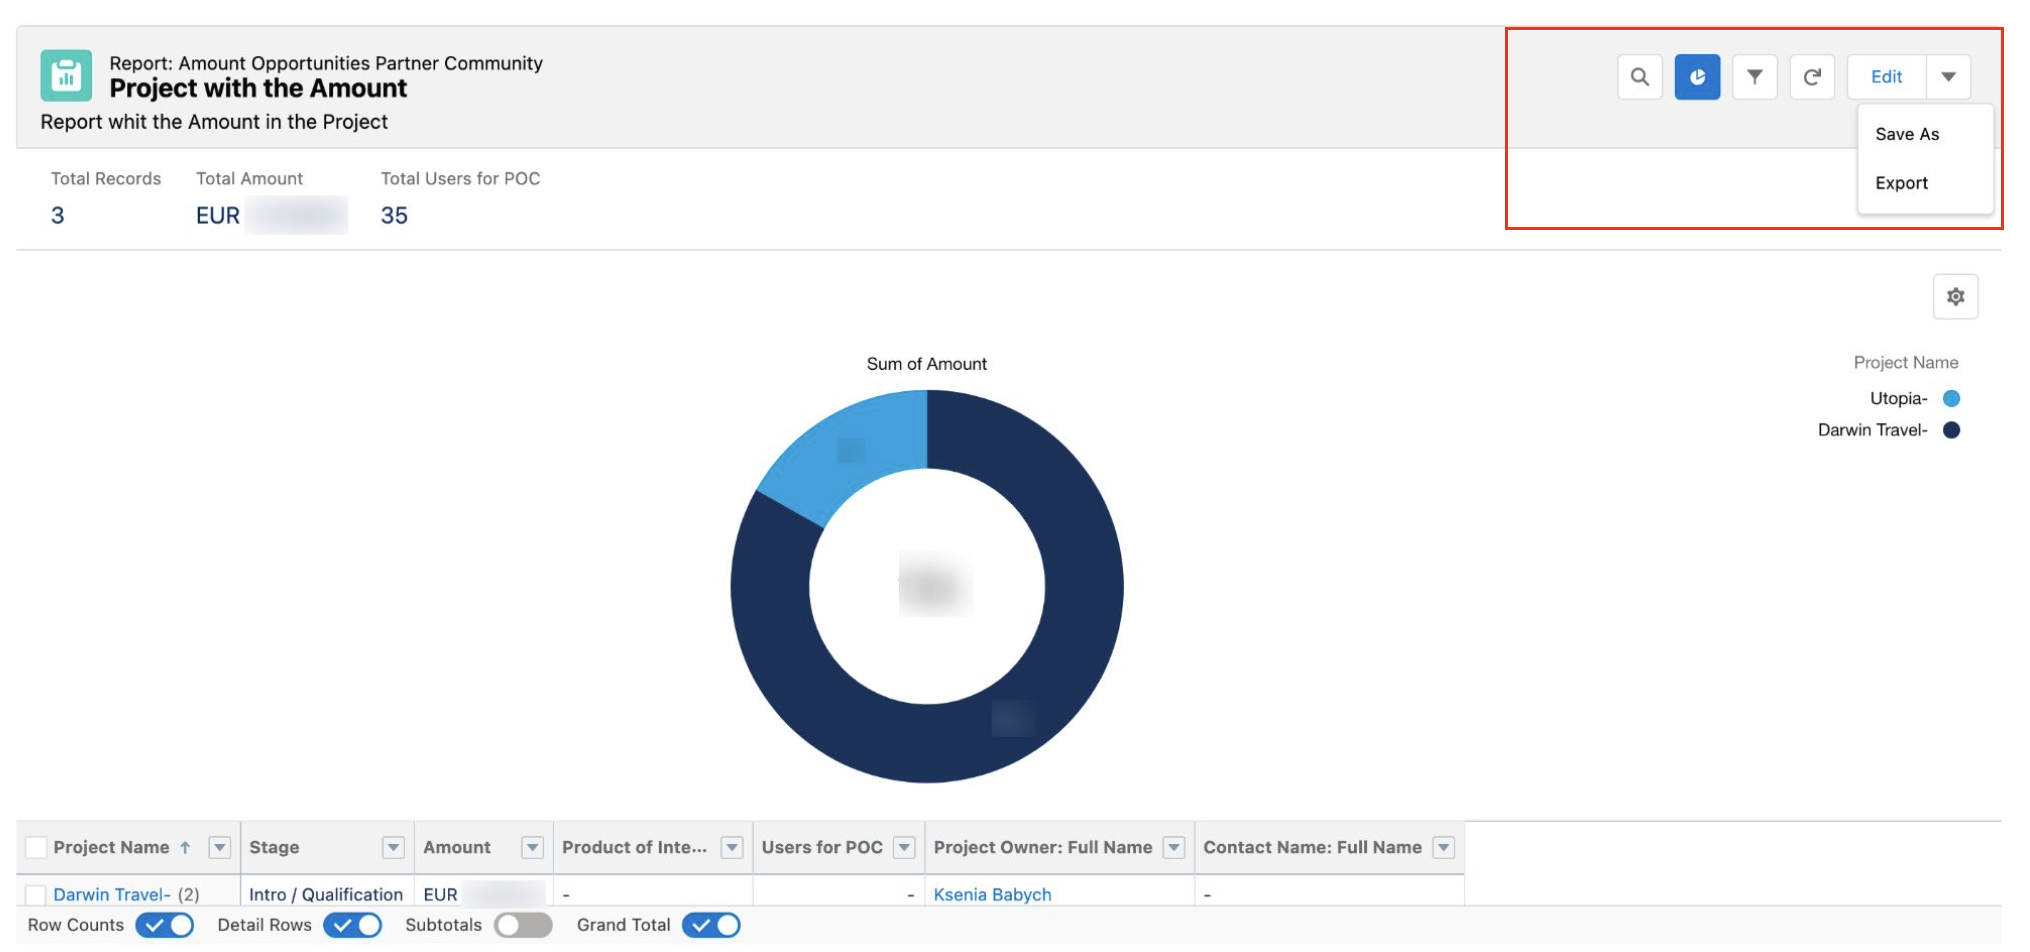
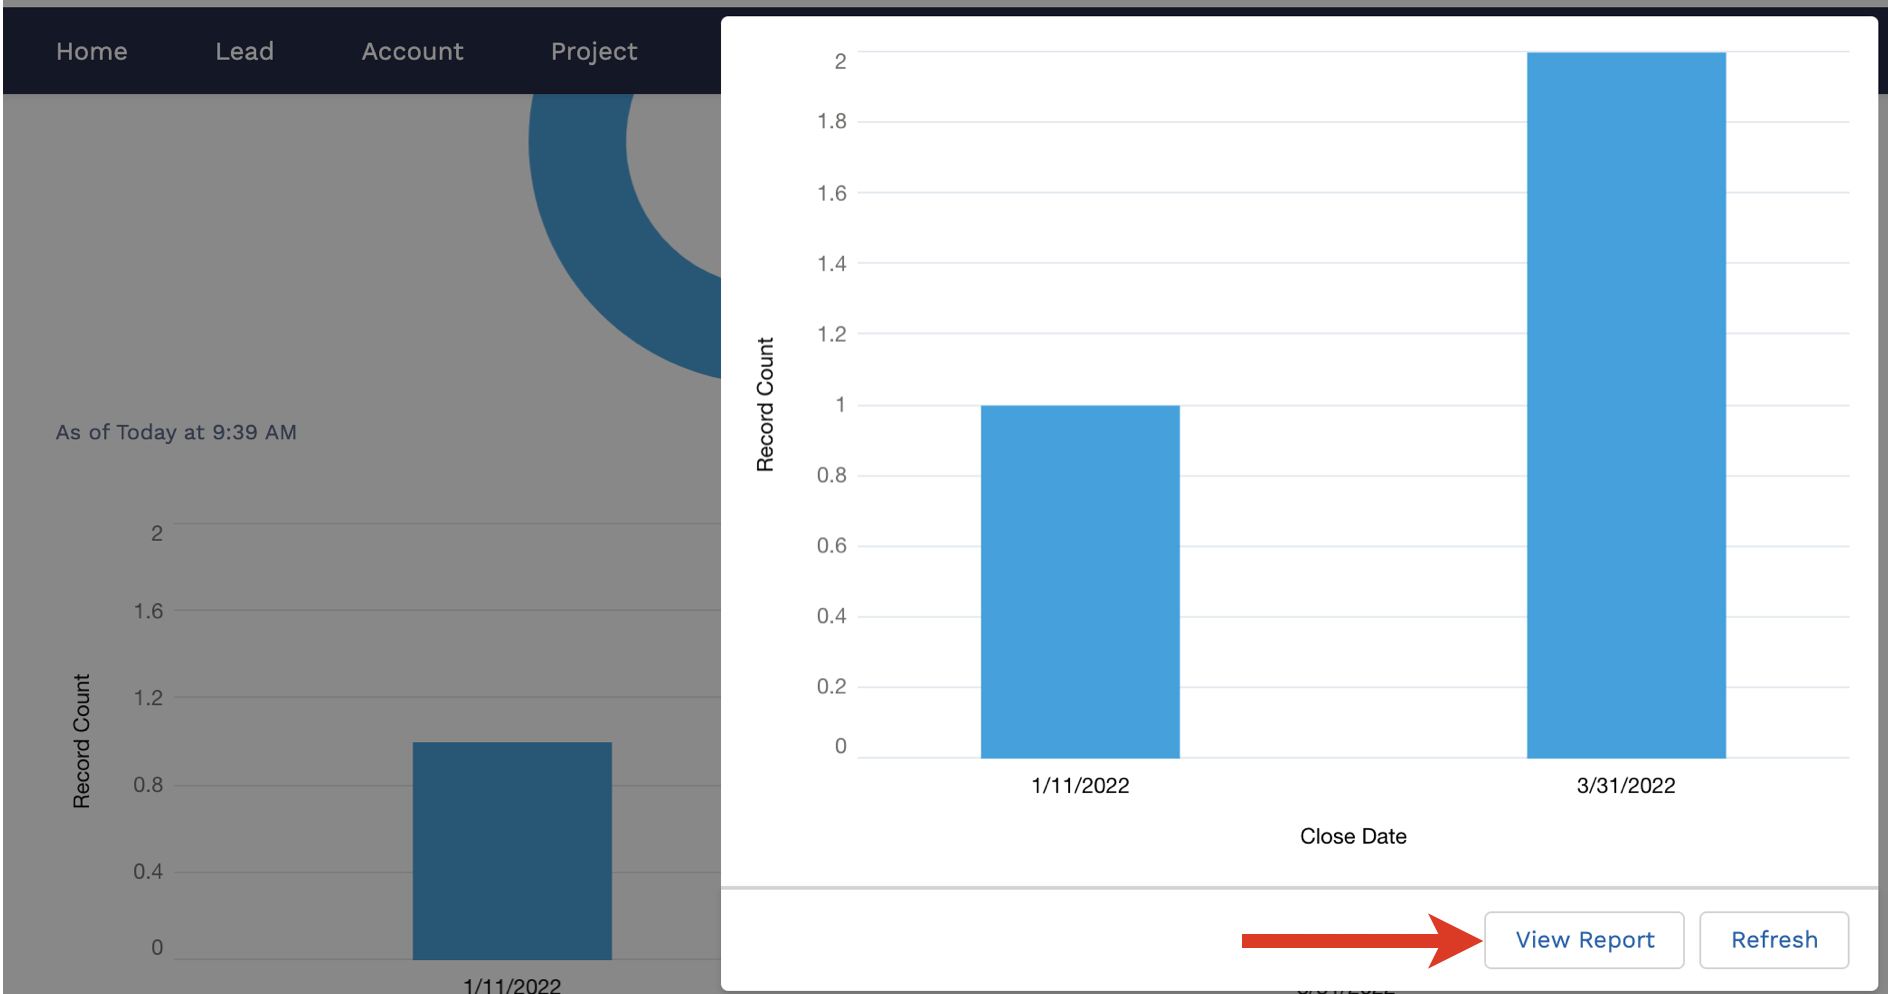
Three reports are available under Home tab. To open a report, click on the graphs and click View Report. You can edit any of the Reports and export them in .xls or .csv formats.
Additionally, you can generate other reports in Report menu.
Partner Opportunities Report shows the detailed information about Projects
Amount Opportunities Report shows the total amount of all created Quotes
- Close Date Opportunities Report shows when Projects are closed
Settings
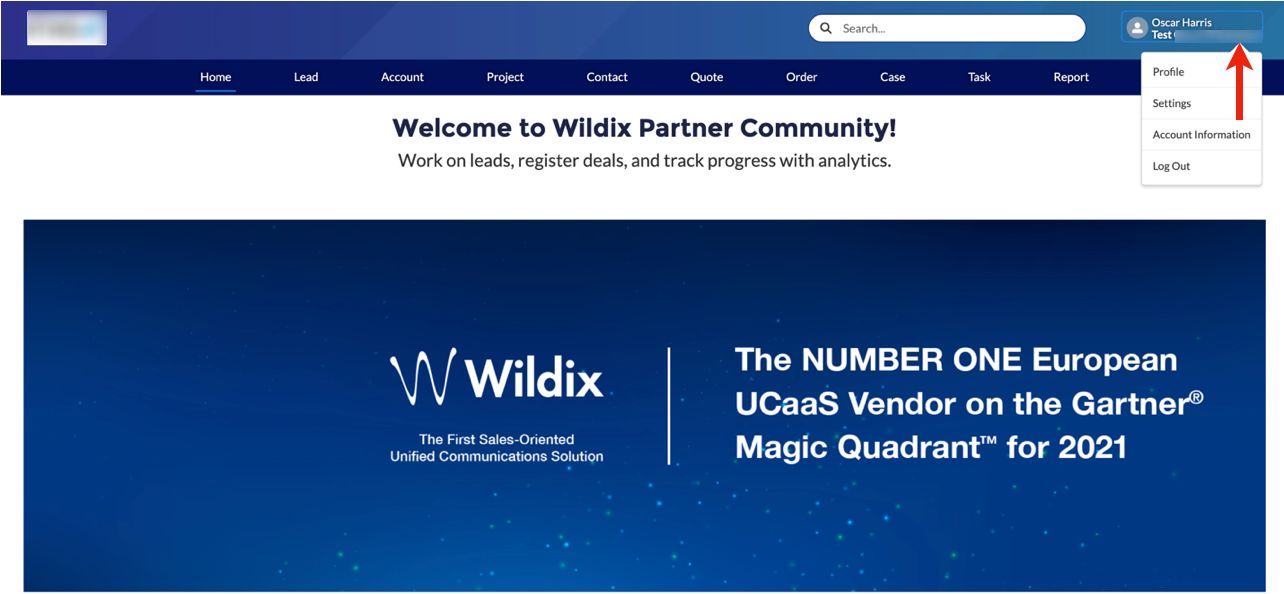
From Settings menu, you can access Home tab, edit your personal Profile and check your Company Account.
- My Profile - this is your personal Profile, you can add user picture, edit your personal information
- My Account - this is your Company Account created by Wildix, you cannot modify the information present on this page
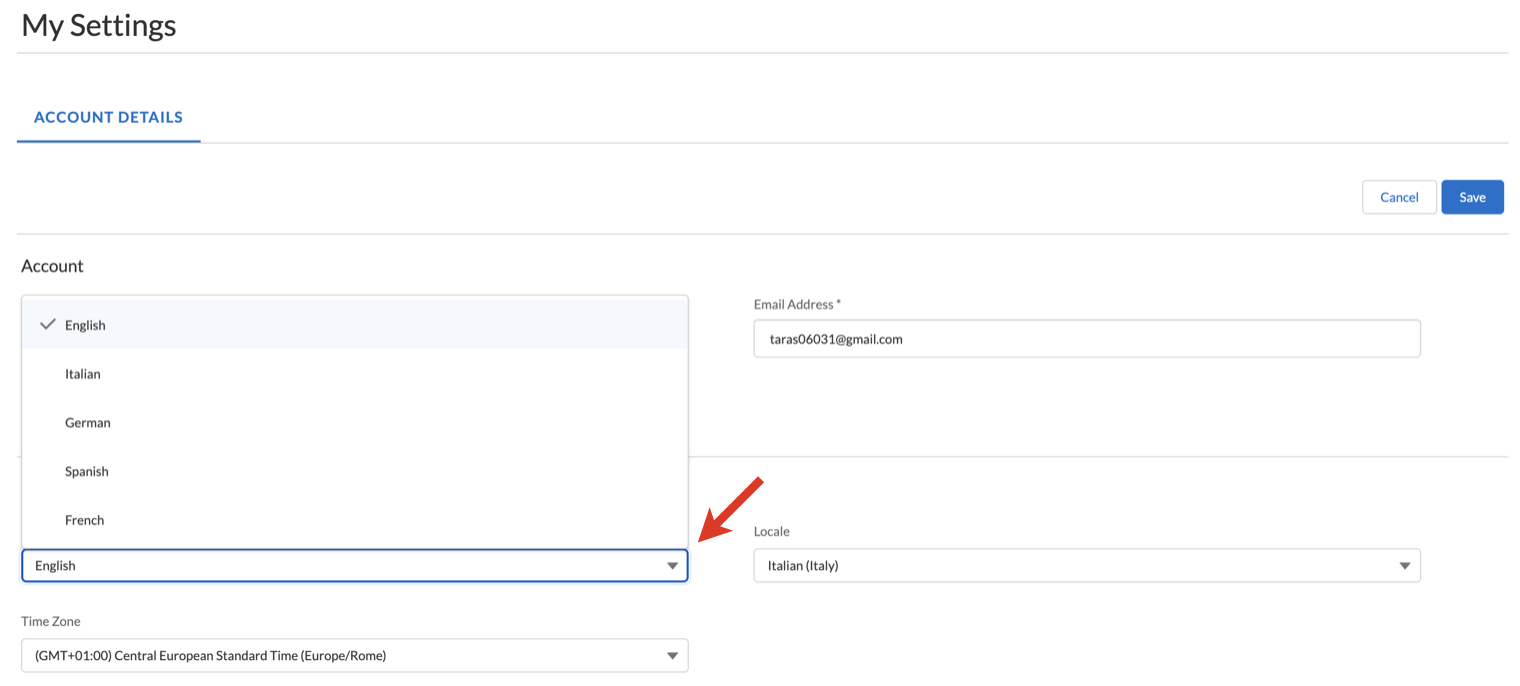
In Account section, you can also change language if required:
Logout
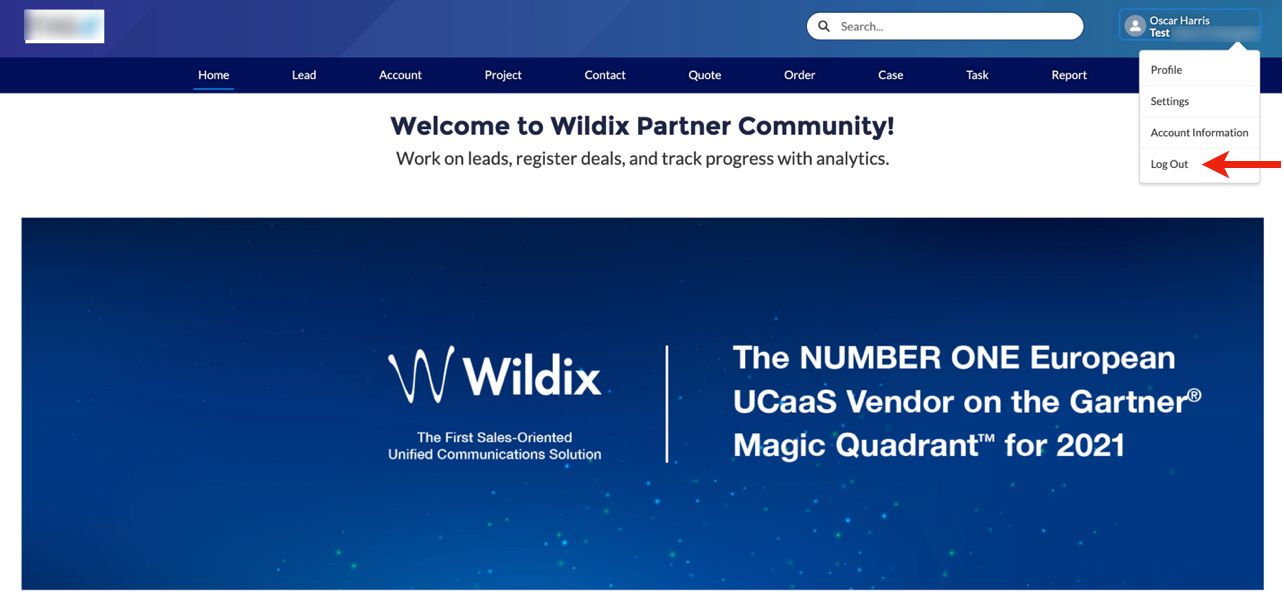
To log out:
- Expand Settings in the top menu
Click Logout
