| Scroll export button | ||||||||
|---|---|---|---|---|---|---|---|---|
|
| Info |
|---|
This Documentation describes how to use Salesforce Partner Community, starting from lead creation and ending with managing opportunities. Related documentation: Submit a Case via Salesforce Partner Community Created: December 2021 Updated: May 2024 Permalink: https://wildix.atlassian.net/wiki/x/ahXOAQ |
| Table of Contents |
|---|
Get Started
Wildix Partner Salesforce Partner Community allows you to manage your customers and leads, starting from lead creation and ending with managing opportunities. The Community includes powerful tools that generate leads so your sales team can close more deals.
...
You have access to the different menus:
- Wildix Partner Community GuideHome - view news & updates, submit a case, etc.
- Wildix Partner Community GuideLead - create and manage Leads
- Wildix Partner Community GuideAccount - create and manage Accounts for companies you plan to sell to
- Wildix Partner Community Guide Project - create and manage Opportunities that refer to the high probability of generating sales revenue
- Wildix Partner Community Guide Contact - create and manage Contacts
- Wildix Partner Community Guide Quote - manage proposed prices of products/ services
- Wildix Partner Community Guide Order - create and manage orders, order items to stock
- Wildix Partner Community Guide Task - create and manage business activities
- Wildix Partner Community GuideReport - generate and manage reports

Home
From the Home page, you can access Wildix Partner Community GuideStatistics, quickly create new Leads and Accounts, submit a case. The Search Field allows you to find any information.
...
See the document Submit a Case via Salesforce Partner Community for more details.
Lead
A Lead is every potential sales opportunity that has not been qualified yet. It can either come from Marketing (both from your Marketing or Wildix Marketing passed to you), or from any activity you and your sales team have done. You need to make sure this potential sales opportunity (or lead) has some characteristics without which it doesn't make sense to move forward in the sales cycle and make this Lead an opportunity. Up to you to decide which characteristics are required, but generally speaking, we talk about: the company is in target, the person is the right one etc, so Wildix so Salesforce Partner Community gives you the opportunity to track this qualification process through the Lead object.
...
Account, Contact and Project are the key object related to the Sales Process. Accounts and Contacts are useful in order to store information about your customers. Accounts represent the companies, and Contacts - are the people who work for them.
Create a New Lead
- Click New button to create a Lead
...
- Click Save button to create a Lead (if you want to create one more Lead, click Save & New button)
Manage existing Leads
You can sort Leads out by clicking on List Views:
...
- When the Lead is qualified and ready to be converted, click Convert button. Based on the Lead, 3 entities are created:
- Account
- Contact
- Project


Account
Accounts represent companies you plan to sell to.
Create a New Account
- Click New button to create an Account
...
- Click Save buttonto create an Account (if you want to create one more Account, click Save & New button)
Manage existing Accounts
You can sort Accounts out by clicking on List Views:
...
From the Related Details and Actions Panel, you have access to all the details connected with the Account: you can review Account History, associated Contacts, add Notes, create Projects, upload files, create and manage Tasks


Project
Projects represent opportunities that refer to the high probability of generating sales revenue. When a Project is created, it’s a signal of the start of a sales cycle.
Create a New Project
- Click New button to create a Project
...
Expected MRR (Calculated): the value is calculated by the following formula:
Total Users * (Weighted Average Price for Licenses + Weighted Average Price for HWaaS + Weighed Average Price for CLASSOUND)
Note: Weighted Average Prices are used in the formula based on the options selected in the “Interested Solution” field.MRR: equals the “Expected MRR (Calculated)”; after the Primary Quote is generated, the value in MRR field equals the actual MRR based on the Primary Quote
Weighted Pipeline: the value is calculated by the formula MRR * Probability
Pipeline MRR: the MRR on the Demo Date date (used in terms of Bonus Pipeline incentive)
Manage existing Projects
You can sort Projects out by clicking on List Views:
...
From the Options Panel, you can edit the Project, generate a Wildix Partner Community Guide Quote, add Notes, clone it. Follow and Change Owner options allow other colleagues of your company to track the Project and change its Owner
...
After providing the answers and moving to another stage, the Demo Done & Demo Date are set to TRUE and Today accordingly and the Pipeline MRR is populated based on the MRR field. After the Account Manager sets the field “Approved by AM” as “Yes”, the Bonus Pipeline requirements are considered fully satisfied.
Contact
Contacts represent a person who is qualified to do business with you. By “qualified,” it means that the person could really become a paying customer.
Create a New Contact
- Click New button to create a Contact
...
- Click Save button to create a Contact (if you want to create one more Contact, click Save & New button)
Manage existing Contacts
You can sort Contacts out by clicking on List Views:
...
From the Related Details and Actions Panel, you have access to all the detailed information connected with the Contact: you can review Contact History, Notes, upload files, create Tasks and upload files

Quote
Quotes represent proposed prices for products and services. Quotes can be created from and synced with Projects and emailed to customers.
Create a Quote
Select a Project you want to generate a Quote for and click Create Quote button:

...
Preview DealRoom: click on the Preview DealRoom button at the top:

It opens the preview of the proposal in DealRoom:
Note Notes:
- The proposal is valid for 1 month, within which it should be signed.
- The quote can be signed only after it is saved (signing option not available in draft).
Here you can view information about Wildix services, see the list of items added to.the proposal, billing information, billing frequency, whether there is commitment or not, as well as terms and conditions.

At the end of the document, there is e-Signature section:
Note Notes: Signing option is not available until the quote is saved.
- Preview PDF: after you click the Preview PDF button, PDF file with the draft of the quote is loaded on your device, so that you can view the quote details, terms and conditions, etc.

When you are ready to save your quote, click Save to draft (1) -> Save & Make Primary (2):

Note Notes:
- When clicking Save & Make Primary button, the quote is synced with Salesforce. No syncing with Salesforce occurs if you click just Save.
- Only a Quote that has been made Primary, can be converted to an Order.
- There is an option Submit Proposal:

When you click on it, an email is sent to the customer with the link to the DealRoom and all the fields of the quote become available in read-only mode.
View saved Quote
The saved quotes appear in the Quotes section of the Project page:
...
On the window that opens, select the tax that displays (you can see quote name, amount of tax, and tax calculation status) and click Done:

Manage existing Quotes
You can sort Tasks out by clicking on List Views: 
...
- To open a Quote, click on its Name

From the Options Panel, you can create a PDF, stop sync, or send the Quote via email

From the Related Details and Actions Panel, you can view the list of related Products/ Services, add Notes, upload attachments, create Tasks

Order
Create an Order from a Quote
- Proceed to your quote: Project -> Quotes -> click on the quote name:

At the top of the quote page, click on the status Accepted:

Note Note: Quote can also be accepted automatically – when the quote is signed by both parties via DealRoom. In this case, quote status automatically changes to Accepted and the relevant order is created.
- Then, click Mark as Current Status:

- The status is successfully changed:
...
Also, on the Order page you can generate PDF file of the Order, by clicking Generate Order PDF:

Order items to Stock
It is possible to order CAPEX products to your stock, so that you can order products anytime and use them with new or existing PBX:
Go to the Order tab and click on the Order to Stock button:

Select the desired CAPEX products and click Next:

To enter the needed quantity of items, hover the mouse next to the necessary item and click on the Edit button (pencil icon):

- Enter the necessary number of items. You can also have an overview of available items in stock (in the Availability, Stock Arrival and Stock Renewal Date columns):

Once done, click Next to confirm your order. On the stock order confirmation popup, click OK to proceed:

Confirm Reseller Orders
Resellers cannot approve their orders. Reseller orders need to be approved on the Partner side. To do this, proceed to the Orders tab, find the Reseller order you want to confirm:
...
Open the order and click Confirm:

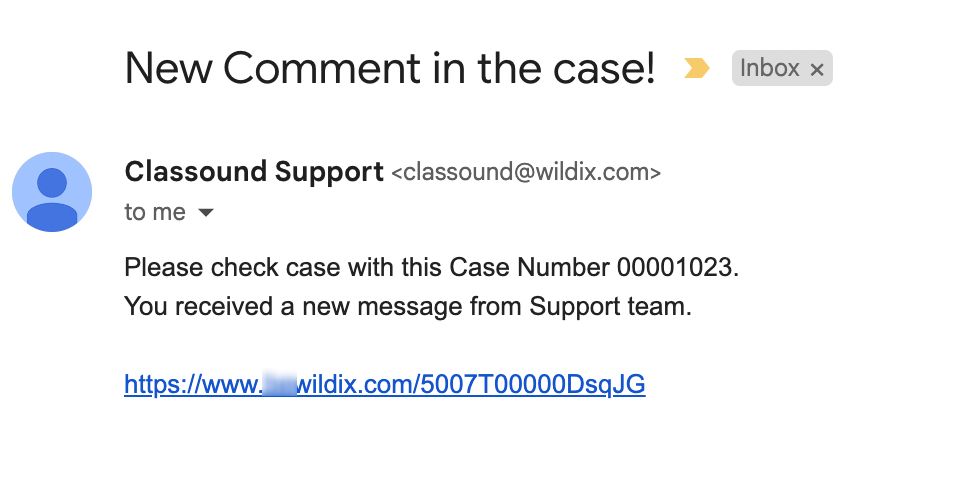
Case
The tab can be used to monitor the status of CLASSOUND orders. Each time when a quote with CLASSOUND add-on (Full Porting, Outbound Only, New DID, New Free Phone) is signed and an order is created, the system automatically creates the relevant number of cases, depending on the number of CLASSOUND add-ons ordered.
...
When CLASSOUND support agent replies/ posts a question, you should receive an email notification, to easily navigate to the necessary case and reply there.
Task
Tasks represent business activities such as making calls, sending quotes or other to-do items.
| Note |
|---|
You can also create and manage Tasks in Lead, Account, Project and Contact tabs, under Open Activities or Actions menus. |
Create a New Task
- Click New Task button to create a Task

Fill in the following mandatory fields:- Subject - add your own or select one of the options: Call/ Send Letter/ Send Quote/ Other
- Assigned To - specify the Task assignee. By default, the Task is assigned to you
- Name - associate it with an existing Contact or create a new one
- Related To - associate it with an existing Account or create a new one
- Activity Currency - indicate the default currency

- Priority - set the Task priority: Normal/ High

- Click Save to create a Task (if you want to create one more Task, click Save & New button)
Manage existing Tasks
You can sort Tasks out by clicking on List Views:
It is also possible to display Tasks as a Kanban board by clicking on Display as:
To open a Task, click on its Subject:
From the Options Panel, you can edit the Task, quickly change Date, Status and Priority, delete it

Once the Task is done, click Mark Complete button

Report
Create a new Report
- To generate a Report, click New Report

Choose Report Type and click Continue

At this stage, you can add/ remove any columns to your Report. Click Save & Run to generate the Report

Manage existing Reports
To open a Report, click on its Name

You can edit the Report or export it in .xls format:

Export Quote information
It is possible to export quote information via Report tab:
- Use Search field to search for the necessary Quote
- Click on the arrow icon on the right and choose the Export in the drop-down menu:

- Proceed with the export, choosing the desired option:
- Formatted Report, which includes report header, groupings, and filter settings
- Details Only, which include detail rows only

Statistics
Three reports are available under Home tab. To open a report, click on the graphs and click View Report. You can edit any of the Reports and export them in .xls or .csv formats.
| Note |
|---|
Additionally, you can generate other reports in Wildix Partner Community Guide Report menu. |
Partner Opportunities Report shows the detailed information about Projects


Amount Opportunities Report shows the total amount of all created Quotes


- Close Date Opportunities Report shows when Projects are closed


Settings
From Settings menu, you can access Home tab, edit your personal Profile and check your Company Account.
- My Profile - this is your personal Profile, you can add user picture, edit your personal information
- My Account - this is your Company Account created by Wildix, you cannot modify the information present on this page
In Account section, you can also change language if required:
Logout
To log out:
- Expand Settings in the top menu
Click Logout

...