| Html |
|---|
<div id="fb-root"></div>
<script>(function(d, s, id) {
  var js, fjs = d.getElementsByTagName(s)[0];
  if (d.getElementById(id)) return;
  js = d.createElement(s); js.id = id;
  js.src = 'https://connect.facebook.net/en_US/sdk.js#xfbml=1&version=v2.11';
  fjs.parentNode.insertBefore(js, fjs);
}(document, 'script', 'facebook-jssdk'));</script> |
| Html |
|---|
<div class="fb-like" data-href="https://confluence.wildix.com/x/xQY8AQ" data-layout="button_count" data-action="recommend" data-size="large" data-show-faces="true" data-share="true"></div> |
| Html |
|---|
<div class="lang-box-pdf">
<div>
<div class="lang-switch">
<span class="letters-form"><a title="French" href="https://confluence.wildix.com/x/3AY8AQ" target="_blank">FR</a> | <a title="German" href="https://confluence.wildix.com/x/4AY8AQ">DE</a></span>
</div>
<div class="google-lang">
<div id="google_translate_element">
</div>
<script type="text/javascript">
function googleTranslateElementInit() {
new google.translate.TranslateElement({pageLanguage: 'en', includedLanguages: 'de,es,fr,it,nl', autoDisplay: false}, 'google_translate_element');
}
</script>
<script type="text/javascript" src="//translate.google.com/translate_a/element.js?cb=googleTranslateElementInit"></script>
</div>
<div class="pdf-button">
<a href="https://confluence.wildix.com/spaces/flyingpdf/pdfpageexport.action?pageId=20711109" alt="Convert to .pdf" title="Convert to .pdf"><img src="https://confluence.wildix.com/download/attachments/14549012/pdf-button-download-wildix-documentation.png"></a>
</div>
</div>
</div> |
| Info |
|---|
This Guide is intended for the following audience:
Min. supported WMS version: 3.88.42218.38 Updated: July 2019 Permalink: https://confluence.wildix.com/x/xQY8AQ |
Table of Contents
Watch the video tutorial (registration is required):
Introduction
Wildix Kite is a professional solution for business communication based on the WebRTC technology that brings Unified Communications to the corporate website. With Wildix Kite a website visitor can communicate with the company call agents via chat, audio and video, desktop and data sharing, all this with just one click.
Features supported:
- Chat
- Audio call
- Video streaming
- Desktop sharing
- File exchange
Wildix WebRTC Kite can be added to the website in the form of:
- Customizable Call button (simple HTML template) with customer authorization or without
- Customizable Widget (embedded into the website or into a separate web page) with customer authorization or without
- HTML email signature with call button, with customer authorization or without
An example of Kite implementation can be found here: www.wildix.com/contacts
Wildix Kite is fully integrated into the Wildix telephony system:
- Chat requests are managed by PBX users via Wildix Collaboration interface
- Audio calls can be managed from all Wildix devices
- Wildix Kite uses a separate Dialplan which makes it easy to customize the service
- Chat requests from Kite service can be routed to separate call agents or to call groups
- Limitation: no support for Kite chat groups on Android/ iOS apps
Configuration
Configuration of Kite service consists of two steps:
- Dialplan configuration – done by PBX administrator
- Implementation on the website – carried out by website webmaster / softhouse
Requirements
Min. supported WMS version: 3.88.42218.38
Browser compatibility:
- Google Chrome
- Mozilla Firefox
- Safari (Limitation: video calls on Safari do not work using Collaboration native app)
We recommend to use the latest stable version of browser.
Licenses:
- UC-Business, more information: https://www.wildix.com/licensing/
- note: one UC-Business is needed for each user that must be contacted via Kite service
Check the ports to open on Firewall: Ports used by Wildix services
Instructions for PBX admin
Dialplan configuration
...
Create Kite link
...
| Scroll export button | ||||||||
|---|---|---|---|---|---|---|---|---|
|
| Info |
|---|
This Guide is intended for the following audience:
Updated: January 2023 Permalink: https://wildix.atlassian.net/wiki/x/EBvOAQ |
Table of Contents
Watch the video tutorial (registration is required):

Introduction
Wildix Kite is a professional solution for business communication based on the WebRTC technology that brings Unified Communications to the corporate website. With Wildix Kite a website visitor can communicate with the company call agents via chat, audio and video, desktop and data sharing, all this with just one click.
Features supported:
- Chat
- Audio call
- Video streaming
- Desktop sharing
- File exchange
Wildix WebRTC Kite can be added to the website in the form of:
- Customizable Call button (simple HTML template) with customer authorization or without
- Customizable Widget (embedded into the website or into a separate web page) with customer authorization or without
- HTML email signature with call button, with customer authorization or without
An example of Kite implementation can be found here: www.wildix.com/contacts.
Wildix Kite is fully integrated into the Wildix telephony system:
- Chat requests are managed by PBX users via Wildix Collaboration interface
- Audio calls can be managed from all Wildix devices
- Wildix Kite uses a separate Dialplan which makes it easy to customize the service
- Chat requests from Kite service can be routed to separate call agents or to call groups
Configuration
Configuration of Kite service consists of two steps:
- Dialplan configuration – done by PBX administrator
- Implementation on the website – carried out by website webmaster / softhouse
Requirements
Browser compatibility:
- Google Chrome
- Mozilla Firefox
- Safari
We recommend to use the latest stable version of a browser.
Licenses:
- UC-Business, more information: https://www.wildix.com/licensing/
- note: one UC-Business is needed for each user that must be contacted via Kite service
Check the ports to open on Firewall: Ports used by Wildix services.
Instructions for PBX admin
Dialplan configuration
- Edit “kite” Dialplan procedure in WMS -> Dialplan -> Dialplan rules (in case “kite” Dialplan procedure is not present, you should create it first)
- Add “internalcalls (Users dialplan)” to Included procedures

Now all the users registered to your PBX can receive calls via Kite service. In case you need to limit the numbers that can be dialed via Kite, refer to Limit access to Kite service chapter.
Create Kite link
- Open supported web browser and type in URL bar: https://kite.wildix.com/PBX_Name/Extension_Number, where
- PBX_Name is the PBX Name (use only PBX domain name in Kite links (do not use PBX serial)
- Extension_Number is the extension number of user registered to this PBX or Call Group Number
Example: https://kite.wildix.com/ucit/324
- Enter your name and email (optional) and click Connect (it is also possible to sign in via your social networks account):

After connection:
- In case the extension entered into the URL exists, chat with this user starts automatically:

PBX user receives a chat request via Wildix Collaboration interface. In addition to the usual options, available in Collaboration web interface, in chat dialog with another PBX user, the following options are available for kite user:

- 1 – Transfer chat to another PBX user
- 2 – Send chat transcript to two email addresses (Operator email/ Customer email)
- 3 – Close chat
Kite user can initiate a call, start video streaming or screen sharing with the PBX user using the icons situated in the upper part of the screen, click the Paperclip icon to send a file or simply drag the file into the input field (support to send files only in JPEG / PDF format), click Options to:

- End chat (log out)
- Send chat transcript to email
- Make an audio echo test
Adjust call settings by changing audio output (available only for Chrome), microphone and webcam:

- Change the language
Resizing video during streaming for Kite users:
Kite user can:
- Place mouse at the bottom of video block -> mouse cursor should change to “Resize (↓)“
- Hold and drag the video to the bottom/ top of the screen to increase/ decrease its size
Or
- Right-click on video -> click Show Controls -> click Fullscreen button
| Warning |
|---|
Limitations:
|
Screen sharing for Kite users:
Kite user has two options to launch screen sharing:
Screen sharing (WebRTC screen streaming): no need to install the component; select a screen or window and share it right away:

Note Note: Supported browsers: Chrome v. 72+; Firefox v. 66+; Edge v. 17+.
Screen sharing with control: in this case Kite user is invited to install the component:

Note Note: detailed information about installation and usage can be found in Collaboration Use Guide.
Create Kite link for Auto-call (call starts after clicking on Kite link)
To enable auto-call (call starts automatically after clicking on Kite link, chat remains available), you should add “?autocall” to your Kite link. So create Kite link in the following format:
- audio call: https://kite.wildix.com/PBXpbx_Name/Extension_Number, where
- PBX_Name is the PBX Name (use only PBX domain name in Kite links (do not use PBX serial)
- Extension_Number is the extension number of user registered to this PBX or Call Group Number
...
- name/extension?autocall
- video call: https://kite.wildix.com/
...
After connection:
...
PBX user receives a chat request via Wildix Collaboration interface. In addition to the usual options, available in Collaboration web interface, in chat dialog with another PBX user, the following options are available for kite user:
- 1 – Transfer chat to another PBX user
- 2 – Send chat transcript to two email addresses (Operator email/ Customer email)
- 3 – Close chat
| Note |
|---|
Note: Starting from WMS 4.01, PBX user can initiate a call and videoconference with Kite user. |
Kite user can initiate a call, start video streaming or screen sharing with the PBX user using the icons situated in the upper part of the screen, click the Paperclip icon to send a file or simply drag the file into the input field (support to send files only in JPEG / PDF format), click Options to:
...
Adjust call settings by changing audio output (available only for Chrome), microphone and webcam:
...
Resizing video during streaming for Kite users:
Kite user can:
- Place mouse at the bottom of video block -> mouse cursor should change to “Resize (↓)“
- Hold and drag the video to the bottom/ top of the screen to increase/ decrease its size
Or
- Right-click on video -> click Show Controls -> click Fullscreen button
| Warning |
|---|
Limitations:
|
Screen sharing for Kite users:
Kite user has two options to launch screen sharing:
Screen sharing (WebRTC screen streaming): no need to install the component; select a screen or window and share it right away:
| Note |
|---|
Note: Supported browsers: Chrome v. 72+; Firefox v. 66+; Edge v. 17+. |
Screen sharing with control: in this case Kite user is invited to install the component:
| Note |
|---|
Note: detailed information about installation and usage can be found in Collaboration Use Guide. |
Create Kite link for Auto-call (call starts after clicking on Kite link)
To enable auto-call (call starts automatically after clicking on Kite link, chat remains available), you should add “?autocall” to your Kite link. So create Kite link in the following format:
- audio call: https://kite.wildix.com/pbx_name/extension?autocall
- video call: https://kite.wildix.com/pbx_name/extension?autovideocall
Where
- pbx_name is the *.wildixin.com domain name of your Wildix PBX
- extension is the extension number or a call group ID
Create Kite link for DIRECT call (without entering chat)
To enable direct call without entering chat, create Kite link in the following format:
- https://kite.wildix.com/pbx_name/phone_number
Where
- pbx_name is the *.wildixin.com domain name of your Wildix PBX
- phone_number is the called number present in the “kite” Dialplan procedure (known issue: letters are not currently supported, only digits)
| Note |
|---|
Note: phone number must not coincide with any existing extension number of user or call group. |
Create Kite link to allow actions only after PBX user sends a message
It is possible to allow chat & screen sharing only after PBX user sends a message.
To enable the option, you should add “?waitMessageFromOperator” to the Kite URL.
Example of the URL: “https://kite.wildix.com/ucit/324?waitMessageFromOperator”. In this case Kite user can send a message, start a call and screen sharing, only after the PBX user sends the first message.
The following values are supported by the parameter:
- call
- screensharing
- chat
You can specify several values separated by comma, example: “https://kite.wildix.com/ucit/324?waitMessageFromOperator=chat,screensharing”
Create Kite link to prevent from asking geolocation
It is possible to prevent Kite from asking geolocation.
To disable the option of asking Kite user's geolocation, you should add "?geolocation=no" to the Kite URL.
Example of the URL: "https://kite.wildix.com/eugeniocloud/448?geolocation=no".
| Note |
|---|
Note: The option can also be disabled/ enabled when generating Kite Widget. |
Create Kite link with disabled notifications
It is possible to disallow notification permission.
To disable sending HTML5 notifications about new chat messages, incoming calls etc, you should add "?notifications=no" to the Kite URL.
Example of the URL: "https://kite.wildix.com/eugeniocloud/448?notifications=no".
| Note |
|---|
Note: The option can also be disabled/ enabled when generating Kite Widget. |
How you can use Kite link
In this Guide we provide information for website webmaster and explain how to:
- Add a Kite contact-me button to a website
- Display additional agent information (status, picture, geolocation)
- Add a Kite widget to a website
Email signature with Kite contact button
You can also use Kite in your email signature, and you don’t need web developer skills, to be able to do it, just follow this link: Generate the HTML signature for email.
Example:
...
- pbx_name/extension?autovideocall
Where
- pbx_name is the *.wildixin.com domain name of your Wildix PBX
- extension is the extension number or a call group ID
Create Kite link for DIRECT call (without entering chat)
To enable direct call without entering chat, create Kite link in the following format:
- https://kite.wildix.com/pbx_name/phone_number
Where
- pbx_name is the *.wildixin.com domain name of your Wildix PBX
- phone_number is the called number present in the “kite” Dialplan procedure (known issue: letters are not currently supported, only digits)
| Note |
|---|
Note: phone number must not coincide with any existing extension number of user or call group. |
Create Kite link to allow actions only after PBX user sends a message
It is possible to allow chat & screen sharing only after PBX user sends a message.
To enable the option, you should add “?waitMessageFromOperator” to the Kite URL.
Example of the URL: “https://kite.wildix.com/ucit/324?waitMessageFromOperator”. In this case Kite user can send a message, start a call and screen sharing, only after the PBX user sends the first message.
The following values are supported by the parameter:
- call
- screensharing
- chat
You can specify several values separated by comma, example: “https://kite.wildix.com/ucit/324?waitMessageFromOperator=chat,screensharing”
Create Kite link to prevent from asking geolocation
It is possible to prevent Kite from asking geolocation.
To disable the option of asking Kite user's geolocation, you should add "?geolocation=no" to the Kite URL.
Example of the URL: "https://kite.wildix.com/eugeniocloud/448?geolocation=no".
| Note |
|---|
Note: The option can also be disabled/ enabled when generating Kite Widget. |
Create Kite link with disabled notifications
It is possible to disallow notification permission.
To disable sending HTML5 notifications about new chat messages, incoming calls etc, you should add "?notifications=no" to the Kite URL.
Example of the URL: "https://kite.wildix.com/eugeniocloud/448?notifications=no".
| Note |
|---|
Note: The option can also be disabled/ enabled when generating Kite Widget. |
How you can use Kite link
In this Guide we provide information for website webmaster and explain how to:
- Add a Kite contact-me button to a website
- Display additional agent information (status, picture, geolocation)
- Add a Kite widget to a website
Email signature with Kite contact button Anchor kitesignature kitesignature
| kitesignature | |
| kitesignature |
You can also use Kite in your email signature, and you don’t need web developer skills, to be able to do it, just follow this link: Generate the HTML signature for email.
Example:
| Easy html macro |
|---|
<table cellpadding="7" cellspacing="0"> <tbody><tr><td width="75" height="5" align="left" valign="middle" bgcolor="#FFFFFF"><img id="picture" style="border-color:#DDD;width: 85px;height: 85px;" src="https://kite.wildix.com/ucit/324/api/avatar" width="85" height="85"></td> <td width="250" height="5" align="left" valign="middle"><table><tbody><tr><td><div style="line-height: 25px;"><span id="uName1" style="font-family: Verdana, Geneva, sans-serif; font-size: 14px; color: #000000; font-weight: bold;">Elena Kornilova</span></div></td></tr> <tr><td><div style="line-height: 14px;"><span id="uJob1" style="font-family: Verdana, Geneva, sans-serif; text-align: left; font-size: 12px; color: #000000;">Documentation & Tech communications Manager</span></div></td></tr> <tr><td><div style="line-height: 14px;"><span id="uCompany1" style="font-family: Verdana, Geneva, sans-serif; text-align: left; font-size: 12px; line-height: 22px; color: #000000;">Wildix</span><span id="separator1" style="font-family: Verdana, Geneva, sans-serif; text-align: left; font-size: 10px; visibility: visible;"> | </span><span id="uWebsiteShow1" style="font-family: Verdana, Geneva, sans-serif; font-size: 12px; color: 0000ff; text-decoration: underline;"><a href="http://www.wildix.com">www.wildix.com</a></span></div></td></tr></tbody></table></td></tr> <tr><td colspan="2" valign="middle"><span contenteditable="true" id="simple" style="font-family:Verdana, Geneva, sans-serif; text-align:left; font-size:12px; line-height:25px; color: #000000;">Prefer online communication?</span><br> <span id="kiteText1" style="font-family:Verdana, Geneva, sans-serif; font-size:15px; line-height:25px; color: #0000FF; text-decoration:underline; font-weight:bold"><a href="https://kite.wildix.com/ucit/324">Click here to chat with me now</a></span></td></tr> <tr><td colspan="2" valign="middle"><div style="line-height:12px"><span id="tel1" style="font-family: Verdana, Geneva, sans-serif; text-align: left; line-height: 12px; font-size: 10px; color: rgb(0, 0, 0); visibility: hidden; display: none;">Tel: </span><span id="uPhone1" style="font-family: Verdana, Geneva, sans-serif; text-align: left; font-size: 14px10px; color: #000000; font-weight: bold;">Elena Kornilova</span></div></td></tr> <tr><td><div rgb(0, 0, 0); display: none;"><br></span> <span id="uAddress1" style="line-height: 14px;"><span id="uJob1" style="normal; font-family: Verdana, Geneva, sans-serif; text-align: left; font-size: 12px10px; color: #000000;">Documentation & Tech communications Manager</span></div></td></tr> <tr><td><divrgb(0, 0, 0); display: none;"></span></div> <div style="line-height: 14px;12px"><span><p><span id="uCompany1uLinkedin1" style="font-family: Verdana, Geneva, sans-serif; textfont-alignsize: left10px; font-sizecolor: 12px0000FF; linetext-heightdecoration: 22pxunderline; colordisplay: #000000none;">Wildix</span><span><a idhref="separator1" ">Add me on LinkedIn</a></span></p></div> <div style="fontline-familyheight: Verdana,12px"><p><span id="uCustomLink1" style="line-height: 12px; font-family:Verdana, Geneva, sans-serif; text-align: left; font-size: 10px10px; display:inline-block; visibilitycolor: visible#000000; display:none;"> | </span><span></span></p></div> <div style="line-height:12px"><p><span id="uWebsiteShow1customField1" style="font-family: Verdana, Geneva, sans-serif; font-size: 12px10px; color: 0000ff#000000; text-decoration: underline;"><a href="http://www.wildix.com">www.wildix.com</a><display:none;"></span></div></td></tr></tbody></table></td></tr> <tr><td colspan="2" valign="middle"><span contenteditable="true" id="simple" style="font-family:Verdana, Geneva, sans-serif; text-align:left; font-size:12px; line-height:25px; color: #000000;">Prefer online communication?</span><br> <span id="kiteText1" style="font-family:Verdana, Geneva, sans-serif; font-size:15px; line-height:25px; color: #0000FF; text-decoration:underline; font-weight:bold"><a href="https://kite.wildix.com/ucit/324">Click here to chat with me now</a></span></td></tr> <tr><td colspan="2" valign="middle"><div style="line-height:12px"><span id="tel1" style="font-family: Verdana, Geneva, sans-serif; text-align: left; line-height: 12px; font-size: 10px; color: rgb(0, 0, 0); visibility: hidden; display: none;">Tel: </span><span id="uPhone1" style="font-family: Verdana, Geneva, sans-serif; text-align: left; font-size: 10px; color: rgb(0, 0, 0); display: none;"><br></span> <span id="uAddress1" style="line-height: normal; font-family: Verdana, Geneva, sans-serif; font-size: 10px; color: rgb(0, 0, 0); display: none;"></span></div> <div style="line-height:12px"><p><span id="uLinkedin1" style="font-family:Verdana, Geneva, sans-serif; font-size:10px; color: 0000FF; text-decoration:underline; display:none;"><a href="">Add me on LinkedIn</a></span></p></div> <div style="line-height:12px"><p><span id="uCustomLink1" style="line-height: 12px; font-family:Verdana, Geneva, sans-serif; text-align:left; font-size:10px; display:inline-block; color: #000000; display:none;"></span></p></div> <div style="line-height:12px"><p><span id="customField1" style="font-family:Verdana, Geneva, sans-serif; font-size:10px; color: #000000; display:none;"></span></p></div> </td></tr> </tbody></table> |
Limit access to Kite service
Via ACL groups you can forbid a user’s presence status and message, avatar visualization, geolocation sharing:
...
Add the Ability “cannot” – “Share status via Kite”/ "Share status message via Kite"/ "Share geolocation via Kite"
| Note |
|---|
Note: if you add the Ability "cannot" – "Share status via Kite", PBX user receives a call automatically. In this way, Kite user doesn't see any information about PBX user (presence, avatar, geolocation) and can only make calls, without entering chat. |
...
Via Dialplan you can limit the numbers that can be dialed via Kite service:
- Go to WMS -> Dialplan > Dialplan rules
- Select “kite” procedure
- Program the Dialplan procedure according to your needs
You can remove “Internalcalls” from Included procedures and add only those numbers that can be dialed. Otherwise you can set up the system to route the incoming calls to certain numbers to Voicemail or to other users.
Instructions for web master
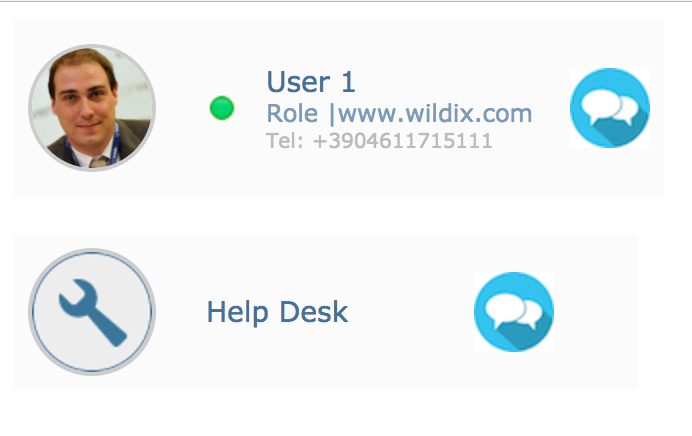
Display call agent information on the website
Kite APIs allow displaying call agent’s presence status, personal image, geolocation. This information is synced with Wildix PBX.
| Note |
|---|
Note: information is not taken from the PBX in real time, it is synced every 10 seconds, so it’s necessary to specify the refresh time in the JavaScript that loads the information. |
- Show user avatar:
https://kite.wildix.com/PBX_Name/Extension_Number/api/avatar
- Show user status image:
https://kite.wildix.com/PBX_Name/Extension_Number/api/presence/image
- Show user status and geolocation in JSON format:
https://kite.wildix.com/PBX_Name/Extension_Number/api/presence
Example:
{“type”:”result”,”result”:{“online”:true,”show”:false,”device_show”:false,”status”:false,”location”:{“address”:false,”lat”:false,”lng”:false}}}
- Information about the user that includes all the data in JSON format:
https://kite.wildix.com/PBX_Name/Extension_Number/api/info
Example:
{“type”:”result”,”result”:{“uid”:”XXXXXXX”,”name”:”User Name”,”avatar”:”http:\/\/XXX.XX.X.XX\/user_avatar\/XXX.png”,”pbx”:”0050568XXXXX”,”presence”:{“online”:true,”show”:false,”device_show”:false,”status”:false,”location”:{“address”:false,”lat”:false,”lng”:false}},”pbxIp”:”XXX.XX.X.XX”, "pbxDomain":"pbx.wildixin.com"}}
Variables explanation:
- uid: unique ID of the user
- name: user name
- avatar: http:\/\/[PBX_IP_address]\/user_avatar\/[Extension_Number].png
- pbx: PBX Serial number
- presence:
- online: online or offline
- show: the status set up by the user (away, dnd)
- device_show: device status (talking, ringing)
- status: status message
- location: serves for geolocation ({address, latitude, longitude})
- pbxIp: PBX IP address
- pbxDomain: PBX domain name
Auto-fill customer name (skip authorization)
It is possible to enable each customer to access Kite service without having to fill in his / her personal data each time. Use Kite link in the following format:
- https://kite.wildix.com/PBX_Name/Extension?name=Customer_Name&email=Customer_Email
where:
- PBX_Name is the *.wildixin.com domain name of the Wildix PBX
- Extension is the extension number of the PBX user or the call group number who receives the request
- Customer_Name is the customer name
- Customer_Email is the customer email address
Example: https://kite.wildix.com/ucit/324?name=Elena&email=elena.kornilova@wildix.com
Customer authorization information is already filled out automatically:
To allow Kite user to connect automatically, add the value “&autologin=1” in the end of the link:
Example: https://kite.wildix.com/ucit/324?name=Elena&email=elena.kornilova@wildix.com&autologin=1.
Kite link in iframe
To insert Kite link into the website page in an iframe, add "/embedded" in the end of the link:
Example:
| Code Block |
|---|
<div align="center"><iframe src="https://kite.wildix.com/mybpx/60" allow="microphone; camera" width="300" height="380" frameborder="0" scrolling="no">
Sorry, your browser doesn't support iframe.
</iframe></div> |
A ready HTML template
Download a ready HTML template HERE.
| Note |
|---|
Note: it is possible to use call group ID instead of an extension number, in this way you can route the chat requests to group of users. |
In the folder you will find two templates.
Template "contacts":
Template "contacts-new":
...
Example of Wildix Kite Widget can be found on www.wildix.com:
...
- Widget design: choose the new (selected by default) or the old design
- Widget icon (new design): select the Kite icon (Chat or Phone) to be displayed on your website
- Widget icon color (new design): select the Kite icon color
- PBX name (new design)/ Serial (old design): PBX name (*.wildixin.com domain name)
- Extension: extension of PBX user or call group number
- Site URL: URL of your website
- Hover title (new design): enter a title to be displayed when hovering over the Kite icon
- Top title / Bottom title (old design): enter titles to be displayed on the Kite icon before and after clicking on it
- Default language: select the default language of the Kite user authorization window, or keep the option “Auto-detection” enabled
- Auto connect: allows PBX users to receive notification once Kite user opens the page (even if Kite widget is not open)
- Auto login: after you enable the option, you can fill out Name and Email of Kite user for pre-authorization
- Ask geolocation: uncheck the box in order to disable option of asking geolocation
- Ask notification permission: uncheck the box to disable sending HTML5 notifications
- Widget behavior: select whether to expand the widget by default, expand the widget after a timeout, or open the widget in a new window
- Position and Offsets: select and optimize the widget position on your website
...
| Note |
|---|
Note: It is possible to perform a test to see how the widget will look on your website: After filling out the fields, press Test instead of Generate, you will see the widget simulation. |
| Note |
|---|
Note: you can edit Kite user name or email (or other values) inside the code after the Kite widget code has been generated (edit the corresponding line of the code). |
Kite events monitoring with Google Analytics
It is possible to access statistics of Wildix Kite (widget) events on Google Analytics.
Read the guide: https://drive.google.com/drive/u/0/folders/1m314TugM0BsQQ23Wnf3QhMhADTBu7Etv
| Html |
|---|
<div class="fb-like" data-href="https://confluence.wildix.com/x/xQY8AQ" data-layout="button_count" data-action="recommend" data-size="large" data-show-faces="true" data-share="true"></div>p></div> </td></tr> </tbody></table> |
Limit access to Kite service
Via ACL groups you can forbid a user’s presence status and message, avatar visualization, geolocation sharing:
- Go to WMS -> Users -> Groups
- Select a group
Add the Ability “cannot” – “Share status via Kite”/ "Share status message via Kite"/ "Share geolocation via Kite"
Note Note: if you add the Ability "cannot" – "Share status via Kite", PBX user receives a call automatically. In this way, Kite user doesn't see any information about PBX user (presence, avatar, geolocation) and can only make calls, without entering chat.
- Click Save
Via Dialplan you can limit the numbers that can be dialed via Kite service:
- Go to WMS -> Dialplan > Dialplan rules
- Select “kite” procedure
- Program the Dialplan procedure according to your needs
You can remove “Internalcalls” from Included procedures and add only those numbers that can be dialed. Otherwise you can set up the system to route the incoming calls to certain numbers to Voicemail or to other users.
Instructions for web master
Display call agent information on the website
Kite APIs allow displaying call agent’s presence status and personal image. This information is synced with Wildix PBX.
| Note |
|---|
Note: information is not taken from the PBX in real time, it is synced every 10 seconds, so it’s necessary to specify the refresh time in the JavaScript that loads the information. |
- Show user avatar:
https://kite.wildix.com/PBX_Name/Extension_Number/api/avatar
- Show user status image:
https://kite.wildix.com/PBX_Name/Extension_Number/api/presence/image
- Show user status in JSON format:
https://kite.wildix.com/PBX_Name/Extension_Number/api/presence
Example:
{“type”:”result”,”result”:{“online”:true,”show”:false,”device_show”:false,”status”:false}}

- Information about the user that includes all the data in JSON format:
https://kite.wildix.com/PBX_Name/Extension_Number/api/info
Example:
{“type”:”result”,”result”:{“uid”:”XXXXXXX”,”name”:”User Name”,”avatar”:”http:\/\/XXX.XX.X.XX\/user_avatar\/XXX.png”,”pbx”:”0050568XXXXX”,”presence”:{“online”:true,”show”:false,”device_show”:false,”status”:false,”pbxIp”:”XXX.XX.X.XX”, "pbxDomain":"pbx.wildixin.com"}}

Variables explanation:
- uid: unique ID of the user
- name: user name
- avatar: http:\/\/[PBX_IP_address]\/user_avatar\/[Extension_Number].png
- pbx: PBX Serial number
- presence:
- online: online or offline
- show: the status set up by the user (away, dnd)
- device_show: device status (talking, ringing)
- status: status message
- pbxIp: PBX IP address
- pbxDomain: PBX domain name
Auto-fill customer name (skip authorization)
It is possible to enable each customer to access Kite service without having to fill in his / her personal data each time. Use Kite link in the following format:
- https://kite.wildix.com/PBX_Name/Extension?name=Customer_Name&email=Customer_Email
where:
- PBX_Name is the *.wildixin.com domain name of the Wildix PBX
- Extension is the extension number of the PBX user or the call group number who receives the request
- Customer_Name is the customer name
- Customer_Email is the customer email address
Example: https://kite.wildix.com/ucit/324?name=Elena&email=elena.kornilova@wildix.com
Customer authorization information is already filled out automatically:

To allow Kite user to connect automatically, add the value “&autologin=1” in the end of the link:
Example: https://kite.wildix.com/ucit/324?name=Elena&email=elena.kornilova@wildix.com&autologin=1.
Kite link in iframe
To insert Kite link into the website page in an iframe, add "/embedded" in the end of the link:
Example:
| Code Block |
|---|
<div align="center"><iframe src="https://kite.wildix.com/mybpx/60" allow="microphone; camera" width="300" height="380" frameborder="0" scrolling="no">
Sorry, your browser doesn't support iframe.
</iframe></div> |
A ready HTML template
Download a ready HTML template HERE.
| Note |
|---|
Note: it is possible to use call group ID instead of an extension number, in this way you can route the chat requests to group of users. |
In the folder you will find two templates.
Template "contacts":
Template "contacts-new":

Add a Kite Widget to your website
Example of Wildix Kite Widget can be found on www.wildix.com:

- Go to the page of code generation: http://kite.wildix.com/pages/widget/
- Fill out the fields:
- Loading type: choose between Async (selected by default) and Sync type. With Async type, a script is loaded simultaneously, which helps to speed the page loading and reduce the amount of downloaded data. With Sync type, a script is loaded sequentially. Use case: Async type can be applied when you need to integrate the Kite widget into an e-commerce platform (for example, Shopify, Magento, Autotrader etc) to have it loaded automatically before a page is loaded
- Widget design: choose the new (selected by default) or the old design
- Widget icon (new design): select the Kite icon (Chat or Phone) to be displayed on your website
- Widget icon color (new design): select the Kite icon color
- PBX name (new design)/ Serial (old design): PBX name (*.wildixin.com domain name)
- Extension: extension of PBX user or call group number
- Site URL: URL of your website
- Hover title (new design): enter a title to be displayed when hovering over the Kite icon
- Top title / Bottom title (old design): enter titles to be displayed on the Kite icon before and after clicking on it
- Default language: select the default language of the Kite user authorization window, or keep the option “Auto-detection” enabled
- Auto connect: allows PBX users to receive notification once Kite user opens the page (even if Kite widget is not open)
- Auto login: after you enable the option, you can fill out Name and Email of Kite user for pre-authorization
- Ask geolocation: uncheck the box in order to disable option of asking geolocation
- Ask notification permission: uncheck the box to disable sending HTML5 notifications
- Widget behavior: select whether to expand the widget by default, expand the widget after a timeout, or open the widget in a new window
- Position and Offsets: select and optimize the widget position on your website
- Click Generate
- The code is generated, copy the code and paste it into your website between the tags and / or into a single web page
| Note |
|---|
Note: It is possible to perform a test to see how the widget will look on your website: After filling out the fields, press Test instead of Generate, you will see the widget simulation. |

| Note |
|---|
Note: you can edit Kite user name or email (or other values) inside the code after the Kite widget code has been generated (edit the corresponding line of the code). |
Distribution of Kite chat requests in Call groups
In case of a call group, Kite chat requests are by default distributed according to Round Robin strategy: the next agent is selected on the list following the individual that received the last chat request.
Chat request is sent to a user and in case it isn’t accepted within 10 seconds, the request is forwarded to the next user and so on until the global timeout of 60 seconds is reached.
Even after a chat request is sent to the next user in the group, the previous user can still respond to it unless it was already taken by another user.
Users who are busy/ away/ offline, don’t get chat requests.
| Note |
|---|
Notes:
|
Kite events monitoring with Google Analytics
It is possible to access statistics of Wildix Kite (widget) events on Google Analytics.
Read the guide: https://drive.google.com/drive/u/0/folders/1m314TugM0BsQQ23Wnf3QhMhADTBu7Etv
Kite chatbot SDK
Please refer to the following document: WebRTC Kite Chatbot SDK
| Macrosuite divider macro | ||||||||||||||||||||||||||
|---|---|---|---|---|---|---|---|---|---|---|---|---|---|---|---|---|---|---|---|---|---|---|---|---|---|---|
|
| Button macro | ||||||||||||||||||||||||||||||||||||||||
|---|---|---|---|---|---|---|---|---|---|---|---|---|---|---|---|---|---|---|---|---|---|---|---|---|---|---|---|---|---|---|---|---|---|---|---|---|---|---|---|---|
|