...
| Info |
|---|
The Guide describes the remote provisioning of each Wildix device. General information about provisioning: Provisioning of Wildix devices Guide. Updated: March May 2024 Permalink: https://wildix.atlassian.net/wiki/x/cBnOAQ |
...
- Go to device’s web interface
Credentials for the first time access: admin : admin - Go to menu System -> Auto Provision tab
- Proceed to the section Static Provisioning Server and insert the PBX domain into the field “Server Address”


- Make sure HTTPS is chosen as Protocol Type:

- Proceed to the section Autoprovision Now and click the Autoprovision Now button

- Press ApplyConfirm the provisioning by pressing OK on the screen that pops up:

WP4X0 2015 - 2016 - 2017, Start, WorkForce, WelcomeConsole
...
- Go to device's web interface
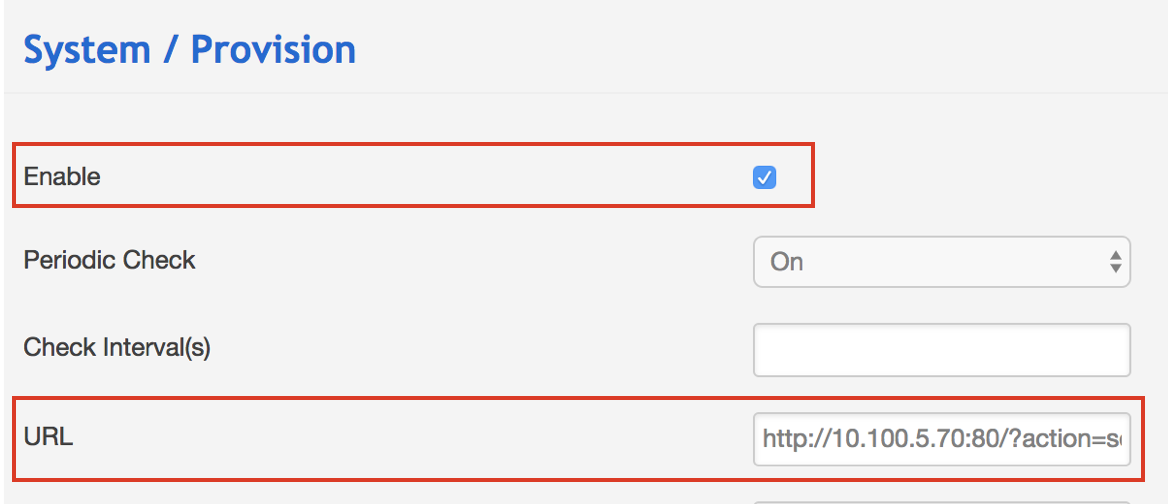
Credentials for the first time access: admin : admin - Go to the menu System -> Provision
- Check off Enable
- Insert the provisioning URL into the field "URL"
Click Save
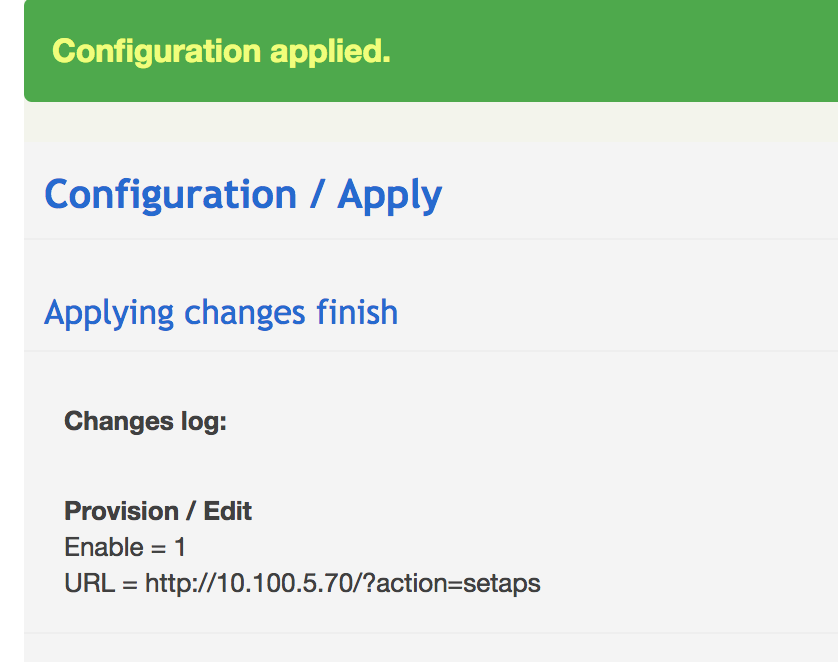
Confirm by clicking Apply

Configuration is now applied
W02FXS 2018, W04FXS 2020, W04FXO 2020/2023, W24FXS 2015, W24FXS 2023
- Go to device’s web interface
Credentials for the first time access: admin : admin
...
Device is now rebooting.
W-AIR Sync Plus
Go to device’s web interface
Credentials for the first time access: admin : adminNote Note: Starting from firmware v. 0730b0100, the credentials are: admin : Wildixwair
- Go to the menu Management
- Modify the following fields:
- Management Transfer Protocol: select “HTTP”
- Configuration File Download: select “Base and Multi Cell Specific File”
- Configuration Server Address: enter the PBX IP address or domain name
- Base Specific File: insert the part of the provisioning URL without the IP address of the PBX: ?action=setaps
- Multi Cell Specific File: the same value as in Base Specific File
- Click Save and Reboot
...
- Go to WMS -> Devices -> W-AIR Networks and click Add to create the network with the added base station
- Select W-AIR Sync Plus in Devices tab and click Configure / Sync device
- Reboot the base station one more time to apply changes
W-AIR old generation
Go to device’s web interface
Credentials for the first time access: admin : adminNote Note: Starting from firmware v. 0730b0100, the credentials are: admin : Wildixwair
- Go to the menu Management
- Modify the following fields:
- Management Transfer Protocol: select “HTTP”
- Configuration File Download: select “Base and Multi Cell Specific File”
- Configuration Server Address: enter the PBX IP address or domain name
- Base Specific File: insert the part of the provisioning URL without the IP address of the PBX: ?action=setaps
- Multi Cell Specific File: the same value as in Base Specific File
- Click Save and Reboot
...
W-AIR Small Business PRE 2021 and 2021
Go to device’s web interface
Credentials for the first time access: admin : adminNote Note: Starting from firmware v. 0730b0100, the credentials are: admin : Wildixwair
- Go to the menu Management
- Modify the following fields:
- Management Transfer Protocol: select “HTTP”
- Configuration File Download: select “Base Specific File”
- Configuration Server Address: enter the PBX IP address or domain name
- Base Specific File: insert the part of the provisioning URL without the IP address of the PBX: ?action=setaps
- Click on Save and Reboot
...