| Scroll export button | ||||||||
|---|---|---|---|---|---|---|---|---|
|
| Info |
|---|
This Guide will lead you through the process of Salesforce Lightning integration usage, starting from a Softphone installation and activation, and ending with practical examples for call receiving. Blog covering available Salesforce integrations: Optimizing Your Salesforce Integration Experience. Created: June 2019 Updated: July 2023May 2024 Permalink: https://wildix.atlassian.net/wiki/x/VgvOAQ |
| Table of Contents | ||
|---|---|---|
|
Requirements
- x-bees:
- WMS version: 6.01 or higher
- x-bees-Standard or x-bees-SuperBee
- Collaboration:
- WMS version: 5.01 or higher
- Wildix UC-Business or UC-Premium license
- Salesforce license with access to the Lightning Platform
- Your Salesforce domain should be whitelisted on the PBX
- Activated Salesforce Payment Plan to set up Call Center, check the prices here
Features
- Click-to-call
- Incoming call popup
Outgoing call popup
- Call history
- Dialpad
- Search Bar for contacts
- Auto-detect existing contacts and redirect to their page
...
| Warning |
|---|
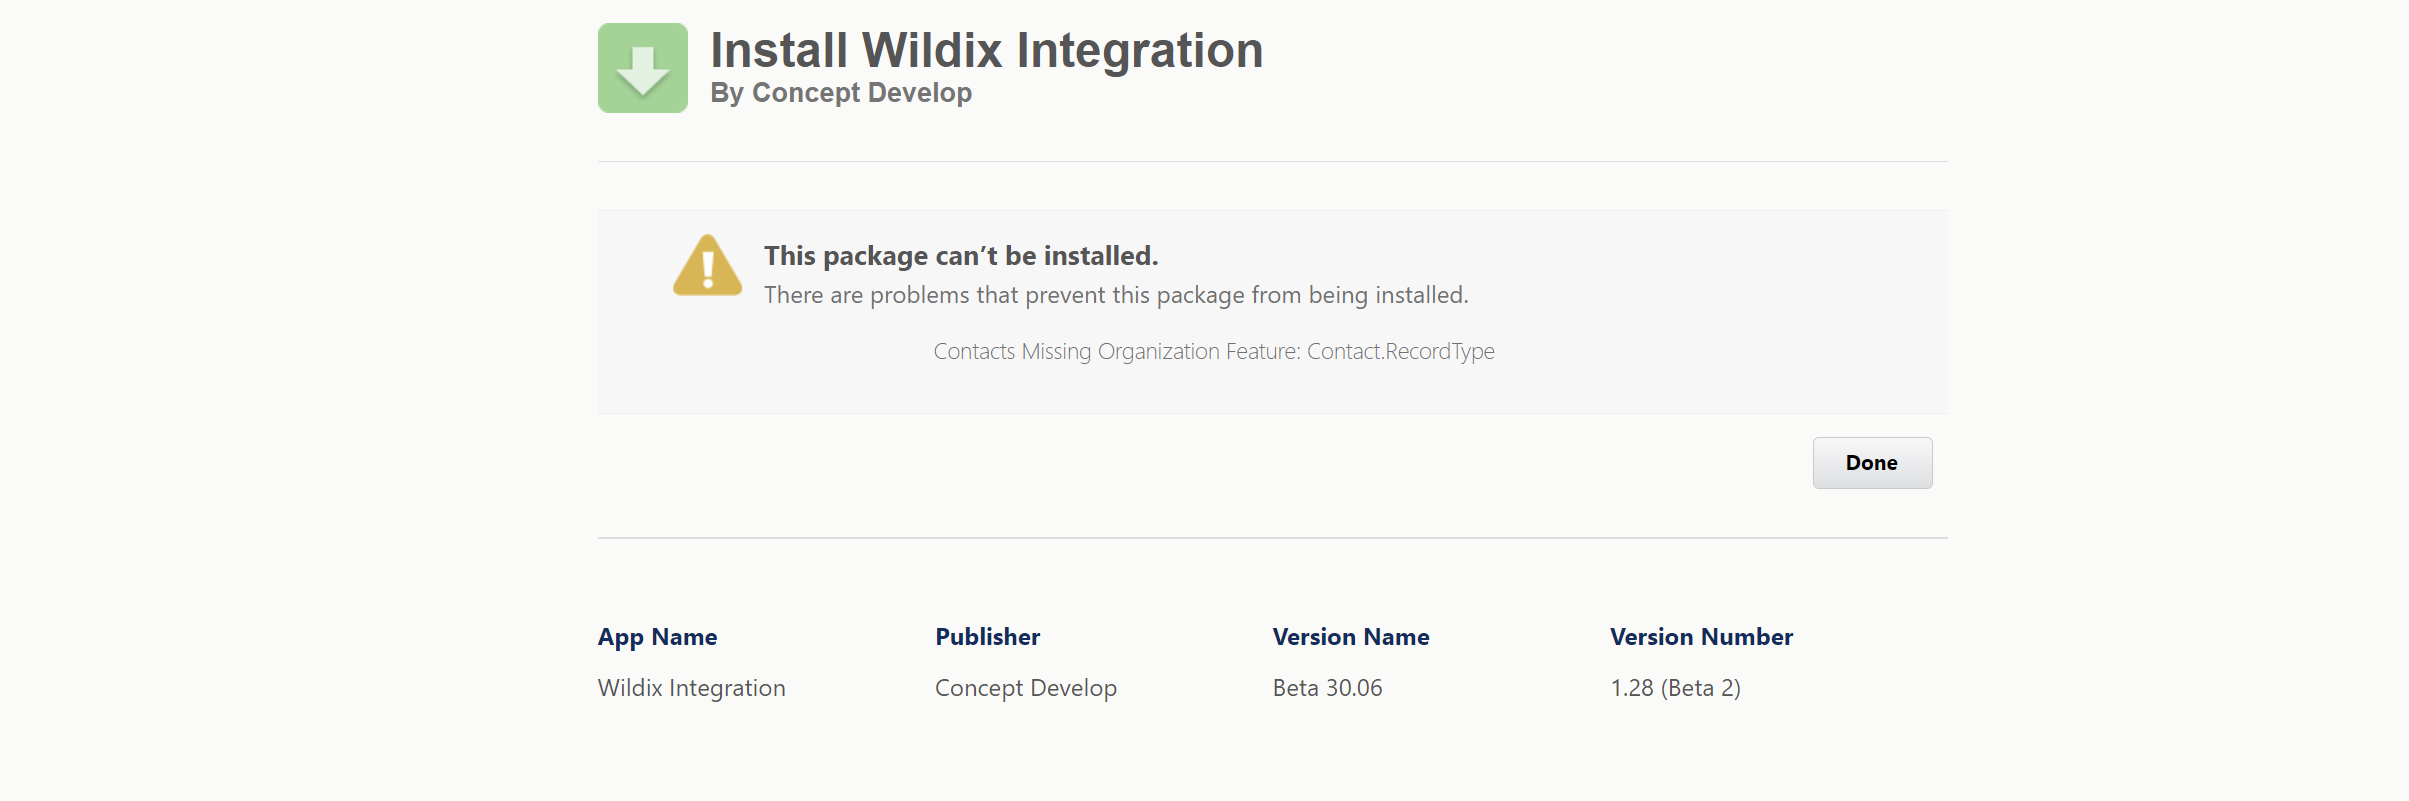
Important: Record types (used for Contacts) should be set up in Salesforce to be able to install Wildix Integration. See How to set up Record Types in Salesforce. In case record types are not set, you may face the following issue when installing Wildix Integration:
|
...
Choose Classic Call Center and click Save.
Enable Salesforce Telephony in WMS
To be able to log in to the integration and performs calls, make sure to install Salesforce Telephony in WMS:
- Go to PBX -> Integrations -> Cloud integrations
- Click on Salesforce Telephony:

- Click Install:
 The integration gets installed:
| Note |
|---|
Note: When Salesforce Telephony is installed, the relevant salesforce_telephony app is added to OAuth 2.0 applications in WMS -> Integrations -> Applications. Please do not delete it, otherwise the integration will not work. |
Application Usage
| Note |
|---|
It is not necessary to keep x-bees / Collaboration open if you have a connected WP phone. You can select a device to place calls if there are several connected devices. |
...
- To add a new contact, click Create contact:

- Add Contact screen shows up, where you need to fill out the following data:
- First Name: enter the contact’s first name
- Last Name: type in the contact’s last name
- Email: fill out email address
- Phone: enter phone number
- Account: start typing and select account the contact belongs to
- Record type: choose type of the record in the drop down list

- Click Add contact
History
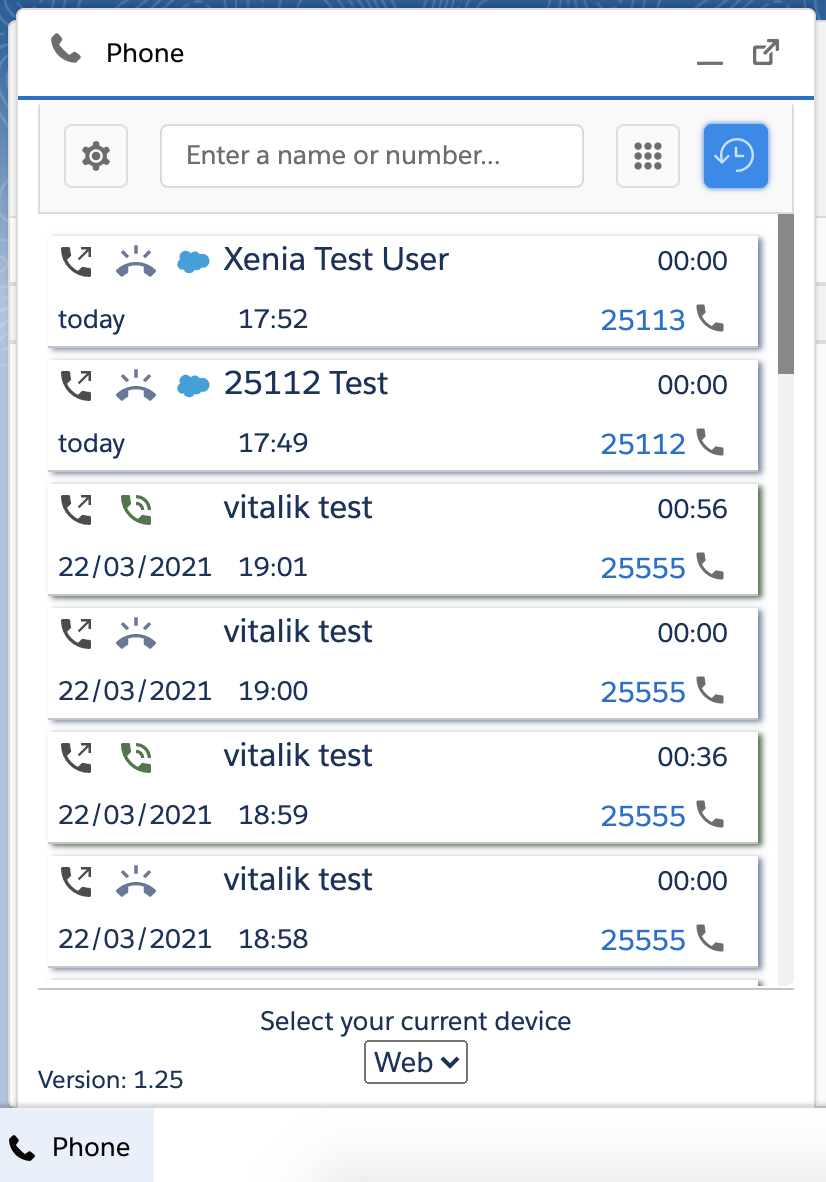
List of previous calls with:
- Phone number
- Name of contact
- Data of call
- Duration of a call
Dialer settings

- Enable auto-opening of found contacts
- Enable auto-opening of found contacts when receiving an incoming call
...