...
| Scroll export button | ||||||||
|---|---|---|---|---|---|---|---|---|
|
| Info |
|---|
This Article explains how to debug Wildix Integration Service and related components. Updated: October 2021January 2023 Permalink: https://confluencewildix.wildixatlassian.comnet/wiki/x/jweIAQRRzOAQ |
| Table of Contents |
|---|
Review of versions
All integrations/ components can be installed from Collaboration - > Settings - > Extensions:

If an integration/ a component is not yet installed, click INSTALL to download a package and launch the installation.
If a new version is available, click UPDATE to to get the latest one. Otherwise, a popup notification will be displayed:

INSTALLED INSTALLED indicates that the latest version is installed.
For more information on WIService installation and update process, check out the guide What is WIService: Installation
How to collect
...
WIService logs on macOS
| Anchor | ||||
|---|---|---|---|---|
|
- Open "Go to Folder" window by pressing Shift+Cmd+G
- Insert the path of the folder: ~/Library/Application Support/com.wildix.wiservice
- Сlick Go
Or
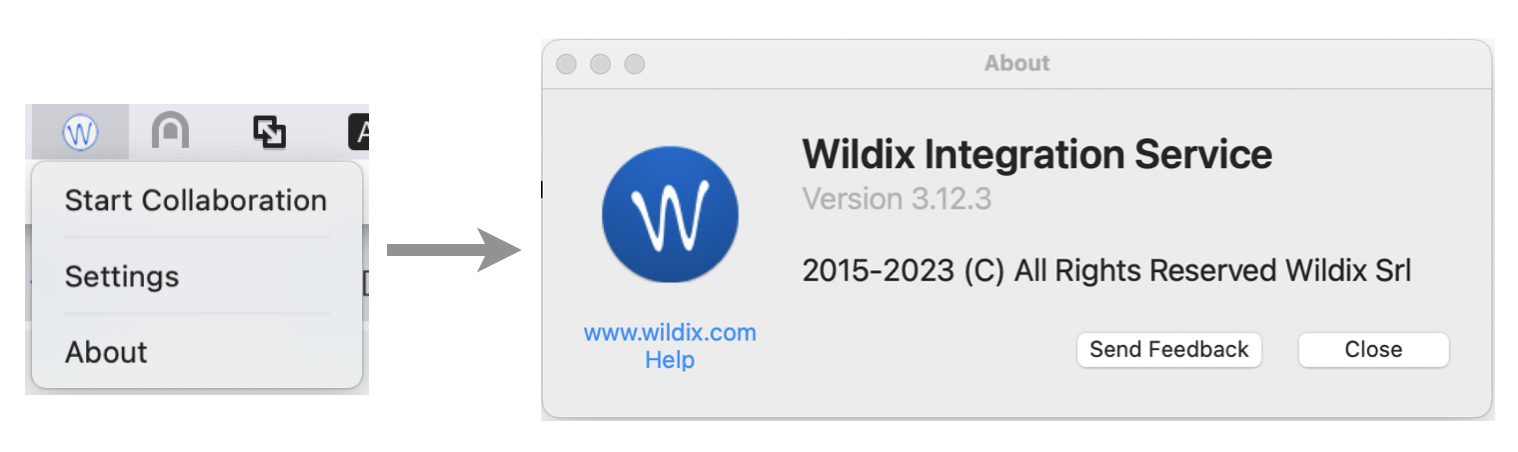
- Go to macOS status menu
- Click on Wildix Integration Service icon
- Select About and click Logs

...
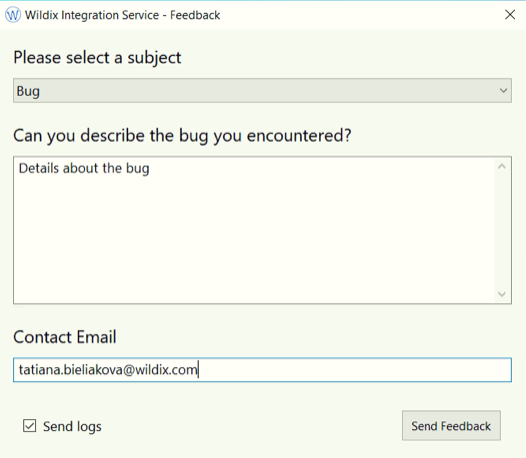
- and click Send Feedback
Enter description of the bug you've encountered and click Send Feedback

| Note |
|---|
Note: The checkbox Send logs is ticked off by default. Make sure not to disable it. |
| Note |
|---|
| Note |
Note: Starting from v 3.2.17, WIService logs also include Headset integration logs. And starting from v 3.4.1 they also include Screen sharing logs. |
Collect Screen Share logs
- Open "Go to Folder" window by pressing Shift+Cmd+G
- Insert the path of the folder: ~/Library/Application Support/com.wildix.screenshare
- Сlick Go
Note: Screen sharing component is merged with WIService starting from v 3.4.1. Thus, starting Starting from v 3.4.1, you can find screen sharing logs in wislog.txt file in the folder ~/Library/Application Support/com.wildix.wiservice. |
Or
- Go to macOS status menu
- Click on Screen Share icon
- Select About and click Logs

To view logs, open wislog.txt file.
Collect Headset Integration logs
- Open "Go to Folder" window by pressing Shift+Cmd+G
- Insert the path of the folder: ~/Library/Application Support/hilog.txt
- Сlick Go
| Note |
|---|
Note: Headset integration is merged into WIService starting from v 3.2.17. Headset integration logs are available in wislog.txt file in the folder ~/Library/Application Support/com.wildix.wiservice. |
Or
- Go macOS status menu
- Click on Headset Integration icon
- Select About and click Logs

To view logs, open hilog.txt file.
WIService also includes Screen sharing logs. |
How to collect logs from Wildix integrations - Windows
...
- Open Windows Explorer (File Explorer)
- Insert the path of the folder: %APPDATA%\Wildix\WIService
To view logs, open wislog.txt file.
Or
- Go to Windows Quick Launch toolbar
- Click on Wildix Integration service icon
- Select About and click Logs

...

- Enter description of the bug you've encountered, provide contact email, and click Send Feedback
| Note |
|---|
Note: The checkbox Send logs is ticked off by default. Make sure not to disable it. |
| Note |
|---|
| Note |
Note: Starting from WIService v 3.2.2, logs also include Headset integration data. |
Collect Outlook Integration logs
- Open Windows Explorer (File Explorer)
- Insert the path of the folder: %APPDATA%\Wildix\OutlookIntegration
Or
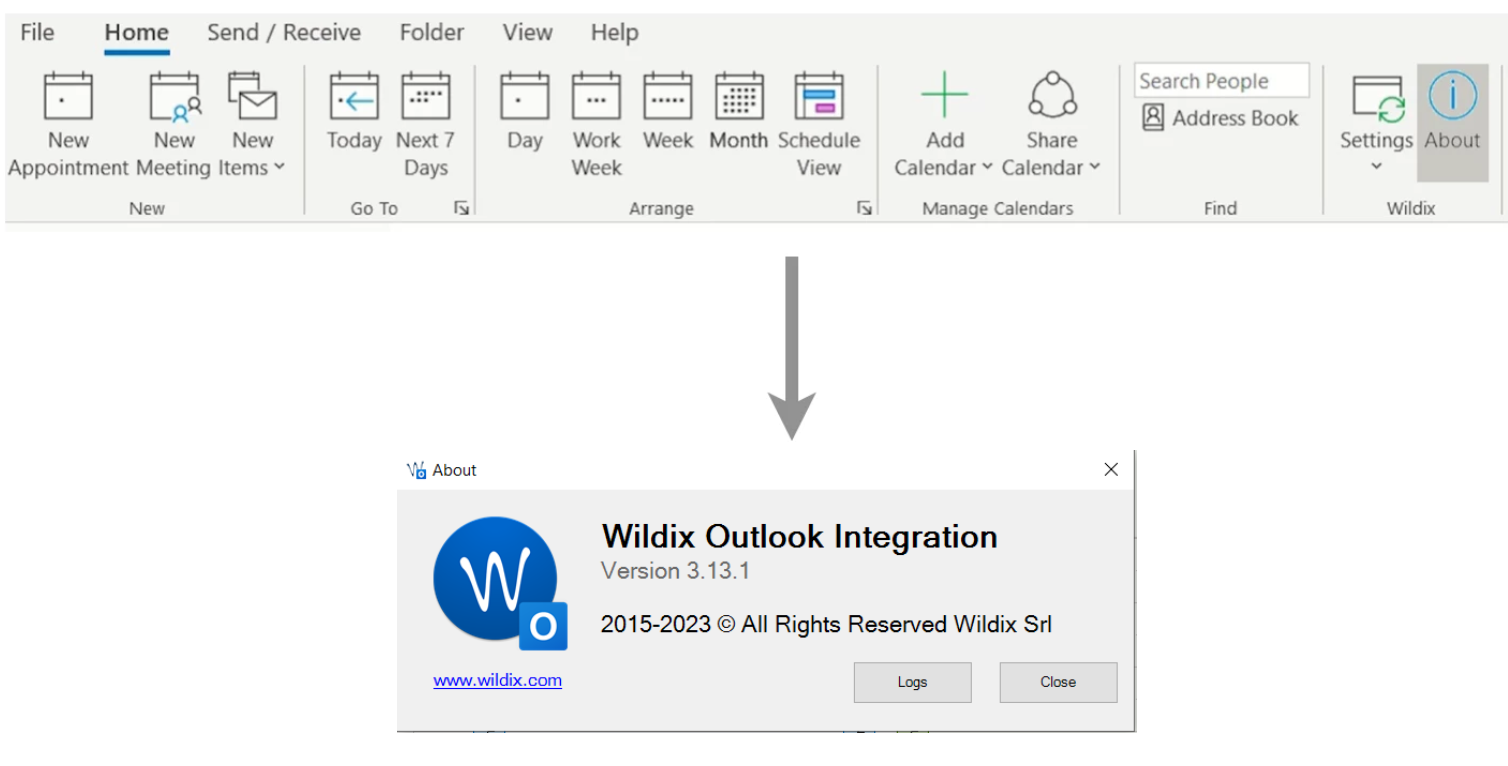
- Go to Outlook Calendar -> Wildix
- Select About and click Logs
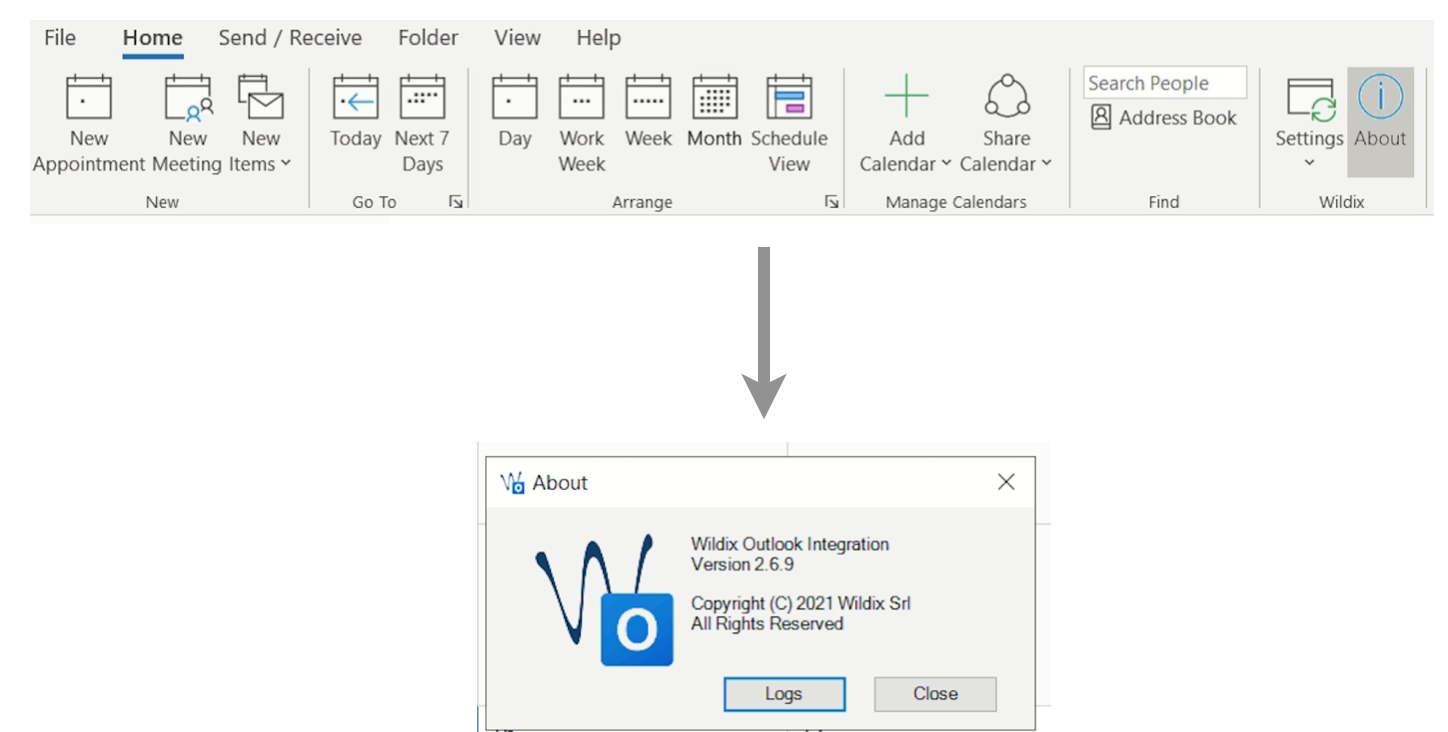
To view logs, open log.txt file.
Collect Screen Share logs
- Open Windows Explorer (File Explorer)
- Insert the path of the folder: %APPDATA%\Wildix\SS
Note: Screen sharing component is merged with WIService starting from v 3.4.1. Thus, starting Starting from v 3.4.1, you can find screen sharing logs in wislog.txt file in the folder %APPDATA%\Wildix\WIService. |
Or
- Go to Windows Quick Launch toolbar
- Click on Screen Share icon
- Select About and click Logs
 To view logs, open wislog.txt file.
Collect Headset Integration logs
| Note |
|---|
Note: Starting from WIService v 3.2.2, Headset integration is a part of WIService. To collect logs, check this section.WIService also includes Screen sharing logs. |
Collect Outlook Integration logs
- Open Windows Explorer (File Explorer)
- Insert the path of the folder: %APPDATA%\Wildix\HIOutlookIntegration
Or
- Go to Windows Quick Launch toolbar Click on Headset Integration iconOutlook Calendar -> Wildix
- Select About and click Logs
...
To view logs, open hiloglog.txt file.
Restart WIService - MacOS
...
Uninstall WIService - MacOS
| Note |
|---|
Note: Starting from WIService v. 3.10.5, it is possible to delete WIService on Mac the same way as other apps (e.g. by moving Wildix Integration Service app to Bin from Launchpad/ Library/ Applications folder) |
To delete Wildix Integration Service, run the following commands:
| Code Block |
|---|
sudo launchctl unload /Library/LaunchDaemons/com.wildix.WIService-wd.plist > /bin/dev/null 2>&1 sudo launchctl unload /Library/LaunchAgentsLaunchDaemons/com.wildix.MenuIntegrationwiservice-autoUpdate.plist > /dev/null 2>&1 /bin/launchctl unload /Library/LaunchAgents/com.wildix.WIServiceMenuIntegration.plist sudo> rm /Library/LaunchDaemons/com.wildix.WIService-wd.plist sudo rm /Library/LaunchAgents/com.wildix.MenuIntegration.plist sudo rm dev/null 2>&1 /bin/launchctl unload /Library/LaunchAgents/com.wildix.WIService.plist sudo rm -r /Library/Services/WIService |
Uninstall Fax Printer - MacOS
To delete Fax Printer component, run the following commands:
| Code Block |
|---|
sudo launchctl unload > /dev/null 2>&1 sudo rm /Library/LaunchDaemons/com.wildix.WIService-wd.plist /bin/launchctl unload /Library/LaunchAgents/com.wildix.MenuIntegration.plist /bin/launchctl unload /Library/LaunchAgents/com.wildix.WIService.plist> /dev/null 2>&1 sudo rm /Library/LaunchDaemons/com.wildix.WIServicewiservice-wdautoUpdate.plist > /dev/null 2>&1 sudo rm /Library/LaunchAgents/com.wildix.MenuIntegration.plist > /dev/null 2>&1 sudo rm /Library/LaunchAgents/com.wildix.WIService.plist > /dev/null 2>&1 sudo rm -r /Library/Services/WIService sudo rm> r /Librarydev/PDF\ Services/Wildix\ Faxnull 2>&1 |
Silent Uninstall (only for .msi packages) - Windows
Run the following command through the Command Line:
Starting from WMS version 4.04.45231.19 and later:
| Code Block |
|---|
for /f "usebackq skip=1 tokens=*" %i in (`wmic product where "Name like 'Wildix Integration Service'" get IdentifyingNumber ^| findstr /r /v "^$"`) do @cmd /c "msiexec /uninstall %i /qn" |
...
| Code Block |
|---|
msiexec /x {product id} /qn |
List of possible product id:
- {54F01ADF-1AF3-421E-A848-38FD7AC2C3D5} — Integration Service
- {DB00FEA0-20BF-4BEE-9EEE-8C6D7C19462A} — Screen Sharing component
- {254F78D9-6A62-4C32-BC02-864D49A373A5} — Outlook Integration
- {F9355602-990F-4244-9B43-E462EFD6A6DD} — Headset Integration
- {DFC64212-94A2-489A-864D-16B57B566884} — Fax Printer
| Macrosuite divider macro | ||||||||||||||||||||||||||
|---|---|---|---|---|---|---|---|---|---|---|---|---|---|---|---|---|---|---|---|---|---|---|---|---|---|---|
|
| Button macro | ||||||||||||||||||||||||||||||||||||||||
|---|---|---|---|---|---|---|---|---|---|---|---|---|---|---|---|---|---|---|---|---|---|---|---|---|---|---|---|---|---|---|---|---|---|---|---|---|---|---|---|---|
|