...
| Info |
|---|
This document is a complete guide explaining how you can enable access to Wizywebinar and use it to schedule and run your webinars. Created: January 2021 Updated: November 2022 Permalink: https://wildix.atlassian.net/wiki/x/ahLOAQ |
| Table of Contents |
|---|
| Noprint |
|---|
Wizywebinar White paper |
...
If you need more sophisticated scheduling options, keep on reading:
Click New Meeting button:
Fill out mandatory fields: Topic, Start date and Duration:
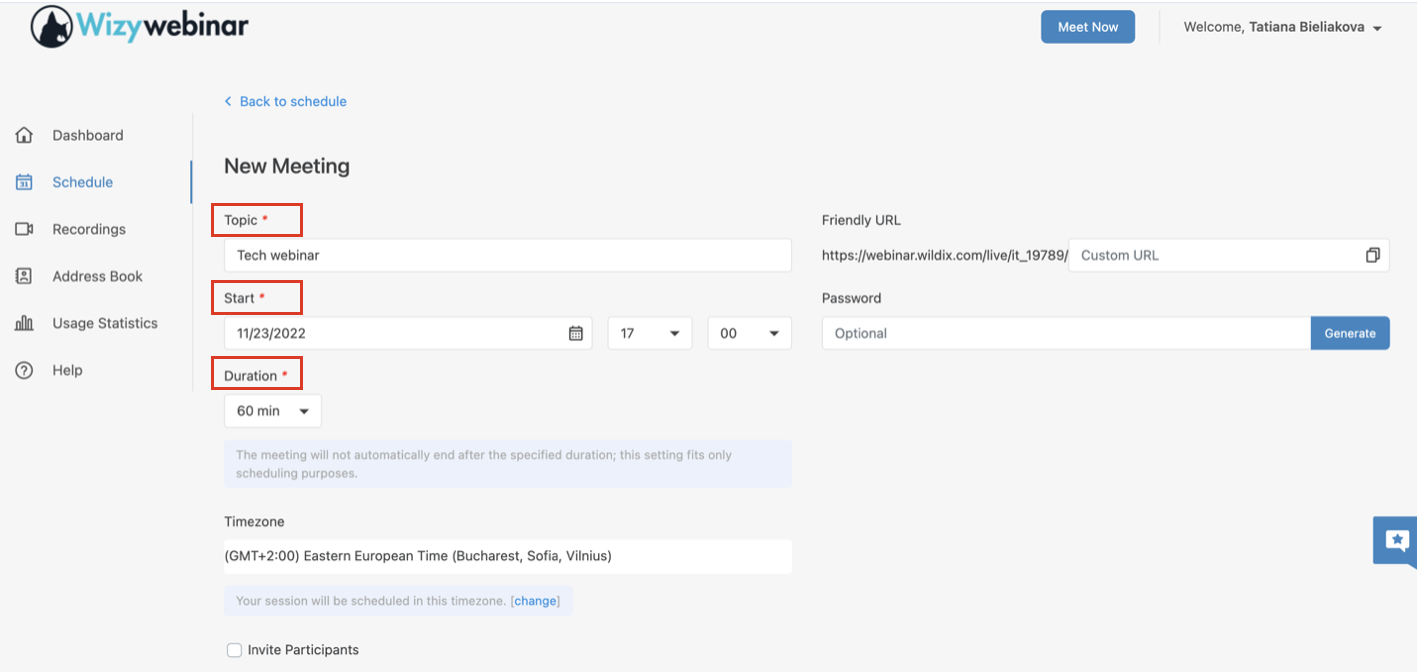
Warning Important: When scheduling a webinar, please check the timezone and make sure it corresponds to the timezone the meeting is going to take place in. If you need to change the timezone, click change.
(Optional) Set Password and Friendly URL:
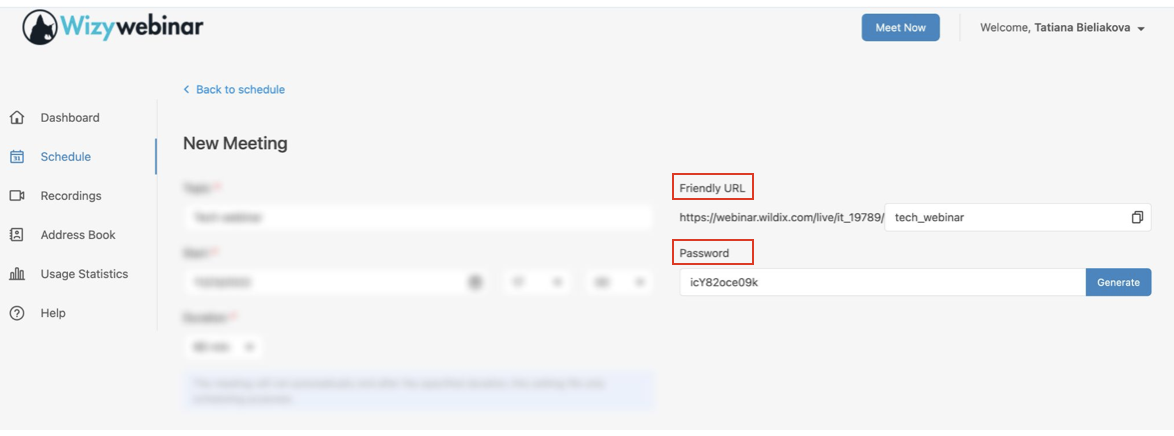
Note Password: If you would like your webinars to be more protected, you can generate a password for them. You have the choice to make up a password or click on Generate button and a password will be created for you. Once you share the Webinar link with a participant, remember that you need to give them the password too.
Friendly URL: You can customize the URL of your webinar. Otherwise, a random session ID will be created for you.
...
- Check the box Invite Participants (1)
Enter First Name (2), Last Name (23), Email (34), choose role(Audience or Speaker) (45)and click Add button (56). Detailed information about adding participants is described in the Participants section

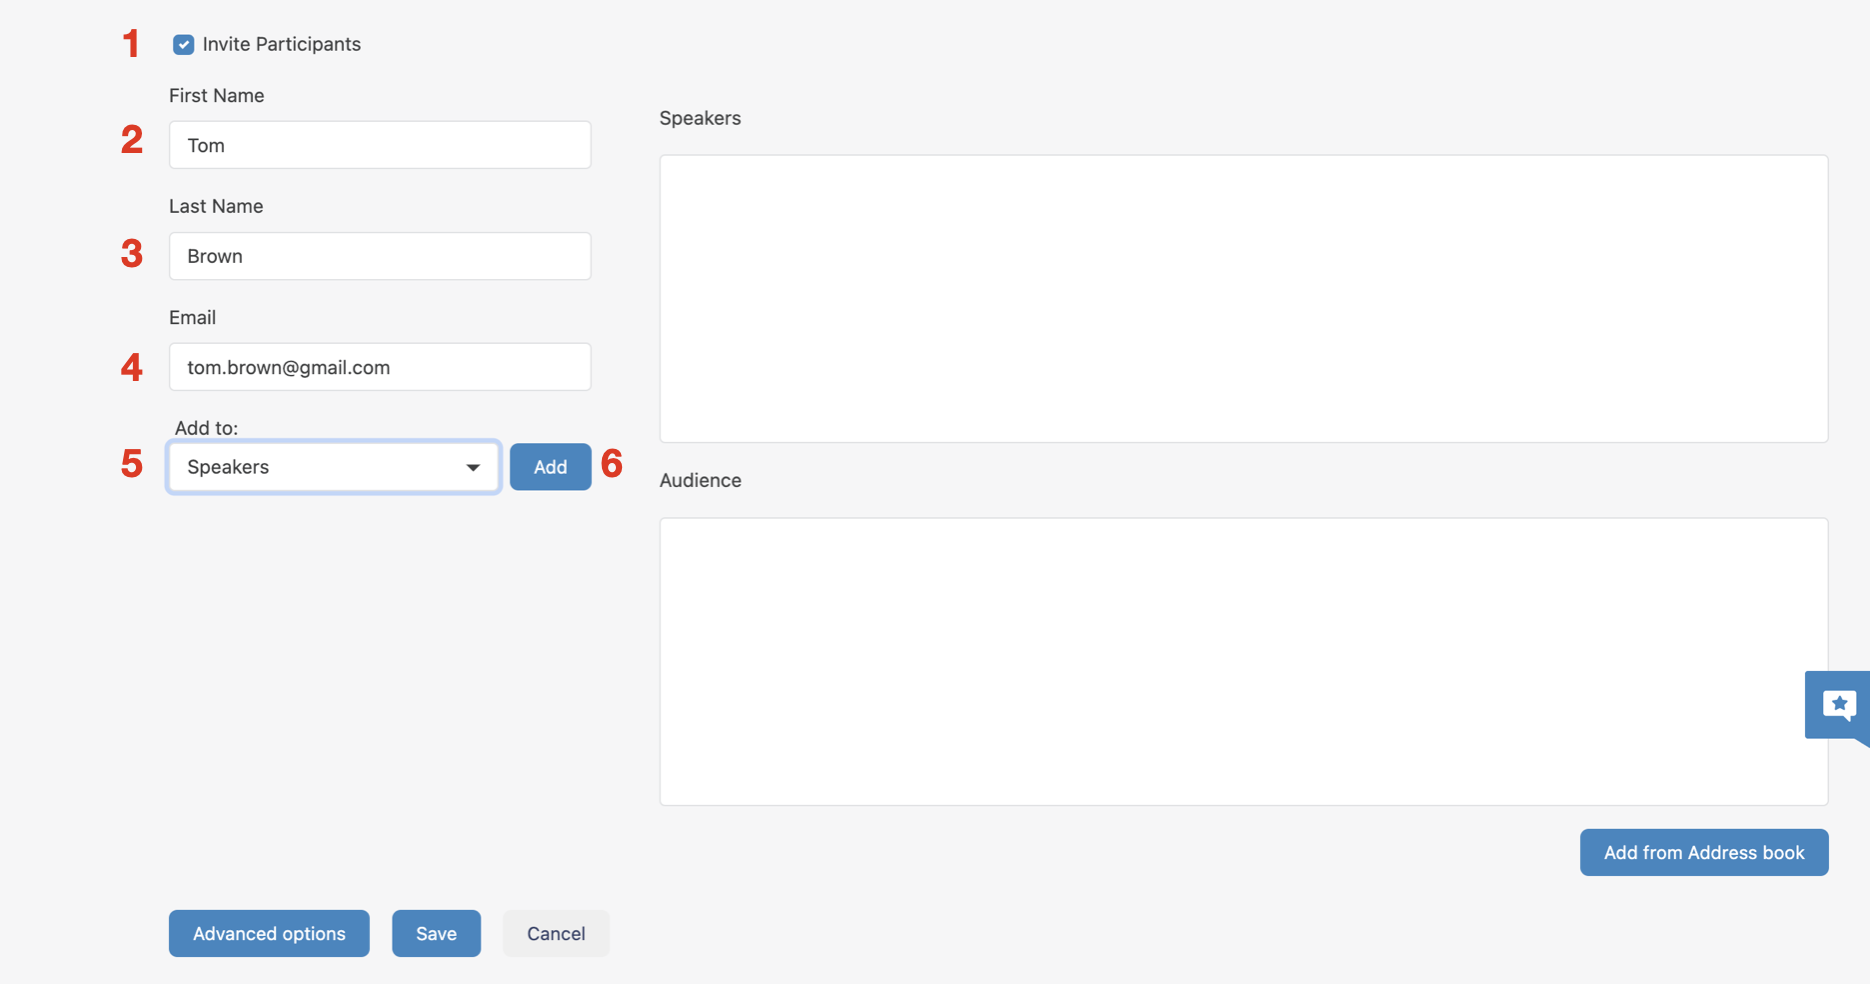
- Click Save in the lower part of the screen
...
- Click on the Participants tab. In this menu, you can add participants to your webinar using one of 3 modes:
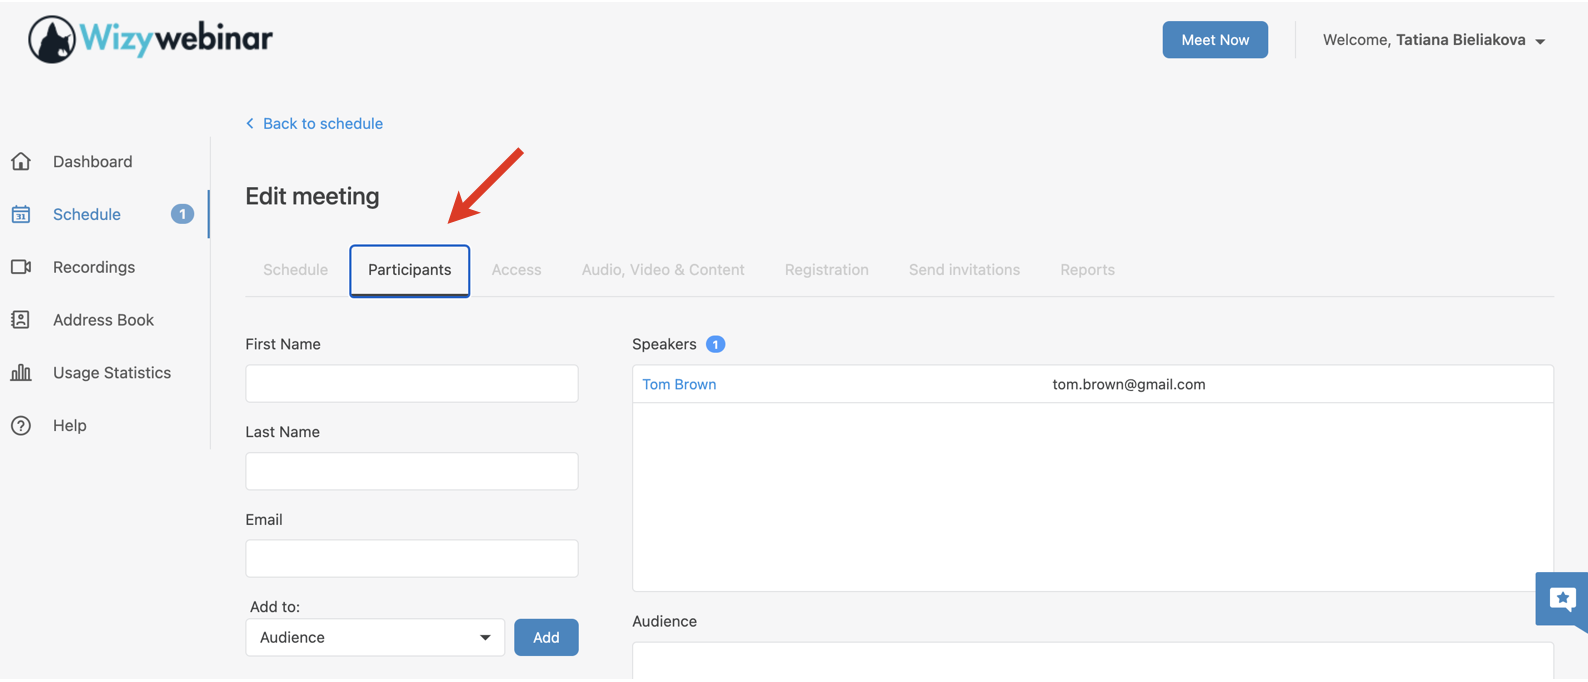
1 - add participants manually: enter user’s First name (1), Last name (2), email (23), set a role (34) and click Add button (45). By default, new contacts are automatically saved in Address Book, unless you change this behavior (see the additional control options in this section):
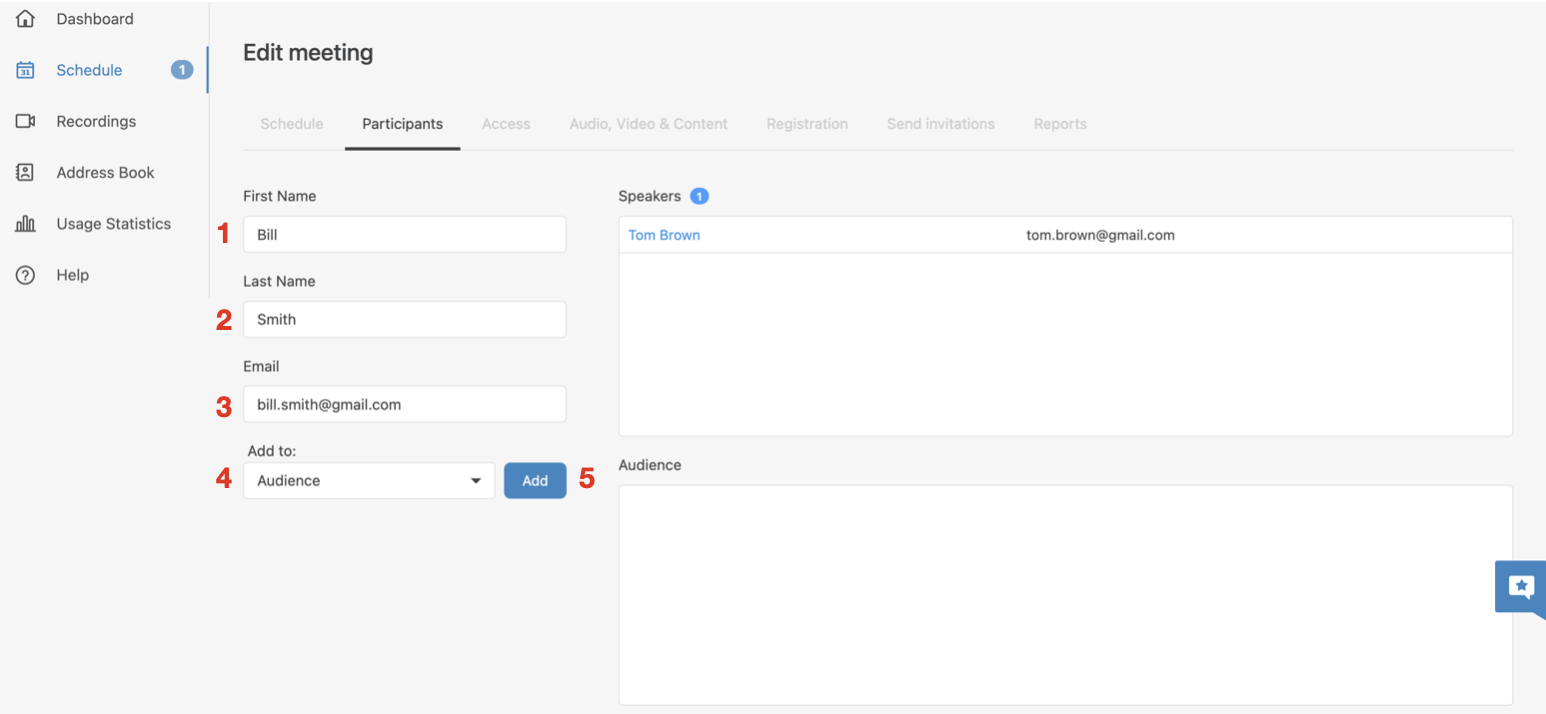
Note Note: When you add participants, you always need to indicate their role:
- Speaker – someone who runs the webinar, broadcasts their audio and video and controls various aspects of the webinar. There can be more than one speaker. Speakers have a number of privileges over other participants, which include: the ability to speak, show video, start the recording, manage other participants, use group chat for speakers, and more as you’ll see later in this Guide
- Audience – mostly passive listeners of the webinar. By default, they don’t have permission to speak, unless allowed by speakers. If needed, they can interact using chat in Conversations, Questions and Answers, etc.
There is also an Account holder – someone who sets up the webinar and the only person who can edit the details of the event before it starts. Account holder belongs to Speakers of the webinar by default.
- 2 - add participants from Address Book: you can add them one by one or select multiple participants
...
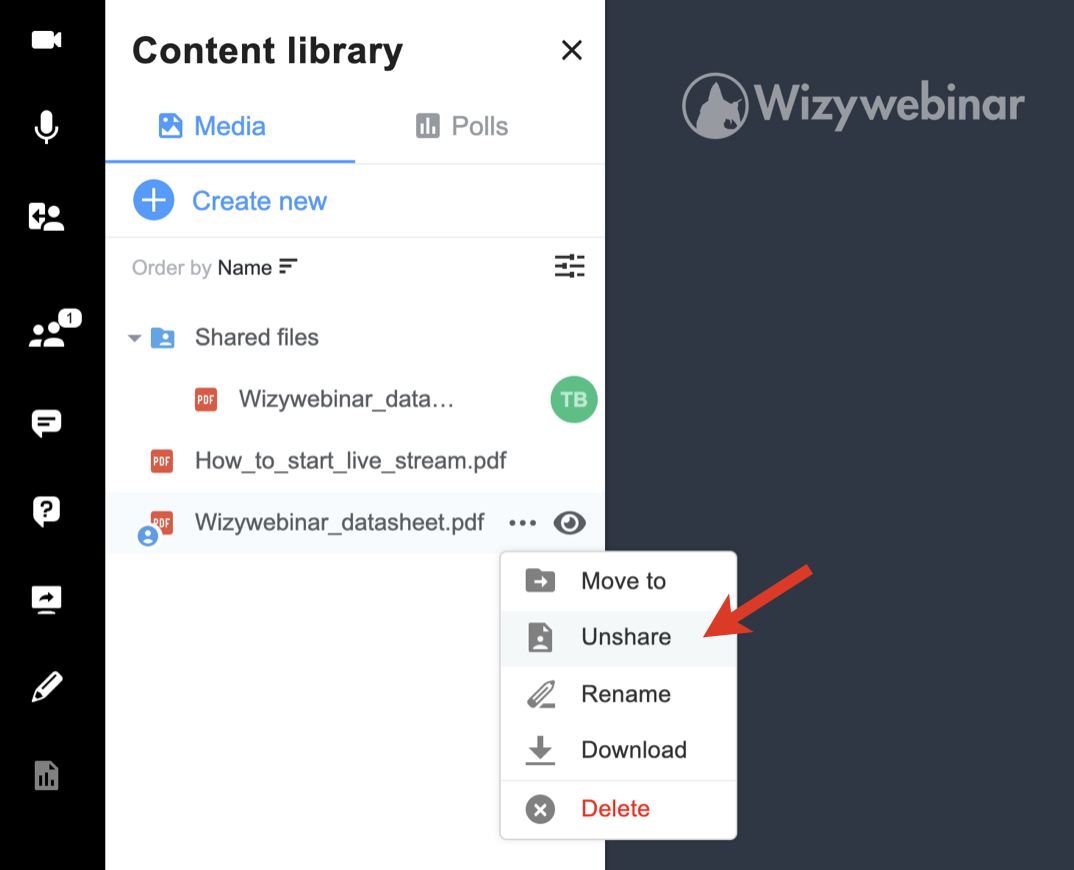
- The shared file or folder is then marked as shared and is added to the Shared files folder:
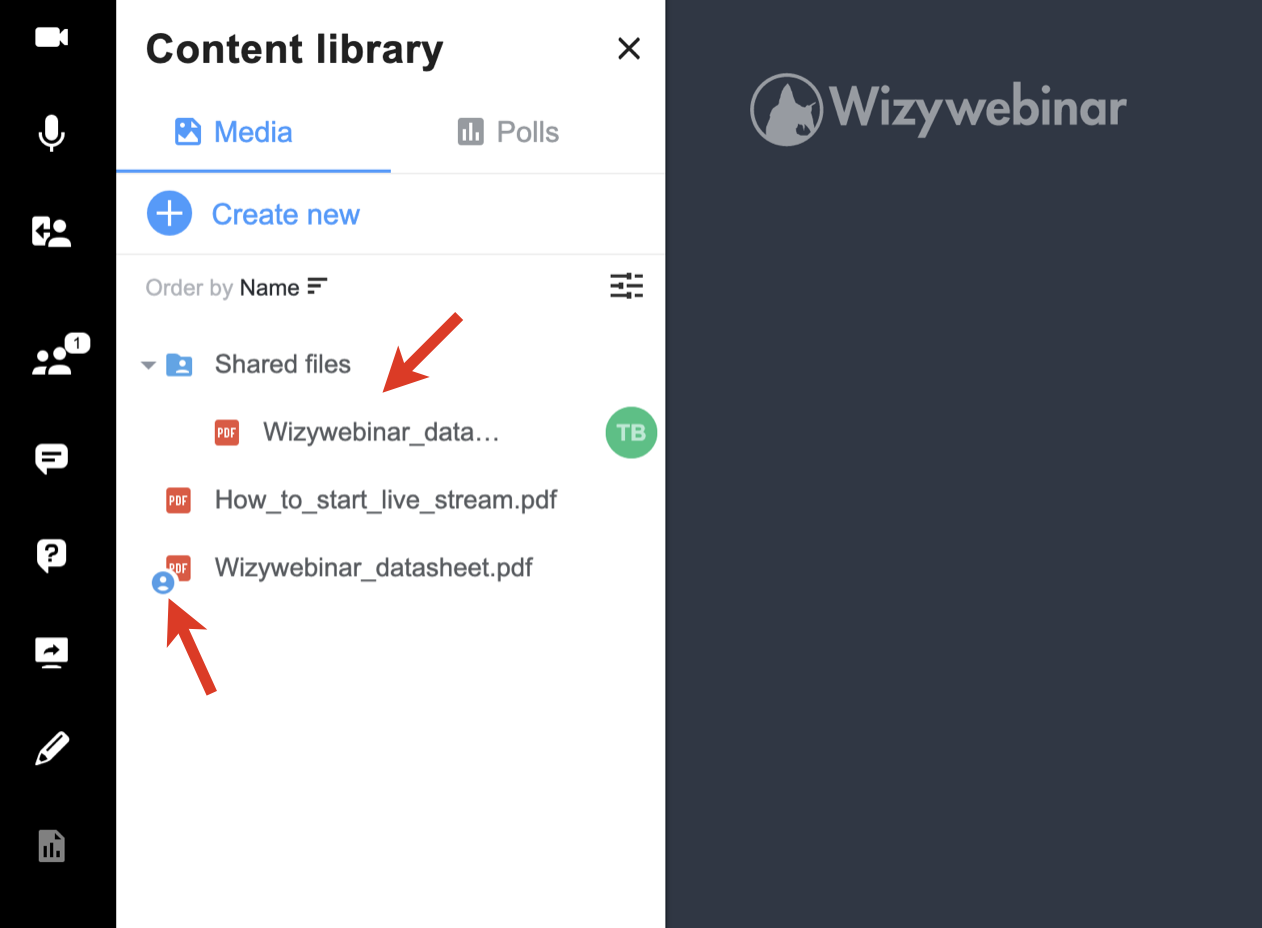
- The speakers you’ve shared the file/ folder with, can access them in the Shared files folder, download, and show to the audience.
- To unshare the file/ folder, click on the three dots -> Unshare. AnySpeaker can unshare files that are shared by other Speakers:
Play a YouTube/ Vimeo video
...
Integration with Wizyconf HW Station
Starting from Wizyconf App v 1.2.16, Wizyconf Station integrates with Wizywebinar, consult this documentation for details.
Other functionality
Protect sessions with end-to-end encryption (E2EE)
...
| Note |
|---|
Note: E2EE is not compatible with Recordings, Live Streaming. E2EE is also not compatible with mobile - mobile users won't be able to join encrypted sessions. |
Emoji Reactions
| Note |
|---|
Note: The feature is available upon request only. The request should be sent to denis.popov@wildix.com. |
...