| Html |
|---|
<div id="fb-root"></div>
<script>(function(d, s, id) {
  var js, fjs = d.getElementsByTagName(s)[0];
  if (d.getElementById(id)) return;
  js = d.createElement(s); js.id = id;
  js.src = 'https://connect.facebook.net/en_US/sdk.js#xfbml=1&version=v2.11';
  fjs.parentNode.insertBefore(js, fjs);
}(document, 'script', 'facebook-jssdk'));</script> |
| Html |
|---|
<div class="fb-like" data-href="https://confluence.wildix.com/x/zAQ8AQ" data-layout="button_count" data-action="recommend" data-size="large" data-show-faces="true" data-share="true"></div> |
| Html |
|---|
 <div class="lang-box-pdf">
	<div>
		<div class="google-lang">
			<div id="google_translate_element">
			</div>
			<script type="text/javascript">
					function googleTranslateElementInit() {
						new google.translate.TranslateElement({pageLanguage: 'en', includedLanguages: 'de,es,fr,it,nl', autoDisplay: false}, 'google_translate_element');
						}
			</script>
			<script type="text/javascript" src="//translate.google.com/translate_a/element.js?cb=googleTranslateElementInit"></script>
		</div>

		<div class="pdf-button">
			<a href="https://confluence.wildix.com/spaces/flyingpdf/pdfpageexport.action?pageId=20710604" alt="Convert to .pdf" title="Convert to .pdf"><img src="https://confluence.wildix.com/download/attachments/14549012/pdf-button-download-wildix-documentation.png"></a>
		</div>
	</div>
</div> |
| Scroll export button | ||||||||
|---|---|---|---|---|---|---|---|---|
|
| Info |
|---|
The Guide describes and explains how to provision Wildix devices. WMS Version: 5.0X / 4.0X Updated: April 2021 Permalink: https://confluencewildix.wildixatlassian.comnet/wiki/x/zAQ8AQOxnOAQ |
| Table of Contents |
|---|
Introduction
There are several provisioning modes supported by WMS:
- Auto-provisioning (available only for Hardware and Virtual PBXs):
For devices connected to the local LAN or remote network via VPN.
For remote/ unreachable devices behind NAT/ firewall.
- Auto-configuration via auto.wildixin.com:
Automatically add Wildix devices during new installations.
Assign devices to PBX via WMP.
...
- Go to WMS -> Devices
- Click + Add for provisioning of devices
- Select Automatic mode and click Next
- Click Scan (you can also specify the IP range for the search):

- Select your device(s) on the list and click Next
- Wait till the device is provisioned:

- Click Finish
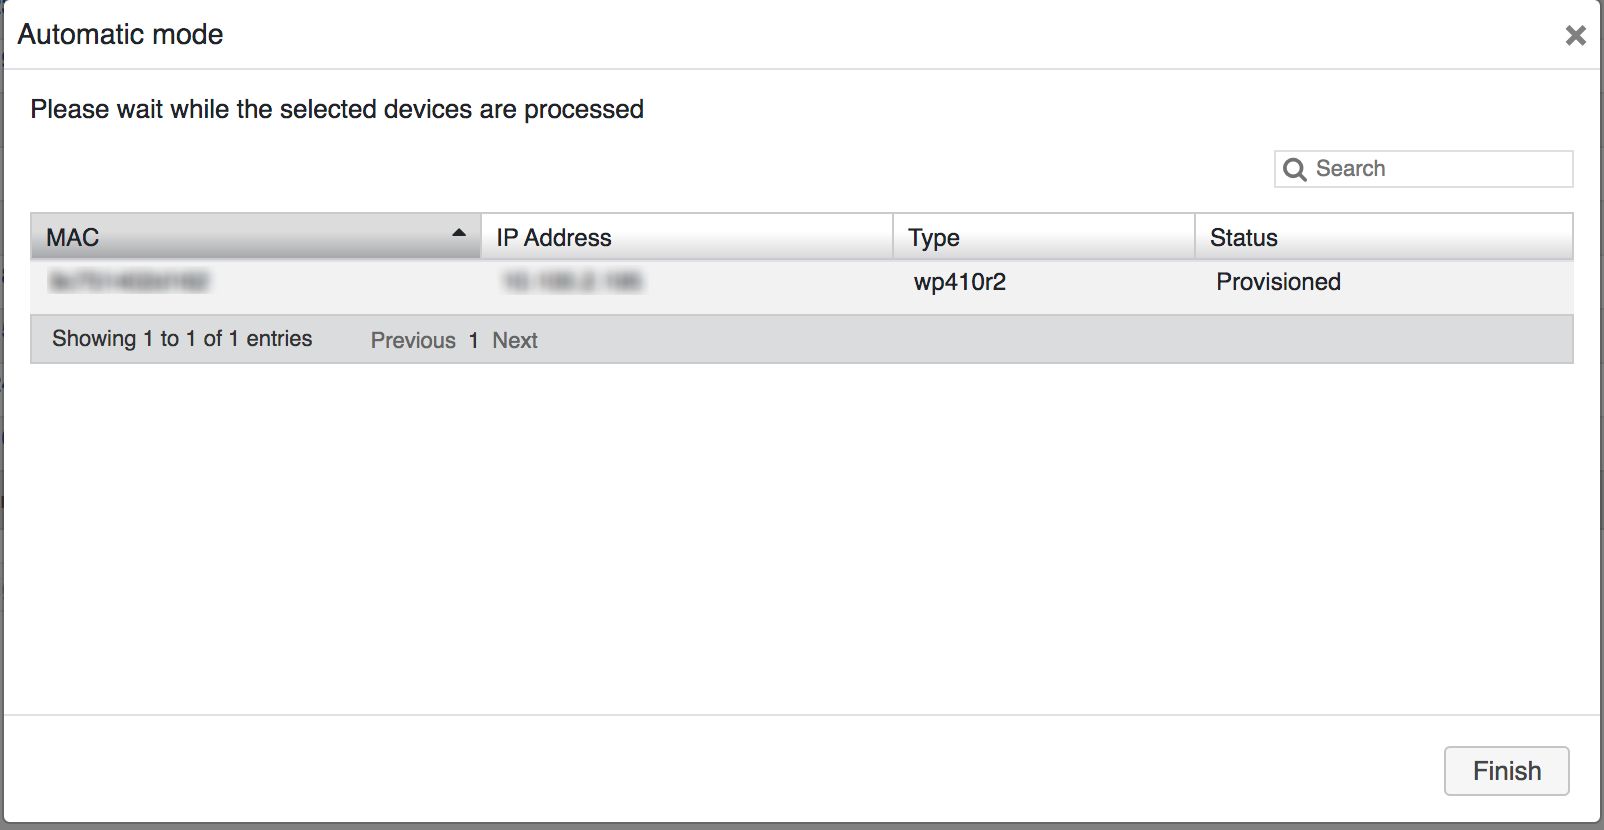
- The provisioned device appears in the list of all available devices in WMS -> Devices:

| Note |
|---|
Note: in case you can see the model, “login1” in the field “phone”, the firmware version and the password, it means that the device is provisioned. |
...
- Go to WMP -> Customers tab
- Select the customer, then the particular PBX and click Options button (three dots)
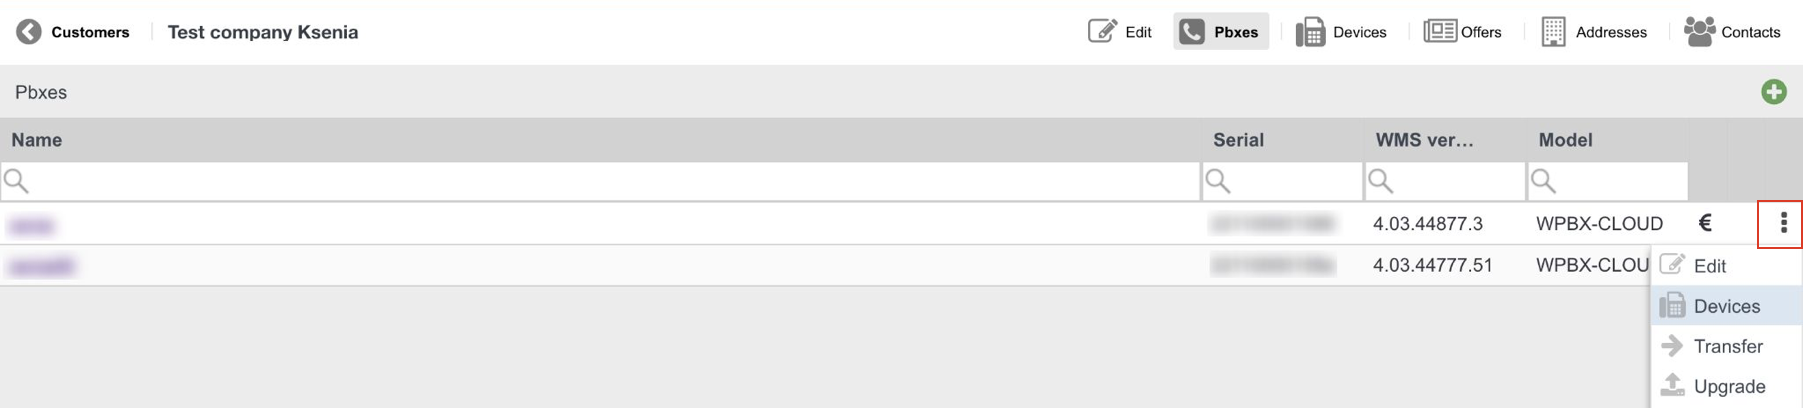
Click Add CAPEX:

| Note |
|---|
If you have previously ordered devices via HWaaS option, they appear under this tab. More details in WMP Dashboards. |
...
- All your available devices are listed; select only those devices that you want to assign to this PBX and click Add:
- Go to WMS -> Devices: provisioned devices appear on the list:
| Note |
|---|
Note: There is no need to click Sync from WMP button as devices appear on the list right after they were added via WMP. At this step, only devices' Model and Mac address are available. When these devices are connected to the network, they will receive IP Address, devices' correct model, Firmware and Password will be indicated. Sync from WMP can be used in order to add removed devices back to PBX with Per User licensing from WMP. |
...
- Go to PBX -> select your PBX from the list
- Click Devices button and then click Add
- Select the devices you would like to assign to this PBX and click Add:

- Go to WMS -> Devices, click Sync from WMP: provisioned devices appear on the list
...
- Click on the green triangle icon "Connect" to allow the connection to this device:

- Click on the link “Open” to connect to the device:

Click on the red square icon “Disconnect” to close the access to the device:
...

| Macrosuite divider macro | ||||||||||||||||||||||||||
|---|---|---|---|---|---|---|---|---|---|---|---|---|---|---|---|---|---|---|---|---|---|---|---|---|---|---|
|
| Button macro | ||||||||||||||||||||||||||||||||||||||||
|---|---|---|---|---|---|---|---|---|---|---|---|---|---|---|---|---|---|---|---|---|---|---|---|---|---|---|---|---|---|---|---|---|---|---|---|---|---|---|---|---|
|