WMS 5 API Authentication
- Ksenia Babych
- Tatiana Bieliakova
- Elena Kornilova
The Articles describes how to use S2S authentication method to make WMS API requests.
Created: September 2020
Updated: January 2023
Permalink: https://wildix.atlassian.net/wiki/x/oBPOAQ
Introduction
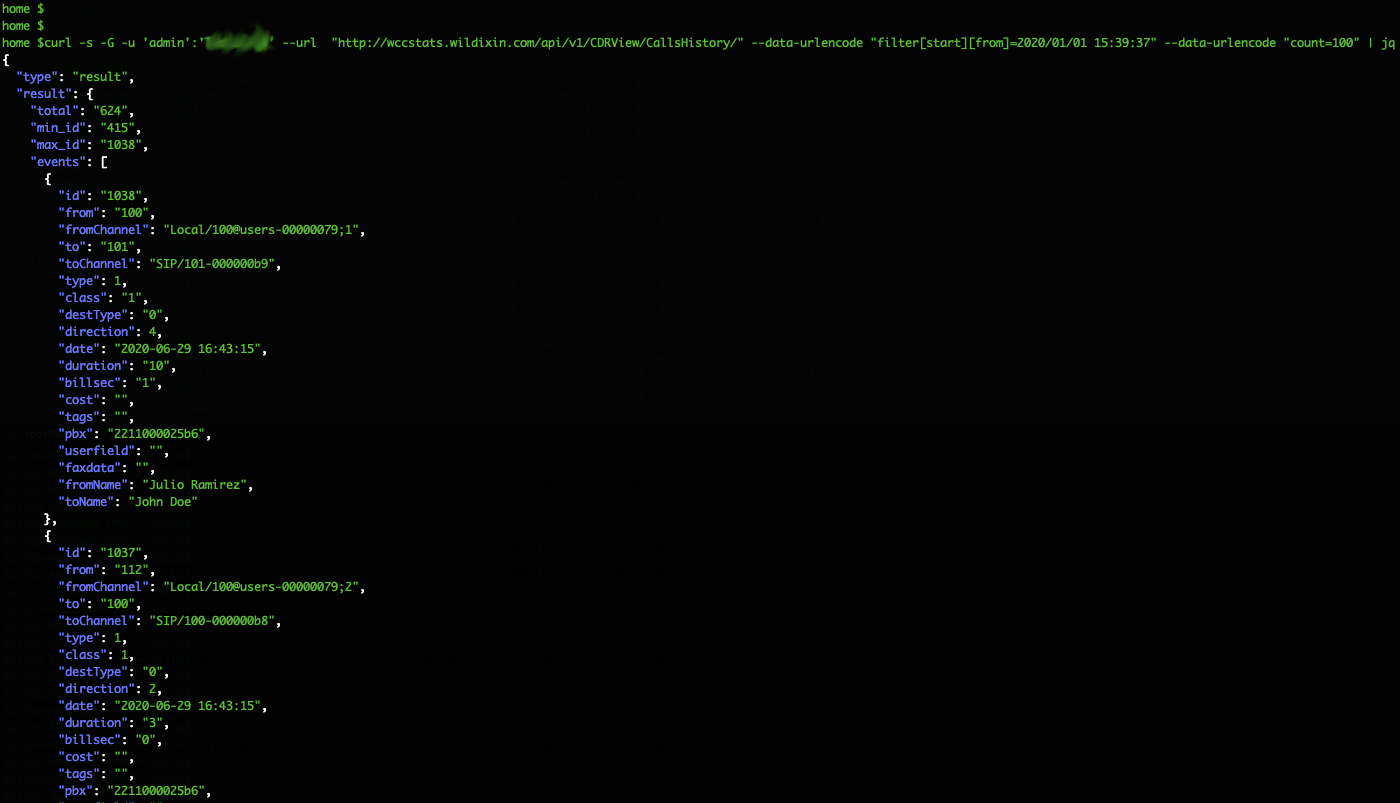
Below is an example of Basic API authentication for the admin user (note the -u ‘admin’:’blurred password’):
However, the recommended authentication mechanism for the admin user on Wildix systems running WMS 5 or higher is S2S authentication using the PHP HTTP client library. In this article, we will see in detail how to use this authentication mechanism for API requests.
Every request made to WMS API needs to have the following headers:
- Host - domain to which the API request is sent
- Authorization - contains the JWT token with the necessary data and signature
- X-APP-ID - API ID obtained from WMS or API
You can find the documentation regarding the Authentication mechanism in your system (logged in as admin): https://SYSTEM-NAME.wildixin.com/api/v1/doc/#section/Authentication.
However, to simplify your development, there is Wildix php library that you can use which handles all the process for authentication. Besides the mentioned php library, a tool for dependency management in php called composer will also be used here. Neither s2s-client-php nor composer are mandatory when trying to use Wildix API, but here they are used to show a basic working example. In a php environment they make it easier to consume Wildix APIs but any language/ environment that can implement JWT tokens can be used for your development.
Installation
1. A server with apache2 and php installed is assumed. First, install required dependencies:
$apt-get install wget php-cli php-zip unzip curl php-curl
2. Then proceed to installing composer:
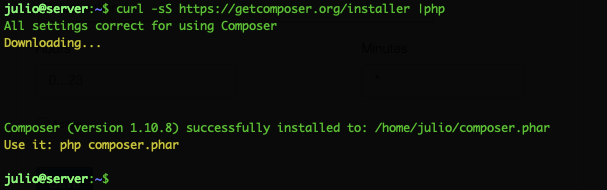
$curl -sS https://getcomposer.org/installer |php
3. Next move composer to /usr/bin folder to make it available system wide:
$sudo mv composer.phar /usr/bin/composer
4. Now proceed to installing the s2s-client-php library. Get the library from git (https://github.com/Wildix/s2s-client-php). You can do this by either cloning the project or downloading the zip file. For simplicity here, we download the zip file:
$wget https://github.com/Wildix/s2s-client-php/archive/master.zip
$unzip master.zip
5. Next create a folder for the project on your web server and create a Wildix folder to store the downloaded files:
$sudo mkdir /var/www/html/project
$sudo mkdir /var/www/html/project/wildix
6. Move the uncompressed folder to Wildix folder:
$sudo mv s2s-client-php-master /var/www/html/project/wildix/
7. Next, run the following command (from your project folder):
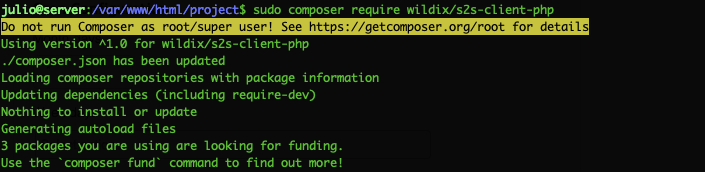
$sudo composer require wildix/s2s-client-php
After running the command above you should have a composer.json file and a vendor folder inside your project folder as shown below:
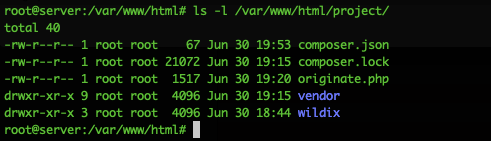
Once you have both the json file and the vendor folder you can use the library on your scripts.
Note: if the following error message appears in the previous step: The "https://repo.packagist.org/packages.json" file could not be downloaded: failed to open stream: Connection timed out, use a work around described below.

You can use a work around. Simply create an entry (as root) in your hosts file for the domain name and ip address:
![]()
$dig +short repo.packagist.org
$echo '142.44.164.249 repo.packagist.org' >> /etc/hosts
Consuming the Wildix API
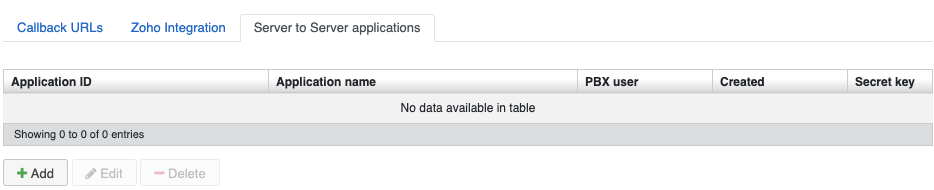
First, you need to create an “Application ID” and a secret for your application. In WMS (logged in as admin) go to PBX -> Integrations-> Server to Server applications and click Add:
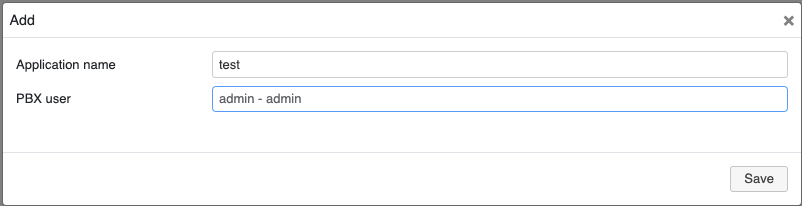
In the displayed form, assign a name and a user (ACL rules apply to selected user) to your application:
Once created, both the “Application ID” and the secret are shown:

The values shown are available at any time by clicking the eye icon on the corresponding application:

Now create php scripts to consume the application.
CallQueues
This first example will consume API “Call Queues” (Get a list of call Queues):
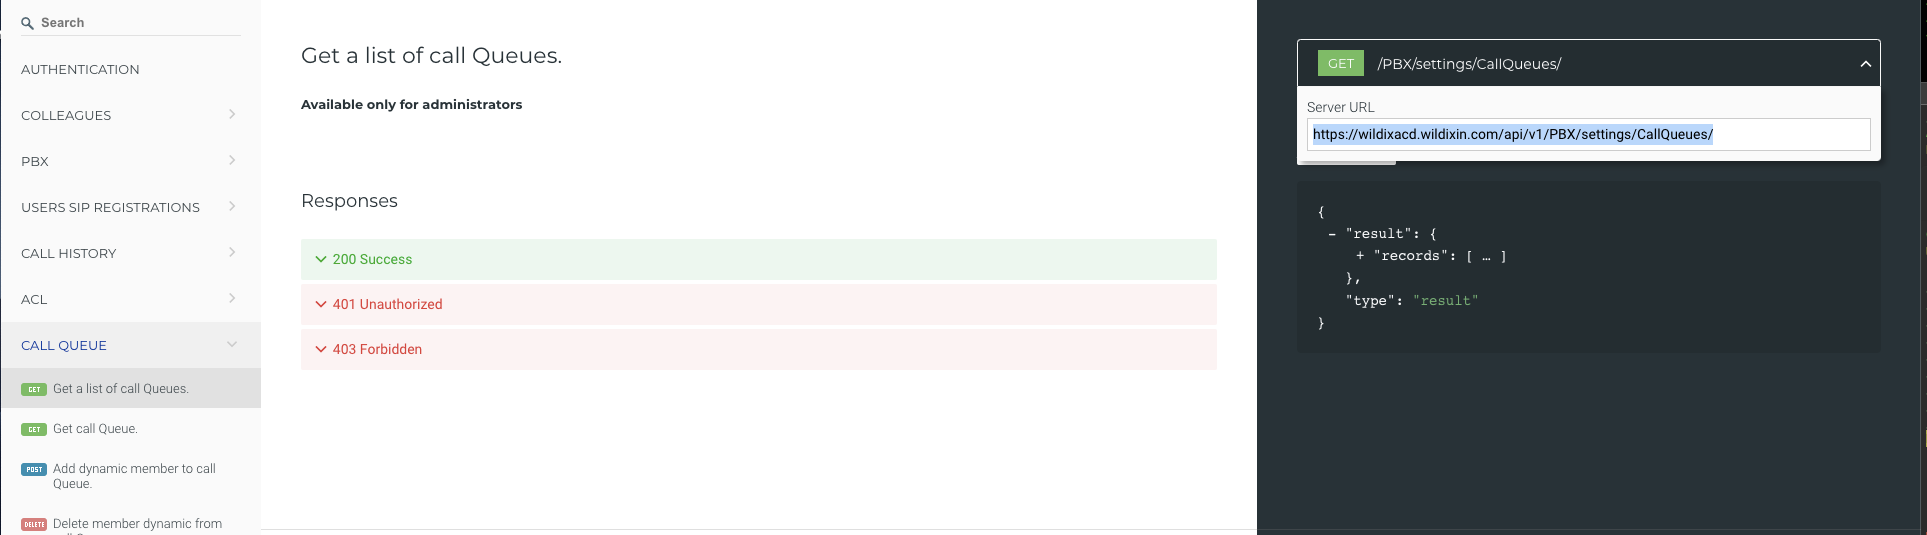
https://SYSTEM-NAME.wildixin.com/api/v1/doc/#operation/pbxSettingsGetCallQueues.
1. Create a php file (in this case group.php) on your project folder and add the following content:
- Add needed library:
![]()
require_once 'vendor/autoload.php';
Then create the client instance:

Required values are found on PBX -> Integrations-> Server to Server applications. Your script should look something like this:
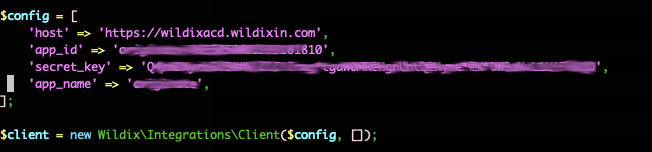
$config = [
    'host' => 'https://SYSTEM-NAME.wildixin.com',
    'app_id' => 'APP_ID',
    'secret_key' => 'SECRETKEY',
    'app_name' => 'APP NAME',
];
$client = new Wildix\Integrations\Client($config, []);
2. Next we need to configure parameters. Since the CallQueues API is a GET request and does not require any parameters, the options should look something like this:

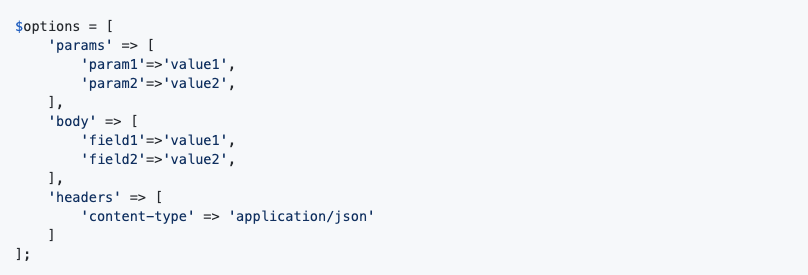
$options = [
        'params' => [
        ],
    'body' => [
    ],
    'headers' => [
    ]
];
3. Finally, we need to make the request. Since CallQueues requires a GET request we’ll use that method:
![]()
$response = $client->get('api/v1/PBX/settings/CallQueues/', $options);
Available options are:
- $client->get(apiPoint[, $options])
- $client->delete(apiPoint[, $options])
- $client->post(apiPoint[, $options])
- $client->put(apiPoint[, $options])
5. Now to show the response:

echo $response->getStatusCode(); // 200
echo $response->getHeaderLine('content-type'); // 'application/json; charset=utf8'
echo $response->getBody()->getContents(); // '{"type": "result", "result": {}}'
The following is the entire script:
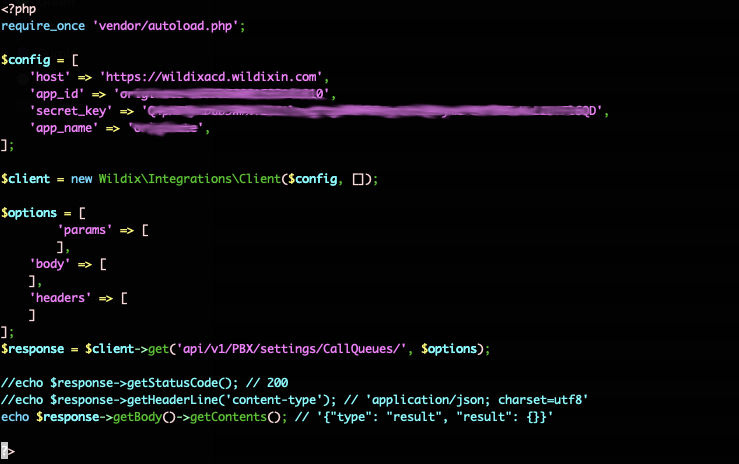
Note: in the previous picture that the status code and headers responses were commented in order to be able to format the entire output as json, see next image.
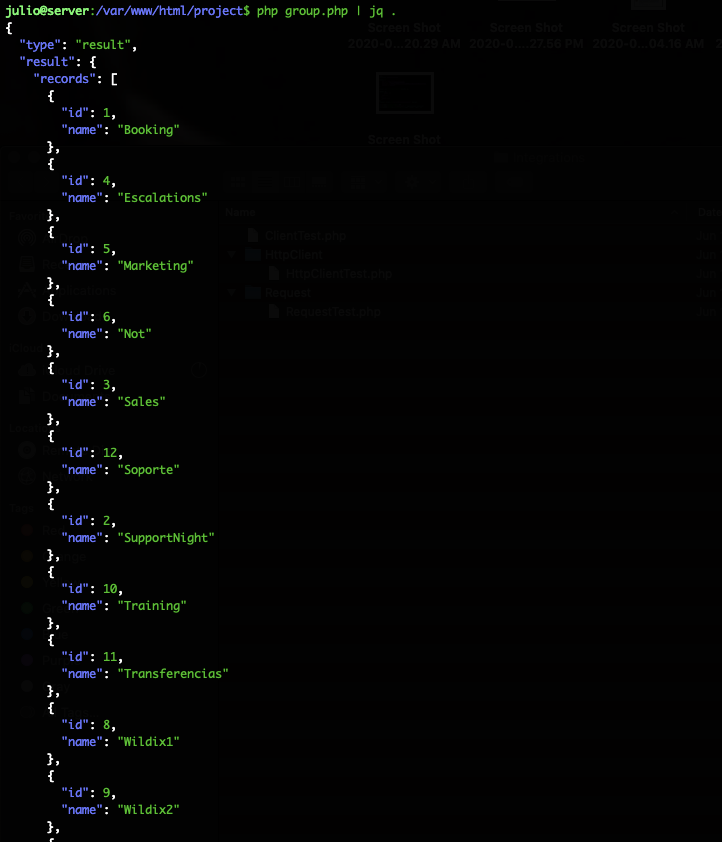
When the script is run:
CallHistory
For this example we will consume API “CallHistory” (Get a global call history):
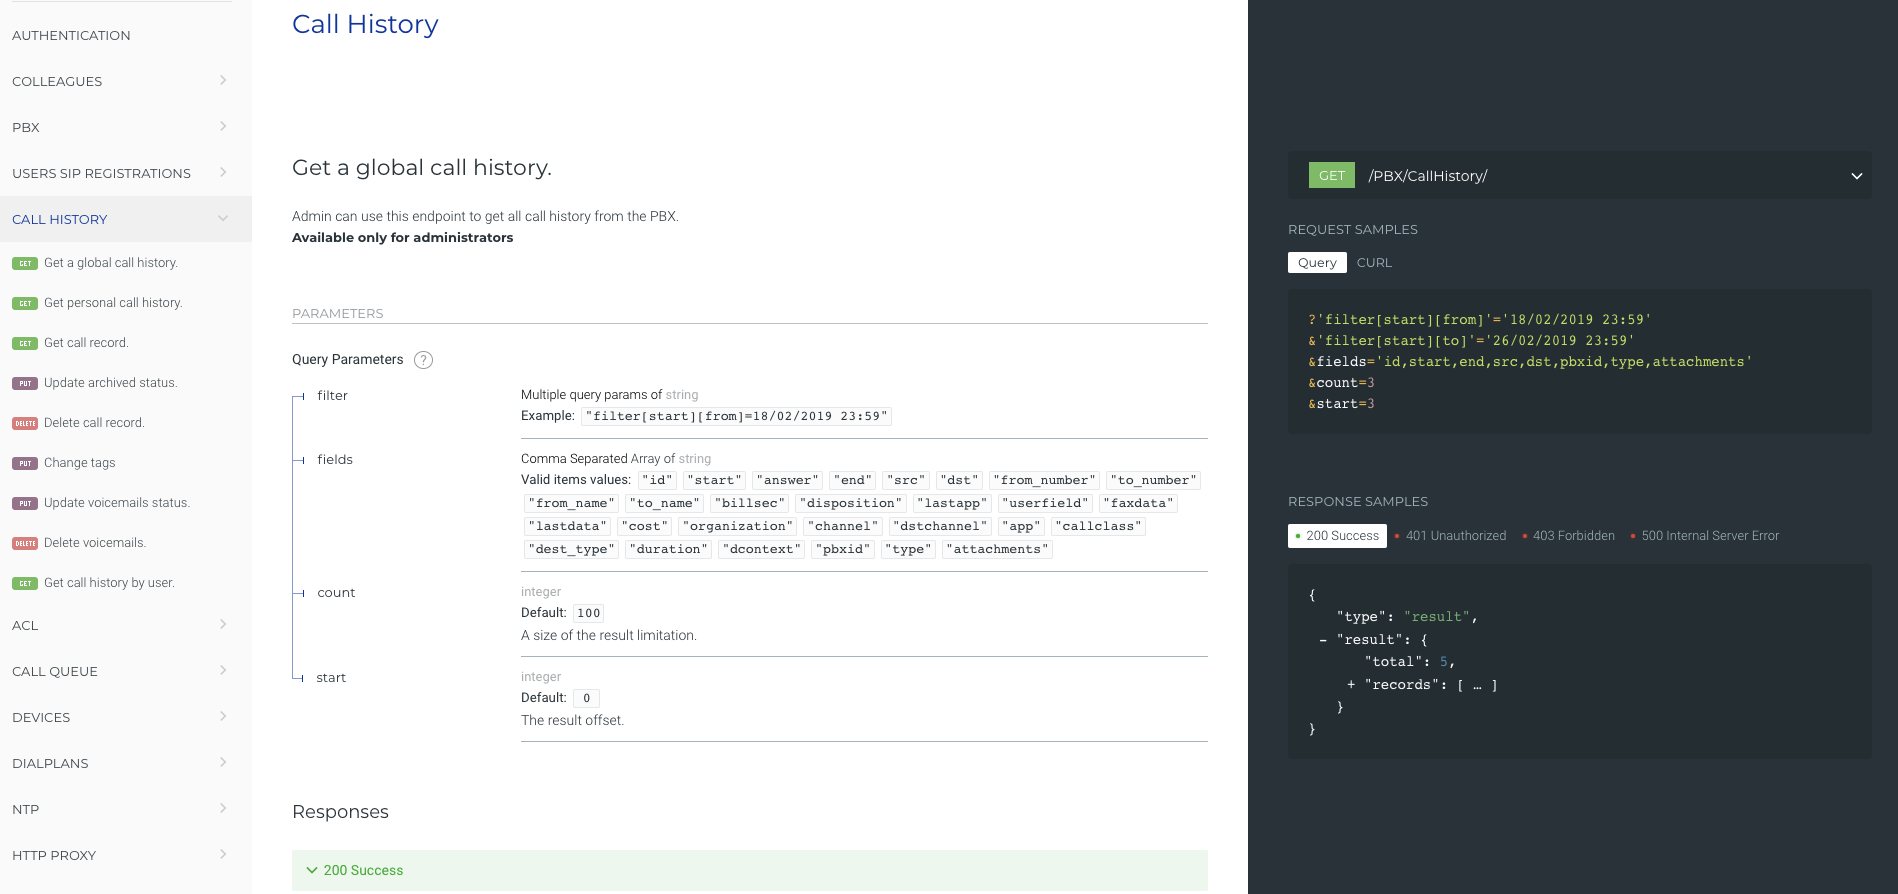
https://SYSTEM-NAME.wildixin.com/api/v1/doc/#tag/Call-History.
1. Create a php file (in this case callhistory.php) in your project folder and add the following content:
- Add needed library:
![]()
require_once 'vendor/autoload.php';
- Then create the client instance:

Required values are found on PBX -> Integrations-> Server to Server applications. Your script should look something like this:
$config = [
    'host' => 'https://SYSTEM-NAME.wildixin.com',
    'app_id' => 'APP_ID',
    'secret_key' => 'SECRETKEY',
    'app_name' => 'APP NAME',
];
$client = new Wildix\Integrations\Client($config, []);
2. Next, configure the parameters. Since the CallHistory API needs a GET request with parameters, we need to add them in ‘params’ section as shown below:

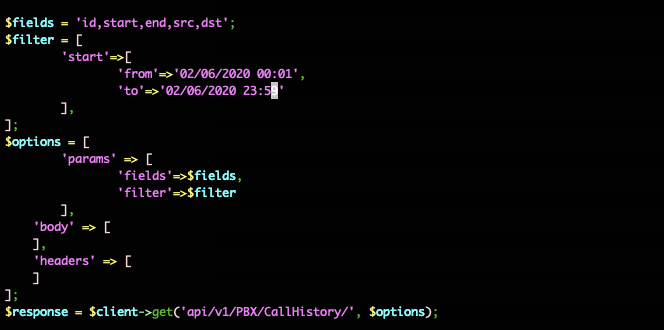
$fields = 'id,start,end,src,dst';
$filter = [
        'start'=>[
                'from'=>'02/06/2020 00:01',
                'to'=>'02/06/2020 23:59'
        ],
];
$options = [
        'params' => [
                'fields'=>$fields,
                'filter'=>$filter
        ],
    'body' => [
    ],
    'headers' => [
    ]
];
In the previous picture, first we create variables for the needed parameters. In the example we get only id,start,end,src,dst with fields variable, and filter calls for 02/06/2020 with filter array. Then we refer to those variables in the params section (for GET requests params section is used). It is worth mentioning that all parameters need to be ordered alphabetically and the parameter names can only be lowercase.
3. Finally we just need to make the request and get the response:

$response = $client->get('api/v1/PBX/CallHistory/', $options);
//echo $response->getStatusCode(); // 200
//echo $response->getHeaderLine('content-type'); // 'application/json; charset=utf8'
echo $response->getBody()->getContents(); // '{"type": "result", "result": {}}'
?>
The entire script:
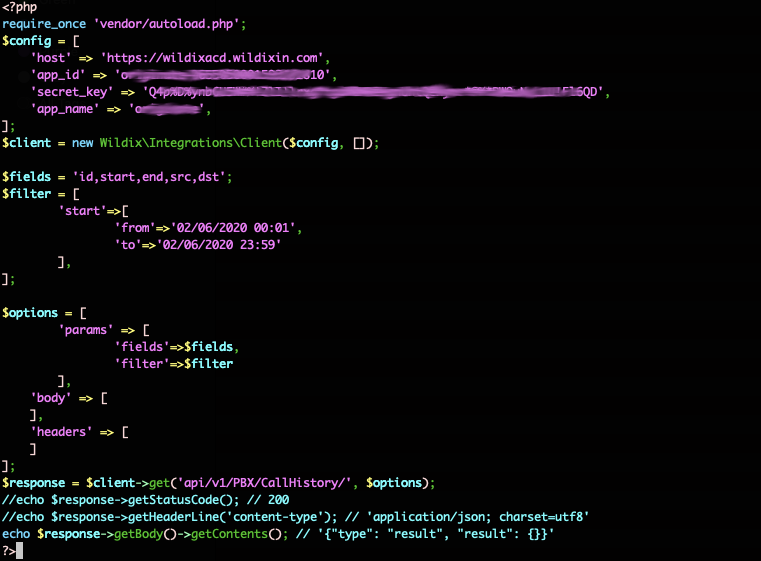
Note: in the previous picture the status code and headers responses were commented in order to be able to format the entire output as json. See the next image.
When the script is run:

Sounds
For this example we will consume API “Sounds” (Create or update sound.):
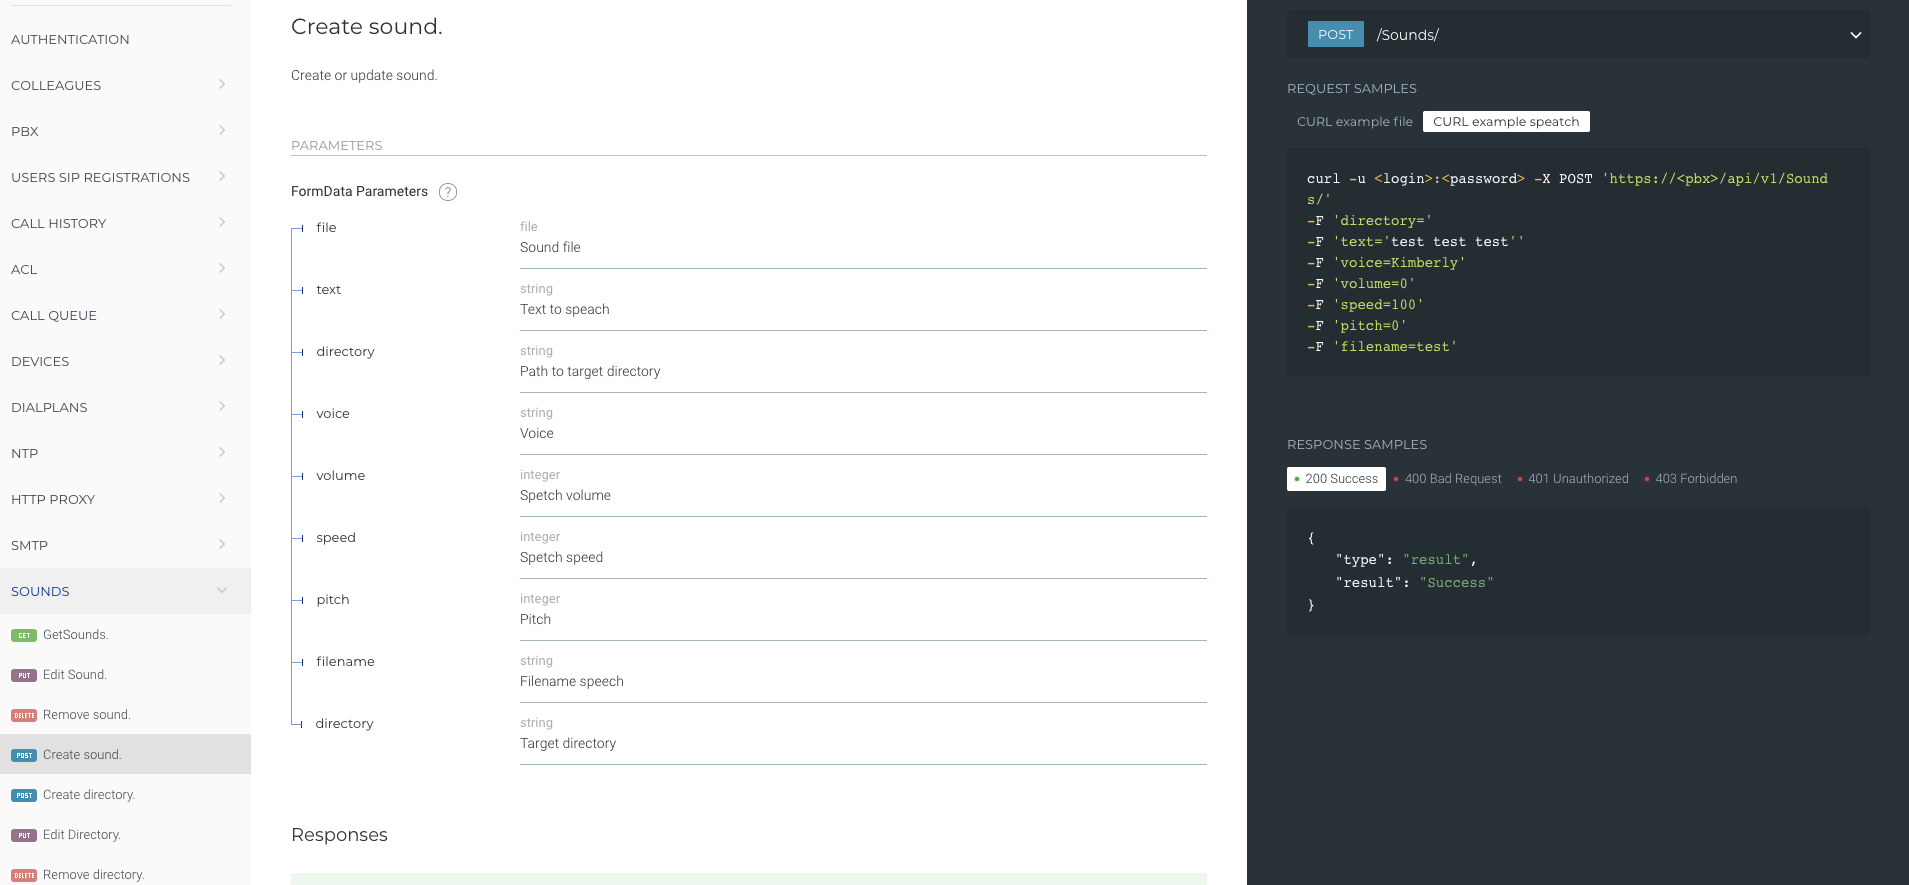
https://SYSTEM-NAME.wildixin.com/api/v1/doc/#operation/SoundsCreate.
1. Create a php file (in this case sounds.php) in your project folder and add the following content:
- Add needed library:
![]()
require_once 'vendor/autoload.php';
- Then create the client instance:
The required values are found on PBX -> Integrations -> Server to Server applications. Your script should look something like this:
$config = [
    'host' => 'https://SYSTEM-NAME.wildixin.com',
    'app_id' => 'APP_ID',
    'secret_key' => 'SECRETKEY',
    'app_name' => 'APP NAME',
];
$client = new Wildix\Integrations\Client($config, []);
2. Next we need to configure parameters. Since the Sounds API needs a POST request with parameters, we need to add them in the body section:
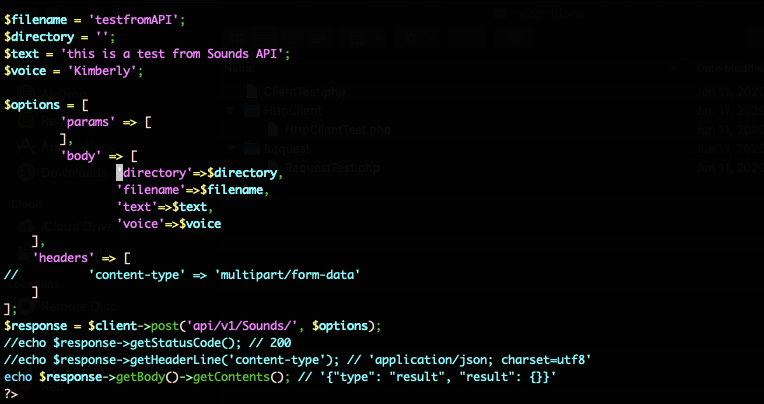
$filename = 'testfromAPI';
$directory = '';
$text = 'this is a test from Sounds API';
$voice = 'Kimberly';
$options = [
        'params' => [
        ],
        'body' => [
                'directory'=>$directory,
                'filename'=>$filename,
                'text'=>$text,
                'voice'=>$voice
    ],
    'headers' => [
//          'content-type' => 'multipart/form-data'
    ]
];
In the previous picture, first we create variables for the needed parameters. In this example we will use Kimberly voice to create a file named testfromAPI that will be stored in the sounds root directory. Then we will refer to those variables in body section (for POST requests body section is used). It is worth mentioning that all parameters need to be ordered alphabetically and parameter names can only be lowercase.
Finally we just need to make the request using post method and get the response:

$response = $client->post('api/v1/Sounds/', $options);
//echo $response->getStatusCode(); // 200
//echo $response->getHeaderLine('content-type'); // 'application/json; charset=utf8'
echo $response->getBody()->getContents(); // '{"type": "result", "result": {}}'
?>
The entire script:
Note: in the previous picture the status code and headers responses were commented in order to be able to format the entire output as json, see next image.
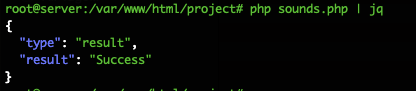
When the script is run:
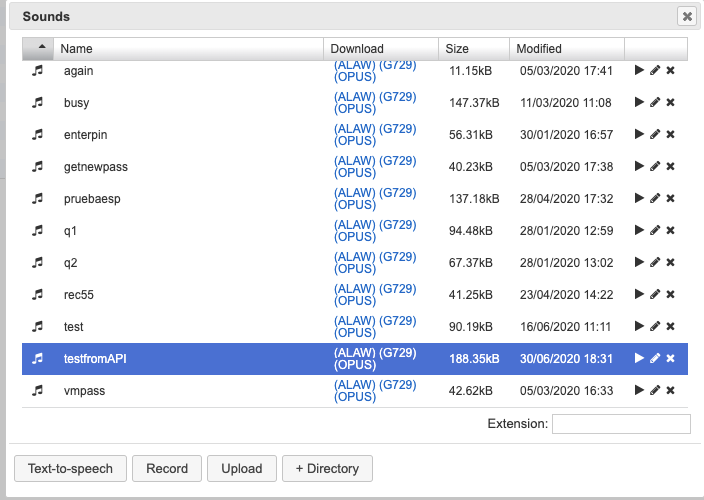
And in WMS sounds:
Originate
For this example we will consume API “Originate” (used to create new calls):
To create a call using Originate, make an HTTP POST request to resource URI:
http(s)://<PBX>/api/v1/Originate
POST Parameters
Parameter | Example | Description |
channel | Local/222@users | Channel that will be created as first leg of the call, in this case extension 222 will be called |
context | users | If the first leg of the call (channel) is successfully created, in what Dialplan to create the second leg, in this case we use users (internal Dialplan that should allow dialing external numbers) |
exten | 16144841500 | If the first leg of the call (channel) is successfully created, what number to call in the specified Dialplan (context), in this case the external number we want to dial |
priority | 1 | Always use 1 |
callerid | \"Announcer\" <16144841500> | Callerid that will be shown on the first leg of the call, in this case as caller id name we use “Announcer” and as caller id number we use the number we will dial |
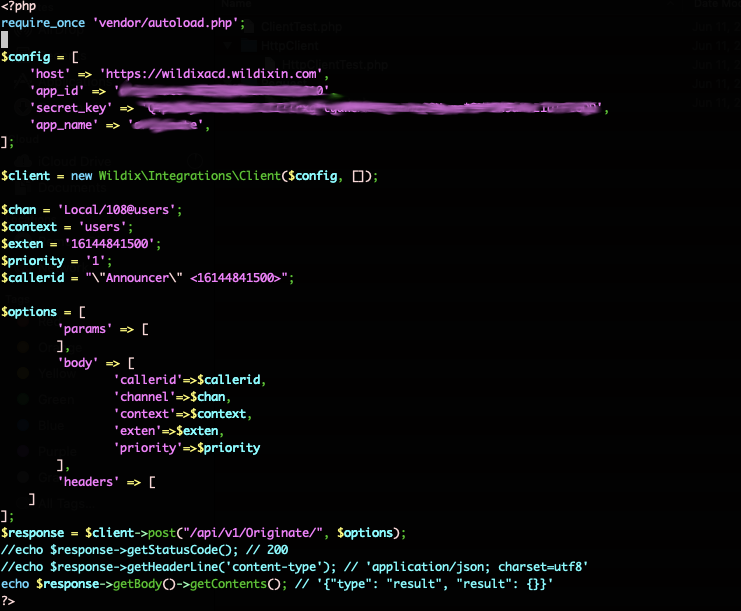
1. Create a php file (in this case originate.php) in your project folder and add the following content:
- Add needed library:
![]()
require_once 'vendor/autoload.php';
Then create the client instance:
Required values are found on PBX -> Integrations -> Server to Server applications. Your script should look something like this:
$config = [
    'host' => 'https://SYSTEM-NAME.wildixin.com',
    'app_id' => 'APP_ID',
    'secret_key' => 'SECRETKEY',
    'app_name' => 'APP NAME',
];
$client = new Wildix\Integrations\Client($config, []);
2. Next we need to configure parameters. Since Originate API needs a POST request with parameters, we need to add them in body section:

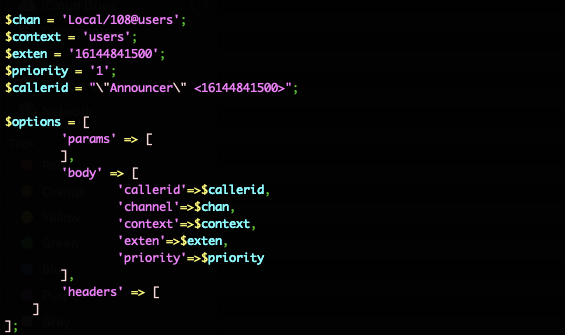
$chan = 'Local/108@users';
$context = 'users';
$exten = '16144841500';
$priority = '1';
$callerid = "\"Announcer\" <16144841500>";
$options = [
        'params' => [
        ],
        'body' => [
                'callerid'=>$callerid,
                'channel'=>$chan,
                'context'=>$context,
                'exten'=>$exten,
                'priority'=>$priority
        ],
        'headers' => [
    ]
];
In the previous picture, first we create variables for needed parameters. In this example we will call extension 108. If extension 108 picks up the call we will dial the number 16144841500). Then we refer to those variables in the body section (for POST requests body section is used). It is worth mentioning that all parameters need to be ordered alphabetically and parameter names can only be lowercase.
Finally we just need to make the request and get the response:
$response = $client->post("/api/v1/Originate/", $options);
//echo $response->getStatusCode(); // 200
//echo $response->getHeaderLine('content-type'); // 'application/json; charset=utf8'
echo $response->getBody()->getContents(); // '{"type": "result", "result": {}}'
?>
The entire script:
Note: in the previous picture the status code and headers responses were commented in order to be able to format the entire output as json, see next image.
When the script is run:

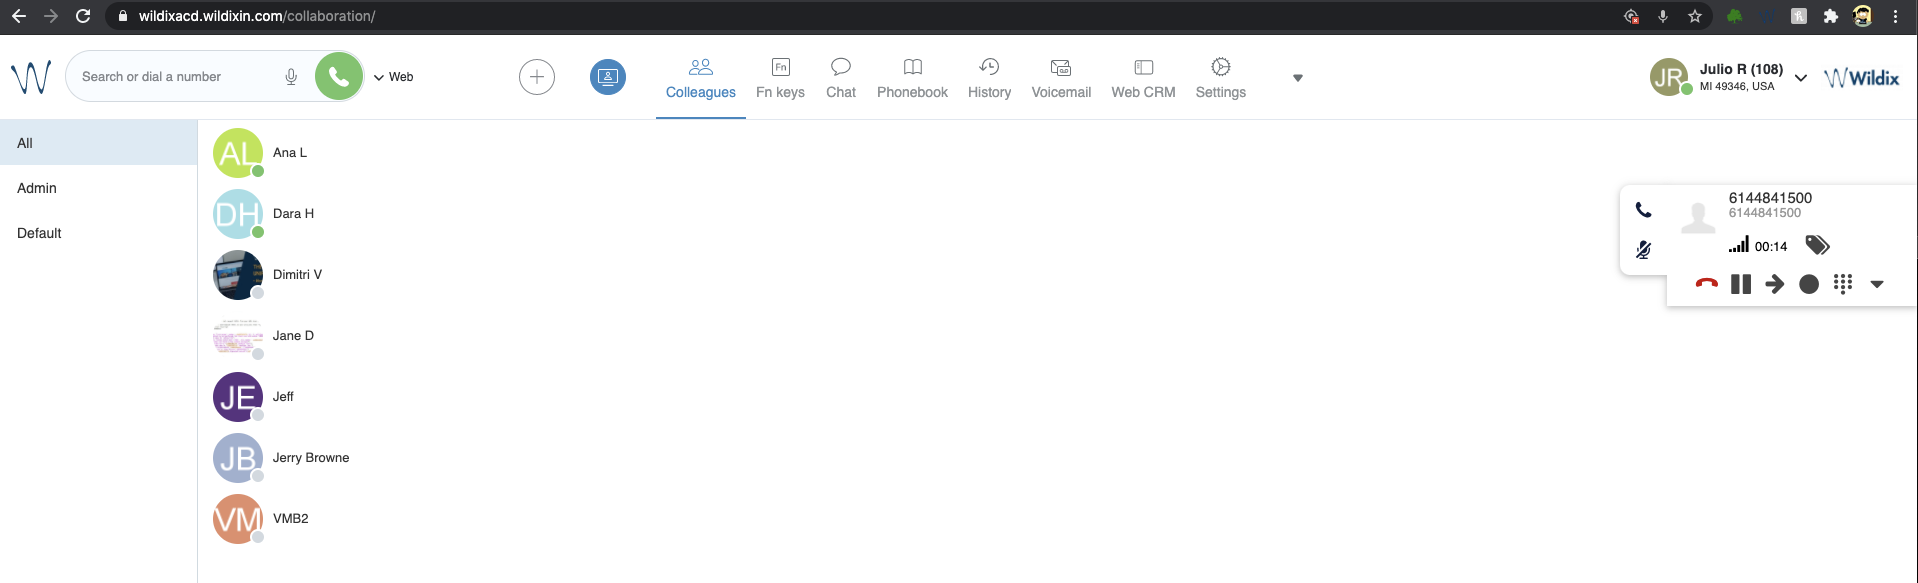
In user 108 Collaboration: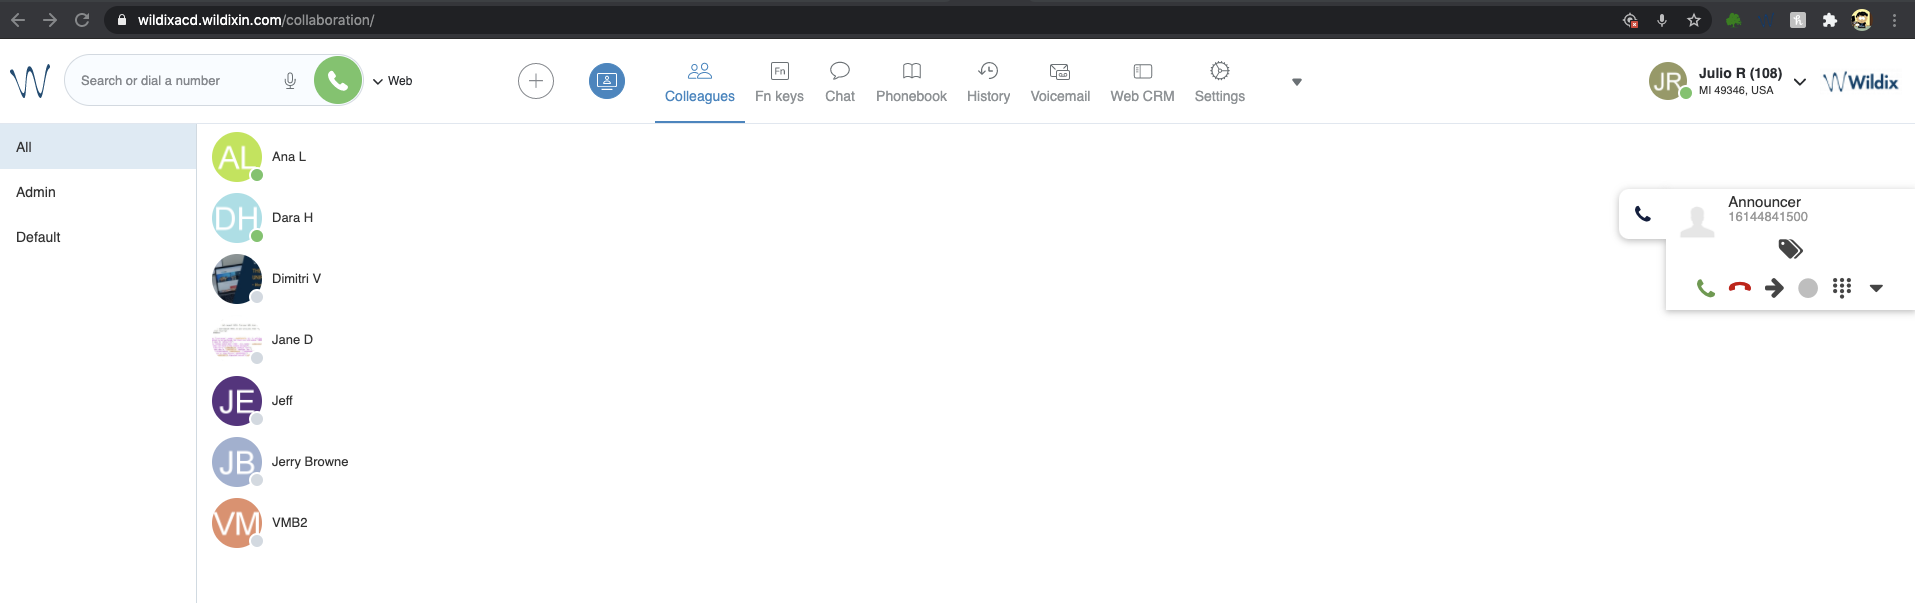
When the call is answered: