How to apply your x-bees email signature
This document describes how to apply your x-bees Kite email signature.
Other x-bees documentation: x-bees documentation.
Created: March 2022
Permalink: https://wildix.atlassian.net/wiki/x/mRnOAQ
Check x-bees Web User Guide (Kite settings -> Email signature section) to see how to generate a signature.
How to apply signature on Gmail
- Once you've generated email signature in Kite Settings -> Email signature, click Download file
- Open the downloaded file with your signature and copy it to clipboard
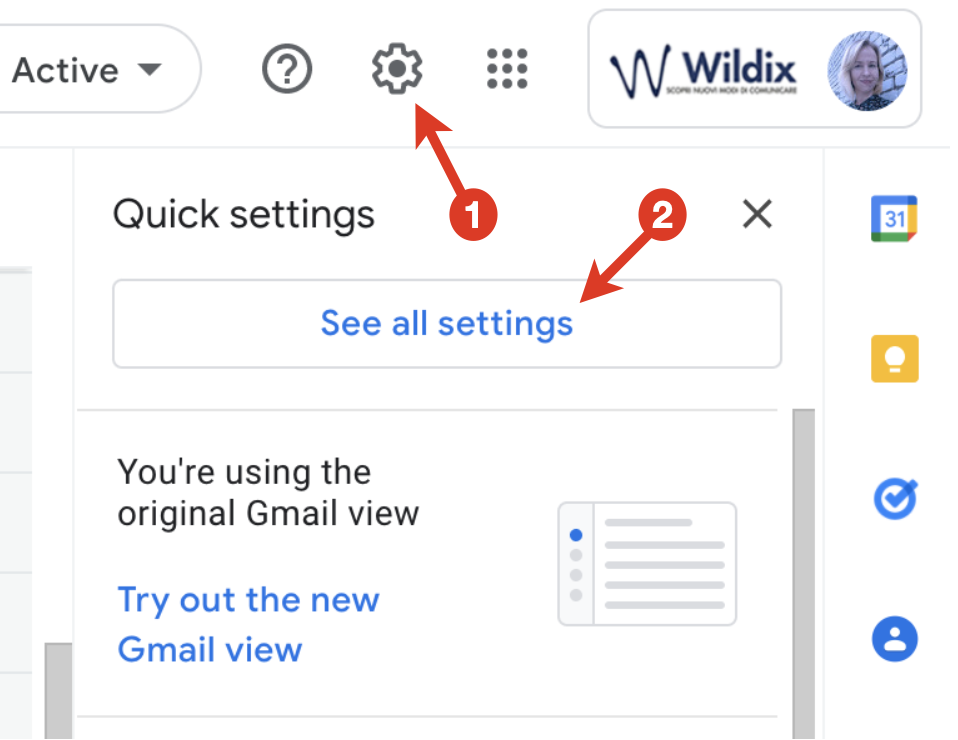
Go to Gmail Settings -> See all settings -> General
Scroll down to the section Signature, click + Create new, enter signature name and paste the signature into the input field (Cmd+A, Cmd+V on macOS or Ctrl+Shift+A, Ctrl+Shift+V on Windows)
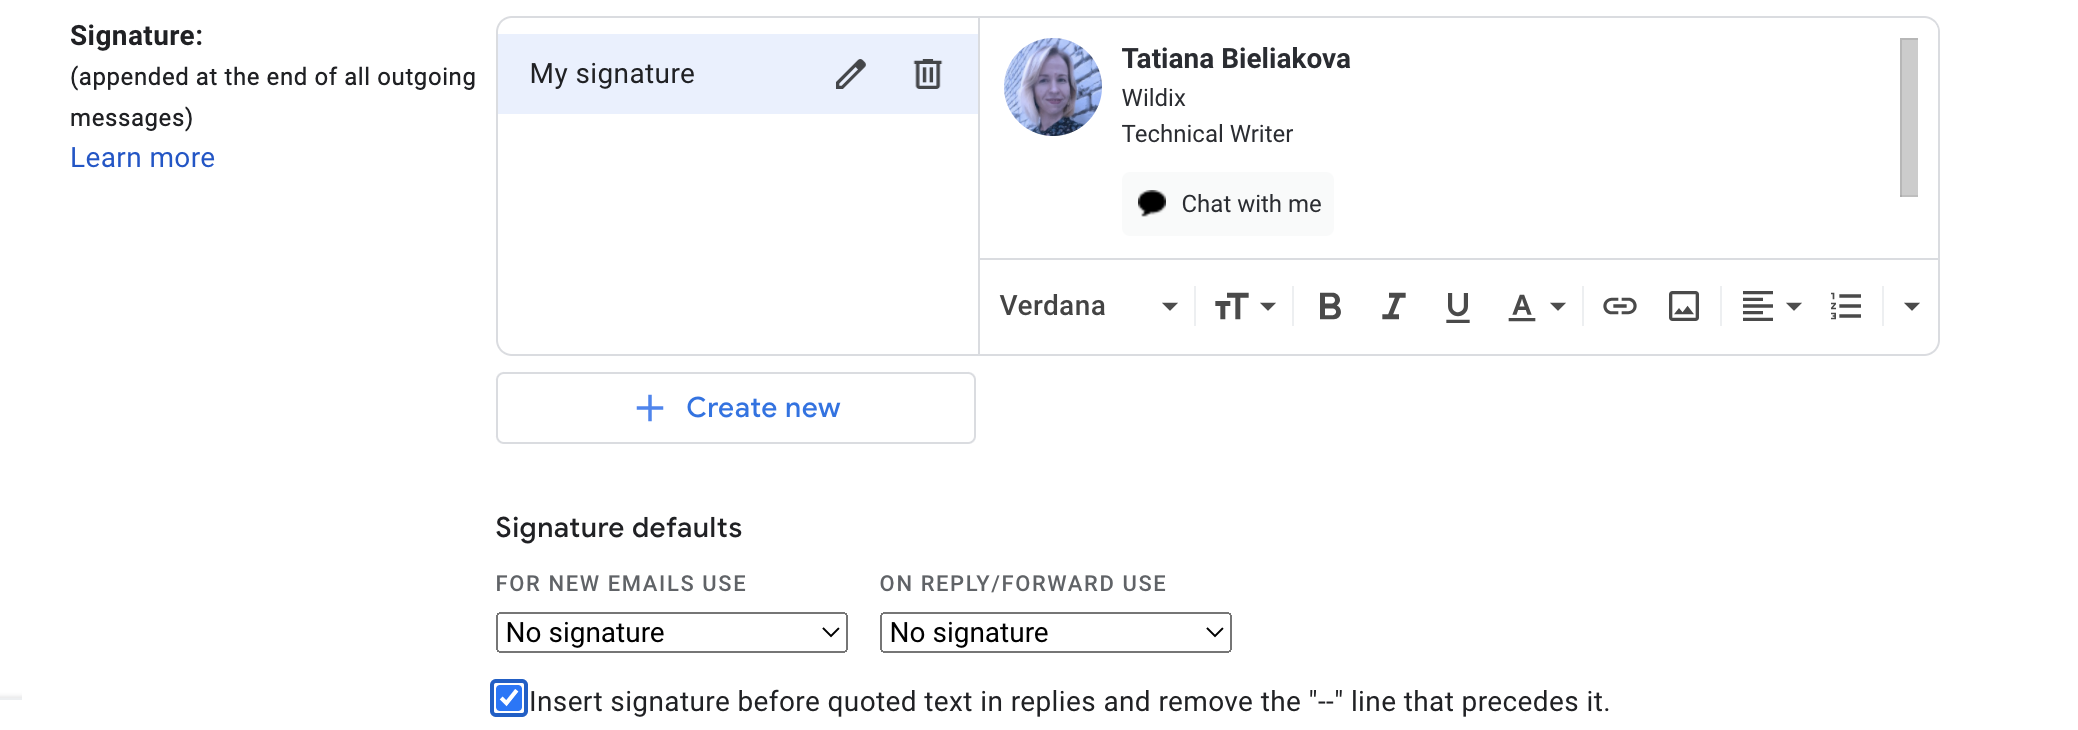
- Scroll down to the bottom of the page and click Save Changes
How to apply signature on Thunderbird
- Click Download file to download the .html file of your signature
- Go to Thunderbird -> Tools -> Account Settings
- Now you have two options:
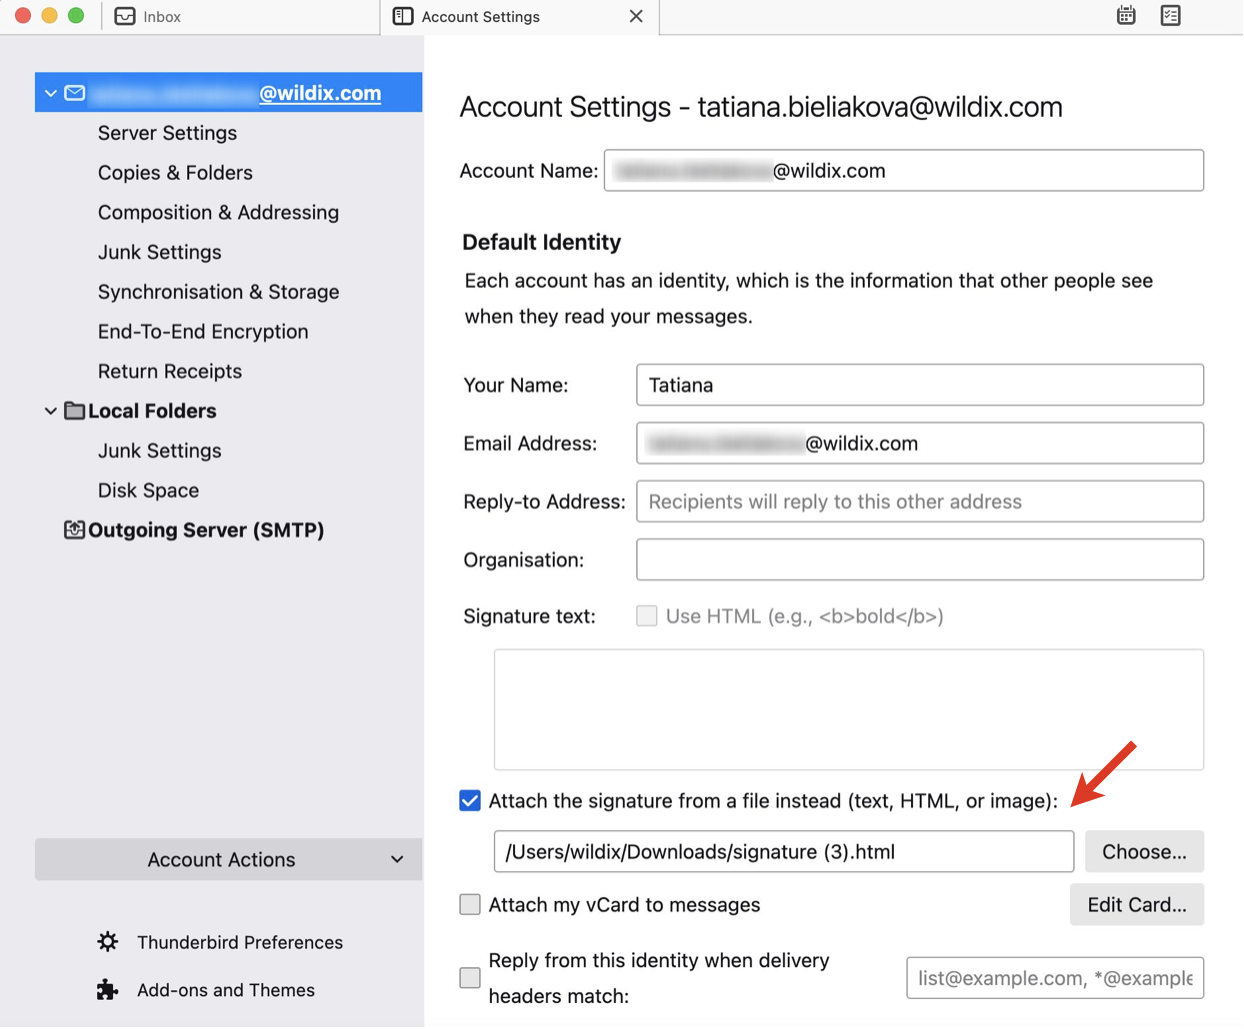
Option 1: Under Signature text: check the box Attach a signature from a file, click Choose, select the .html file that you downloaded, click OK.
IMPORTANT: Don't delete the .html file from your PC, otherwise your signature will disappear.
Option 2:
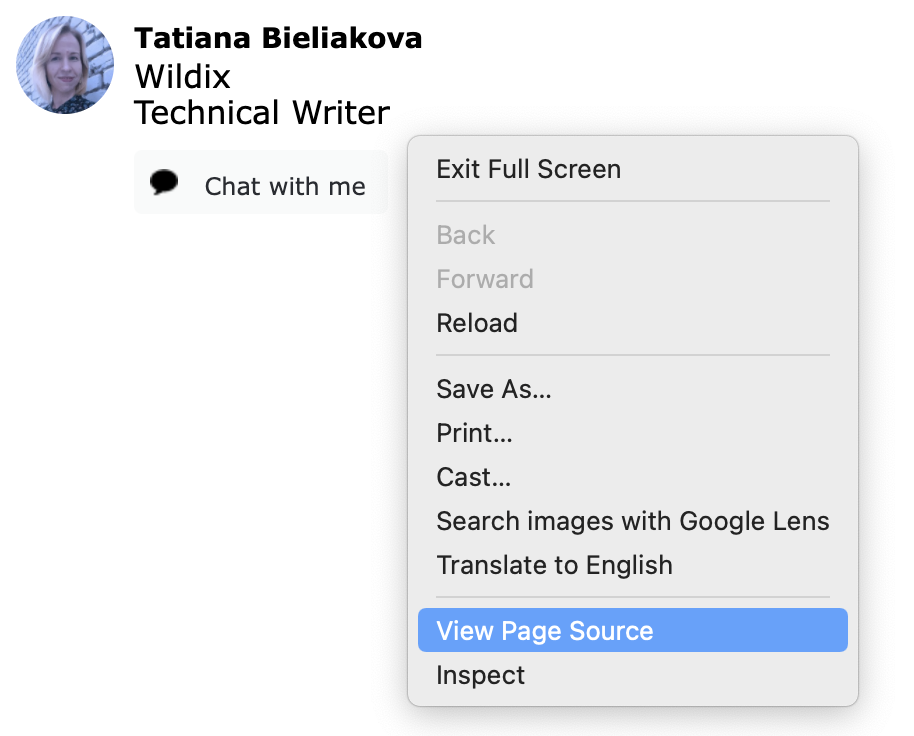
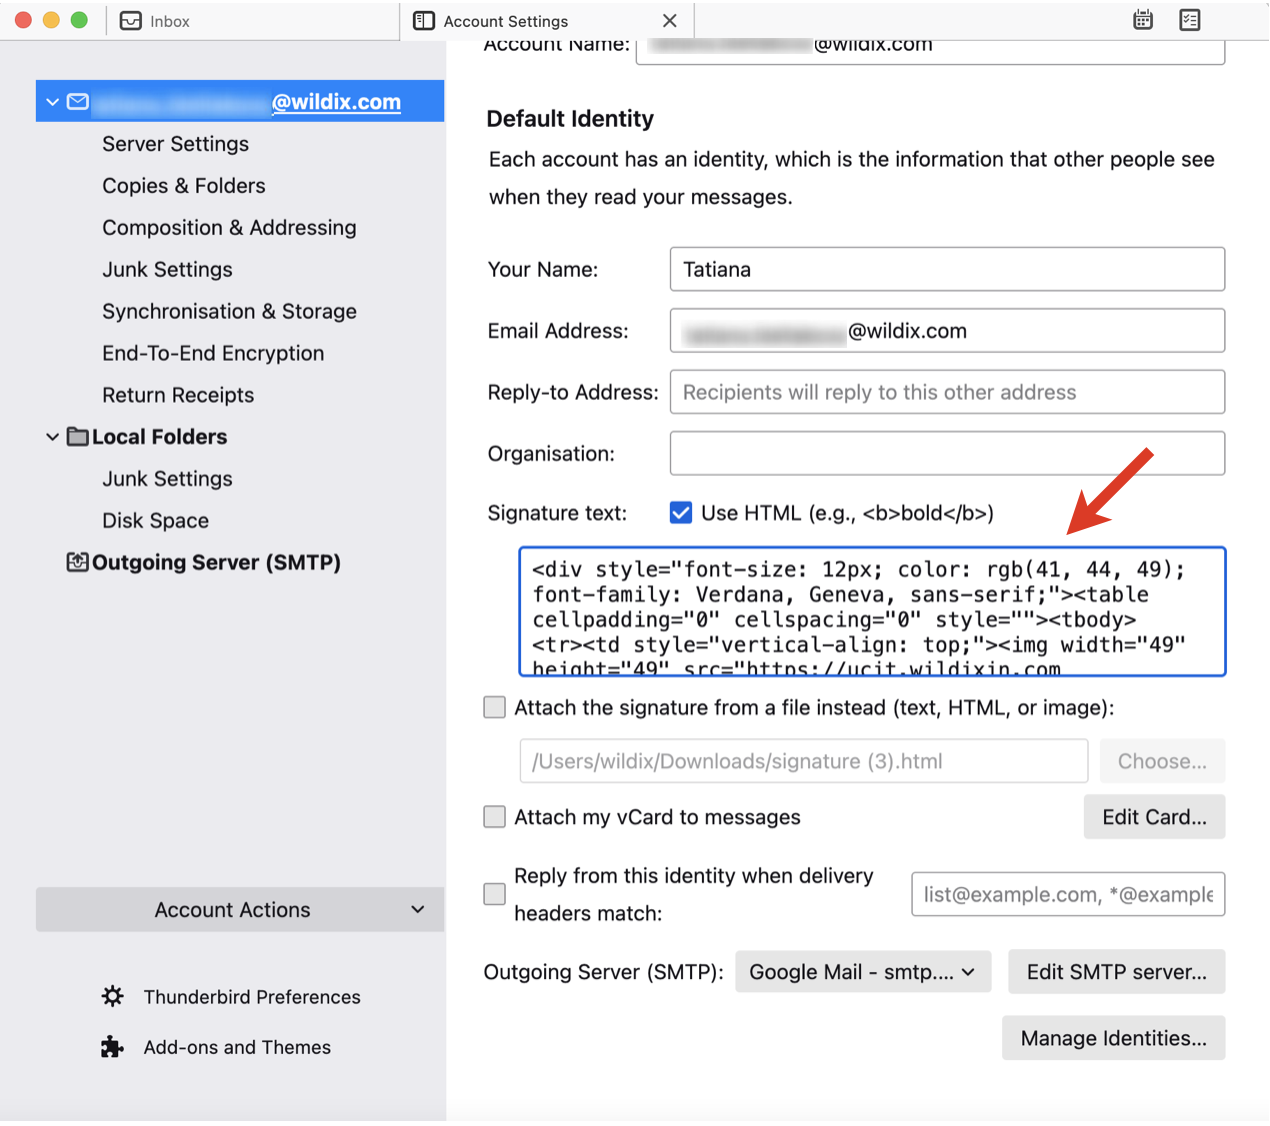
- Open the HTML file you have downloaded in step 1 in the browser
Right-click and select View page source
- Copy the content
Go back to Thunderbird -> Tools -> Account Settings and under Signature text check the box Use HTML and enter the copied content into the box below
How to apply signature on Outlook
(Tested on: Outlook 2010/ 2016)
- Once you've generated email signature in Kite Settings -> Email signature, click Download file
- Open the downloaded file with your signature and copy it to clipboard
- Open Outlook, go File -> Options (may vary depending on Outlook version)
Go to Mail menu and click on Signatures

- The window of mail Signatures opens, click on New and give a title to your signature (for instance, Kite).
- Select the signature and paste the content copied at step 3 into the box "Edit signature" below. Click Ok to apply.
When you create a new email, Kite email signature should be automatically applied (in case you are using several signatures, select Kite signature)
How to apply signature on Apple Mail
- Once you've generated email signature in Kite Settings -> Email signature, click Download file
- Open the downloaded file with your signature and copy it to clipboard
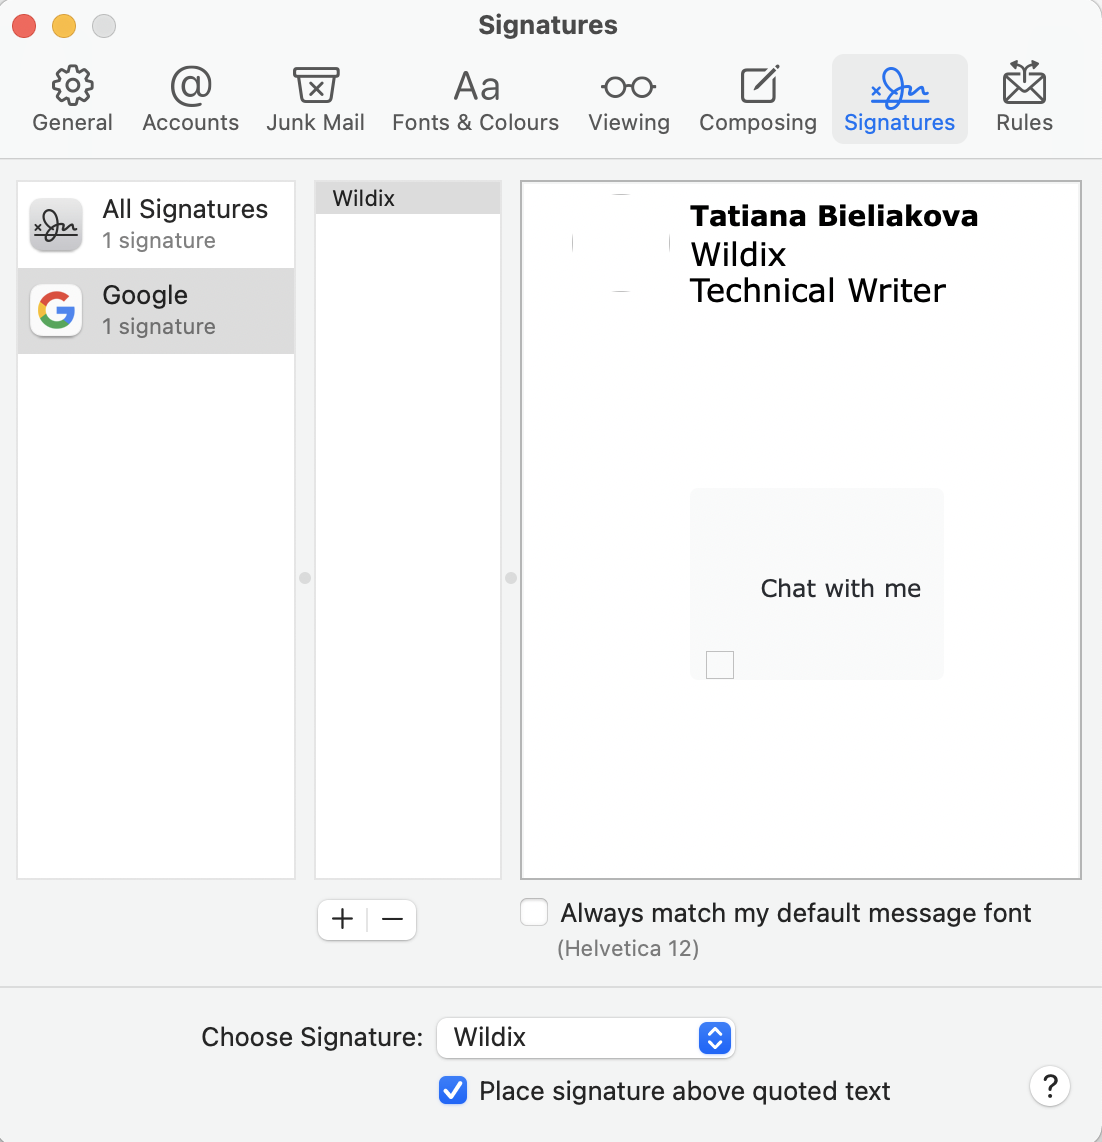
- Go to Apple Mail -> Preferences -> Signatures, select Google and click + to create a new signature
- Give your signature a name and make sure to disable the option Always match my default message font
- Delete the content and paste the new signature (Cmd+A, Cmd+V on macOS or Ctrl+Shift+A, Ctrl+Shift+V on Windows)
When you create a new email, Kite signature must be applied (in case you are using several signatures, make sure to select the Kite one)