This guide explains how to configure Webhook integration with third-party web applications and services, for sending events related to calls.
Created: August 2023
Permalink: https://wildix.atlassian.net/wiki/x/AYCODg
Introduction
Webhook integration (currently, in Beta) allows to connect different third-party web applications and services by sending events related to calls.
Requirements
- WMS Beta 6.04
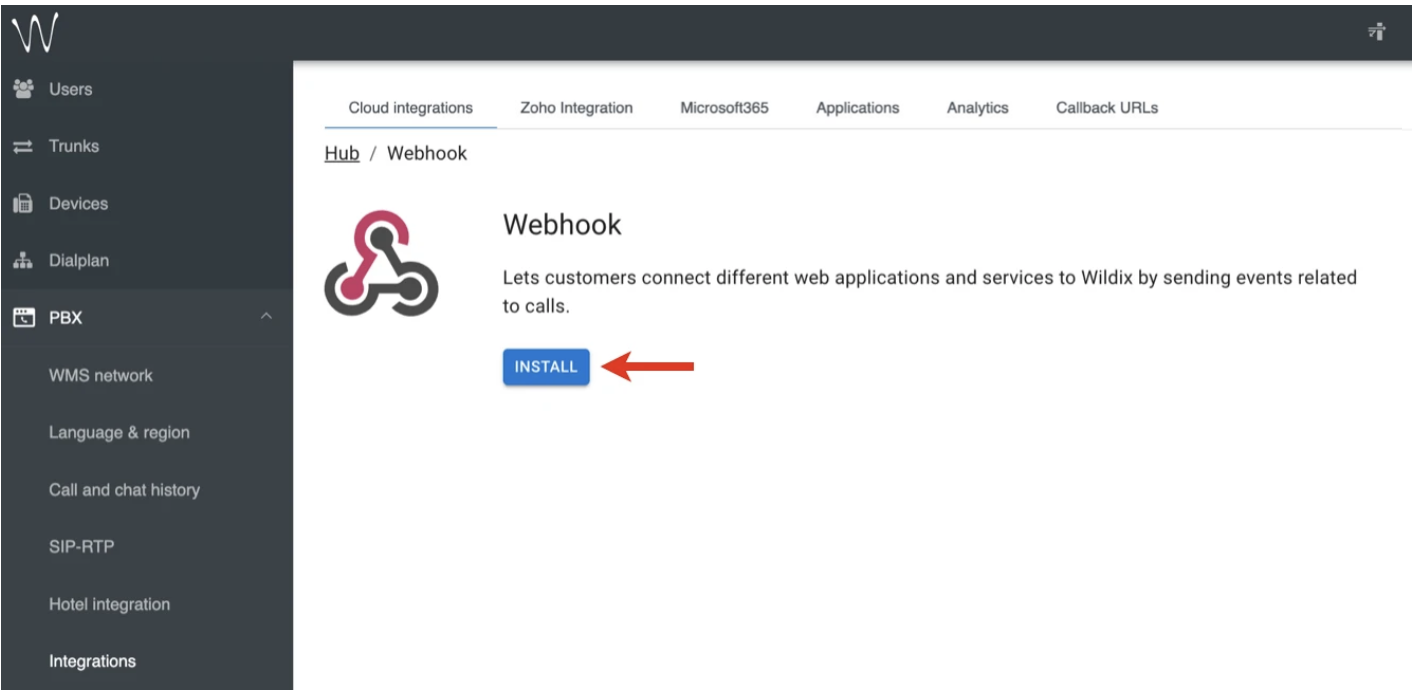
How to configure the integration
1. Go to WMS -> PBX -> Integrations -> Calendars tab (or to x-bees tab in case of a PBX with x-bees licence)

2. Click on the Webhook integration -> click Install
3. On the Connect integration screen, fill out the following fields:
Select transmission type for sending the events:
- WebHook: POST requests are sent to the URL, specified by customer
- AWS SQS: events are sent to AWS SQS queue
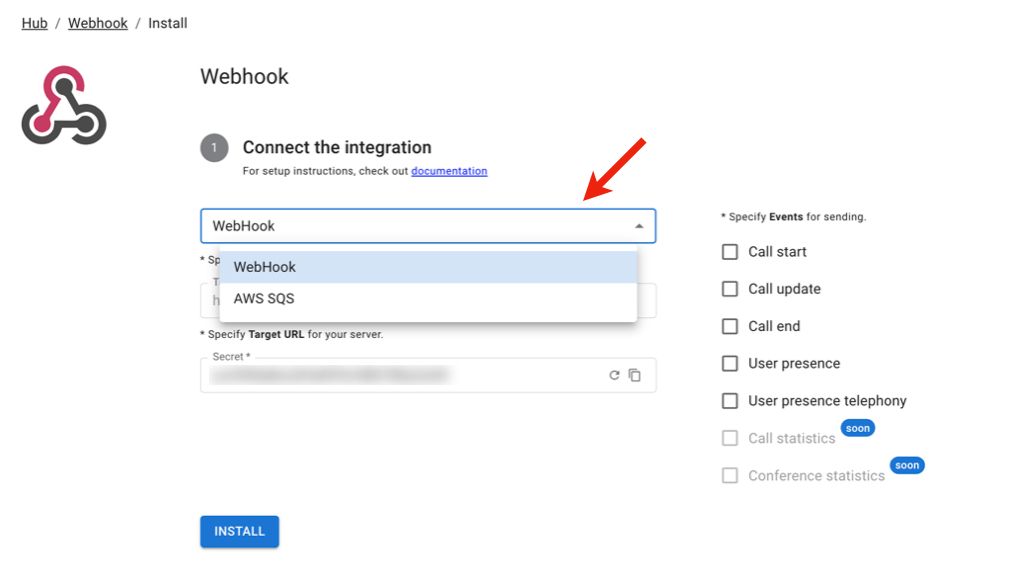
a) In case of WebHook transmission type:
- In the Target field, indicate the URL where the data should be sent to.
- Secret is generated automatically and cannot be edited.
- Choose type of events:
- Call start
- Call update
- Call end

b) In case of SQS transmission type:
- In the Target field, indicate the SQS URL where the data should be sent to.
- Enter SQS Key and Secret in the relevant fields.
- Choose type of events:
- Call start
- Call update
- Call end

4. Click Install.
Once installed, you can see details about the new integration which includes Integration ID, Transmission type, URL, Secret, and types of events selected.
Note: Editing of the integration is currently not supported. If you need to update any data, please delete the current Webhook integration and create a new one.
Copy the Integration ID and use it in your web application / service
Important: For security reasons, it is highly recommended that you validate the data received to your web application / service and make sure the data comes from Wildix and the data is not broken.
For this, look for the x-signature in the header section and use it to validate the body section. See example of the code below:
