This guide will lead you through the process of Salesforce Classic integration usage, starting from a Softphone installation and activation, and ending with practical examples for call receiving.
Requirements:
- WMS version: 4.01
- Wildix UC-Business license
- Installed WIService
Created: June 2019
Updated: October 2019
Permalink: https://confluence.wildix.com/x/XQCqAg
Click-to-call
- Call History
- Search Bar for the contacts
- Auto-detect existing contact and redirect to his page
Link to the application
You must uninstall the previous version before the manual update
You need to get the application from this link
Choose these states of radio buttons:
- Rename conflicting components in the package
- Install for All Users
And press Install. This process may take several minutes.
Call Сenter
Setup
Step - 1
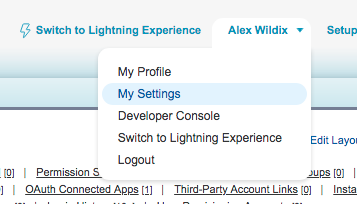
- 1 - Click on your Profile name
- 2 - Go to My Settings page
Step - 2
- Choose Advanced User Details subcategory
- Press the Edit button
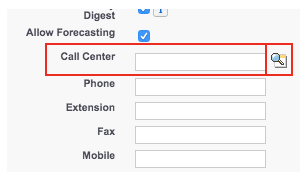
- Scroll down to Call Center field and press the Magnifier button
Step - 3
You see a popup with two options:
- Wildix Classic Call Center - will work only for Classic interface
- Wildix Lightning Call Center - will work only for Lightning version
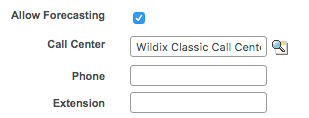
Choose WIldix Classic Call Center and click Save.
Switch
In order to switch for Salesforce Lightning you also need to choose Lighten Call Center.
Step - 1
- 1 - Click on your profile
- 2 - Go to the Settings page
Step - 2
- Choose Advanced User Details subcategory
- Press the Edit button
- Scroll down to Call Center field and press the Magnifier button
Step - 3
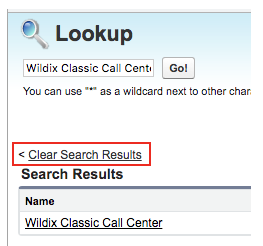
You see a popup with only one option. Click on Clear Search Results to get:
- Wildix Classic Call Center - will work only for Classic interface
- Wildix Lighten Call Center - will work only for Lightning version
Choose Lighten and click Save
Application Usage
Keep Collaboration open while working with app
Once you ended the setup process you can access the application on the left side of the page from all tabs except Reports and Dashboards
The application contains four tabs:
Menu
Main tab of application
- Search bar for Contacts
- Search Results with contacts info and Click-to-call function
Phone
This tab is opening automatically if you have a call
- Shows caller info
- Suggest to add in the contact list
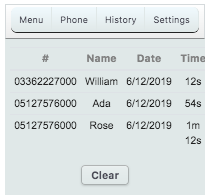
History
List of previous calls with:
- Phone number
- Name of contact
- Data of call
- Duration of a call
Dialer settings
Application has two checkboxes
- Enable auto-opening of found contacts
- Enable auto-opening of found contacts when receiving an incoming call
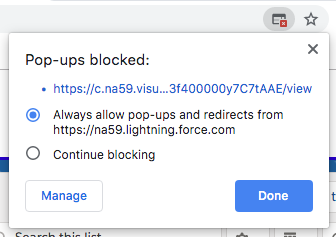
By default, Google Chrome does not allow pop-ups. Click on error icon on the Address bar and change it
Make a Call
Keep the Collaboration open while working with the application
Making a Call by Click-to-Dial
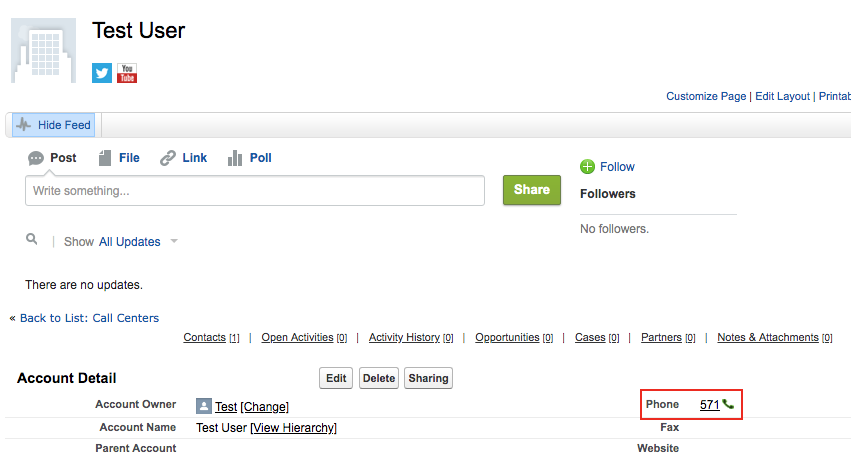
- Locate the number that you want to dial in the Contact Page.
- Click the button or the number. The number is automatically dialed in the softphone (Collaboration application).
- A number that has already been clicked cannot be clicked again for five seconds.
- The button does not appear next to fax numbers.
- icon displays if you have trouble with connection to collaboration
Making a Call by Application
- Go to the Menu tab.
- Search for the right contact.
- By using the search bar.
- By choosing from previous calls.
- Call it by pressing.
- Action icon.
- Contact name.
- Contact number
Answer a Call
Keep the Collaboration open while working with the application
For accepting an incoming call you have to open Collaboration. A call dialog window is displayed when there is an incoming call:
To answer a call: click the green Handset icon
To decline a call: click the Hang up (red) icon
You can set up automatic call forwarding based on user status (available, DND, away) and call type (internal, external, whitelist, blacklist). See chapter: Features.

