| Scroll export button | ||||||||
|---|---|---|---|---|---|---|---|---|
|
| Info |
|---|
The document describes how to set up integration with Datto Autotask PSA. Created: August 2022 Permalink: https://wildix.atlassian.net/wiki/x/AYDzAQ |
| Table of Contents |
|---|
Autotask PSA is a business management solution that combines service desk, project management, account management, time tracking and billing, contracts, reporting, and more. Autotask integration with Wildix adds up some more handy features to this list: Click-to-call, which allows to initiate calls from Autotask in just one click.
...
- Within Autotask, click on the menu icon next to the Search field in the top left corner -> navigate to Admin (1) -> Account Settings & Users (2):

2. On the Account & Settings tab, expand the option RESOURCES/USERS (HR) and click Resources/Users:


3. Click on the arrow icon next to the button +New -> select option New API User:


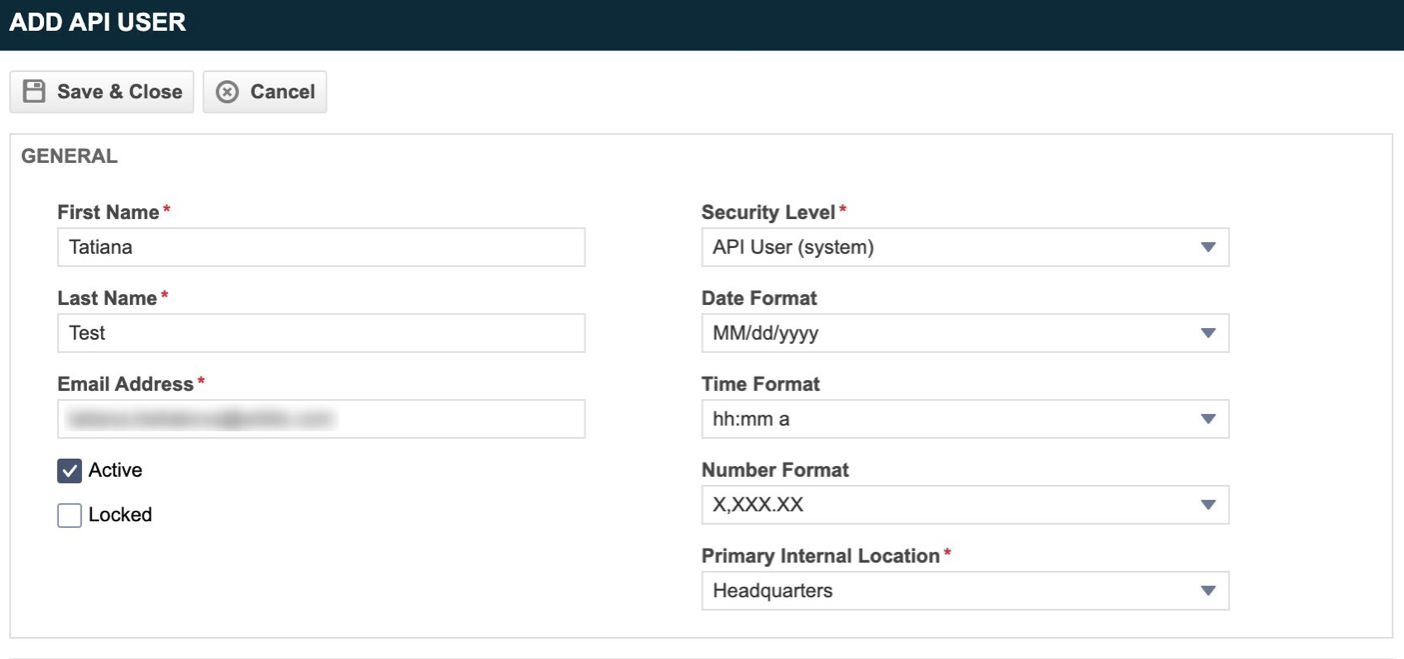
4. Fill out the necessary fields in the section General:
- First Name
- Last Name
- Email Address
- Security Level: Make sure to choose the option API User (System)
- Date format (optional)
- Time format (optional)
- Number format (optional)
- Primary Internal Location

5. In the Credentials section, generate API Keys:
...
Click Generate Secret and make sure to save the password somewhere safe for later usage.

6. In API Tracking Identifier section, select the option Custom (Internal Integration) -> enter custom name of the integration, e.g. Wildix, in the field Internal Integration Name and copy the Tracking Identifier for further usage:![]()
![]()
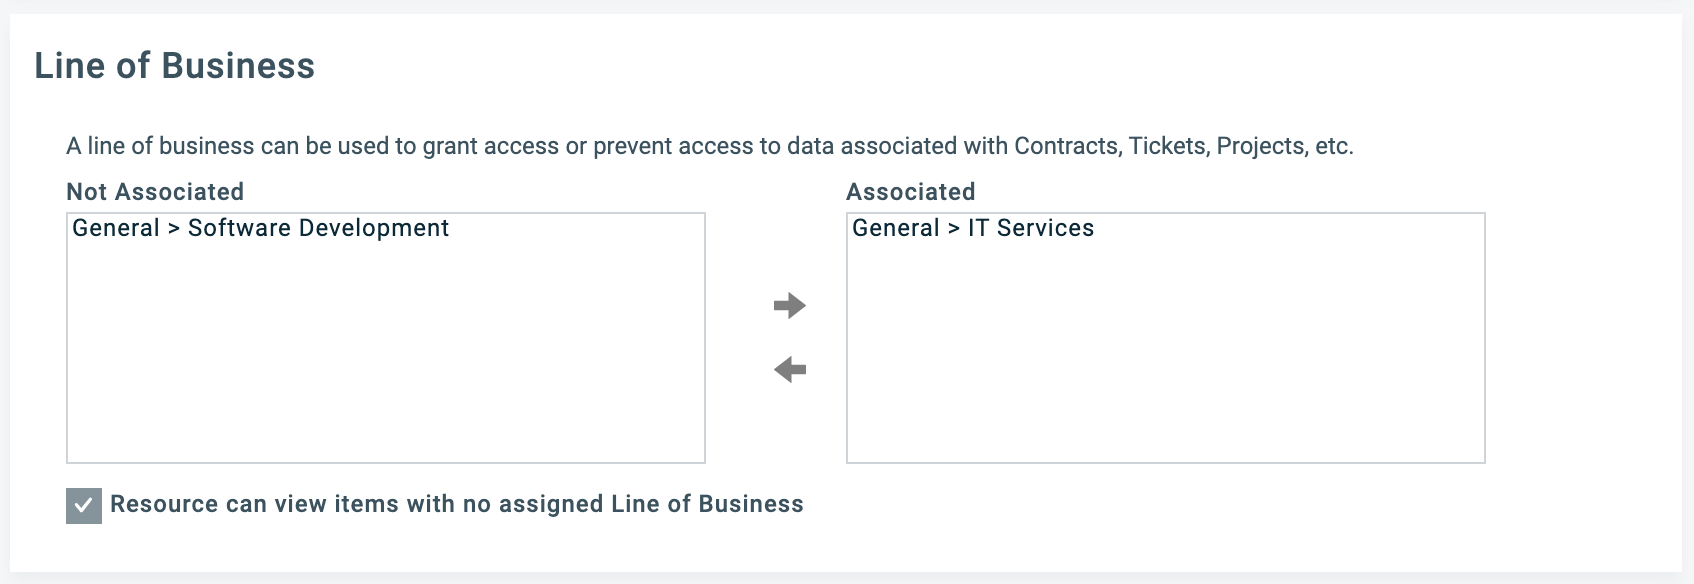
7. In the Line of Business section, drag all relevant line items that relate to reading contact data to provide access to the relevant areas:
8. Click Save & Close at the top of the page:

Enable Wildix integration with Autotask
...
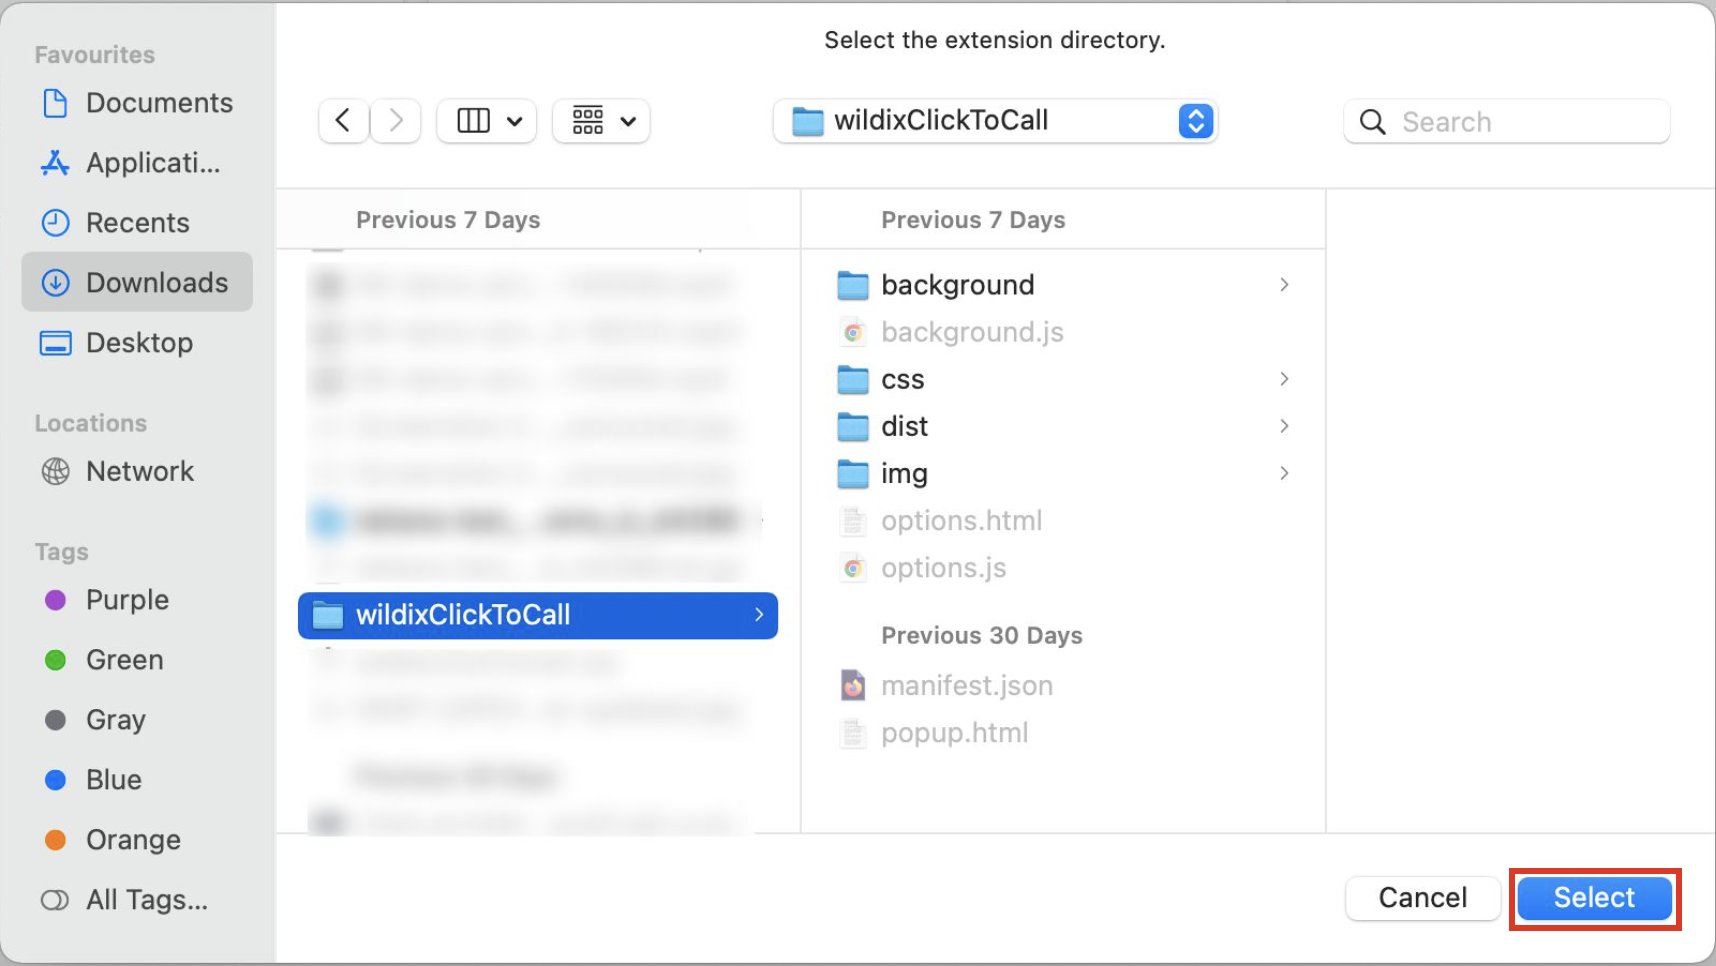
- Install Wildix ClickToCall browser extension:
- Download the folder to your device and unzip it: LINK
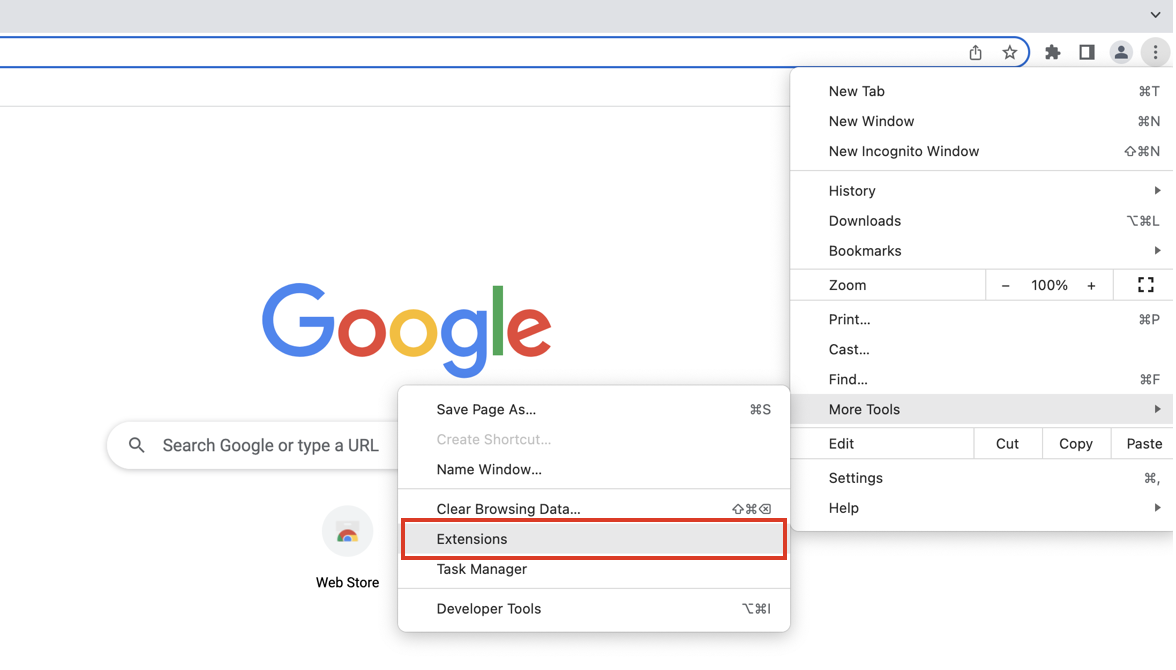
- Go to Google Chrome browser Settings -> More tools -> Extensions:
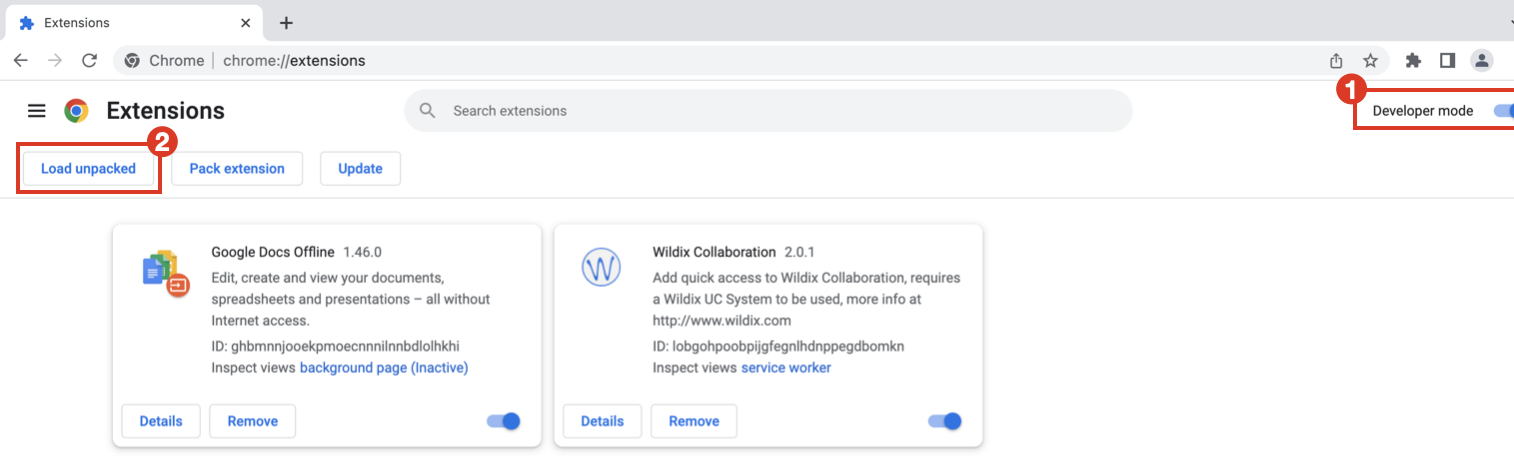
- Make sure Developer mode is turned on (1) and click Load unpacked (2):
- Select the folder you've downloaded:
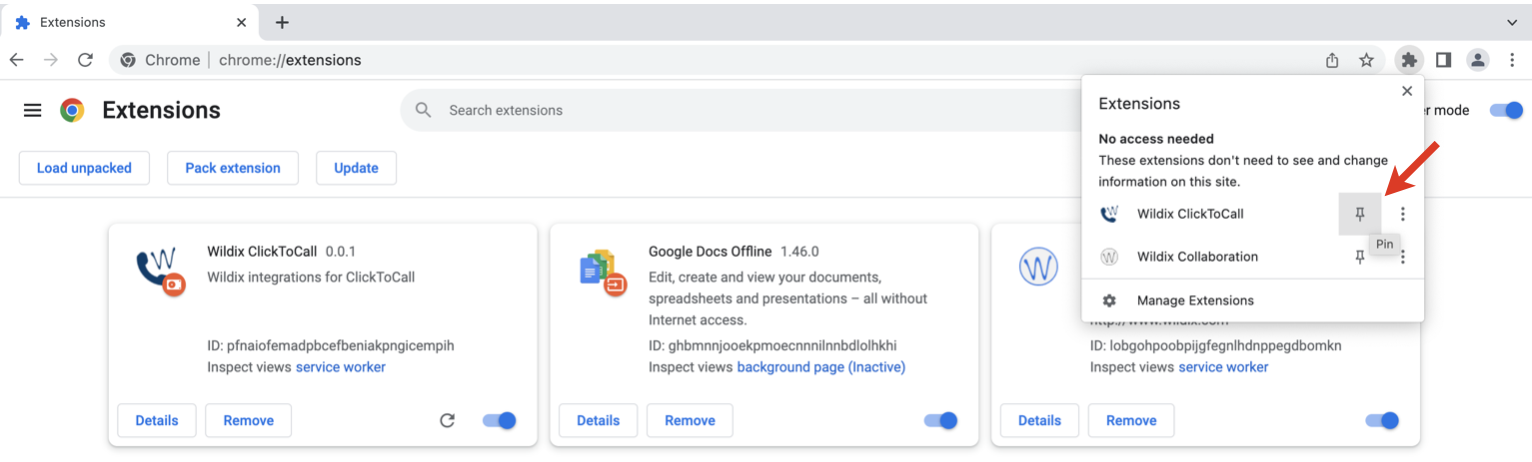
- Pin the extension: click on the Extension icon in browser -> click Pin next to ClickToCall:
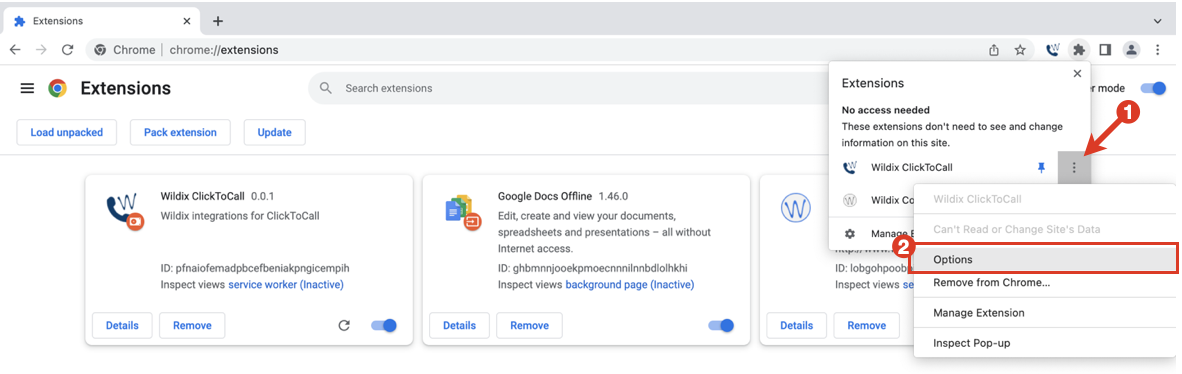
- Click More actions (1) next to ClickToCall extension -> proceed to Options (2):
- The Datto API variables screen appears. Enter the following data:
- Domain: enter the domain name
- Zone: information about Autotask PSA API Zones
- API integration code: enter the code copied from Tracking Identifier field in Datto
- User Name: enter data copied from Username (Key) field when creating API User in Datto
- Secret: enter Password (Secret) generated for API User in Datto
- Click Save:
...
When you hover a mouse over a phone number or extension in the list of contacts or on contact details page, you can see a phone icon:
![]()
![]()
To initiate a call, click on the phone number/ extension. The following Wildix pop-up appears:

If user is found in Collaboration, the line "User from Collaboration" is displayed on the pop-up. Otherwise, there can be the contact's email. Also, Wildix pop-up shows name of contact and phone number/ extension.
| Note |
|---|
Current limitation: For Autotask contact to be found in Collaboration, their phone number should fully coincide with how it's registered in Autotask and on the PBX side. |
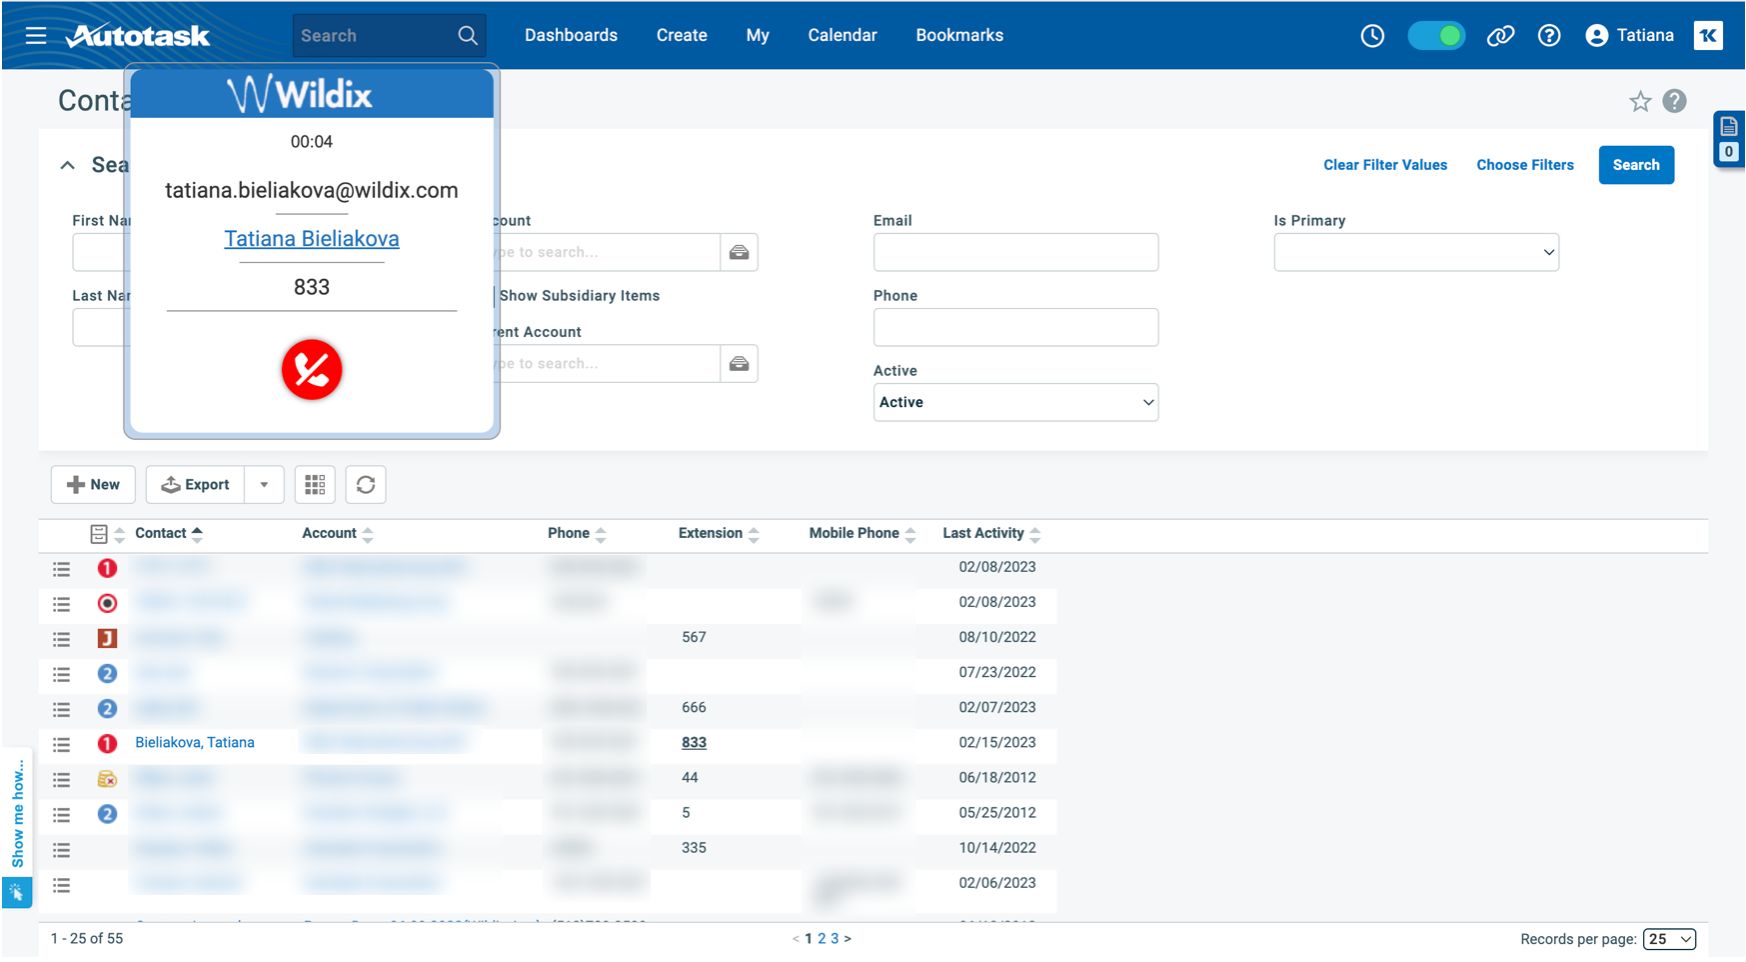
The pop-up displays email, name, and extension of the contact. You can drag and drop the pop-up to any part of the screen for your convenience.
If the contact is available in Autotask phonebook, the contact name is clickable. When you click on the contact name, a separate window opens with details about the contact.

| Note |
|---|
Note: For the separate window with contact details to open, pop-ups should be allowed in browser settings. |
...
Accept an incoming call
To accept an incoming call, click on the green phone icon:


If user is not found in Autotask contacts, you'll see "User from Collaboration" on the pop-up.
End a call
To end a call, click on the red call icon on the Wildix pop-up:
...