| Scroll export button | ||||||||
|---|---|---|---|---|---|---|---|---|
|
| Info |
|---|
The Guide explains how to set up and use Zabbix for monitoring Wildix PBX.Supported WMS version: starting from 3.82.33693 Updated: June 2018May 2023 Permalink: https://wildix.atlassian.net/wiki/x/mRDOAQ |
| Table of Contents |
|---|
| Note |
|---|
Zabbix should be installed and running on a separate server. |
Step 1. Setup of zabbix-agent
1. Access PBX via SSH as root:
...
3. Restart zabbix-agent:
Use the command:
On systems with WMS 6 version:
Code Block systemctl restart zabbix-agent.serviceOn systems with WMS 5 version:
Code Block /etc/init.d/zabbix-agent restart
Step 2. Setup of zabbix-server
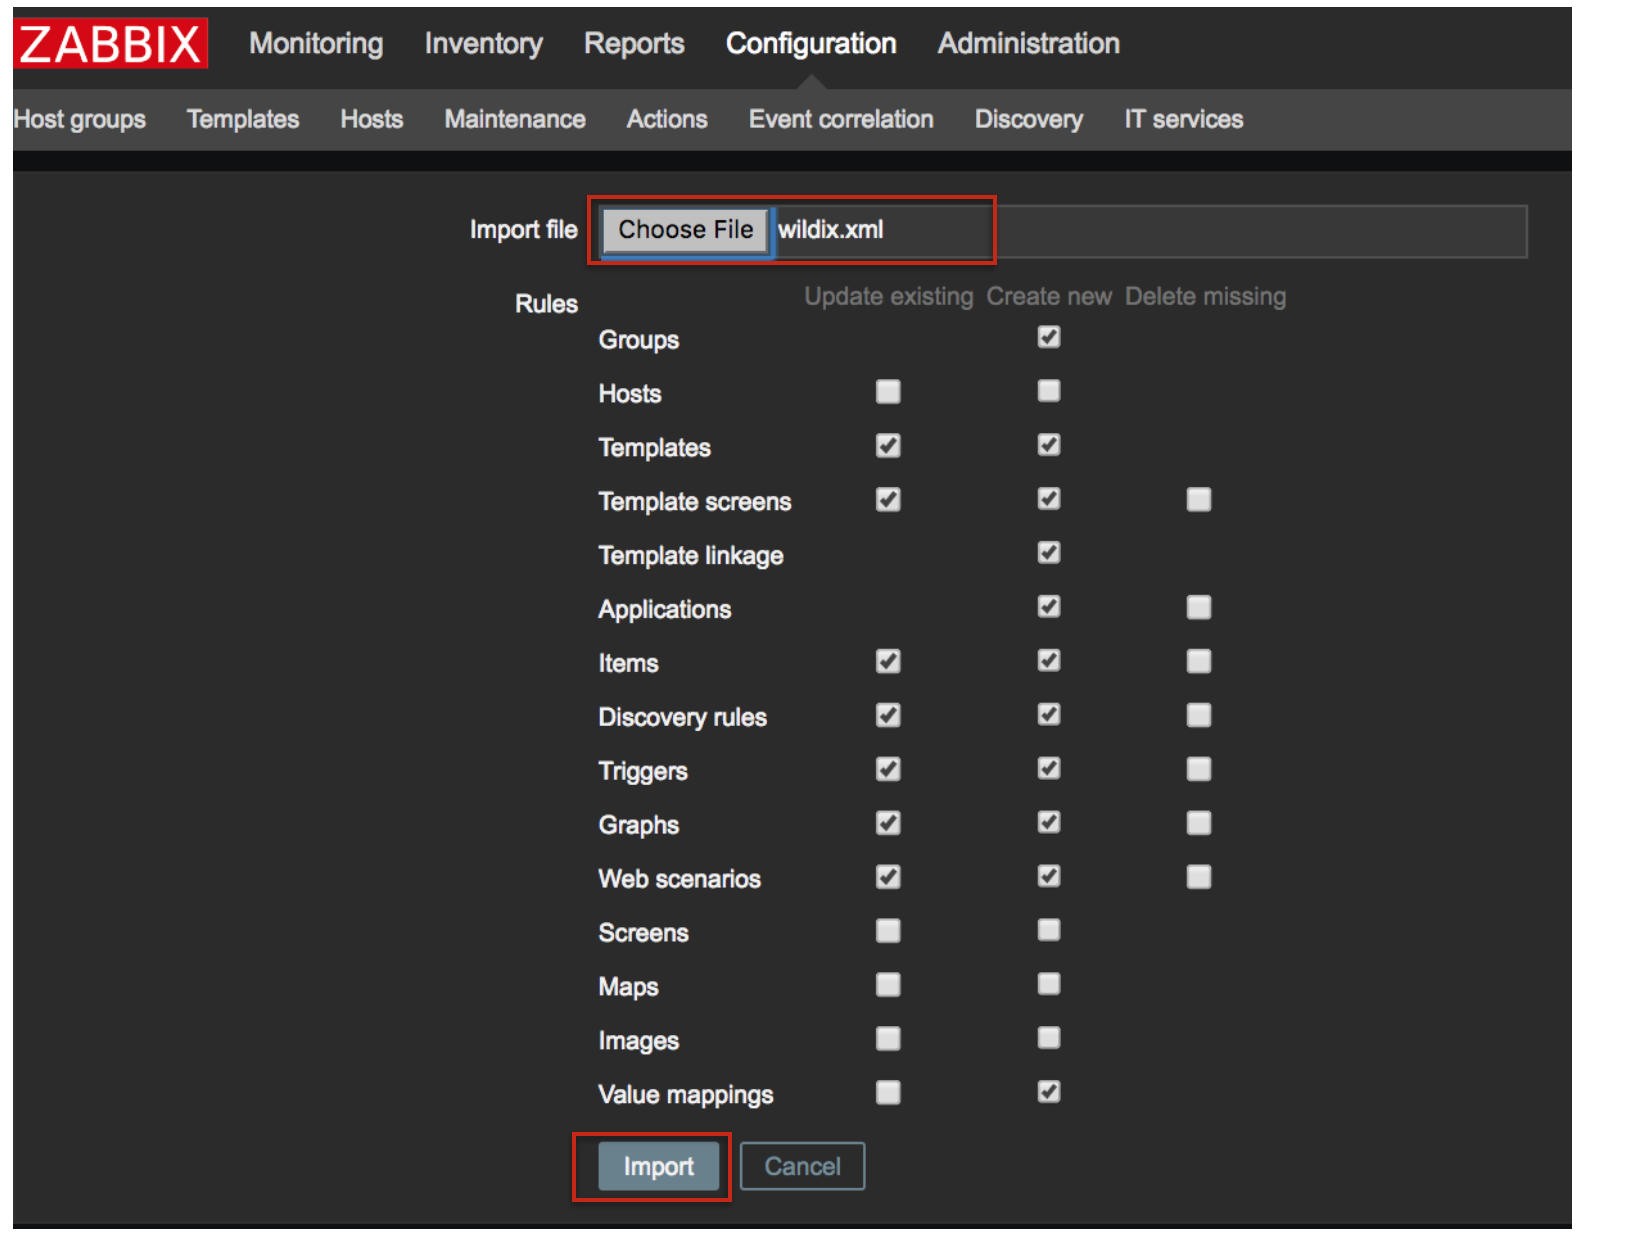
Download the template file from https://files.wildix.com/images/zabbix-templates/wildix.xml
- Access Zabbix -> Configuration -> Templates
Click Choose File to upload the template file that you have saved on your PC, then click Import
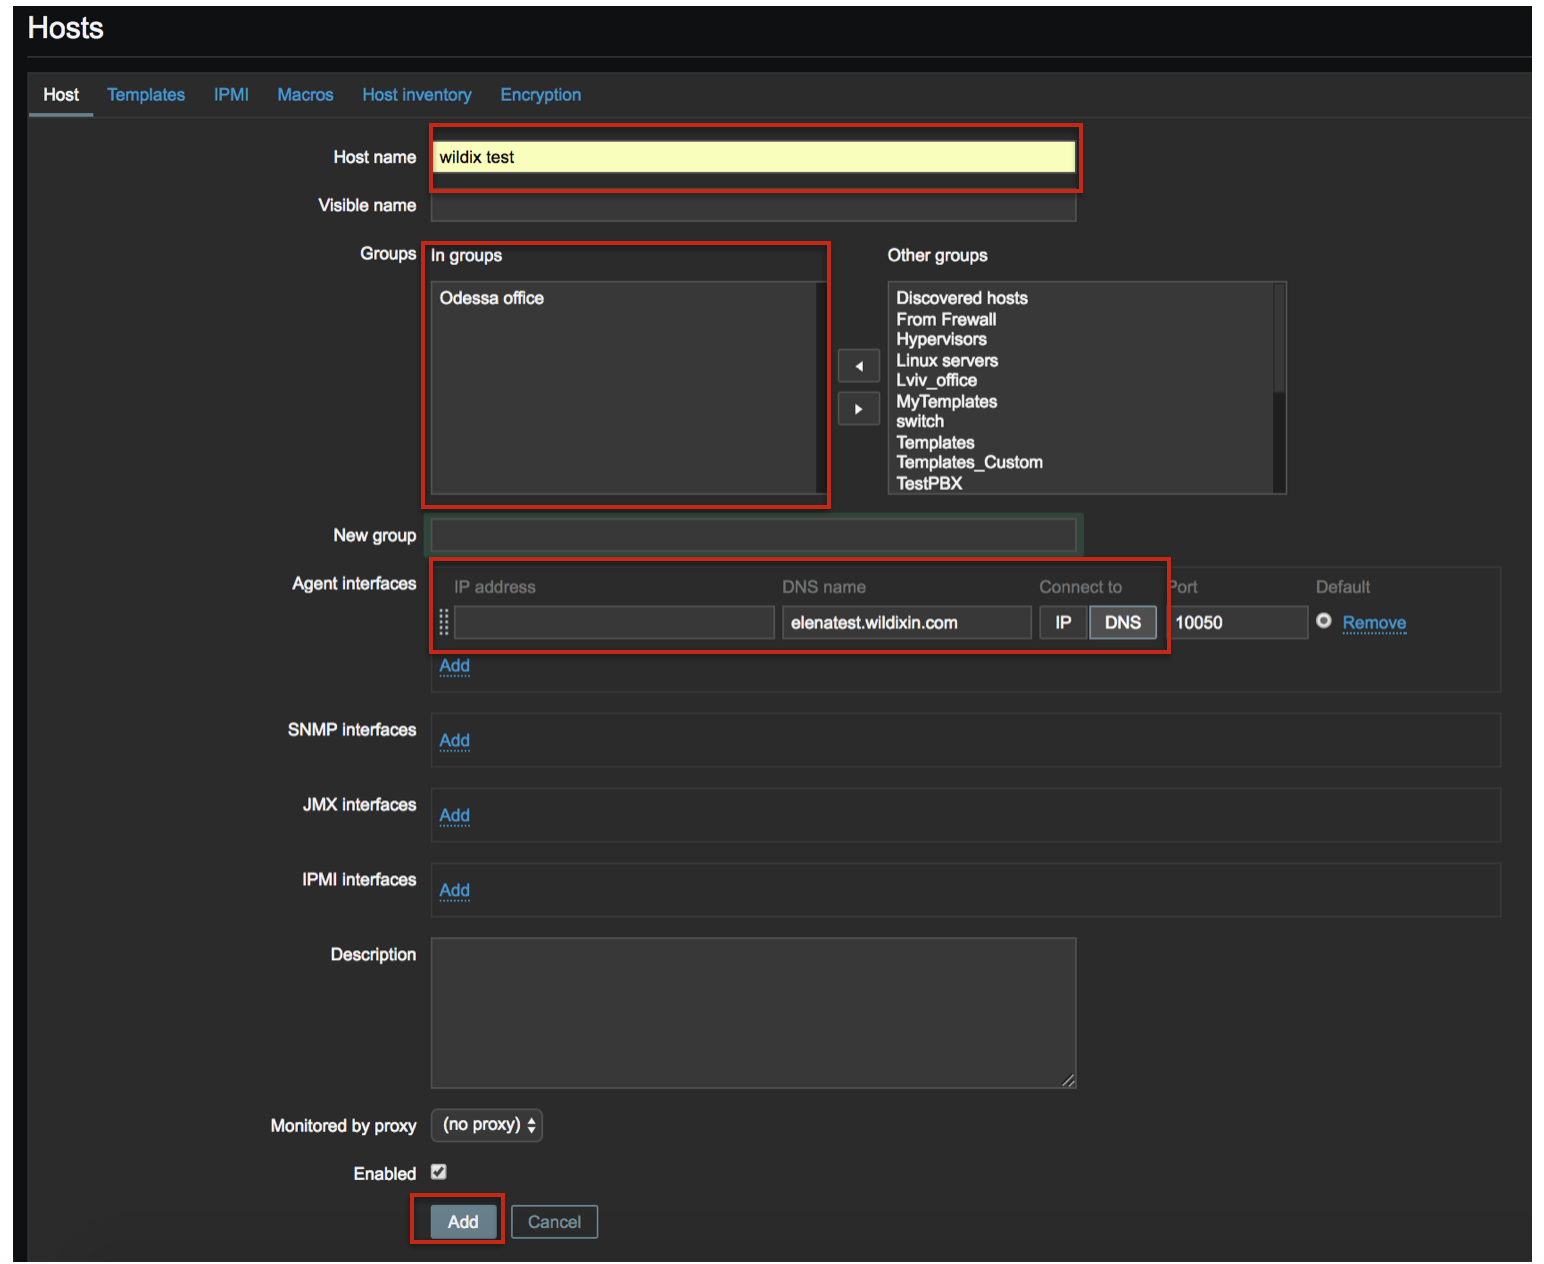
- Go to Configuration -> Hosts
- Click Create host and fill in:
- Host name
- Groups: select group(s) from “Other groups” section and move the selected group(s) to “In groups” section
- Agent interfaces: enter IP address or DNS name of your Wildix PBX (depending on what you selected, choose Connect to IP or DNS
Click Add
- Go to Configuration -> Templates,
- Click Group and select “Wildix Templates” from the list
Tick off “Template Wildix-PBX” and click Select

- Go to Configuration -> Hosts and find your Host on the list by its Host name
...
Ports used by Zabbix
- 8099 TCP for IP 52.18.154.170
- 10050 TCP for local Zabbix
...