| Scroll export button | ||||||||
|---|---|---|---|---|---|---|---|---|
|
| Info |
|---|
The document describes how to set up integration with Datto Autotask PSA. Created: August 2022 Permalink: https://wildix.atlassian.net/wiki/x/AYDzAQ |
| Table of Contents |
|---|
Introduction
...
- Within Autotask, click on the menu icon next to the Search field -> navigate to Admin -> Account Settings & Users:
...

2. On the Account & Settings tab, expand the option RESOURCES/USERS (HR) and click Resources/Users:


3. Click on the arrow icon next to the button +New -> select option New API User:


4. Fill out the necessary fields in the section General:
...
Click Generate Secret and make sure to save the password somewhere safe for later usage.

6. In API Tracking Identifier section, select the option Custom (Internal Integration) -> enter custom name of the integration, e.g. Wildix, in the field Internal Integration Name and copy the Tracking Identifier for further usage:![]()
![]()
7. In the Line of Business section, drag all relevant line items that relate to reading contact data to provide access to the relevant areas:

8. Click Save & Close at the top of the page:

Enable Wildix integration with Autotask
...
- Install Wildix ClickToCall browser extension:
- Download the folder to your device and unzip it: LINK
- Go to Google Chrome browser Settings -> More tools -> Extensions:

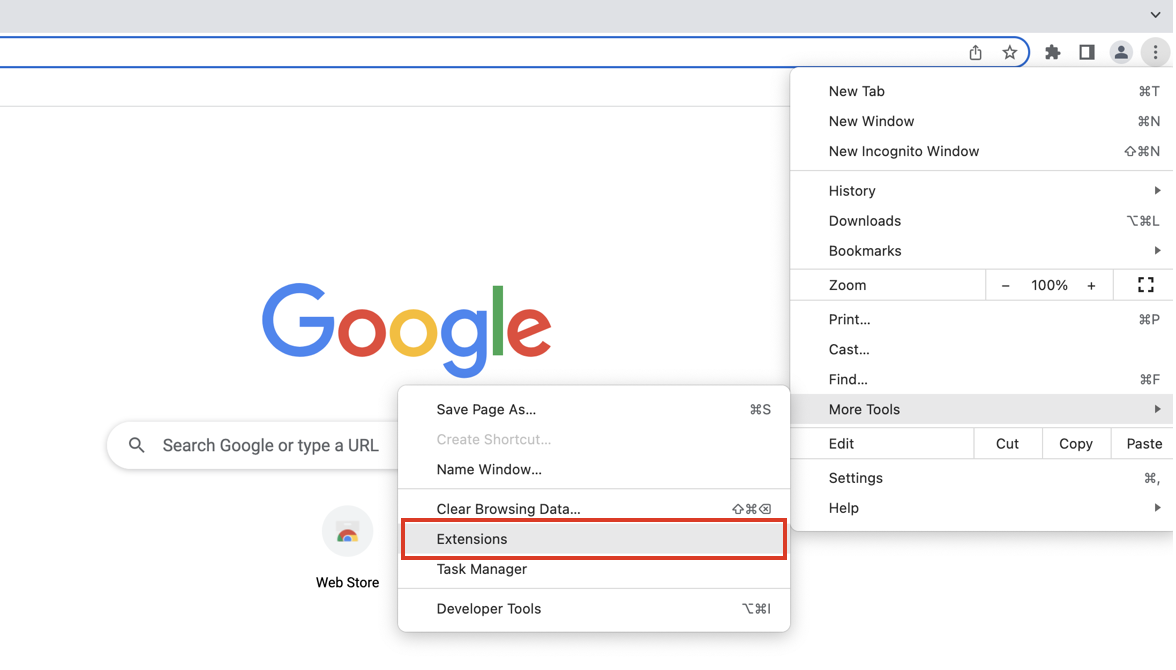
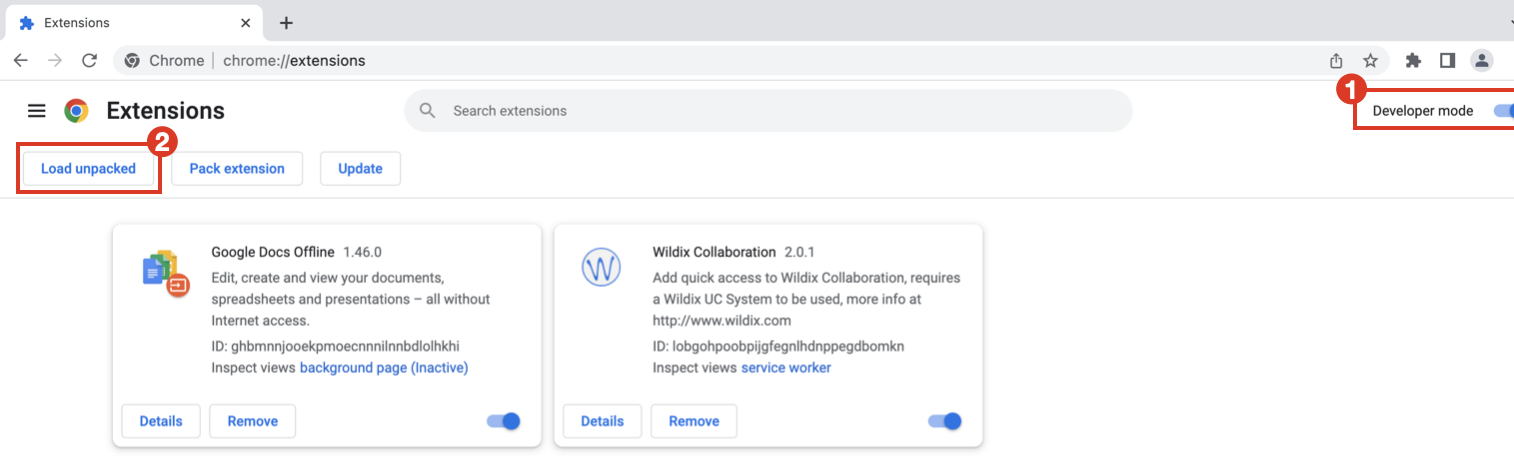
- Make sure Developer mode is turned on (1) and click Load unpacked (2):

- Select the folder you've downloaded:

- Pin the extension: click on the Extension icon in browser -> click Pin next to ClickToCall:

- Click More actions (1) next to ClickToCall extension -> proceed to Options (2):

- The Datto API variables screen appears. Enter the following data:
- Zone: information about Autotask PSA API Zones
- API integration code: enter the code copied from Tracking Identifier field in Datto
- User Name: enter data copied from Username (Key) field when creating API User in Datto
- Secret: enter Password (Secret) generated for API User in Datto
- Click Save:
...