...
Device is now rebooting (the phone screen indicates that the device is rebooting). After the reboot, you can see the date and time, soft keys and “login0X” on the screen of the device.
WP4X0 old generation and WP500
- Go to device’s web interface
Credentials for the first time access: admin : admin
...
Device is now rebooting (the phone screen indicates that the device is rebooting). After the reboot, you can see the date and time, soft keys and “login0X” on the screen of the device.
WP600 old generation
| Note |
|---|
Note: This is WP600 old generation (pre 2015); new generation WP600AXX do not support provisioning via WMS, for configuration of WP600AXX (both remote and local), follow the steps described here: WP600A / WP600ACG – User Guide. |
...
Device is now rebooting (the phone screen indicates that the device is rebooting). After the reboot, you can see the date and time, soft keys and “login0X” on the screen of the device.
W01GSM
- Go to device’s web interface
Credentials for the first time access: admin : admin
...
- Click on Save
- Press Back on the prompt page
- Click on Provision
Device is now rebooting.
DaySaver
- Go to device's web interface
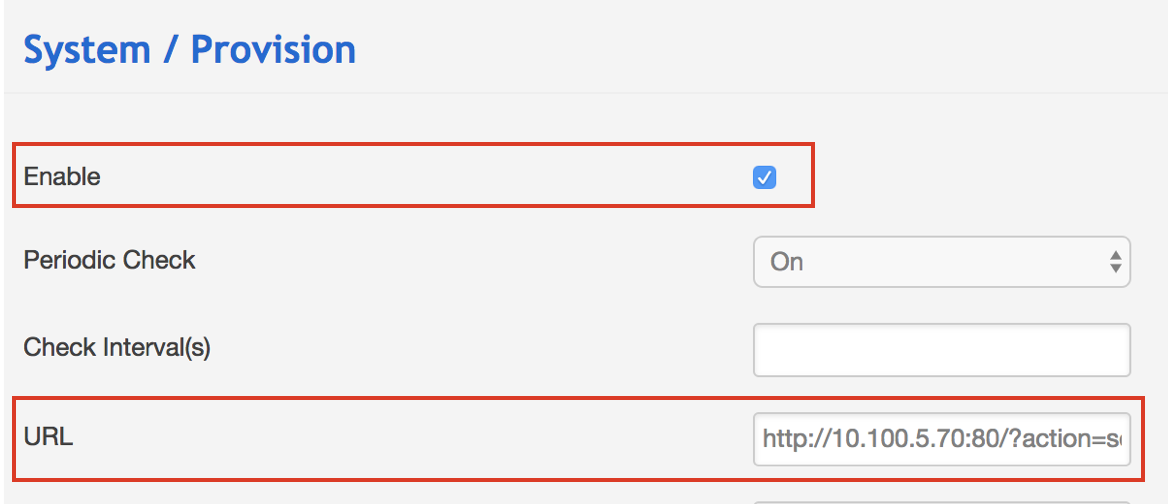
Credentials for the first time access: admin : admin - Go to the menu System -> Provision
- Check off Enable
- Insert the provisioning URL into the field "URL"
Click Save
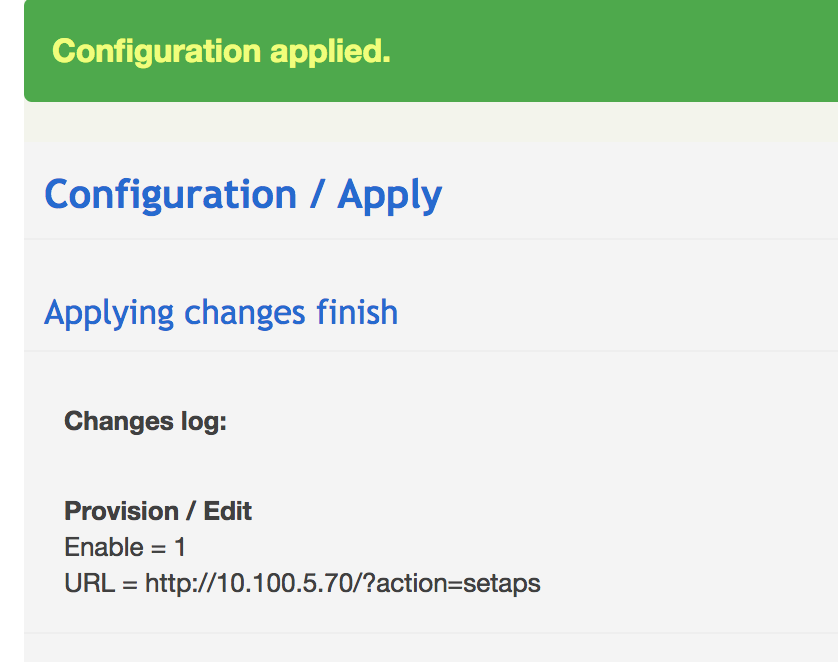
Confirm by clicking Apply

Configuration is now applied
W02FXS 2018, W04FXS 2020, W04FXO 2020/2023, W24FXS 2015
- Go to device’s web interface
Credentials for the first time access: admin : admin
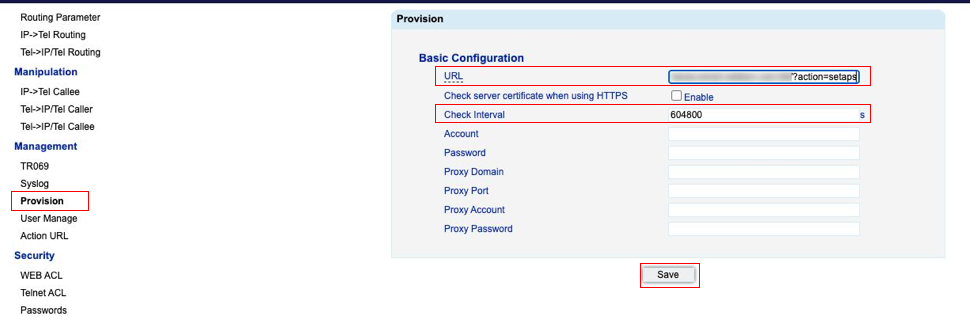
- Go to the menu Management -> Provision
- Fill in the following fields:
URL: insert the provisioning URL
- Check Interval: 604800
- Click Save
W01FXS 2014 / W02FXS 2015
- Go to device’s web interface
Credentials for the first time access: admin : admin
...
Click on save and reboot:
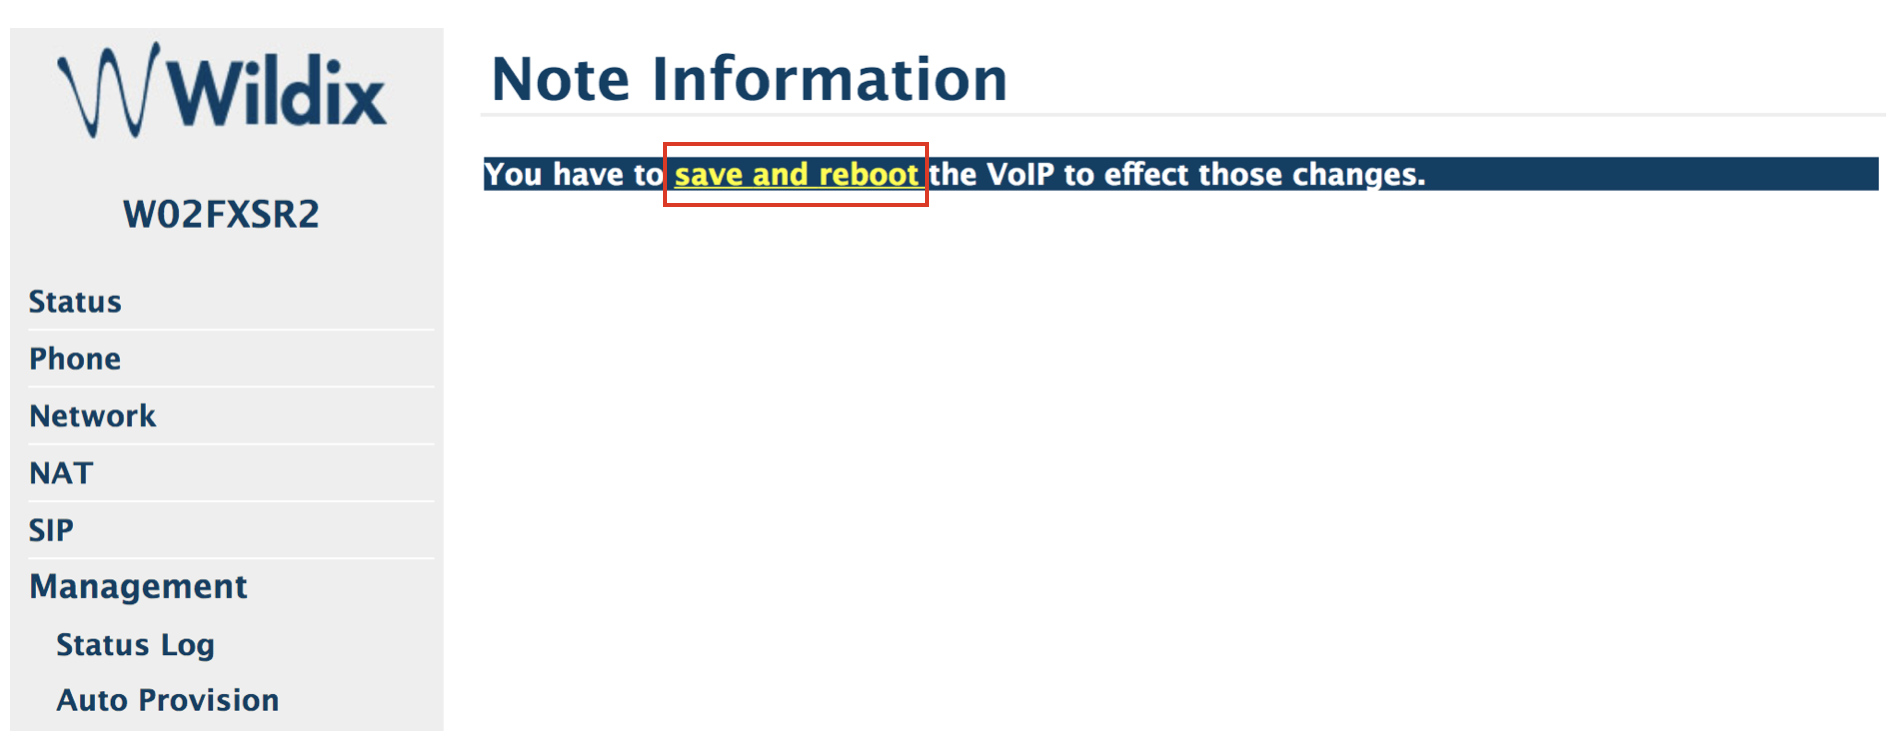
Device is now rebooting.
W04FXS 2017 and W04FXO 2015
- Go to device’s web interface
Credentials for the first time access: admin : admin OR admin : wildix (depending on the fw version)
...
- Select Reboot and press Apply
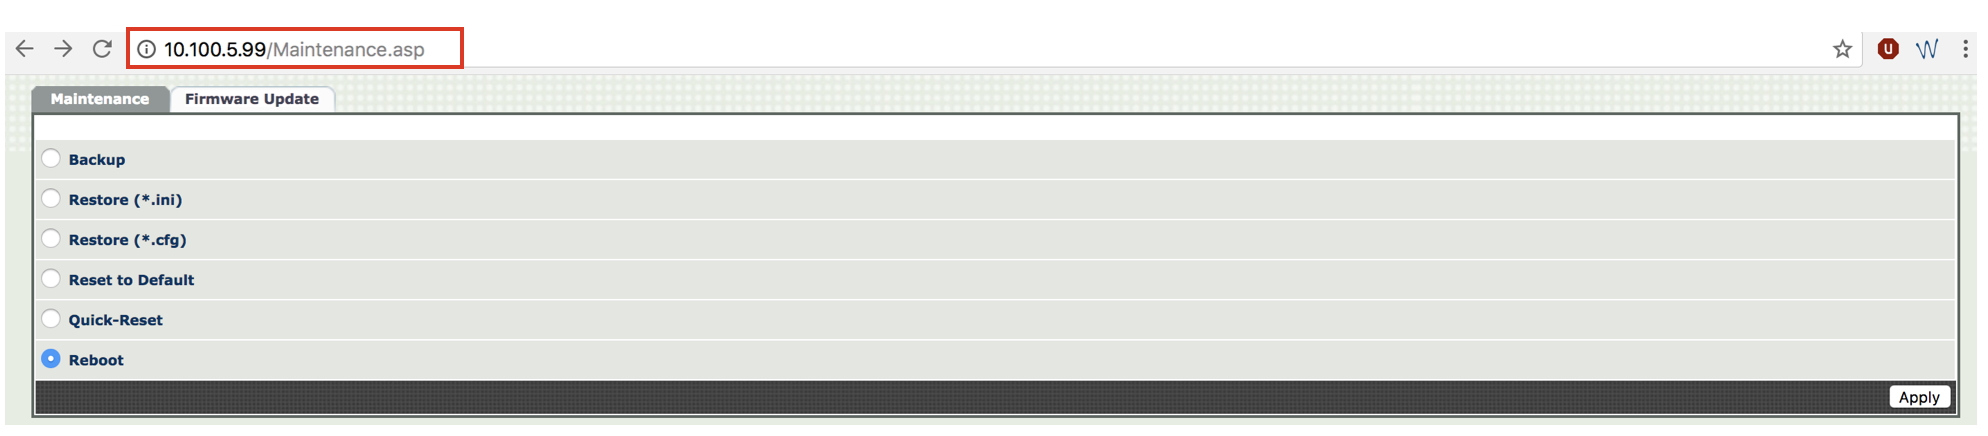
Device is now rebooting.
PRIPRI, BRI, W04FXS (old generation), W08FXS, W16FXS and W24FXS (old generation)
- Go to device’s web interface
User name for the first time access: public, no password needed
- Go to the menu Management -> Configuration Scripts
- Fill in the following fields inside the section “Execute Scripts”:
- Specific File Name: insert the part of the provisioning URL without the PBX IP address: ?action=setaps
- Transfer Protocol: select “HTTP”
- Host Name: enter the PBX IP address or domain name
- Click on Apply & Execute Now
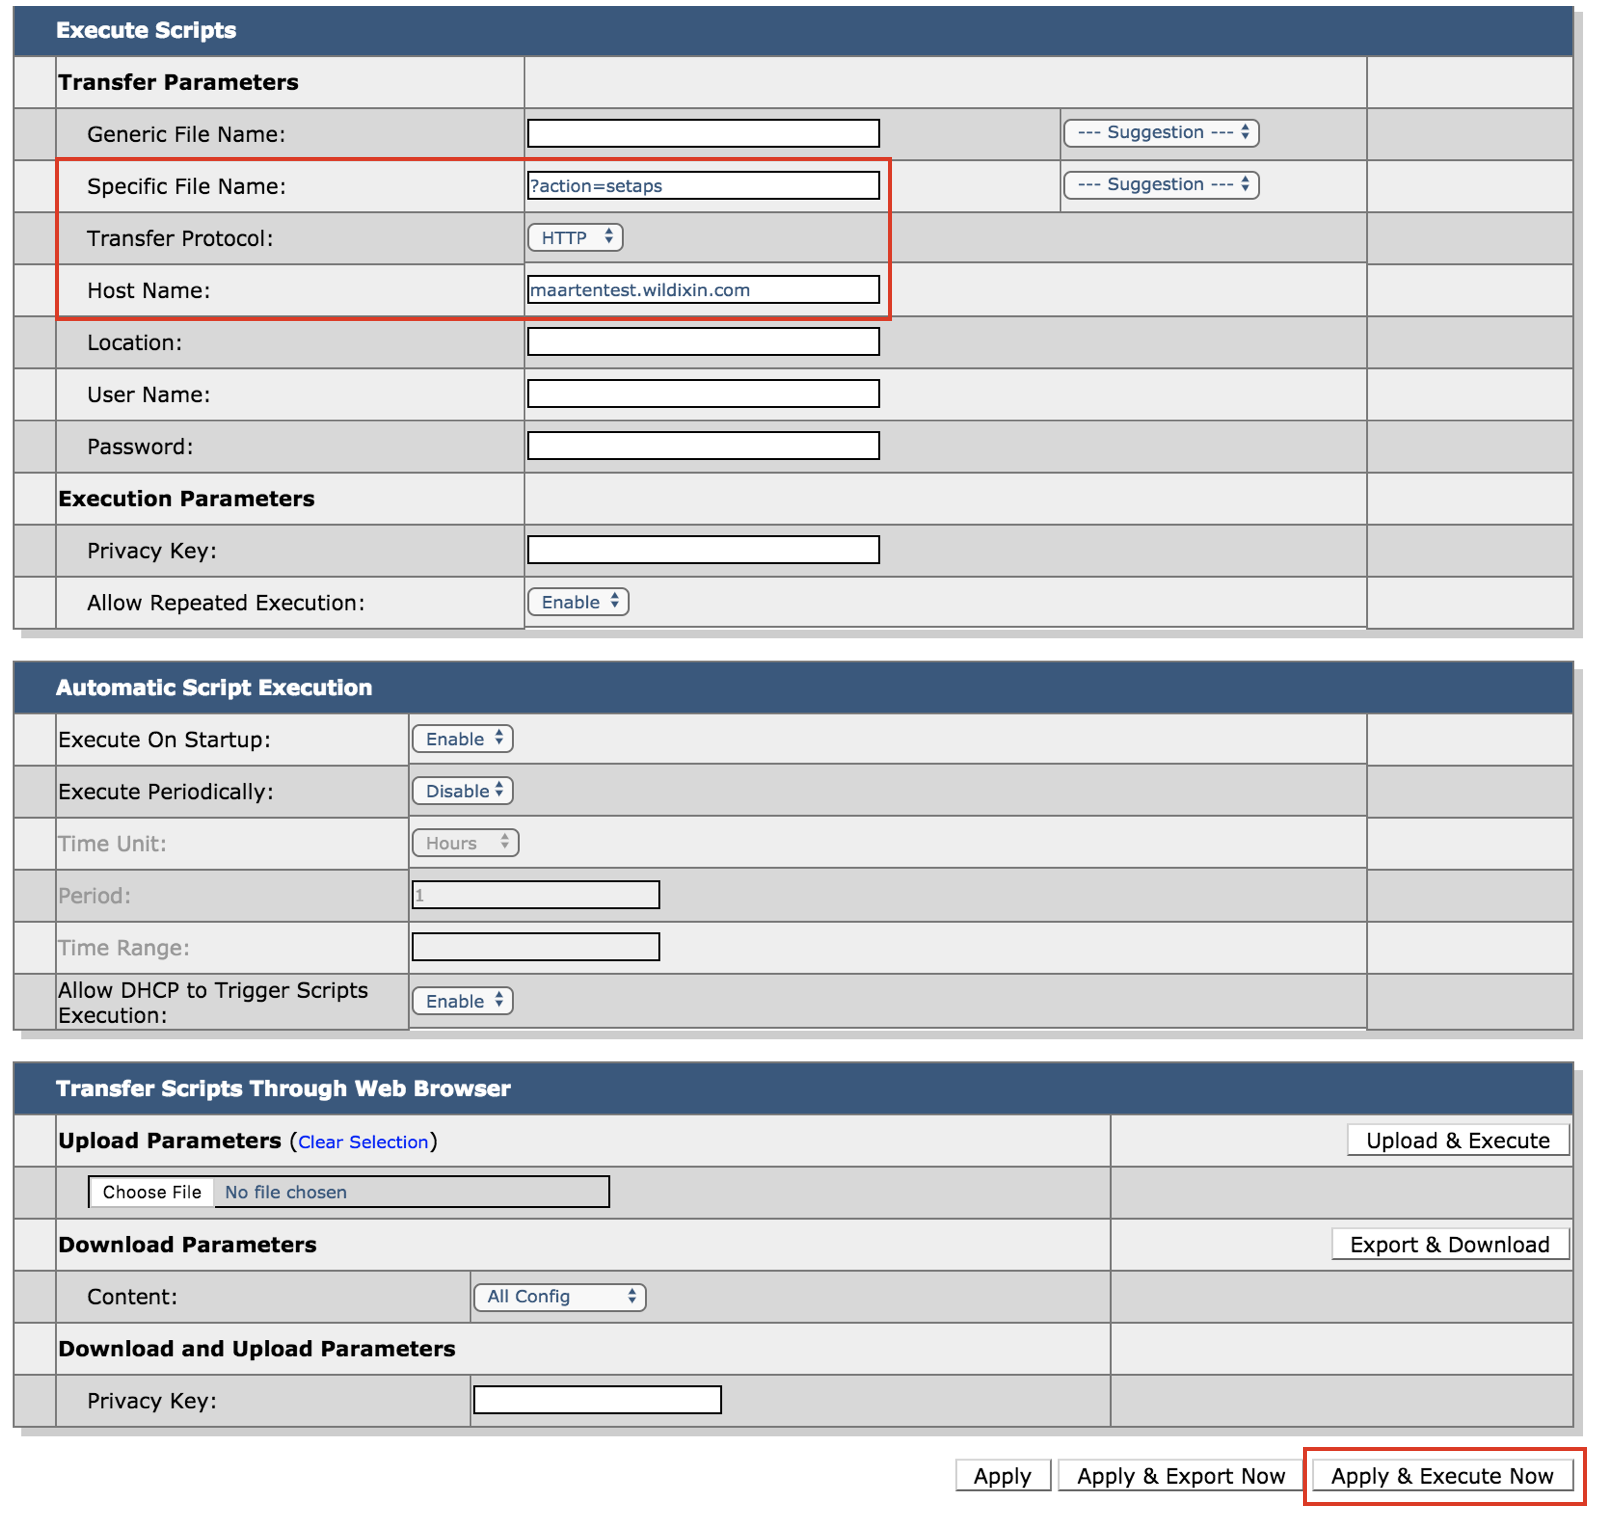
Device is now rebooting.
W01FXS old generation
- Go to device’s web interface
Credentials for the first time access: administrator : 84117341
...
- Go to the menu Save change
- Click on Save
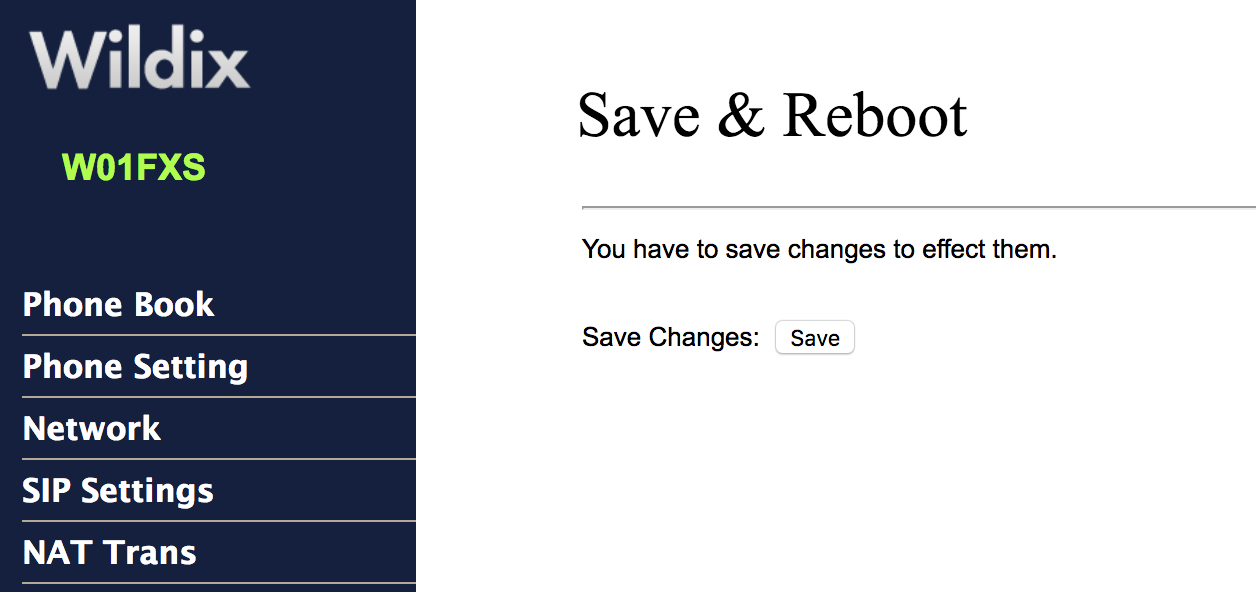
Device is now rebooting.
W-AIR Sync Plus
- Go to device’s web interface
Credentials for the first time access: admin : admin
...
- Go to WMS -> Devices -> W-AIR Networks and click Add to create the network with the added base station
- Select W-AIR Sync Plus in Devices tab and click Configure / Sync device
- Reboot the base station one more time to apply changes
W-AIR old generation
- Go to device’s web interface
Credentials for the first time access: admin : admin
...
- Go to WMS -> Devices -> W-AIR Networks and click Add to create the network with the added base station
- Select W-AIR in Devices tab and click Configure / Sync device
- Reboot the base station one more time to apply changes
W-AIR Small Business PRE 2021 and 2021
- Go to device’s web interface
Credentials for the first time access: admin : admin
- Go to the menu Management
- Modify the following fields:
- Management Transfer Protocol: select “HTTP”
- Configuration File Download: select “Base Specific File”
- Configuration Server Address: enter the PBX IP address or domain name
- Base Specific File: insert the part of the provisioning URL without the IP address of the PBX: ?action=setaps
- Click on Save and Reboot
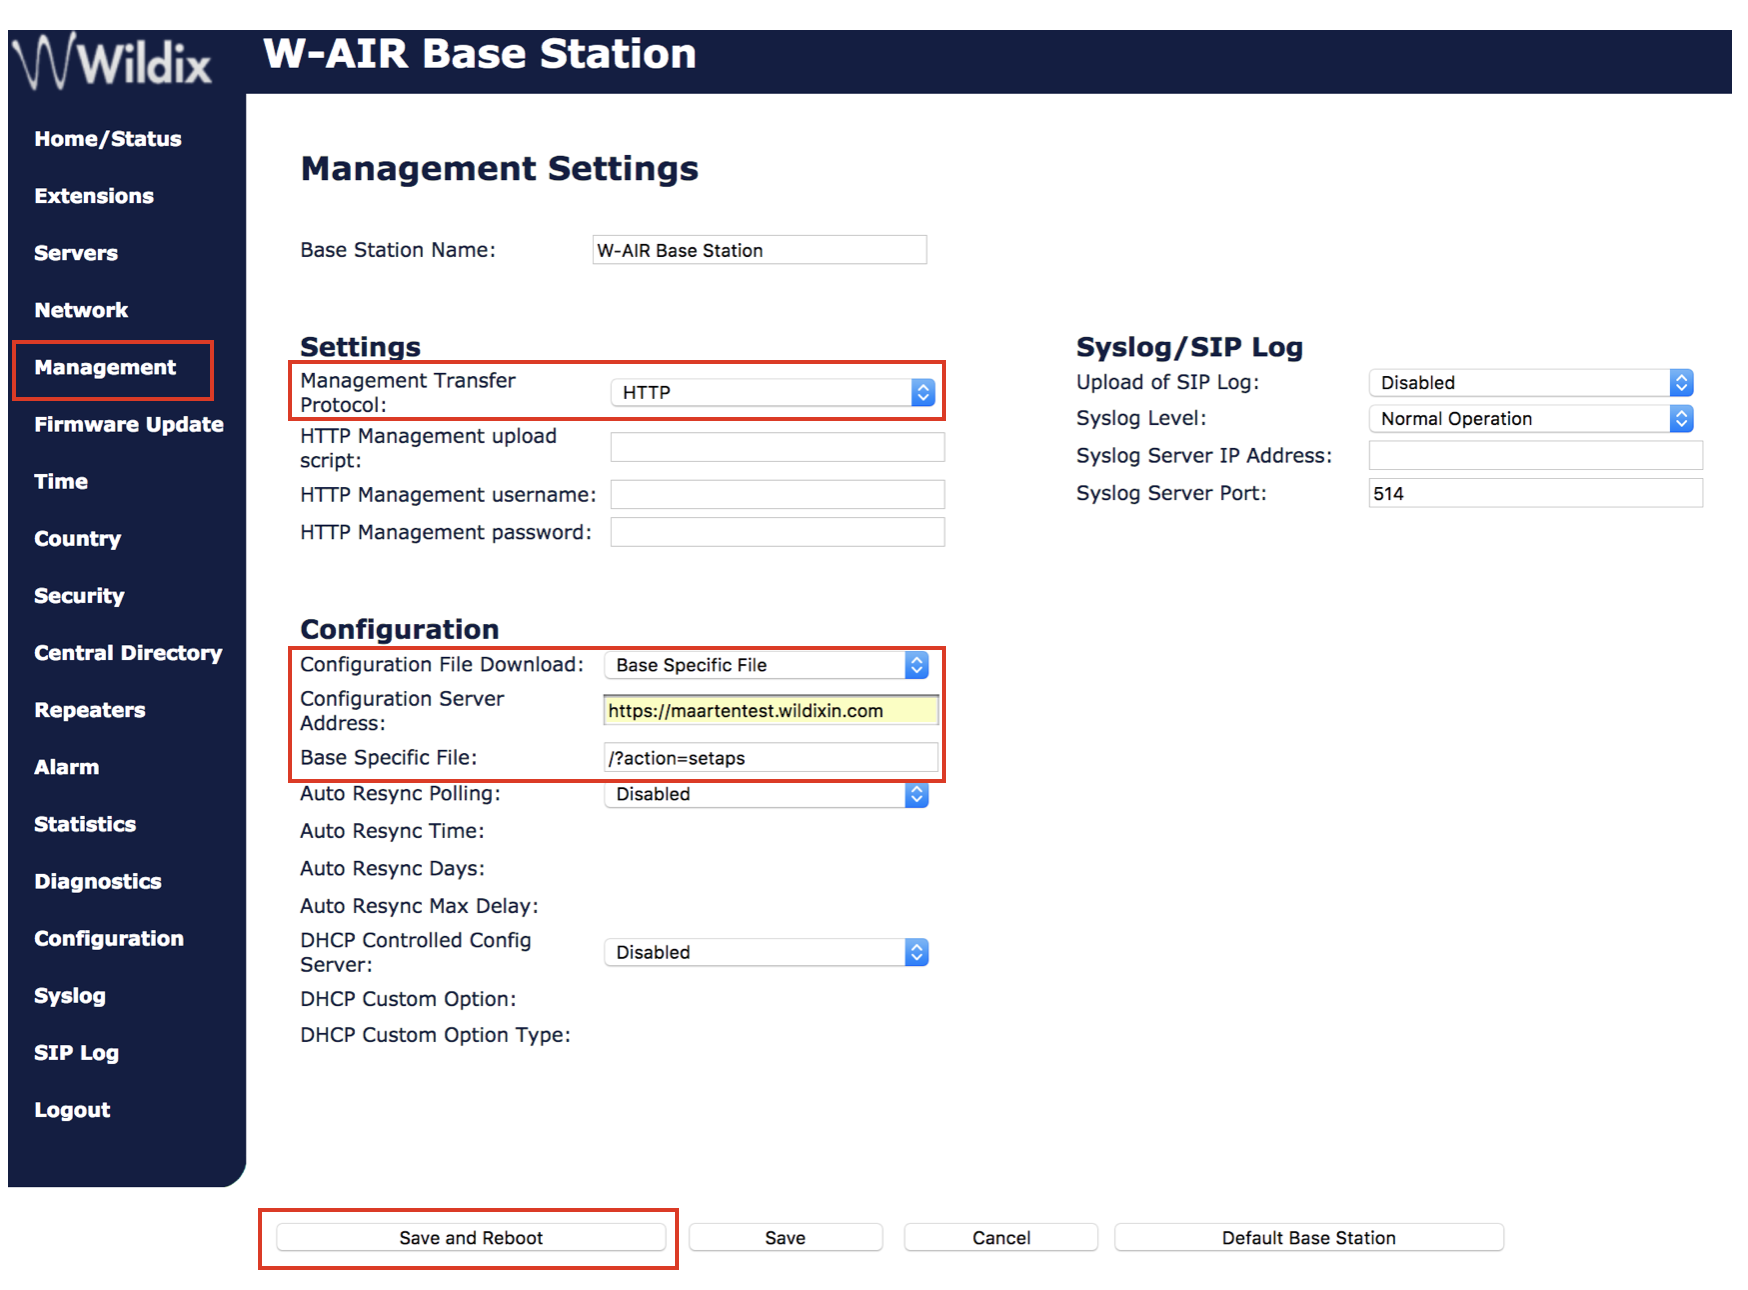
Device is now rebooting.
W-PA
- Go to device's web interface:
- Press Volume - key for 3 seconds to obtain its IP address
IP address will be playbacked through the speaker
Warning Important: to be able to get W-PA IP address, you have to connect external speakers via Speaker interfaces/ a microphone via Microphone interface.
...
The device is now rebooting. You will hear two audio signals: the first one is played at the beginning of the reboot, the second one is played after it is completed.
Note: After provisioning
As soon as the device has rebooted, go to the WMS -> Devices.
...