| Html |
|---|
<div id="fb-root"></div>
<script>(function(d, s, id) {
  var js, fjs = d.getElementsByTagName(s)[0];
  if (d.getElementById(id)) return;
  js = d.createElement(s); js.id = id;
  js.src = 'https://connect.facebook.net/en_US/sdk.js#xfbml=1&version=v2.11';
  fjs.parentNode.insertBefore(js, fjs);
}(document, 'script', 'facebook-jssdk'));</script> |
...
| Html |
|---|
 <div class="lang-box-pdf">
	<div>
		<div class="google-lang">
			<div id="google_translate_element">
			</div>
			<script type="text/javascript">
					function googleTranslateElementInit() {
						new google.translate.TranslateElement({pageLanguage: 'en', includedLanguages: 'de,es,fr,it,nl', autoDisplay: false}, 'google_translate_element');
						}
			</script>
			<script type="text/javascript" src="//translate.google.com/translate_a/element.js?cb=googleTranslateElementInit"></script>
		</div>

		<div class="pdf-button">
			<a href="https://confluence.wildix.com/spaces/flyingpdf/pdfpageexport.action?pageId=58294531" alt="Convert to .pdf" title="Convert to .pdf"><img src="https://confluence.wildix.com/download/attachments/14549012/pdf-button-download-wildix-documentation.png"></a>
		</div>
	</div>
</div> |
| Info |
|---|
This guide will lead you through the process of PieSync synchronization usage, starting from a Softphone installation and activation, and ending with practical examples for call receiving. Requirements:
Created: November 2019 Permalink: https://confluence.wildix.com/x/A4F5Aw |
| Panel | ||||||||||||||
|---|---|---|---|---|---|---|---|---|---|---|---|---|---|---|
| ||||||||||||||
|
| Table of Contents | ||
|---|---|---|
|
Choose your app
In setting up a sync connection, you first choose the app that contains the contacts data you need to be synced with Wildix. Choose it from the list, or by using the search bar.

After you select Wildix, you immediately proceed to select the second app.

Let's choose Freshdesk as an example.
Log in to your apps
In order to use PieSync, you need to have registered accounts with both Wildix and the app you selected. At this point, you'll need to connect PieSync to them so it can fetch the contacts data configuration. You do this for both apps. If it is the first time using PieSync, you will need to authorize both Wildix and another app, one after the other.

If you have previously set up a connection with any of these apps, you can choose to re-purpose that authorization. Of course, you can also choose to login to your apps with a separate account too.

If it's your first login, you should log in to your Wildix account using nex info:
- Subdomain — Your PBX name
- Username — Collaboration extension number or username to account with permission to use Phonebooks
- Password — Password for that account

After you logged in, you should specify Wildix Phonebook to sync.
| Note |
|---|
You cannot create Phonebook in this popup. You should create one, before setting up the synchronization. |

Configure your sync
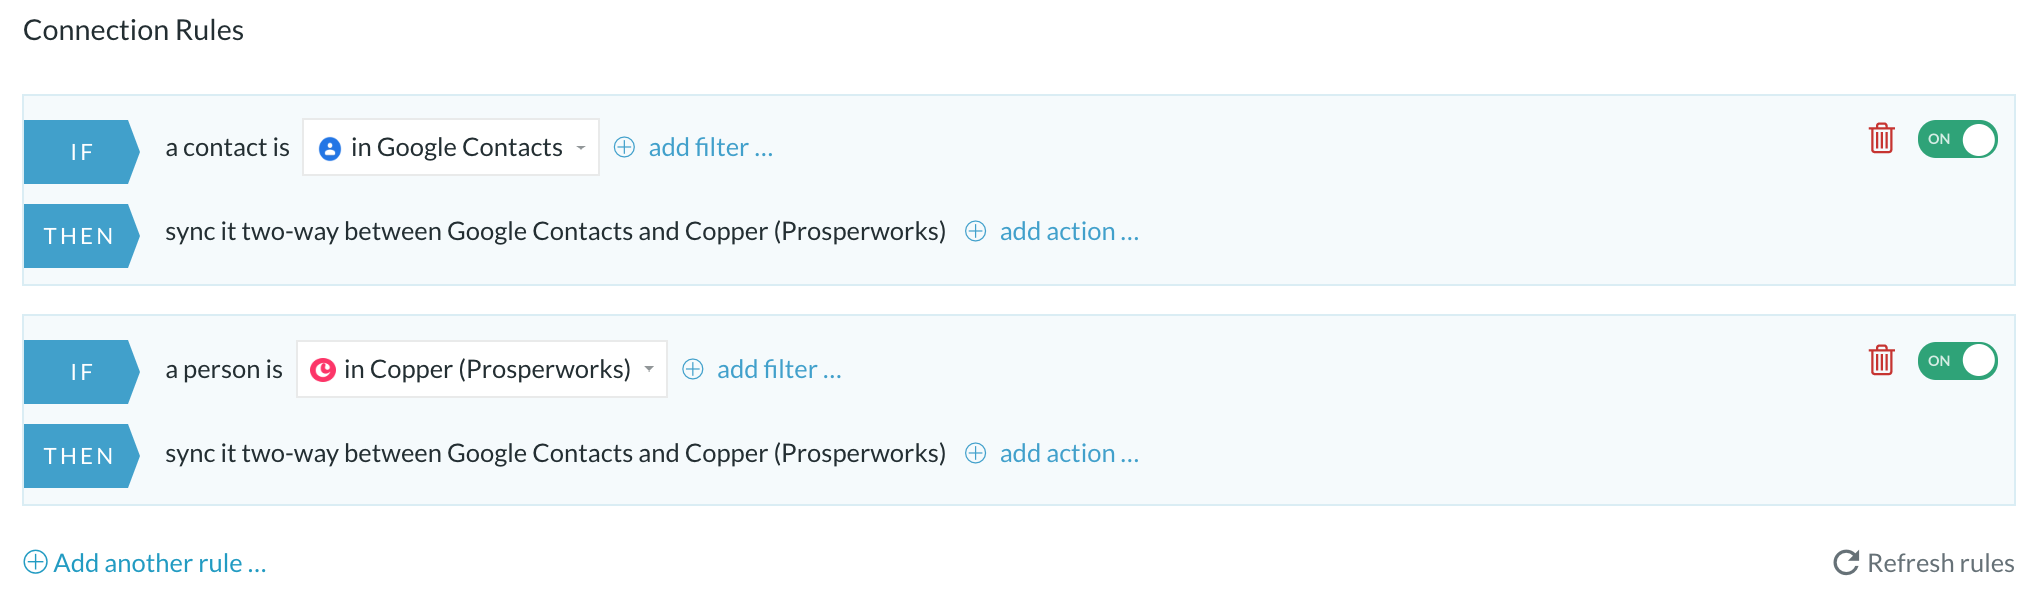
A two-way sync is made up by at least two rules
...
A two-way sync starts off with 2 rules. Each rule fulfills the conditions of each side of the sync. PieSync looks at all the data stored on each side, so you can define exactly what data needs to move from one side to the other.

| Note |
|---|
In this example, rule 1 dictates that for every contact that PieSync finds in Google Contacts, PieSync will update or create one in Wildix in case it didn't exist already there. Rule 2 completes this 2-way sync: for each contact that exists in Wildix, a counterpart will be updated or created in Google Contacts. For instance, if you don't need all of your Wildix contacts into Google Contacts, simply remove this rule! |
...
Custom Mappings are available from the Pro Plan onward. More information about Pro Plan here.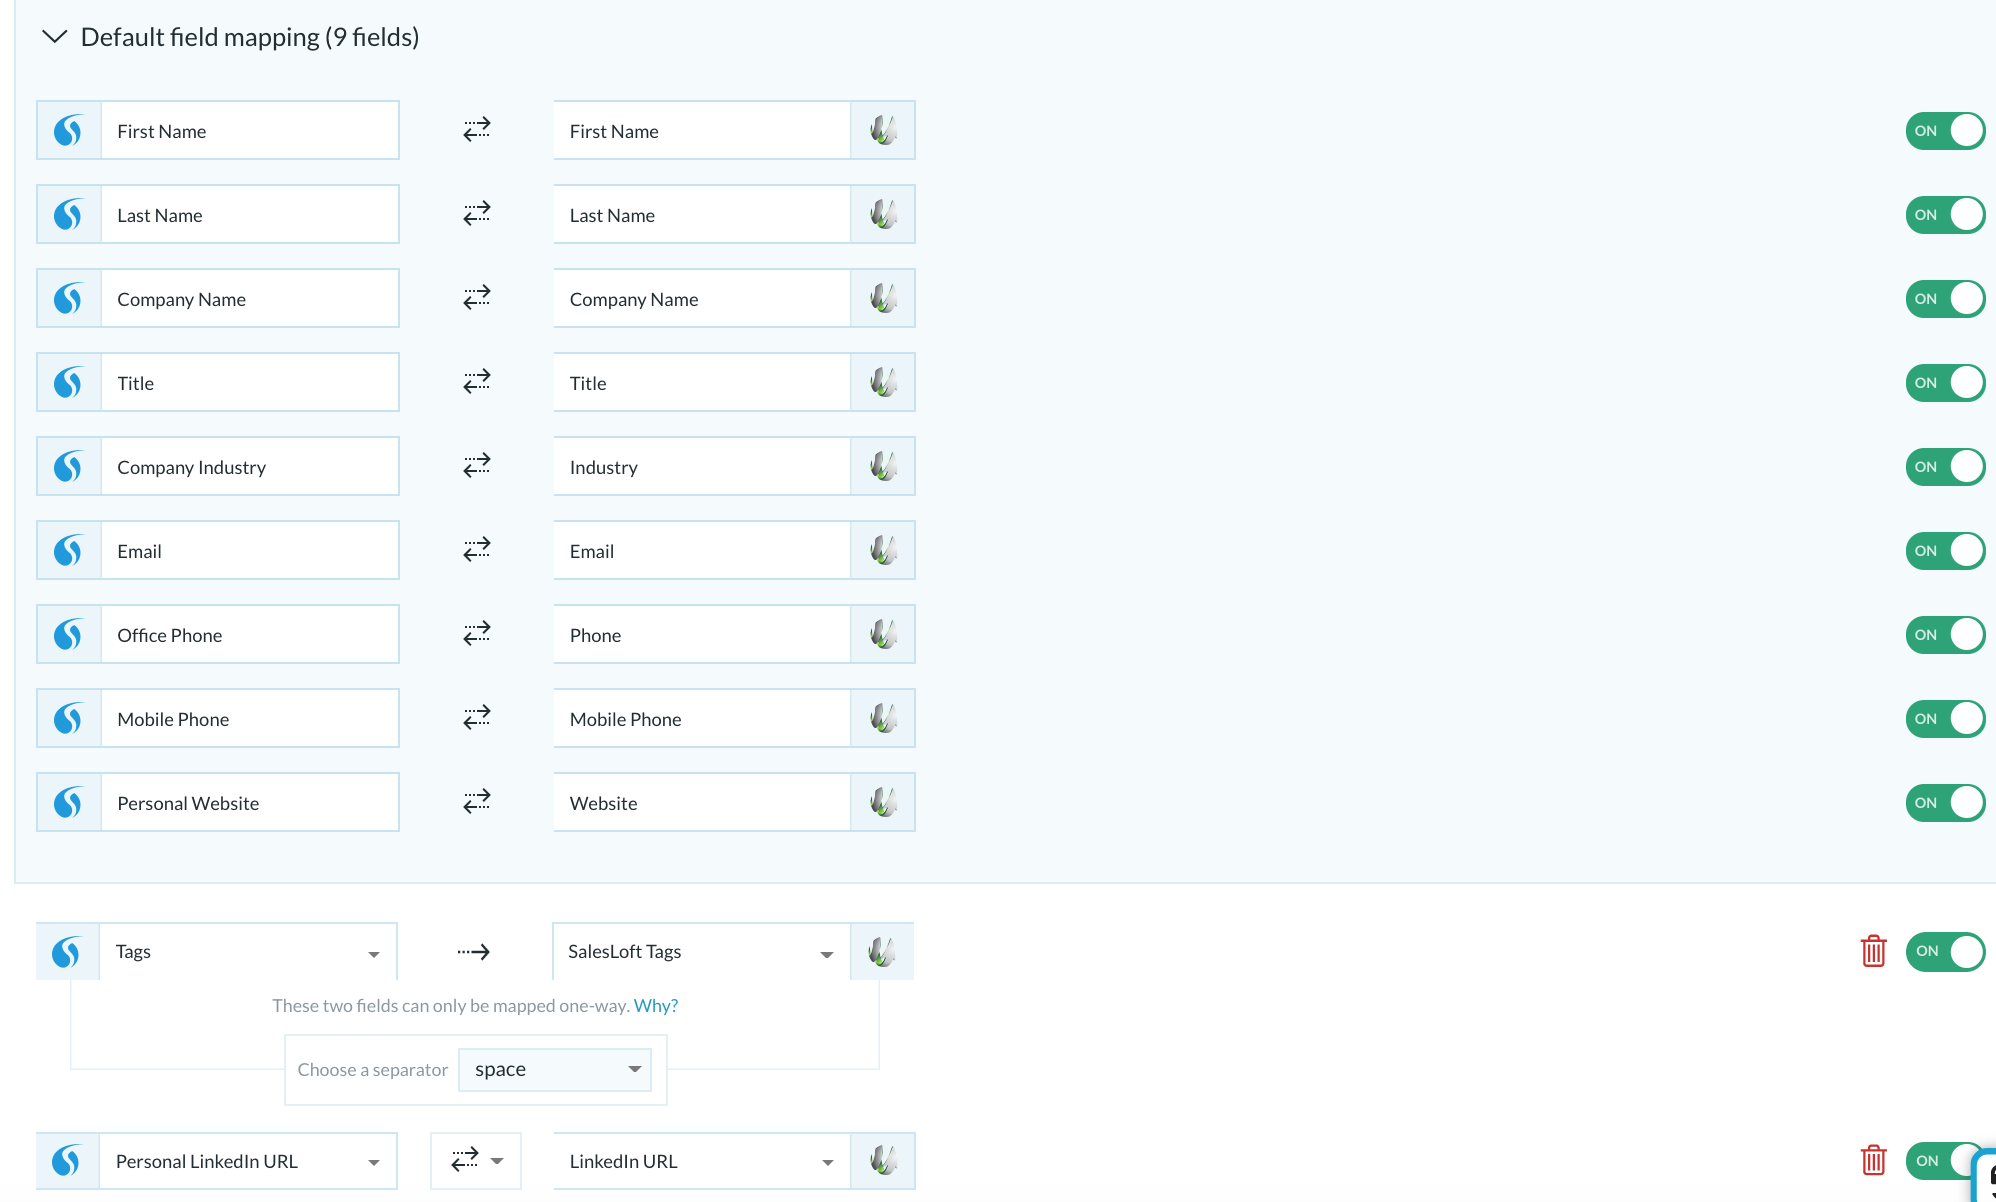

Start syncing!

Make sure no other integrations are running next to PieSync for the accounts you have connected in PieSync. Other integrations will have access to your data and have the ability to manipulate as well. For this reason, we kindly ask you to use PieSync and nothing else to keep your data in sync. Other integrations running in parallel with PieSync are a no-go!
...