Setting up Algo SIP Endpoints with Wildix PBX Platform
This guide explains how to set up and configure Algo 8301 Paging Adapter & Scheduler, 8201 SIP PoE Intercom , 8188 SIP Ceiling Speaker, SIP Video Intercom.
Created: May 2018
Permalink: https://wildix.atlassian.net/wiki/x/rxTOAQ
Introduction
These Application Notes describe the configuration steps required for Algo 8301 Paging Adapter & Scheduler, 8201 SIP PoE Intercom, 8188 SIP Ceiling Speaker, and 8039 SIP Video Intercom to interoperate with Wildix PBX Platform. These are SIP-based devices that can register with Wildix PBX Platform as SIP endpoints. Note: Other Algo SIP endpoints will register in a similar way.
Firmware used for testing:
- Algo 8301 – 1.5.6
- Algo 8201 – 1.5.6
- Algo 8188 – 1.5.6
- Algo 8039 – 1.5.6
Get Help
For more information about Wildix PBX Platform, refer to Wildix tech support. For technical questions about the Algo products, please contact Algo support: at 604-454-3792 or support@algosolutions.com.
Additional helpful Algo resources:
Algo 8301 Paging Adapter & Scheduler
- To configure the 8301, open an empty web browser, enter the device’s IP address in the address field, and press Enter
To find the device’s IP address, please refer to the user guide available at http://www.algosolutions.com/8301/guide

- In the web interface, enter the password to log in (default password is algo)
Click on Basic Settings tab and then SIP tab. To register the 8301 with Wildix Server, enter the domain name in the SIP Domain field (e.g. "mysystem.wildix.com"). Enter a unique Extension, Authentication ID (login) and Authentication Password for page and/or ring. At the bottom of the screen click Save
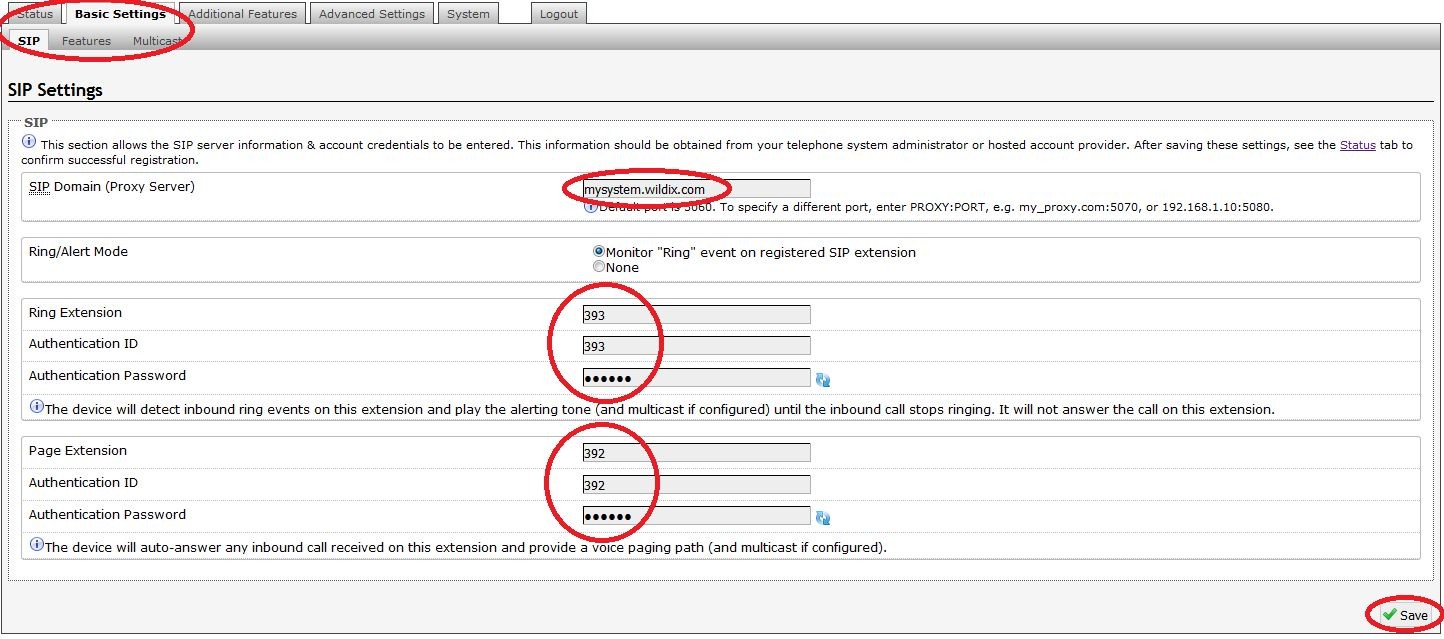
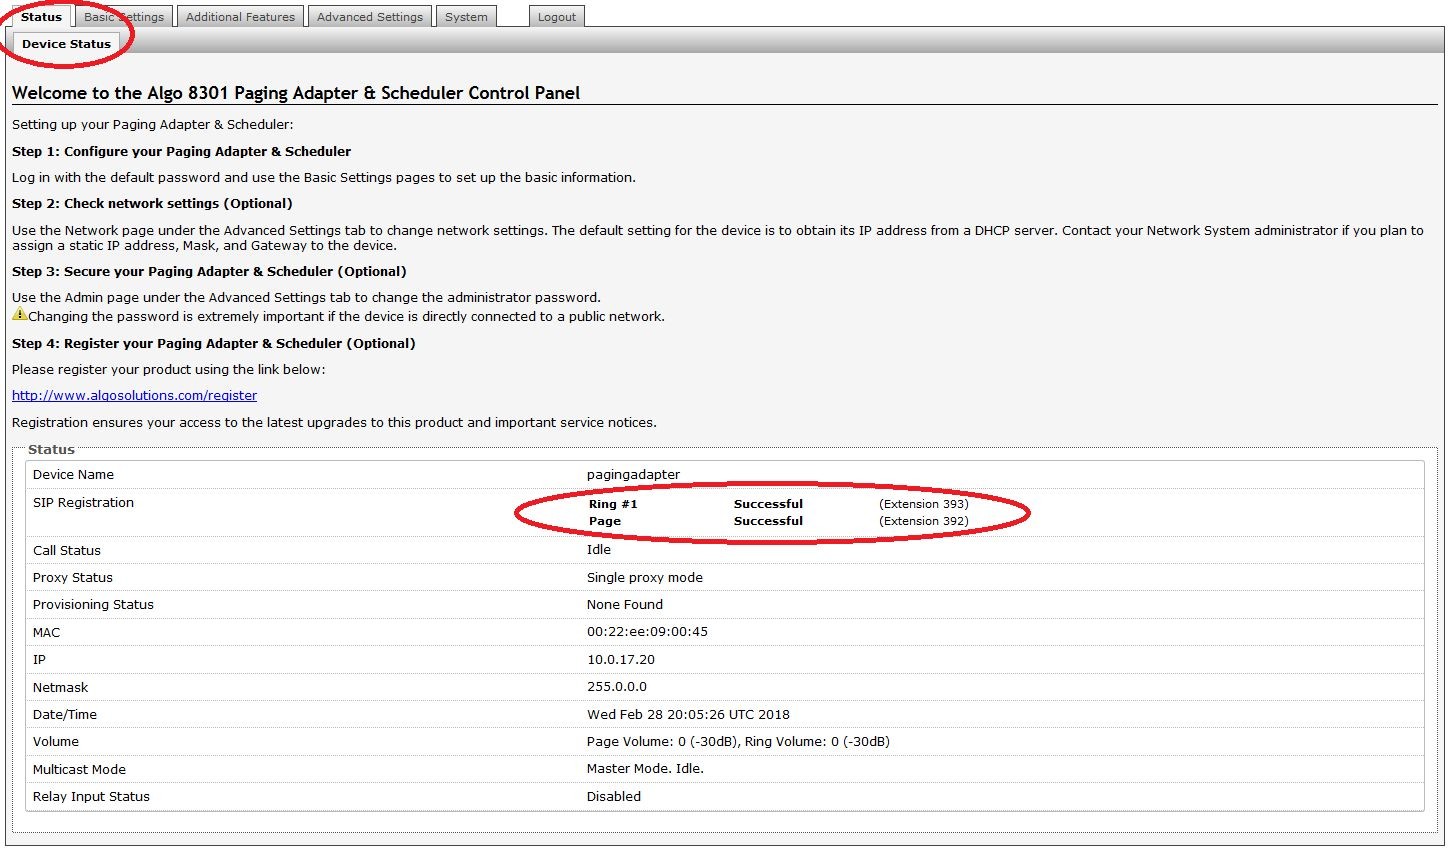
- Click on Status tab and verify whether the extension(s) registered successfully with the server
Algo 8201 SIP PoE Intercom
- To configure the 8201, open an empty web browser, enter the device’s IP address in the address field, and press Enter
To find the device’s IP address, please refer to the user guide available at http://www.algosolutions.com/8201/guide

In the web interface, enter the password to log in (default password is algo)
Click on Basic Settings tab and then SIP tab. To register the 8201 with Wildix Server, enter the domain name in the SIP Domain field (e.g. "mysystem.wildix.com"). Enter a unique Extension, Authentication ID (login), Authentication Password, and Extension to Dial when pressing the button. At the bottom of the screen click Save
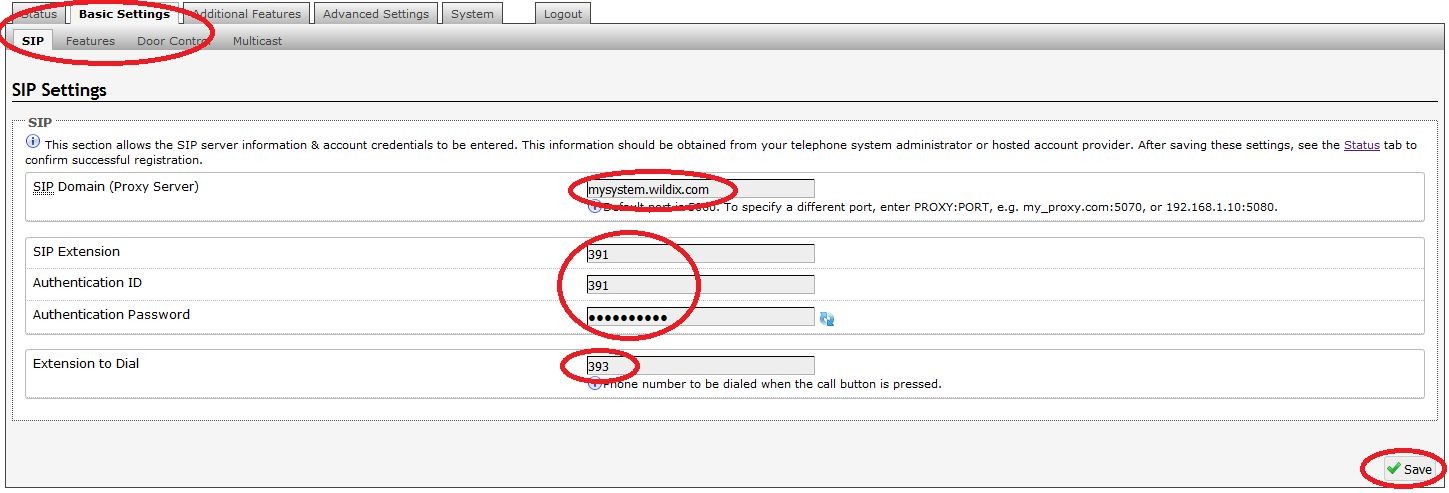
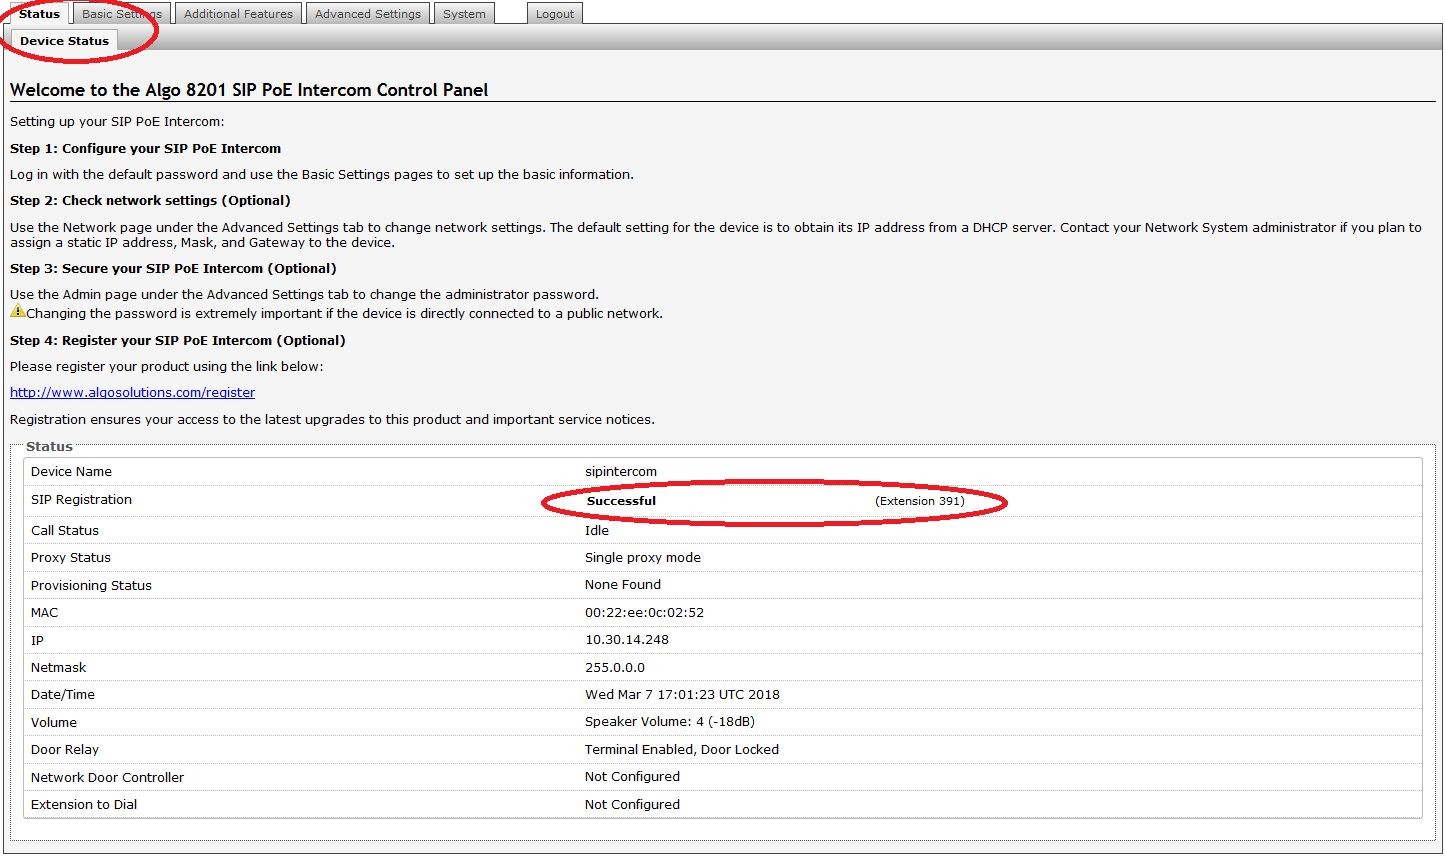
- Click on Status tab and verify whether the extension registered successfully with the server
Algo 8188 SIP Ceiling Speaker
- To configure the 8188, open an empty web browser, enter the device’s IP address in the address field, and press Enter
To find the device’s IP address, please refer to the user guide available at http://www.algosolutions.com/8188/guide
- In the web interface, enter the password to log in (default password is algo)
- Click on Basic Settings tab and then SIP tab. To register the 8188 with Wildix Server, enter the domain name in the SIP Domain field (e.g. "mysystem.wildix.com"). Enter a unique Extension, Authentication ID (login) and Authentication Password for page and/or ring. At the bottom of the screen click Save
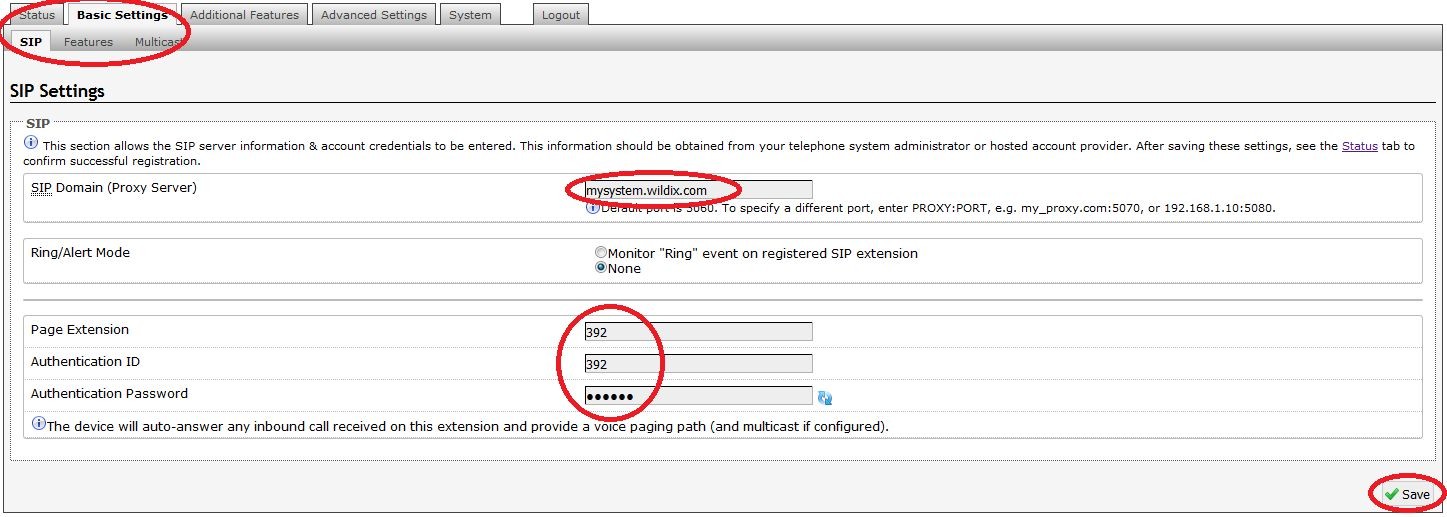
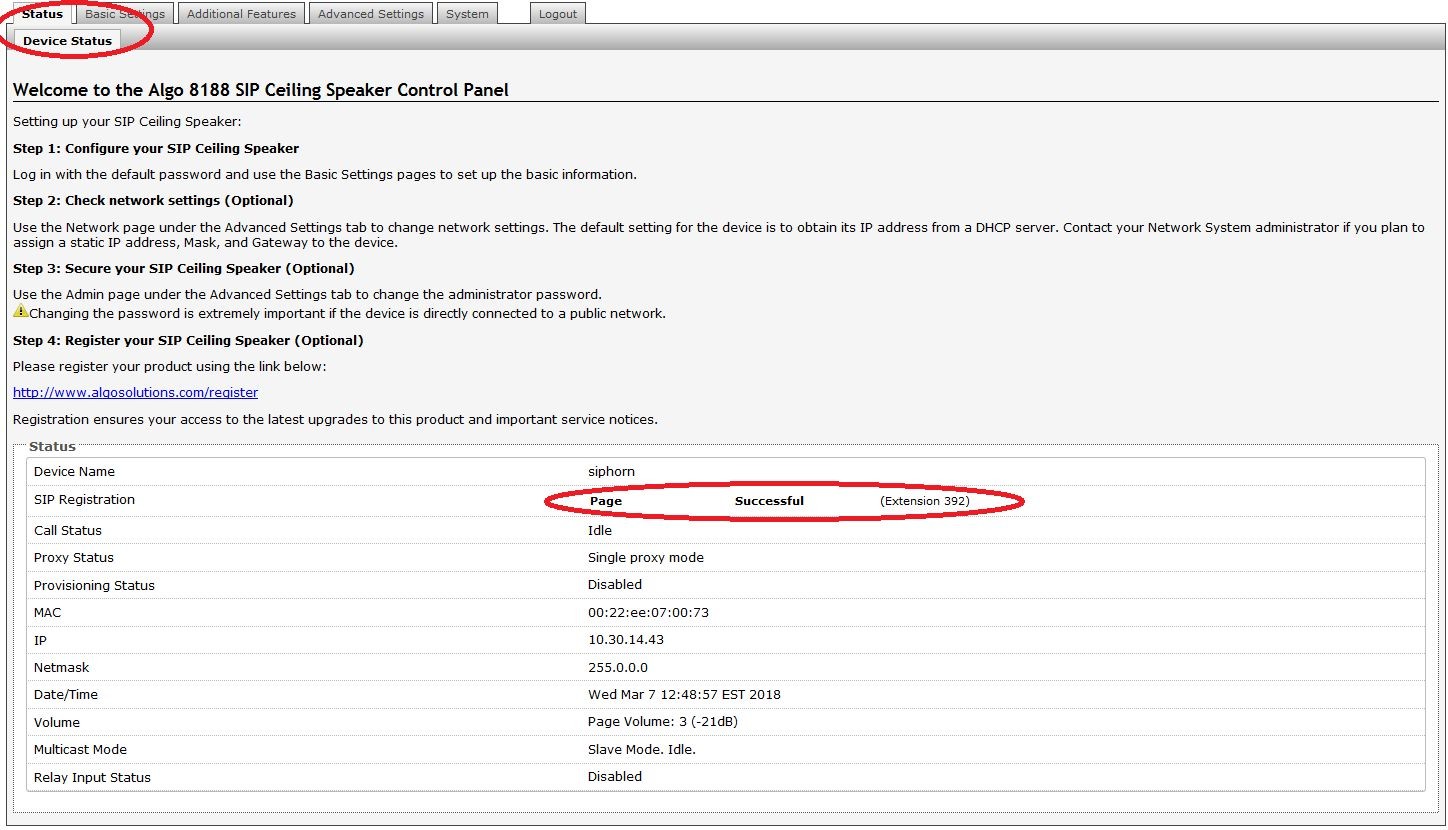
- Click on Status tab and verify whether the extension(s) registered successfully with the server
Algo 8039 SIP Video Intercom
- To configure the 8039, open an empty web browser, enter the device’s IP address in the address field, and press Enter
To find the device’s IP address, please refer to the user guide available at http://www.algosolutions.com/8039/guide
- In the web interface, enter the password to log in (default password is algo)
- Click on Basic Settings tab and then SIP tab. To register the 8039 with Wildix Server, enter the domain name in the SIP Domain field (e.g. "mysystem.wildix.com"). Enter a unique Extension, Authentication ID (login), Authentication Password, and Extension to Dial when pressing the button. At the bottom of the screen click Save
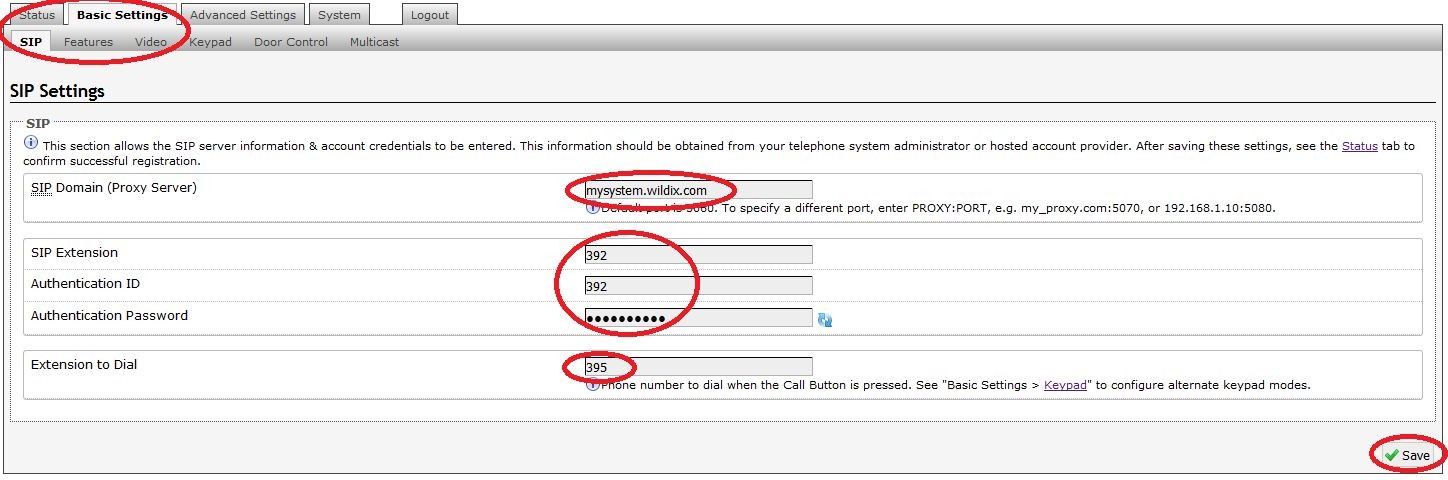
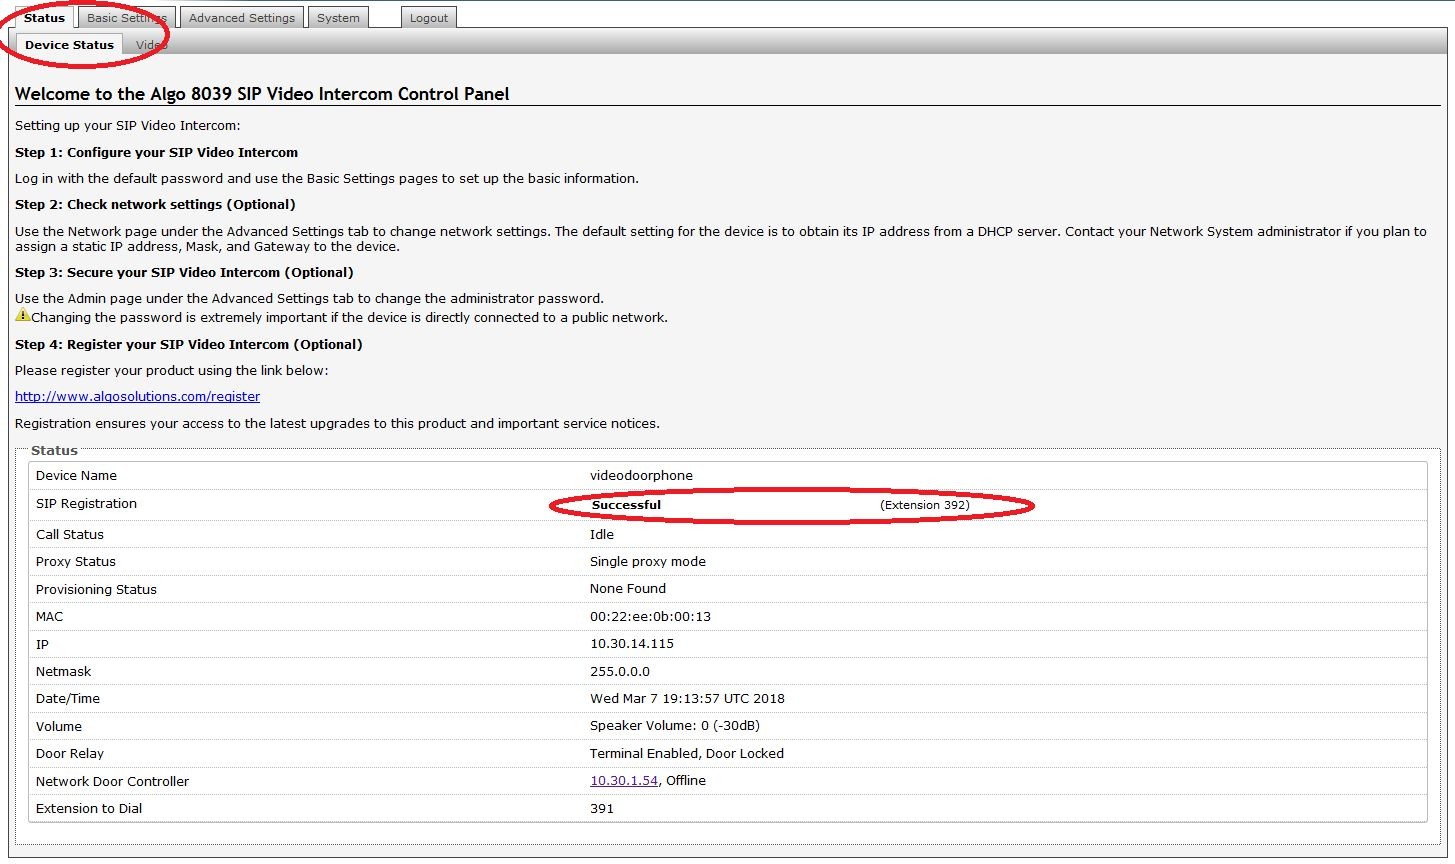
- Click on Status tab and verify whether the extension registered successfully with the server
Compatibility with Web Collaboration Portal and Mobile Apps
Compatibility tests for ringing, paging (one-way and talkback), and video with Wildix Collaboration Portal and Mobile Apps were successful and presented no issues whatsoever.
Wildix PBX Configuration via WMS
Since all Algo devices discussed within this document are SIP devices, the only configuration necessary on the Wildix system is to add users for the devices to register into. Each device is simply a SIP endpoint on the Wildix PBX. To access WMS, open a browser and navigate to the PBX url (e.g. mysystem.wildix.com or mysystem.wildixin.com). Login with ‘admin’ account or any other account that has the correct privileges to add user accounts to the system.
Adding a Wildix User
Once logged in, the administrator will see the following near the top left of the page. The icons left to right represent Users, Trunks, Devices, Dialplans and Settings. Select the users icon as is done in the screenshot (notice the users icon is white/selected), the admin will see the Users, Groups, PBXes and Phonebooks options below the set of icons).

- Click on Users to show a list of all of the users in the Wildix PBX and gain access to the ability to add users. Once clicking on Users, the following options will be displayed below the current list of users:

- Select the + symbol to add a user and fill out the User data as shown below. Note that the user in the example below is ‘1234’ and that their Login is set to ‘1234’ as well. However, also make note that there is no password set for this user yet
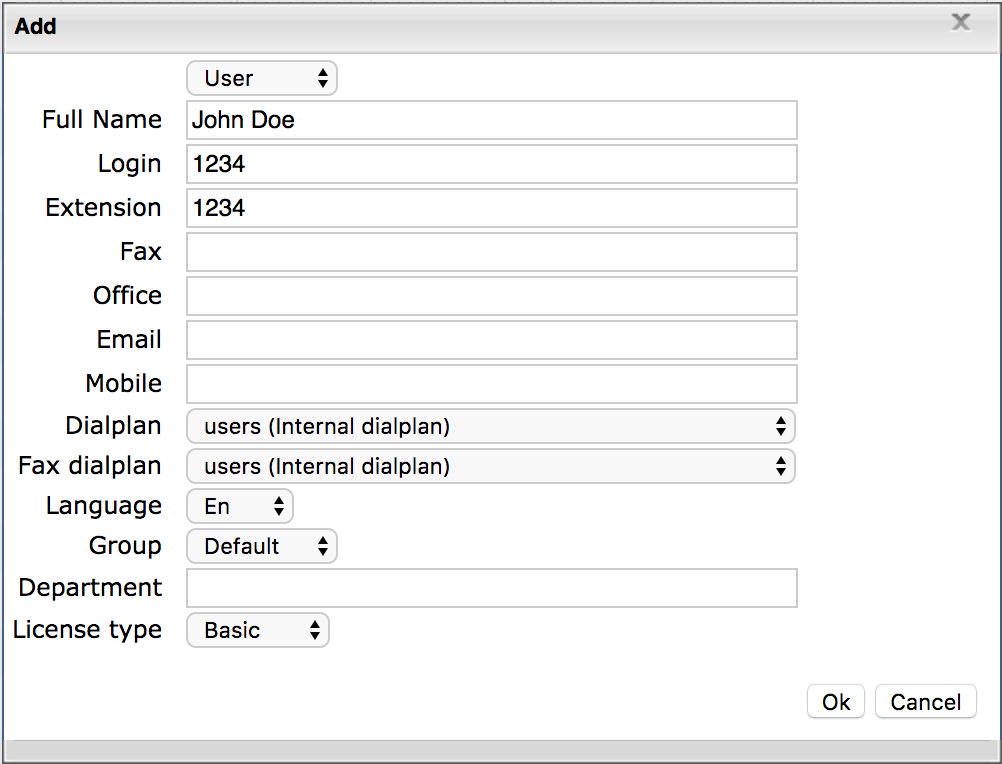
- After entering the user details click on OK, then select the new user in the list and click on the ‘Set passwords’ button below the users list. See the screenshot above that has the + option in it to add users. The Set passwords button is in that same row on the configuration UI
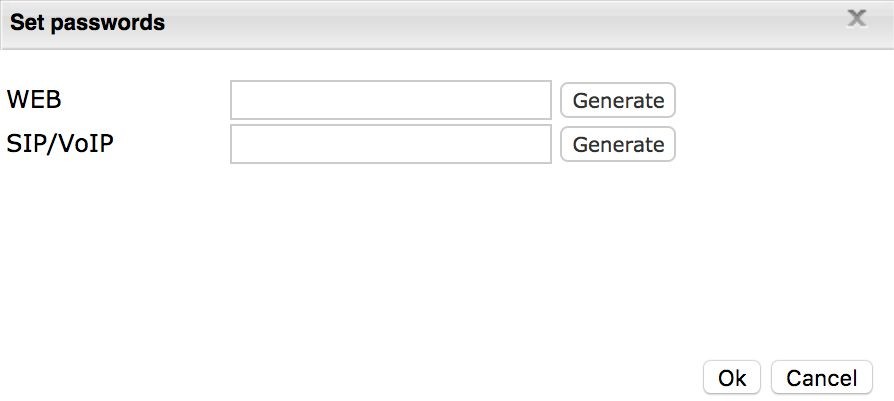
- Enter the password desired or auto generate the passwords via the ‘Generate’ button. Once the passwords have been filled in, click Ok
You now have a user in the Wildix system that can be used by the Algo devices. Note that the fields is the Wildix user relate to the configuration parameters on the Algo devices in the following way.
Wildix Parameter | Algo Parameter |
Login | Authentication ID |
Extension | SIP Extension |
WEB Password | <not required on Algo devices> |
SIP/VoIP Password | Authentication Password |
<any valid extension in pbx> | Extension to Dial |