| Html |
|---|
<div id="fb-root"></div>
<script>(function(d, s, id) {
  var js, fjs = d.getElementsByTagName(s)[0];
  if (d.getElementById(id)) return;
  js = d.createElement(s); js.id = id;
  js.src = 'https://connect.facebook.net/en_US/sdk.js#xfbml=1&version=v2.11';
  fjs.parentNode.insertBefore(js, fjs);
}(document, 'script', 'facebook-jssdk'));</script> |
| Html |
|---|
<div class="fb-like" data-href="https://confluence.wildix.com/x/xwQ8AQ" data-layout="button_count" data-action="recommend" data-size="large" data-show-faces="true" data-share="true"></div> |
| Html |
|---|
 <div class="lang-box-pdf">
	<div>
		<div class="google-lang">
			<div id="google_translate_element">
			</div>
			<script type="text/javascript">
					function googleTranslateElementInit() {
						new google.translate.TranslateElement({pageLanguage: 'en', includedLanguages: 'de,es,fr,it,nl', autoDisplay: false}, 'google_translate_element');
						}
			</script>
			<script type="text/javascript" src="//translate.google.com/translate_a/element.js?cb=googleTranslateElementInit"></script>
		</div>

		<div class="pdf-button">
			<a href="https://confluence.wildix.com/spaces/flyingpdf/pdfpageexport.action?pageId=20710599" alt="Convert to .pdf" title="Convert to .pdf"><img src="https://confluence.wildix.com/download/attachments/14549012/pdf-button-download-wildix-documentation.png"></a>
		</div>
	</div>
</div> |
| Scroll export button | ||||||||
|---|---|---|---|---|---|---|---|---|
|
| Info |
|---|
The Guide describes the remote provisioning of each Wildix device. General information about provisioning: Provisioning of Wildix devices Guide. Updated: January 2021 Permalink: https://confluencewildix.wildixatlassian.comnet/wiki/x/xwQ8AQcBnOAQ |
Table of Contents
| Note |
|---|
Note: It is possible to assign unprovisioned devices to users. Available only for devices added via Remote Provisioning (Semi-automatic mode) or WMP. Refer to this chapter of WMS Start Guide for detailed information about assigning to users. |
...
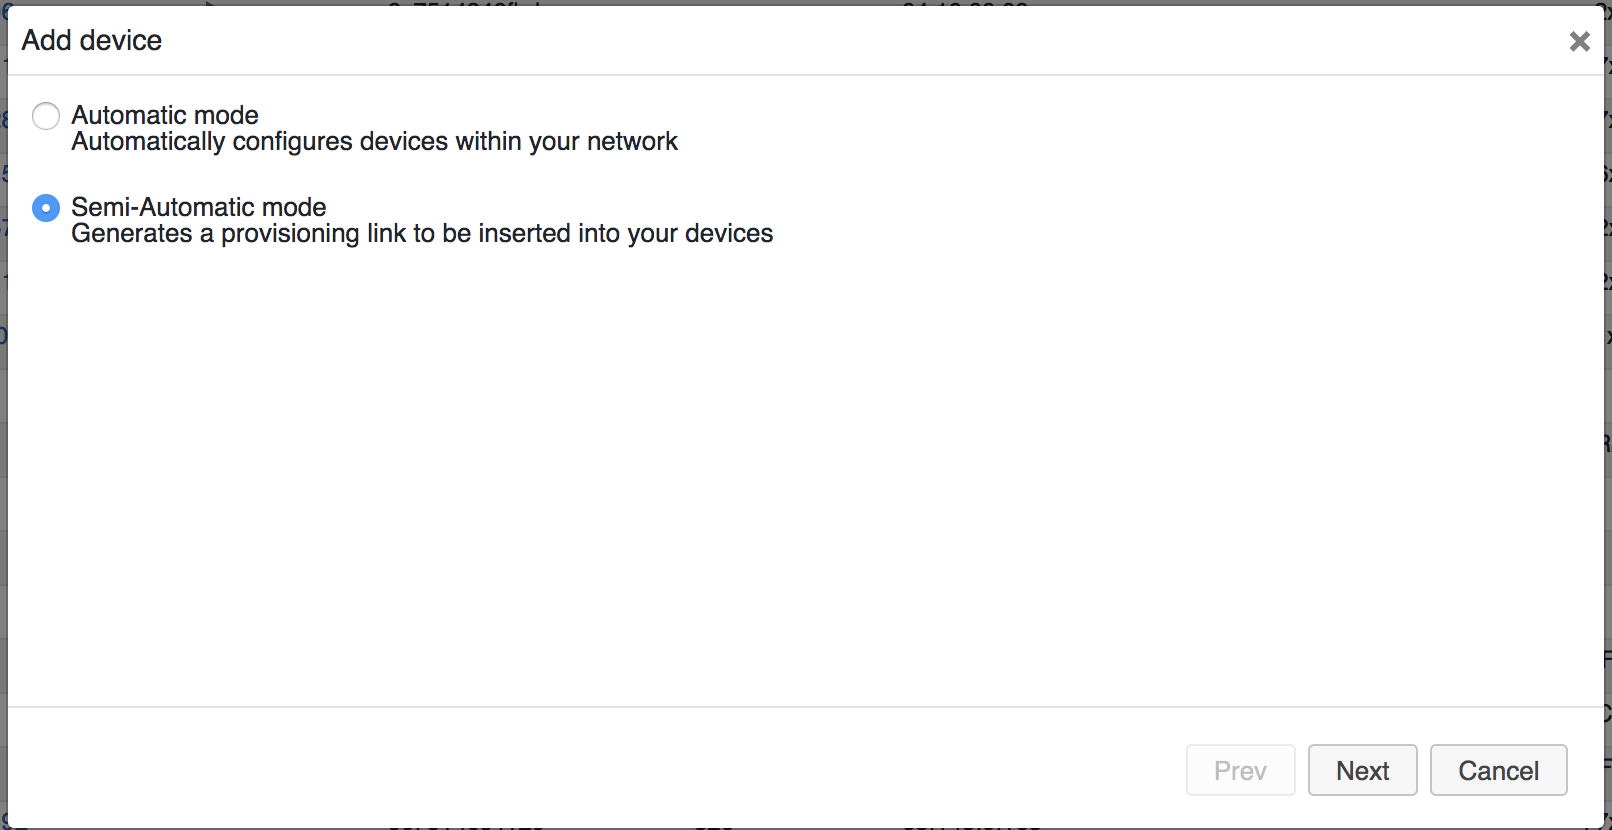
- Go to the WMS -> Devices
- Click +Add
- Select Semi-Automatic mode and click Next:
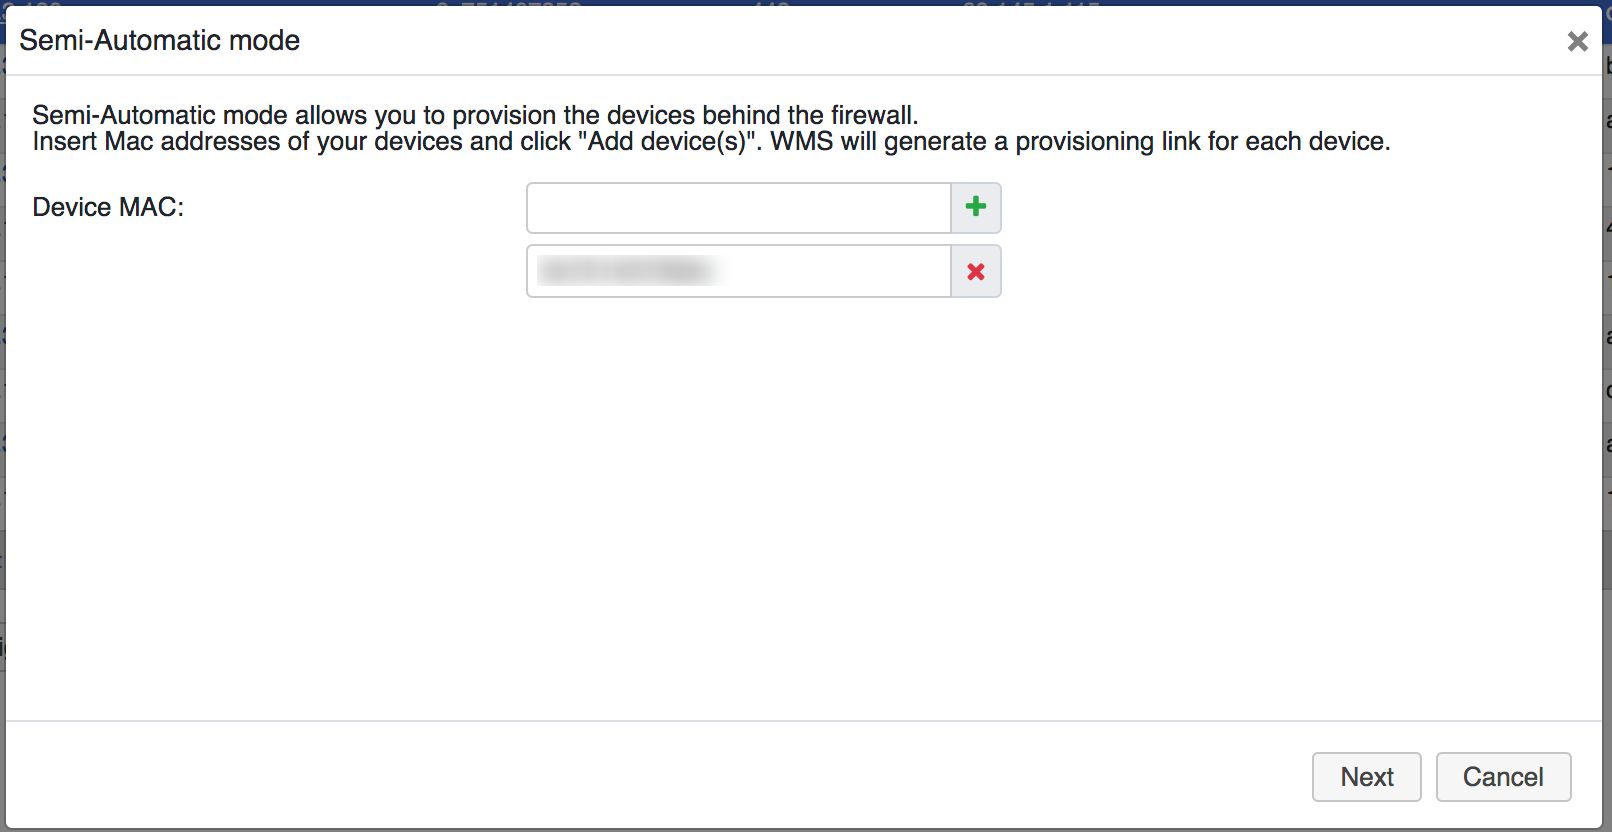
Insert the device’s Mac Address into the field and click Next:
| Note |
|---|
Note: usually Mac Address is located on the rear panel of your device. |
- After the provisioning link has been generated, copy the Provisioning URL
...
| Warning |
|---|
For Virtual / Hardware PBX you can use either IP address or PBX domain name in this Provisioning ULR. If you provision devices to Cloud PBX, please make sure PBX domain name is used in the Provisioning URL, and not the IP address. |
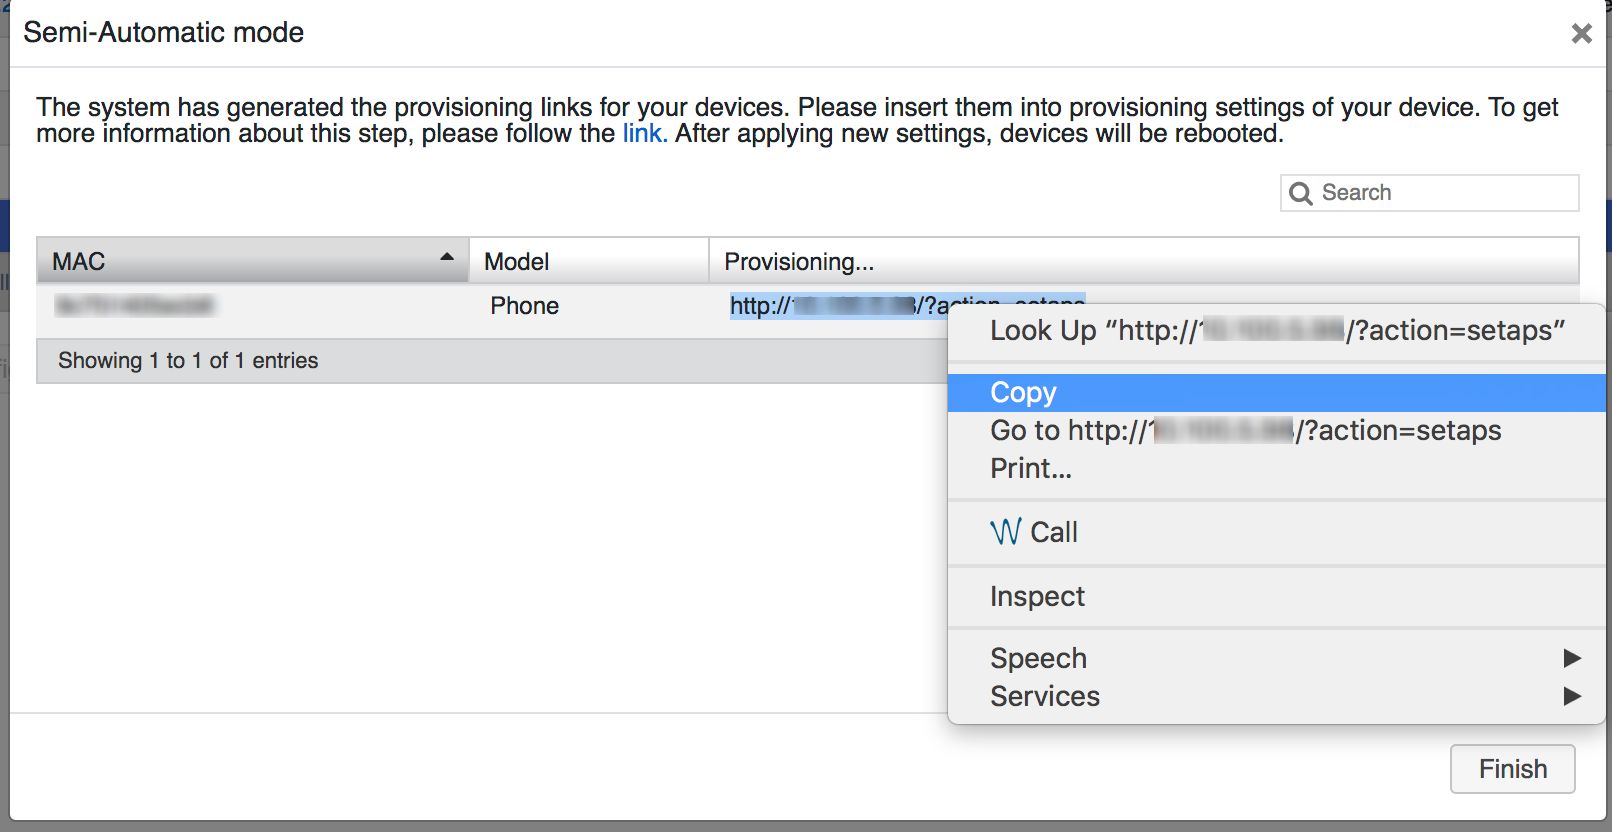
- After you click Finish, the new device appears on the list:

Step 2: Insert the provisioning link on the device’s web interface
...
- Go to menu Upgrade -> Advanced
- Insert the provisioning URL into the field “URL”
- Click AutoP Immediately
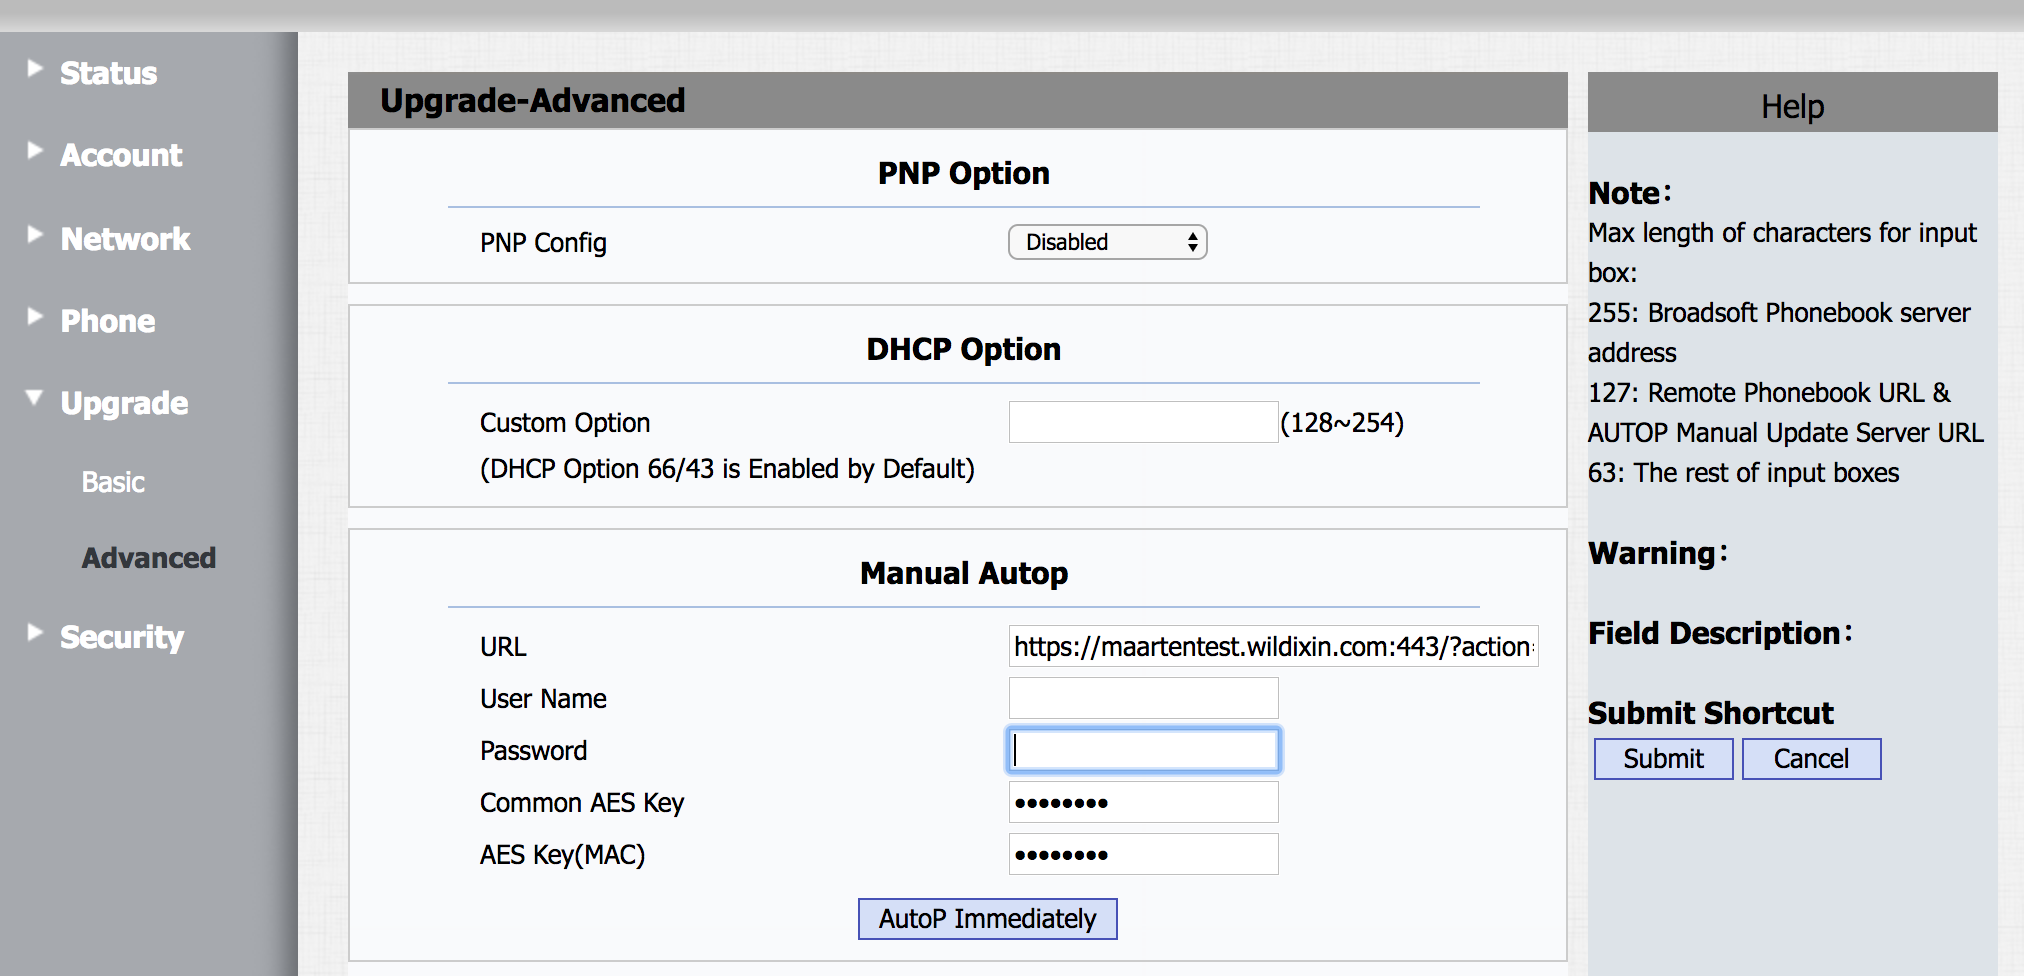
Device is now rebooting (the phone screen indicates that the device is rebooting). After the reboot, you can see the date and time, soft keys and “login0X” on the screen of the device.
...
- Go to the menu Upgrade -> Advanced
- Insert the provisioning URL into the field “URL”
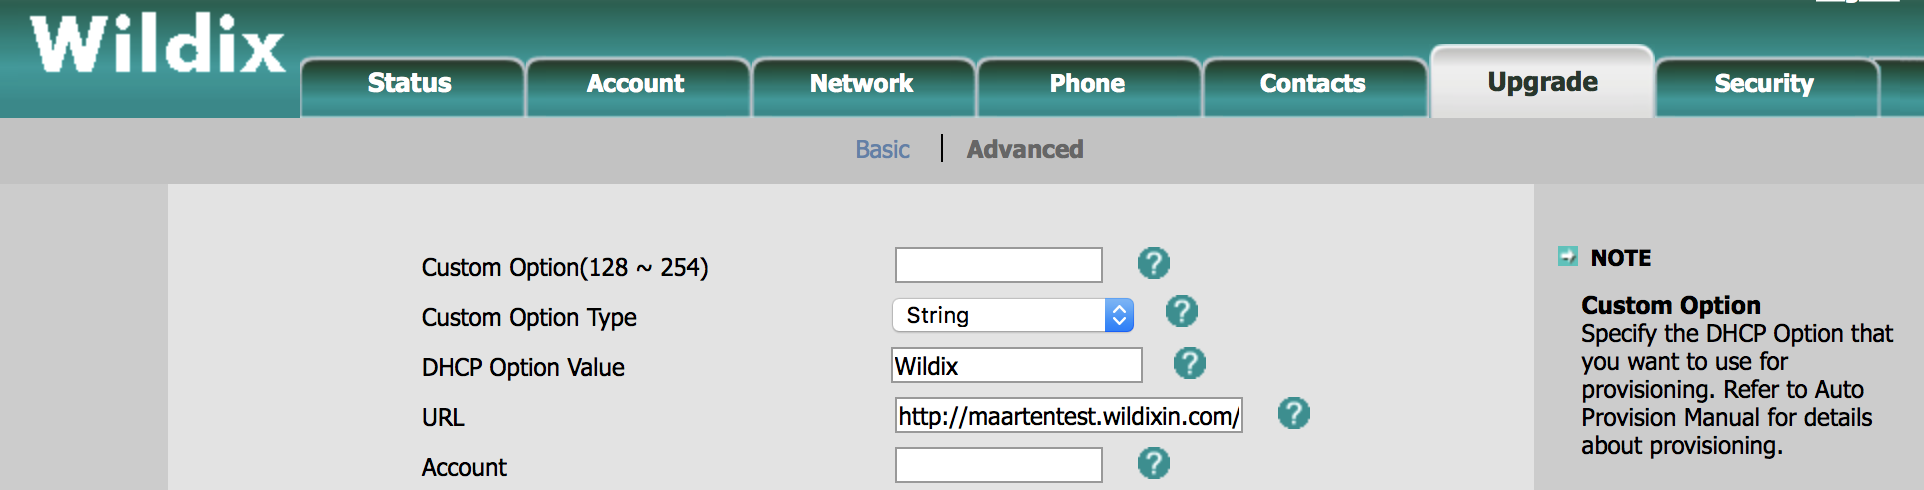
- Click Confirm to save URL
- Click Auto provision
...
- Go to the menu Phone -> Auto Provision
- Insert the provisioning URL into the field “Server URL”:
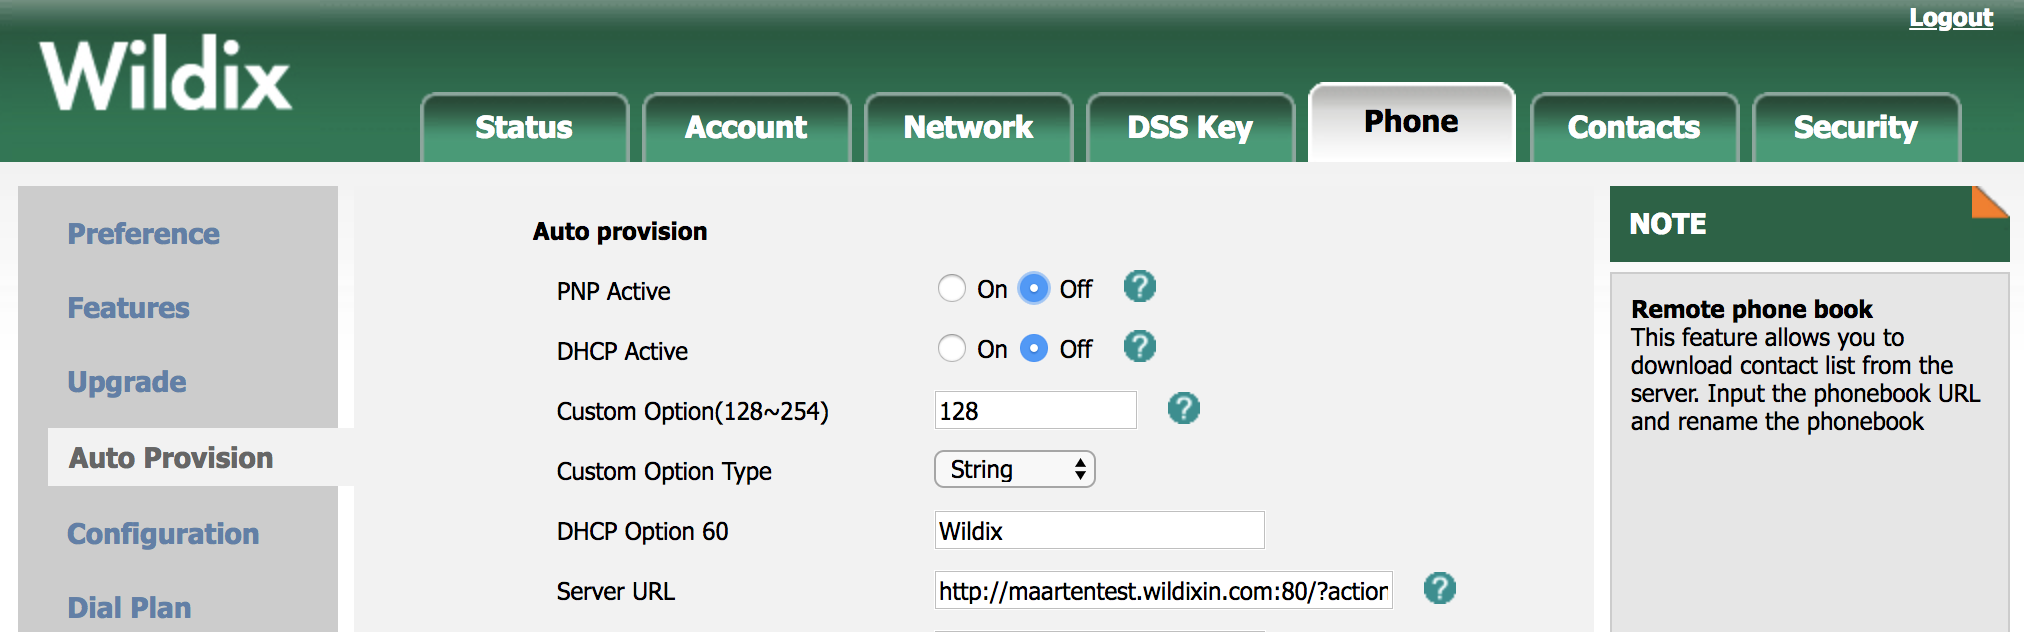
- Click on Autoprovision Now
...
- Go to the menu System -> System Configuration
- Insert the provisioning URL into the field “Primary Profile URL”
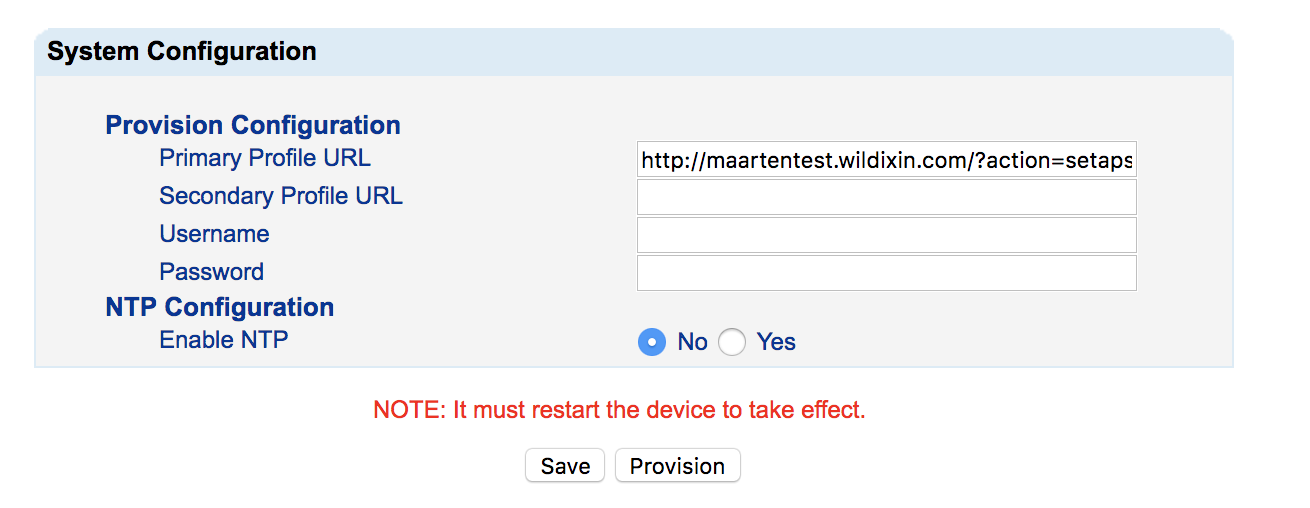
- Click on Save
- Press Back on the prompt page
- Click on Provision
...
- Go to device's web interface
Credentials for the first time access: admin : admin - Go to the menu System -> Provision
- Check off Enable
- Insert the provisioning URL into the field "URL"
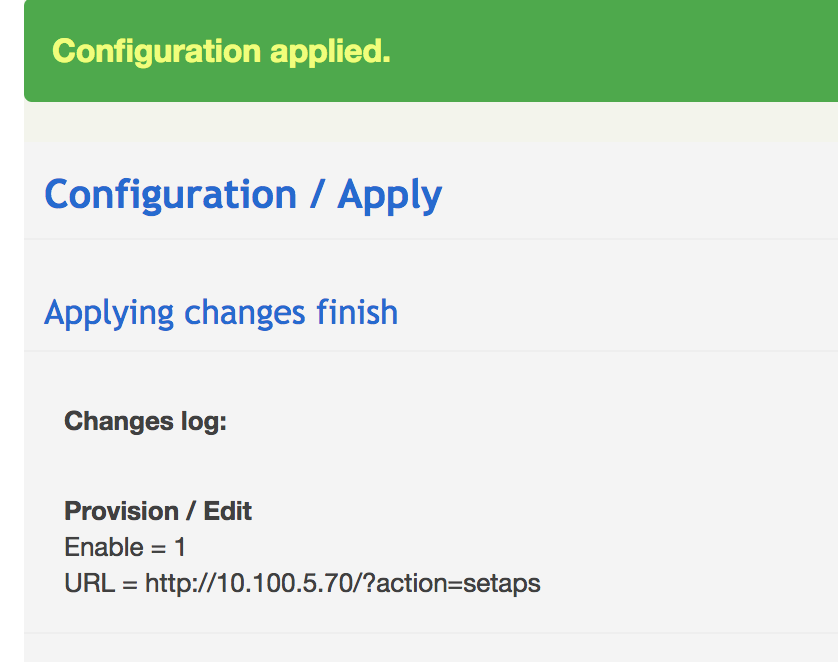
Click Save
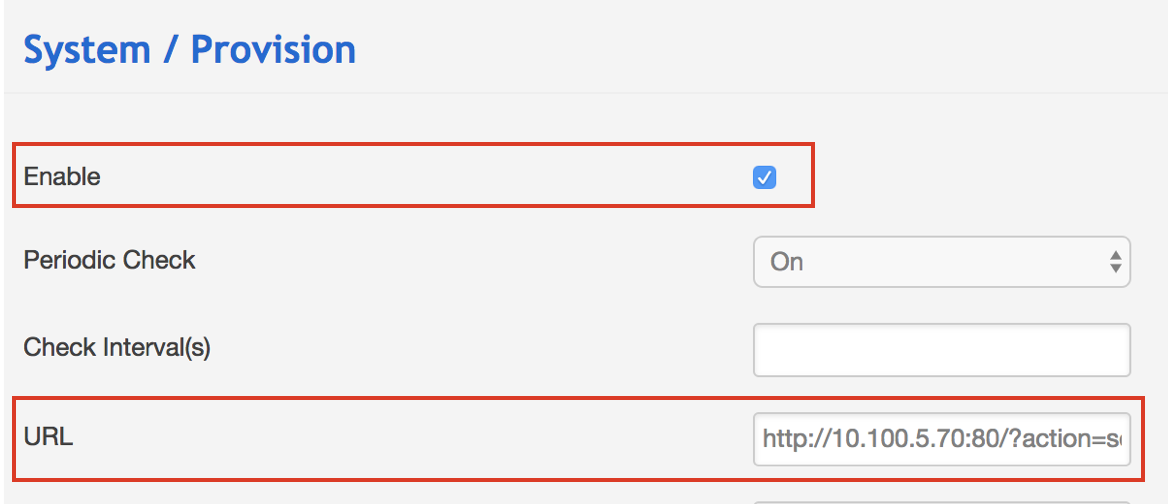
Confirm by clicking Apply

Configuration is now applied
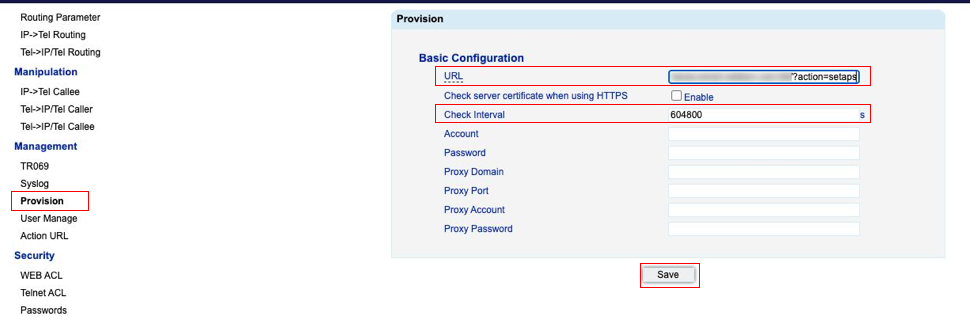
W02FXS 2018, W04FXS 2020, W04FXO 2020, W24FXS 2015
...
- Go to the menu Management -> Provision
- Fill in the following fields:
URL: insert the provisioning URL
- Check Interval: 604800
- Click Save
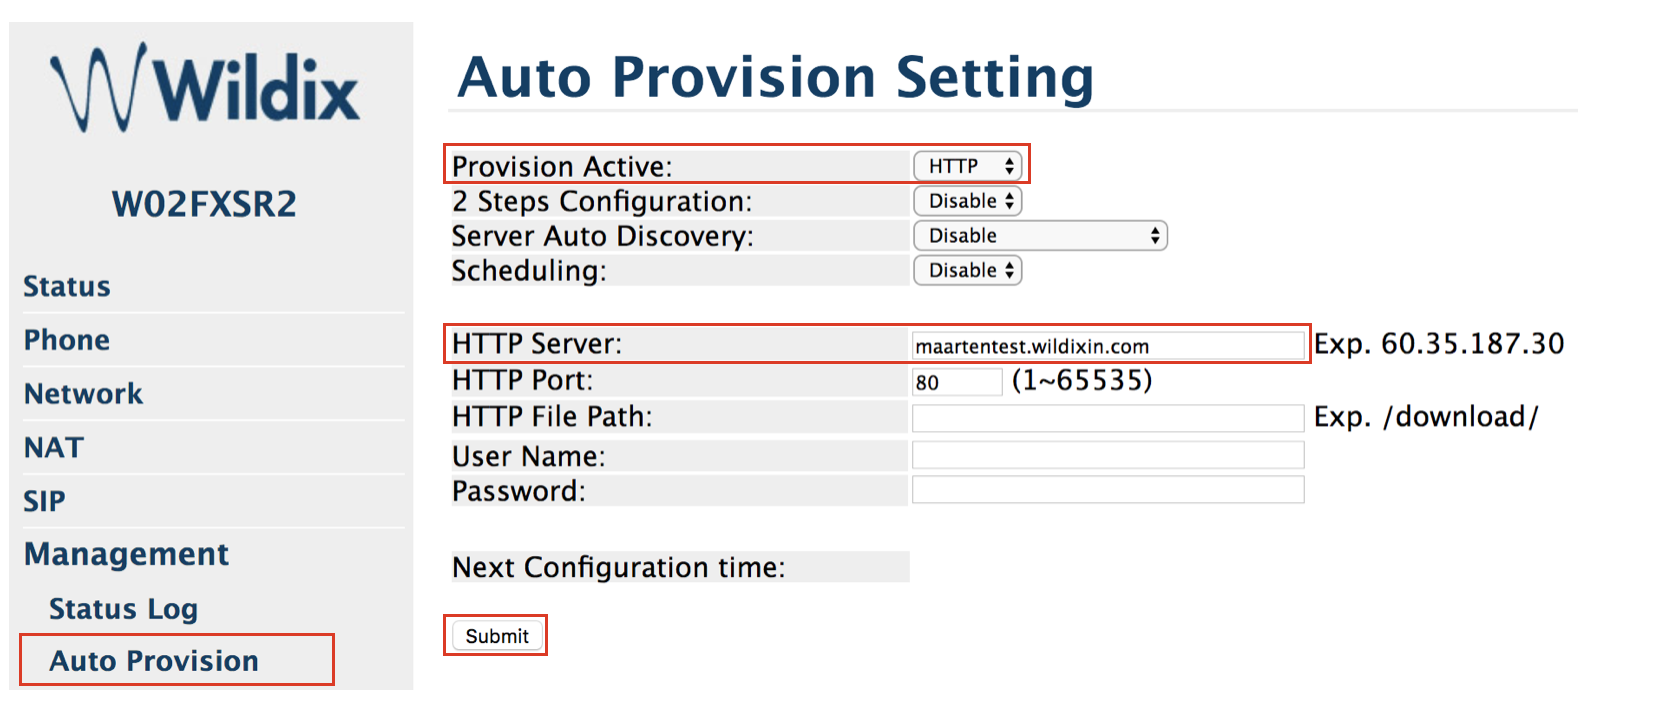
W01FXS 2014 / W02FXS 2015
...
- Go to the menu Management -> Auto Provision
- Fill in the following fields:
- Provision Active: select “HTTP”
- HTTP Server: enter the PBX IP address or domain
- Click Submit
Click on save and reboot:
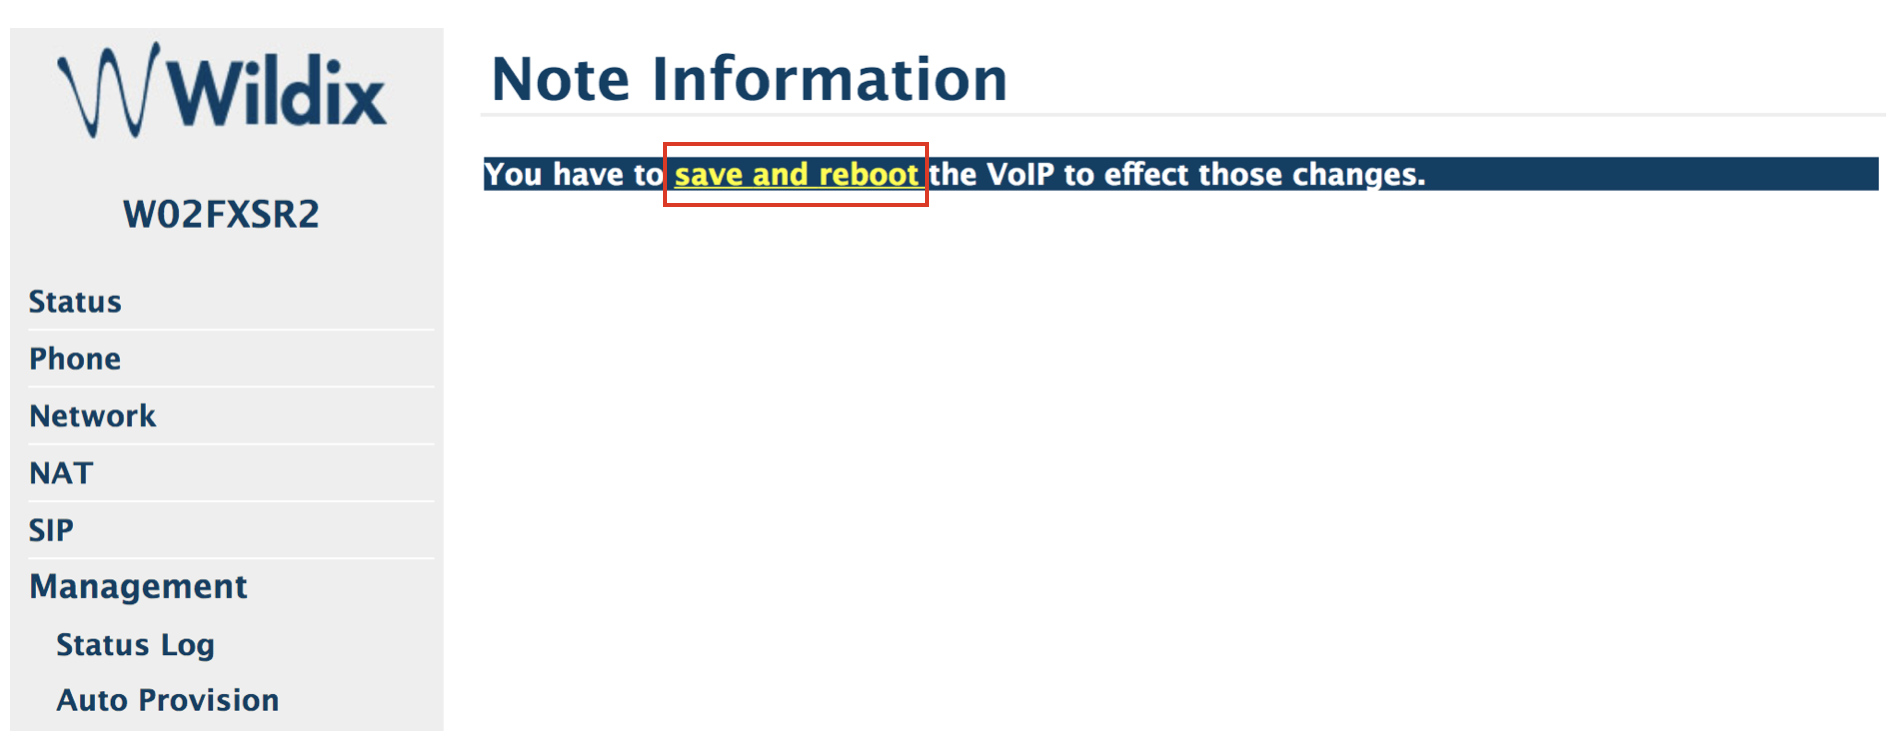
Device is now rebooting.
W04FXS 2017 and W04FXO 2015
...
- Go to the menu Device Setting -> Provisioning
- Insert the provisioning URL into the field “HTTP Config URL”
- Make sure that the following parameters are correct:
- Provisioning type: HTTP
- Refresh Interval (minute): 14400
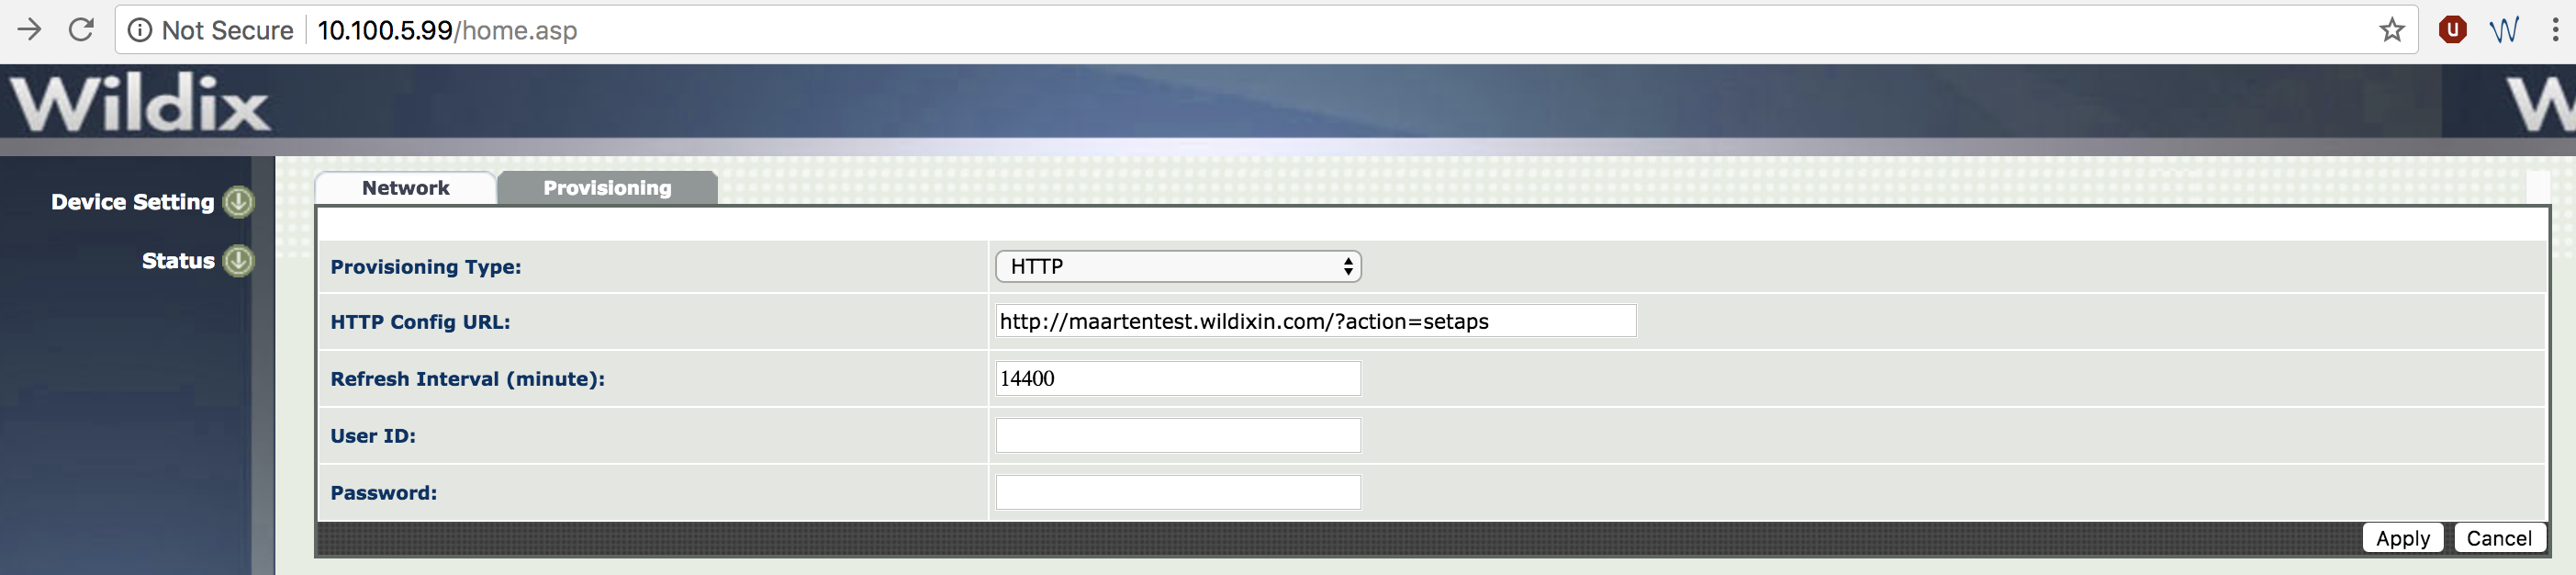
- Click Apply
- Change the URL address: instead of "/home.asp" add "/Maintenance.asp" to the URL
Example: http://10.100.5.99/Maintenance.asp
- Select Reboot and press Apply
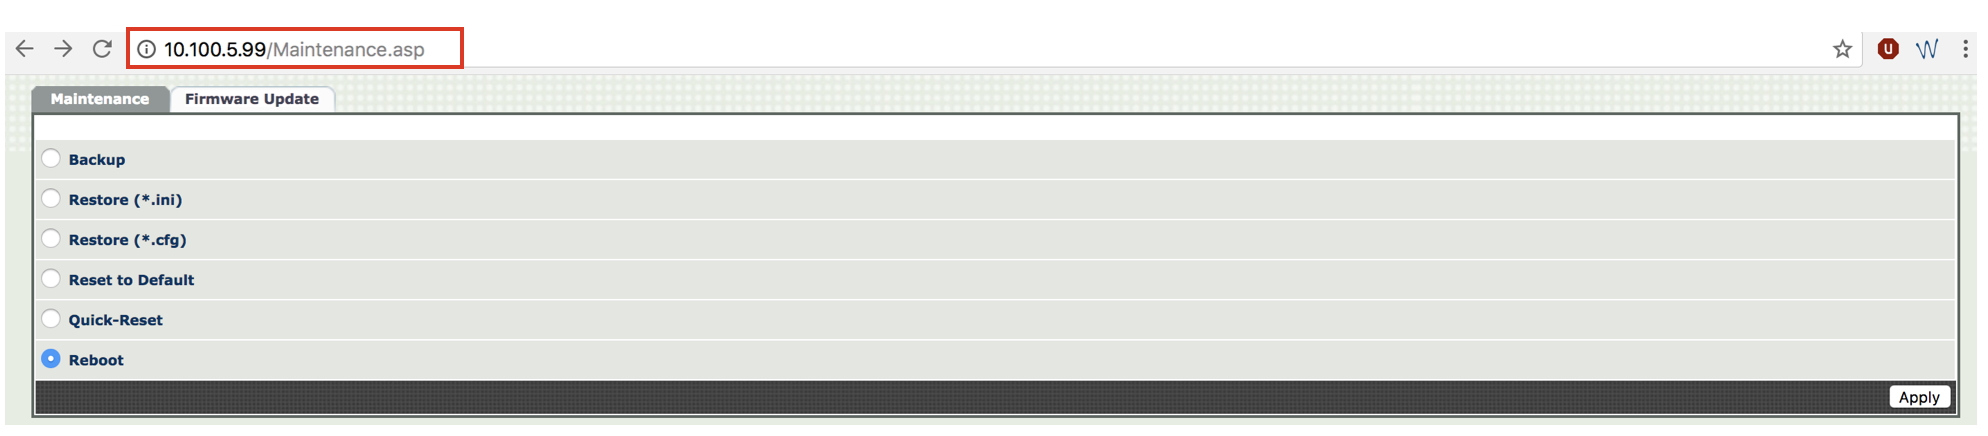
Device is now rebooting.
PRI, BRI, W04FXS (old generation), W08FXS, W16FXS and W24FXS (old generation)
...
- Go to the menu Management -> Configuration Scripts
- Fill in the following fields inside the section “Execute Scripts”:
- Specific File Name: insert the part of the provisioning URL without the PBX IP address: ?action=setaps
- Transfer Protocol: select “HTTP”
- Host Name: enter the PBX IP address or domain name
- Click on Apply & Execute Now
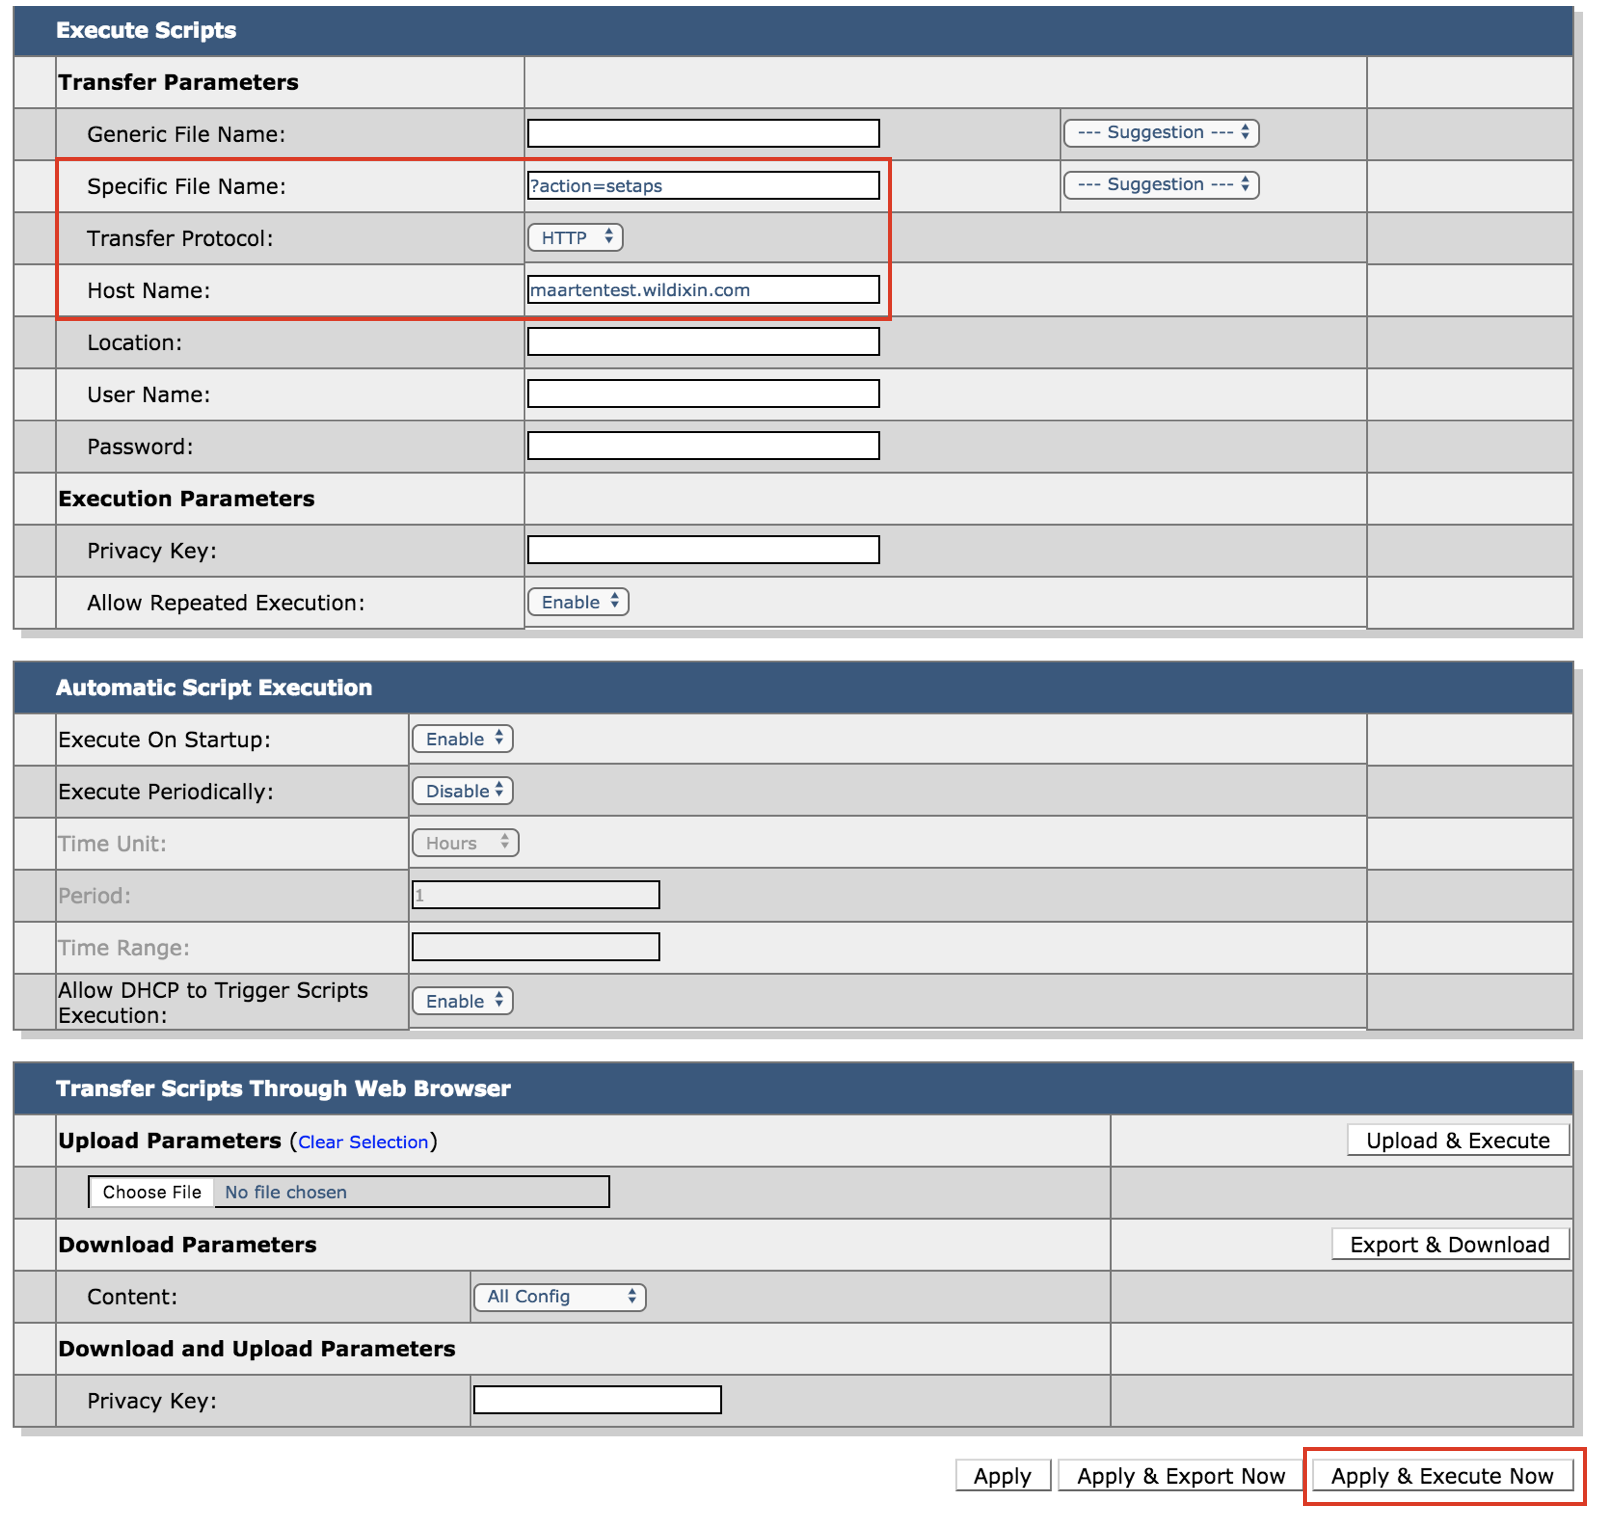
Device is now rebooting.
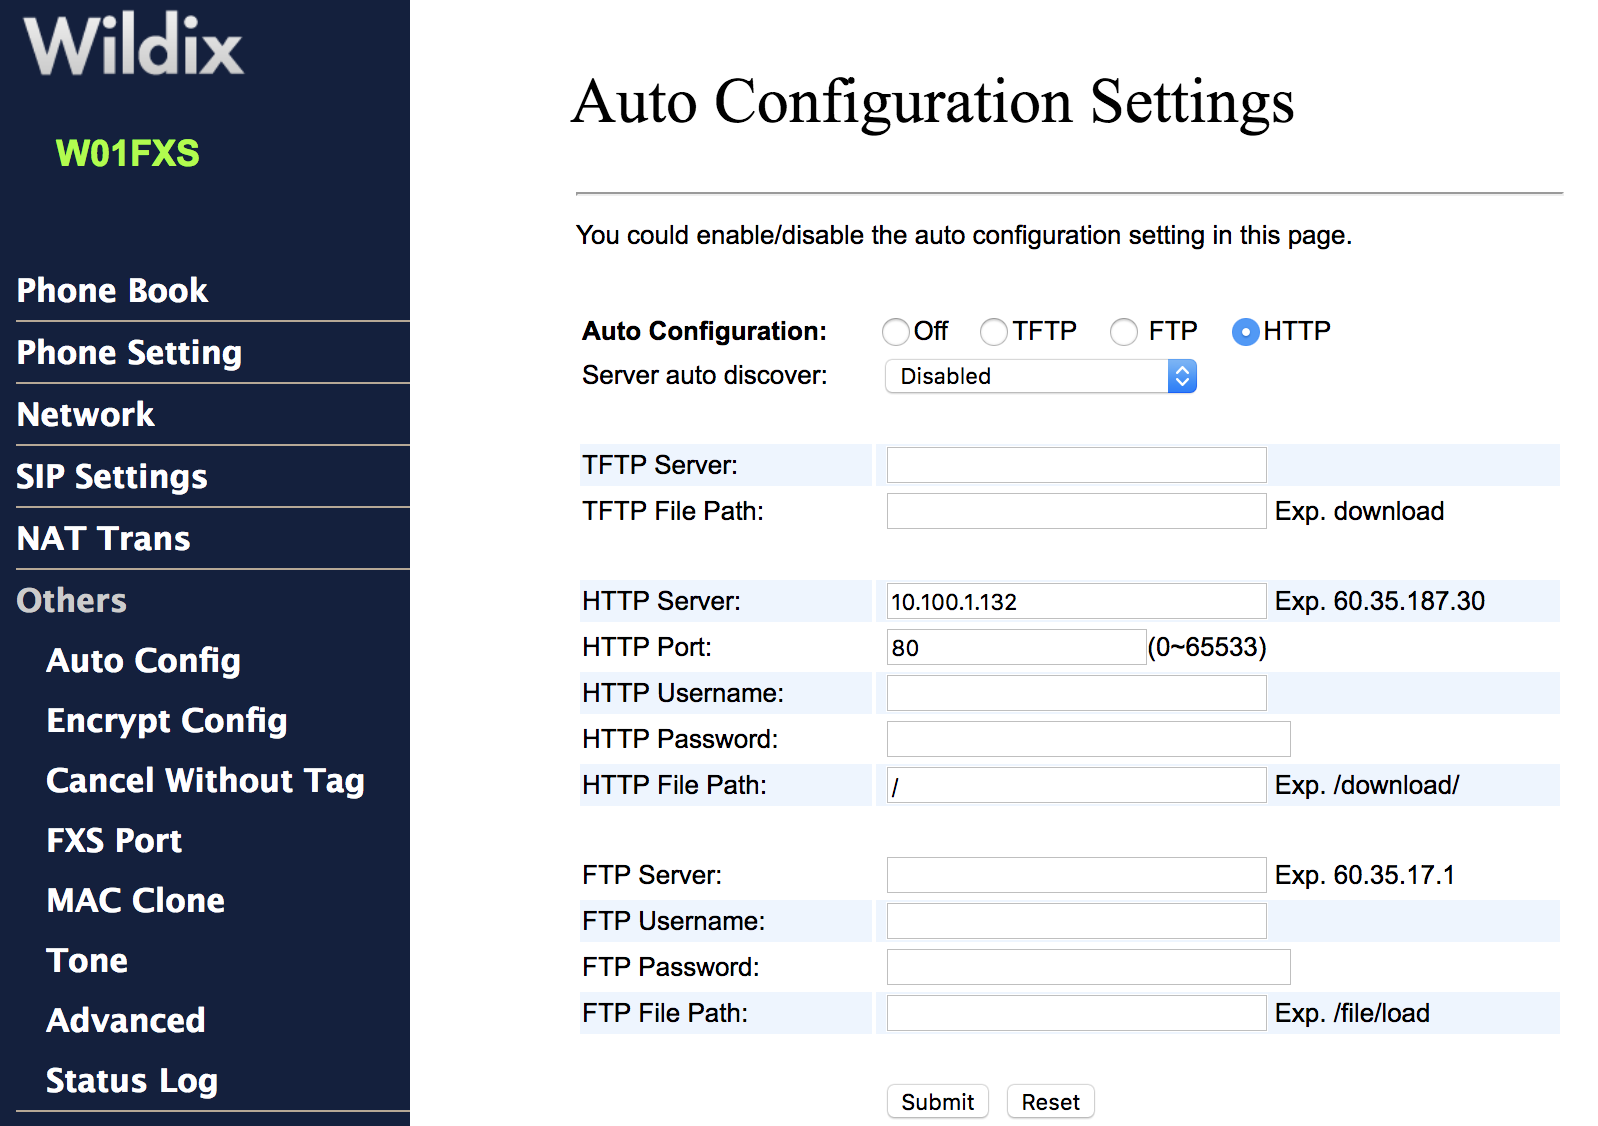
W01FXS old generation
...
- Go to the menu Others -> Auto Config
- Modify the following fields:
- Auto Configuration: select “HTTP”
- HTTP Server: enter the PBX IP address or domain
- Click on Submit
- Go to the menu Save change
- Click on Save
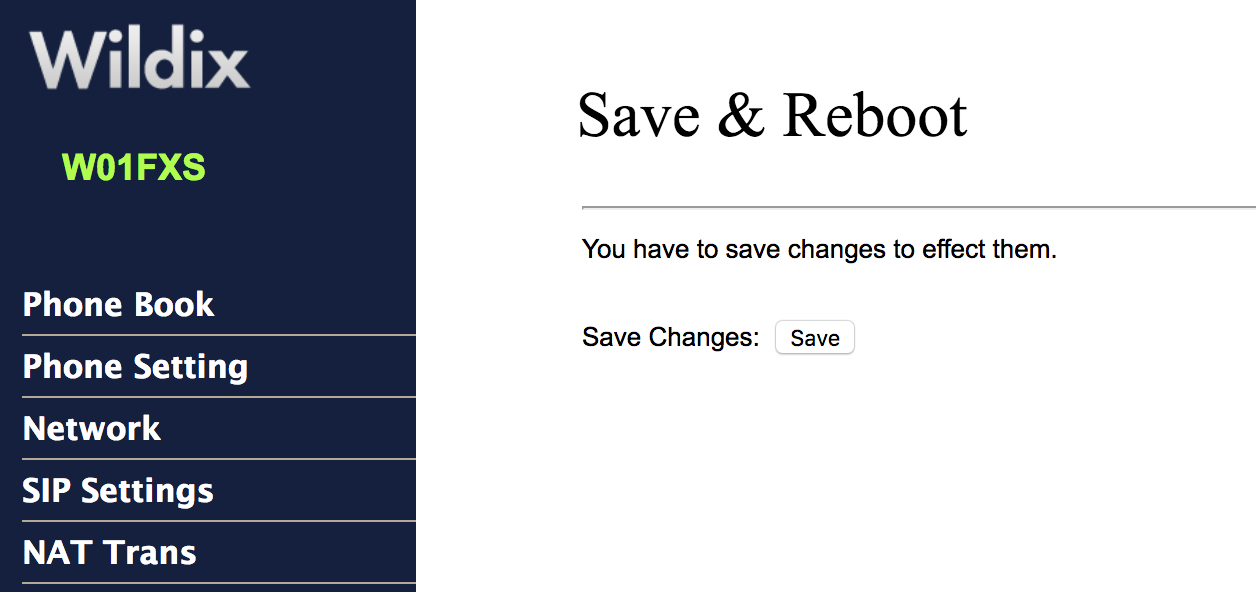
Device is now rebooting.
W-AIR Sync Plus
...
- Go to the menu Management
- Modify the following fields:
- Management Transfer Protocol: select “HTTP”
- Configuration File Download: select “Base and Multi Cell Specific File”
- Configuration Server Address: enter the PBX IP address or domain name
- Base Specific File: insert the part of the provisioning URL without the IP address of the PBX: ?action=setaps
- Multi Cell Specific File: the same value as in Base Specific File
- Click Save and Reboot
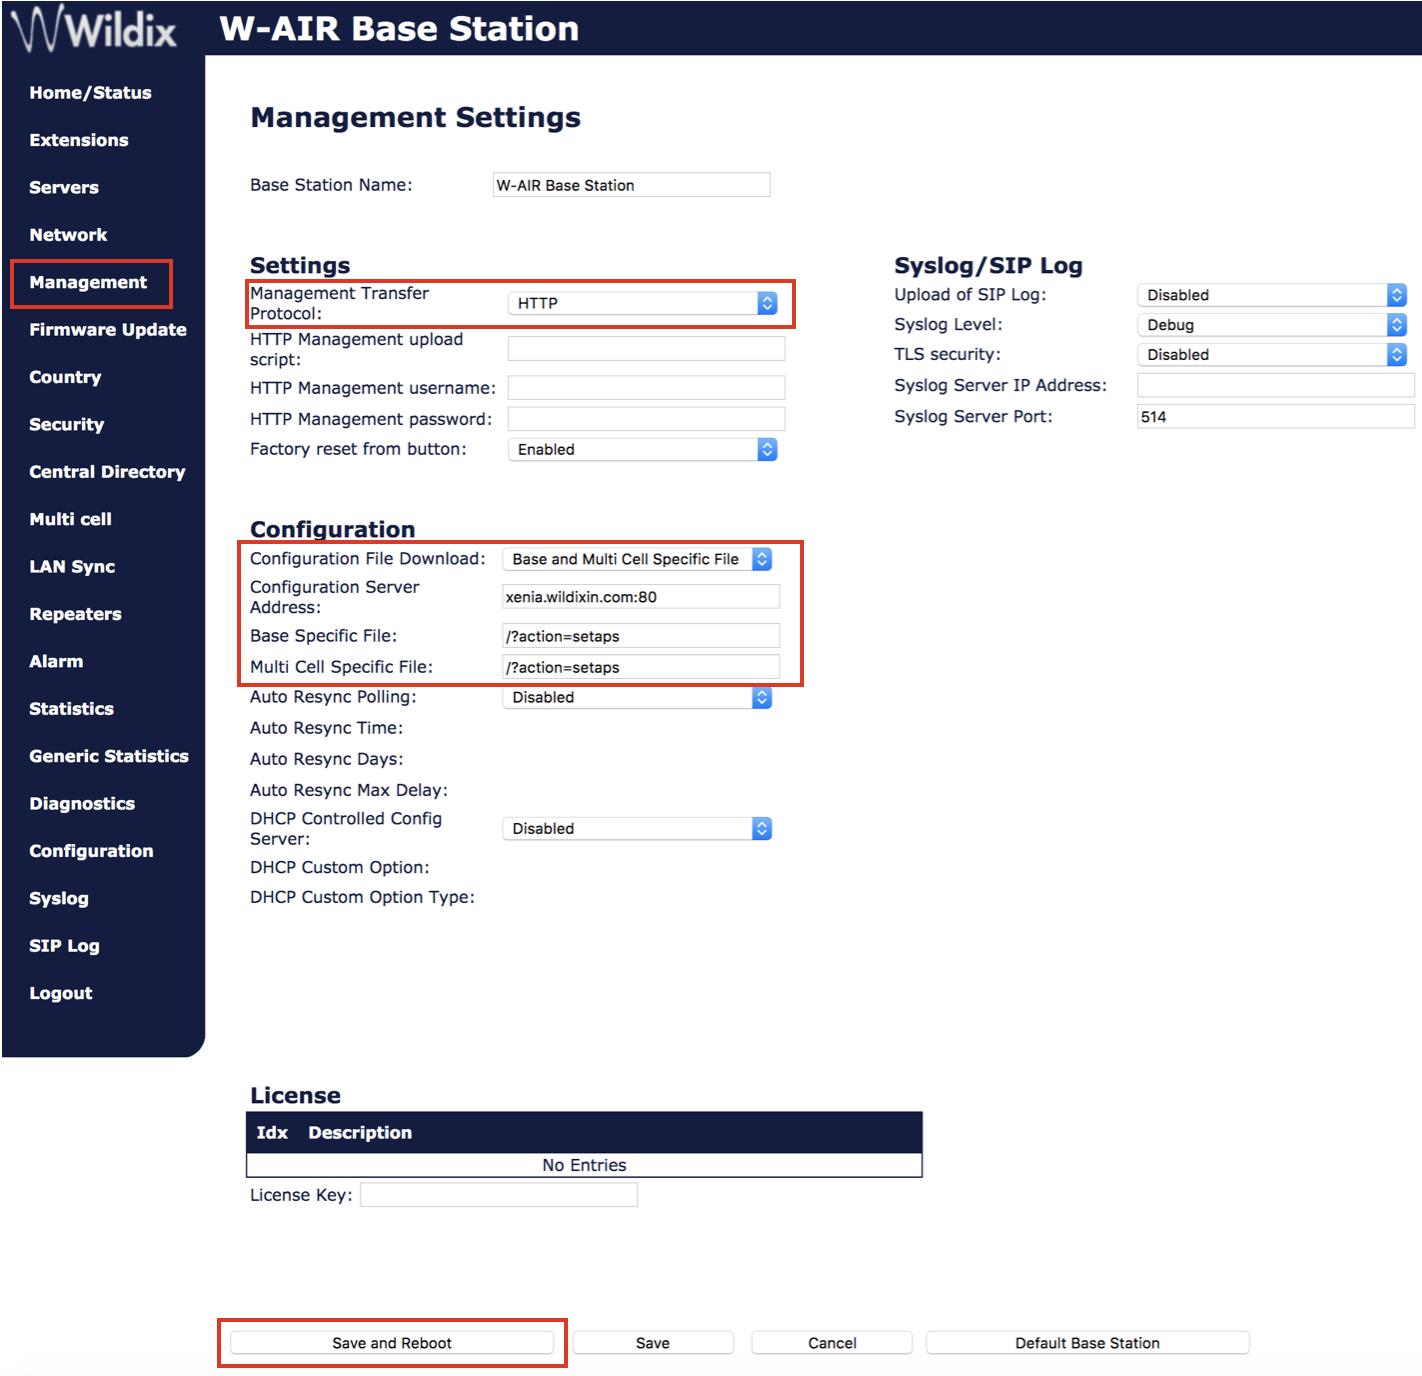
Device is now rebooting.
After rebooting:
...
- Go to the menu Management
- Modify the following fields:
- Management Transfer Protocol: select “HTTP”
- Configuration File Download: select “Base and Multi Cell Specific File”
- Configuration Server Address: enter the PBX IP address or domain name
- Base Specific File: insert the part of the provisioning URL without the IP address of the PBX: ?action=setaps
- Multi Cell Specific File: the same value as in Base Specific File
- Click Save and Reboot
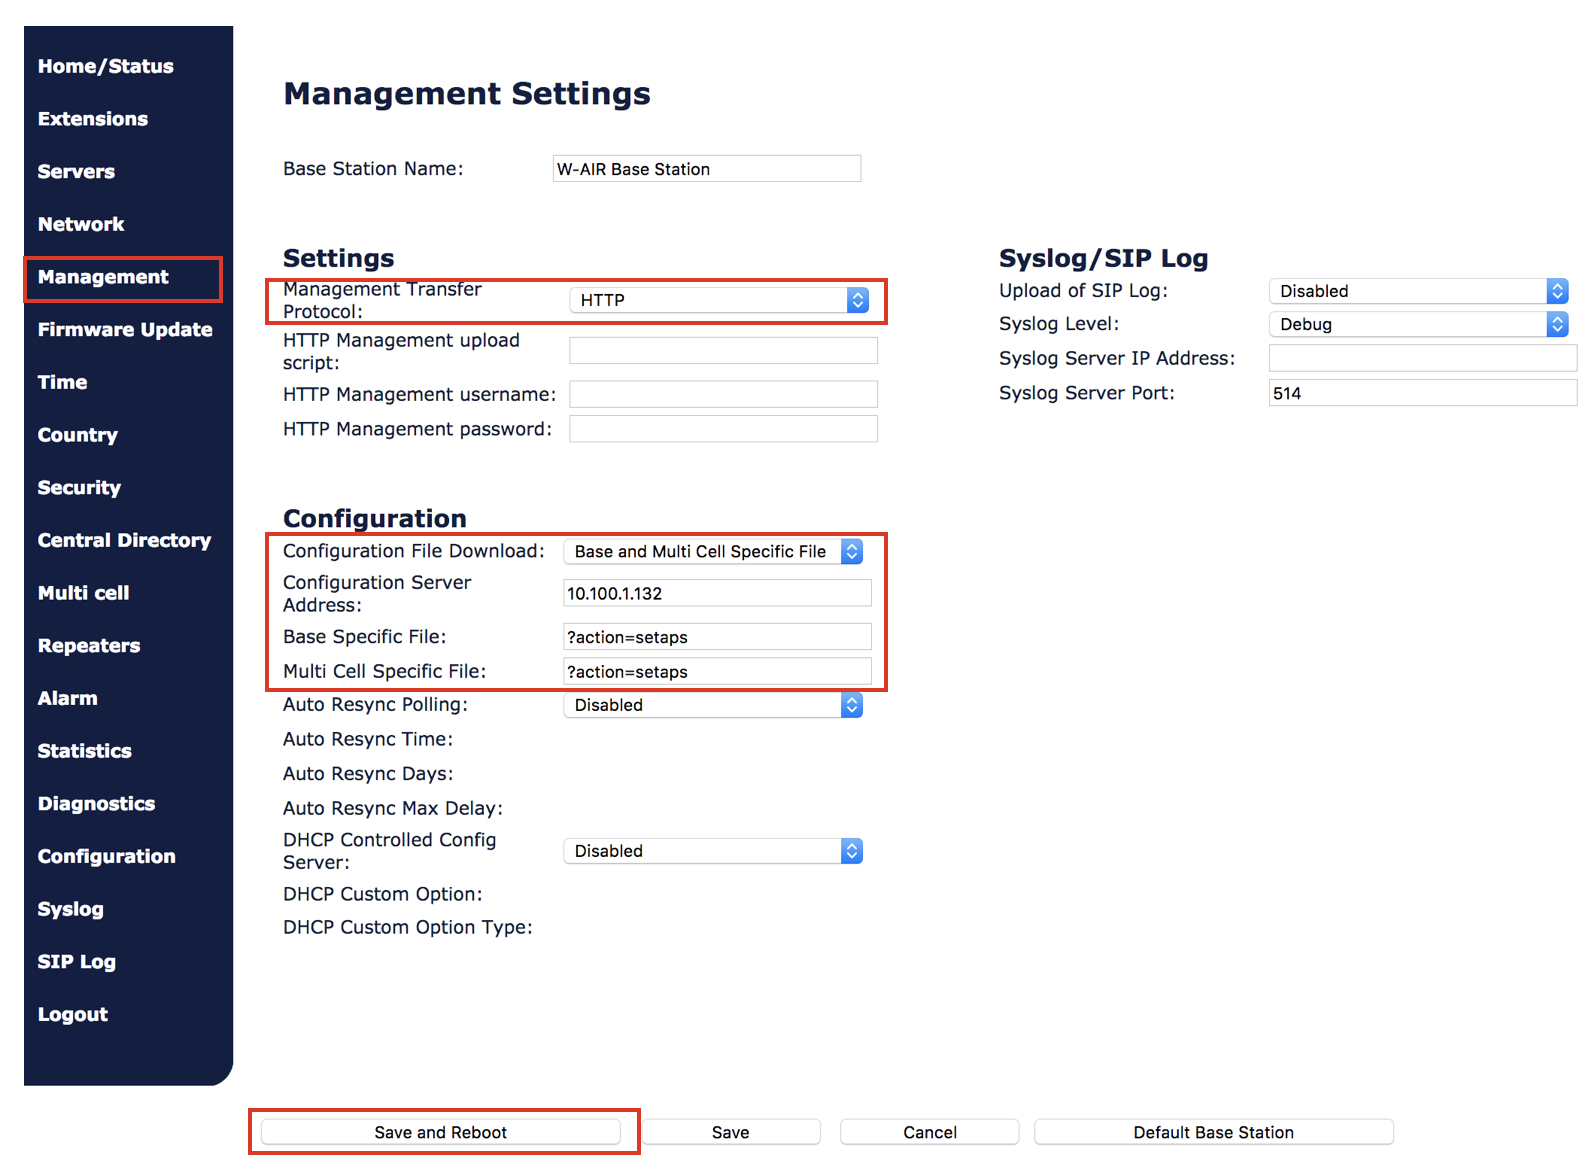
Device is now rebooting.
After rebooting:
...
- Go to the menu Management
- Modify the following fields:
- Management Transfer Protocol: select “HTTP”
- Configuration File Download: select “Base Specific File”
- Configuration Server Address: enter the PBX IP address or domain name
- Base Specific File: insert the part of the provisioning URL without the IP address of the PBX: ?action=setaps
- Click on Save and Reboot
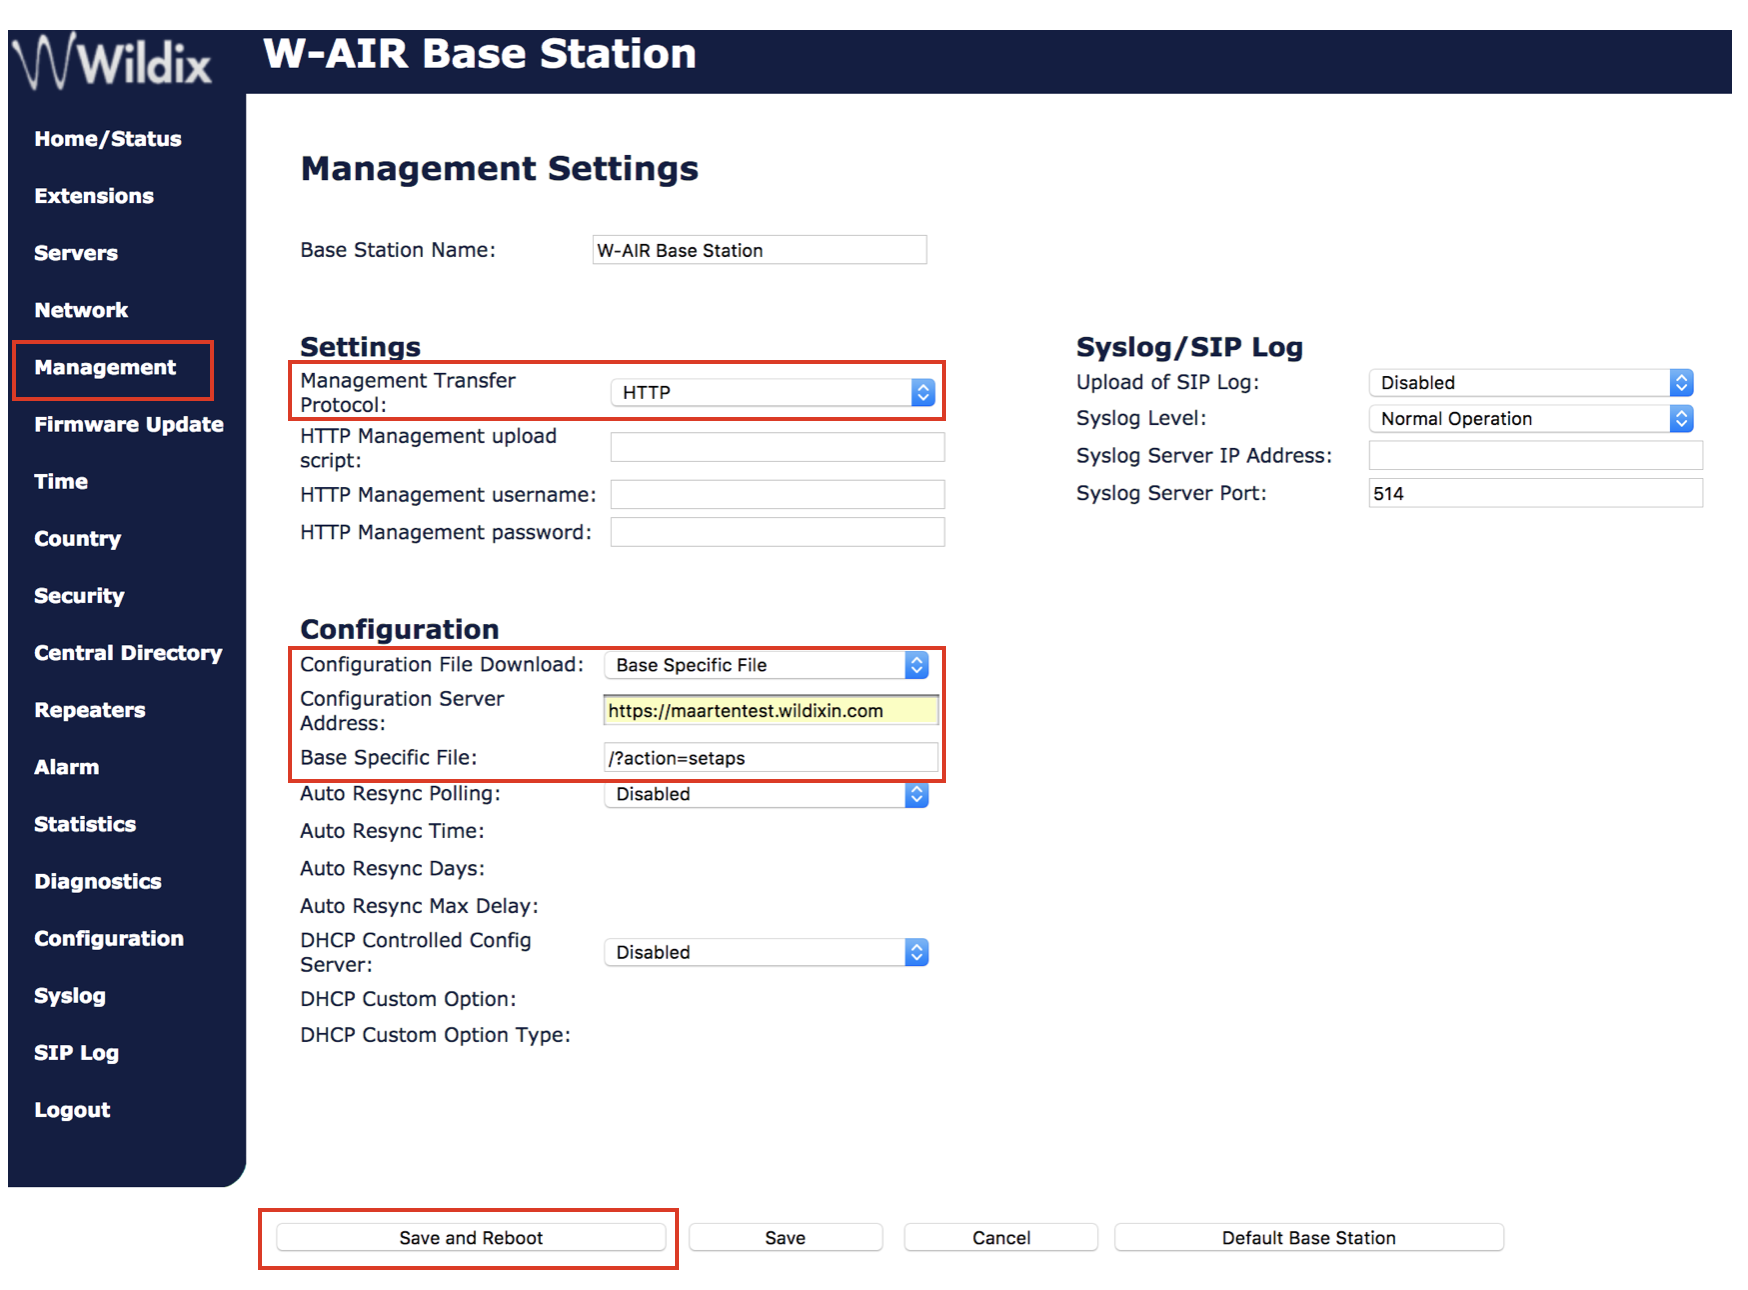
Device is now rebooting.
W-PA
...
- Use first time access credentials: admin : admin
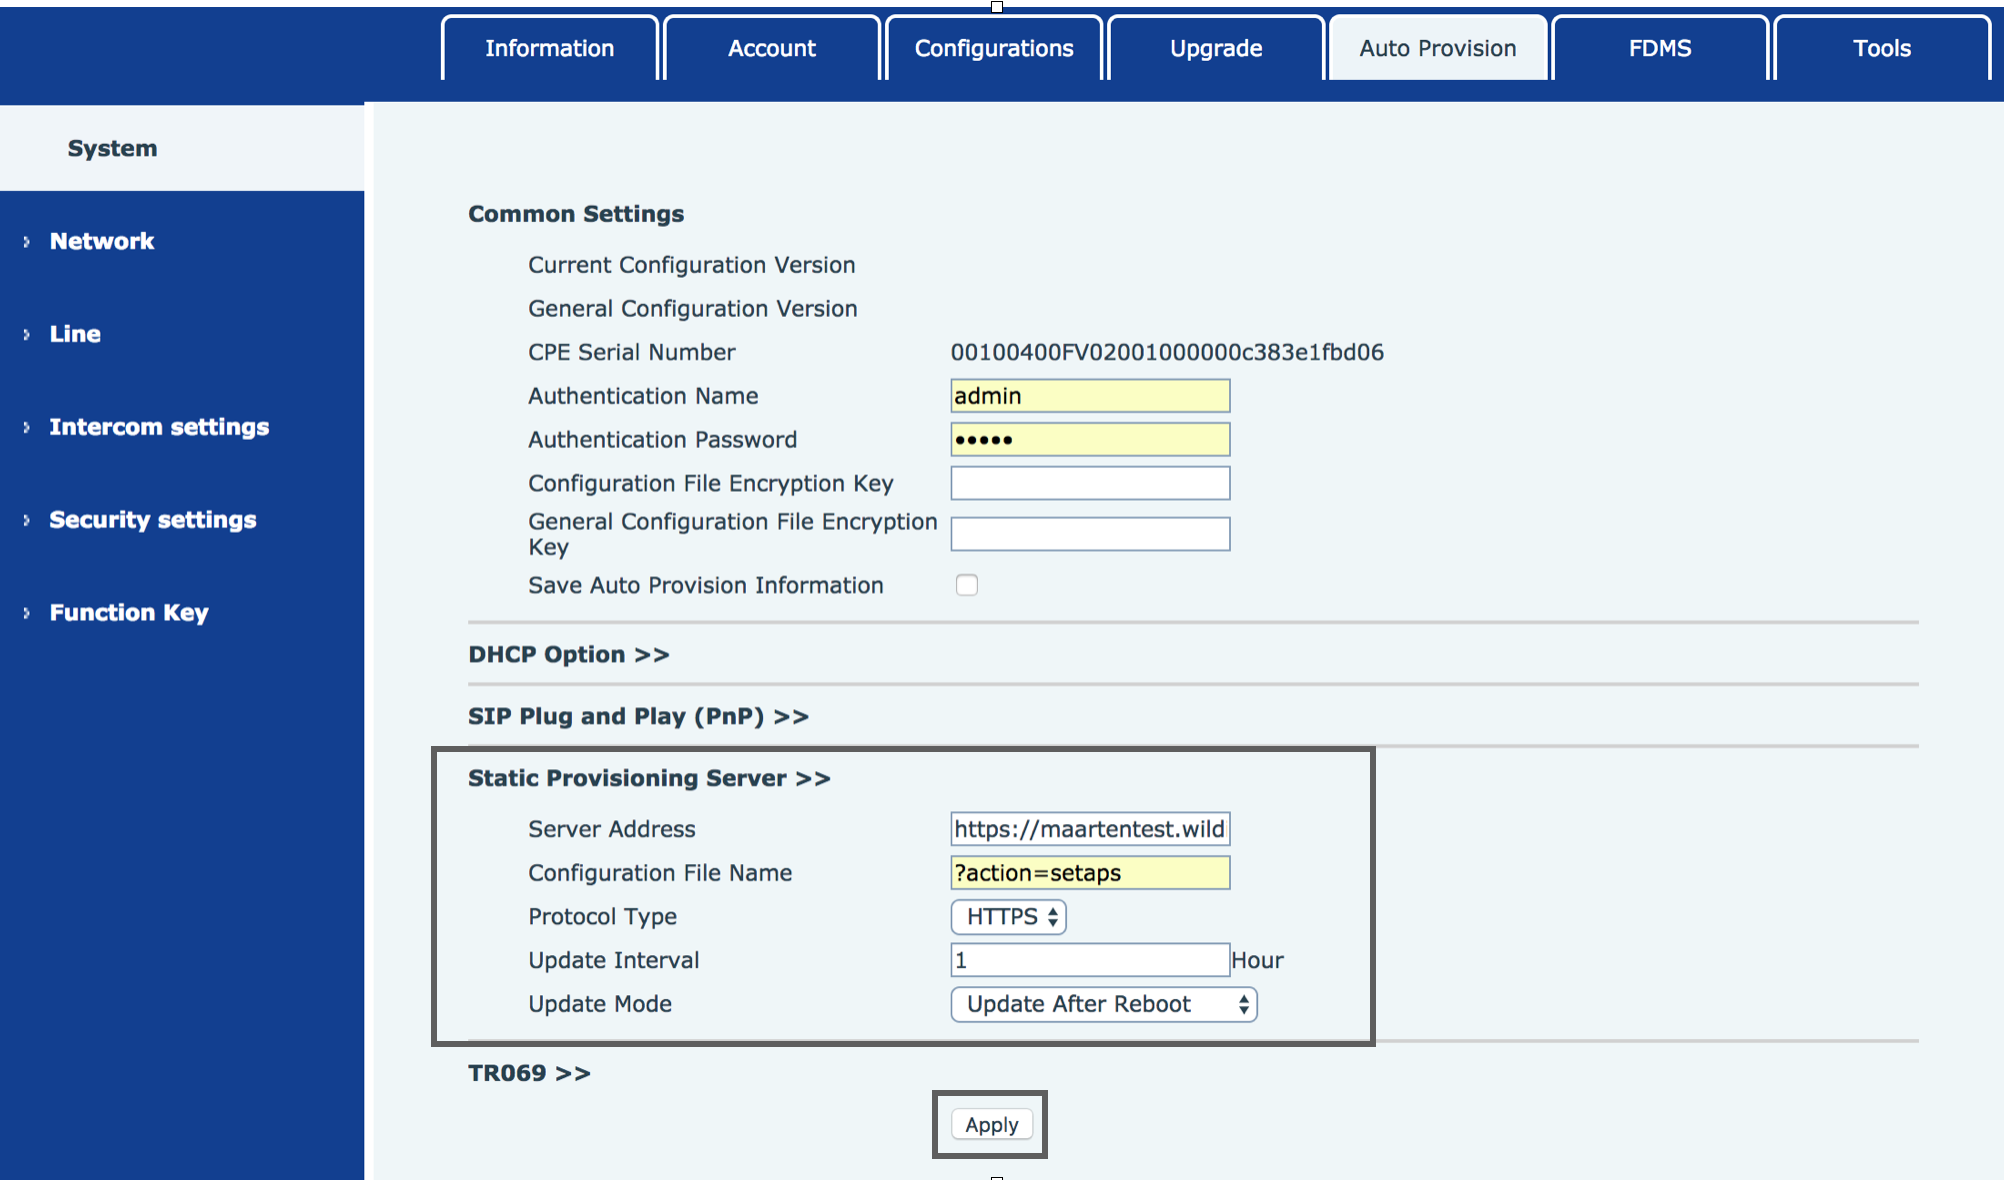
- Go to menu System -> Auto Provision -> Static Provisioning Server
- Modify the following fields:
- Server Address: enter your PBX host address or public IP
- Configuration File Name: ?action=setaps
- Protocol Type: HTTPS
- Click Apply
- Go to menu System -> Tools -> Reboot phone
- Click Reboot
- Confirm the reboot by clicking OK
...
- login : admin
- password : use the value in the field “Password” in WMS:
...

| Macrosuite divider macro | ||||||||||||||||||||||||||
|---|---|---|---|---|---|---|---|---|---|---|---|---|---|---|---|---|---|---|---|---|---|---|---|---|---|---|
|
| Button macro | ||||||||||||||||||||||||||||||||||||||||
|---|---|---|---|---|---|---|---|---|---|---|---|---|---|---|---|---|---|---|---|---|---|---|---|---|---|---|---|---|---|---|---|---|---|---|---|---|---|---|---|---|
|